11.3 Operations
Tim A. Bacon
Surface grinders are primarily used for grinding flat surfaces. The workholding and setups are similar to those used in milling. When surface grinding, the wheel face is the outside diameter of the wheel.
Safety
Surface grinders, like the other machines in the shop, are dangerous. Follow some basic precautions to help ensure a successful operation.
- Personal protective equipment (PPE) starts with safety glasses.
- Some processes may require a dust mask.
- Wear appropriate closed toed shoes.
- Do not wear loose fitting clothing.
- Remove jewelry, watches, and tie back long hair.
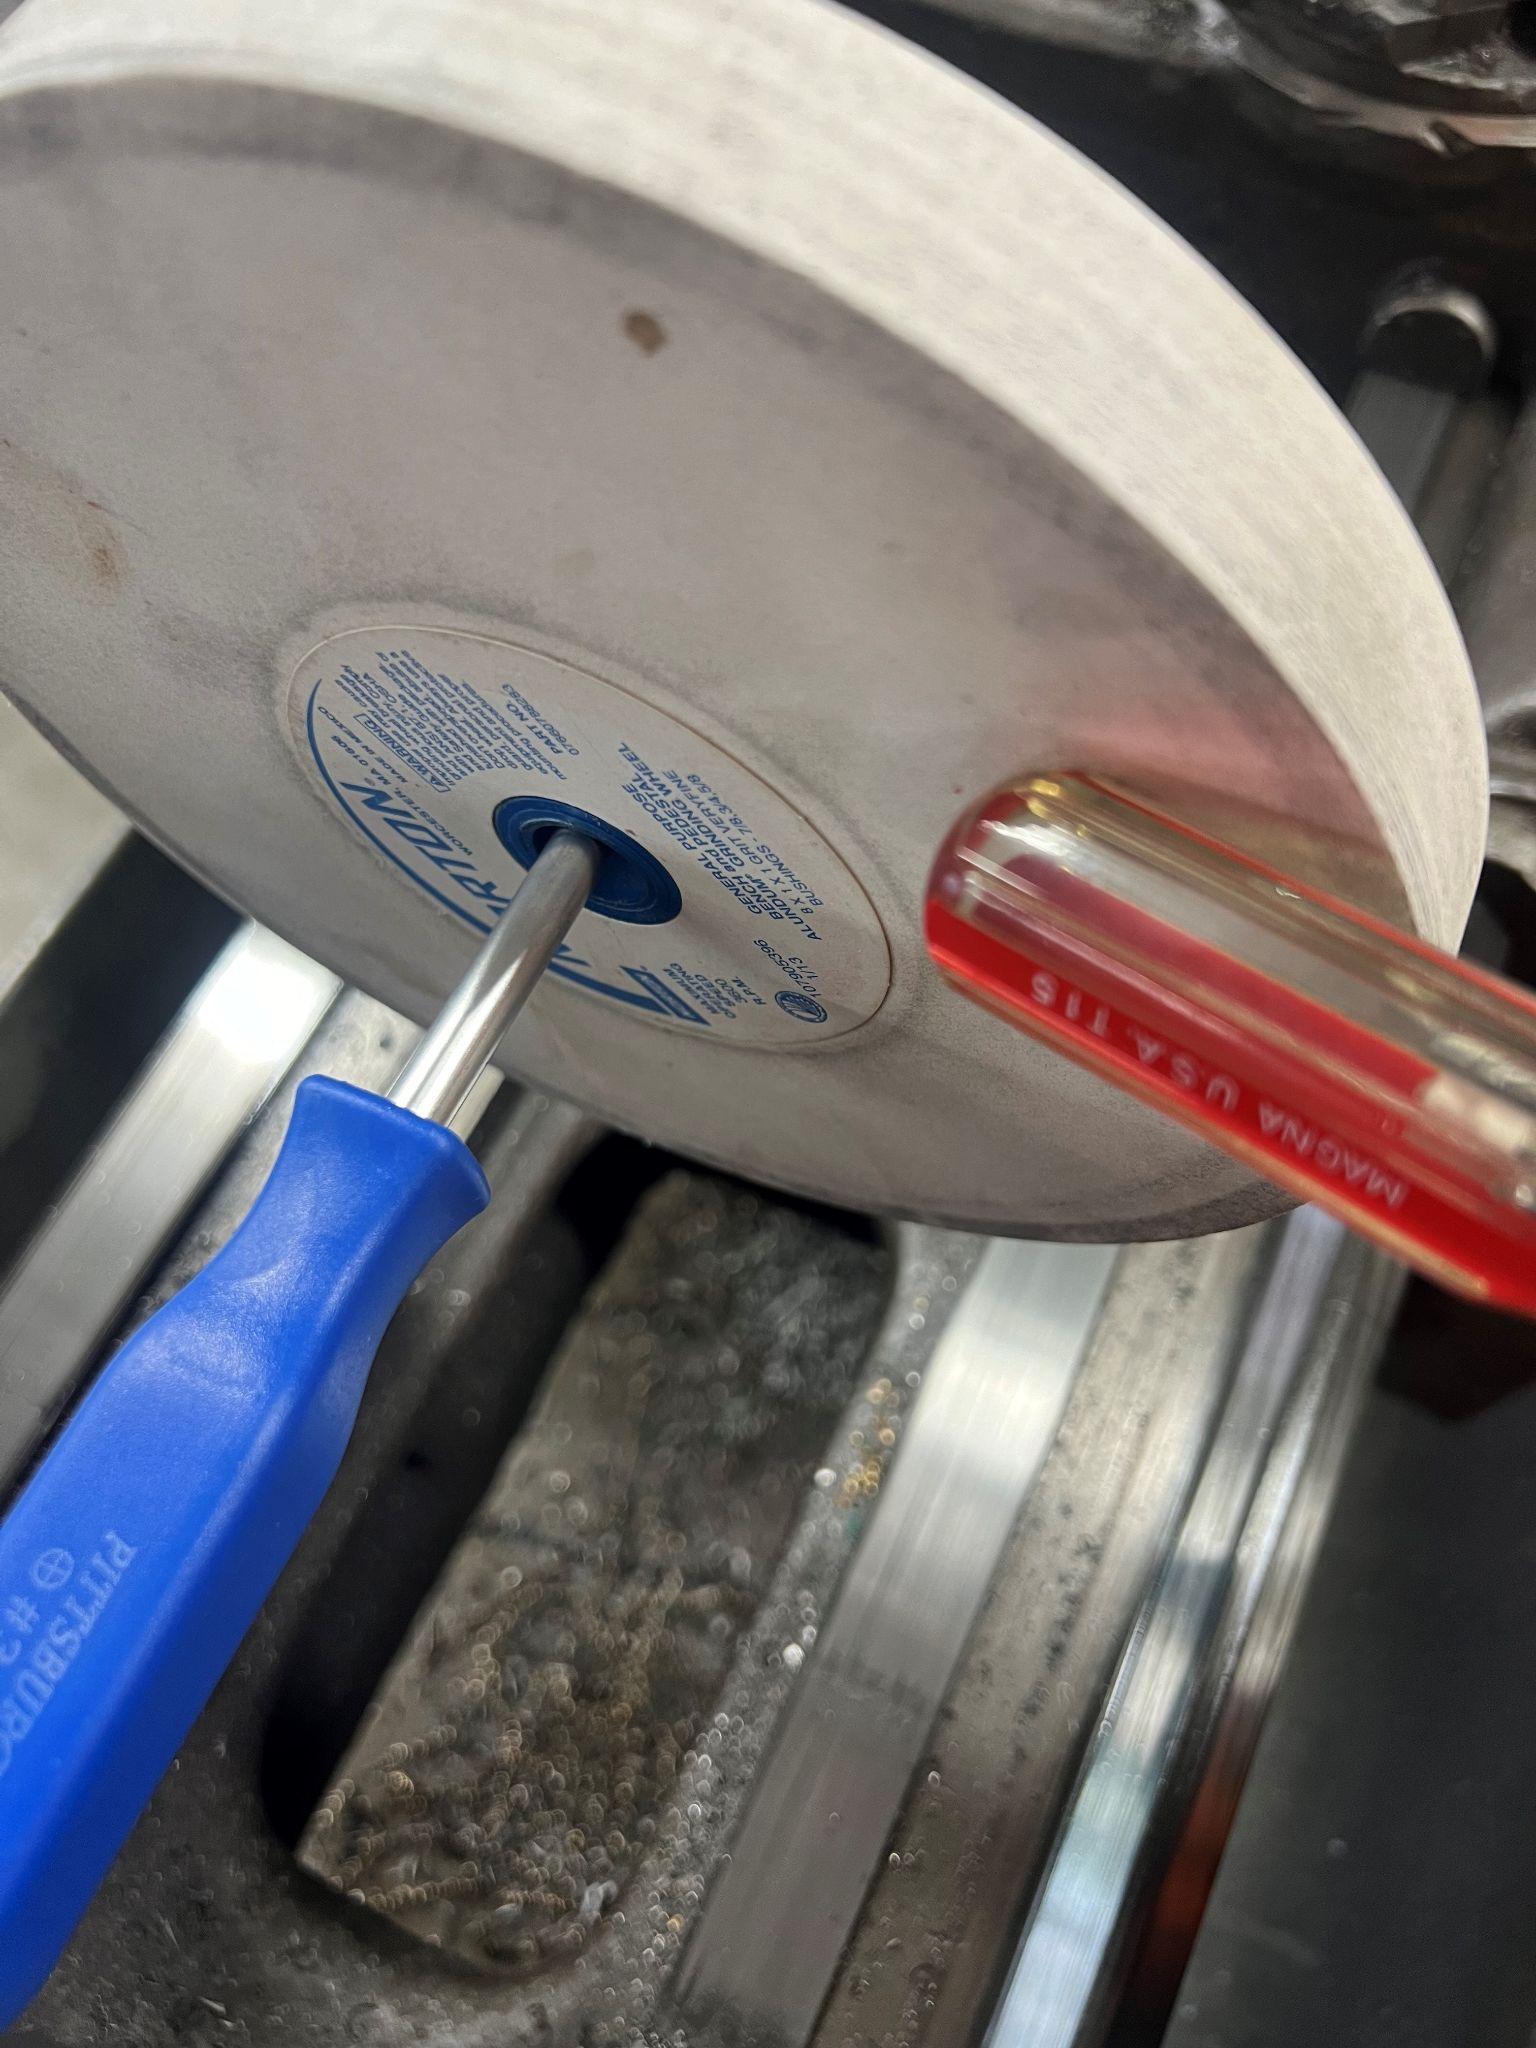
- Another precaution is to perform a ring test before installing a grinding wheel. Hold the wheel with a small rod in the middle of it, as pictured above, and tap the side with the handle of a screwdriver. A dull sound indicates that there is a crack in the wheel. Discard it immediately. If it makes a high “ring” sound, proceed with installation.
- Always ensure that the machine is off and that the wheel is not spinning before making any adjustments to the machine or the workpiece.
- When removing or installing a wheel, remember that the nut holding the wheel on the arbor will tighten as it spins. Depending on which side of the grinder the wheel is mounted on, the threads may be left- or right-handed. Having a left-handed thread makes the nut tighten on the wheel as the wheel spins. If it is a right-handed nut, it will come off when the wheel starts up.
Workholding
A surface grinder can have T-slots like those on a manual mill table. These can be used to directly clamp the parts to the table. However, the clamps can be in the way of the grinding operation. A better workholding choice is to use a magnetic plate, or chuck, that is bolted to the table. Parts can then be placed on the magnet, and when the magnet is switched on, it holds the part in place while grinding.
The magnetic plate is made from alternating segments of ferrous and nonferrous materials. When placing a part on the plate, the part should span at least three of the nonferrous segments, or the magnetic force may not be strong enough to secure the part to the chuck. If the workpiece is taller than its own length or width, the magnetic chuck may not be strong enough to hold the part.
Blocking can be used to help secure the part to the chuck and prevent it from tipping or being pulled off the magnet. Blocks are placed tightly around the workpiece before activating the magnet. Since the main force while grinding is in the direction of the longitudinal table feed (X axis), blocking on the left and right sides of the workpiece is critical. Blocking can also be used when grinding nonferrous parts. Accessories such as magnetic parallels, and magnetic v-blocks along with the usual clamping hardware, can be employed to hold a workpiece down while grinding.
Critical Safety Note
- When using a magnetic work holding device, always double check that the magnetic field is engaged, securing the workpiece to the table.
- A demagnetizer may be necessary to remove the magnetism from the workpiece after the grinding is completed.
Wheel dressing
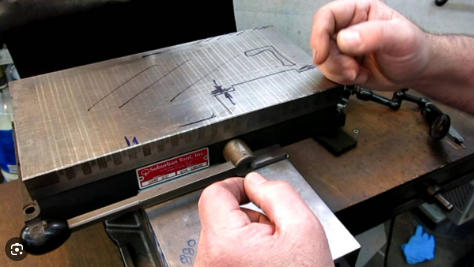
Before beginning any grinding operation, the wheel should be dressed. Dressing the wheel will true it up. Truing makes the wheel precisely round, removes deposits, and eliminates wheel runout. The dresser uses a single point diamond tip to cut against the grinding wheel. The dressing tool is mounted to the table using a magnetic chuck, as seen below.
Following are steps to follow for dressing a grinding wheel prior to use.
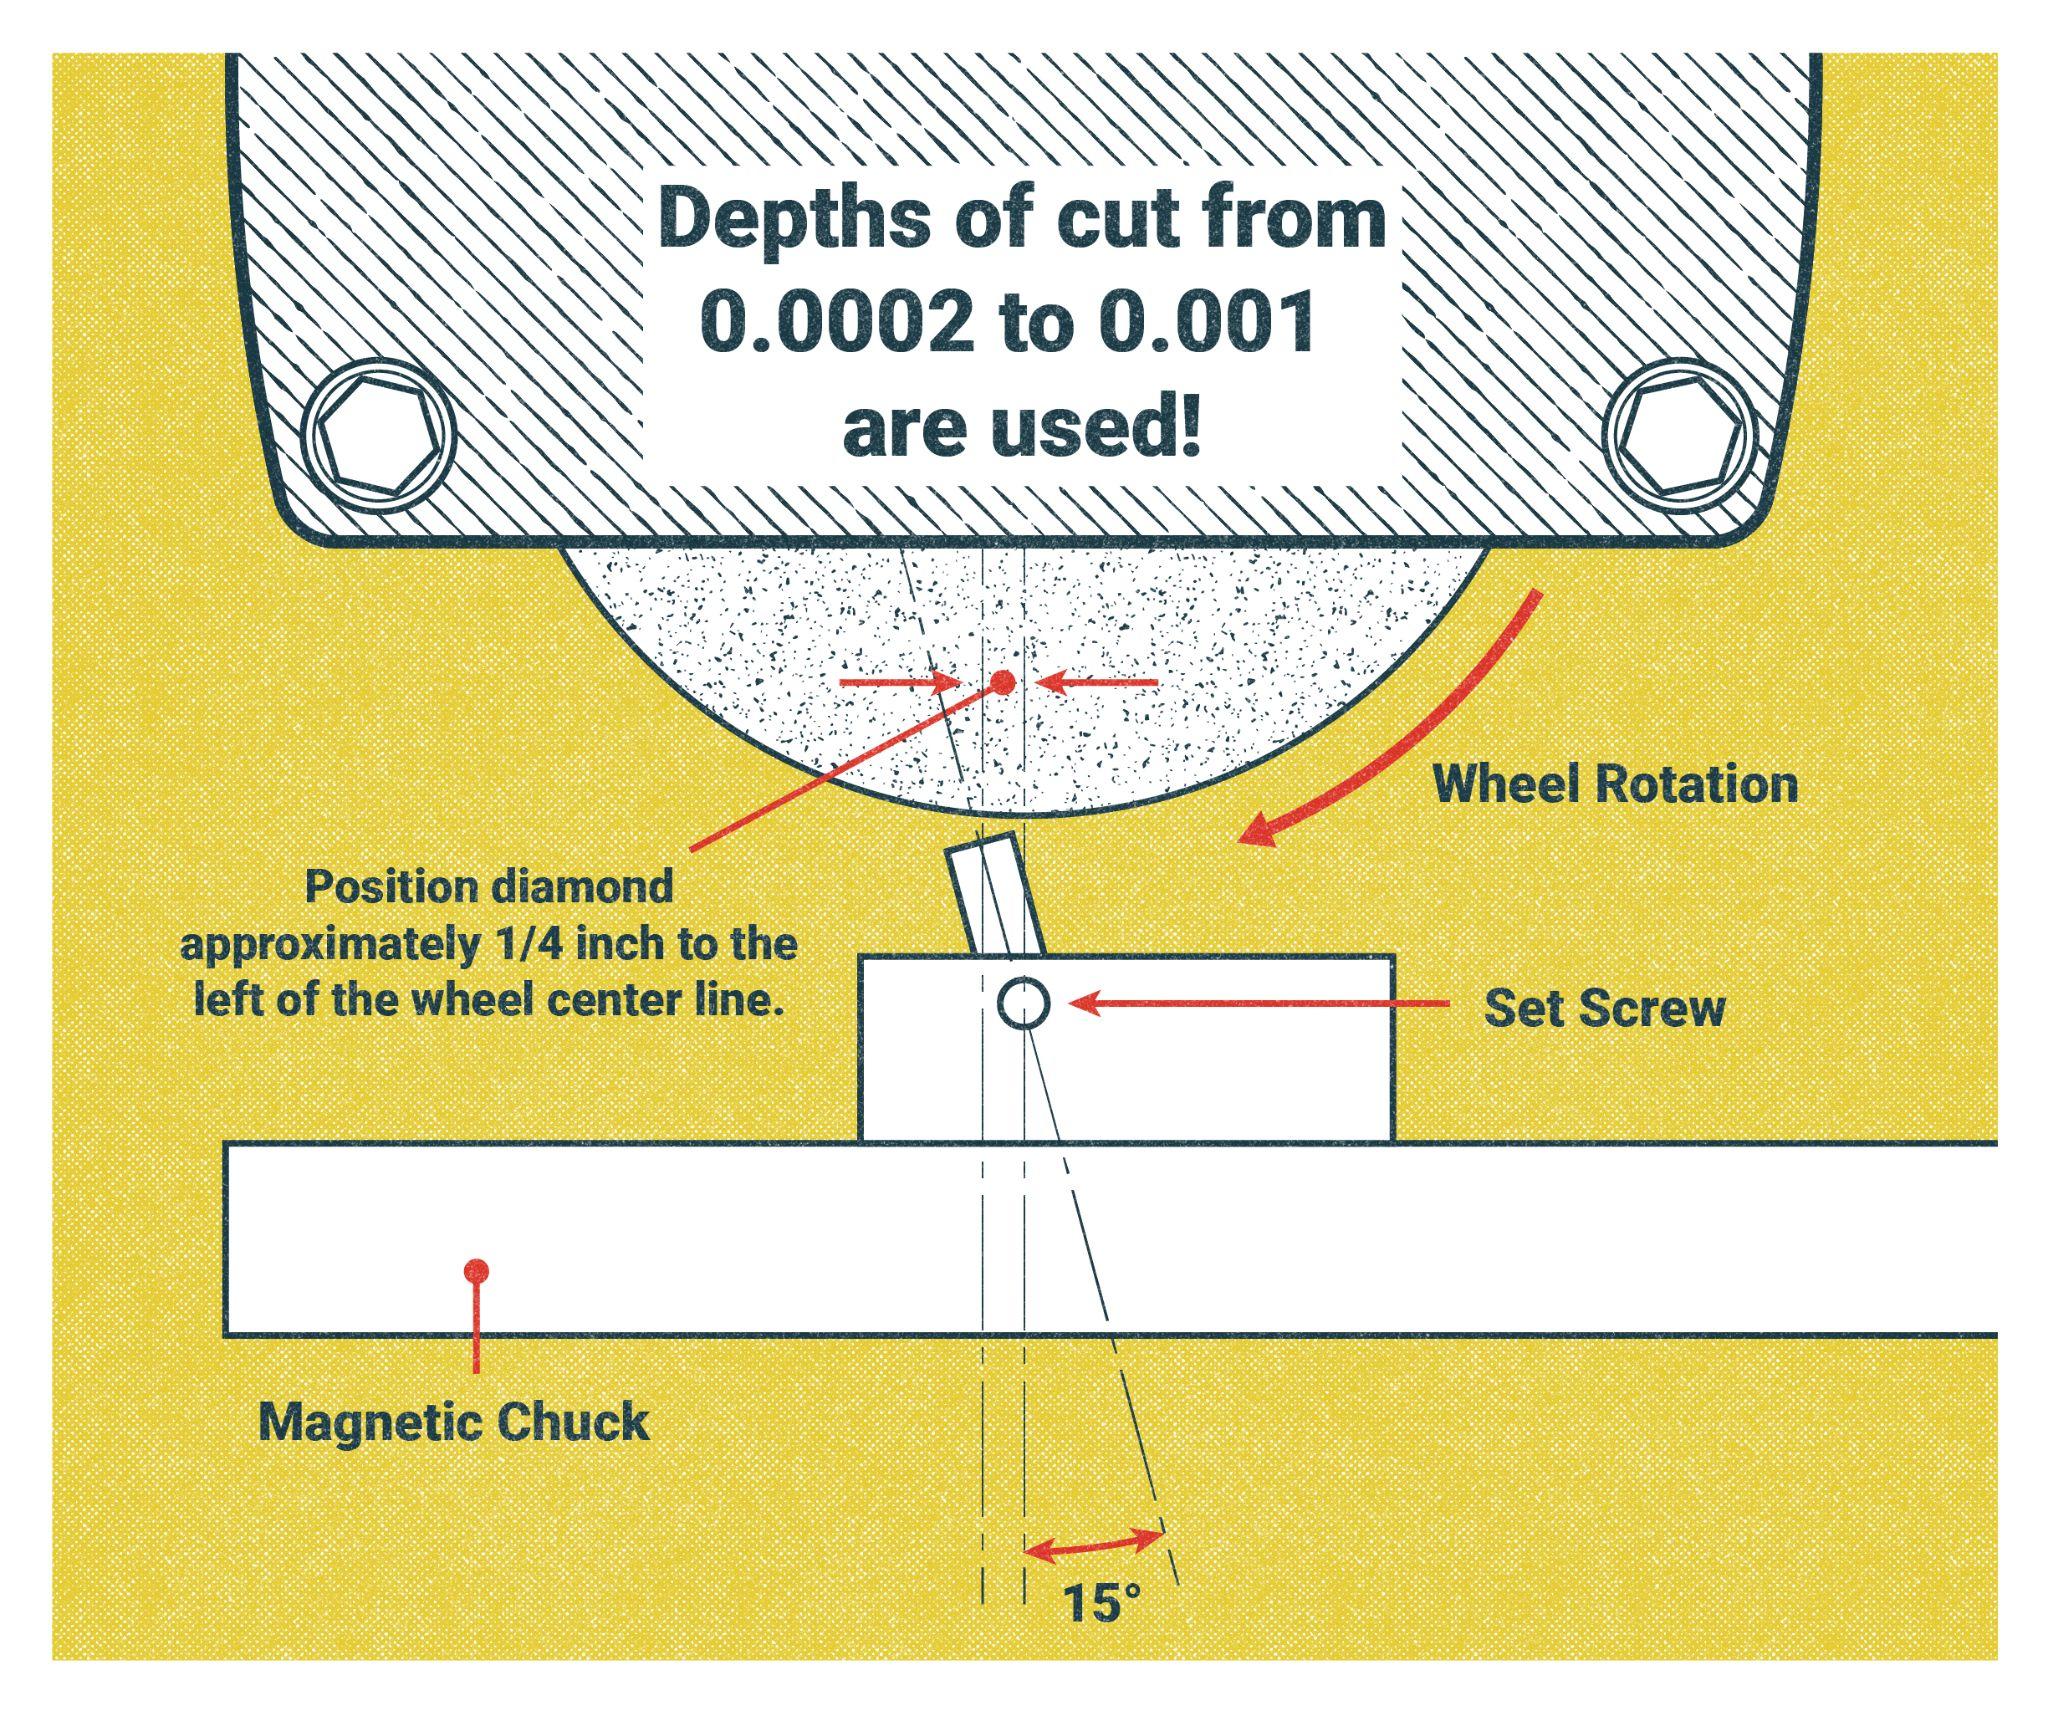
- The dresser must be placed on the exit side of the wheel (left) and point slightly away from the center of the wheel.
- Lock the long motion of the table. This is usually the X axis.
- Engage the magnet or clamping device.
- When starting the wheel, give it a spin to start the rotation, and then activate the power. This will help to keep the wheel from shifting on the arbor due to rotational torque on startup.
- When moving the dresser across the wheel, a fast pass will make a course finish. Moving it slowly will result in a fine finish. Dress the wheel according to the type of work, and the type of material; for example, roughing or finishing, hard or soft material.
Grinding
Prior to placing the workpiece on the table, ensure that the wheel is not moving!
- Once everything is set up, the part is secure, and the wheel has been dressed, bring the wheel down next to the part, and slightly past the top.
- Next, gently move the table horizontally until the part touches the wheel. This process is referred to as “touching off“.
- Now slowly raise the wheel while keeping in contact with the part.
- When the part slides under the wheel, stop raising the wheel.
- Move the part away from the wheel on the exit side of the rotation.
- Now press the power switch to start the grinder wheel rotating.
- Once the grinder is moving and the workpiece has been touched off, the coolant can be started. Angle the nozzle towards the ingoing nip for best cooling. This will flush the grit away and keep the part from overheating.
- When the wheel is lowered to make a cut, the workpiece should make initial contact to the wheel on the outgoing nip side (left side).
Critical Safety Note
Remember, never stand or walk around the outgoing side of the wheel, the left side. The left side of the grinder is where parts go, and chunks of the grinder wheel go when parts get knocked off the table.
Problems
It’s not a perfect world. The grinding machine may need to be slightly adjusted to achieve the quality of finish that is required. Challenges that may be encountered are surface finish burning, scratches, or waviness. Adjustments to the process will improve performance.
- Burning the surface happens when there is too much heat. This may be from overly aggressive cuts, and/or lack of coolant on the part. There will be a visible spiral with yellow or brown discoloration in some areas of the surface. Check the wheel dressing, work speed of the table, the cross feed, or redirect the coolant.
- Scratches on the surface can be caused by grinding without coolant or not thoroughly cleaning the table before loading the part.
- Waviness, or chatter, is a result of an out-of-round wheel. This happens when the wheel is not “trued” or “dressed” before using it. The wheel could also be loose on the spindle. If chatter is present, double check that the wheel is secure, and then dress it. Waviness can also be caused by an unbalanced wheel. The wheel may need to be remounted.

Attributions
- Figure 11.15: Ring test by T Bacon, courtesy of Bates Technical College, for WA Open ProfTech, © SBCTC, CC BY 4.0
- Figure 11.16: Magnetic chuck by T Bacon, courtesy of Bates Technical College, for WA Open ProfTech, © SBCTC, CC BY 4.0
- Figure 11.17: Dressing the wheel by Nicholas Malara, for WA Open ProfTech, © SBCTC, CC BY 4.0
- Figure 11.18: Burn and chatter by T Bacon, courtesy of Bates Technical College, for WA Open ProfTech, © SBCTC, CC BY 4.0
Personal Protective Equipment is specialized clothing, equipment, or devices designed to protect individuals from potential hazards, injuries, or health risks in the workplace or other environments
A process performed to verify a grinding wheel is not structurally damaged. It requires suspending the wheel loosely on a screw driver and rapping the side of the wheel with a hard-plastic handle. It should be a high-pitched ring note. If not, the wheel has a crack in it and should not be used.
Material containing iron
Material without iron
Using blocks to keep the part from moving around
Blocks that have an electronic field in which to hold parts while grinding
Blocks with an angled shape and an electronic field in which to hold parts while grinding
a grinding wheel maintenance task where the surface of the grinding wheel is restored to improve performance.
Running a diamond tool across the wheel to ensure that the wheel is turning in a circular pattern
Runout is the total variation that the reference surface can have when the part is rotated around the datum's true axis.
The centrical force acting radially on a wheel when first turned on
Please look for related terms in the Glossary
Too much heat from the wheel is going into the part. Increase feed to resolve.
A grinding wheel may fracture leaving a jagged edge that will leave scratches on the part.
Irregular patterns in the finish from a wheel that has not been trued up.
