7.4 Saw Operations, and Handling
Tim A. Bacon
Horizontal Saw Operations
Prior to starting your job, tie back long hair, secure loose clothing, remove jewelry, and always wear safety glasses. Here are some basic steps to follow when using a horizontal band saw to cut material.
Determine the proper RPM for the saw. It is common for the saw to be set up for surface feet per minute (SFM). This is based on the type of material to be cut. Aluminum has an average SFM around 700; mild steel is closer to 66 SFM. In general, cut hard material with fine teeth at a slow speed and soft material with coarse teeth at a high speed.
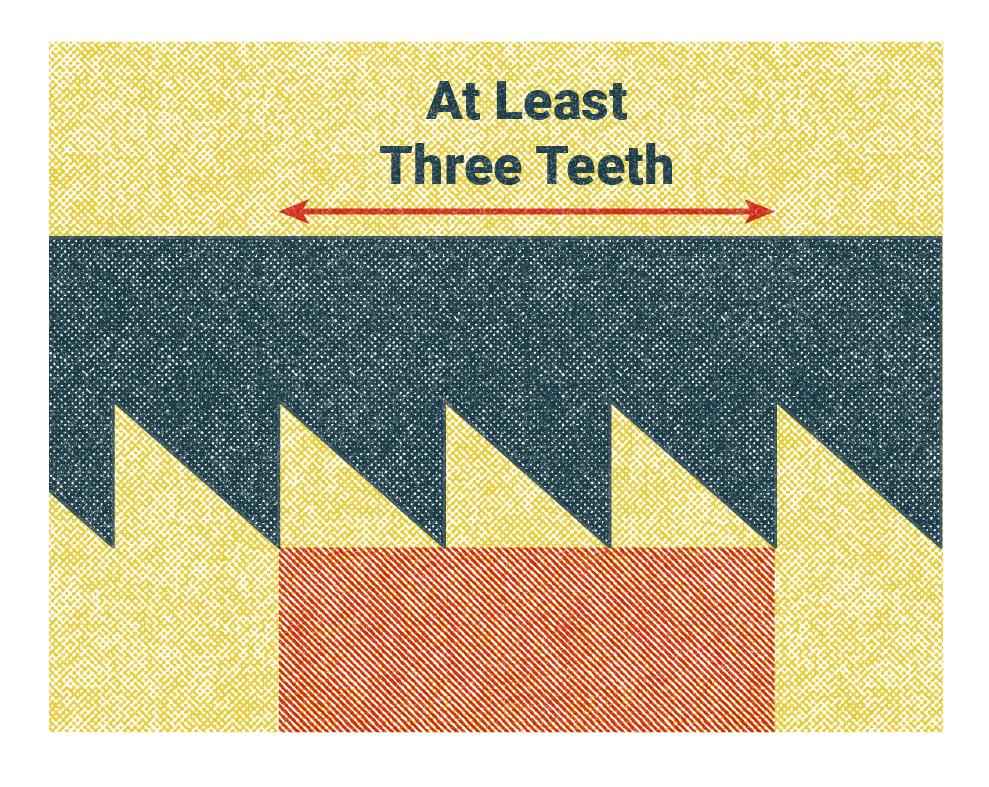
Recall that the three tooth principle states that the material to be cut should be thicker than three teeth on the blade. If the material is too thin, you’re likely to break off the teeth of the blade. By having three teeth of the blade always in contact with the material while cutting, the blade and material are supporting each other, and there is constant pressure between the blade and the material. When there is only one tooth engaged with the part, there will likely be damage to the blade as a result of the single tooth hitting the material. If the material is too thin, less than three teeth thick, the force of a single tooth hitting the material will cause a fracture or chip the tooth. This will destroy the blade and require that a new one be installed. If necessary, choose between changing the blade to a larger tooth per inch (TPI) blade or getting a piece of sacrificial material to increase the thickness of the material being cut.
Author’s Tip
Stack up several parts to be cut. This will increase the material thickness AND increase the productivity of the project. In fact, when the boss sees this, you may get the employee of the month parking spot!
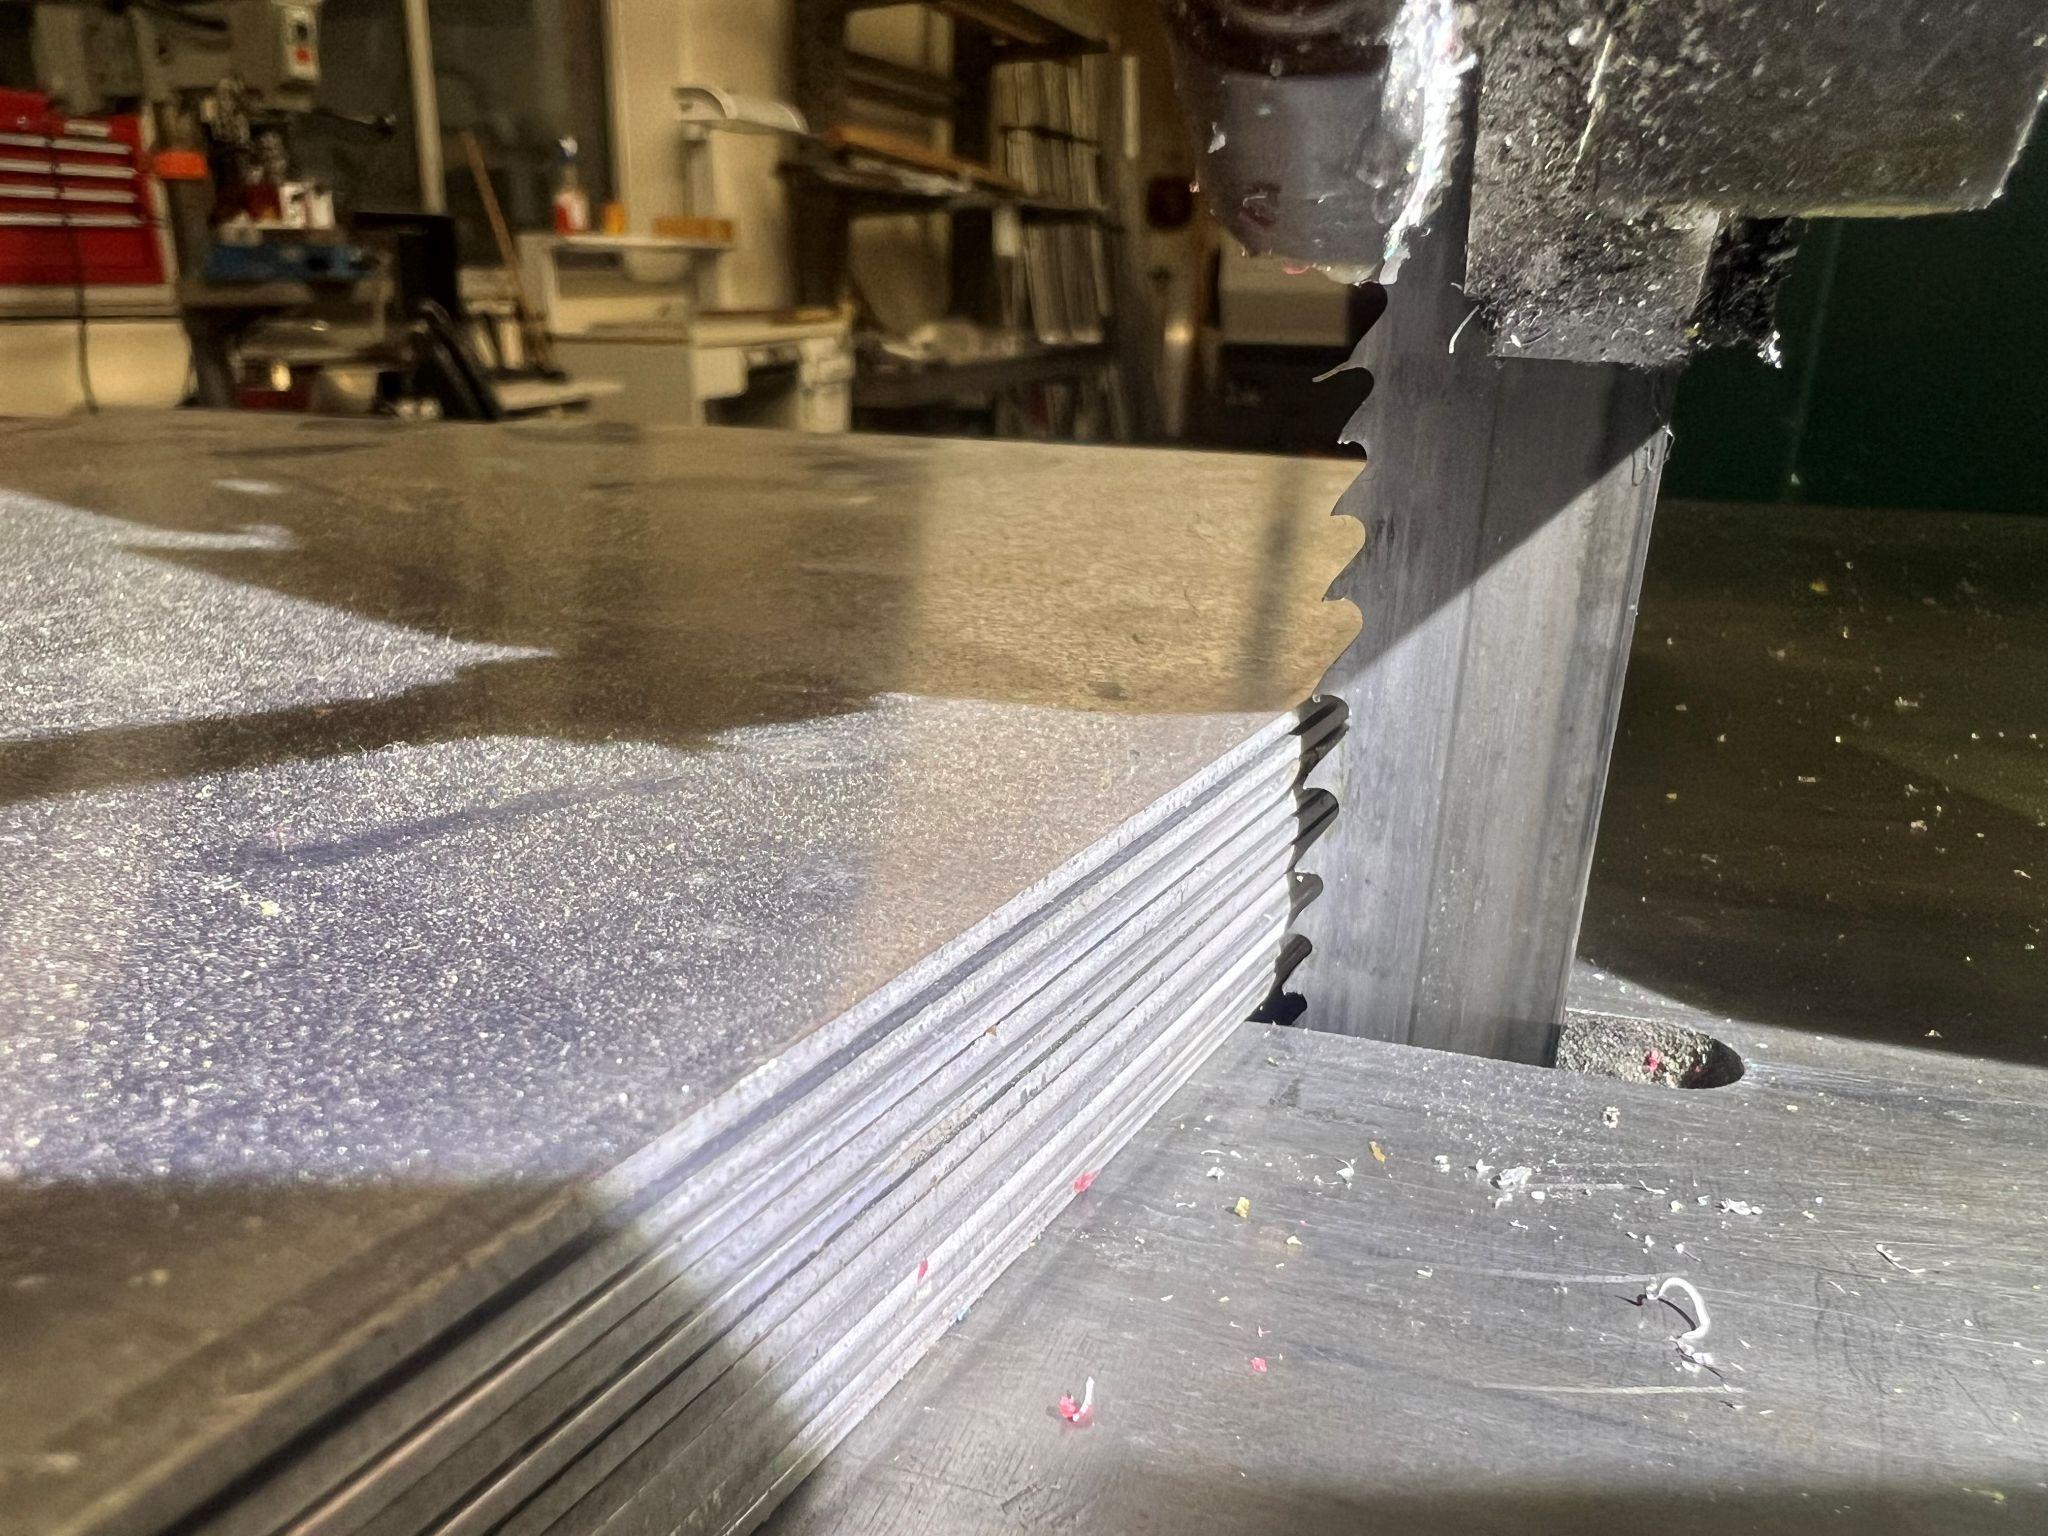
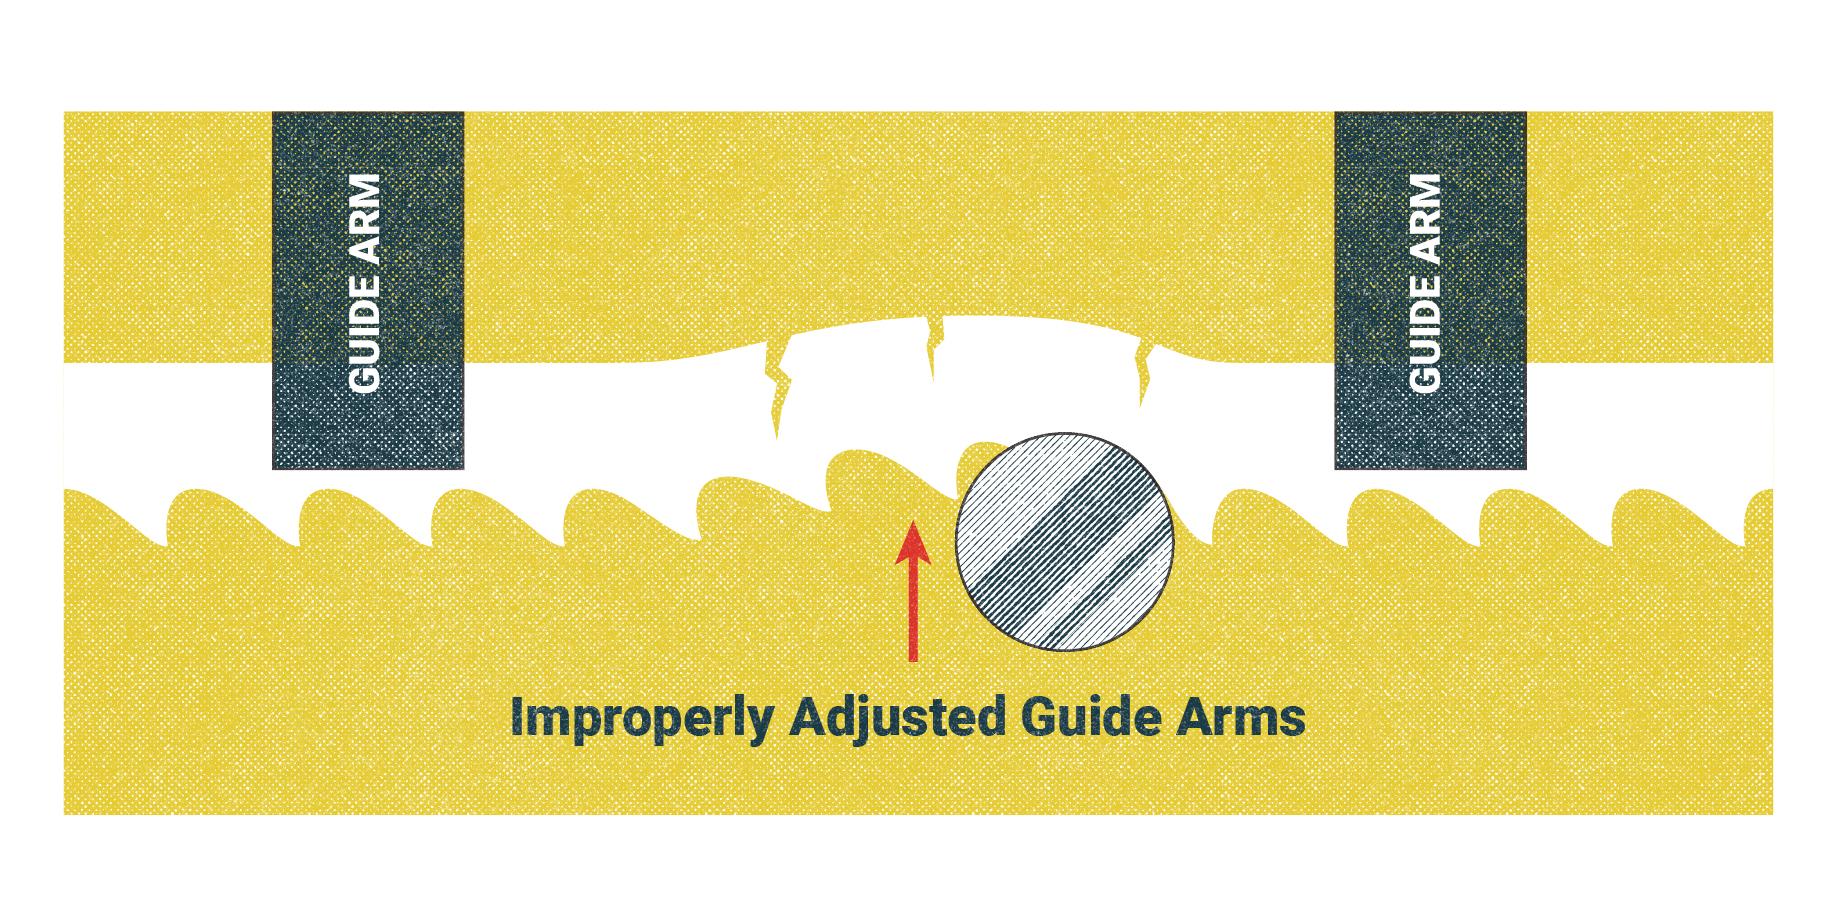
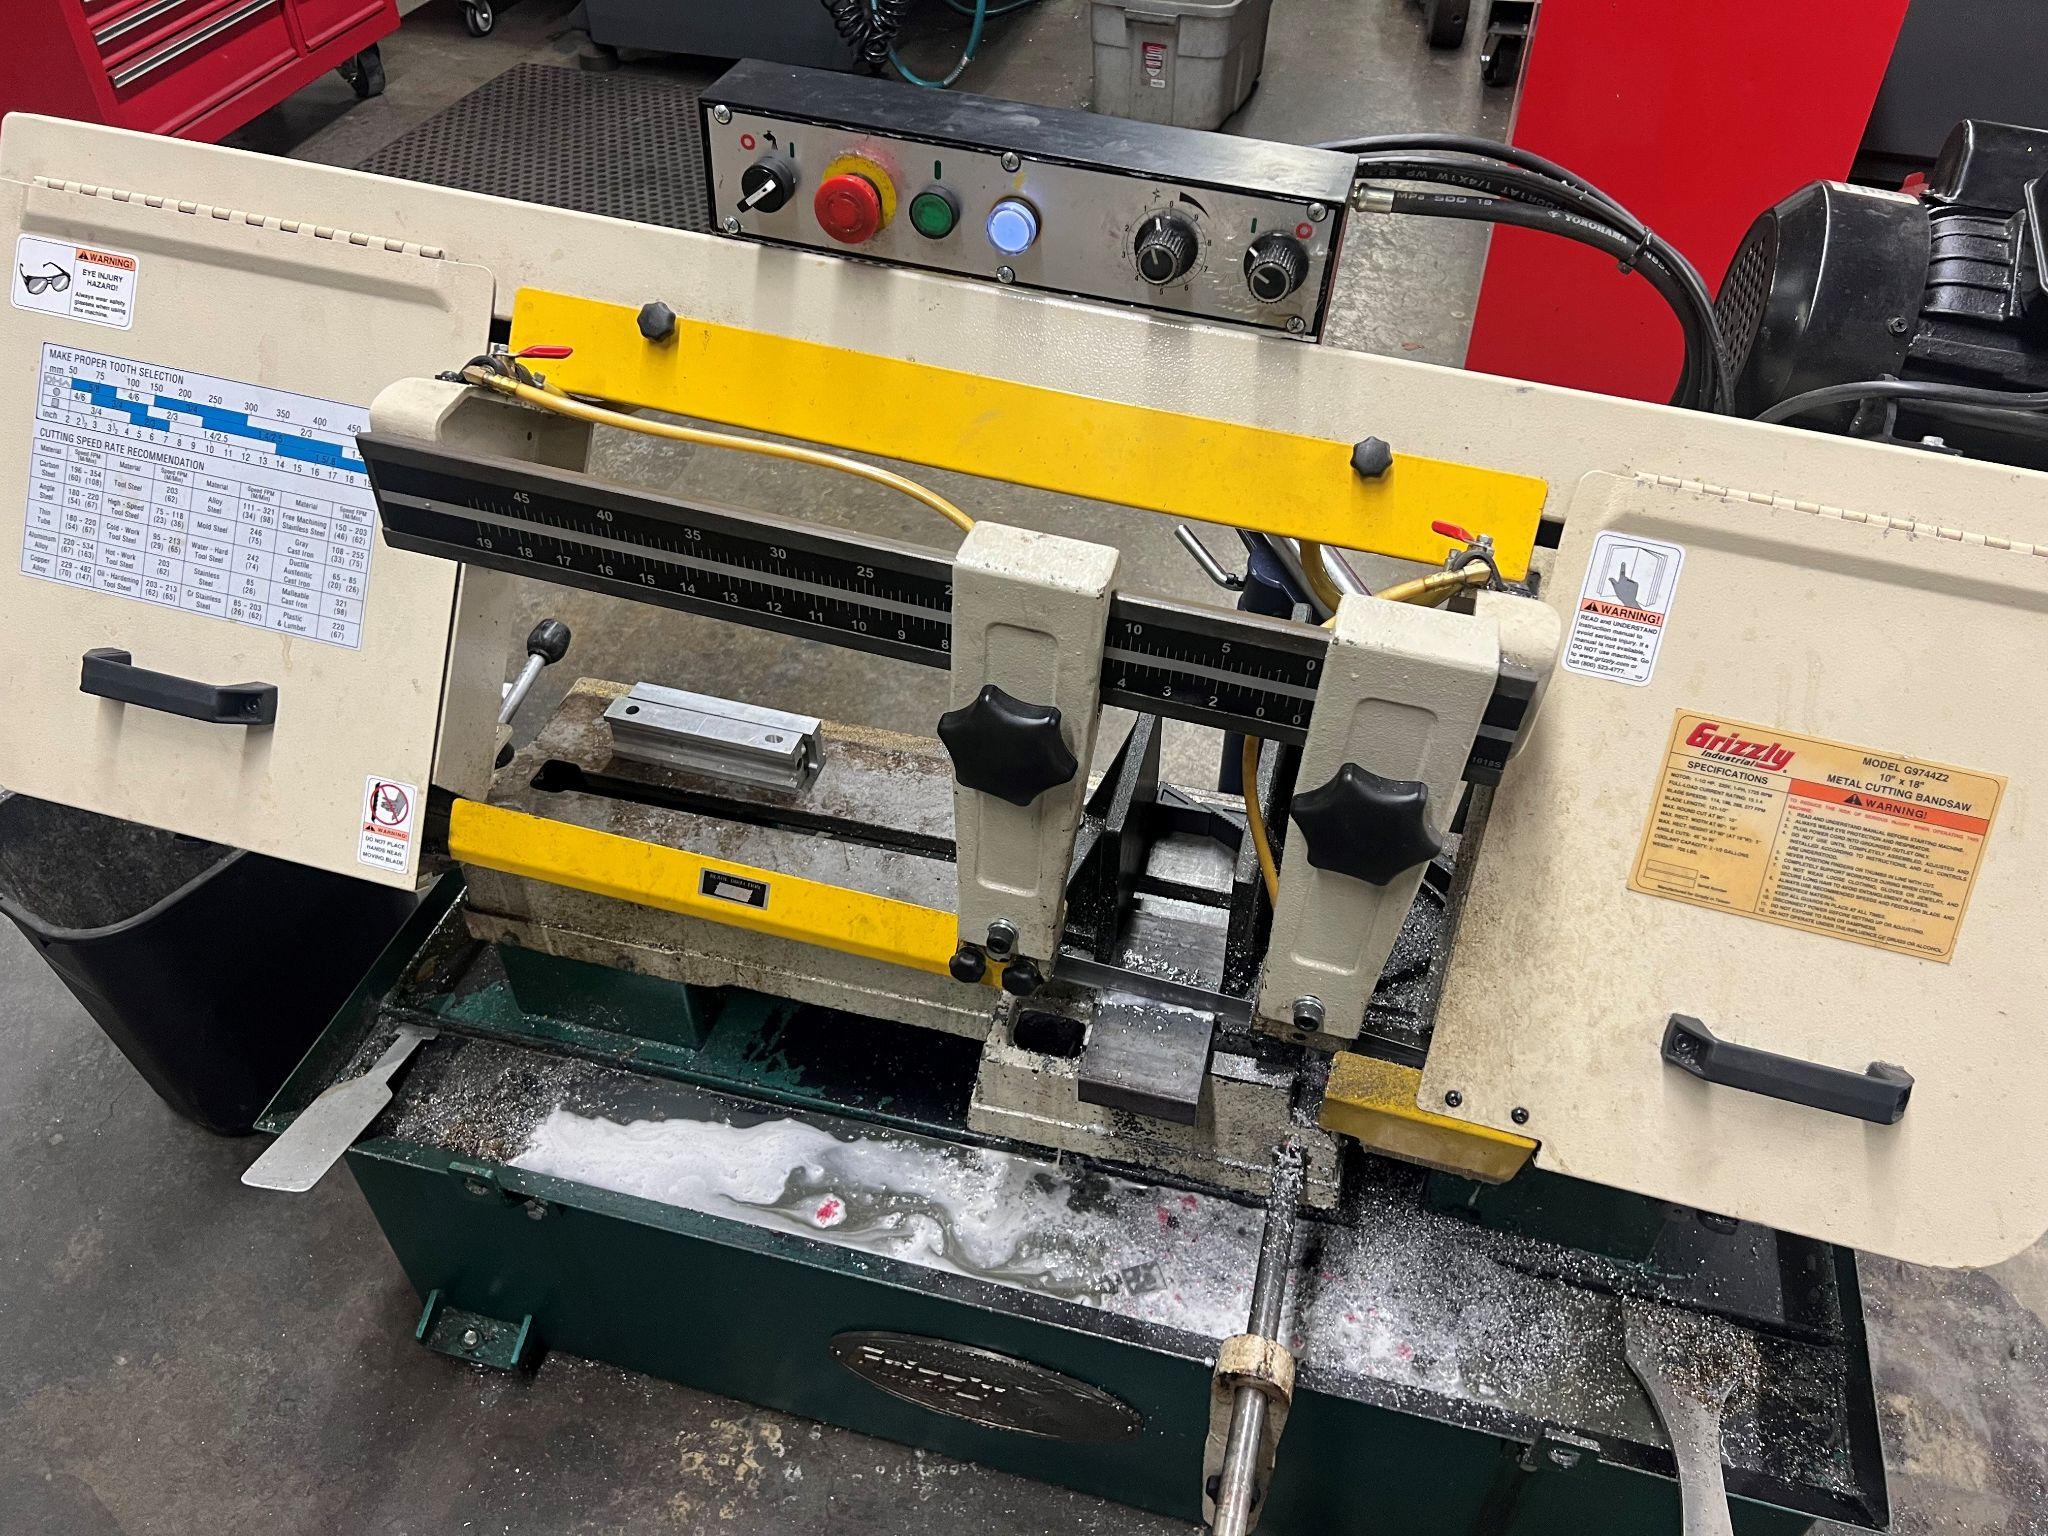
Adjust the guide arms on the leading and trailing sides of the part as close as possible to help support the blade during the cut. If the arms are too far apart, the blade may be damaged. Having the guides significantly away from the material being cut will also allow the blade to bend or twist. This can damage the blade and waste material.
Most machines have a chart as a guide to determine the speed of the blade needed for a given material. Adjust the speed (RPM) if needed.
Never start the blade when it is in contact with the part. It is common practice to start the blade when it is about a ¼ inch away from the part.
Lower the blade slowly to engage the material. Dropping it fast can damage the blade. Verify that the blade is creating chips. If the feed is too slow, it will be rubbing more than cutting, which generates heat and hardens the part. This will also shorten the life of the saw blade. Increase the feed once the blade has made contact to produce a proper chip.
After every sawing operation, the part should be deburred in preparation for the next step.
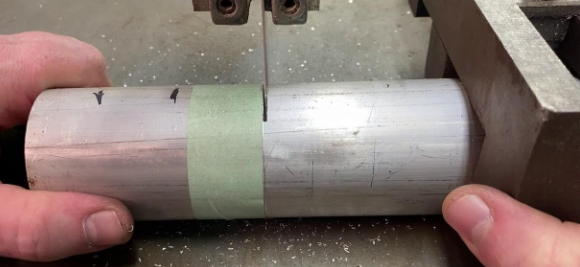
Set up the horizontal saw with the guides close to the part, as shown.
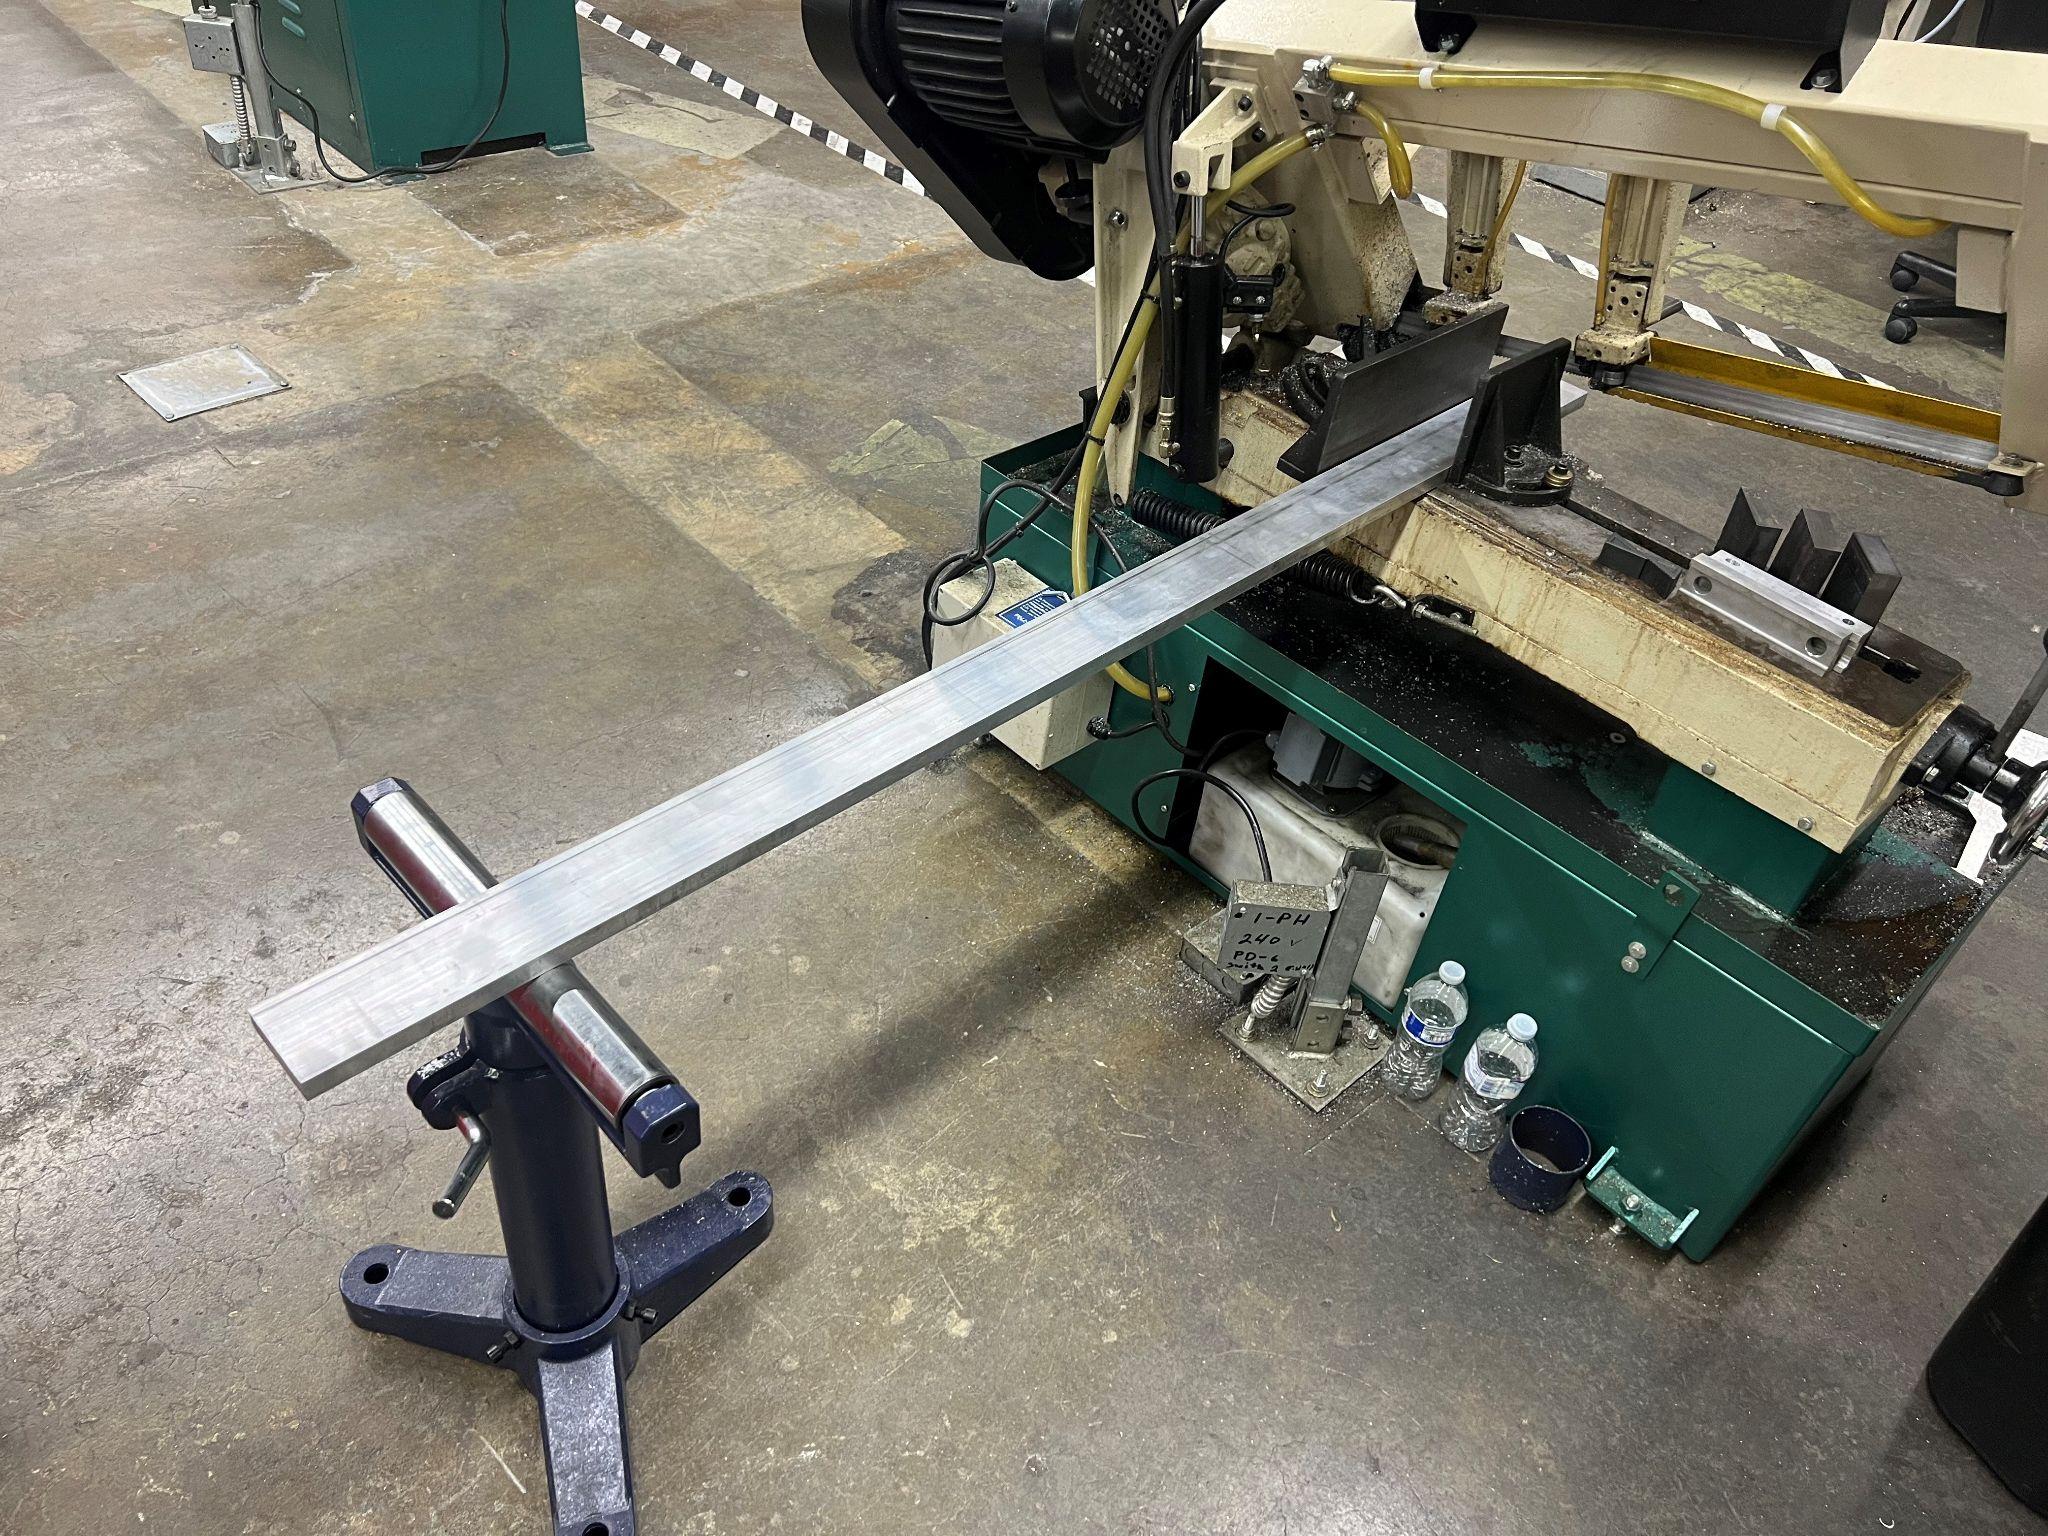
To cut long bar stock, pull the desired amount of material past the bandsaw blade, tighten the vise, and cut.
When cutting long pieces of material, it may be necessary to use a moveable stand to support the end away from the saw. This will help keep the material on the table and keep the stock oriented properly to the blade. (see picture below.)
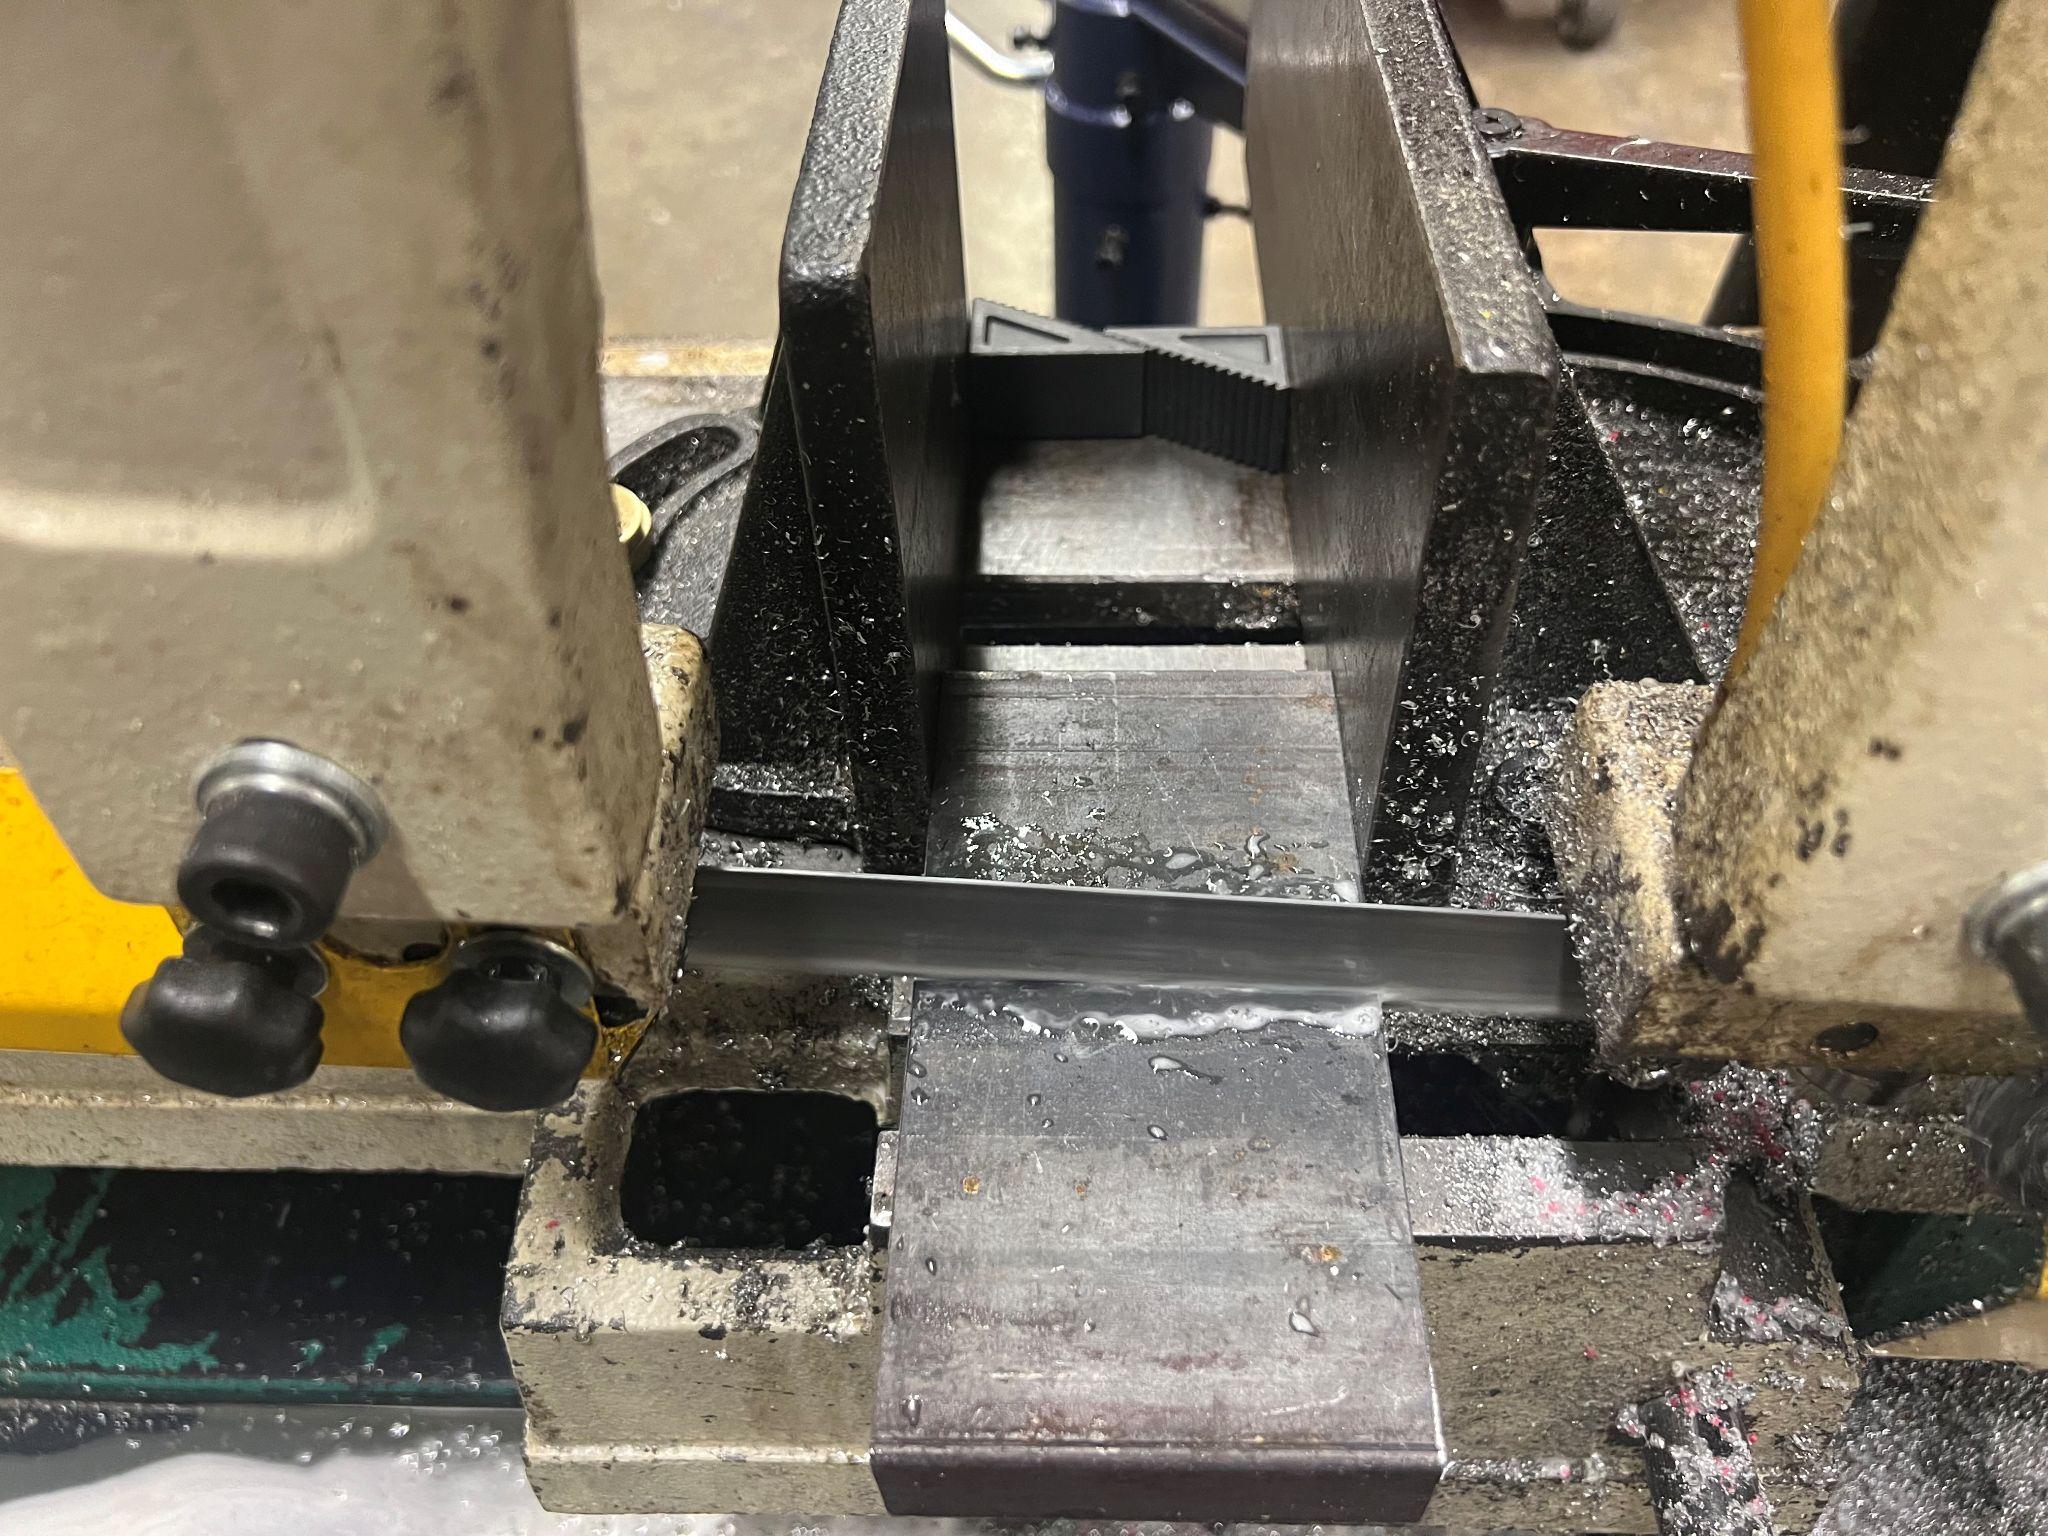
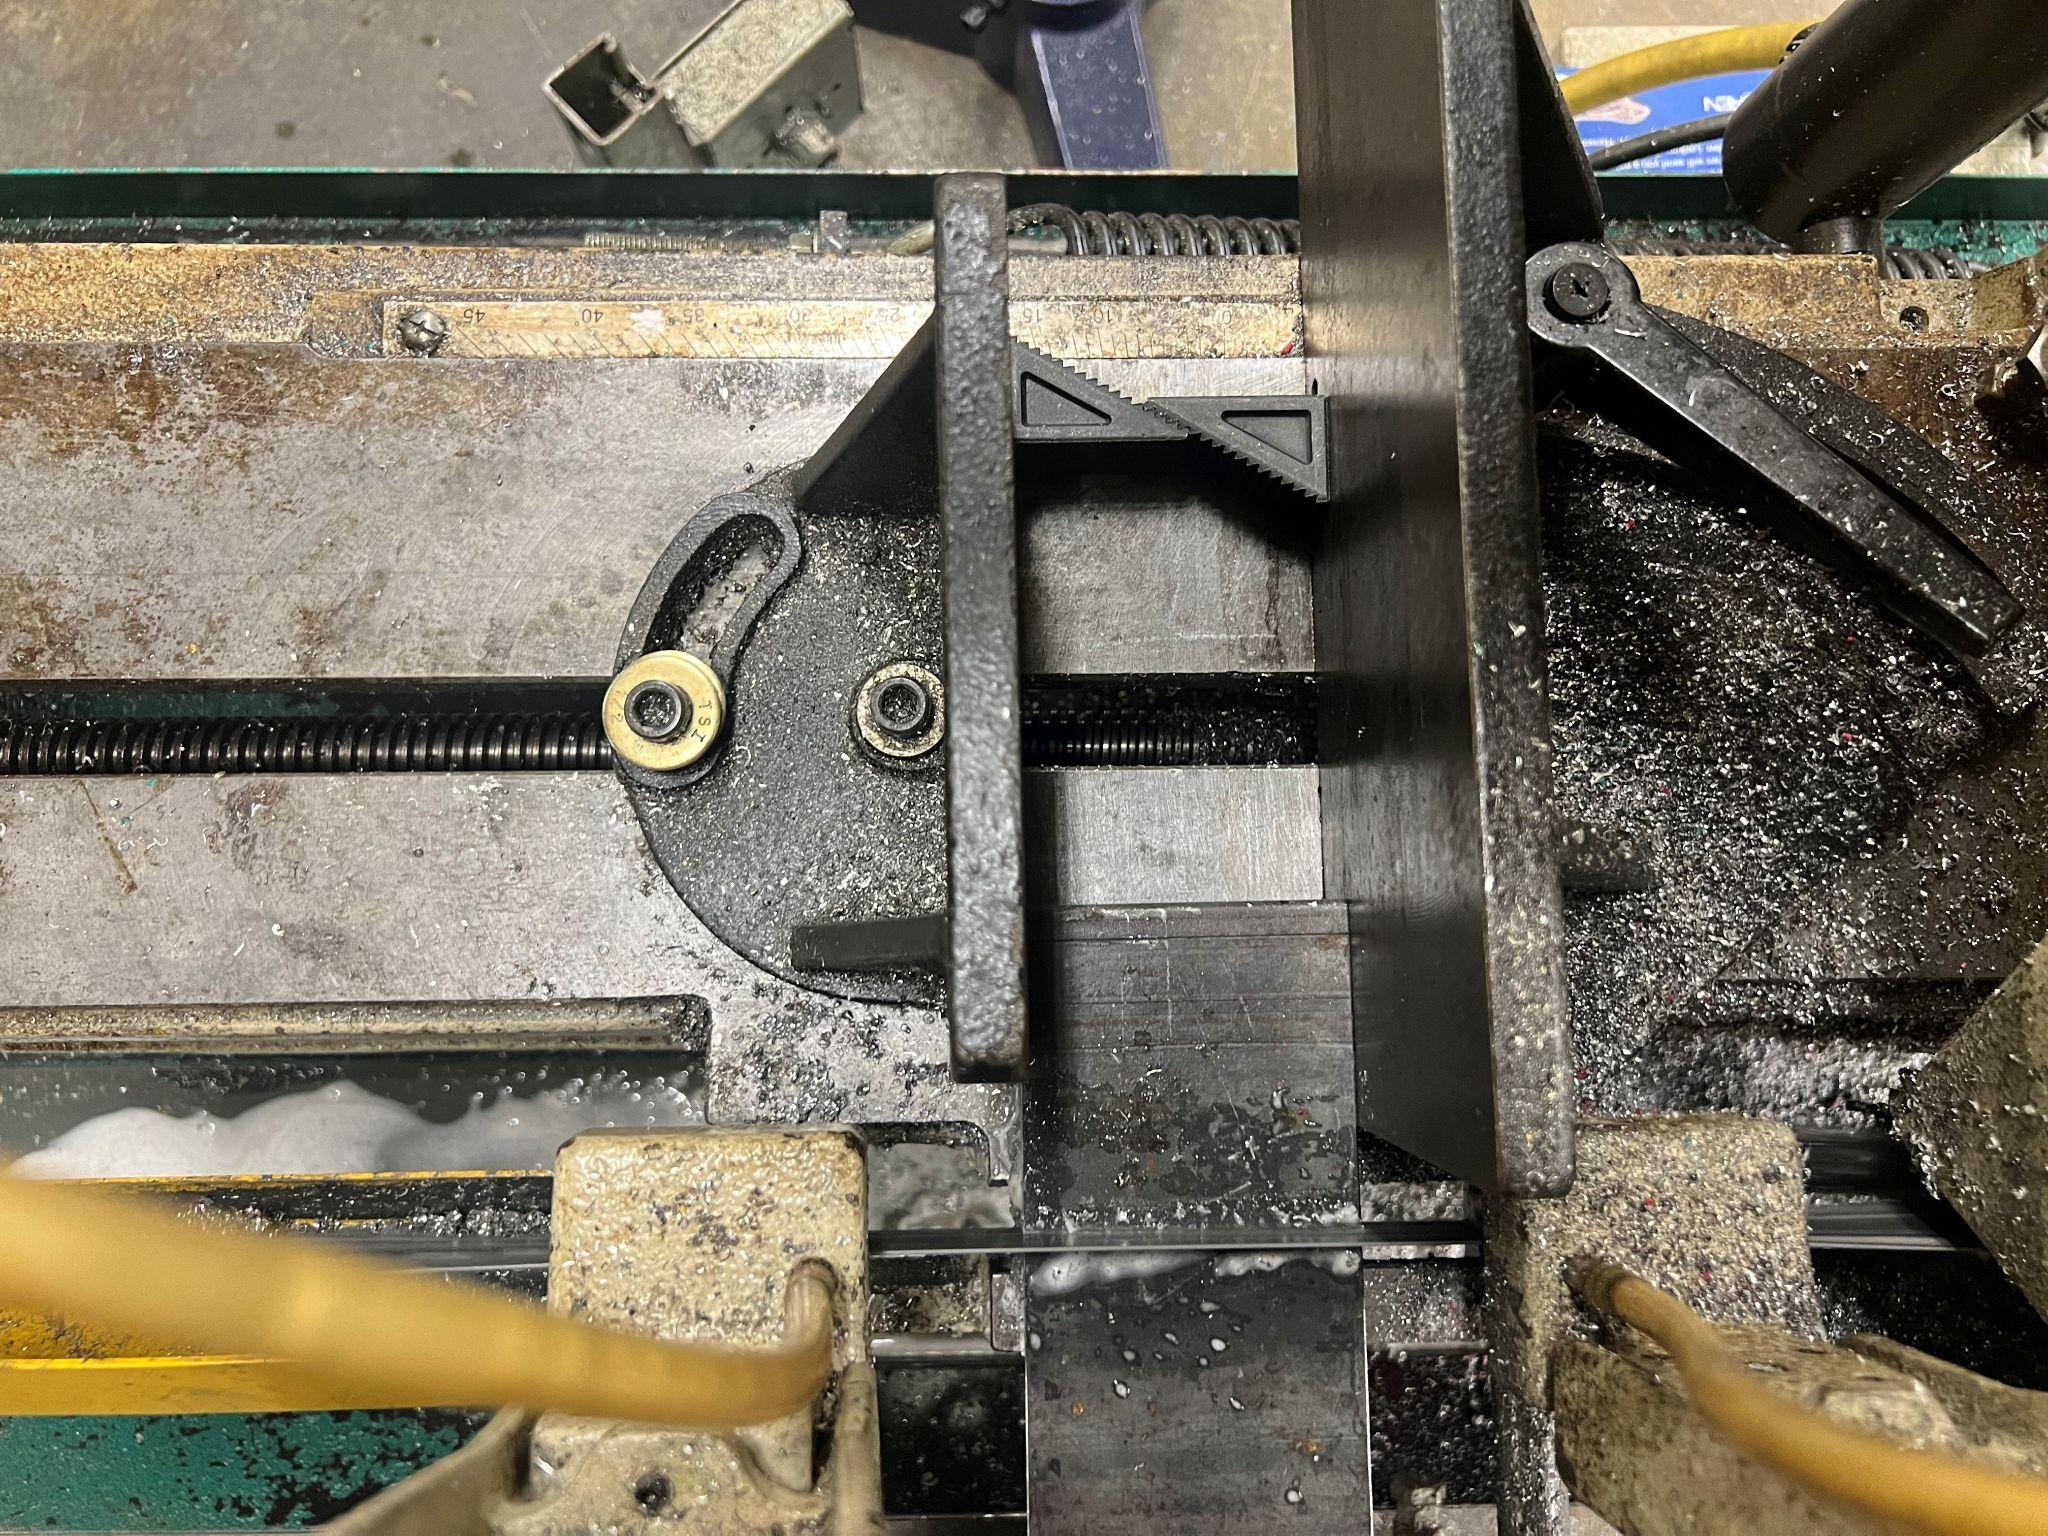
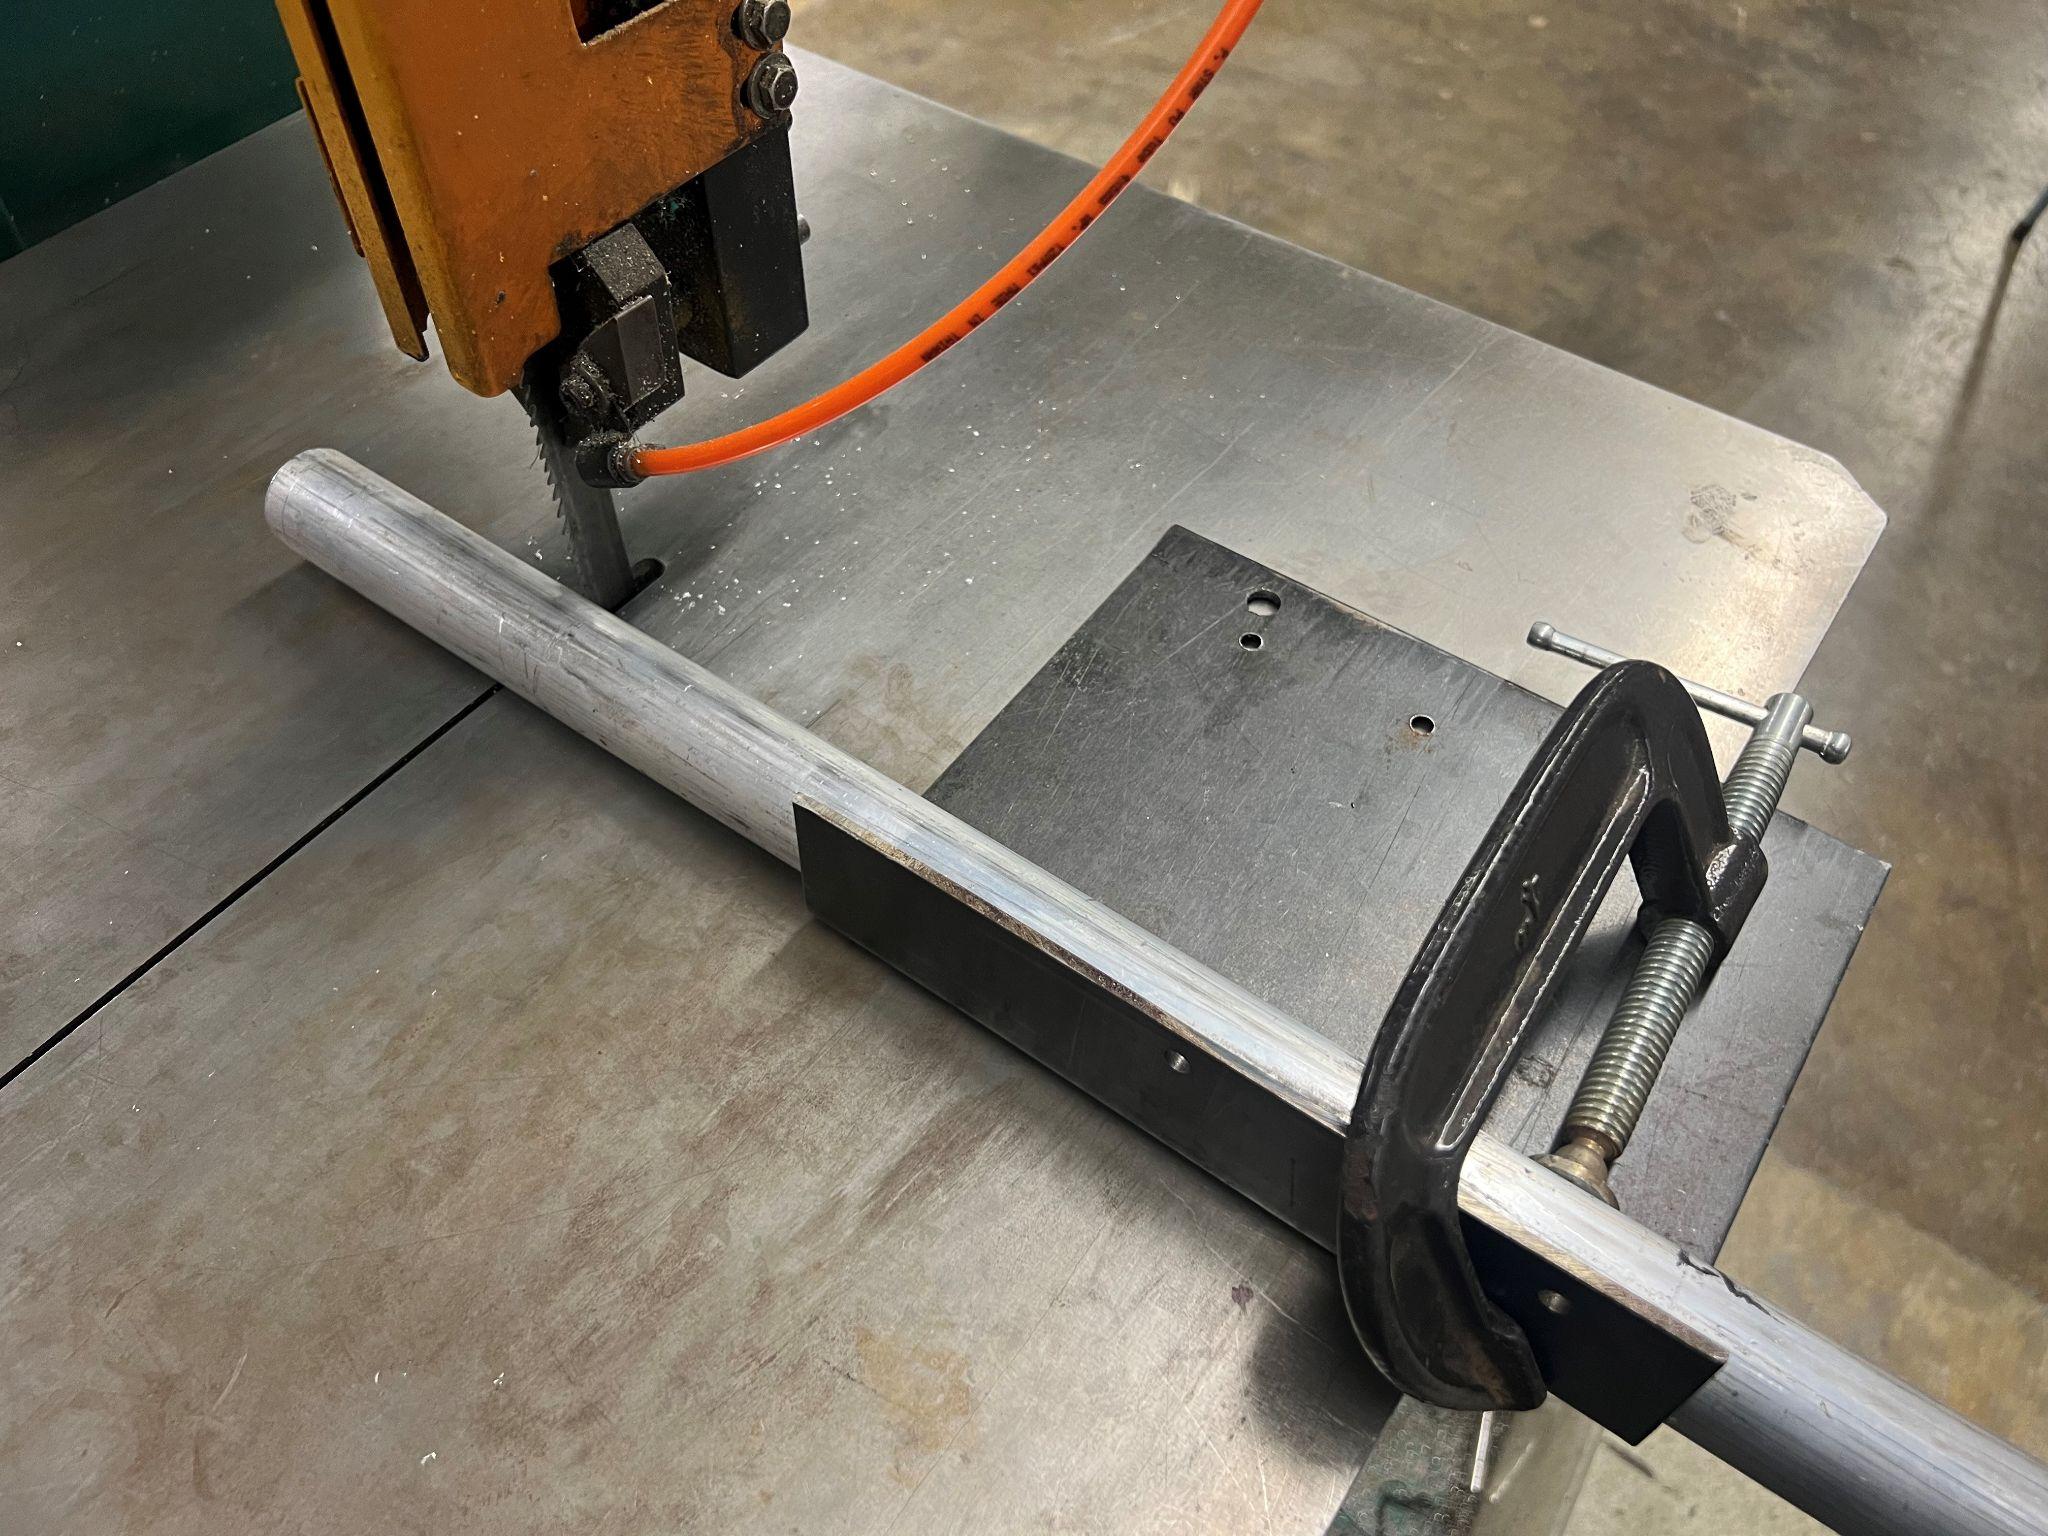
The center of the vise is a pivot point. The part being held needs to extend past this point, away from the saw to ensure positive holding. If the part is shorter, use different material or remnant stock to extend the jaws out. Also, a set of step blocks can be used opposite the saw blade side to allow the vise to properly hold the small part.
When it comes to shorter parts, step blocks can be used on the opposite side of the pivot point on the vise. Use step blocks stacked to the same size as the material being cut to support the pivot vise on the opposite side of the material being cut.
Vertical Saw Operations
Like the horizontal saw, the vertical bandsaw is used to rough-cut material to something close to the finished size of the part. This helps to increase productivity and profitability. It can also be used to remove excess material.
The cut made on a vertical saw may be just a simple straight cut (a wide blade) or something with more complex curves or shapes (a narrow blade). Drilling holes at a corner of the part can help when cutting irregular shapes.
Steps to keep in mind when using the vertical saw.
- Assess the thickness of the part to be cut. Add material if it has a thickness of less than three teeth. Another option is to change the blade to a finer pitch.
- Adjust the overhead guide arm so that it is just above the part.
- Always keep your fingers away from the blade. It is strongly suggested that you use a piece of wood to push the part through.
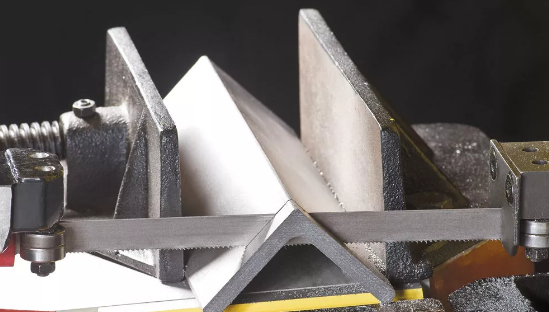
- Cutting a round piece of material on the saw is very dangerous because the blade will want to grab the material, and spin it. This can ruin the finish on the material and/or damage the saw. Clamping a square piece of material to the bar stock may help to inhibit the rotation.
This picture demonstrates a square being clamped onto a round part when using a vertical saw. The square will keep the round part from spinning as it is being cut.
Abrasive Saw Operations
The abrasive saw is a fairly basic piece of equipment. Points to keep in mind when using these saws include:
- Proper clamping in the vise. This is similar to the horizontal band saw. Ensure that both sides of the vise are engaged.
- Long pieces of material will need to be supported.
- These saws produce sparks and dust. Pay attention to where sparks and dust are going. Fires have been started by something as simple as an unmonitored spark.
- This piece of equipment is quite loud. Hearing and eye protection eye protection is necessary when using it.
- Care must be exercised when cutting. The area around and near the cut in the material will be very hot. Burning injuries are possible.

Attributions
- Figure 7.17: When the part is too thin by T. Bacon, courtesy of Bates Technical College, for WA Open ProfTech, © SBCTC, CC BY 4.0
- Figure 7.18: Three tooth rule by Nicholas Malara, for WA Open ProfTech, © SBCTC, CC BY 4.0
- Figure 7.19: Support the saw blade by Nicholas Malara, for WA Open ProfTech, © SBCTC, CC BY 4.0
- Figure 7.20: Horizontal workholding by T. Bacon, courtesy of Bates Technical College, for WA Open ProfTech, © SBCTC, CC BY 4.0
- Figure 7.21: Horizontal bandsaw by T. Bacon, courtesy of Bates Technical College, for WA Open ProfTech, © SBCTC, CC BY 4.0
- Figure 7.22: Cutting long parts on the horizontal bandsaw by T. Bacon, courtesy of Bates Technical College, for WA Open ProfTech, © SBCTC, CC BY 4.0
- Figure 7.23: Using step blocks by T. Bacon, courtesy of Bates Technical College, for WA Open ProfTech, © SBCTC, CC BY 4.0
- Figure 7.24: Top view of step blocks by T. Bacon, courtesy of Bates Technical College, for WA Open ProfTech, © SBCTC, CC BY 4.0
- Figure 7.25: Workholding with round parts by T. Bacon, courtesy of Bates Technical College, for WA Open ProfTech, © SBCTC, CC BY 4.0
- Figure 7.26: Workholding for round parts by T. Bacon, courtesy of Bates Technical College, for WA Open ProfTech, © SBCTC, CC BY 4.0
- Figure 7.27: US Navy 110914-N-BT887-143 Aviation Boatswain’s Mate (Equipment) 3rd Class Brock Puffett, from Independence, Iowa, Cutting an Arresting Gear Cable abo.jpg by U.S. Navy photo/Mass Communication Specialist 3rd Class Benjamin Crossley in the Public Domain; This file is a work of a sailor or employee of the U.S. Navy, taken or made as part of that person’s official duties. As a work of the U.S. federal government, it is in the public domain in the United States.
Please look for related terms in the Glossary

_3rd_Class_Brock_Puffett,_from_Independence,_Iowa,_cuts_an_arresting_gear_cable_abo.jpg)