37 Hardness Tests
A hardness test is a test used to determine the relative hardness of a weld area as compared with the base metal. Hardness is the ability of a metal to resist penetration or indentation. Indentation hardness testing is applied across an HAZ (heat-affected zone) and uses the surface impression produced by a standardized shape indenter and standardized load to determine hardness.
There are a few different type of hardness tests, including Brinell and Rockwell. The Rockwell hardness test is the most commonly used and versatile hardness test.
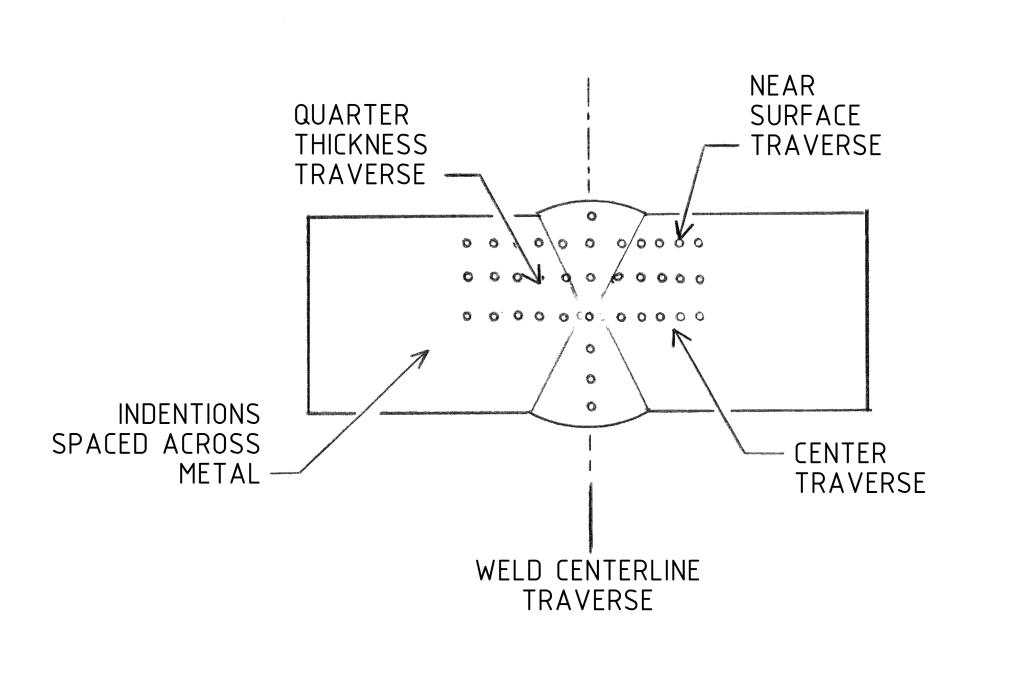
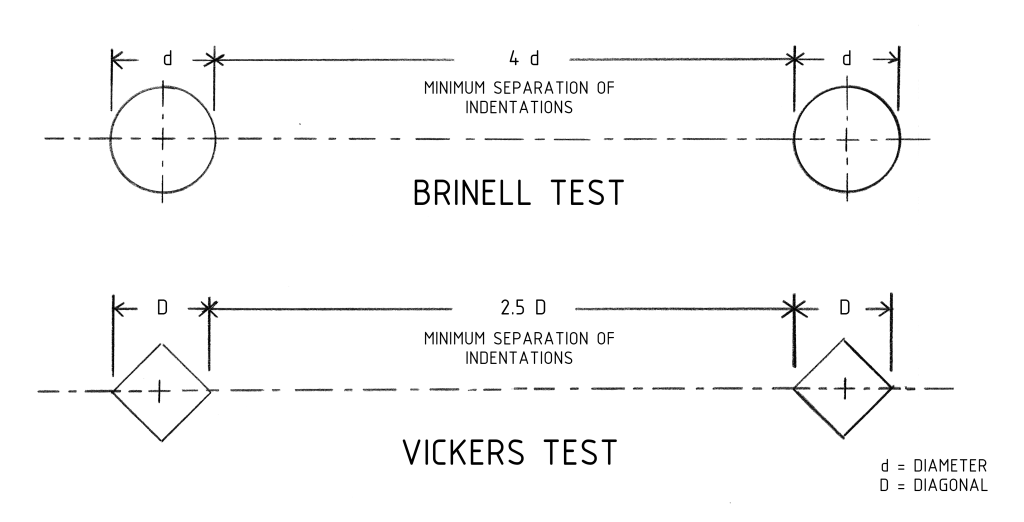
For evaluation of weld metal hardness, the edge of the indentation must be within the weld metal and no closer than 1/8″ from the weld metal interface with the base metal. The minimum spacing between indentations depends on the type of test. If the indentations are too close together, there will be disturbed zones of metal. The minimum separation between indentations should be four diameters (4 d center to center) for the Brinell and Rockwell hardness tests and two-and-a-half diagonals (2 1/2 D center to center) for the Vickers hardness test.
Rockwell Hardness Test
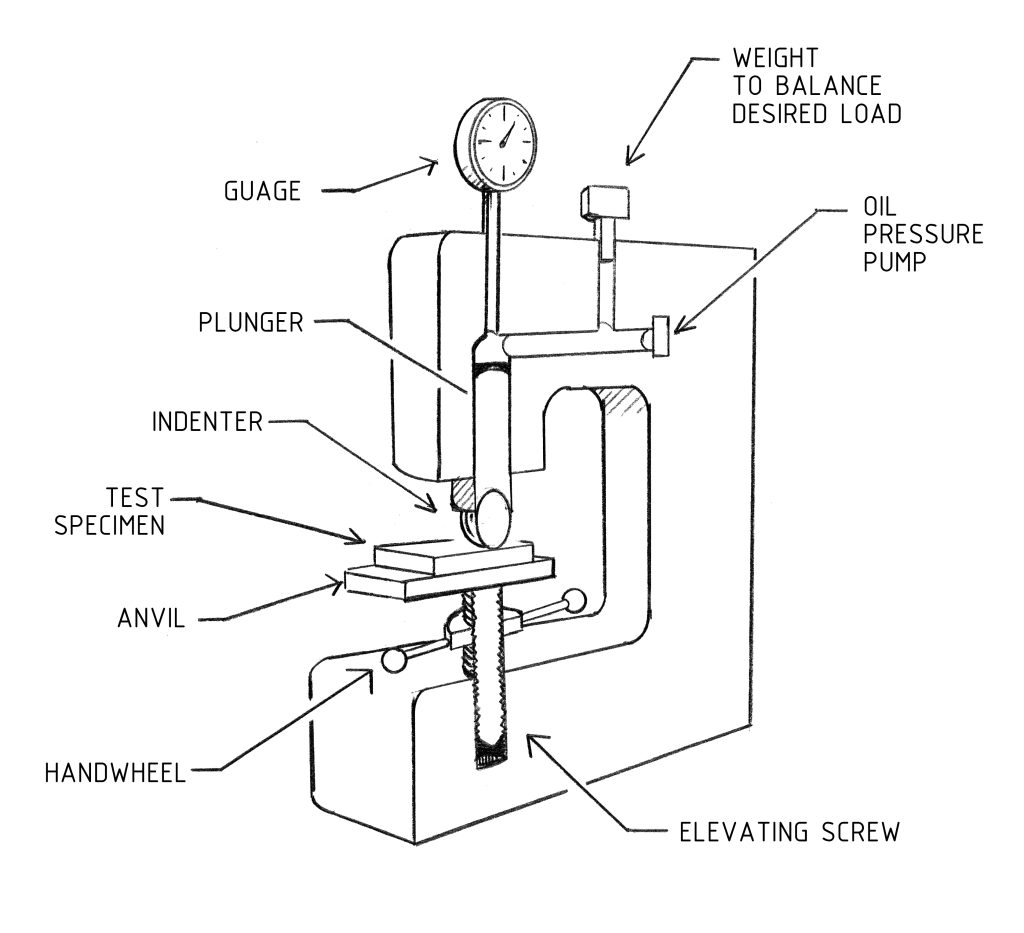
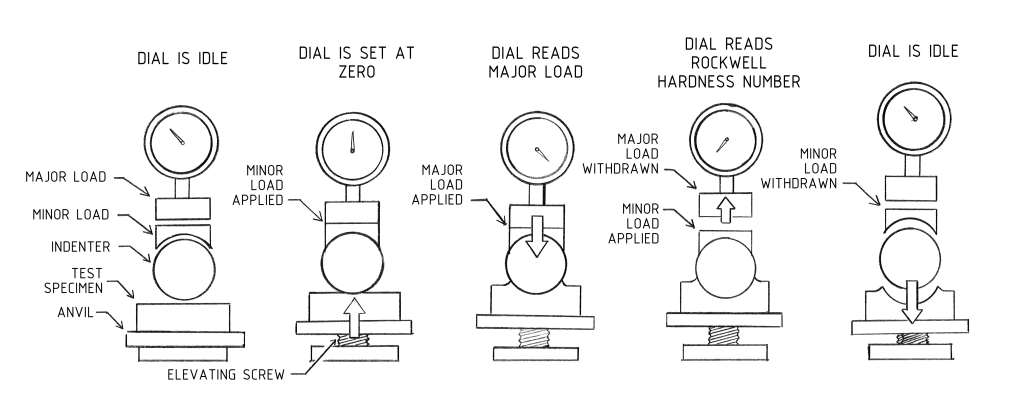
The Rockwell hardness test is an indentation hardness test that uses two loads, supplied sequentially, to form an indentation on a metal test specimen to determine hardness. The Rockwell hardness test is the most commonly used and versatile hardness test. The Rockwell hardness test is commonly used for weld and base metal measurements. The Rockwell testing machine has a variety of attachments that enable it to measure the hardness of a wide range of materials.
A 1/16″ diameter steel ball and a 120-diamond cone are the two types of indenters. A minor load of 10 kg is first applied, which helps seat the indenter and removes the effect of surface irregularities. A major load, which varies from 60 kg to 150 kg, is then applied.
Brinell Hardness Test
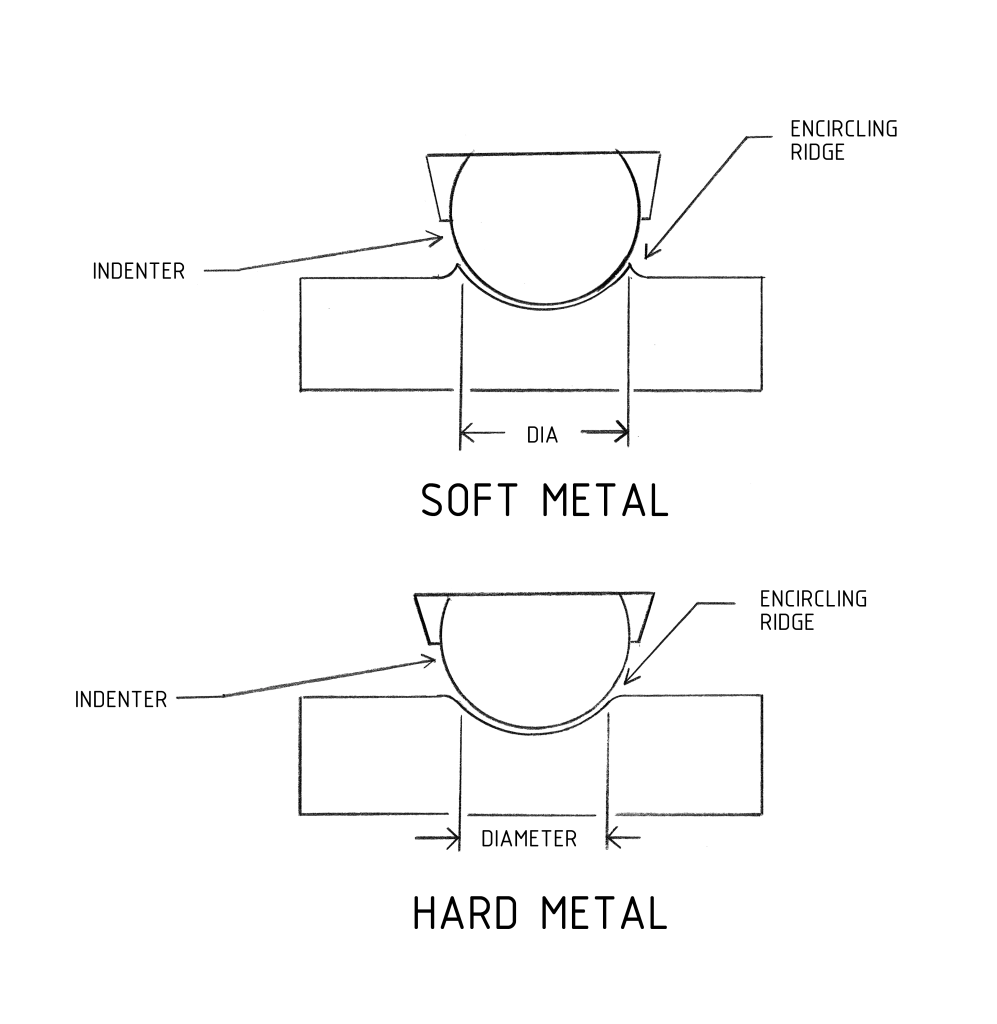
The Brinell hardness test is an indentation hardness test that uses a machine to press a 10 mm diameter, hardened-steel ball into the surface of a test specimen. The load must remain on the specimen 15 seconds for ferrous metals or 30 seconds for nonferrous metals. Sufficient time is required for adequate flow of the material being tested; otherwise, the readings will be inaccurate. The test is used to determine base metal hardness. The Brinell hardness test is fully described in ASTM E 10, Brinell Hardness Testing of Metallic Materials.
The Brinell hardness number followed by the abbreviation “HB” indicates a hardness value calculated under standard conditions using a 10 mm diameter, hardened-steel ball; a 3,000 kg load; and an indentation time of 15 seconds to 30 seconds. However, the load applied to the steel ball depends on the type of metal being tested. A 500 kg steel ball is used for aluminum castings, and a 3,000 kg steel ball is used for ferrous metals. The diameter of the indentation is measured to 0.05 mm using a low-magnification portable microscope.
Care must be taken to measure the exact diameter of the indentation and not the apparent diameter caused by edge effects. Edge effects may result in a ridge or depression encircling the true indentation.
Micro Hardness Test
Micro hardness tests are indentation hardness tests that use very light loads of less than 200 g. Micro hardness tests are at the opposite end of the scale from the Brinell and Rockwell hardness tests. A polished surface along with the light loads allows the hardness of individual grains of metal or other micro constituents to be measured at regular intervals in the specimen.
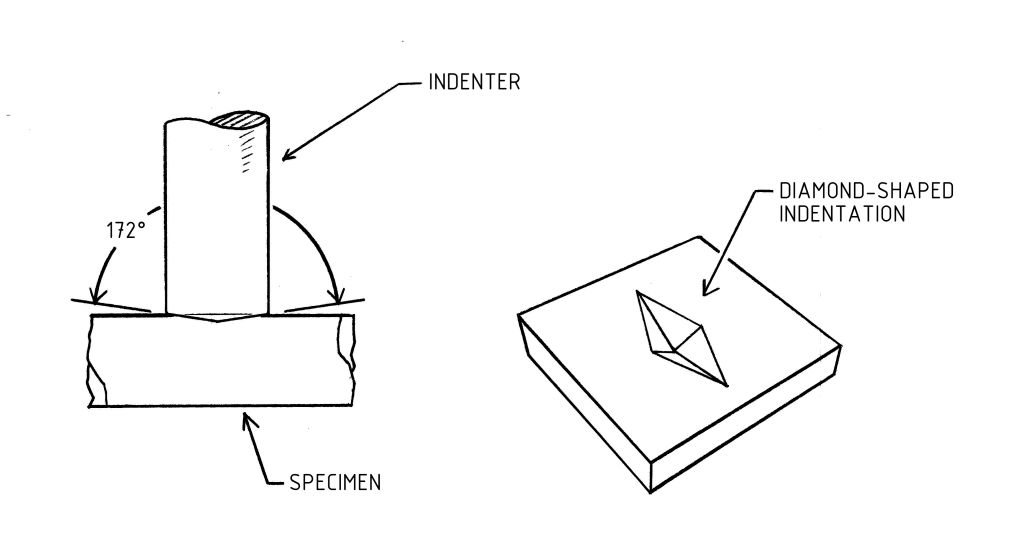
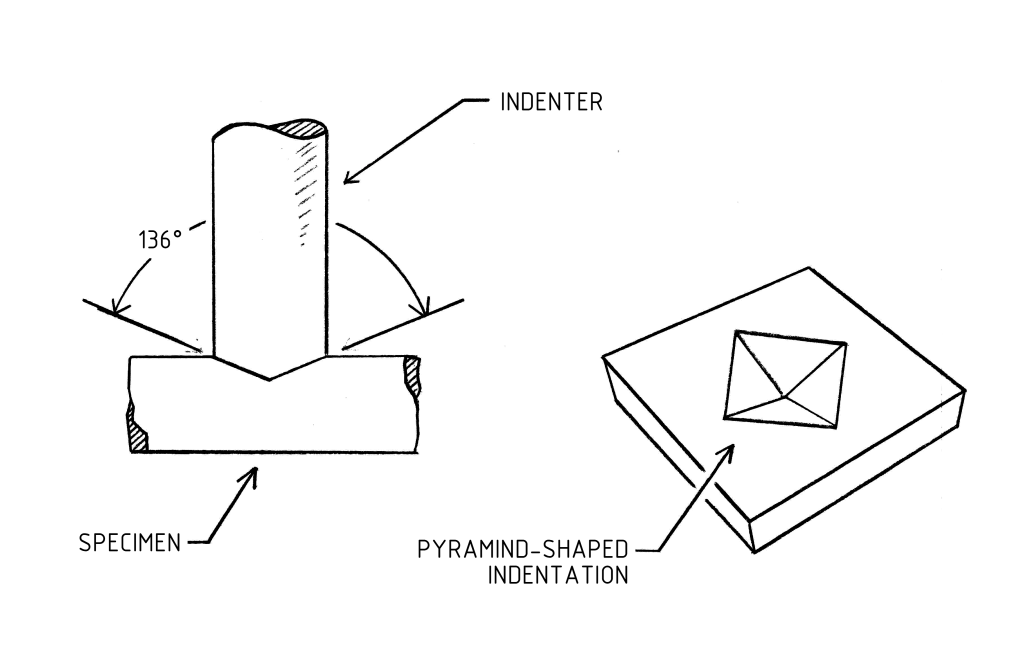
There are two types of micro hardness tests. They are the Vickers micro hardness test and the Knoop micro hardness test. The primary difference between the two types of tests is the shape of the indentation they produce. The Vickers test produces a square (pyramid-shaped) indentation, and the Knoop test produces a rectangular (diamond-shaped) indentation.
Vickers Test
To perform the Vickers test, the polished specimen is placed on an anvil and raised by a screw until it is near the indenter. The starting lever is tripped, and the load is applied slowly to the indenter. A microscope is used to measure the diagonals of the pyramid-shaped indentation. Vertical and horizontal axes are measured and averaged to obtain the Vickers hardness number, which is followed by the letters HV. The Vickers hardness test is described in ASTM E 92, Vickers Hardness Testing of Metallic Materials.
Knoop Test
The procedure for performing the Knoop test is similar to the procedure for the Vickers test. However, the indenter is rectangular (diamond-shaped) instead of square. Also unlike the Vickers, the Knoop test only measures the long axis of the indentation. This measurement is then converted to a Knoop hardness number using a chart.
