33 Soundness: Guided Bend Test
Soundness tests are designed to determine if a weld is free of imperfections, such as inclusions, porosity, incomplete fusion, and cracks. The guided bend test is the most commonly used soundness test for groove welds, but nick-break and fillet weld break tests are also soundness tests.
Guided Bend Test
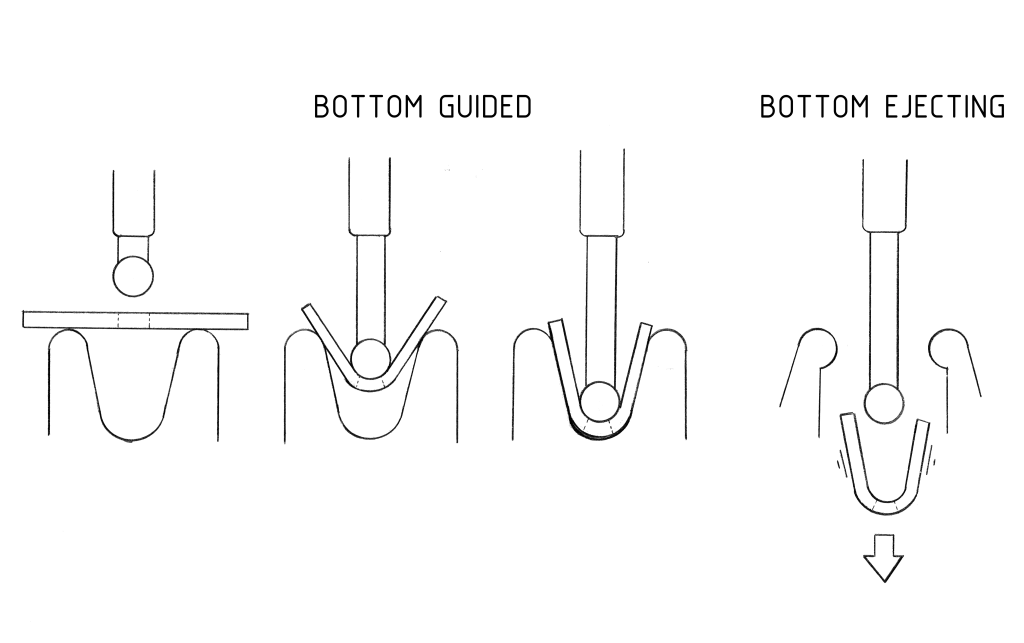
Guided bend test fixtures can be bottom guided or bottom ejecting. The bottom guided bend fixture is designed to support the specimen in the die as it is bent. The bottom ejecting guided bend fixture allows the specimen to be ejected from the die after it is bent.

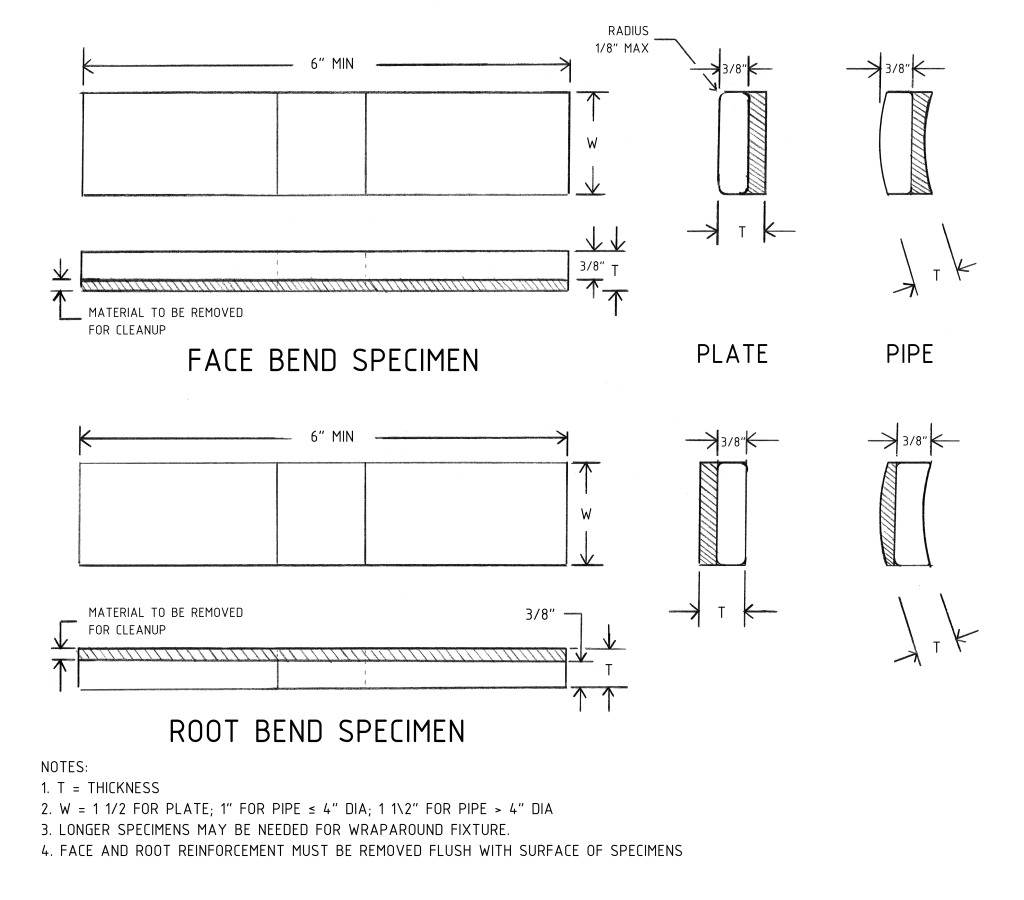
Typically, one face specimen and one root specimen are used for a standard guided bend test on plate up to 3/8″ thick. Above that thickness, side bend tests are used because the metal is too thick for a standard guided bend test. Four bend specimens are required for pipe, two face specimens and two root specimens. During a face bend, the face of the weld is stretched. During a root bend, the root of the weld is stretched.

Wraparound Guided Bend Test
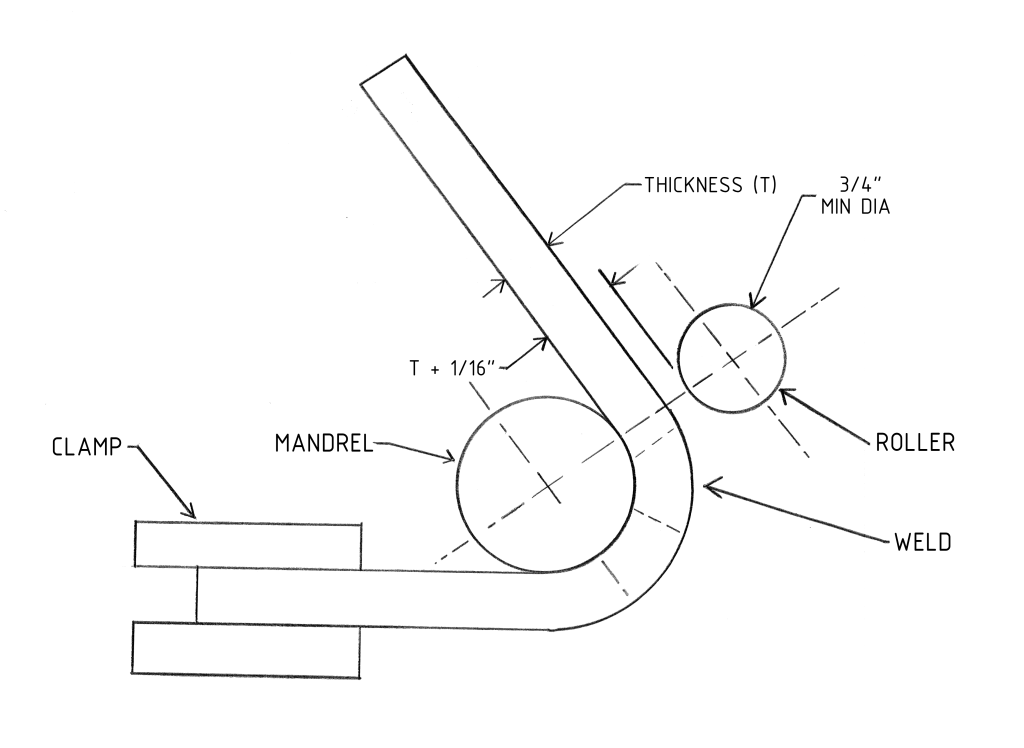
A wraparound guided bend test is a bend test in which a specimen is bent around a stationary mandrel. One end of the specimen is clamped to prevent it from sliding during bending, and a roller is used to force the specimen to bend around the mandrel. The weld and the HAZ must be completely within the bent portion of the specimen after testing. The test specimen is removed from the bend fixture when the outer roller has moved 180° from the starting point.


