38 Toughness: Charpy V-Notch Test
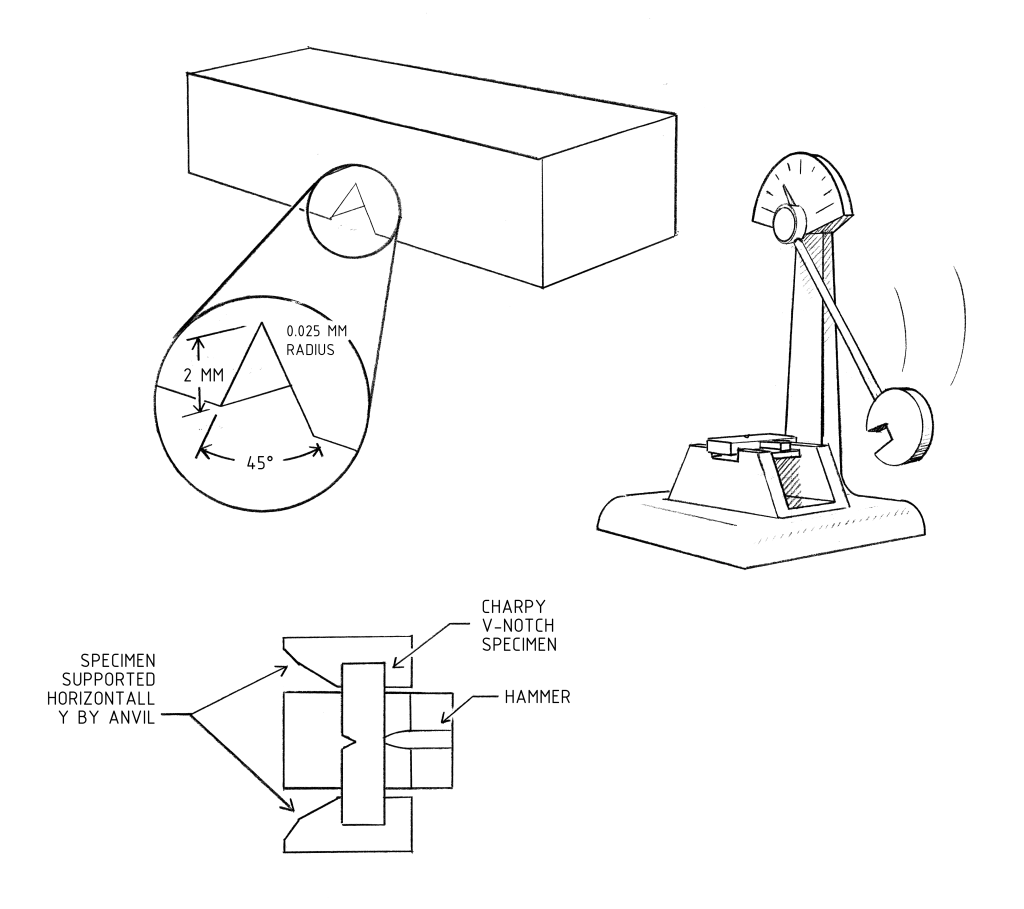
The Charpy V-notch test is a toughness test. It uses the energy produced by a dynamic load and measures the energy needed to break a small, machine-notched test specimen. Specimens are tested at different temperatures to ensure the materials will withstand the service conditions in which they will be used.
A Charpy V-notch test is performed in a universal pendulum impact tester. The specimen is placed horizontally against two supports at the bottom of the tester. The pendulum is raised to a standard height, giving it a potential energy of 240 ft-lb or 325 joules (J). The pendulum is released, and the specimen is struck and broken as the pendulum swings through its arc. The swing of the pendulum after it strikes the specimen indicates the energy absorbed on impact and is measured in foot-pounds or joules.

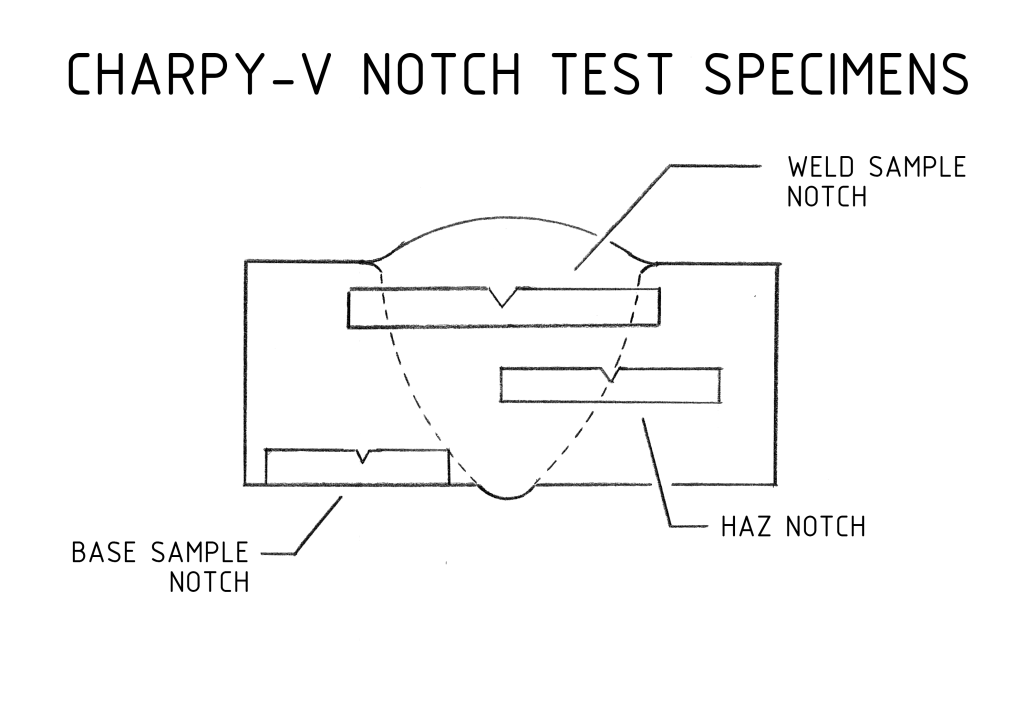
The small specimen size required for the Charpy V-notch test is also convenient because specimens may be cut at various orientations or locations within a part.
 Since the properties of metals may vary according to orientation or location, it is often necessary in quality control programs to check for properties in orientations that would exhibit the lowest toughness. For example with plate products, a test specimen with a transverse orientation usually exhibits lower quality, or lower mechanical properties. With welds, specimens that have notch locations in the weld metal, HAZ, or base metal may exhibit significantly different notch toughness values.

