Chapter 10 Part 2: Manual Lathes
WORK HOLDING
Work holding devices on a lathe are designed to securely hold material for various operations. They need to be simple, quick and easy to use. The most common workholding solutions on a lathe are chucks. These solutions come in many different styles, but perform the same function of holding the work.
Three jaw chuck
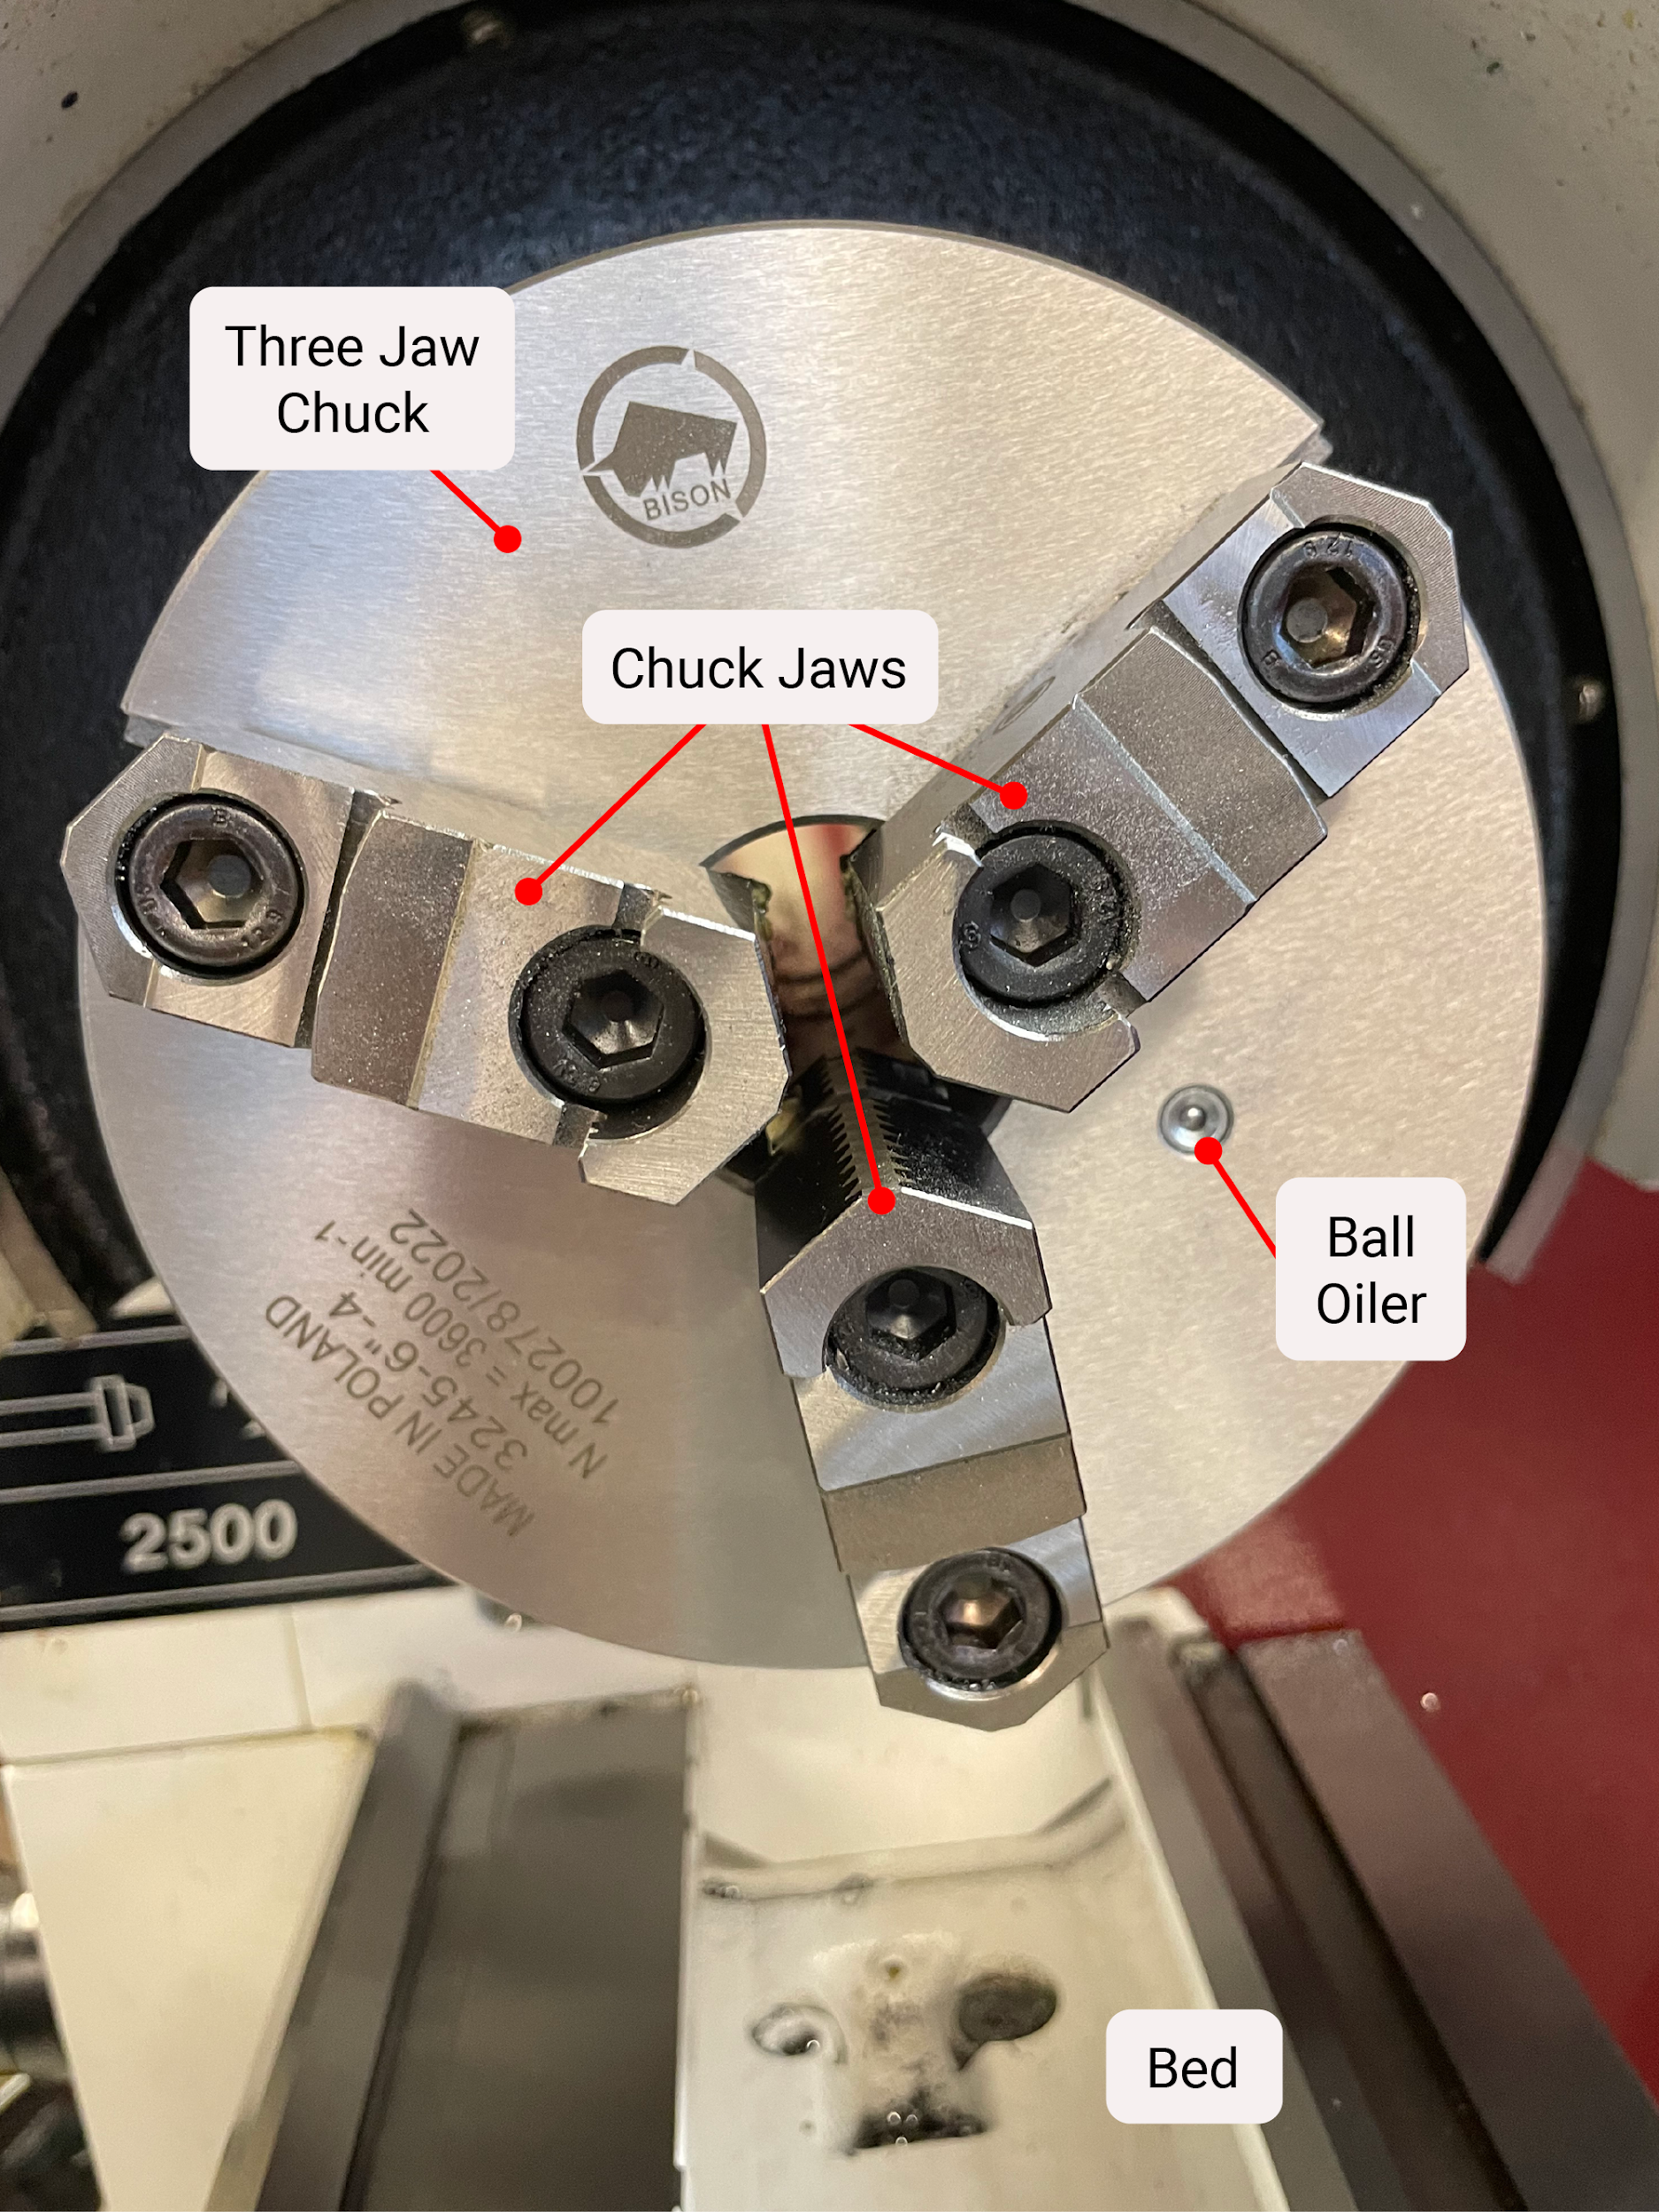
A chuck is a work holding device mounted to the spindle nose of the lathe. One of the most common is the three jaw chuck because of its ease of use. The jaws of the chuck are secured inside of a linear channel. The three jaw chuck is adjusted by a tee handle that is inserted into and turns a square drive shaft. On the inside of the chuck, the square drive shaft has a gear on the end of it. That gear turns a scroll plate that simultaneously moves the three jaws in and out. This style of chuck is capable of gripping on round and hexagonal work. Quality chucks are capable of holding within .003 run out; inexpensive chucks may run out .010-.015 or more.
Four jaw chuck
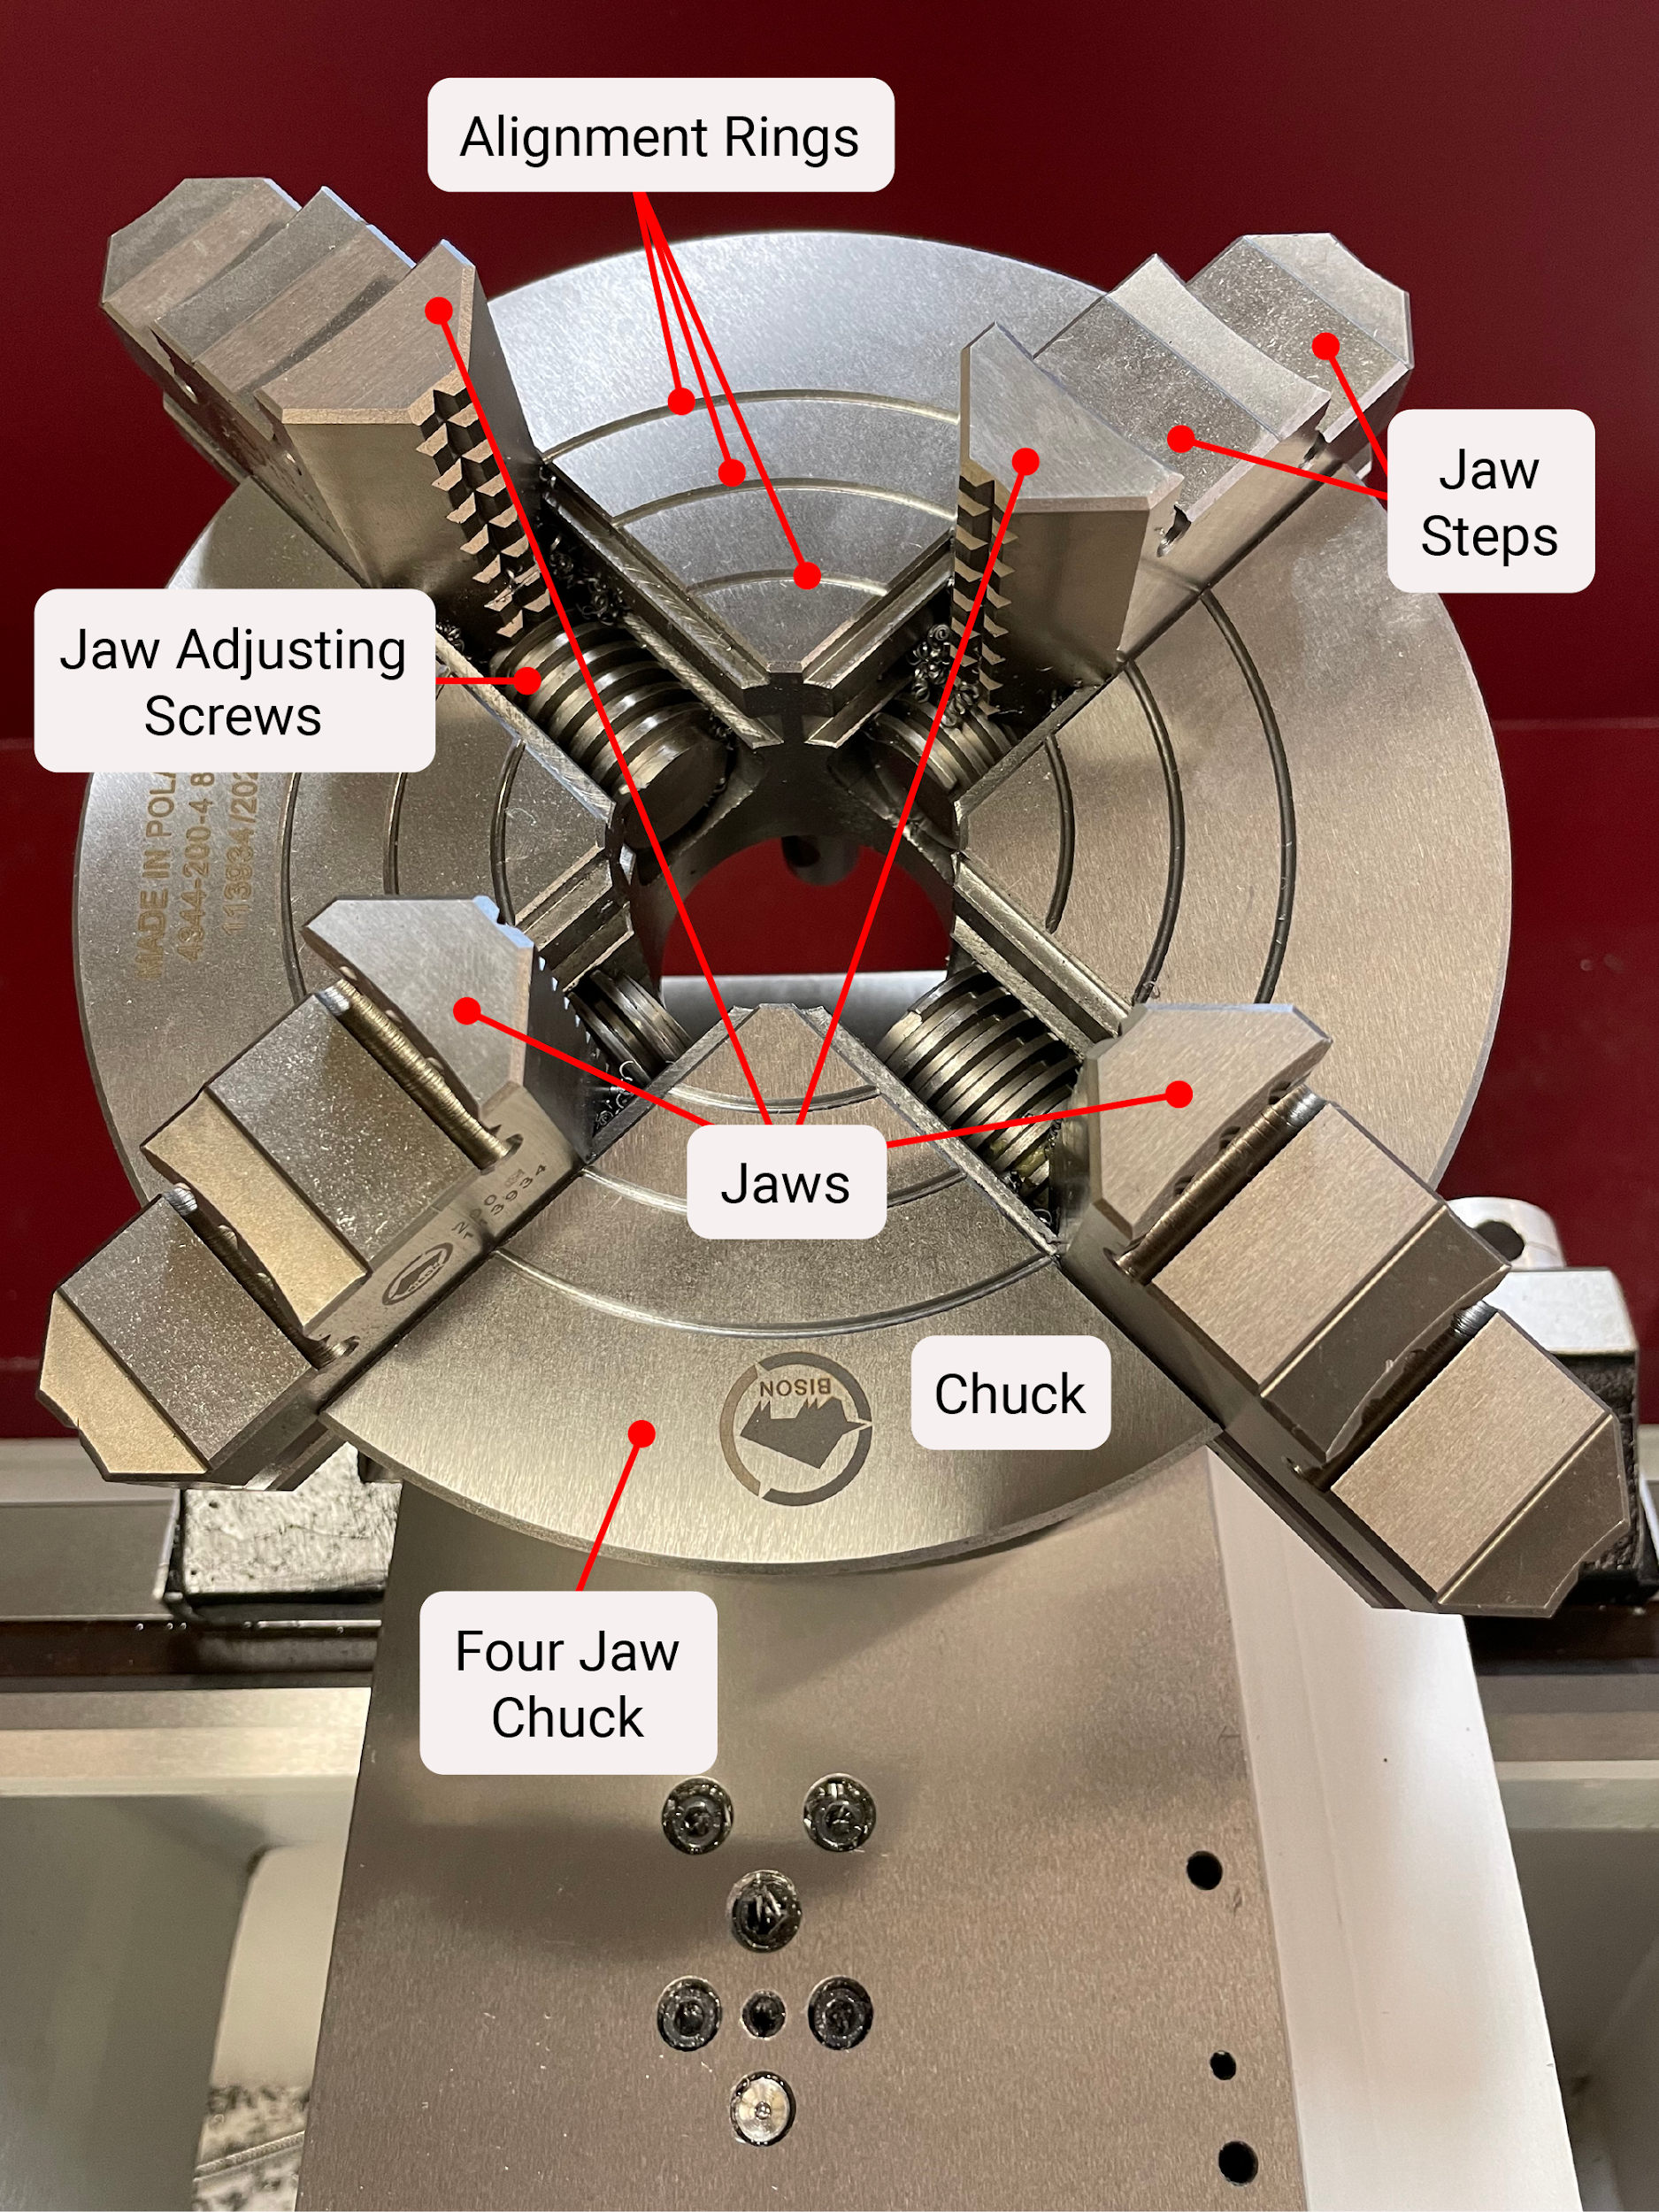
A four jaw chuck is used to hold square or odd shaped parts, or when extra precision is required. The four jaws on this chuck are moved independently of one another, allowing it to have a high degree of adjustability. This adjustability is very useful when a greater level of accuracy is needed than what can be achieved with a three jaw chuck. The four jaw chuck also holds the parts more stable because there is a jaw every 90 degrees versus every 120 degrees on the three jaw chuck.
A face plate is another workholding device that is mounted to the spindle nose. It is often used to bolt larger or odd shaped parts to in order to perform turning operations. A faceplate has multiple slots to allow tee nuts and other securing devices to be used for part mounting. A faceplate can be very versatile, but also much more cumbersome to set up; therefore, they aren’t as commonly used as chucks unless absolutely needed.
Centers
Step by step process for removing and installing workholding devices on a cam style spindle:
- Turn the main power switch to the off position for safety. This is often located on the back of the machine.
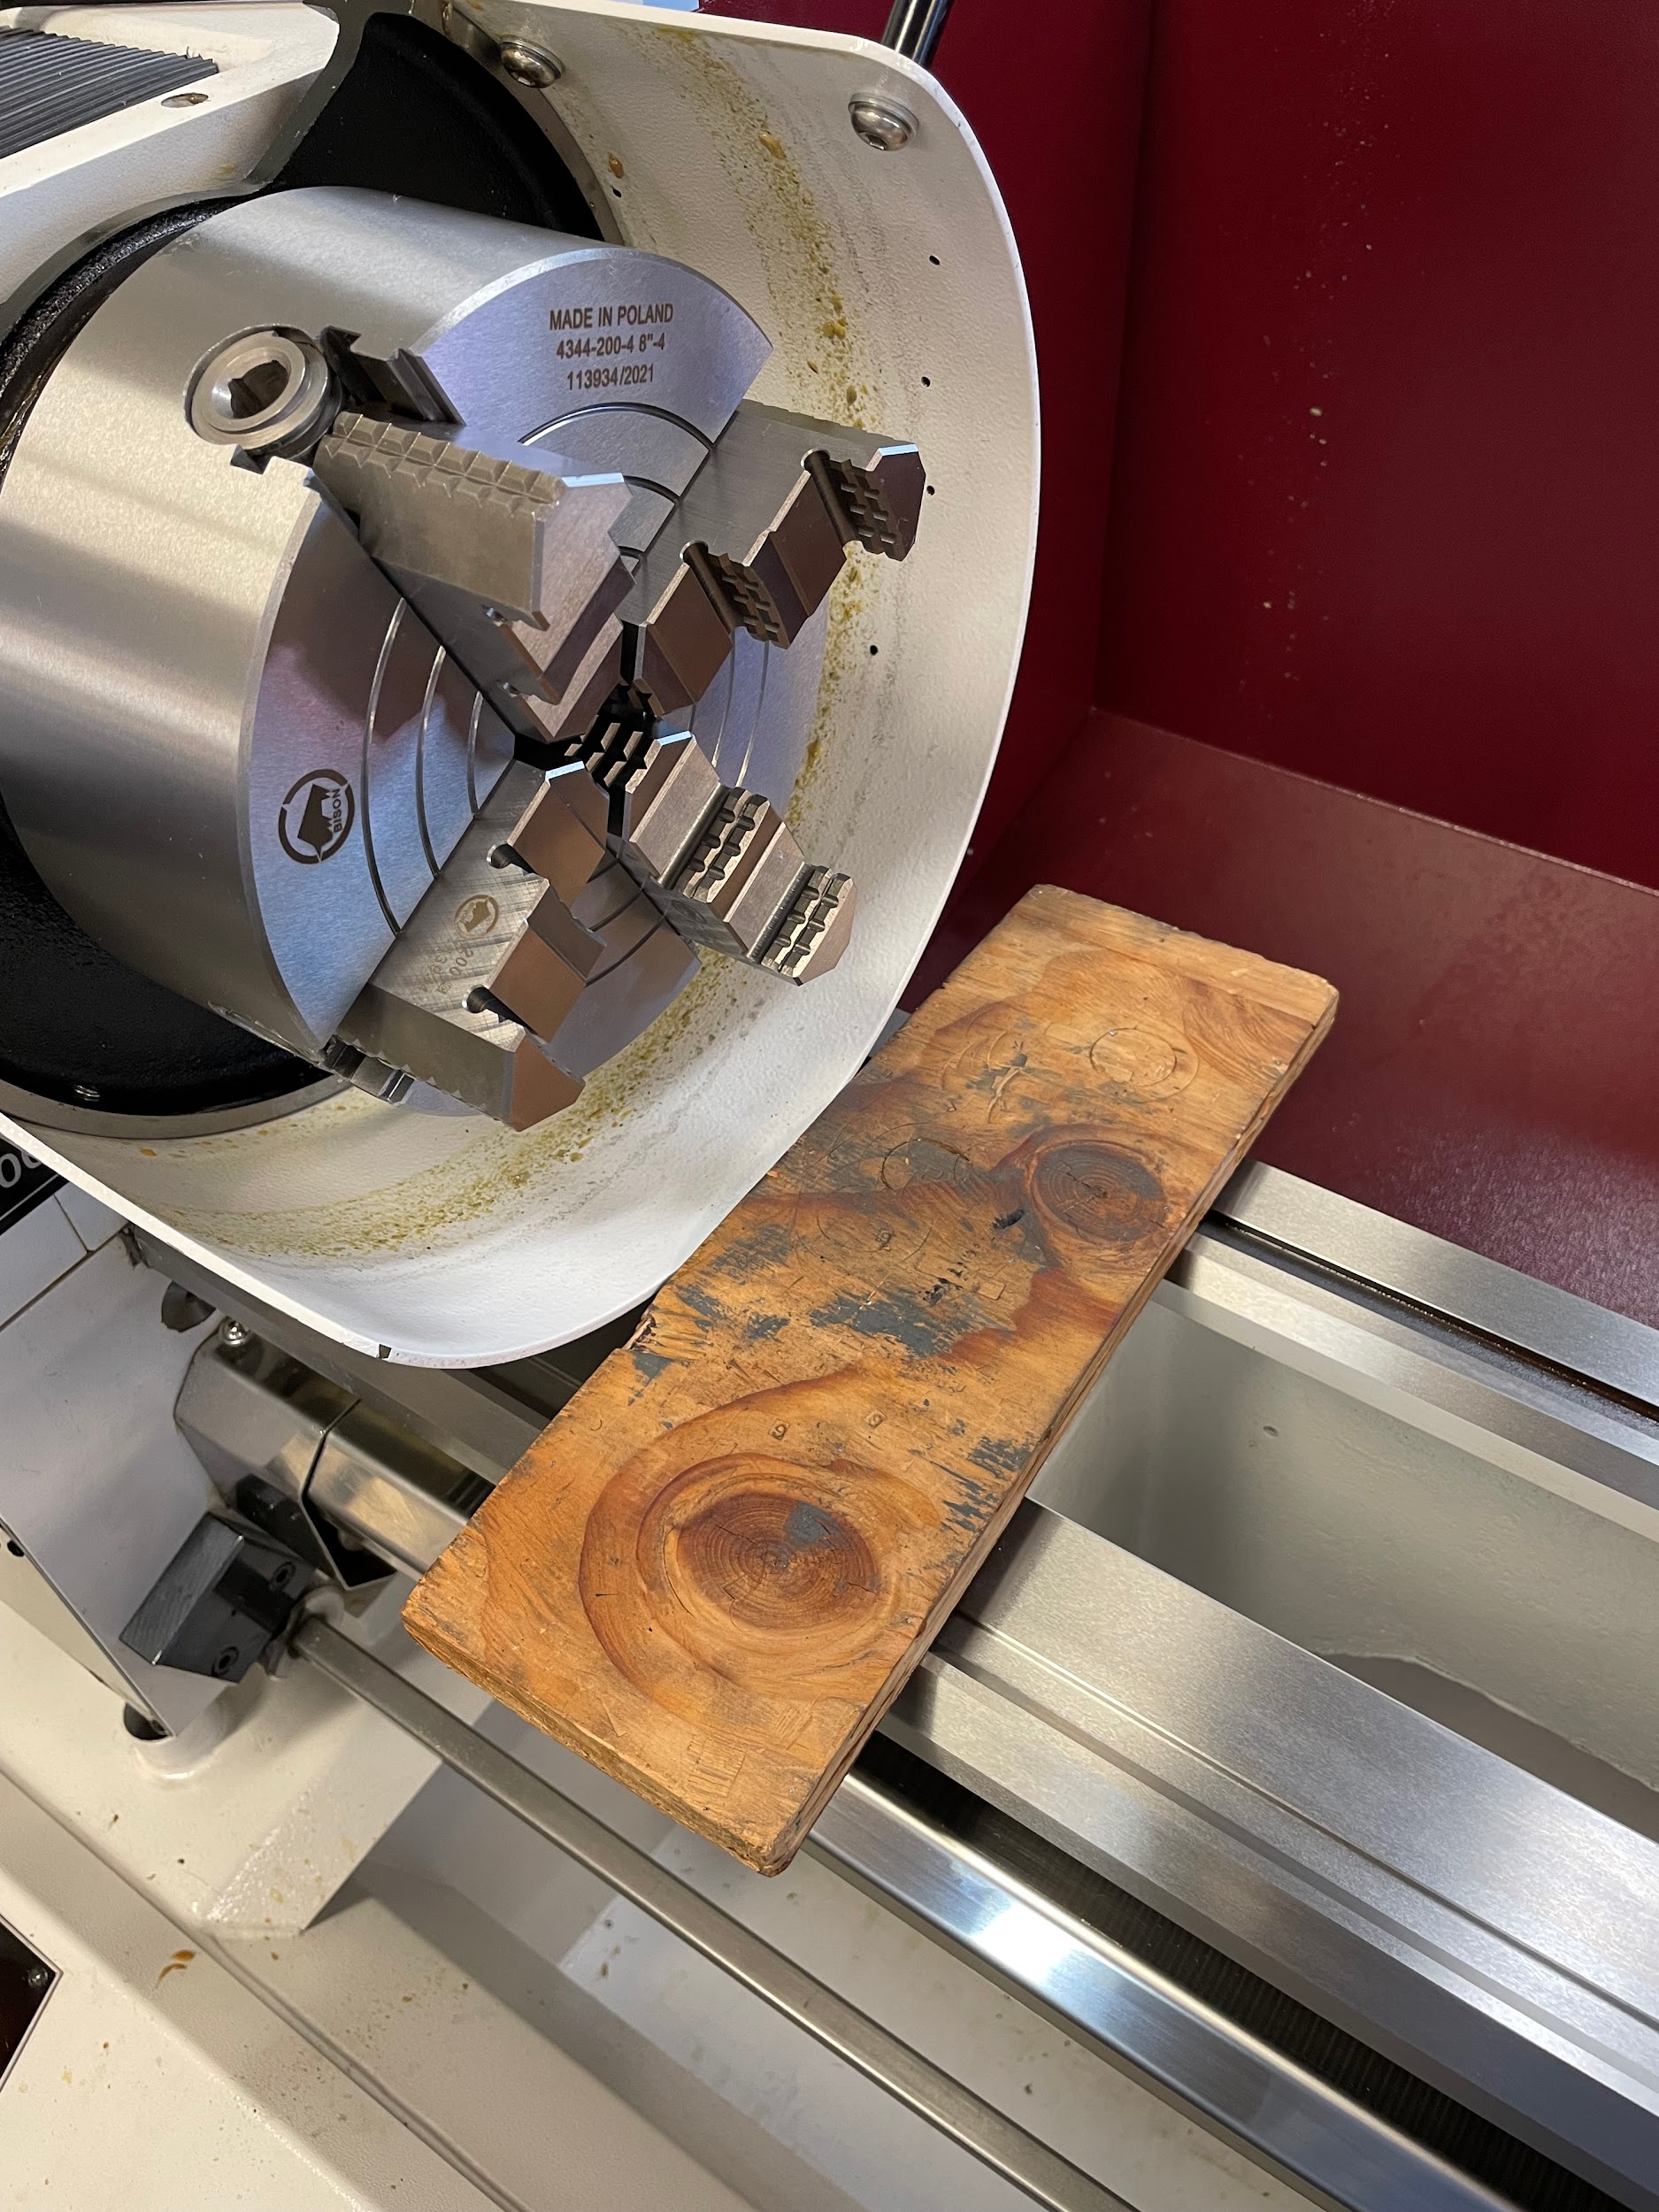
- Put a piece of wood or chuck cradle on the ways of the lathe for protection.
- Loosen all of the cam bolts counterclockwise so that the line on the bolt lines up with the line on the spindle nose at the 12 o’clock position.
- Using a dead blow hammer, gently tap on the back of the work holding device while supporting the front to loosen the taper of the spindle nose. The studs protruding from the work holding device should help keep it from falling off.
- Gently lift the work holding device straight out and away from the spindle. Avoid letting the studs hit the taper. For larger work holding devices, this may require a crane and a chuck lifter.
- Set the work holding device in its storage space.
- Put the new work holding device on a workbench in preparation for cleaning and inspection.
- Clean any chips from the interior of the through bore of the workholding device.
- With a clean rag, wipe the taper of the workholding device as well as the flat portion that will simultaneously make contact with the spindle nose.
- Inspect these surfaces for chips that may have been smashed into them when it was last installed. Small chips may easily be scraped away with a fingernail. Larger chips may require the gentle push of a sharp scribe. For damage that is really deep, leaving displaced, raised edges, a gentle honing may be required.
- If chips are found and removed, clean again with a rag.
- Wipe all surfaces with a clean hand or fingers; this is to remove fine pieces of rags, lint, or dust that may have been left behind by previous steps.
- Clean the spindle nose in the same manner. The spindle nose generally won’t have any chips in it or damage to it because it is hardened.
- Lift the new work holding device and gently slip the studs into the holes of the spindle, taking care not to hit them on the spindle taper.
- With the right hand supporting the work holding device and pushing it up against the back of the spindle nose, turn one of the cam bolts to 3 o’clock.
- Rotate the spindle by hand and repeat this process on the rest of the cam bolts. Tightening each of the bolts incrementally will help the workholding device seat correctly.
- Repeat the process, turning the bolts to about the 4:30 position.
- Repeat the process again, fully tightening the bolts. When properly set up, the cam bolts should tighten somewhere between 3 o’clock and 6 o’clock. If one or more of the cam bolts are out of that range, the workholding device must be removed, and the studs must be adjusted in length so the cam mechanism engages at a different point.
“Step 2: Put a piece of wood or chuck cradle on the ways of the lathe for protection.“
“Step 3: Loosen all of the cam bolts counterclockwise so that the line on the bolt lines up with the line on the spindle nose at the 12 o’clock position.“
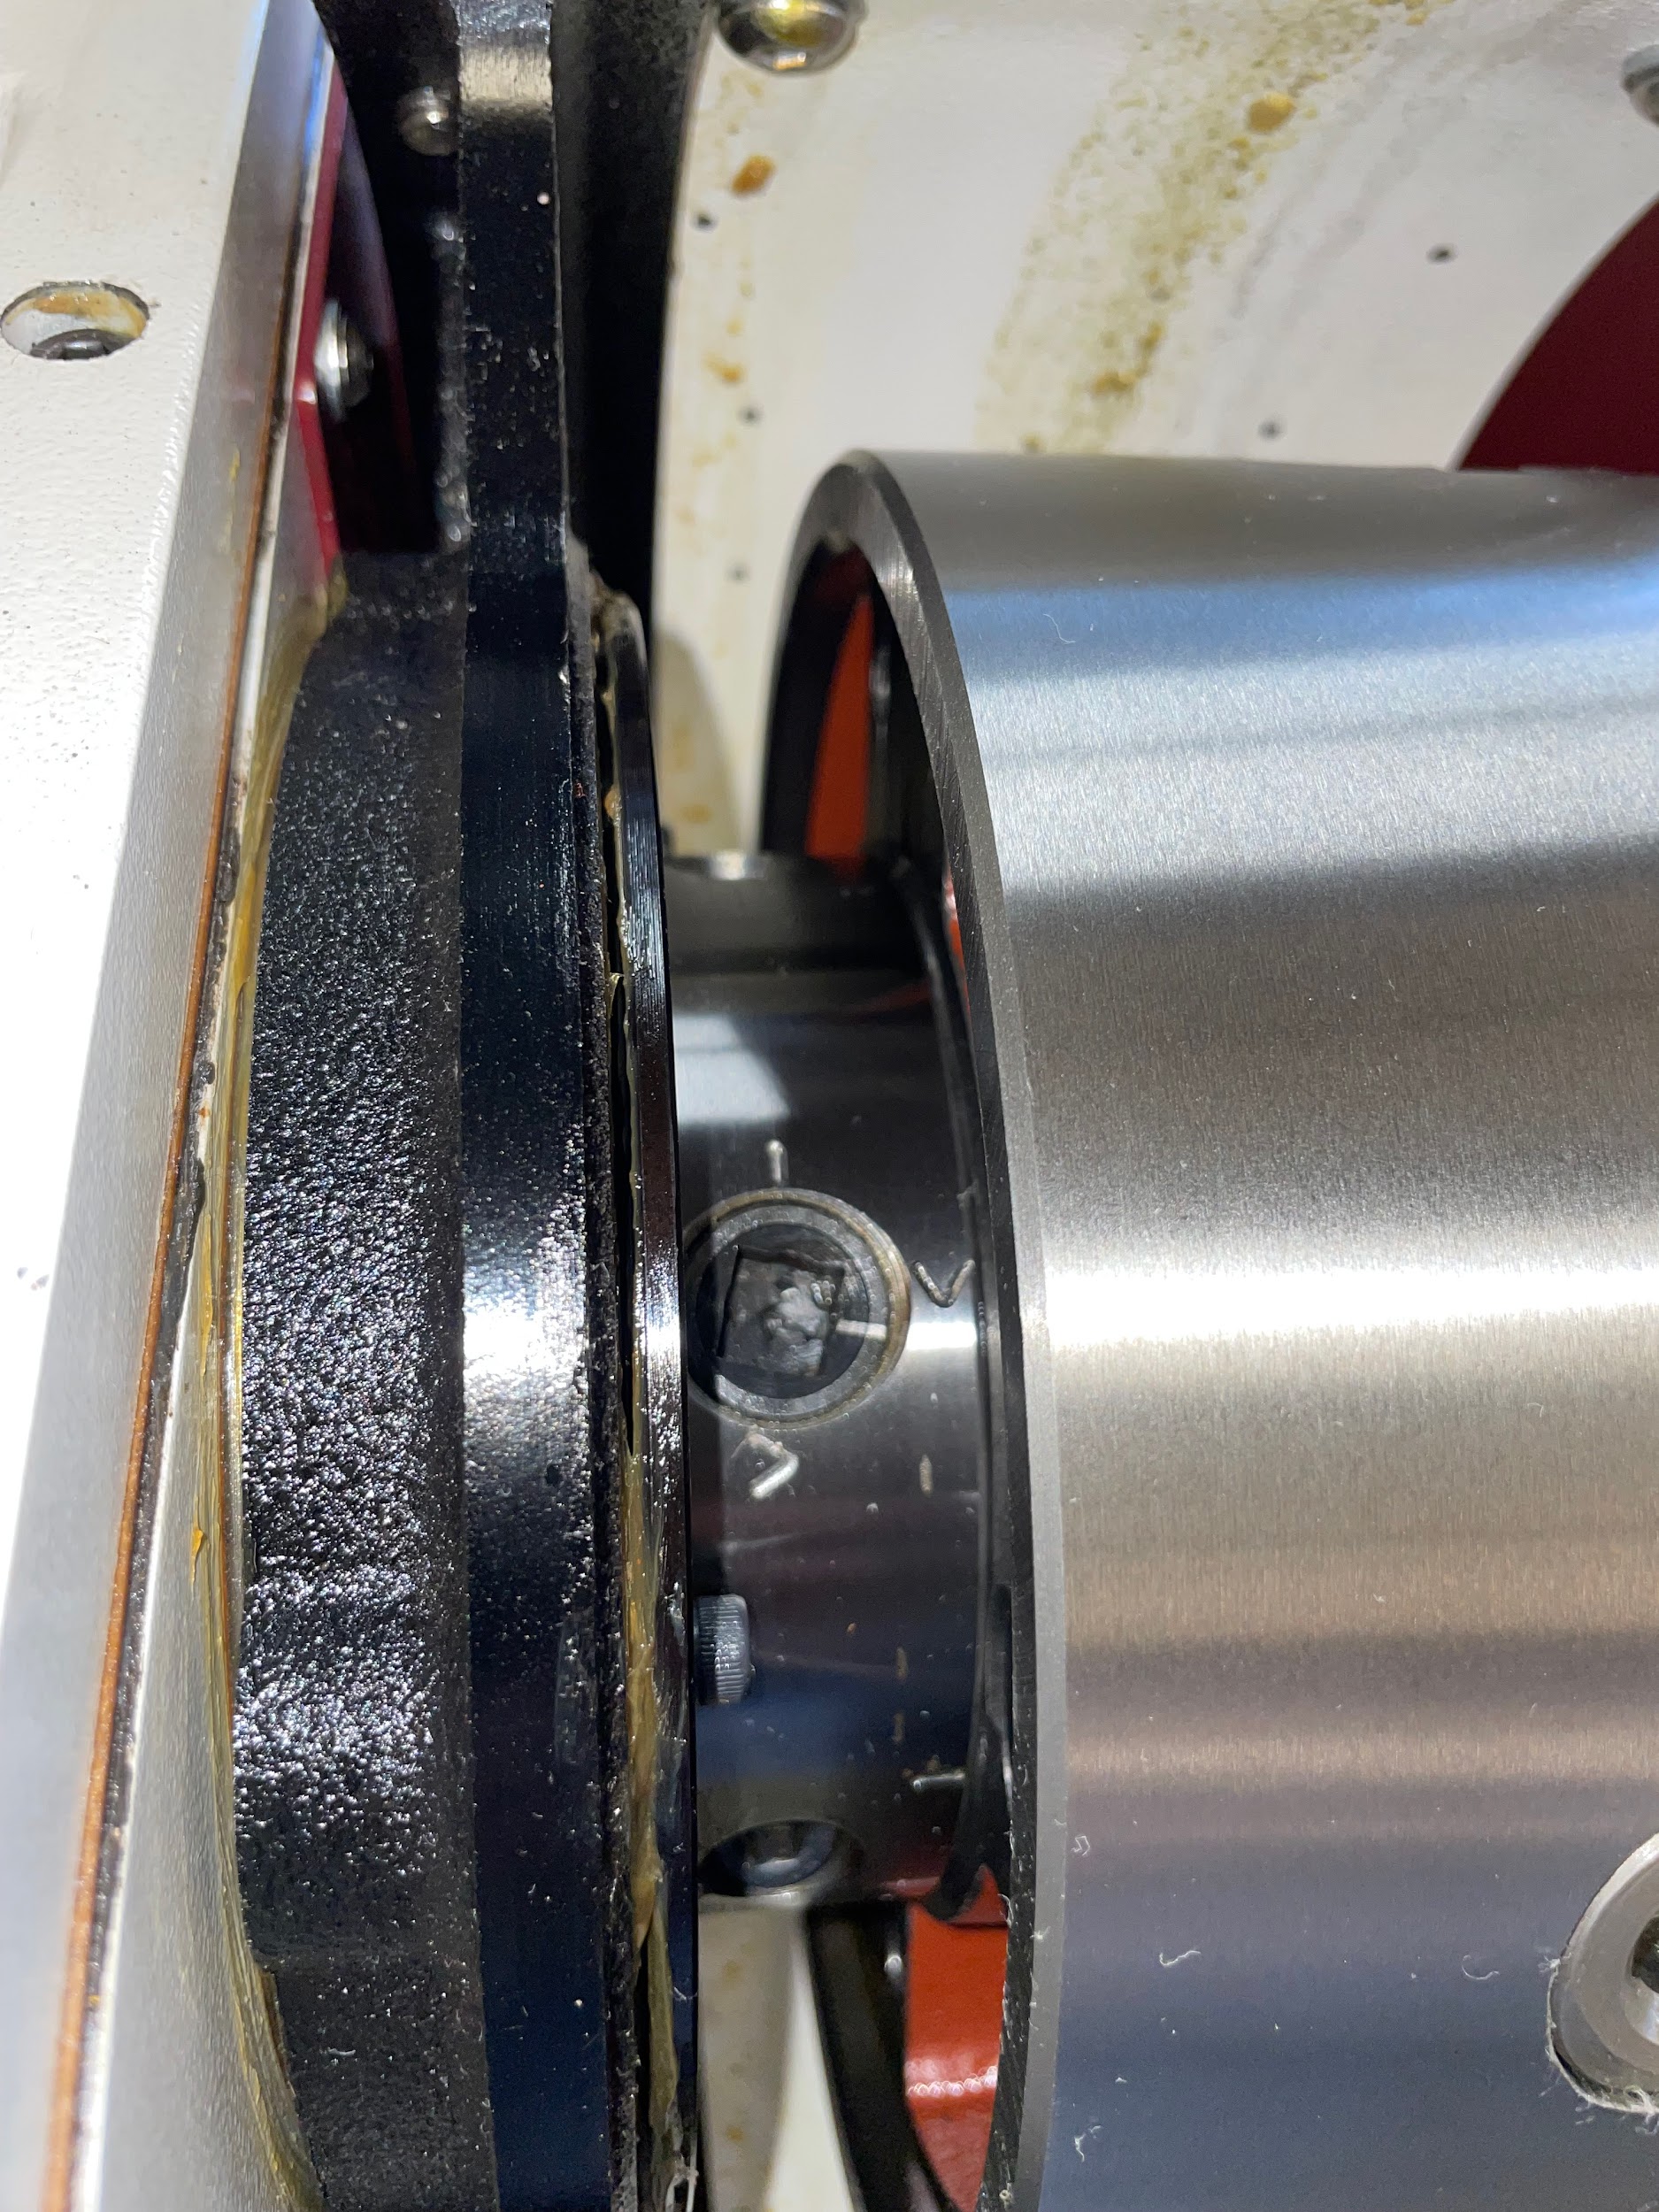
“Step 4: Using a dead blow hammer, gently tap on the back of the work holding device while supporting the front to loosen the taper of the spindle nose. The studs protruding from the work holding device should help keep it from falling off.“
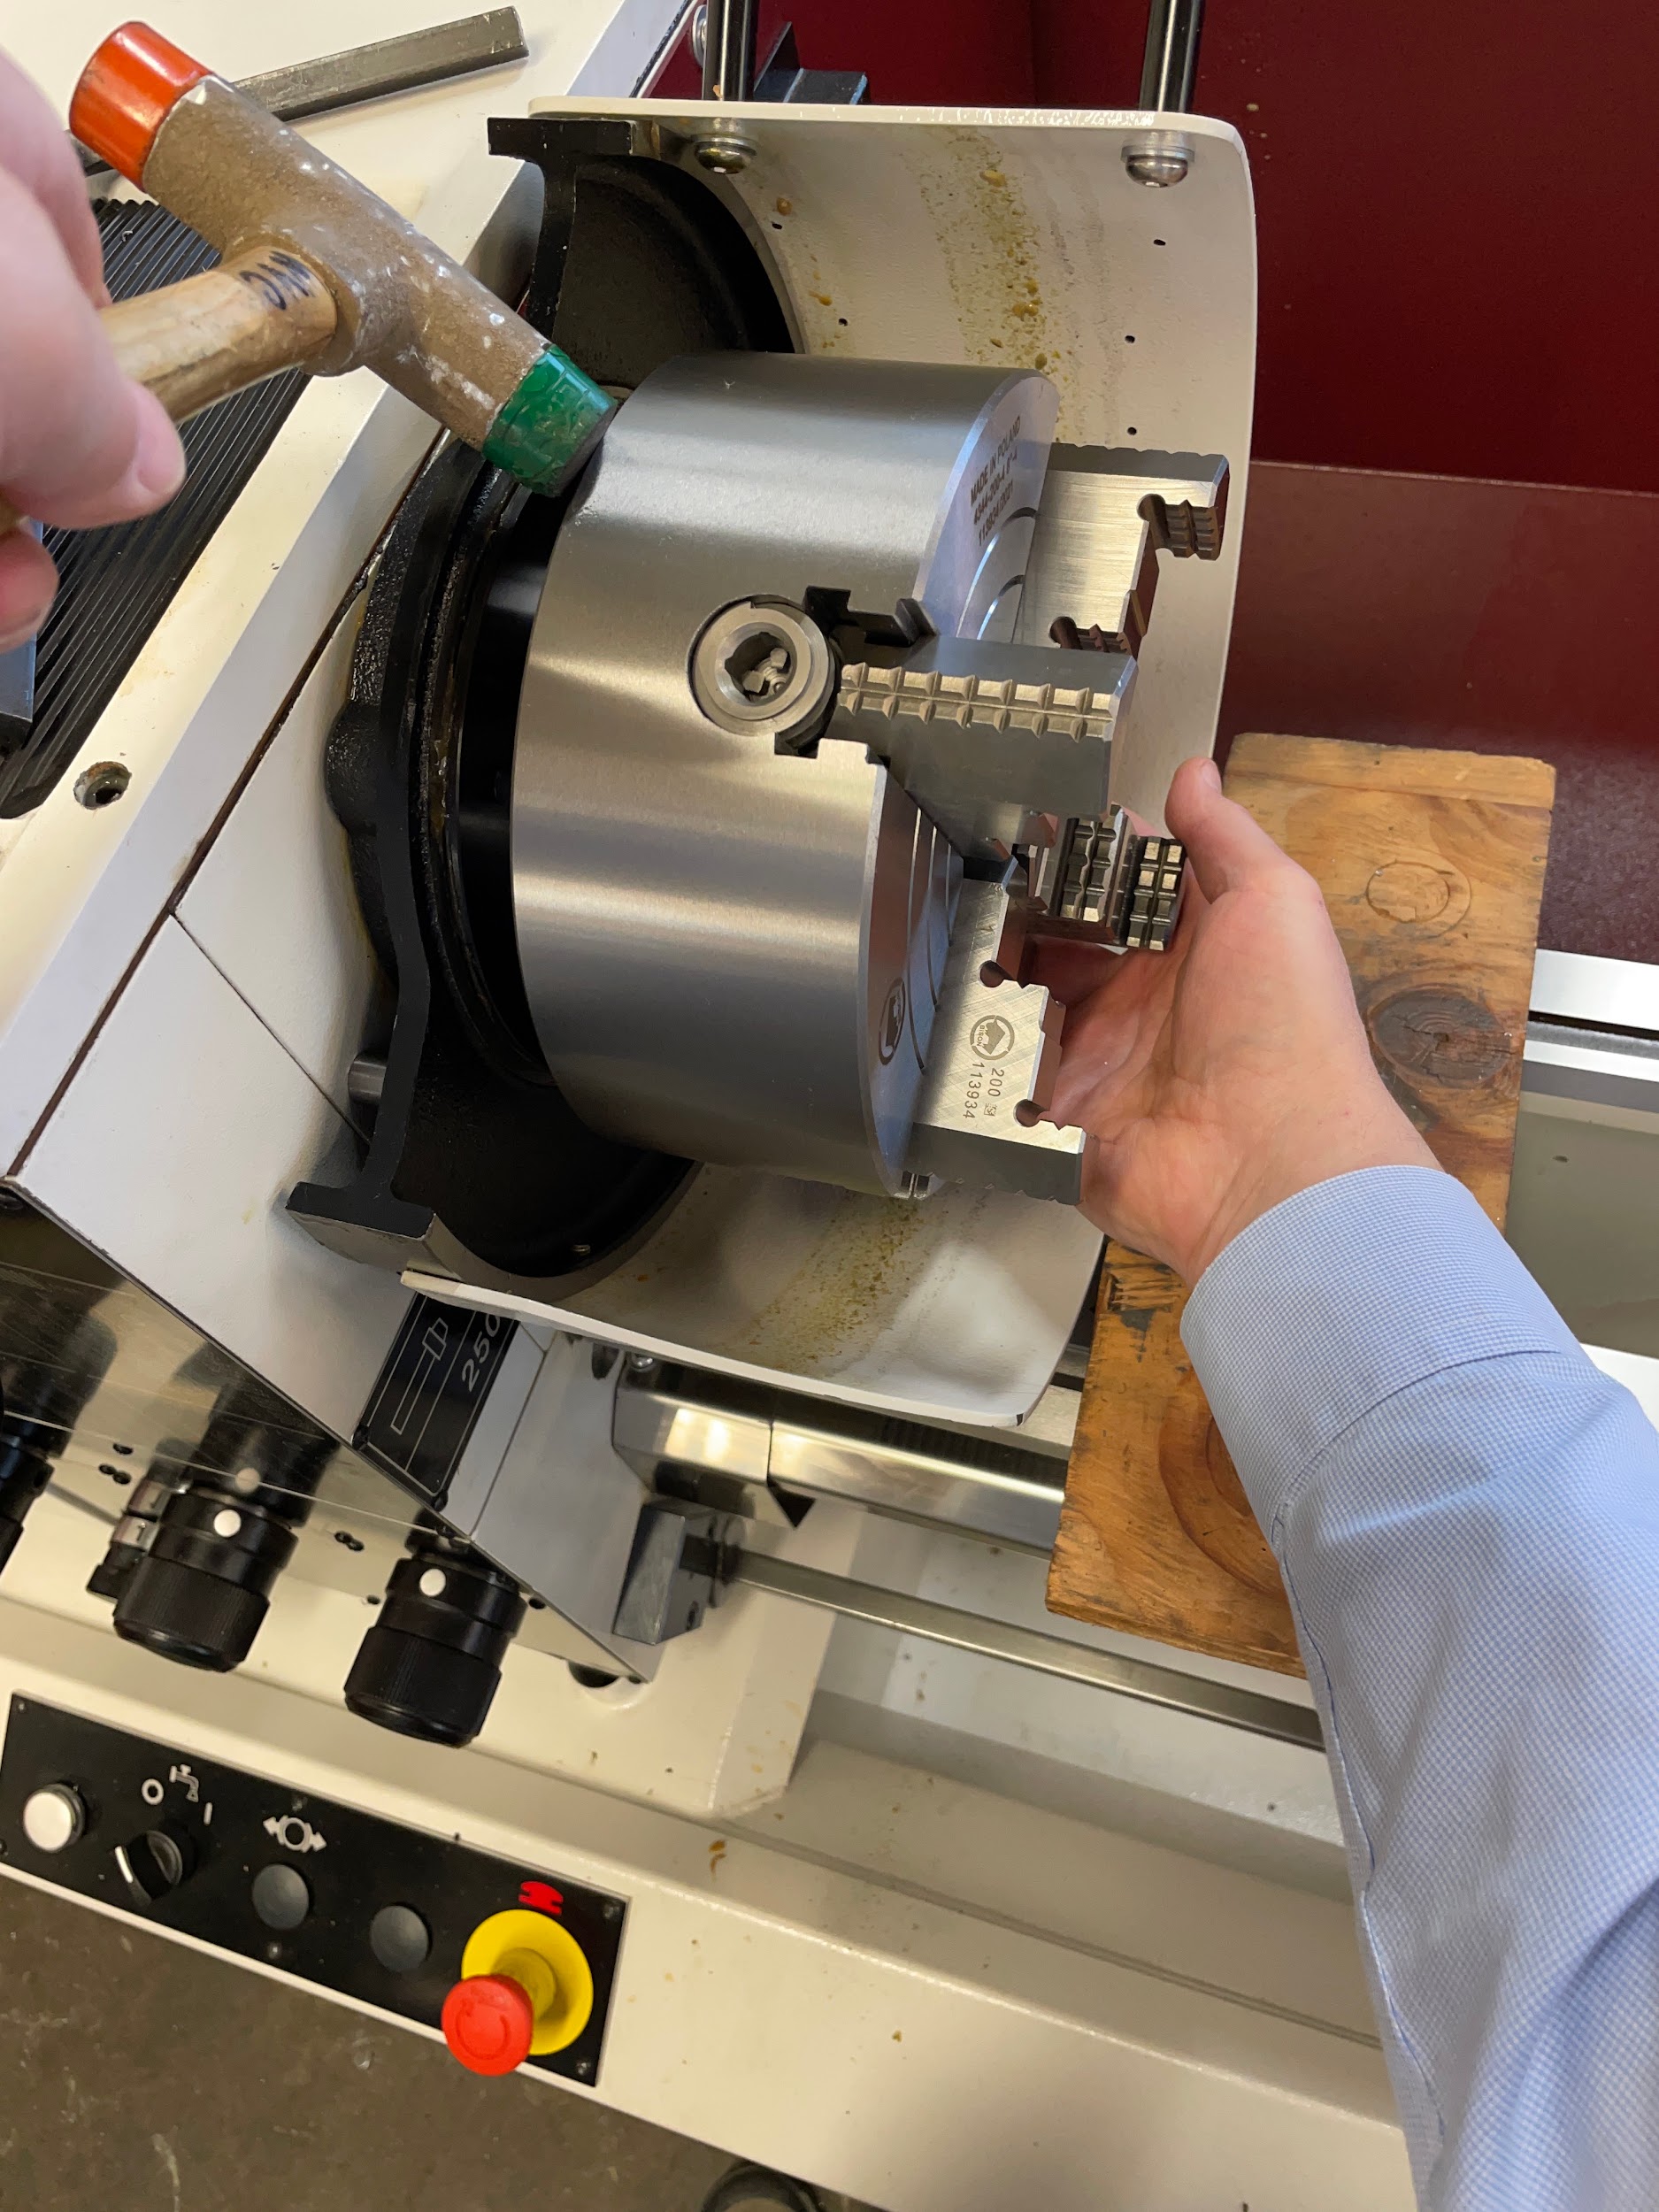
“Step 10: Inspect these surfaces for chips that may have been smashed into them when it was last installed. Small chips may easily be scraped away with a fingernail. Larger chips may require the gentle push of a sharp scribe. For damage that is really deep, leaving displaced, raised edges, a gentle honing may be required.“
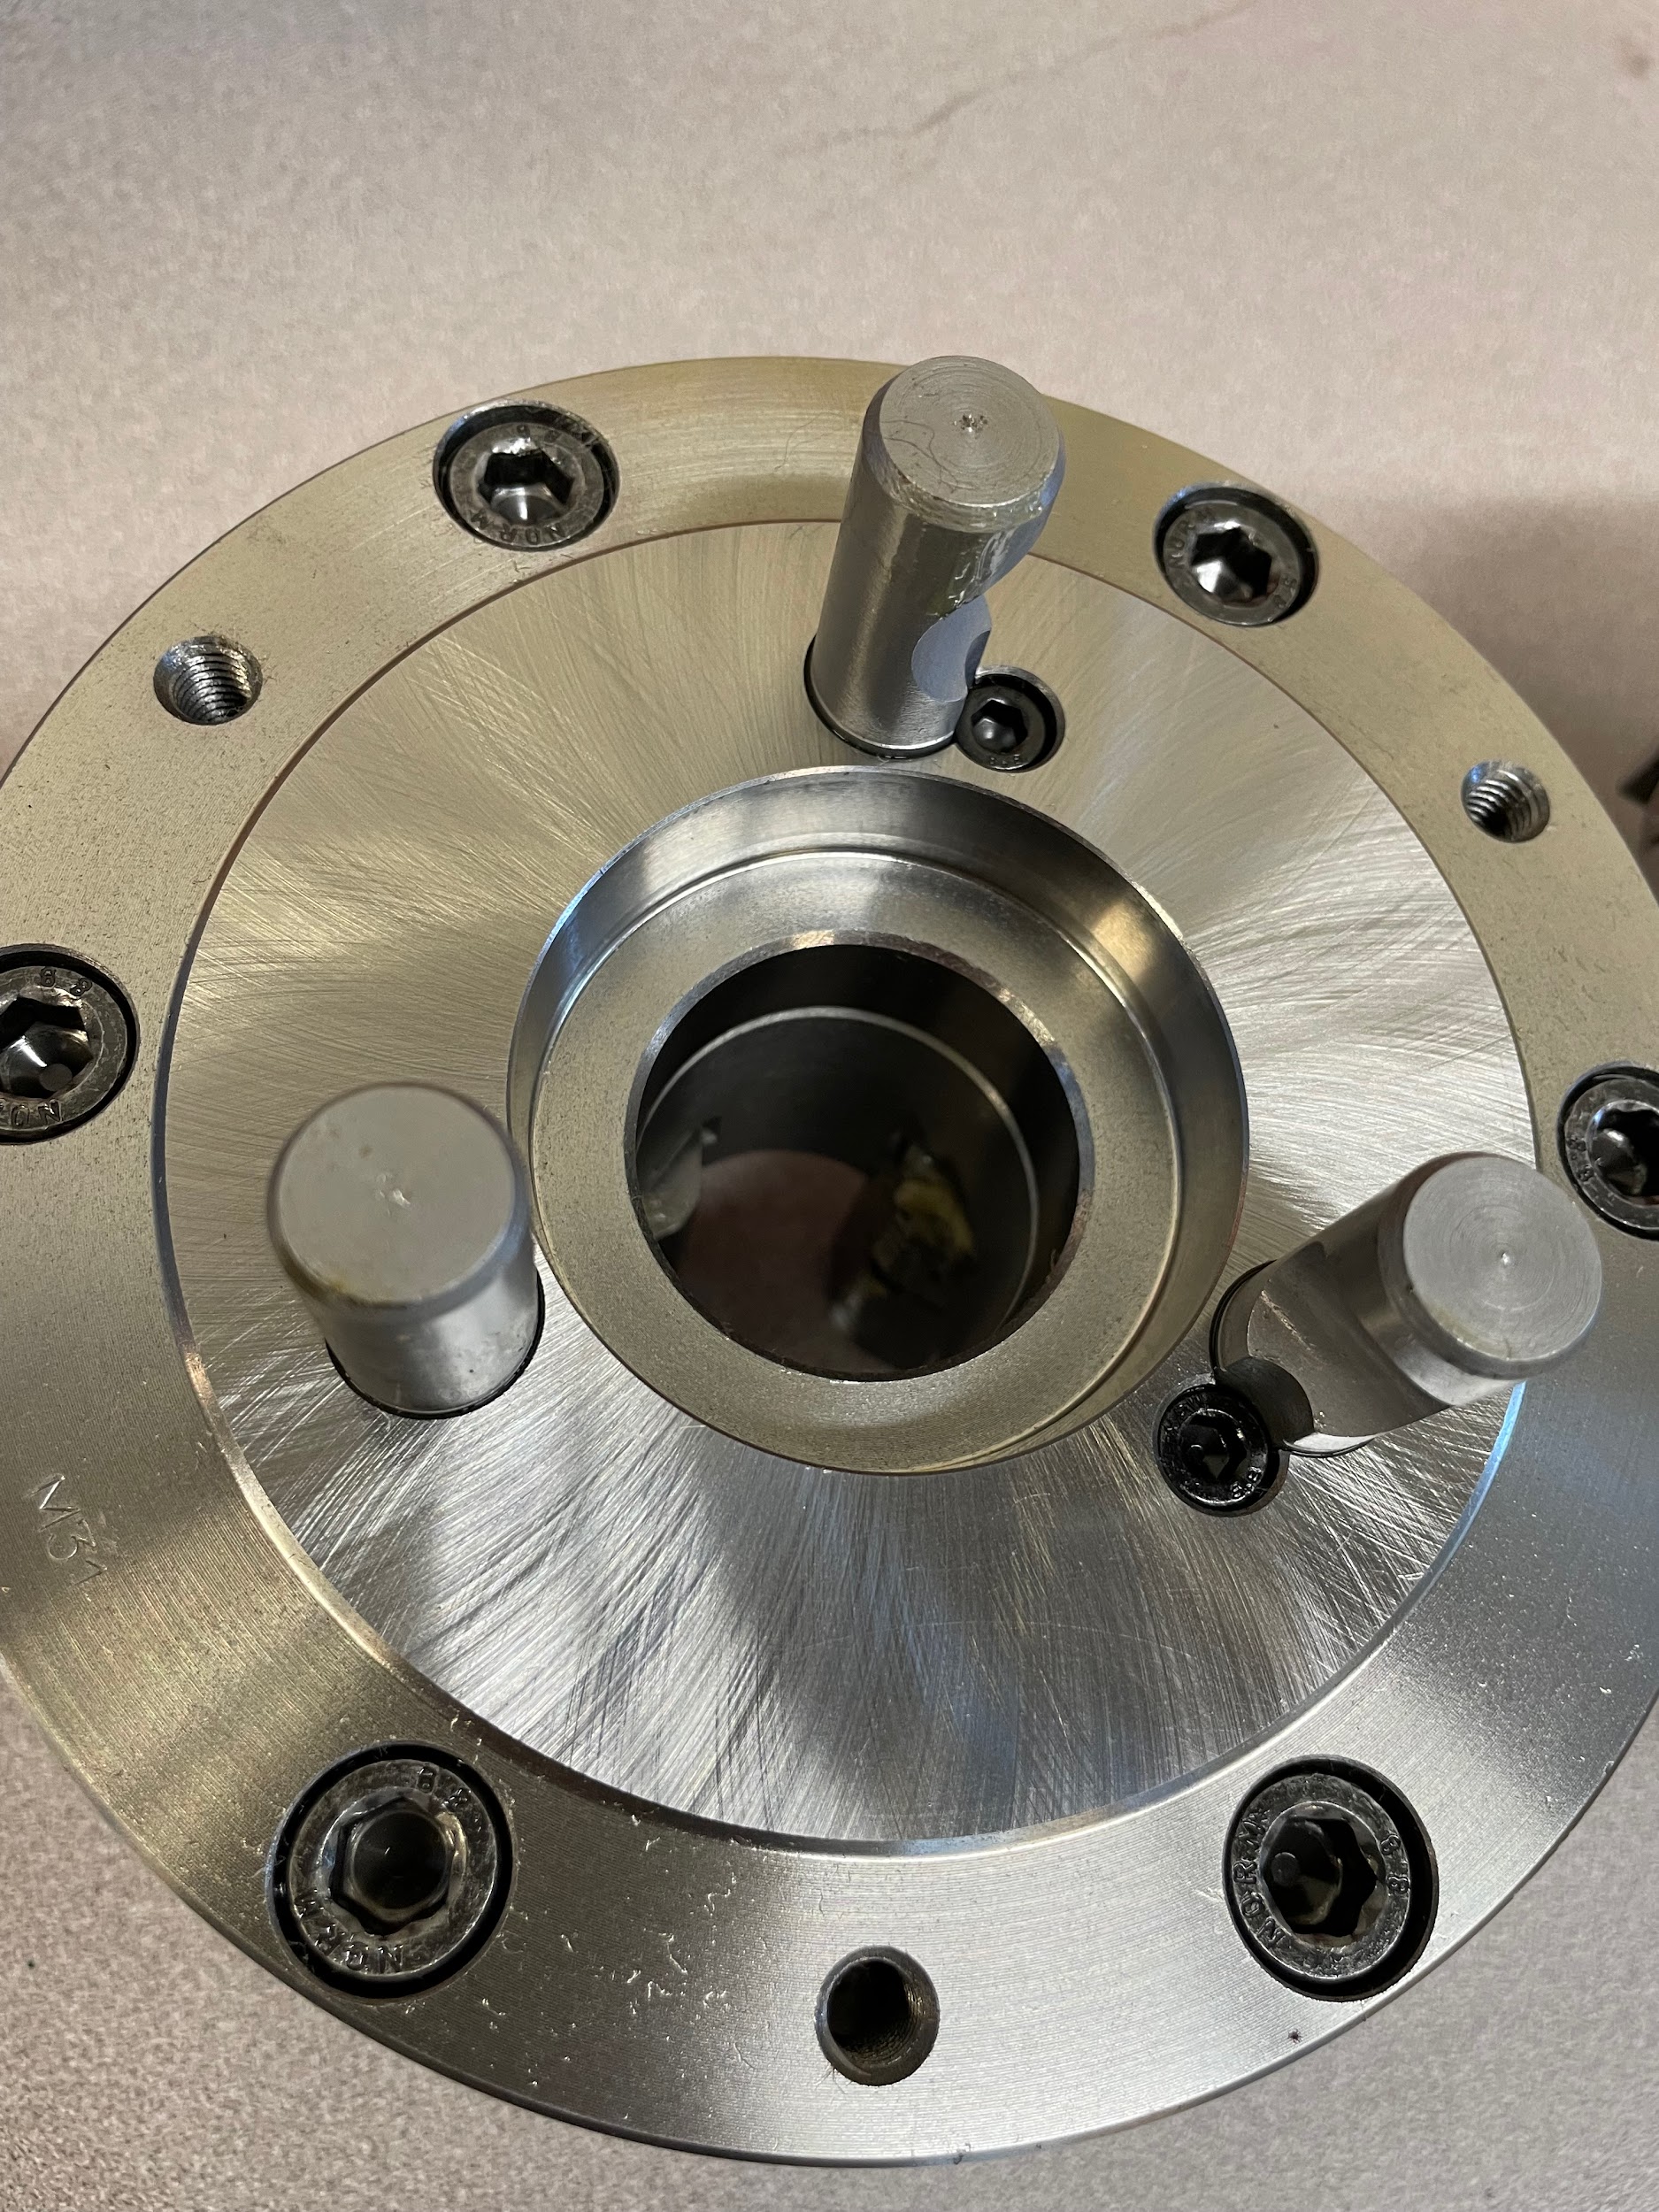
“Step 13: Clean the spindle nose in the same manner. The spindle nose generally won’t have any chips in it or damage to it because it is hardened. “
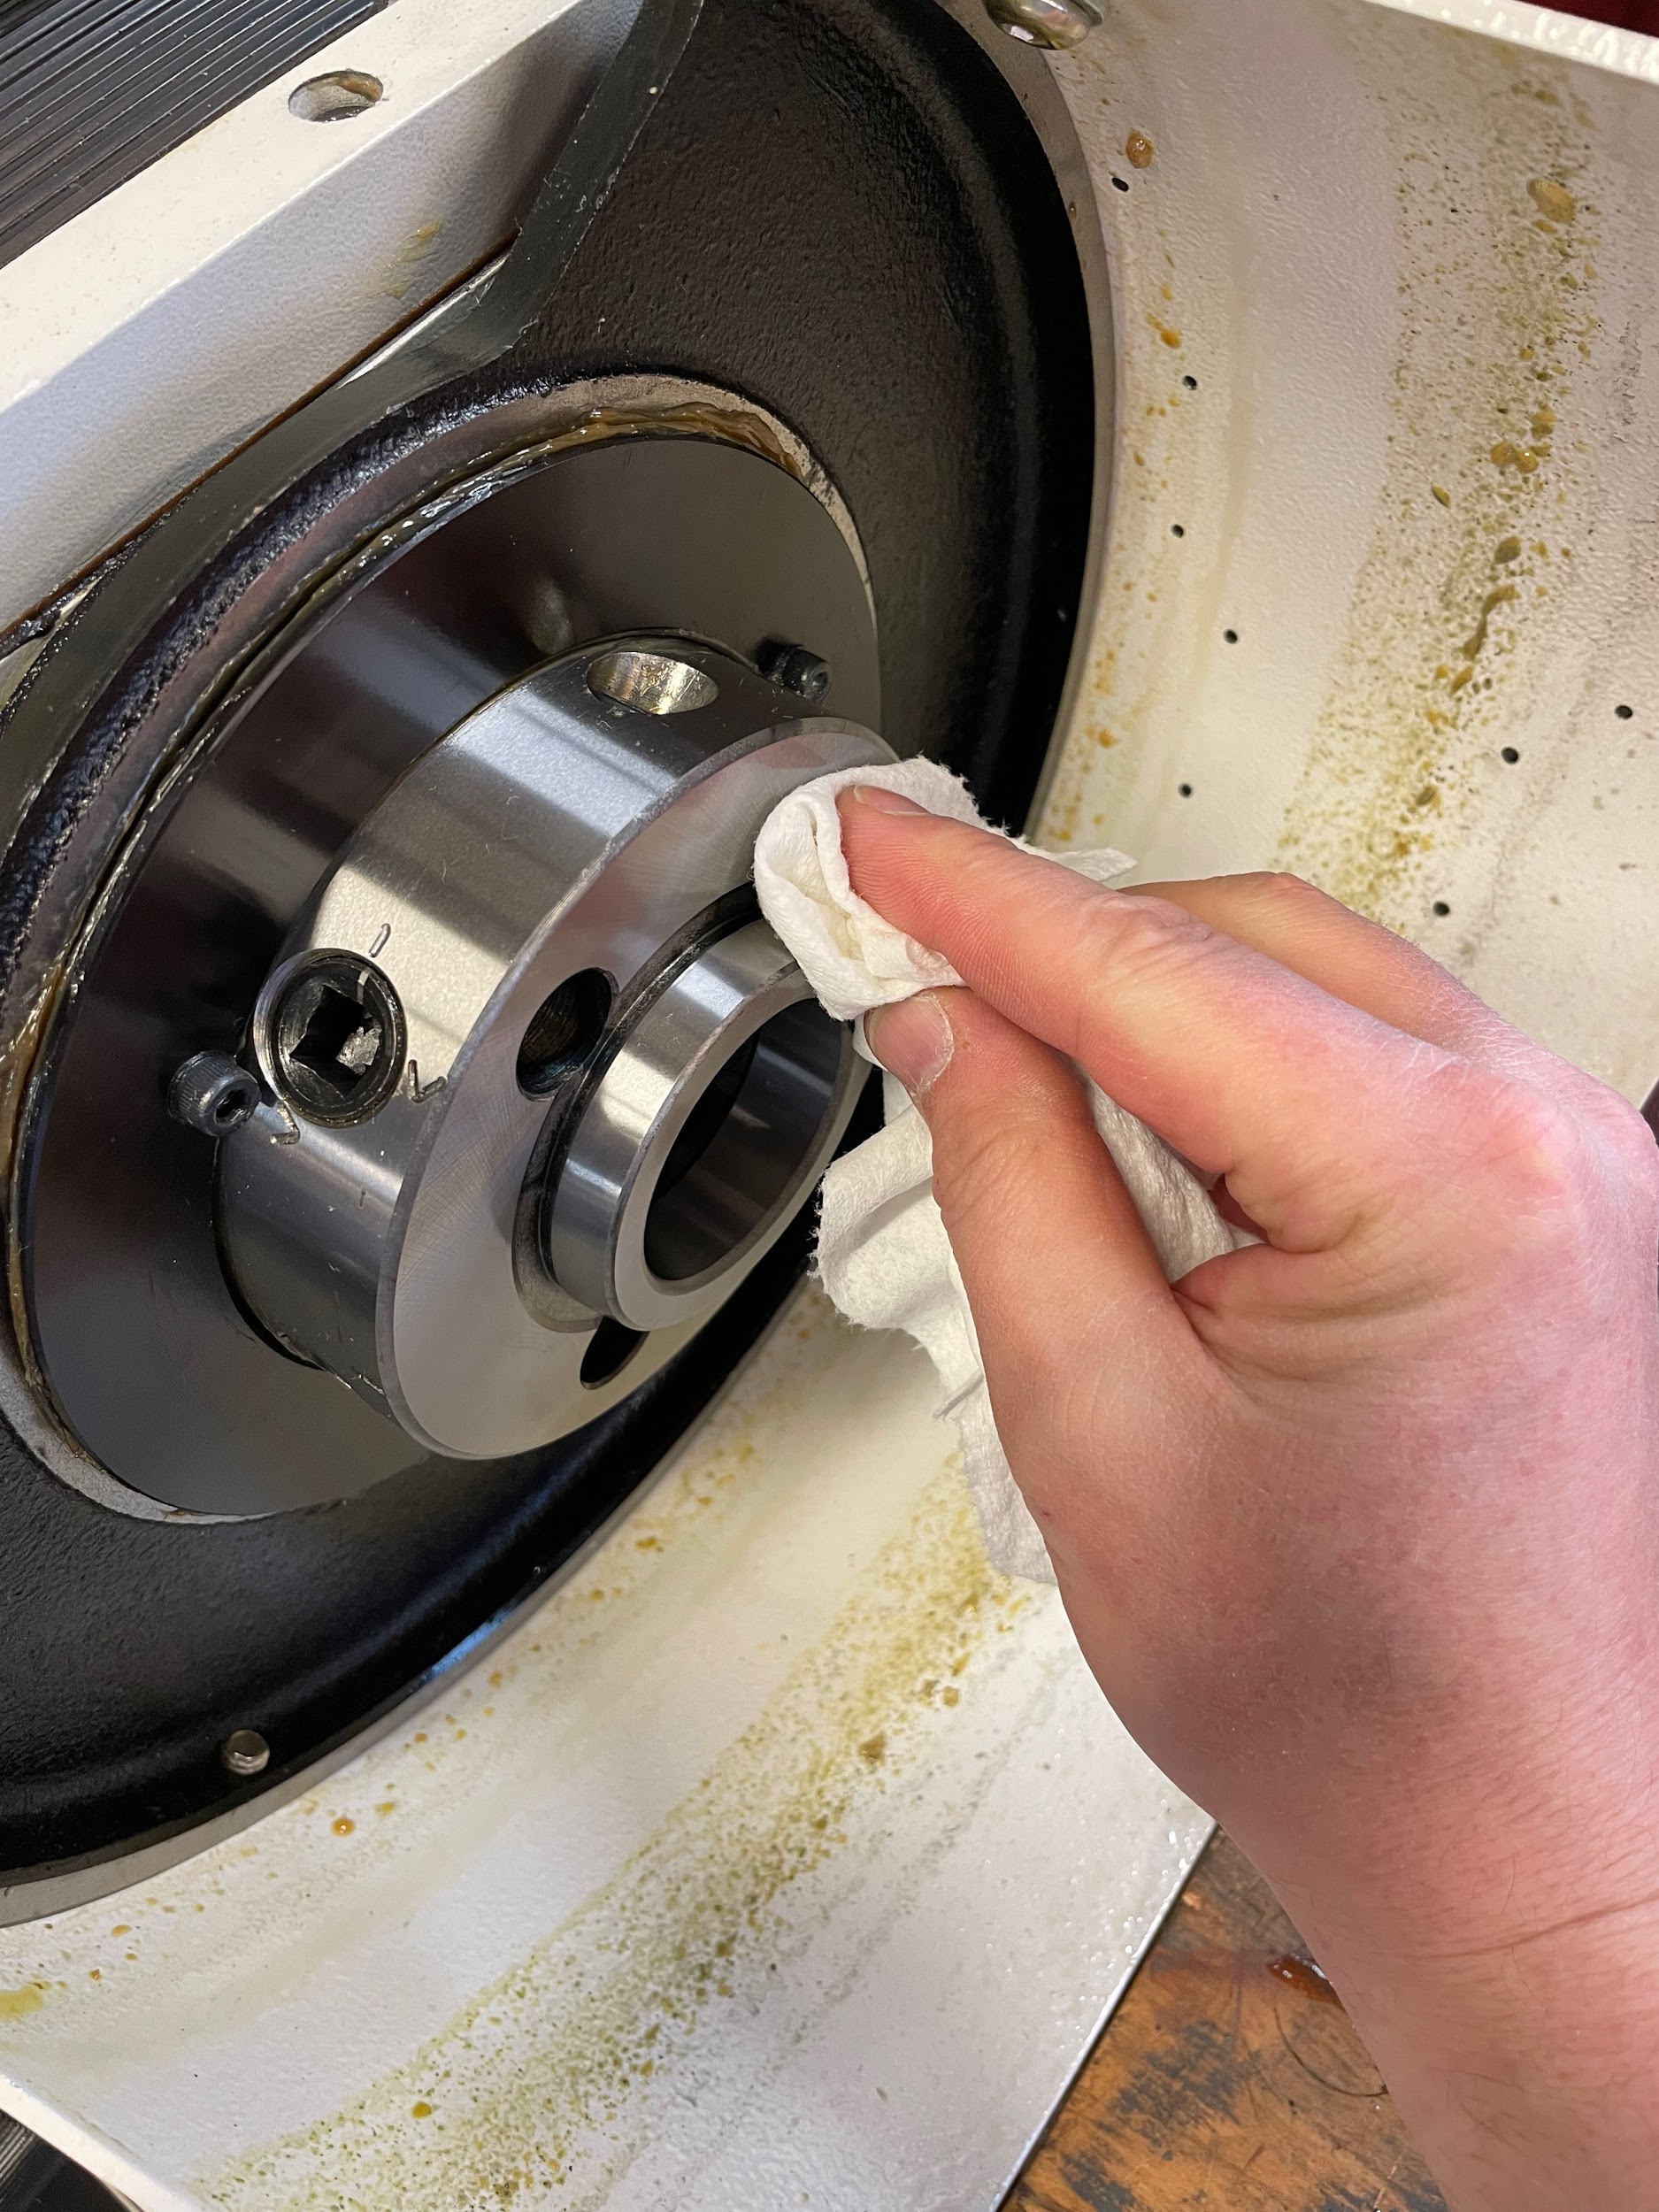
“Step 18: Repeat the process again, fully tightening the bolts. When properly set up, the cam bolts should tighten somewhere between 3 o’clock and 6 o’clock. If one or more of the cam bolts are out of that range, the workholding device must be removed, and the studs must be adjusted in length so the cam mechanism engages at a different point. “
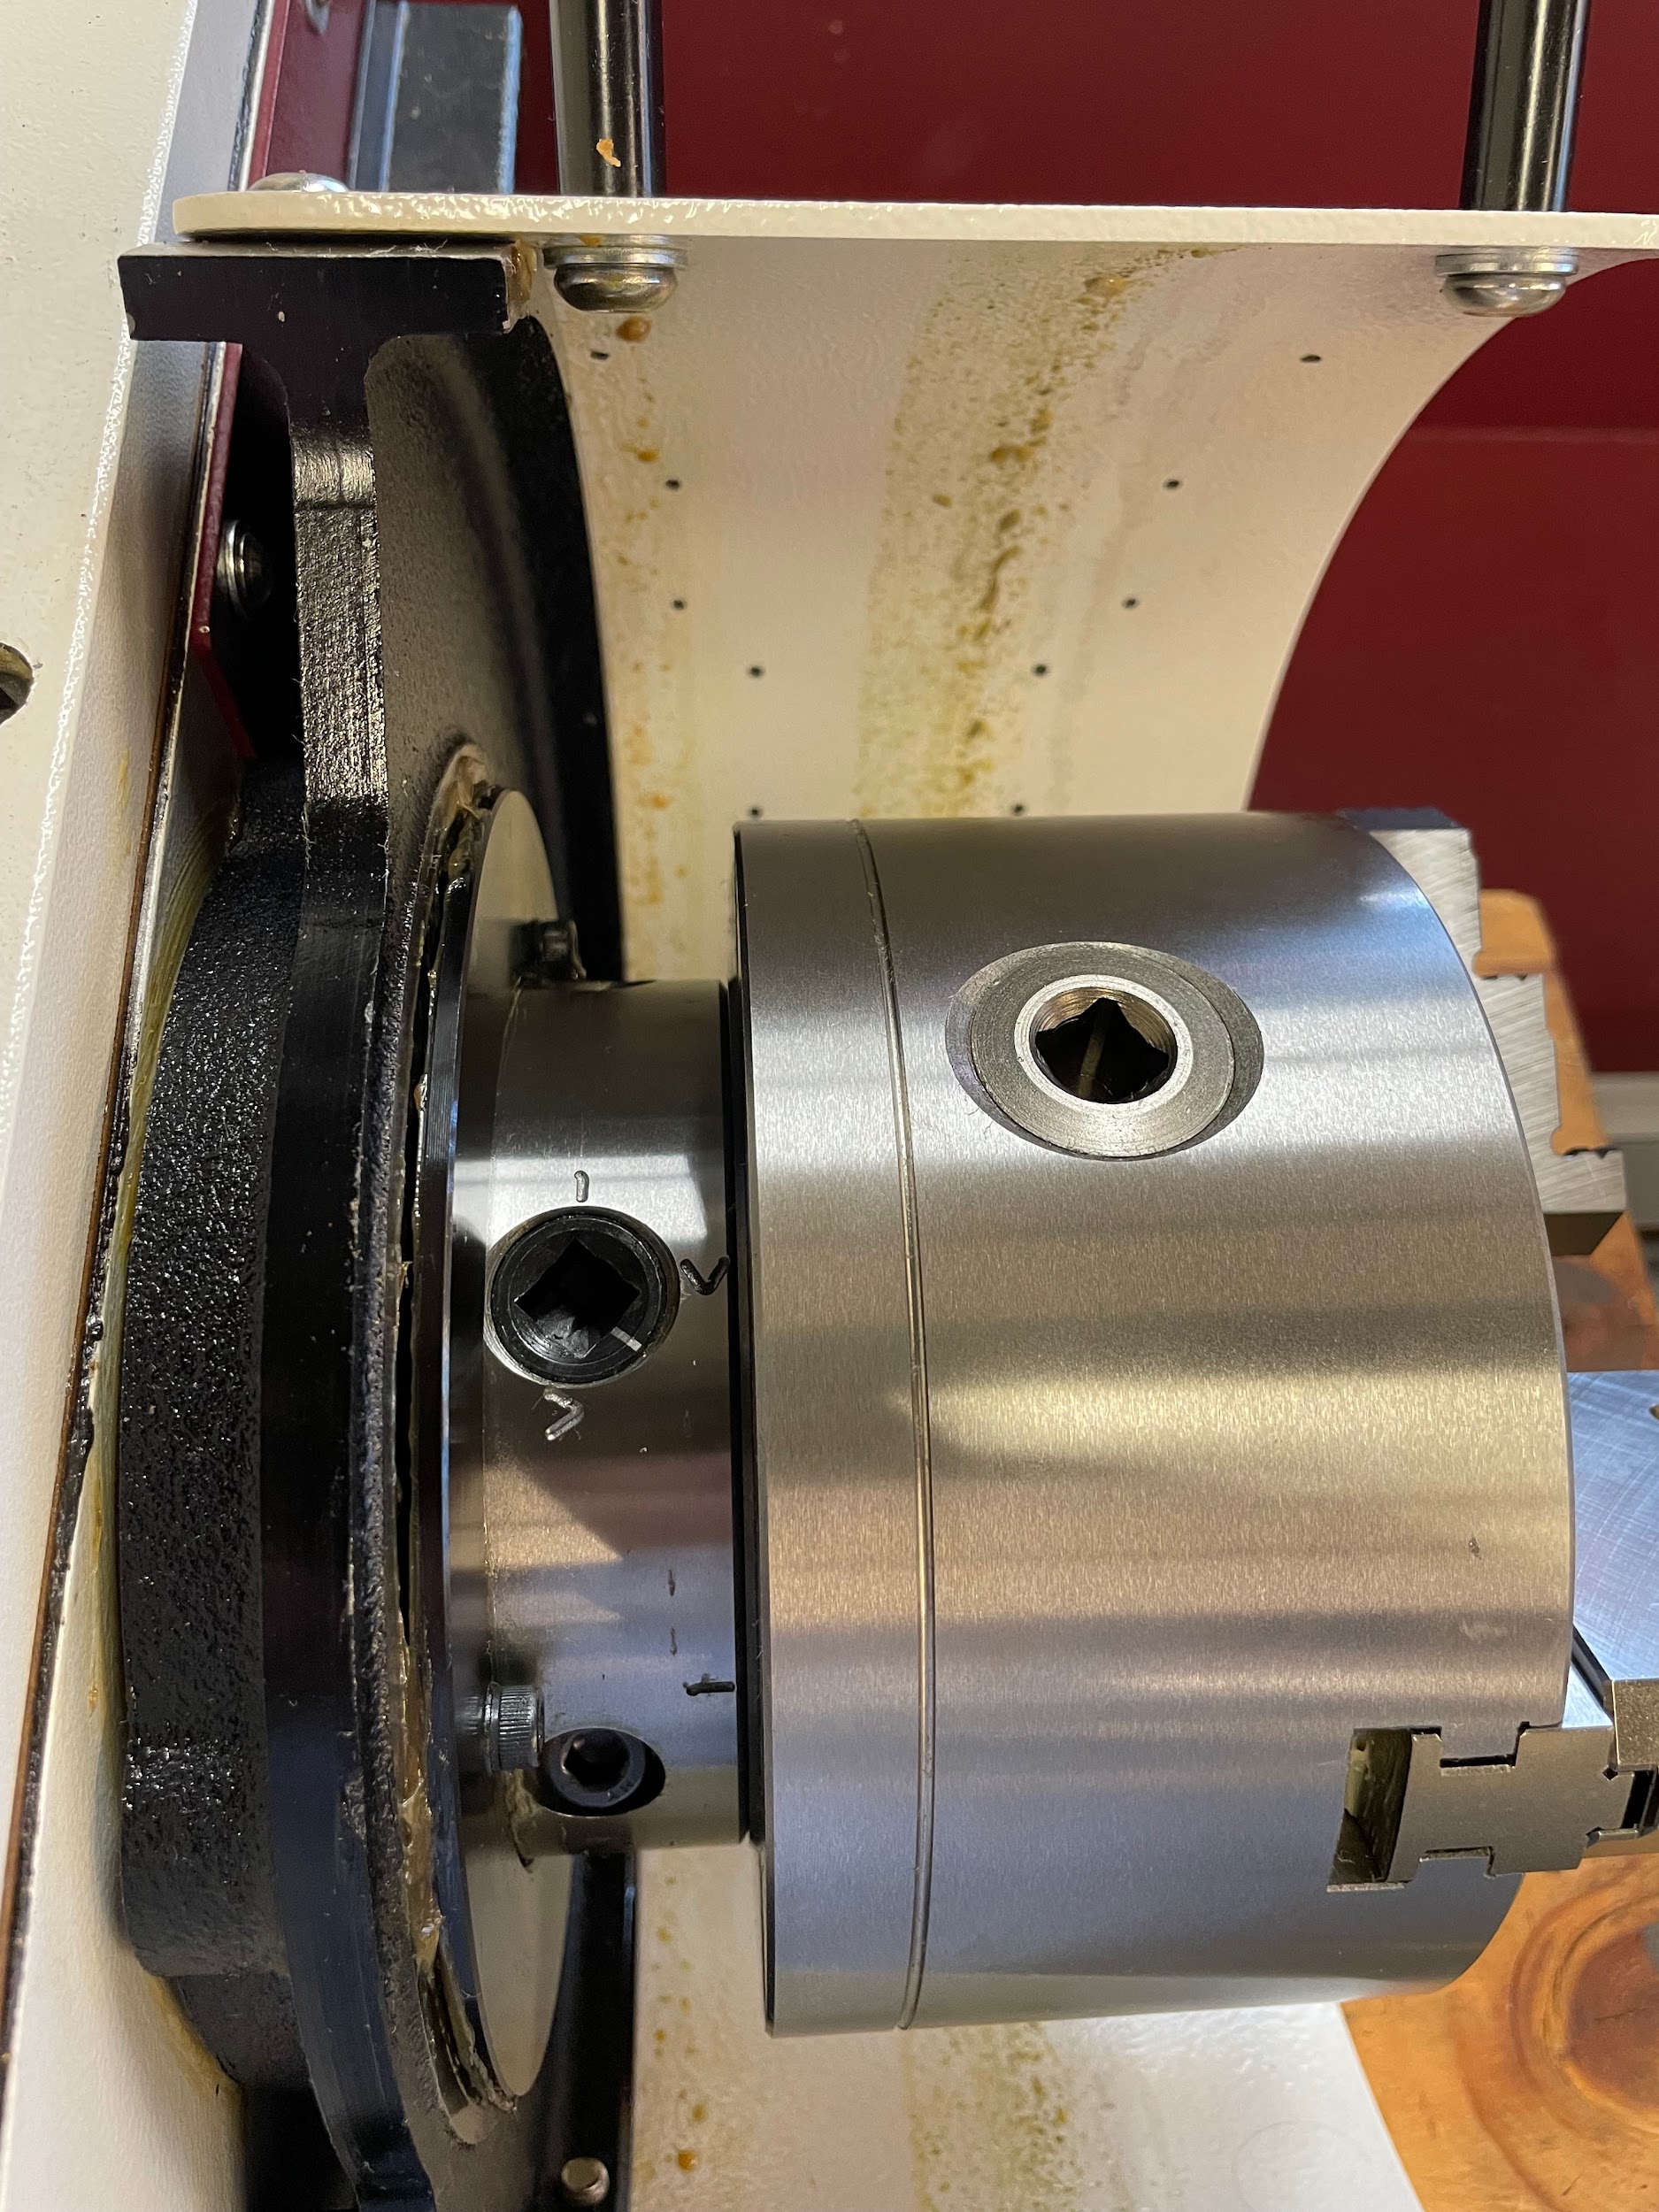
Step by step process for removing and installing workholding devices on a taper style spindle:
- Turn the main power switch to the off position for safety. This is often located on the back of the machine.
- Put the lathe in the lowest gear. This will aid in removing the work holding device by making the spindle difficult to turn.
- Put a piece of wood or chuck cradle on the ways of the lathe for protection.
- Loosen the threaded locking ring with a large spanner. Loosening is pushing up and away from the operational position of the lathe.
- Once the lock ring is loose, continue to unscrew by hand until it becomes tight again.
- Apply the spanner again and continue turning in the loosening direction. At this step, the locking taper is being broken loose.
- Continue to loosen the locking ring by hand until it is fully disengaged.
- Gently lift the work holding device straight out and away from the spindle. Avoid letting the taper get damaged. For larger work holding devices, this may require a crane and a chuck lifter.
- Set the work holding device in its storage space.
- Put the new work holding device on a workbench in preparation for cleaning and inspection.
- Clean any chips from the interior of the through bore of the workholding device.
- With a clean rag, wipe the taper of the workholding device that will make contact with the spindle nose.
- Inspect these surfaces for chips that may have been smashed into them when it was last installed. Small chips may easily be scraped away with a fingernail. Larger chips may require the gentle push of a sharp scribe. For damage that is really deep, leaving displaced, raised edges, a gentle honing may be required.
- If chips are found and removed, clean again with a rag.
- Wipe all surfaces with a clean hand or fingers; this is to remove fine pieces of rags, lint, or dust that may have been left behind by previous steps.
- Clean the spindle nose in the same manner. The spindle nose generally won’t have any chips in it or damage to it because it is hardened.
- Notice the key orientation on the spindle and orient the work holding device to this position while on the bench
- Lift the new work holding device and gently slip it onto the taper of the spindle nose.
- With the right hand supporting the work holding device and pushing it up against the spindle nose, turn the locking ring by hand counterclockwise. If it doesn’t start easily by hand, stop and inspect. Do not attempt to use a wrench until it is correctly started by hand.
- Once hand tight, fully tighten with a spanner.
Step by step process for removing and installing workholding devices on a threaded style spindle:
- Turn the main power switch to the off position for safety. This is often located on the back of the machine.
- Put the lathe in the lowest gear. This will aid in removing the work holding device by making the spindle difficult to turn.
- Put a piece of wood or chuck cradle on the ways of the lathe for protection.
- Place a chuck key into one of the square tightening holes and pull shapely to dislodge it in a counterclockwise motion. Alternatively, a large adjustable wrench can be used to grab a single chuck jaw during this step. If a faceplate is being removed, a piece of pipe or crowbar can be clamped to the faceplate to act as a lever.
- Once the workholding device is loose, continue to unscrew by hand. Caution must be taken with this type; as soon as the workholding device is fully unscrewed, it has nothing else to hold it, and will drop off the spindle. For larger work holding devices, this may require a crane and a chuck lifter.
- Gently lift the work holding device straight out and away from the spindle.
- Set the work holding device in its storage space.
- Put the new work holding device on a workbench in preparation for cleaning and inspection.
- Clean any chips from the interior of the through bore of the work holding device.
- With a clean rag, wipe the threads and the flat portion that will make contact with the spindle nose.
- Inspect these surfaces for chips that may have been smashed into them when it was last installed. Small chips may easily be scraped away with a fingernail. Larger chips may require the gentle push of a sharp scribe. For damage that is really deep, leaving displaced, raised edges, a gentle honing may be required.
- If chips are found and removed, clean again with a rag.
- Wipe all surfaces with a clean hand or fingers; this is to remove fine pieces of rags, lint, or dust that may have been left behind by previous steps.
- Clean the spindle nose in the same manner. The spindle nose generally won’t have any chips in it or damage to it because it is hardened.
- Notice the thread orientation on the spindle and orient the work holding device to this position while on the bench
- Lift the new work holding device and gently align the treads.
- Gently thread the work holding device onto the spindle nose by hand.
- Once hand tight, fully tighten using one of the lever methods mentioned above.
End runout
Checking runout is one of the first steps in making parts on a lathe. Runout is measured on a lathe with a drop indicator. If the part is sticking out from the jaws far enough, the end of the part should be dialed in to make sure it is concentric with the portion that is in the jaws. To achieve this dialing in procedure, the steps below can be followed. If a large portion of the work is being held onto, more than 1x the diameter, it may be impossible to influence the part in the manner below. If a small portion of the part is being held onto, 1x diameter or less, a tailstock is probably needed for lateral support.
Step by step process for checking runout and dialing in runout:
- Grip a piece of material with a couple serrations in a three jaw chuck.
- Set up a drop indicator on a magnetic base so that it points perpendicular to the axis of rotation.
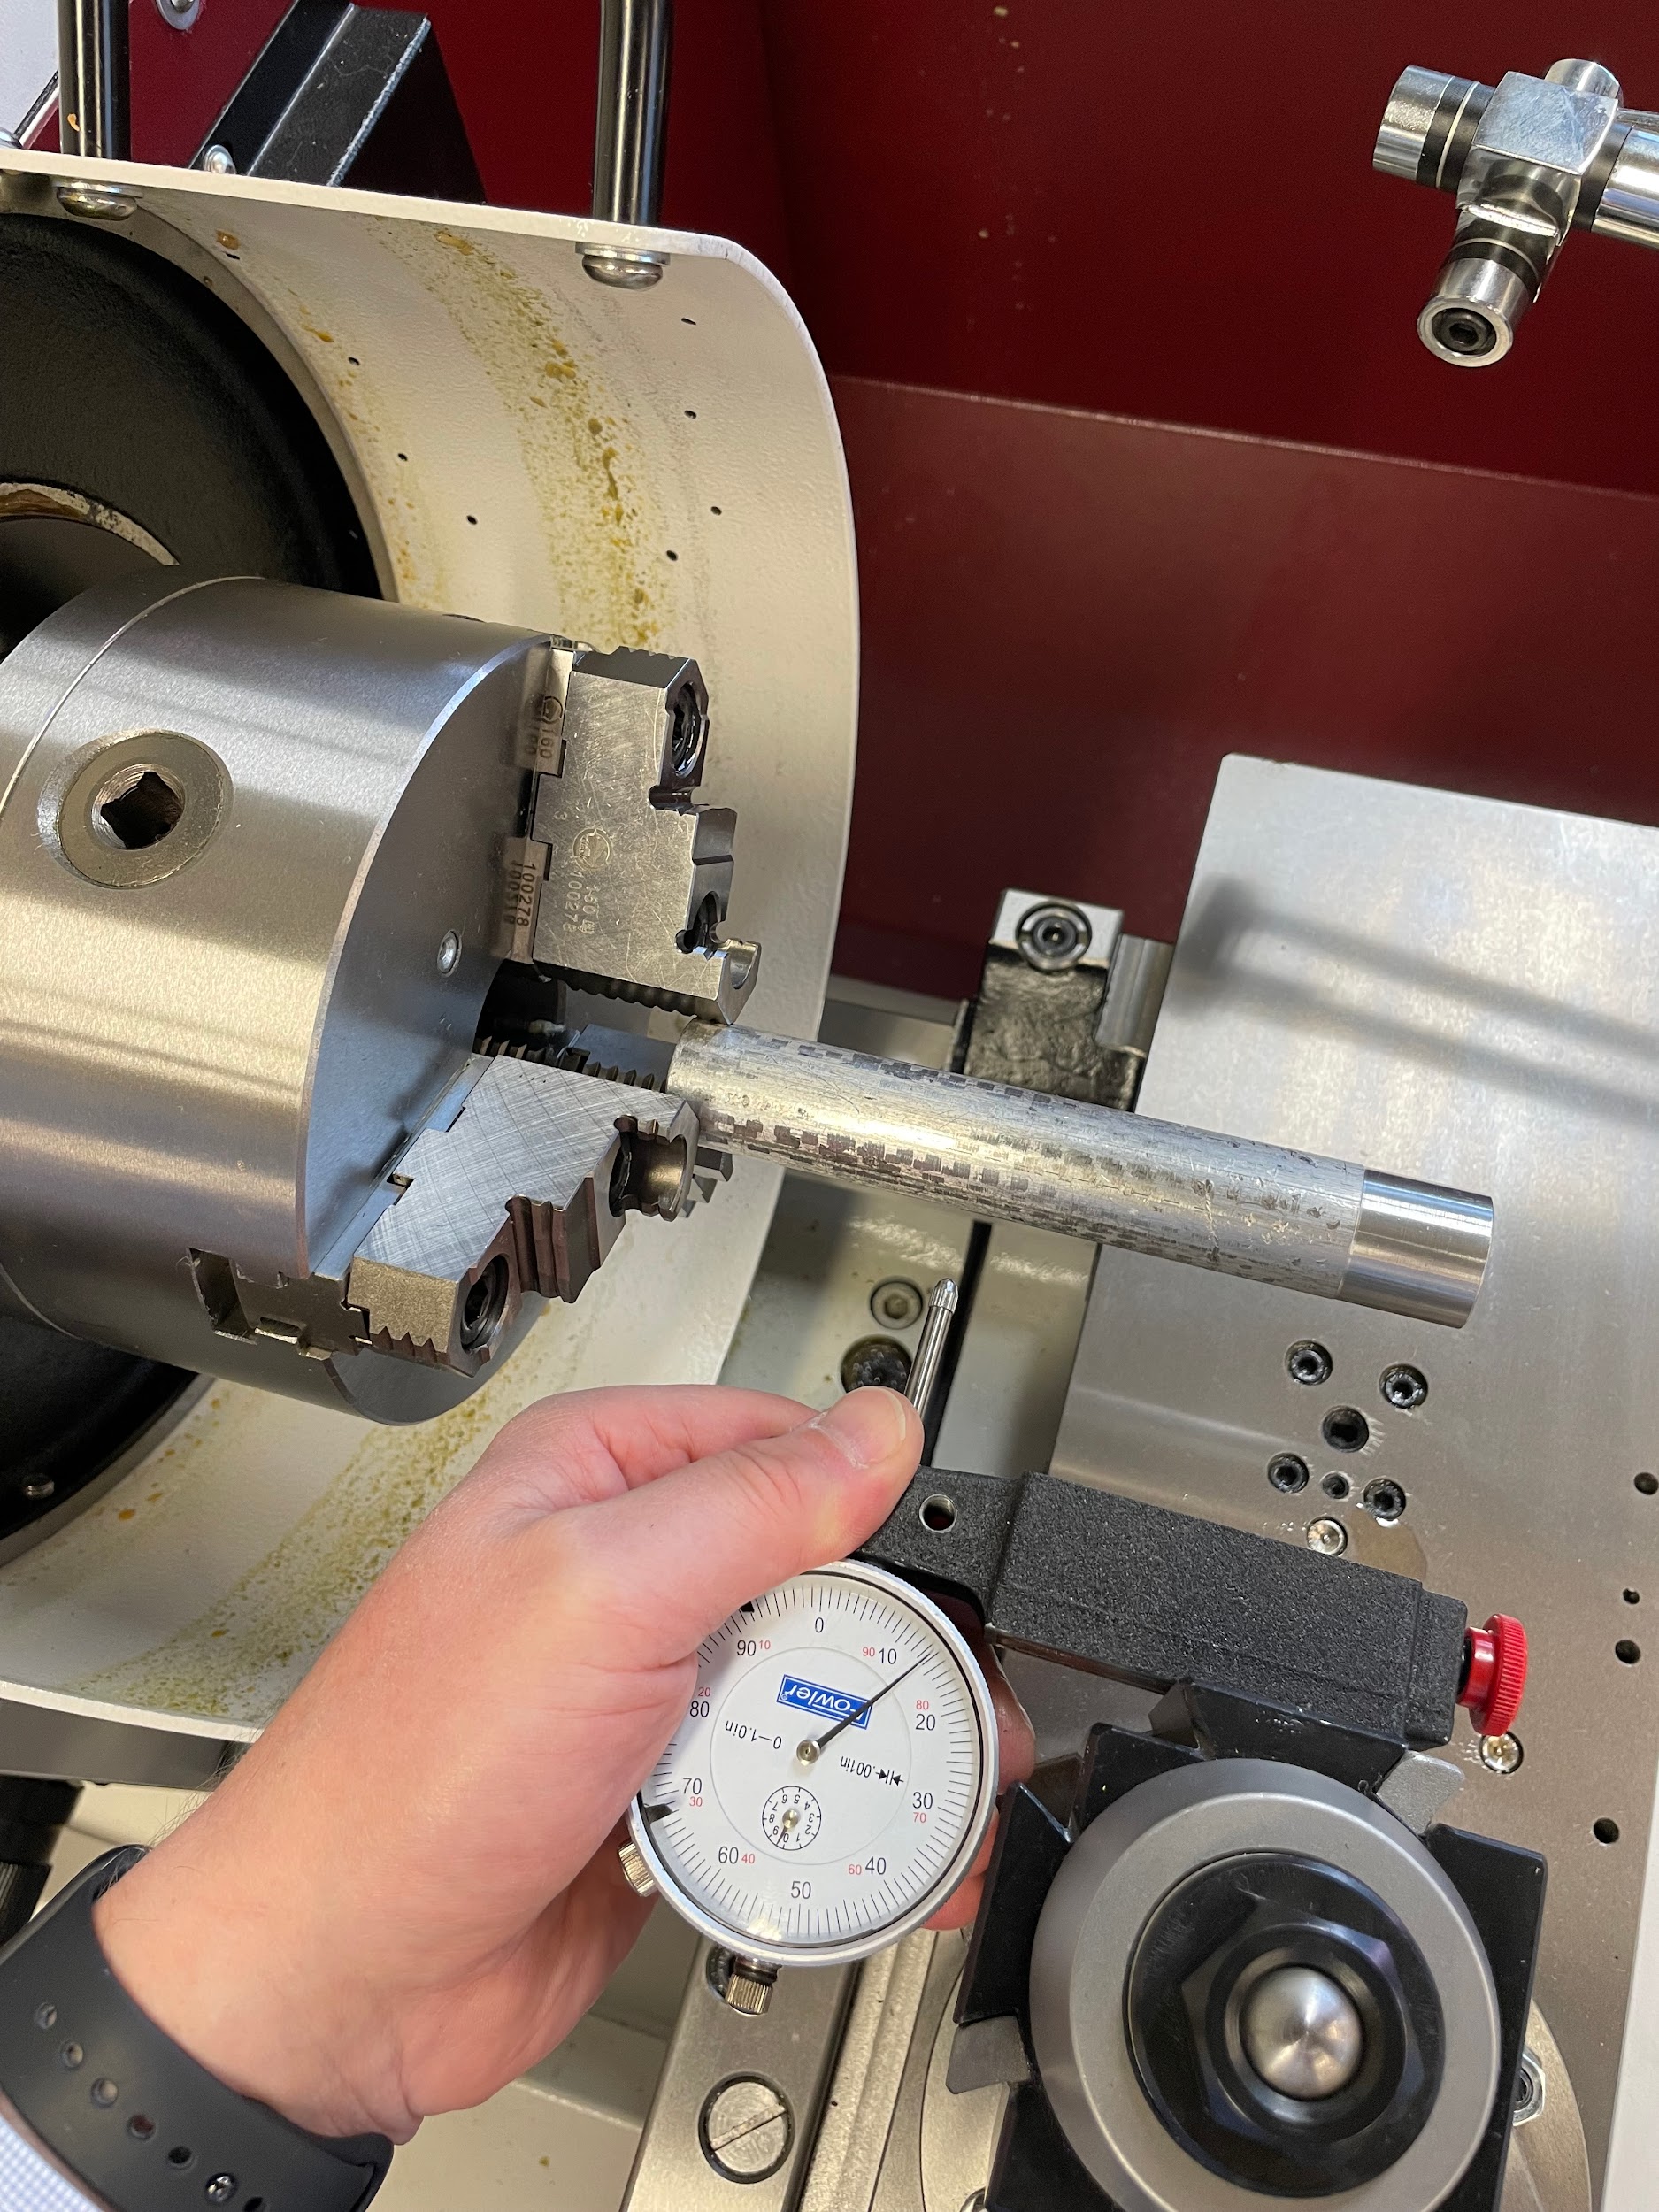
- Bring the indicator up to touch the part about 1/8” from the end.
- Advance the indicator into the part so that it is loaded and there is sufficient travel left in the indicator. Generally .100 is sufficient.
- Rotate the chuck by hand and note the runout.
- Position the chuck at one of the extremes of movement as shown on the indicator.
- Grasp the backside of the indicator plunger and gently pull it off the part while watching which direction the needle moves.
- If the needle moves in the direction of the other extreme reading, the operator will want to attempt to move the part in that direction. If the indicator needle continues to get more extreme in the same direction, the operator will want to attempt to move the part in the opposite direction.
- Slightly tap with a soft faced hammer watching how much the part is moving. Ideally the part should be moved half the distance between the two extreme readings.
- Rotate the chuck again and recheck the runout. Repeat the part adjustment steps until the desired runout and concentricity is reached.
- Once the acceptable amount of runout is achieved, Tighten the chuck fully and recheck runout.
“Step 1: Grip a piece of material with a couple serrations in a three jaw chuck.“
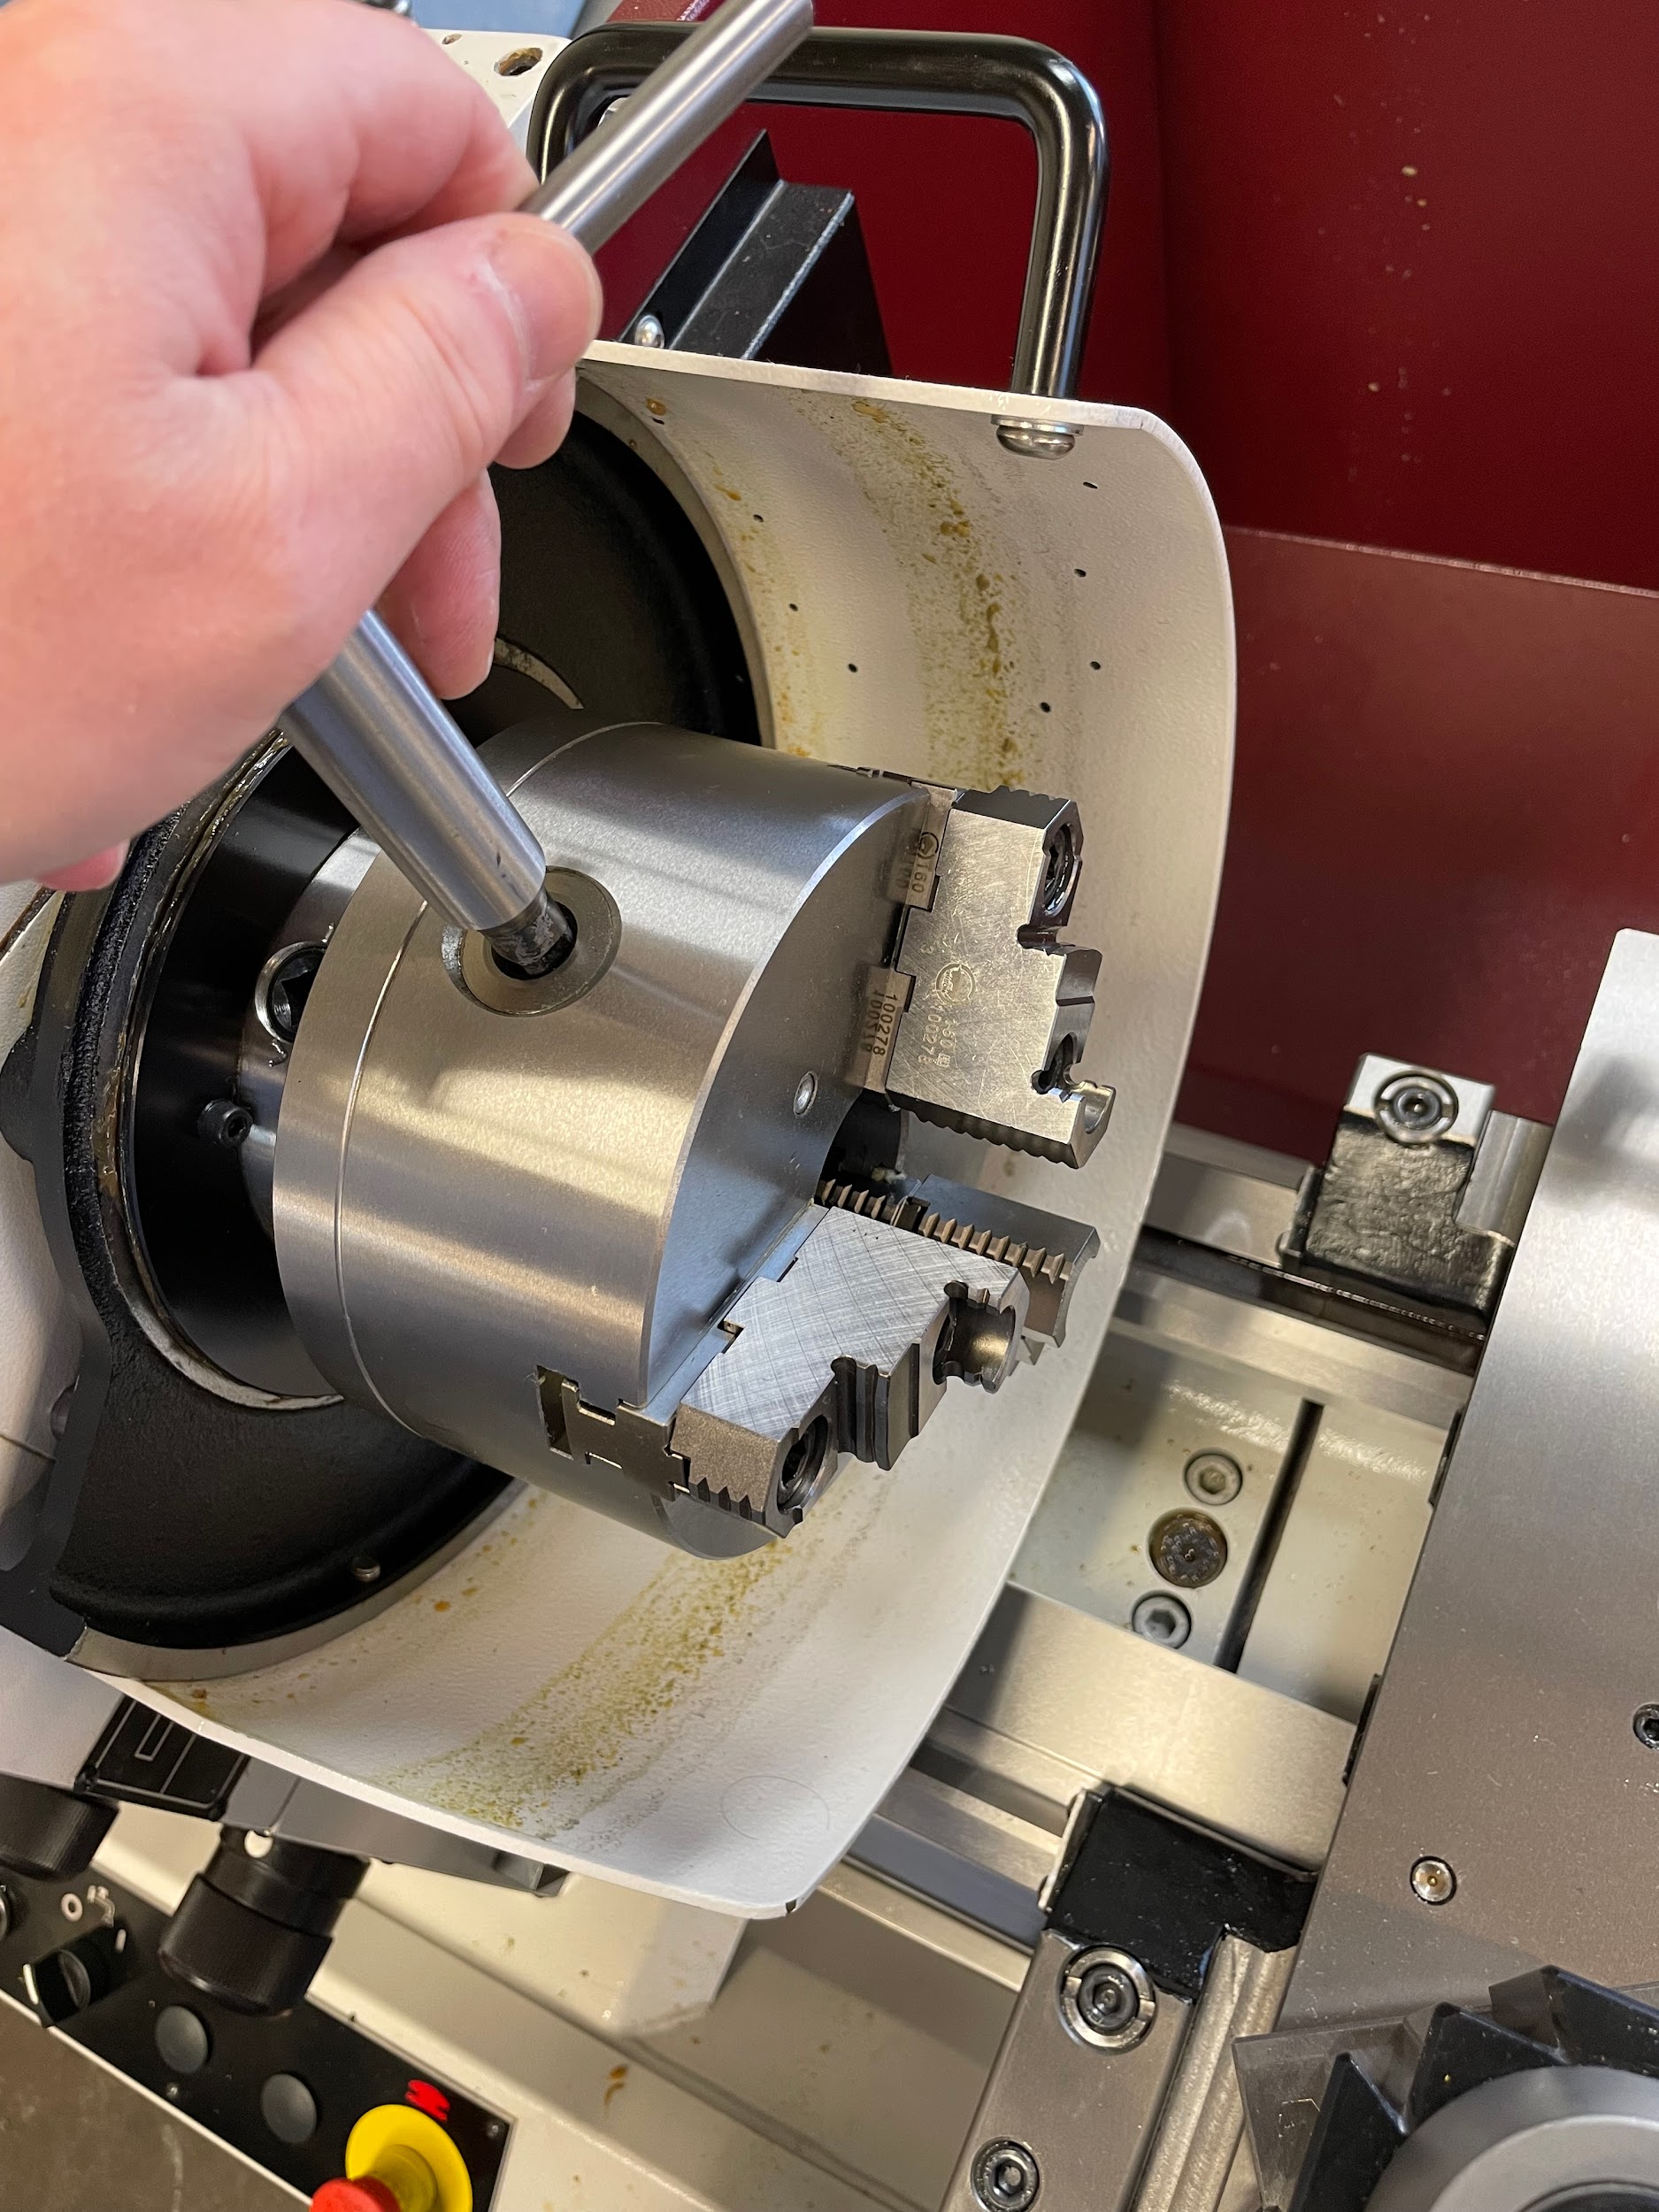
“Step 1: Grip a piece of material with a couple serrations in a three jaw chuck.“
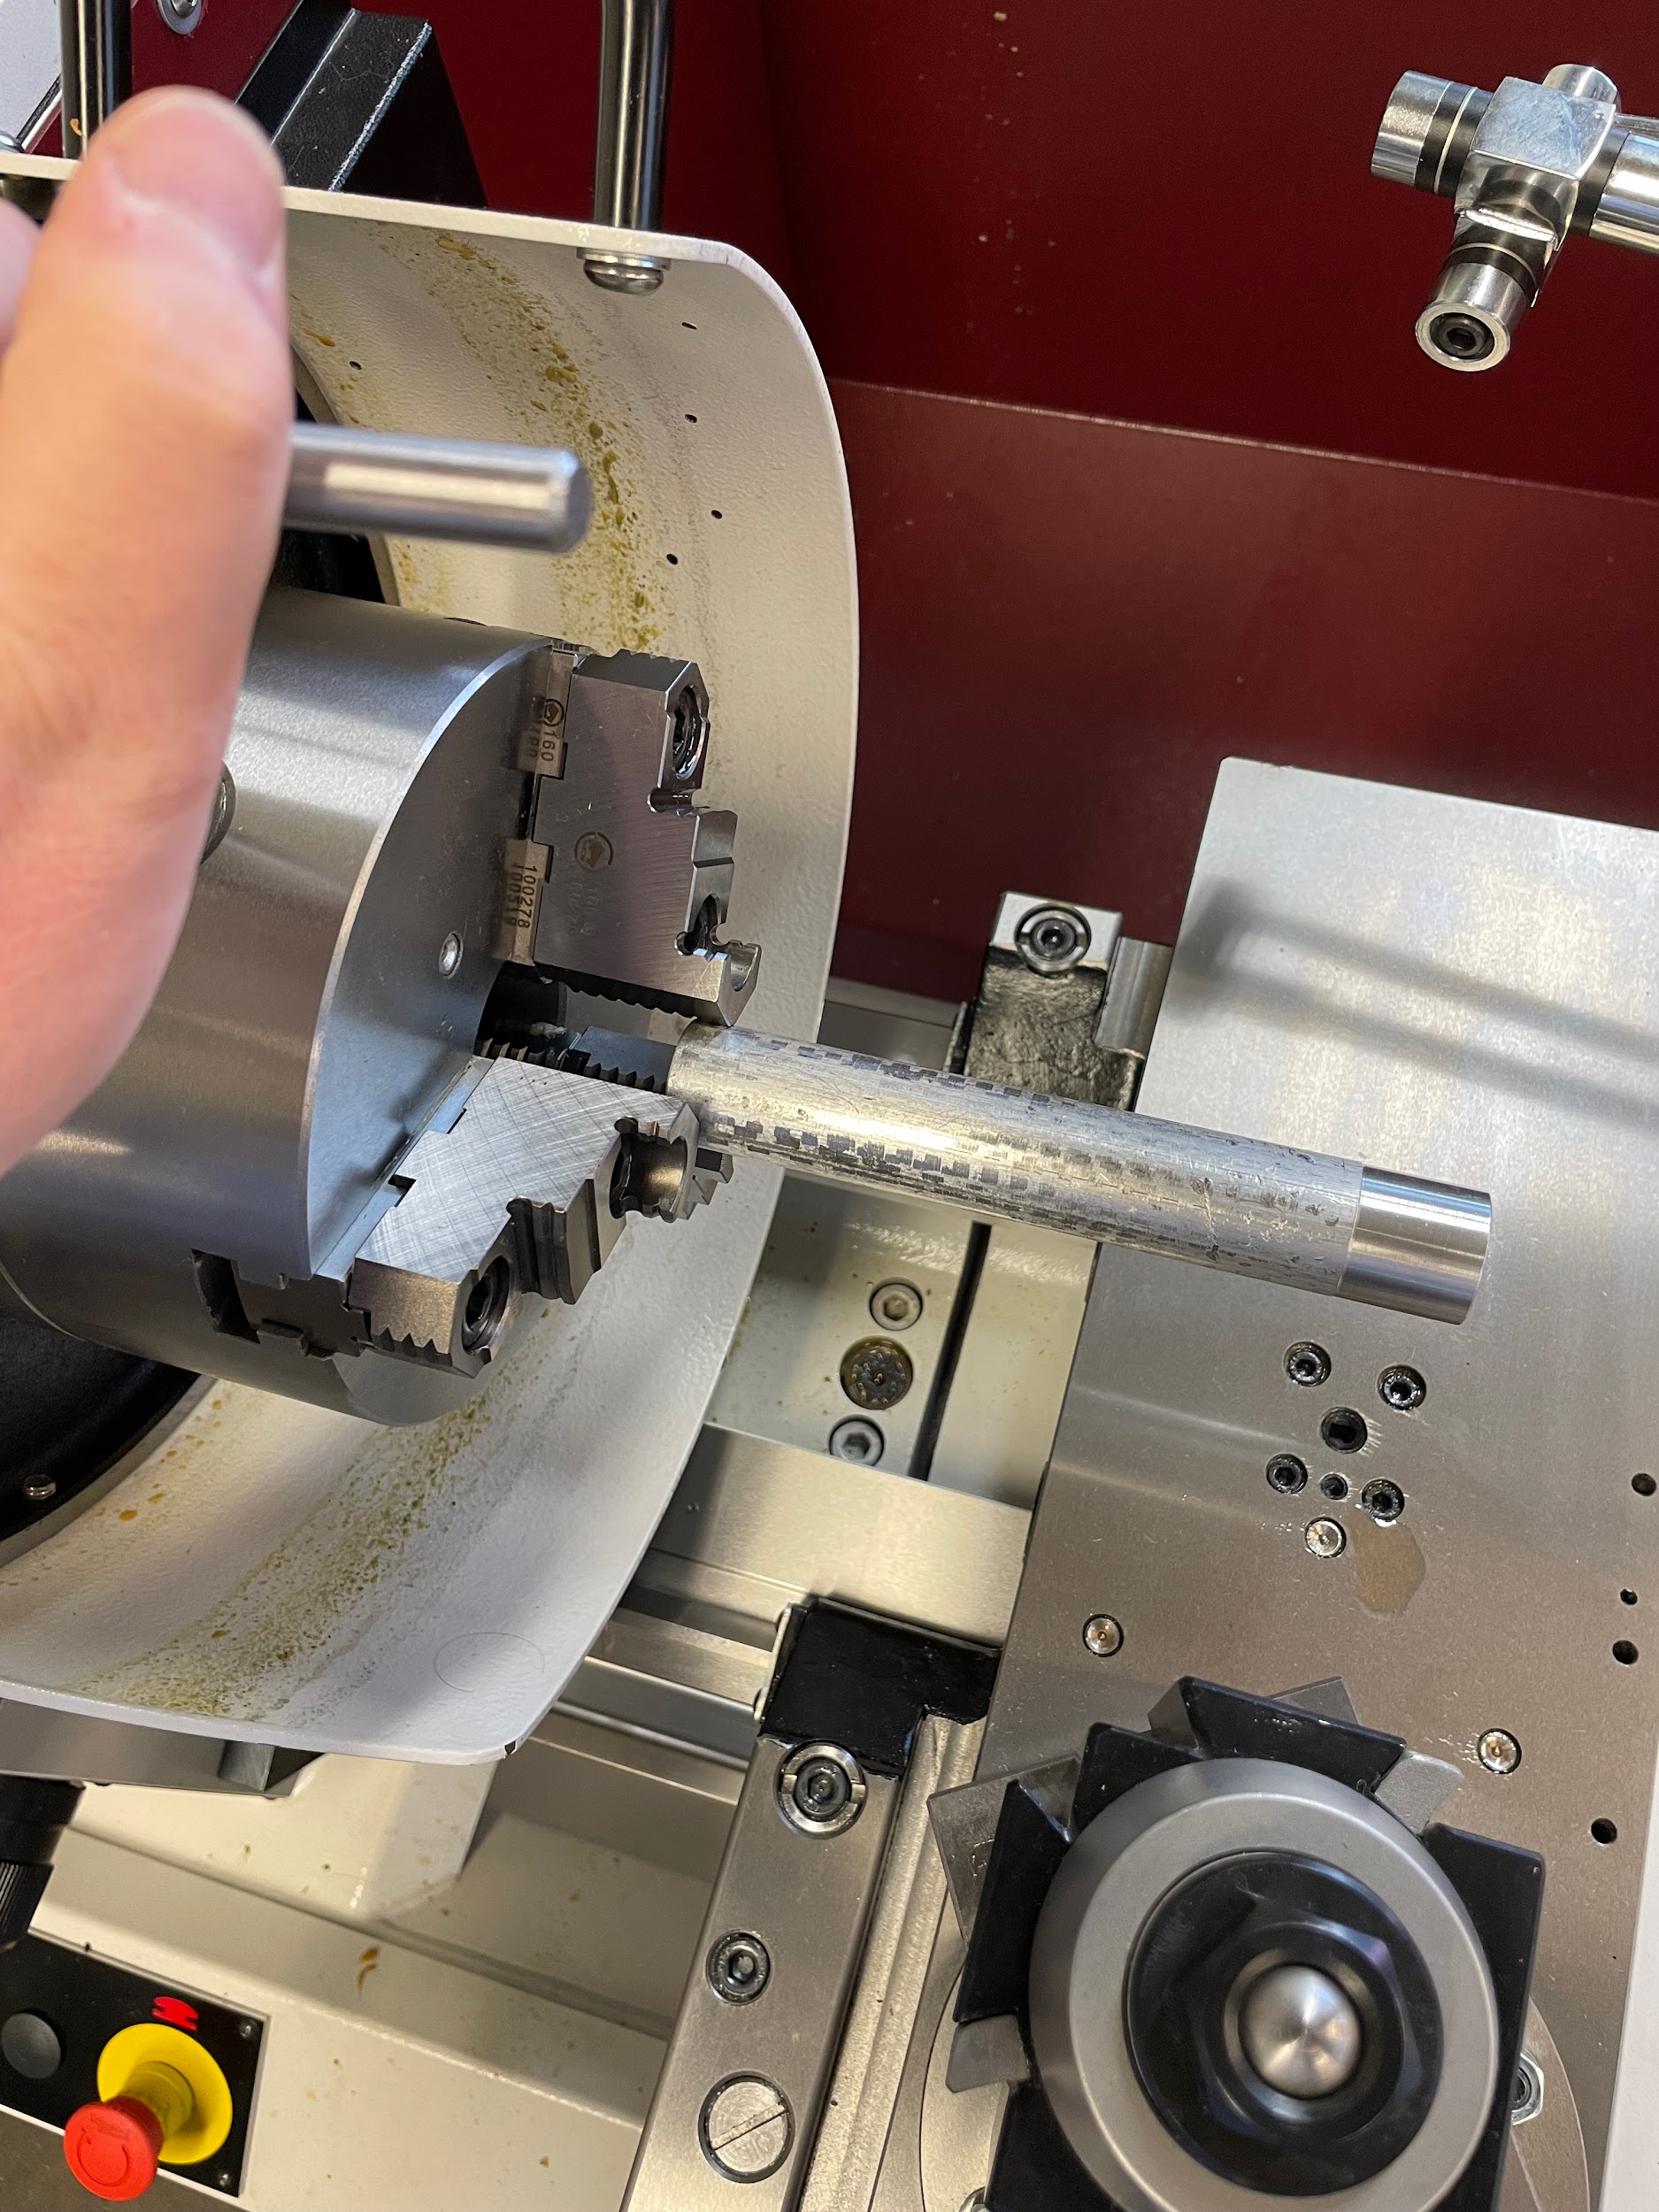
“Step 2: Set up a drop indicator on a magnetic base so that it points perpendicular to the axis of rotation.“
Author’s Tip
Sometimes it can be difficult to get a part to run true in a three jaw chuck, regardless of the part running out on the end or near the chuck jaws. The above method only works for dialing the end in. One trick I use is to unchuck and chuck the part with a slight rotation in between. Check the runout after each clamping, and try moving the part slightly again if needed. Sometimes, with a three jaw chuck you can get within .003 runout each time, but maybe you need it to be a little bit better. Often, when using this method, I can get less than .001 runout without having to get out the four jaw chuck.
Concentricity at chuck jaws
When dialing in shorter parts, sometimes all the operator has control over is the portion of the part right near the chuck jaws. The machinist really only has control over this portion when they are using the independent movement of the four jaw chuck. With a three jaw, operators are limited by the synchronous movement of the jaws. No amount of hammer tapping will move the jaws to make the part more concentric. That is the beauty of the four jaw chuck, ultimate adjustability. The steps to dialing in a part within a four jaw chuck are as follows.
Step by step process for dialing in a round part on a four jaw chuck:
- With the tee handle, adjust all the jaws outward so the part will fit inside the jaws.
- Notice the concentric circles machined on the face of the chuck, and adjust the jaws to lightly contact the part and visually be an equal distance away from the concentric circles.
- Set up a drop indicator on a magnetic base so that it points perpendicular to the axis of rotation.
- Bring the indicator up to touch the part as close to the chuck jaws as possible.
- Advance the indicator into the part so that it is loaded and there is sufficient travel left in the indicator. Generally .100 is sufficient.
- Rotate the chuck by hand and note the runout.
- Position the chuck so that the indicator is in line with the jaw that has the most runout.
- Grasp the backside of the indicator plunger and gently pull it off the part while watching which direction the needle moves.
- If the needle moves in the direction of the other extreme reading, the operator will want to attempt to move the part in that direction. If the indicator needle continues to get more extreme in the same direction, the operator will want to attempt to move the part in the opposite direction.
- Loosen one side of the side jaw in the direction the part needs to move, and gently tighten the opposite side. Aim for the point on the indicator that is halfway between the indicator reading on each opposing jaw.
- Rotate the chuck again and recheck the runout. Repeat the part adjustment steps until the desired runout and concentricity are reached.
- It is important to note that the part can only be manipulated in the directions the jaws move.
- Once the acceptable amount of runout is achieved near the chuck, longer parts now need to have the end of the part checked for runout and adjusted by the hammer tapping method previously mentioned.
- Once the acceptable amount of total runout is achieved at both ends, tighten chuck fully and recheck total runout.
Step by step process for dialing in a square part on a four jaw chuck:
- With the tee handle, adjust all the jaws outward so the part will fit inside the jaws.
- Notice the concentric circles machined on the face of the chuck, and adjust the jaws to lightly contact the part and visually be an equal distance away from the concentric circles.
- Set up a drop indicator on a magnetic base so that it points perpendicular to the axis of rotation.
- Bring the indicator up to touch one of the part’s flats as close to the chuck jaws as possible.
- Advance the indicator into the part so that it is loaded and there is sufficient travel left in the indicator. Generally .100 is sufficient.
- Rotate the chuck back and forth by hand slightly, and zero the bezel at the low point. This is the point at which the indicator changes direction.
- Notice the position of the small dial of the indicator.
- Grasp the backside of the indicator plunger, gently pull it off the part, and rotate the chuck 180 degrees.
- Check the second side and note the low mount in the same manner by slightly rotating the part back and forth and looking for the point of reversal.
- Calculate the difference between the first indicator reading and the second.
- Pull the indicator off the part and make note of the direction the needle moves.
- Loosen the jaw on the side that measures smaller and tighten the side that measures larger by half of the difference.
- Pull the indicator off the part, rotate the chuck again, and recheck the runout. Repeat the part adjustment steps until the desired runout and concentricity is reached.
- Check and adjust the second set of opposing jaws in the same manner.
- It is important to note that the part can only be manipulated in the directions the jaws move.
- Once the acceptable amount of runout is achieved near the chuck, longer parts now need to have the end of the part checked for runout and adjusted by the hammer tapping method previously mentioned.
- Once the acceptable amount of total runout is achieved at both ends, tighten the chuck fully and recheck the total runout.
“Step 2: Notice the concentric circles machined on the face of the chuck, and adjust the jaws to lightly contact the part and visually be an equal distance away from the concentric circles.“
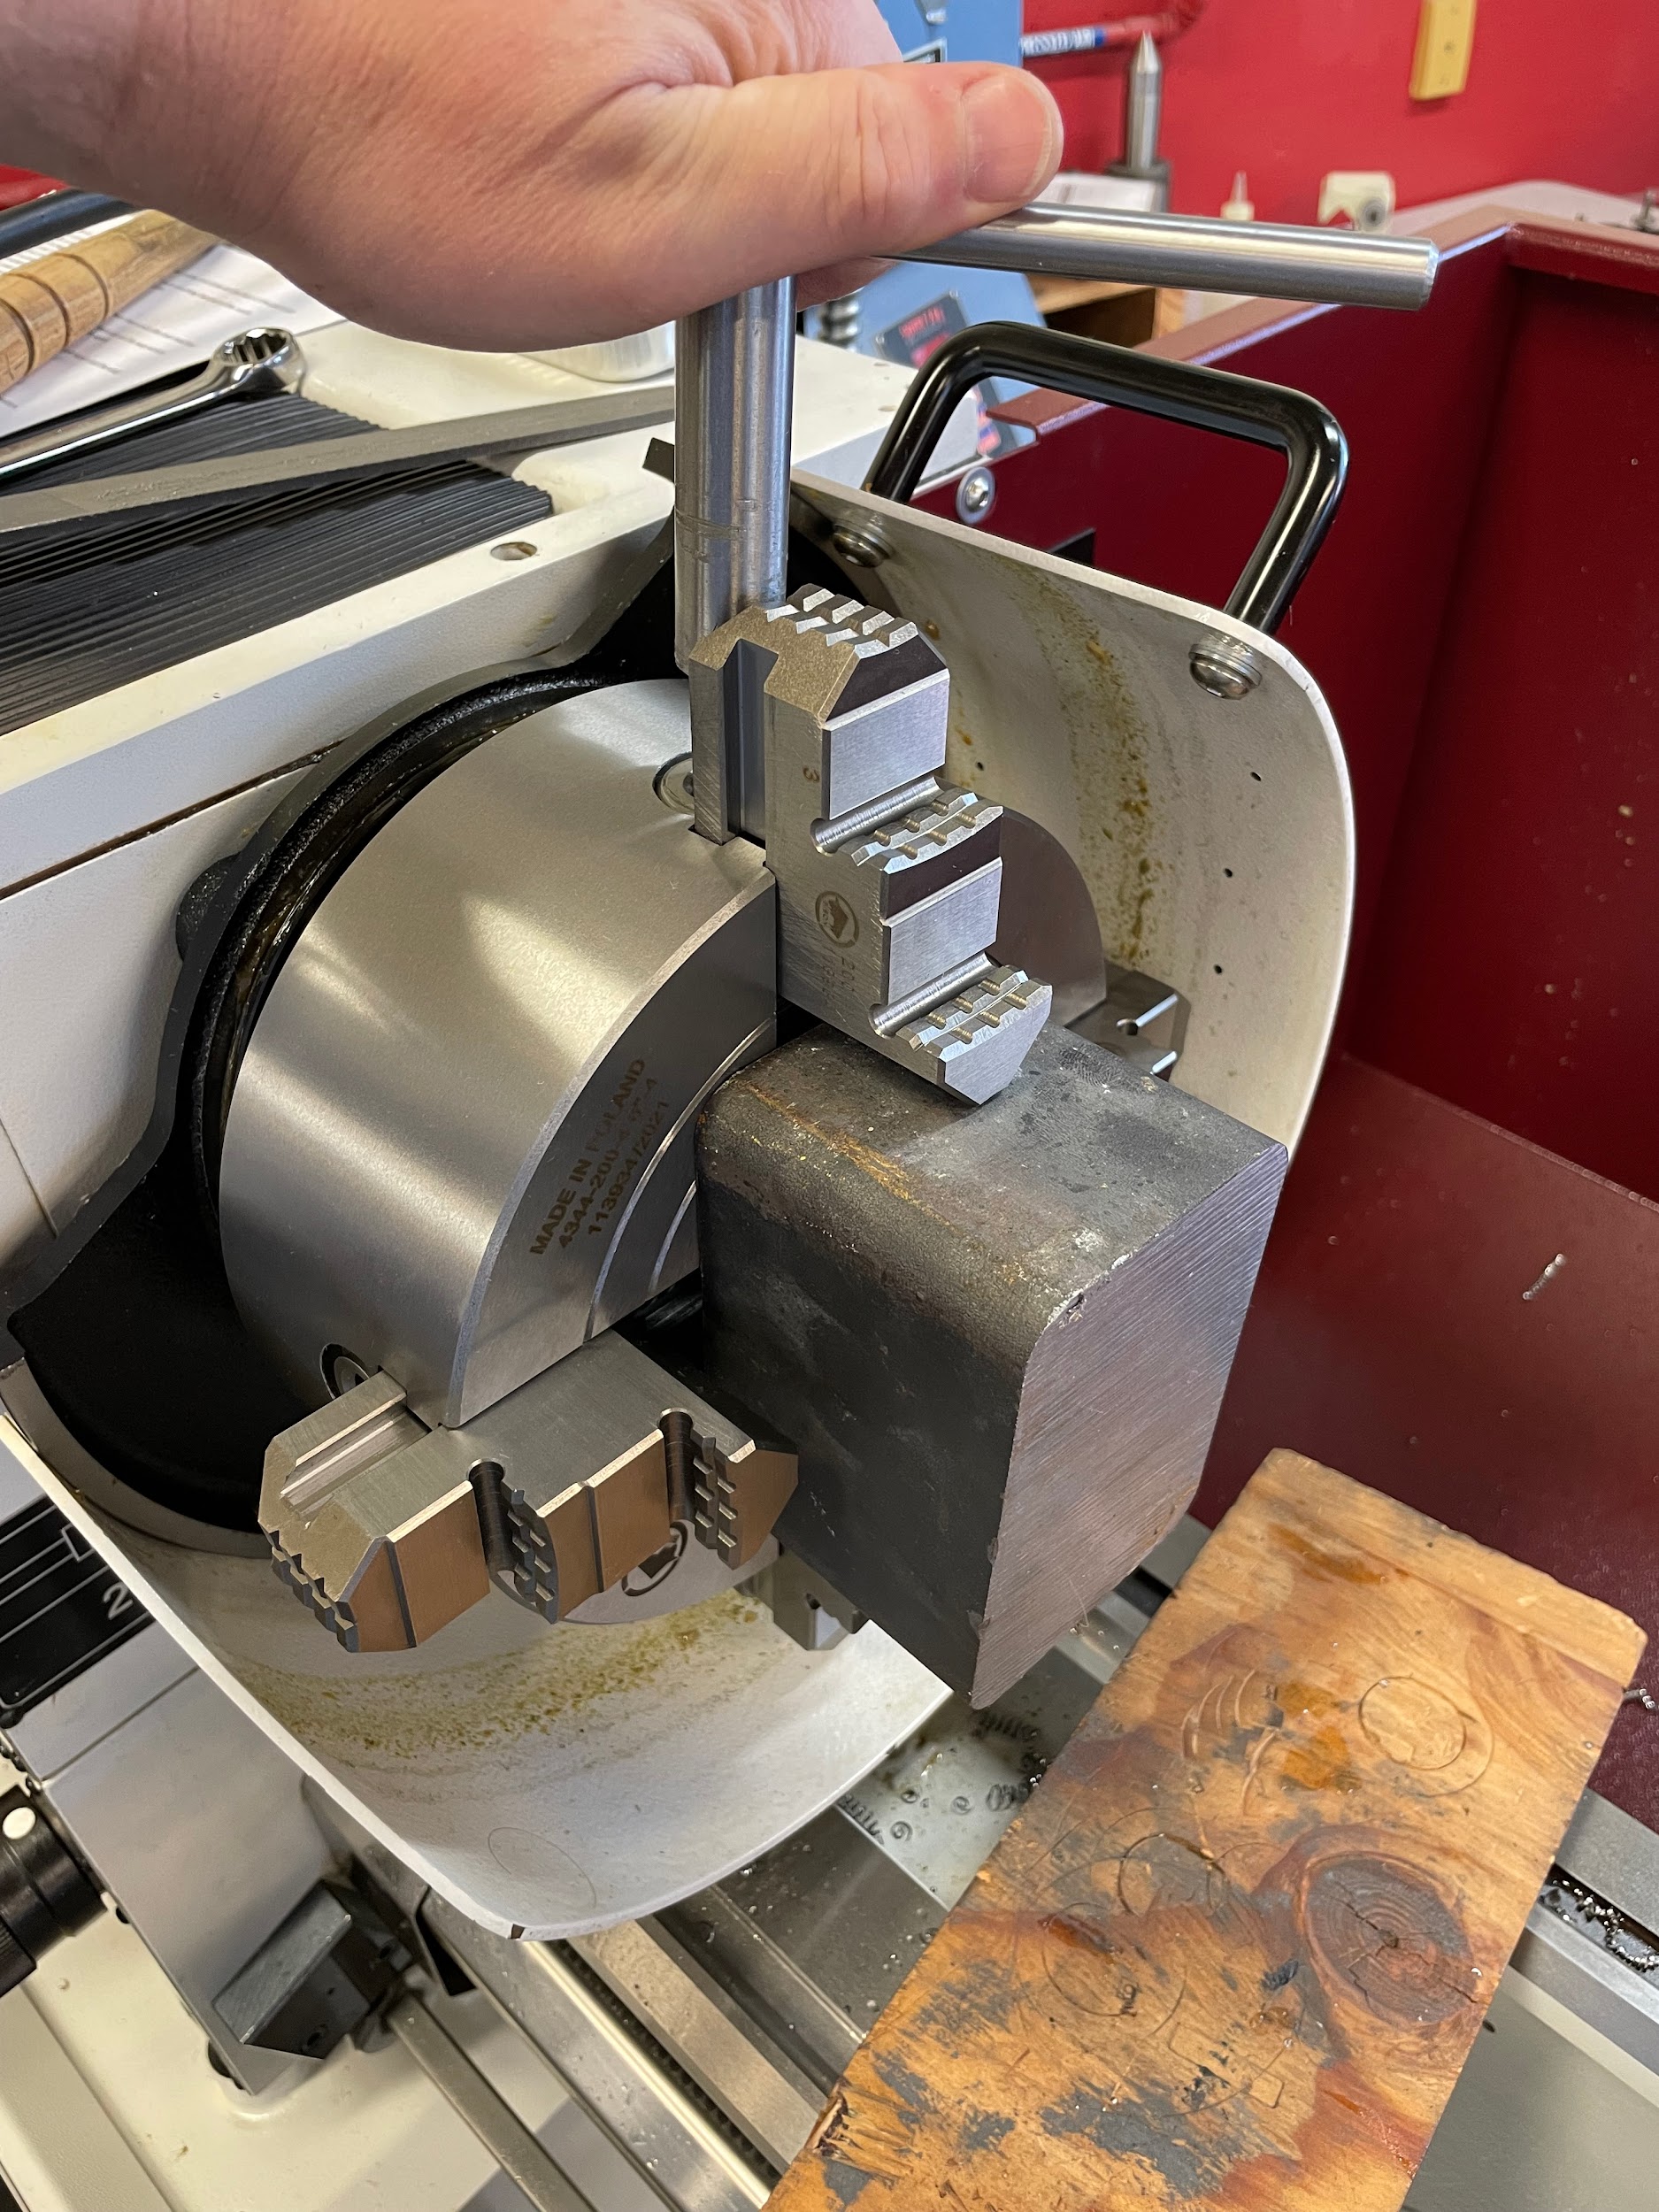
“Step 2: Notice the concentric circles machined on the face of the chuck, and adjust the jaws to lightly contact the part and visually be an equal distance away from the concentric circles.“
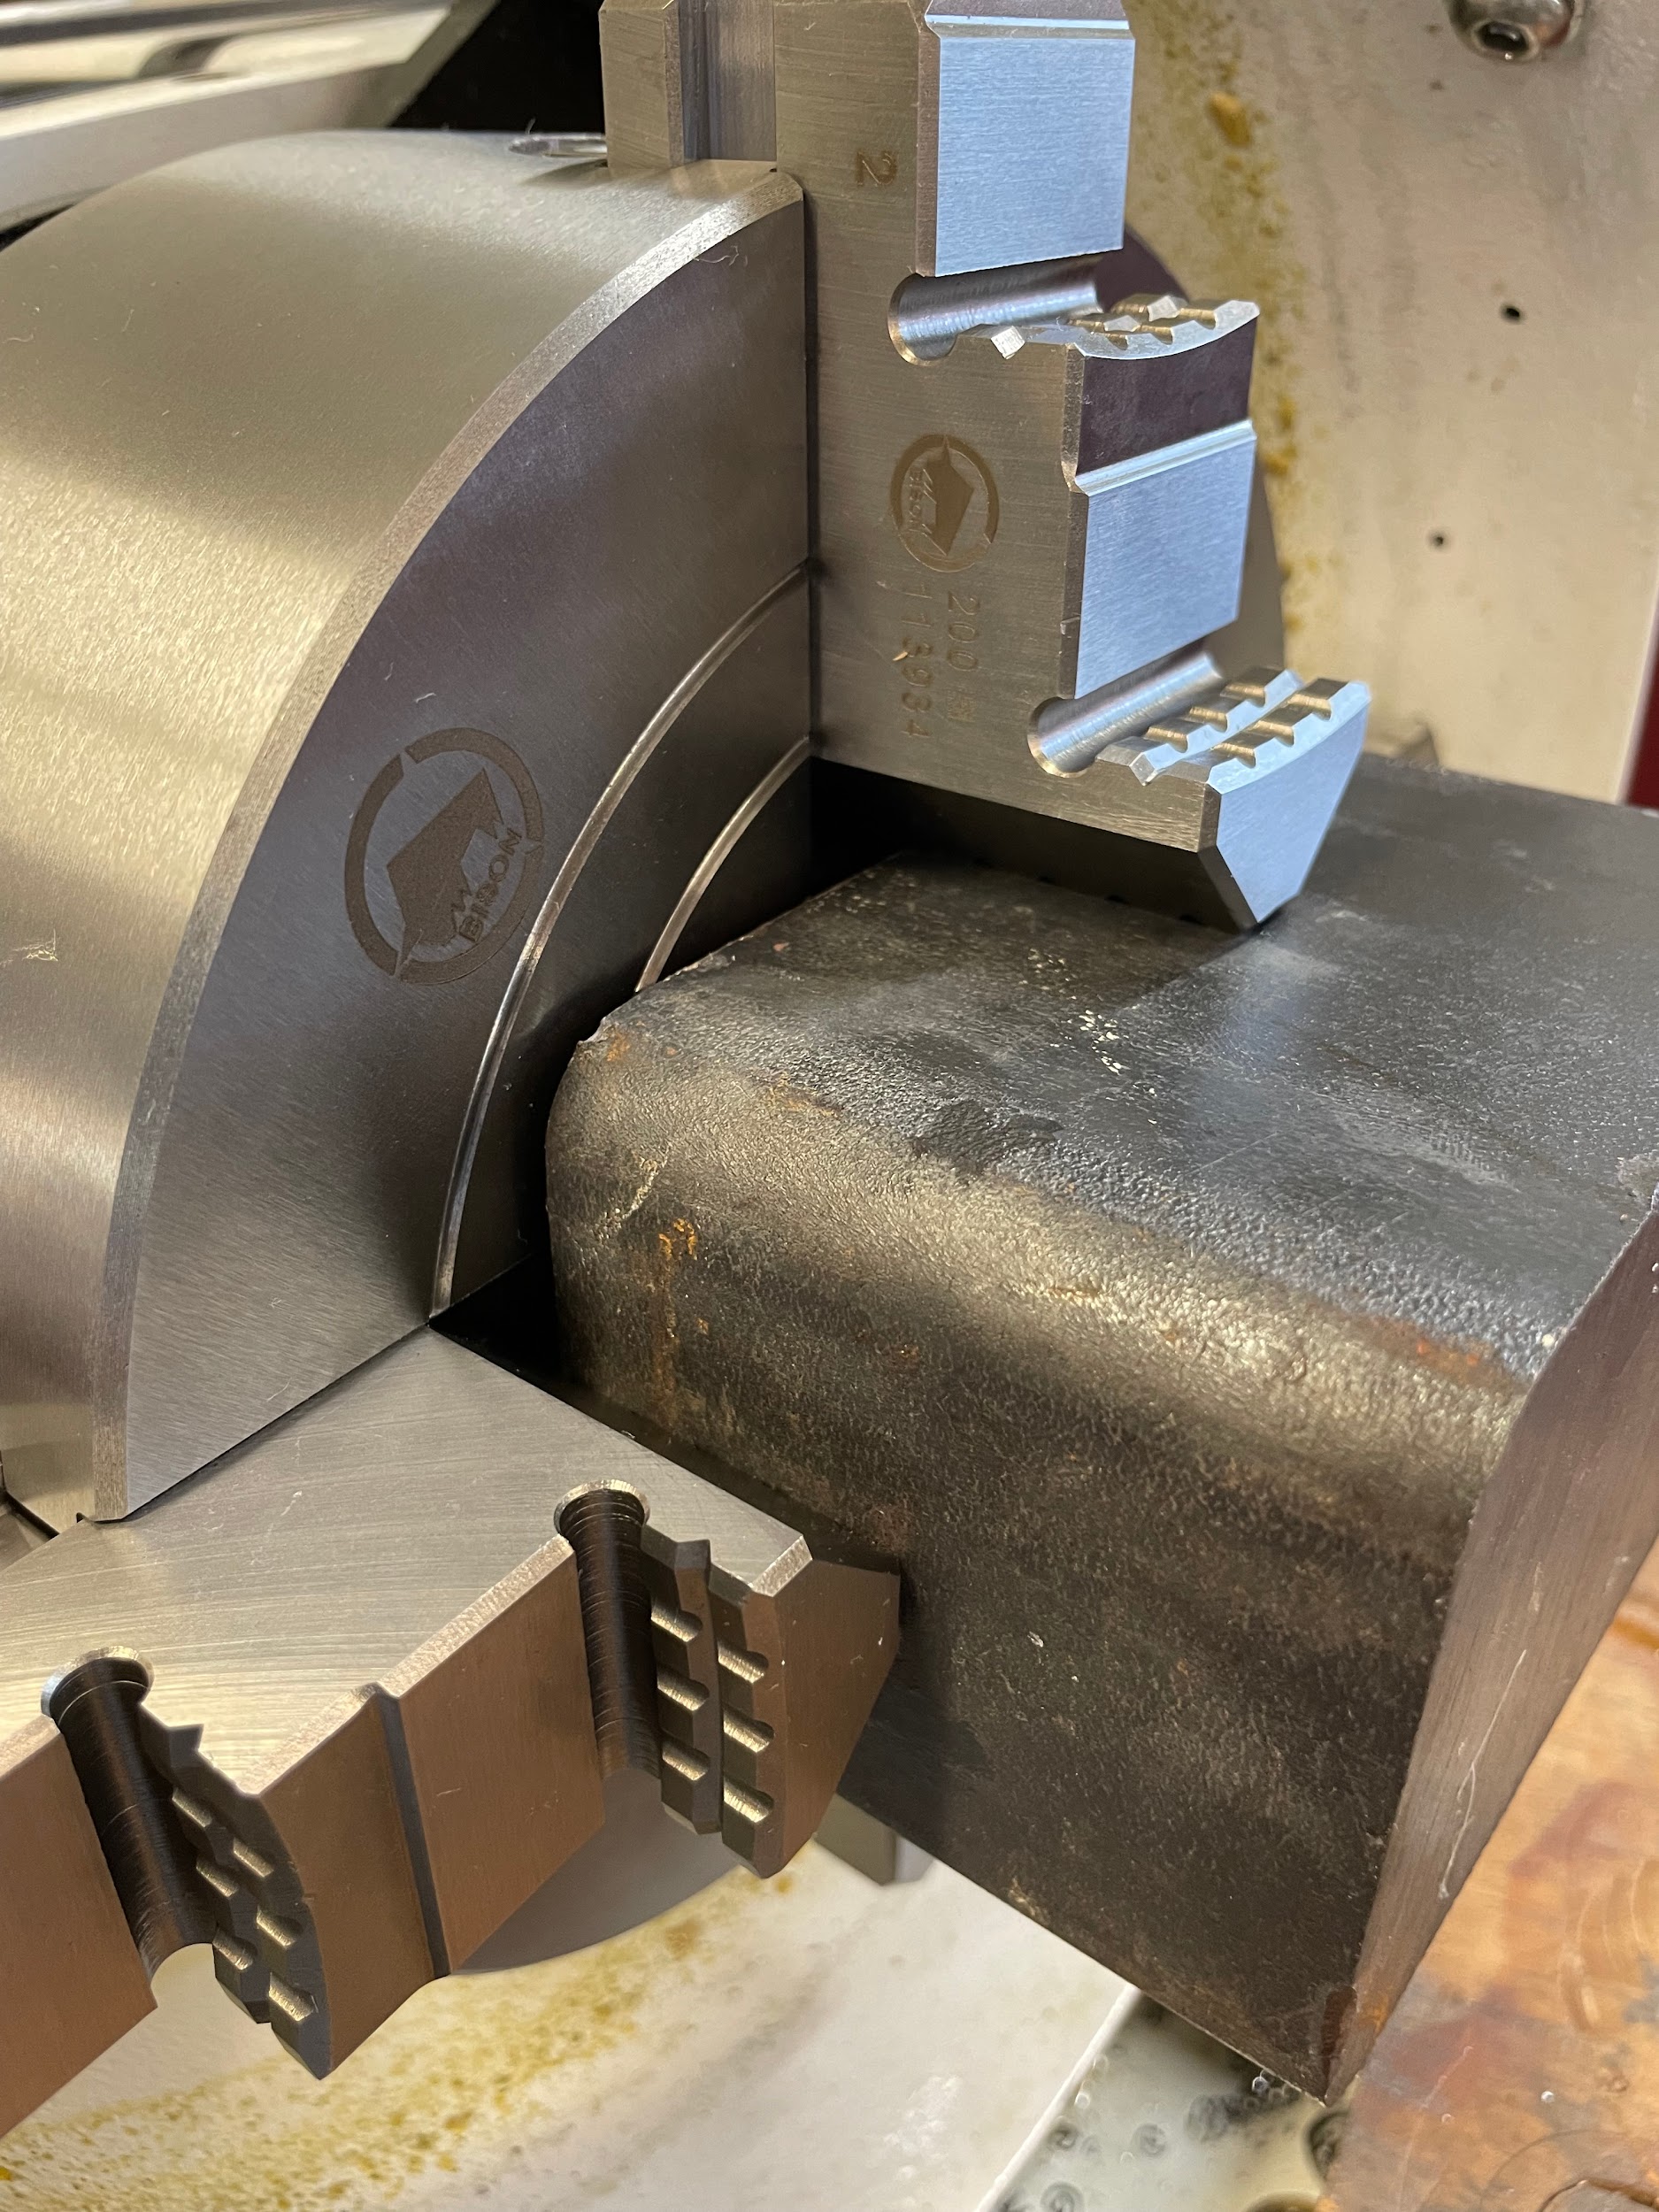
“Step 17: Once the acceptable amount of total runout is achieved at both ends, tighten the chuck fully and recheck the total runout.“
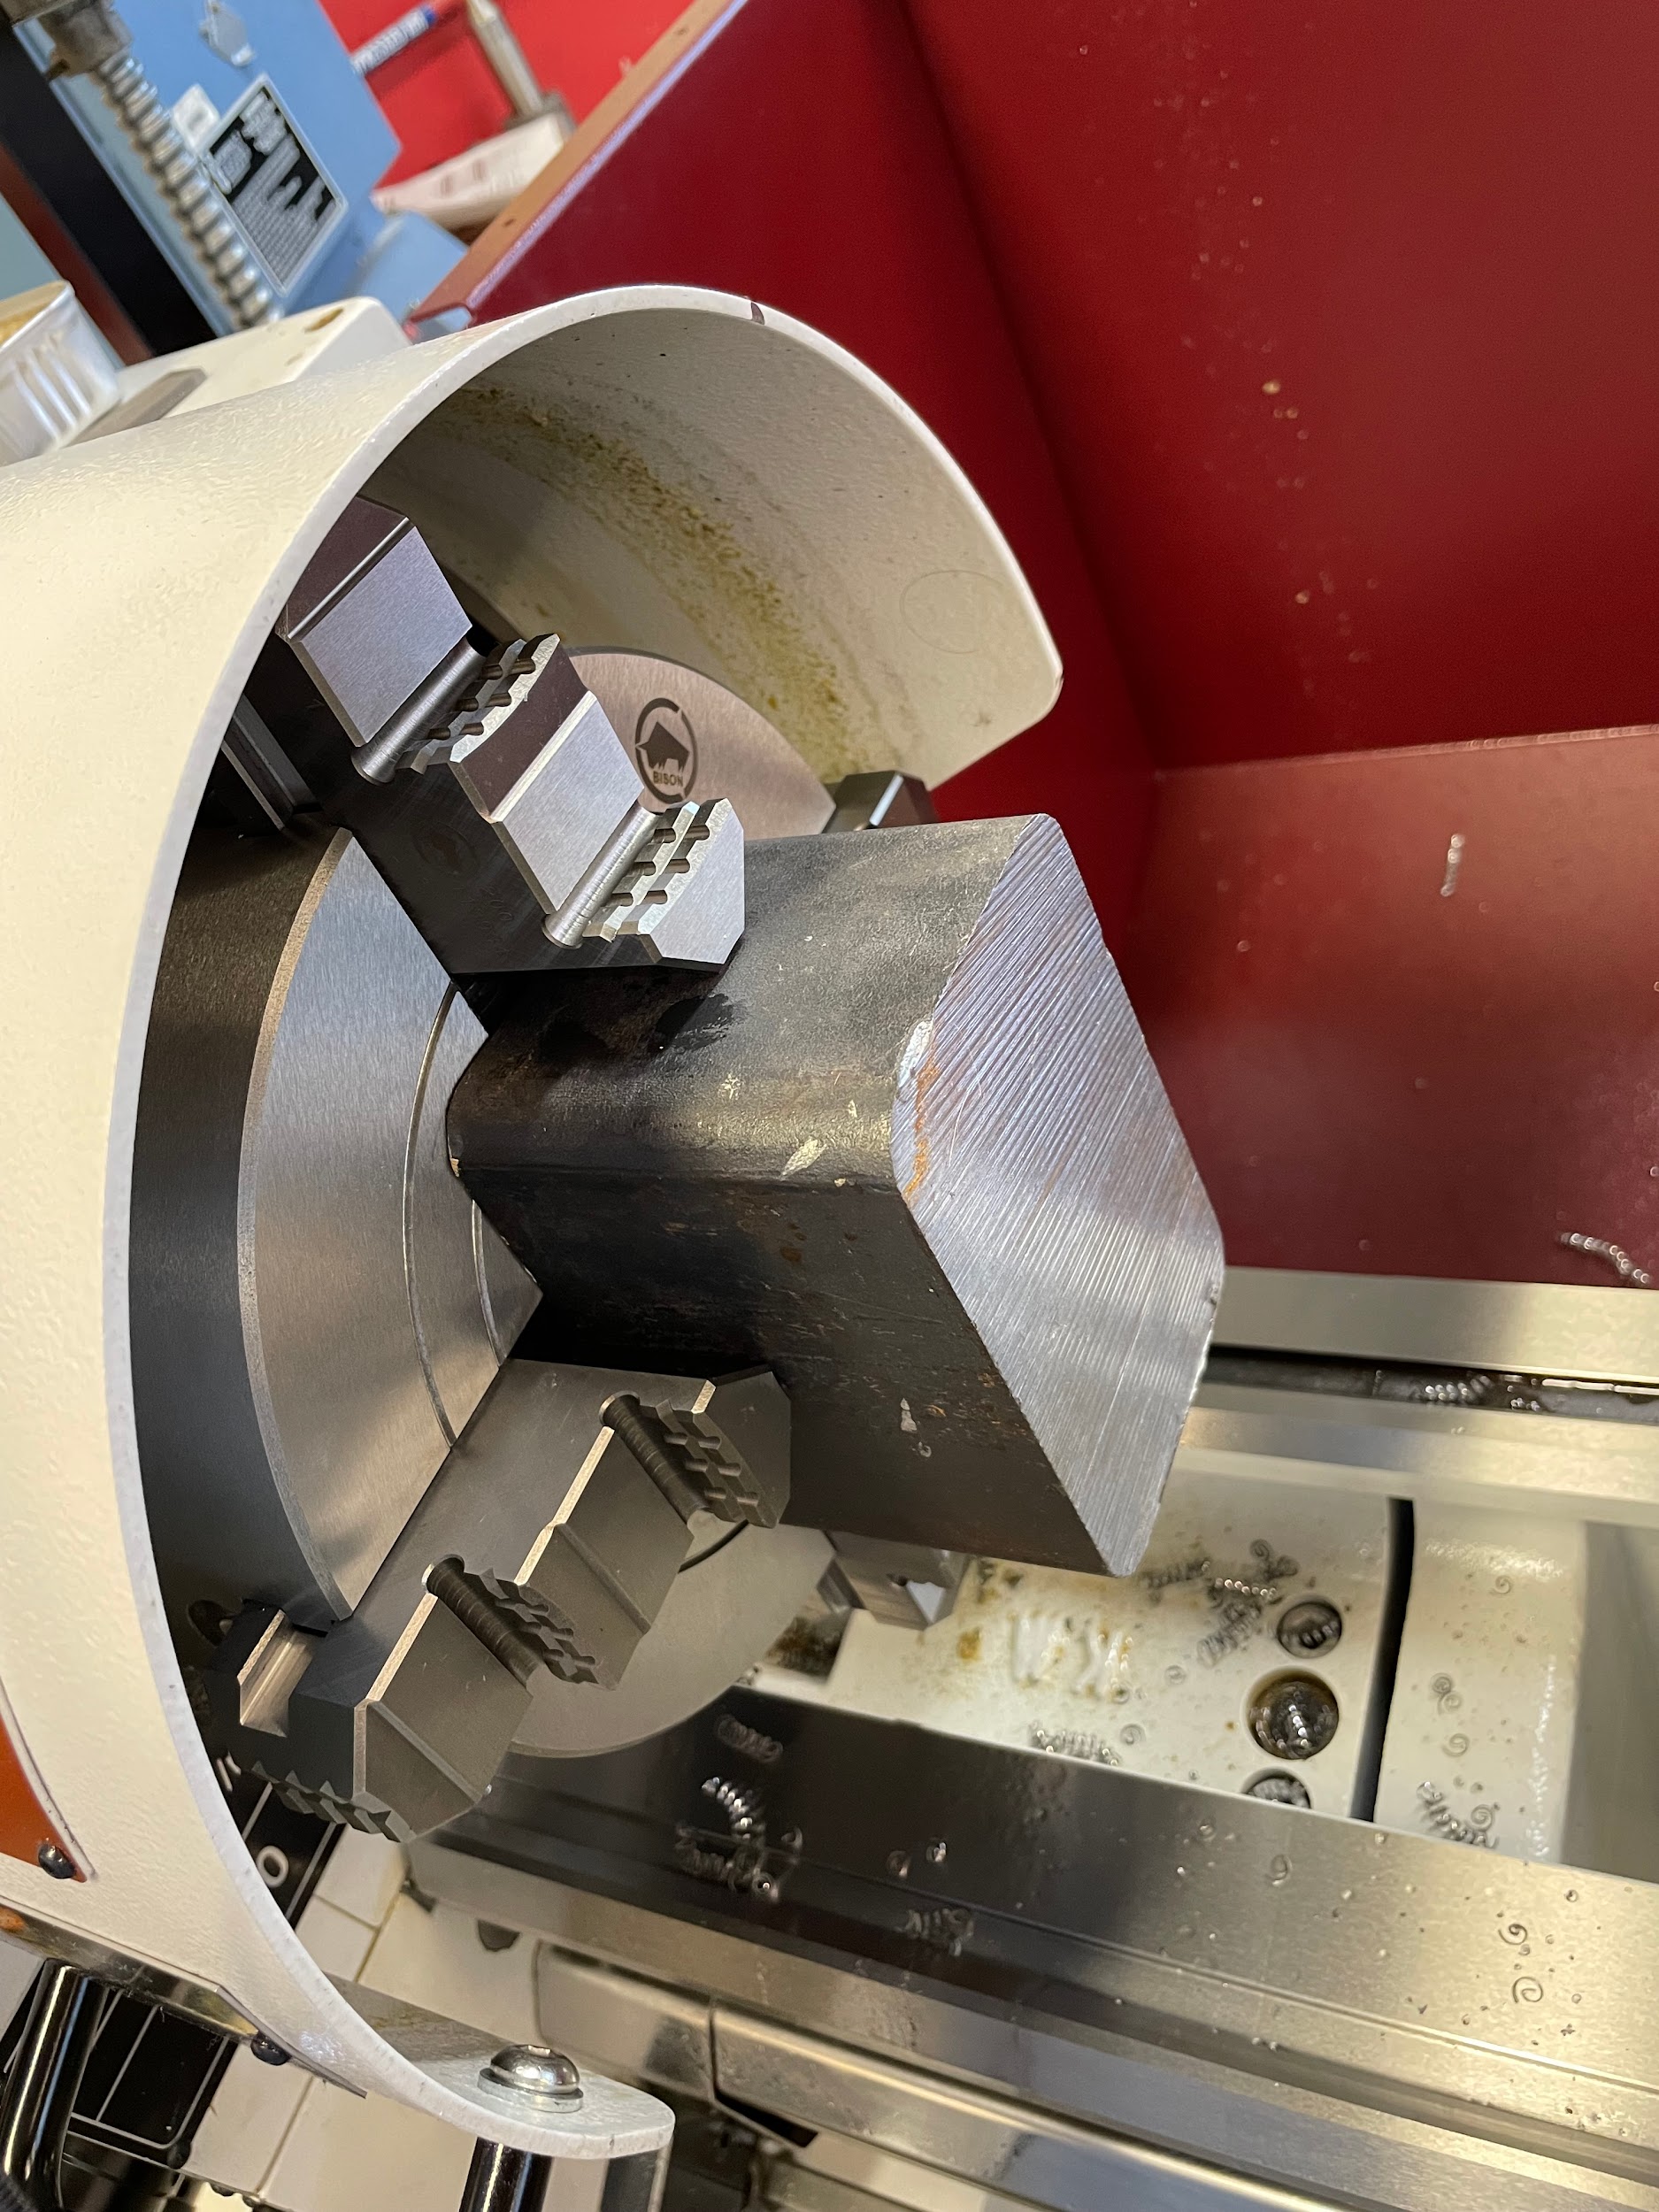
Tailstock
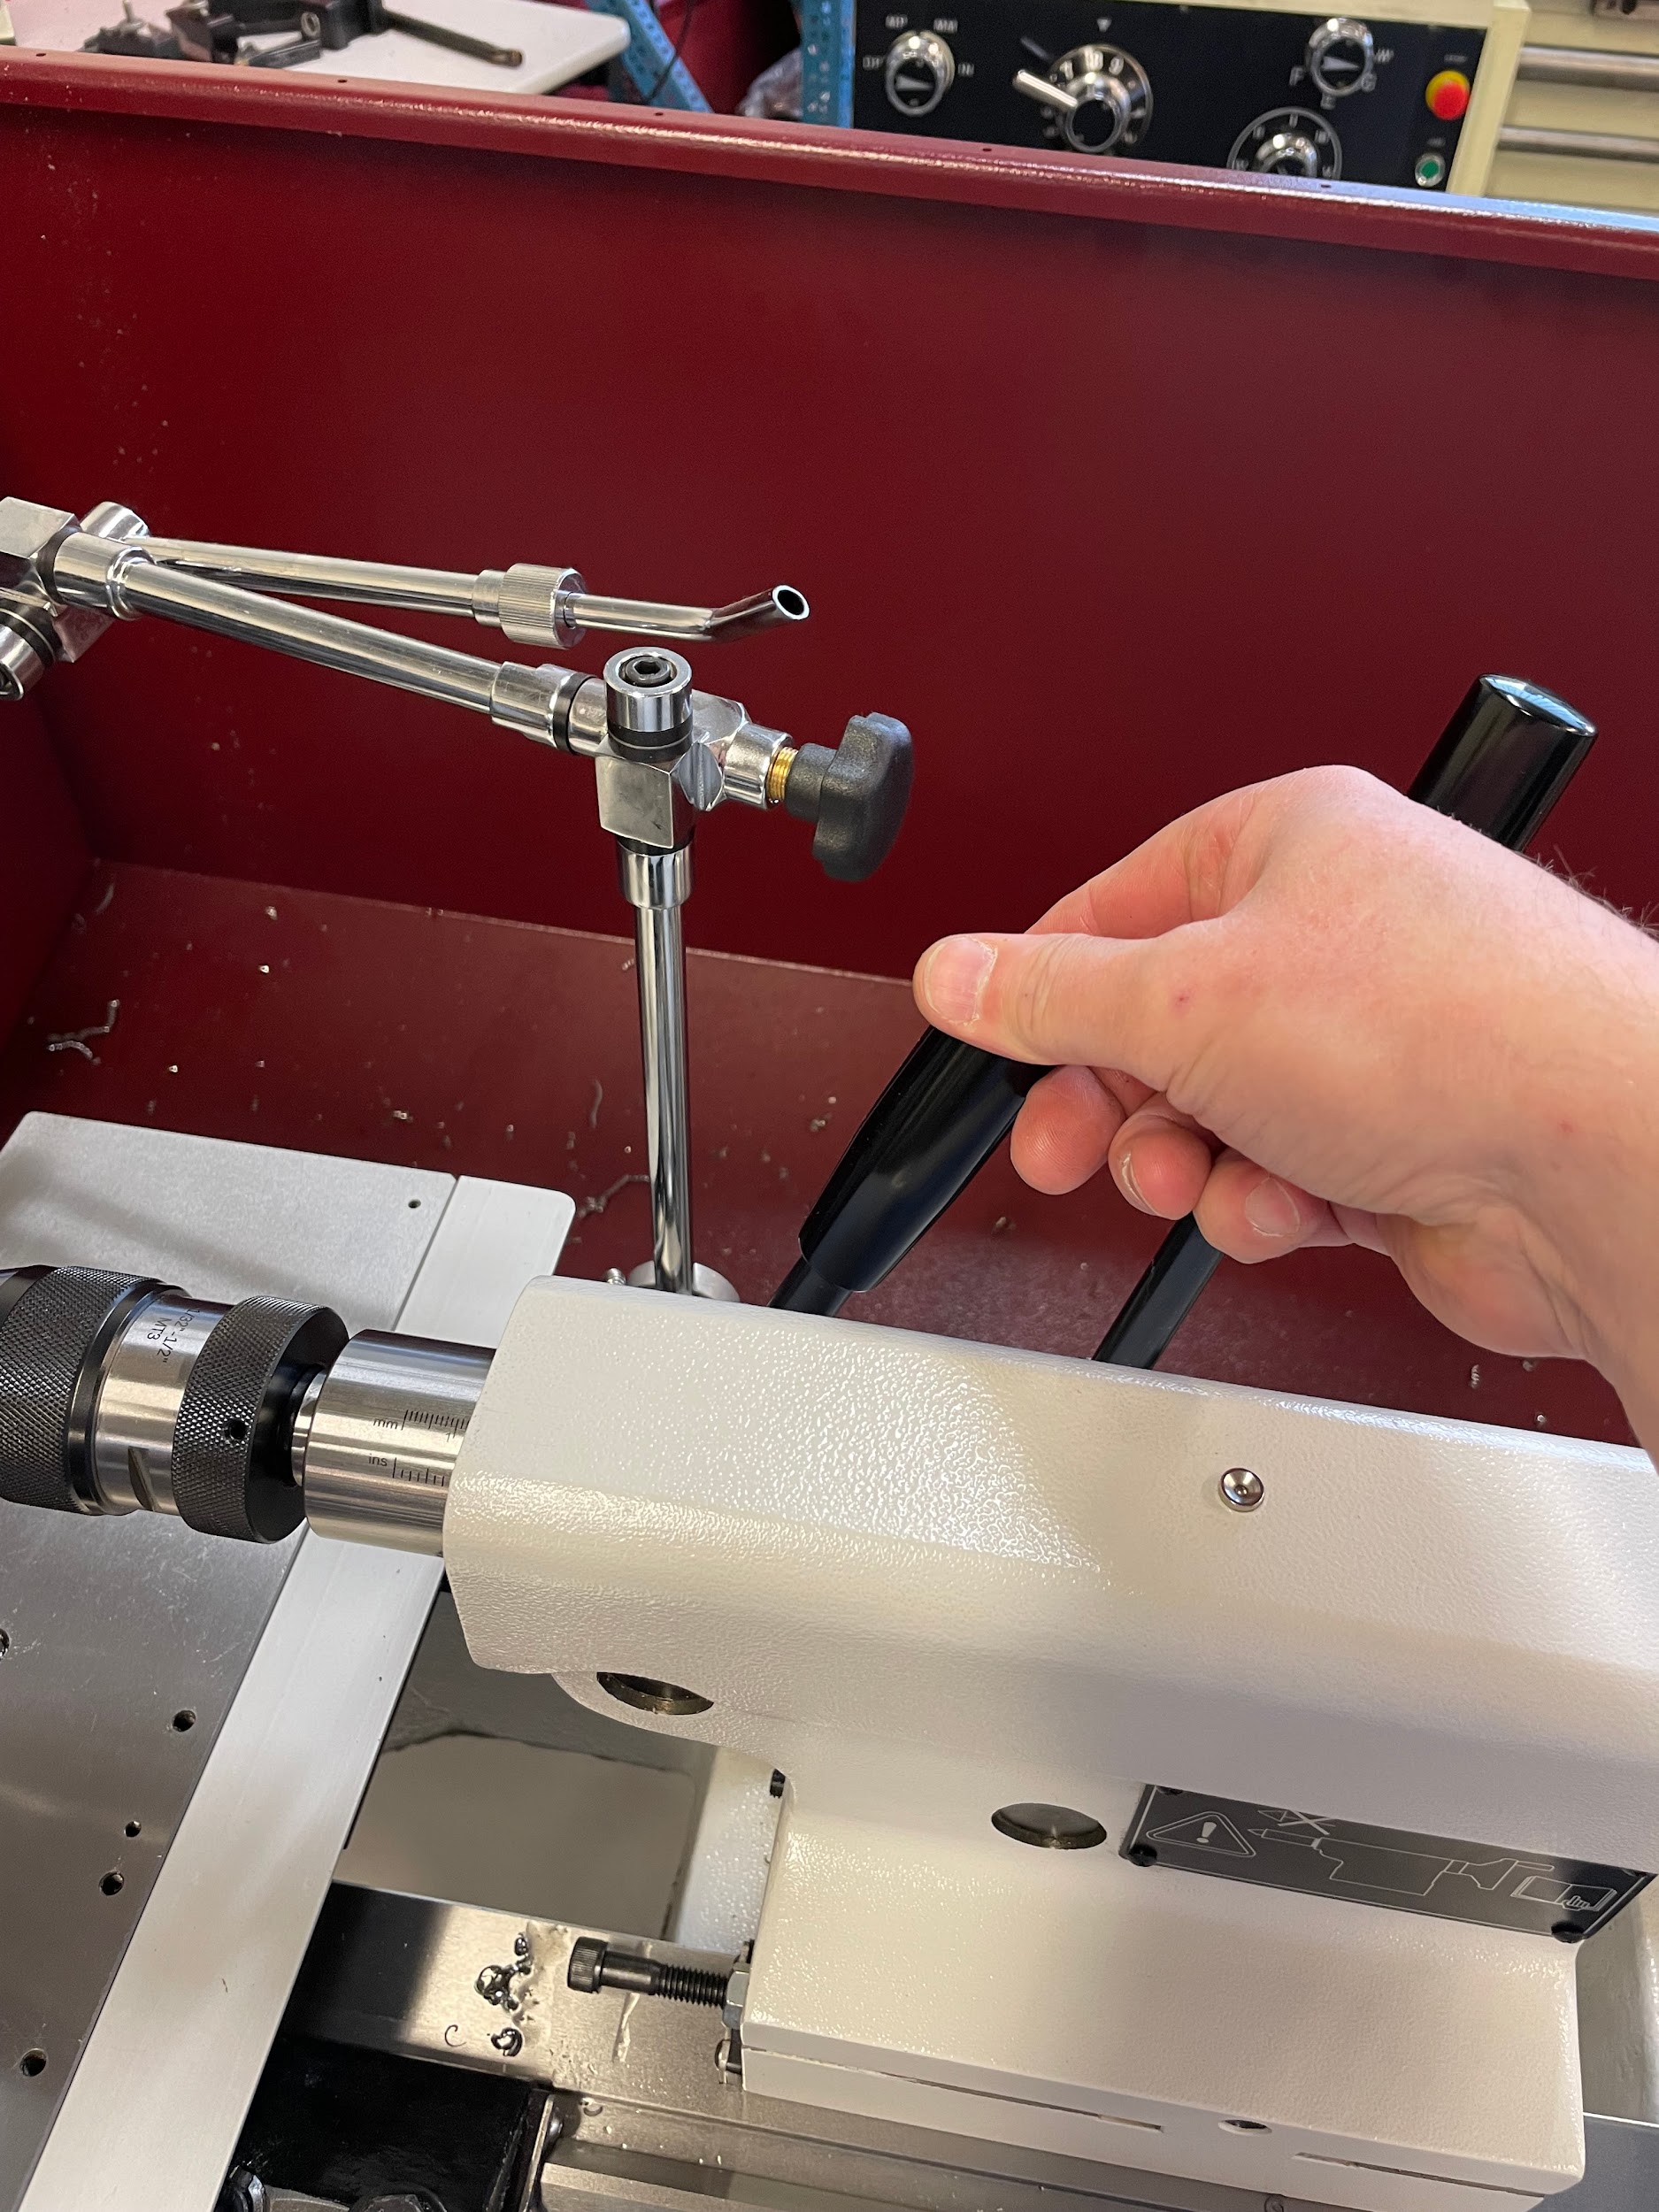
The tailstock is an important feature during work setup. Any work that needs to be extended out of the workholding device by more than 3x its diameter, or any work that is held by less than 1x its diameter, requires the extra support of a tailstock center. The tailstock center provides support to the work that would otherwise allow for the part to flex under the pressures of the cutting action. This flexing can create taper, chatter or other undesirable cutting conditions. The tailstock can also be used to intentionally hold the part off center so that a calculated taper angle is created.
Step by step process for setting up the tailstock:
- Position the cutting tool about a half of an inch in front of the end of the part. This will ensure clearance once the tailstock is placed.
- Clean the tailstock ways with a rag. Pay close attention to the area just in front of the tailstock base.
- Lubricate the ways.
- Gently retract the quill into the tailstock until it stops. This will make sure the quill is not retracted too far, helping with a rigid setup.
- Move the tailstock about a half an inch in front of the part by pushing on it. It may be lightly stuck to the ways if it hasn’t been moved in a while. Larger lathers may have a crank handle that will aid in moving larger tailstocks.
- Lock the tailstock in place by firmly applying the locking lever. On some machines, this may be a nut or bolt that gets tightened with a wrench.
- Clean the tip of the center as well as the center drilled hole in the end of the part.
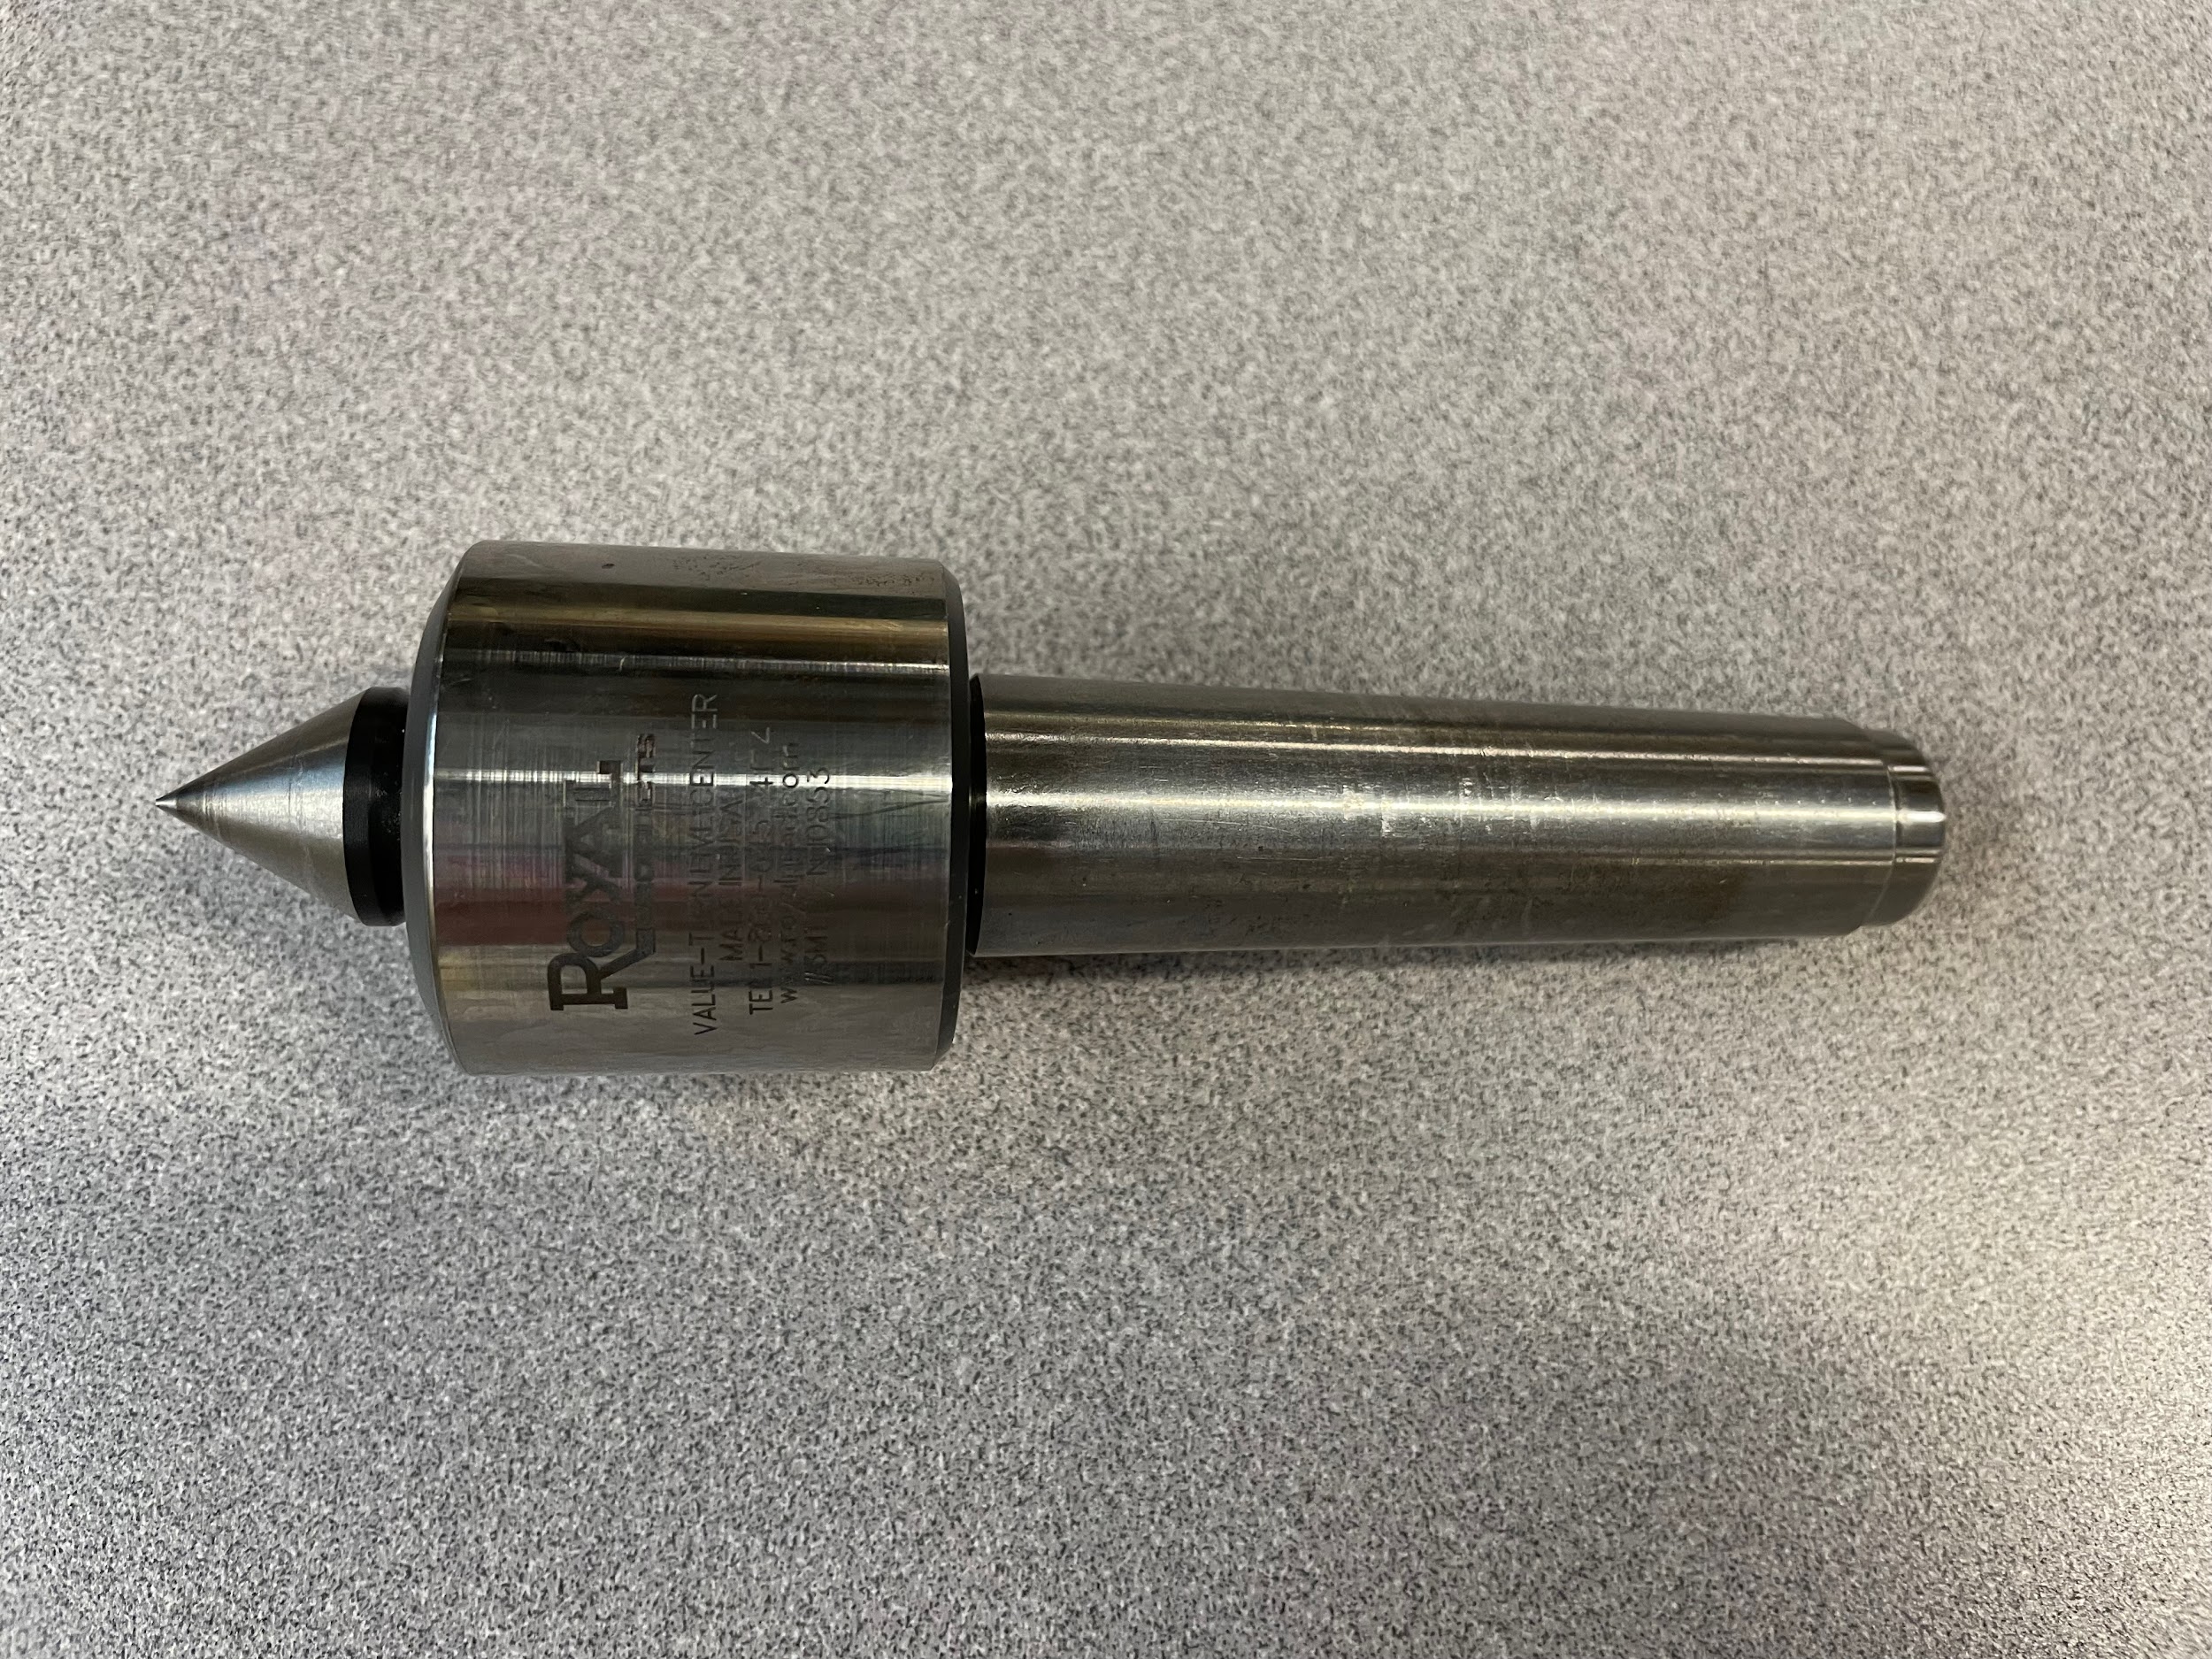
- Extend the quill until the live center mates with the center mark at the end of the part.
- Rotate the live center with the left hand while tightening the handwheel of the tailstock. Generally speaking, if the operator can rotate the center by hand, the tailstock isn’t tight enough.
- Lock the quill in place by firmly applying the quill locking lever. This will keep the quill from backing out during use.
“Step 6: Lock the tailstock in place by firmly applying the locking lever. On some machines, this may be a nut or bolt that gets tightened with a wrench.“
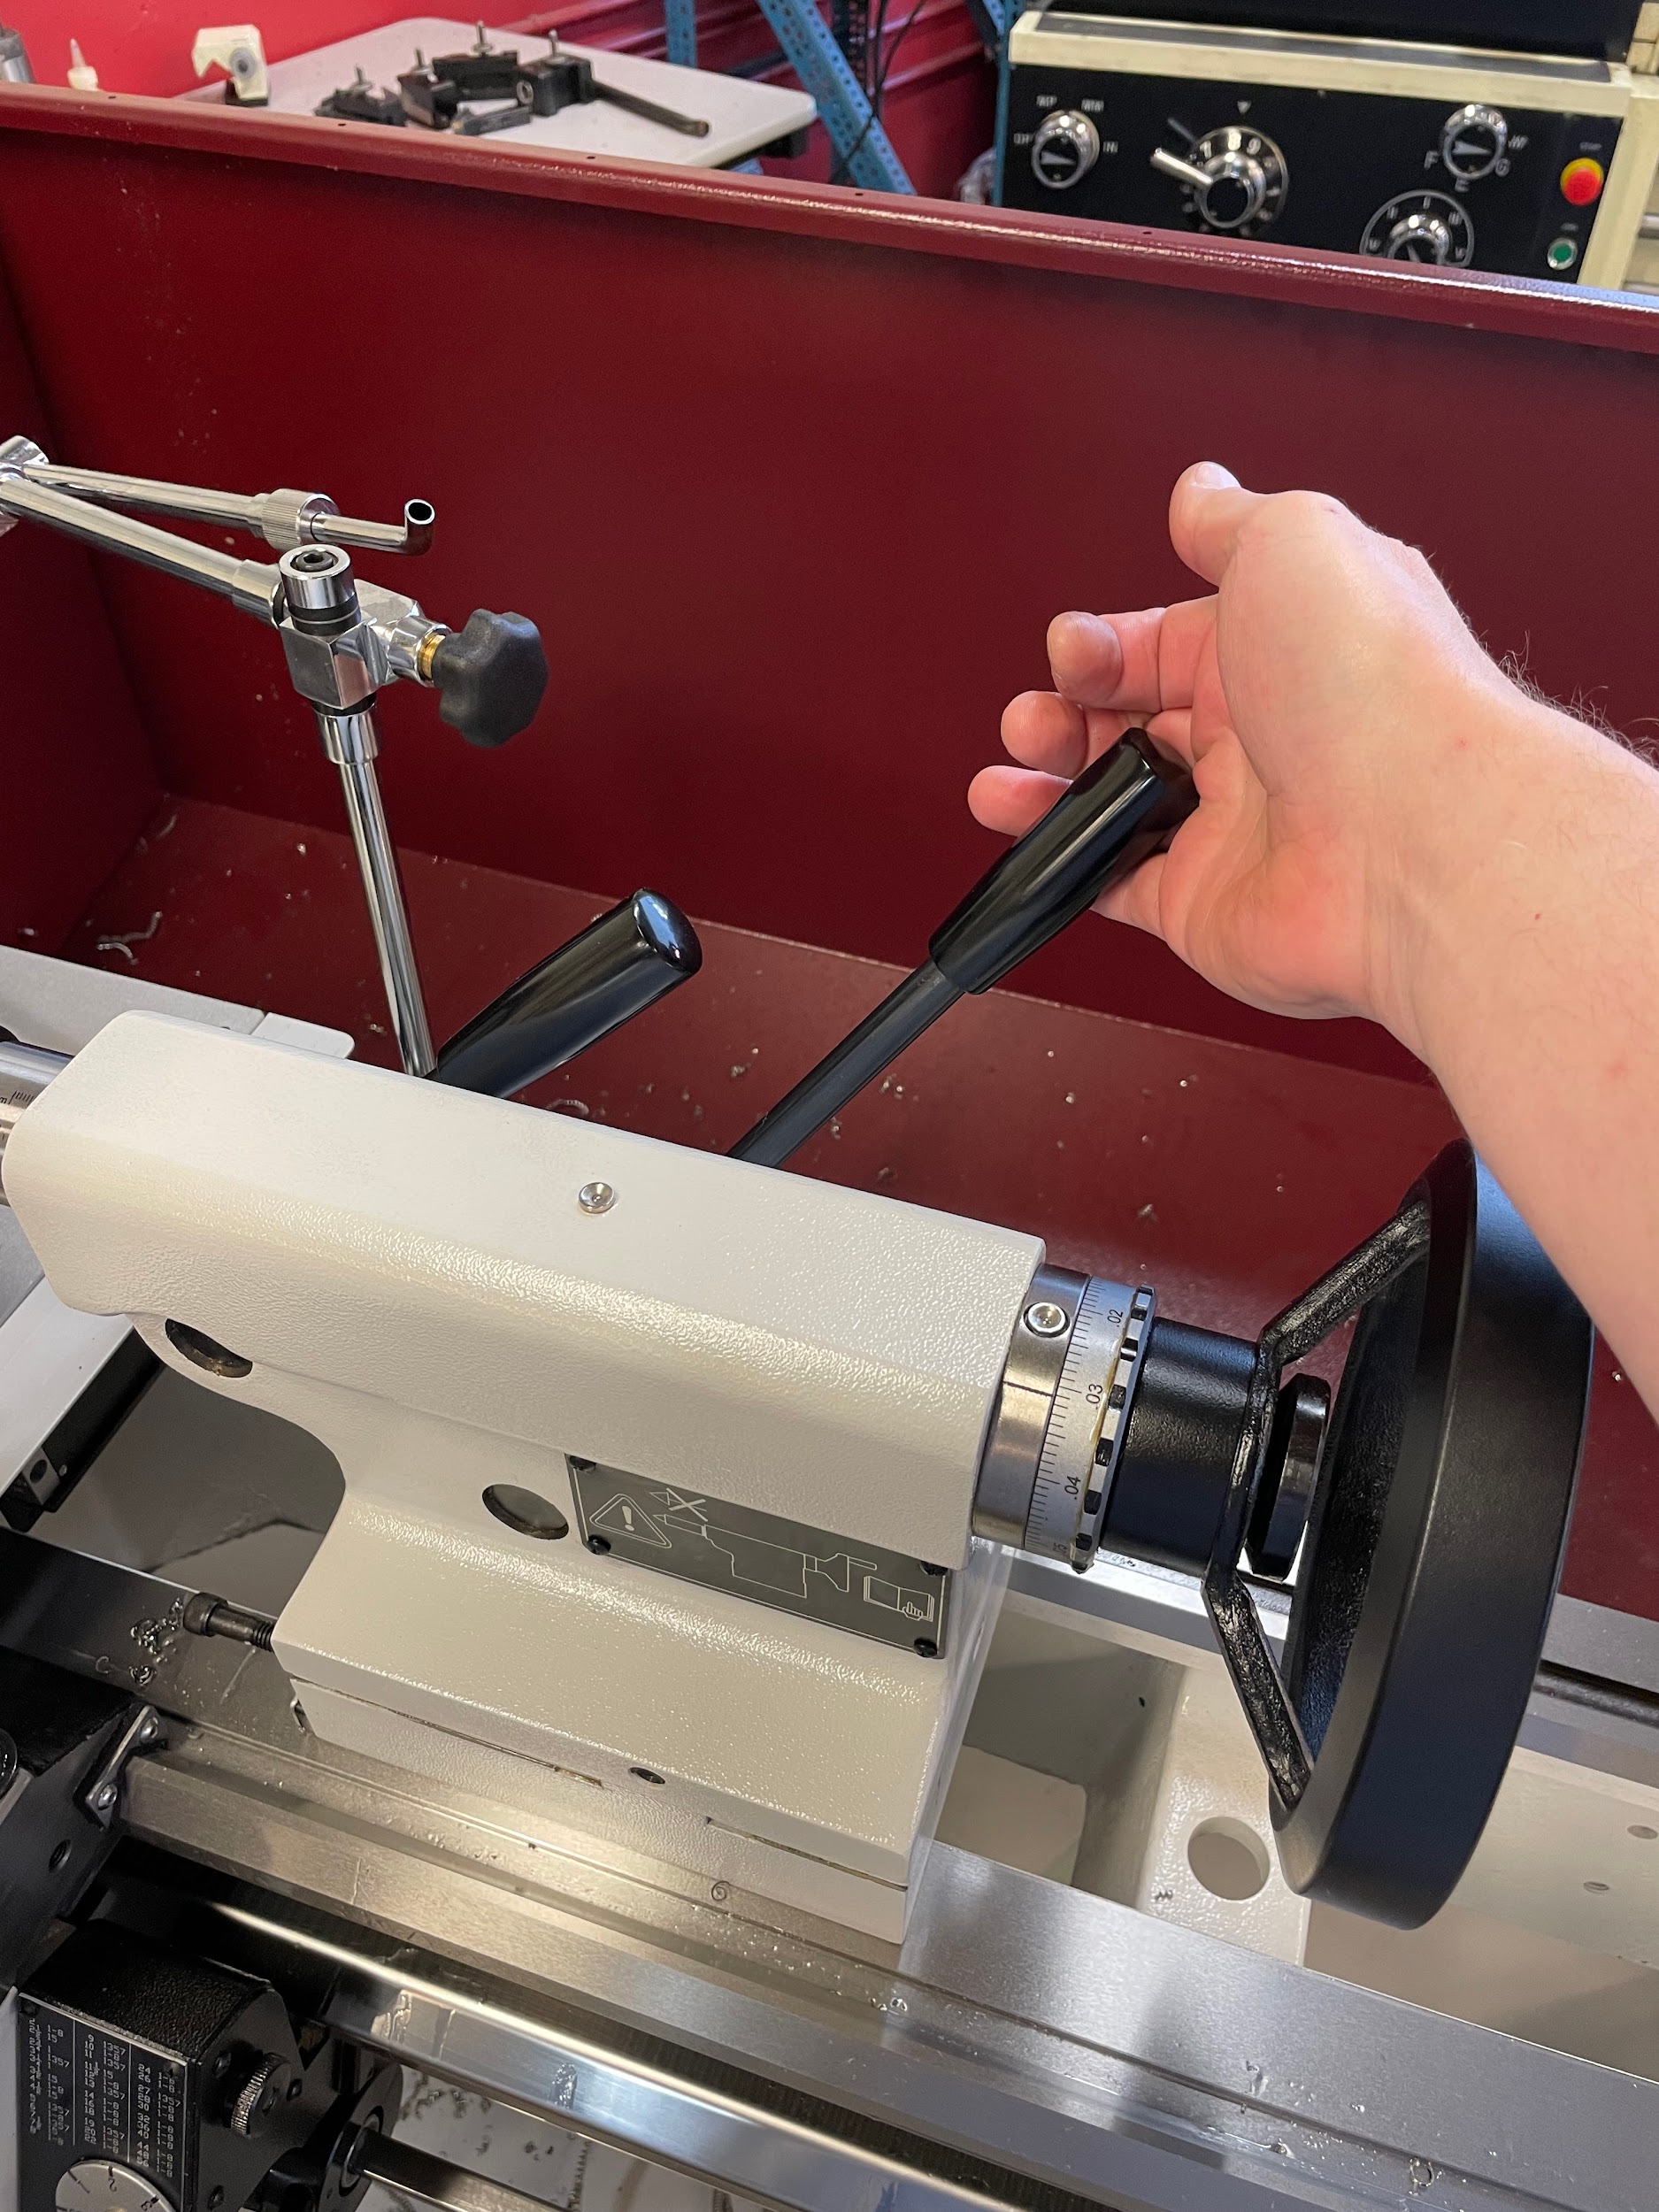
“Step 10: Lock the quill in place by firmly applying the quill locking lever. This will keep the quill from backing out during use.“
Between centers
Machining parts between centers is one of the best methods for controlling end to end runout. This is because the part is primarily being held by a single point at the chuck end and a single point on the tailstock end. One half can be cut on the lathe and then flipped to machine the second side. The setup involves installing a faceplate, a couple of mating tapers, a center in the spindle, a center in the tailstock, and a lathe dog.
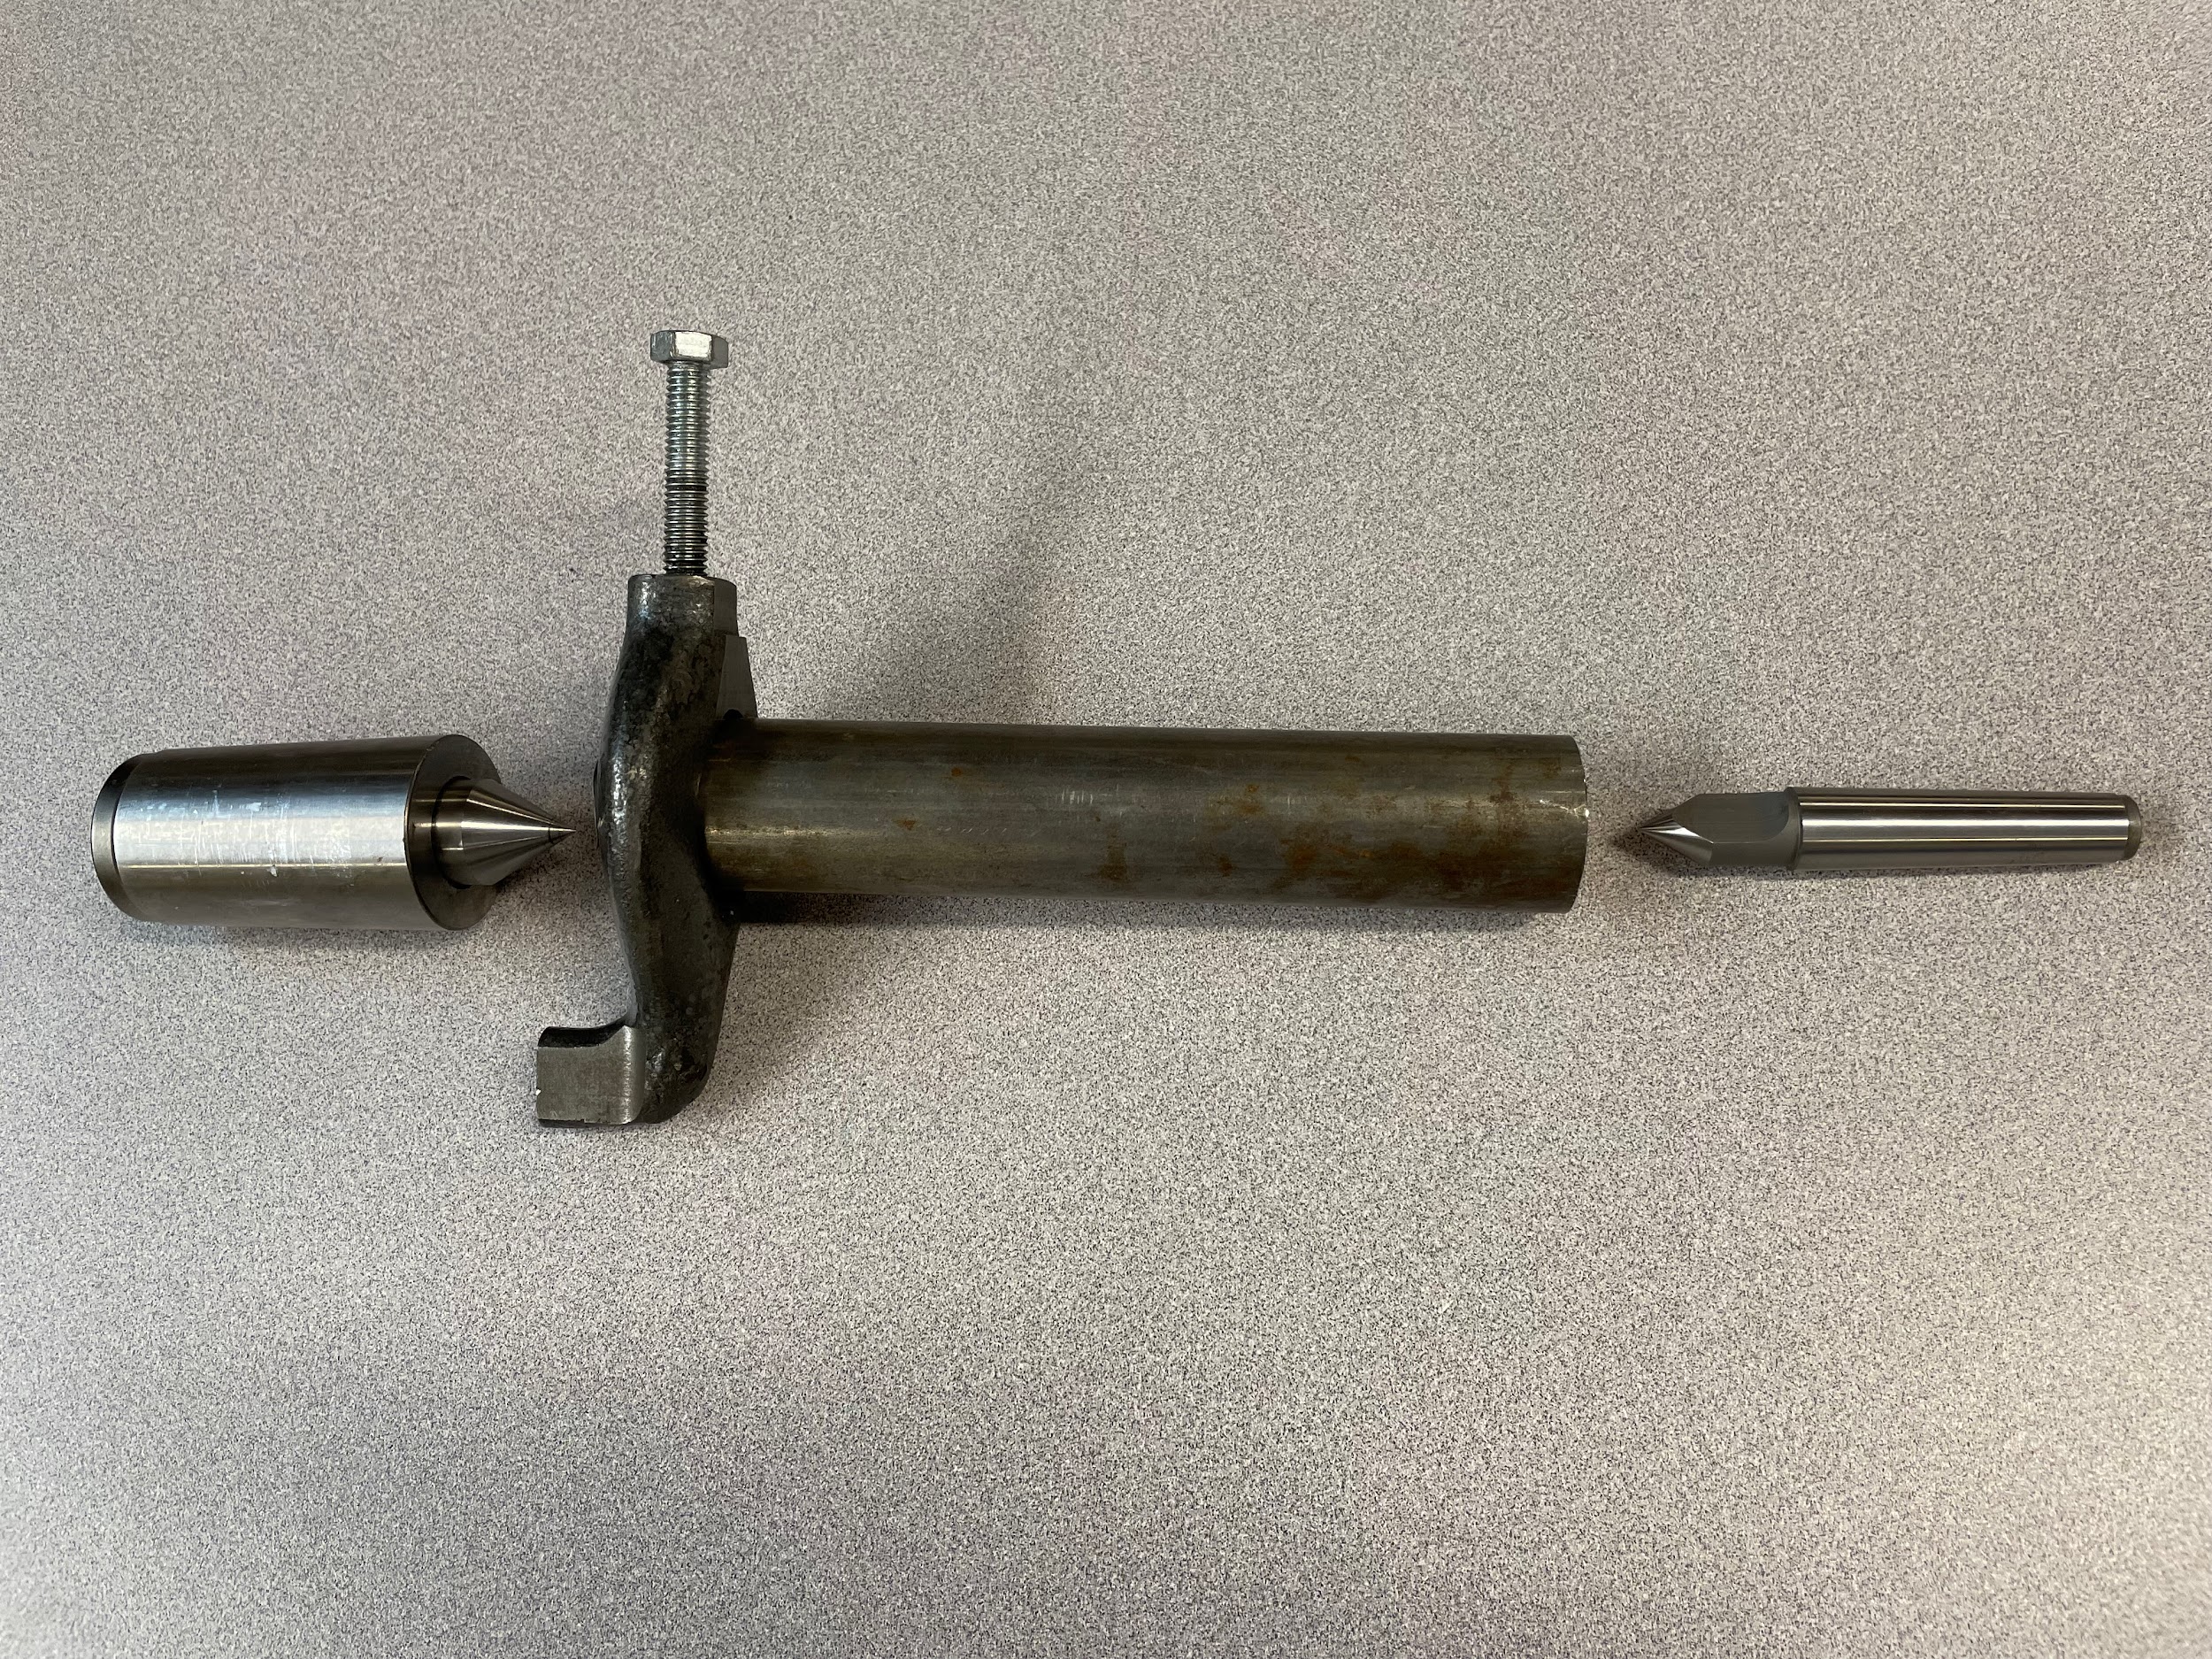
Step by step process for setting up work between centers:
- Remove any workholding devices attached to the spindle.
- Install a center and any required taper adapters into the spindle.
- Install the faceplate on the spindle. This will be used to drive the part.
- Install a center in the tailstock.
- Select and slide a lathe dog onto the first side of the part, with the tail out. Gently tighten the set screw into the part.
- Clean all the centers and center marks.
- Holding the part against the spindle center with the left hand, move the tailstock into position with the right.
- Secure and tension the tailstock.
- Loosen the lathe dog and reposition it to where the tail can slip into and be driven by a slot or hole in the faceplate.
- Tighten the lathe dog in place.
Author’s Tip
I personally do not like the multiple tapers, adapter, and center that using a traditional spindle center requires. When properly set up, it works, but using adapters and multiple taper contacts has the opportunity for runout. For that reason, I prefer to install a small chunk of quality steel into a three jaw chuck and turn a 60 degree center point. This has two advantages over the traditional center installed in the spindle. One, it eliminates all measurable runout at the center itself. Two, the jaws of the chuck can be used to drive the lathe dog, negating the need for the installation of the faceplate. I find completing the operation of making a center to take about the same amount of time as setting up the traditional spindle center, but with the benefit of zero runout and no teardown time.
Steady rest
Step by step process for setting up a steady rest:
- Move the carriage to the end of the table, where it will be used.
- Clean the ways where the steady rest will sit.
- Clean and inspect the bottom pads of the steady rest for damage and chips.
- Lift the steady rest onto the lathe and set it on the ways close to the carriage. This will help keep the cutting action as rigid as possible.
- Secure the steady rest in place by positioning the tee nut under the ways and tightening the bolt.
- Open the top of the steady rest and put the part in the lathe. The arms of the steady rest may have to be unlocked and backed off to get the part in place.
- Support the part between the chuck and the tailstock center.
- Close the top half of the steady rest and secure the latch mechanism.
- If using a steady rest with wear pads, apply some high pressure grease to each pad.
- Unlock the arms and adjust each one inward to lightly touch the workpiece.
- Go back around to each adjustment and make each one snug with fingers only. If they are too tight, the bearings or wear pads could be damaged; if they are too loose, the part will not be secure, and chatter or deflections could occur.
- Lock the movement of the support arms with the set screws or locking levers.
Follower rest
Step by step process for setting up a follower rest:
- Move the carriage to the end of the table, where it will be used.
- Clean the pads on the carriage where the follower rest will sit.
- Clean and inspect the bottom pads of the follower rest for damage and chips.
- Lift the follower rest onto the carriage.
- Secure the follower rest in place by bolting it to the carriage.
- Put the part in the lathe. The arms of the follower rest may have to be unlocked and backed off to get the part in place.
- Support the part between the chuck and the tailstock center.
- If using a follower rest with wear pads, apply some high pressure grease to each pad.
- Unlock the arms and adjust each one inward to lightly touch the workpiece. Finger tight only. This is easier done at the chuck or tailstock ends because the material is more rigid. If done in the middle of the part, there may already be sag in the part, or it may be easier to overtighten the arms.
- Lock the movement of the support arms with the set screws or locking levers.

