Chapter 5 Part 1: Benchwork
Learning a new skill has several important steps. Since you must communicate with others in your field, you will need to learn the vocabulary of new terms which differ from trade to trade. This chapter will aid you in learning the tooling and terms utilized when performing benchwork. Benchwork is the term used when you are using hand tools to fabricate a part. The basics involve having a means to hold the work while you machine it. By the end of this chapter you will be able to select the correct tool for the job and describe how these tools are used by skilled tradesmen.
OBJECTIVES
- Exercise safe practices with off-hand grinding.
- Correlate grinding wheels to the operations being performed.
- Describe the purpose and use of basic hand tools and power tools.
- Apply semi-precision measurement to part layout.
KEY TERMS
- Benchwork
- Bi-metal
- Annealing
- Chamfer
- Dressing
- Drill Guide
- File
- Layout
- Layout Dye
- Punch
- Runout
- Safe Edge
- Scribe
- Straight edge
- Tap Drill
- Thread Tap
- Thread Tapping
- Threading Die
- Tool Rest
- Transfer Punch
- Workholding
- 3X Rule of Saw Teeth
5.1 What is a Layout and Benchwork?
Layout is a term used to define the process for placing part feature markings onto the surface of the stock the part will be made from. Children’s sketch books usually have projects where you cut out shapes with a pair of scissors by following specific lines already printed on paper. In this example, the lines are the layout of the part you are to create. For the machinist, the part stock is usually metal, and the tools used to create the layout lines are many and designed for a particular purpose. The process of layout falls under a category of work referred to as benchwork. Benchwork is a semi-precise method of machining performed using hand tools and a bench vise to hold the stock. Having benchwork skills is important for the fabricator who is repairing a part or making a prototype part where extensive machining processes are not reasonable due to the time investment of setup and programming of more sophisticated machine processes.

A dart board is a good example of precision and tolerance. Let’s take the bull’s eye for example. A dart must be placed in the area that defines the bull’s eye zone. It may be a little left, right, high, or low and still count as a score. The goal is to land in this zone, which is like a part dimension, and the size of this zone is the tolerance, meaning that as long as the dart lands in this zone, the goal is achieved.
For the machinist, we usually have small tolerance zones that must be maintained; however, there are instances where the tolerance zone is larger and more forgiving. If we applied all the principles used to maintain tight tolerance, time and energy would be wasted. This is where semi-precise methods may be used, and we typically refer to those methods as benchwork. Semi-precise is a term used to explain a lower level of detail in manufacturing processes.
Tools used to perform benchwork operations are rulers, protractors, dividers, trammels, squares, and straight edges. A straight edge performs a similar function as a ruler when creating a straight line, but a straight edge is a precision ground tool that has a more accurate edge than a ruler. Most of these tools have been superseded due to the ever lowering cost of more complex measuring and layout equipment, but using equipment that needs no batteries and is of simple design has value for benchwork tasks.
5.2 Stock Preparation
Every job begins with the stock. Whether it is a CNC production job or a simple benchwork job, this requires us to select the correct type and size of material. Most material is in bar form, which is too large for our needs and must be cut to length. Since this chapter is about benchwork, this will require the use of a manual saw such as a hacksaw. A hacksaw is a manual saw designed for cutting tough materials such as metals, using a back and forth cutting action.
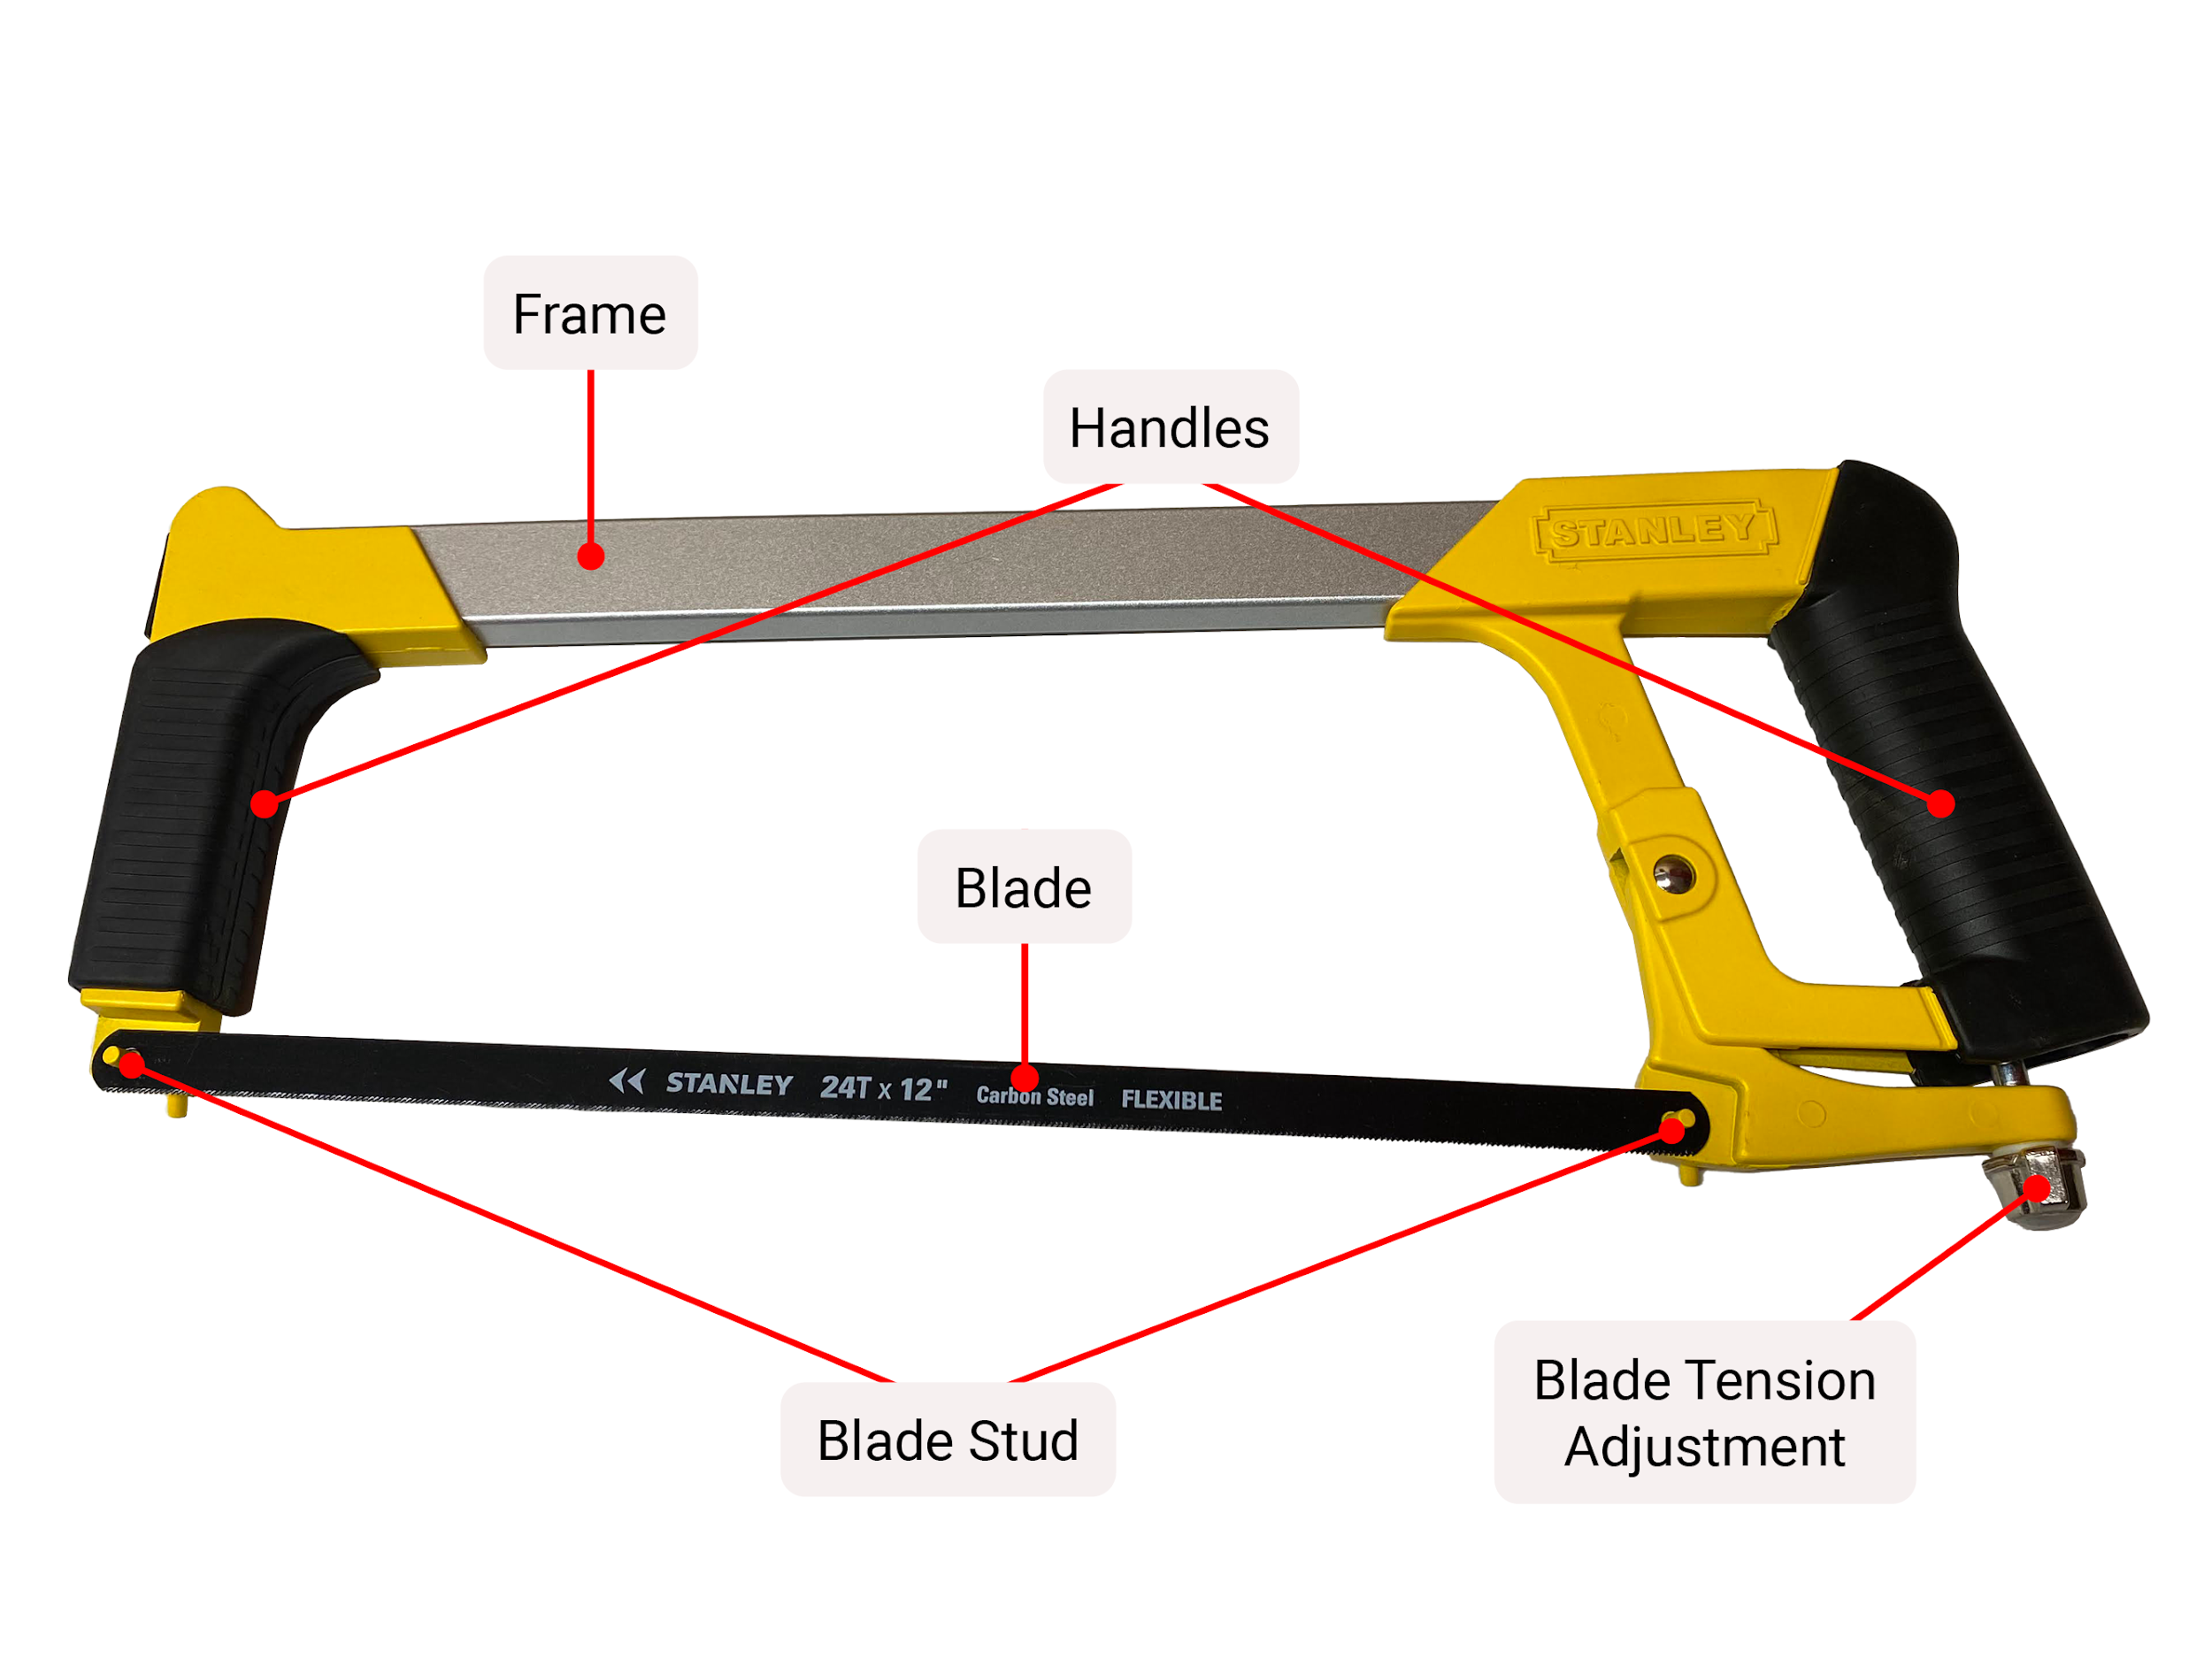
The features of a hacksaw all serve the purpose of holding a blade in a rigid manner so as to allow the operator to stroke the saw in a back and forth motion, allowing the blades cutting teeth to sever the material. There are several models of hacksaws, but they all serve this purpose. Holding the blade tight and preventing it from wobbling is the purpose of the blade studs and tension adjustment. A hack saw blade has a rather high tension to prevent movement during use. A large frame prevents bending, and robust handles allow the operator to grip the saw in a comfortable and firm manner.
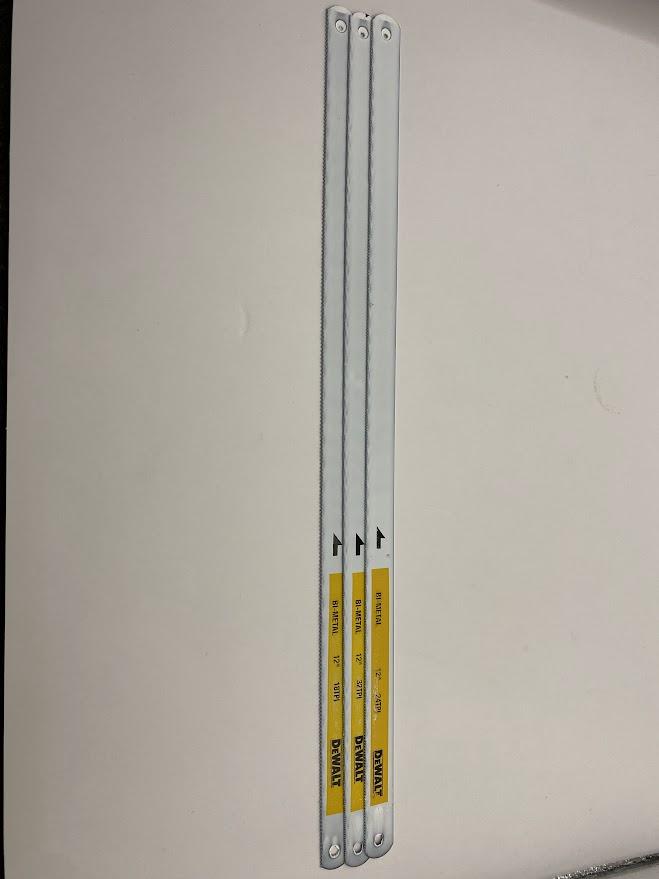
The most common hacksaw lengths are 10” and 12”. This length refers to the blade’s length. A selection of saw blades is required due to the need to coordinate the pitch of the cutting teeth with the thickness of the material being cut. Blade length, number of cutting teeth, and blade material are the three primary considerations when choosing a saw blade.
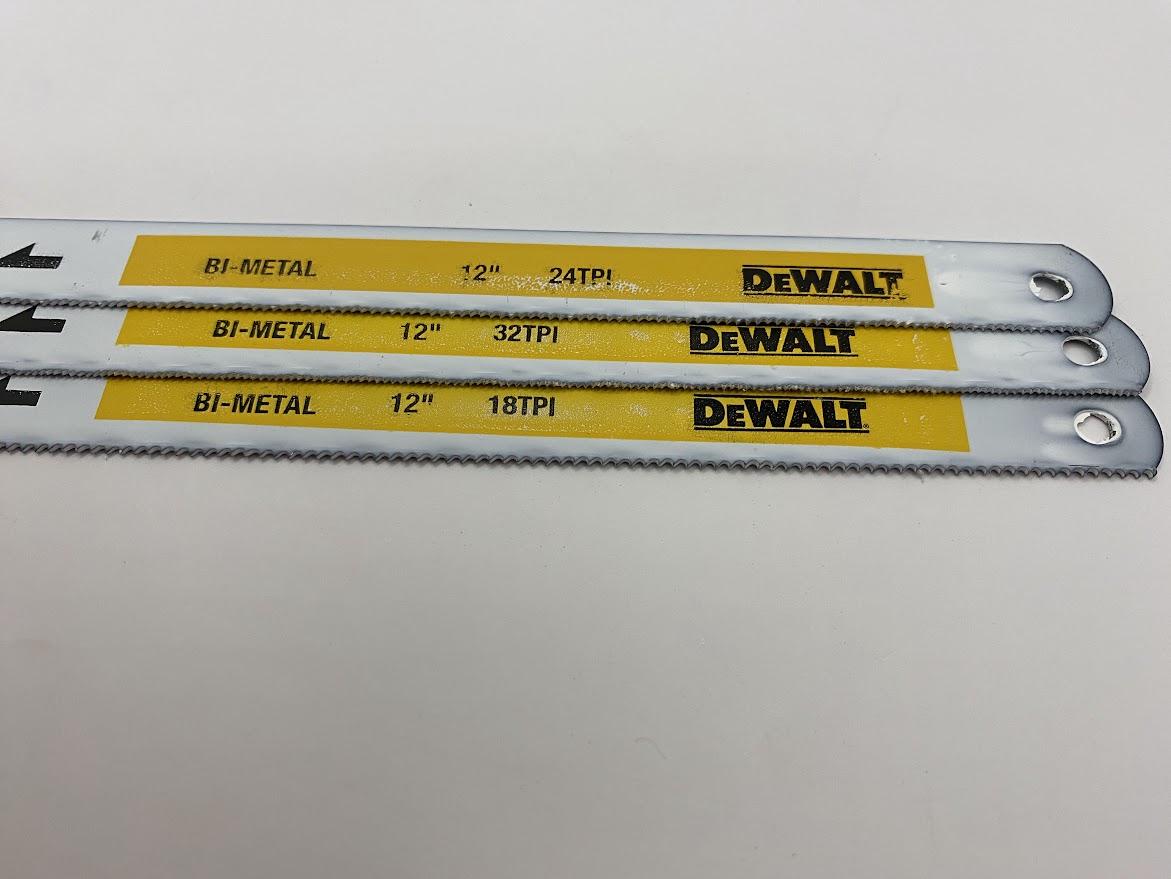
Blade material must be harder than the material being cut and the most economical quality blades are bi-metal. Bi-metal blades are constructed of two types of metal. The blade body, which makes up the majority of the blade, is made from quality carbon steel but the cutting teeth are made from a harder material which is often heat-treated and tempered for better cutting performance.
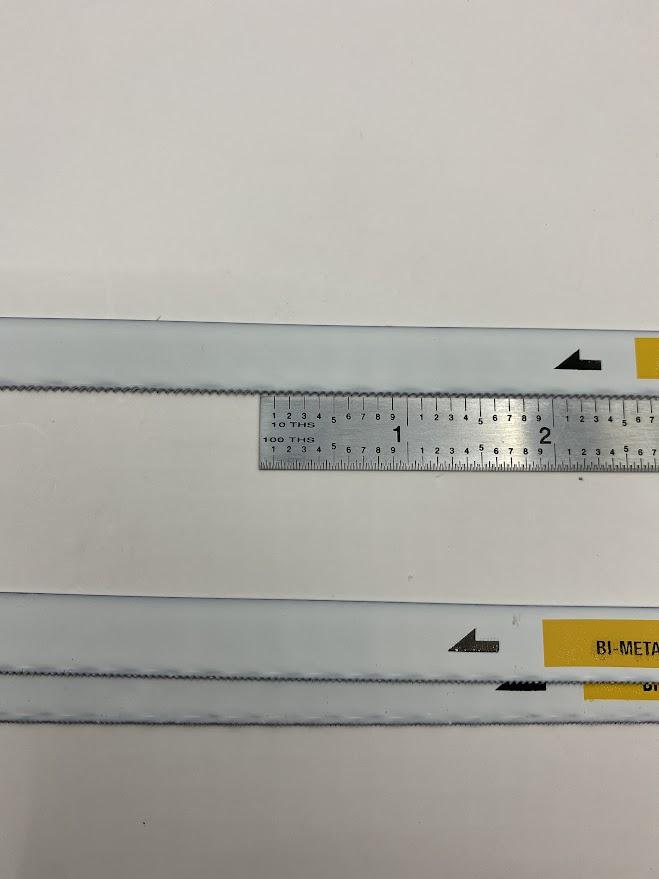
Selecting a blade with the correct number of teeth is critical to saw performance. Saw blade teeth quantity is expressed in Teeth Per Inch (TPI). In the figure above, the saw blade has 18 TPI. In order to select the correct blade, the operator must know the material thickness. This may sound a bit odd, but depending on how the blade is positioned during a cut, it affects the function of the cutting teeth. The distance between two adjacent cutting teeth on a saw blade is referred to as the saw blade pitch. To calculate blade pitch, divide one inch by the TPI.
1inch/24TPI=.041″
1inch/32TPI=.031″
The need to perform this math will become evident when selecting a saw blade.
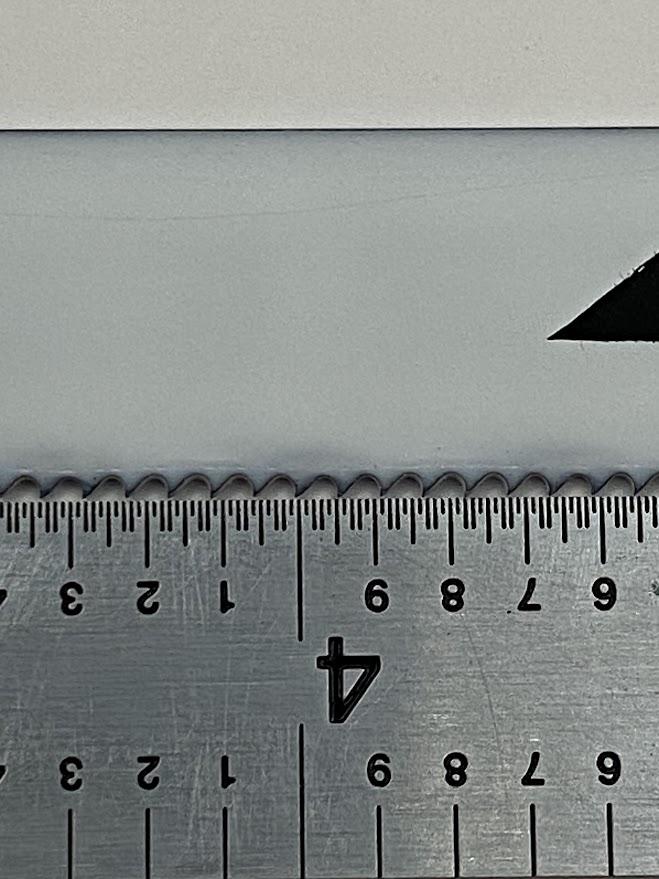
In the figure above, you can see the blade’s cutting teeth arrayed along the length of the blade. There are edges that will sever the crystalline structure of the metal, creating a chip. The gap between the blades cutting teeth is a gullet. The purpose of the gullet is to provide space for the chip to occupy while the blade is buried inside the stock material. The gullet size is established by the TPI of the blade. More teeth means smaller gullets, and vice versa. This characteristic of a saw blade is the reason the correct saw blade must be selected. If the material is too thin, it will fall into the gullet between the cutting edges and bind the saw, preventing movement and possibly damaging the adjacent teeth from the excess force required to overcome getting stuck.
To select the correct blade TPI and prevent the saw from getting stuck, you must apply the rule of three teeth. The 3X rule of saw teeth refers to the requirement for three cutting teeth to be engaged in the cut at all times. To calculate which TPI is necessary, the stock thickness needs to be known. For ¼: stock, we divide .25 by 3.
This means a blade TPI with a pitch of .083” or less is needed. Select the blade closest to the calculated pitch necessary and install that blade. If too fine of a blade is selected, the small gullets can fill with chips and prevent the saw blade from progressing through the material in an economical manner. This boils down to the operator needing to make more strokes to cut through the stock material. Cutting with a hacksaw is a time-consuming task requiring considerable effort.
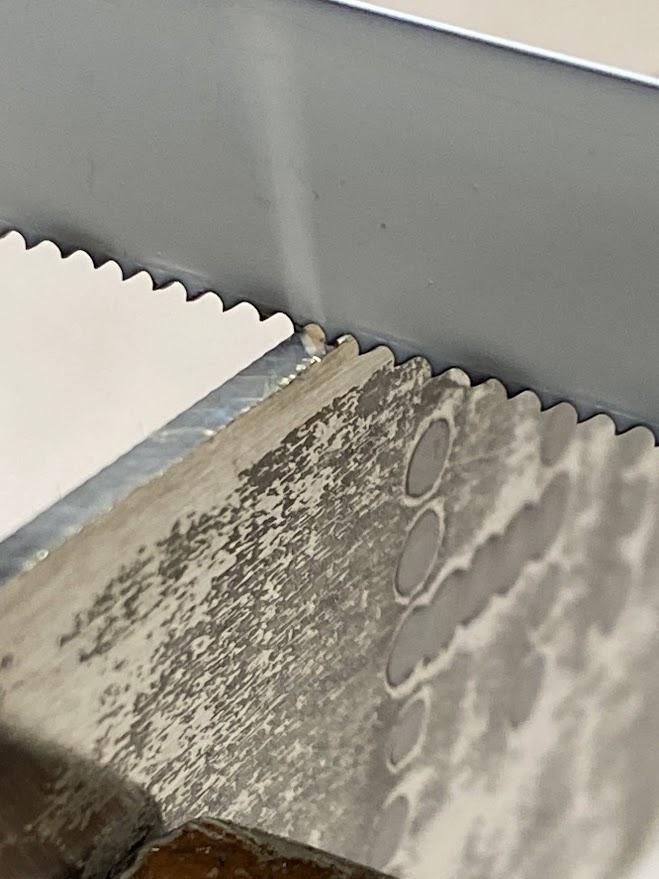
The above photo illustrates that the teeth are pointing forward. This means the blade only cuts on the forward stroke. Ensure the blade is installed with the teeth pointing forward.
The figure above illustrates only two teeth in contact with the material. This blade will bind and not provide a quality cut, as well as damage the teeth on the blade.
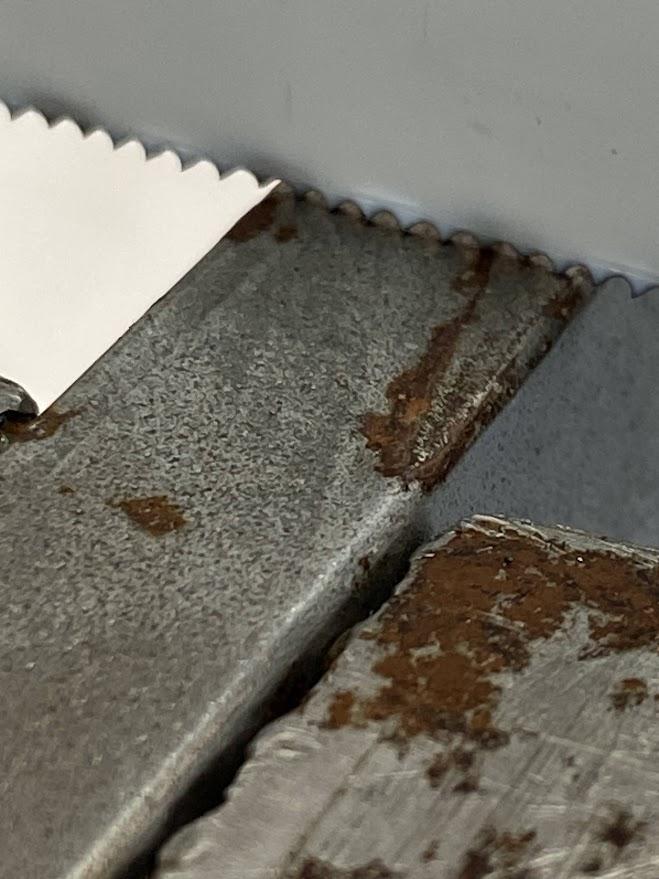
With 18 TPI blades being the most common coarse blade selection, this would be the correct blade for this application. A blade pitch any finer would only result in the operator’s wasted effort as the gullets would quickly fill and slow the sawing process.
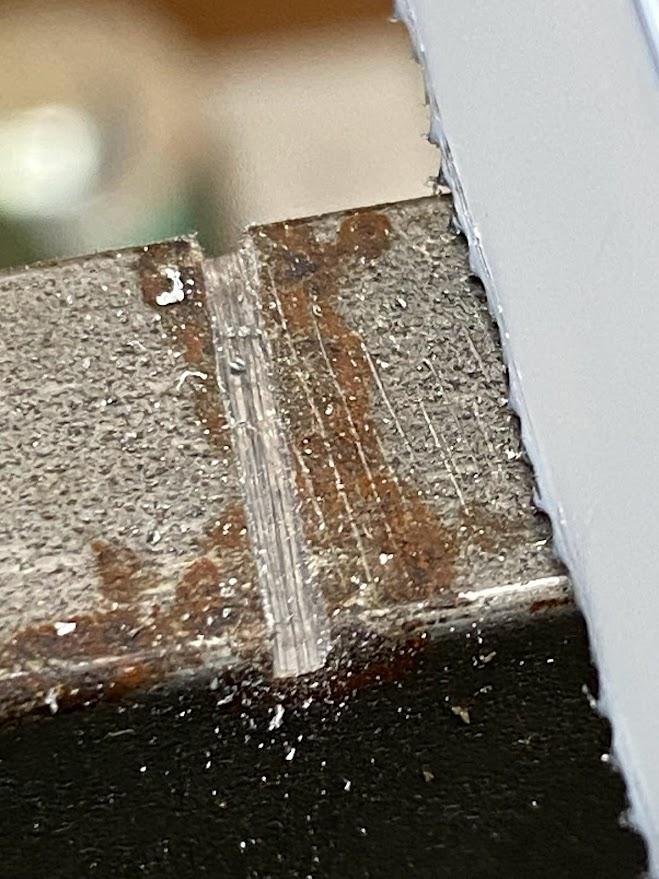
The width of the gap cut by a saw blade is referred to as a kerf. The kerf must be wide enough to allow the saw blade to progress through the material without binding against the sides of the saw blade.
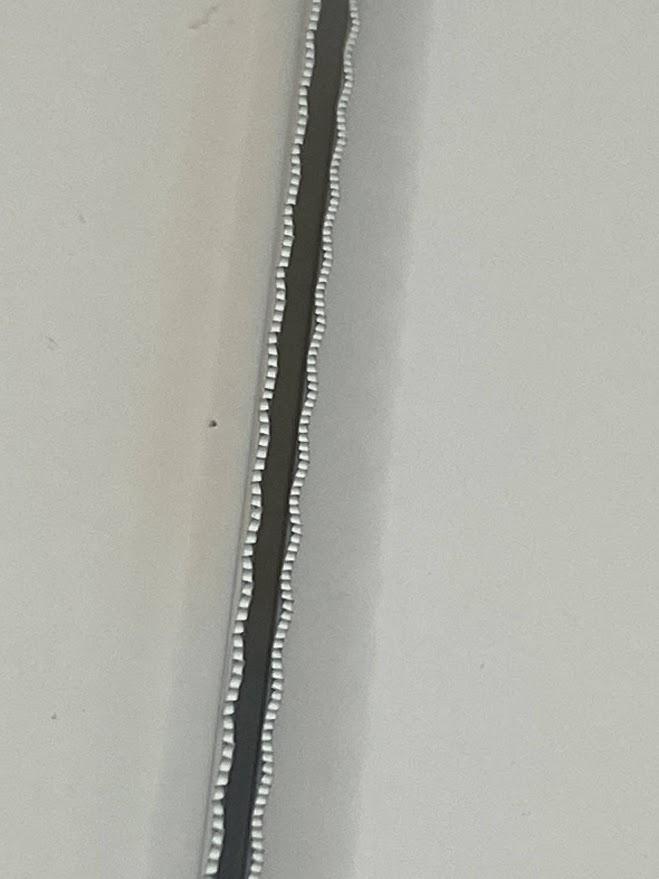
The feature of a saw blade which controls the width of the cut is called the tooth set. Tooth set is the deliberate bending of the tooth to the left and right of the blade creating an offset from one tooth to the next on a saw blade. In the figure above the tooth set is caused by the wavy progression from left to right of the blade’s teeth. On larger saw blades individual teeth will be set left, right and straight depending on the design of the blade.
5.3 Layout Dye
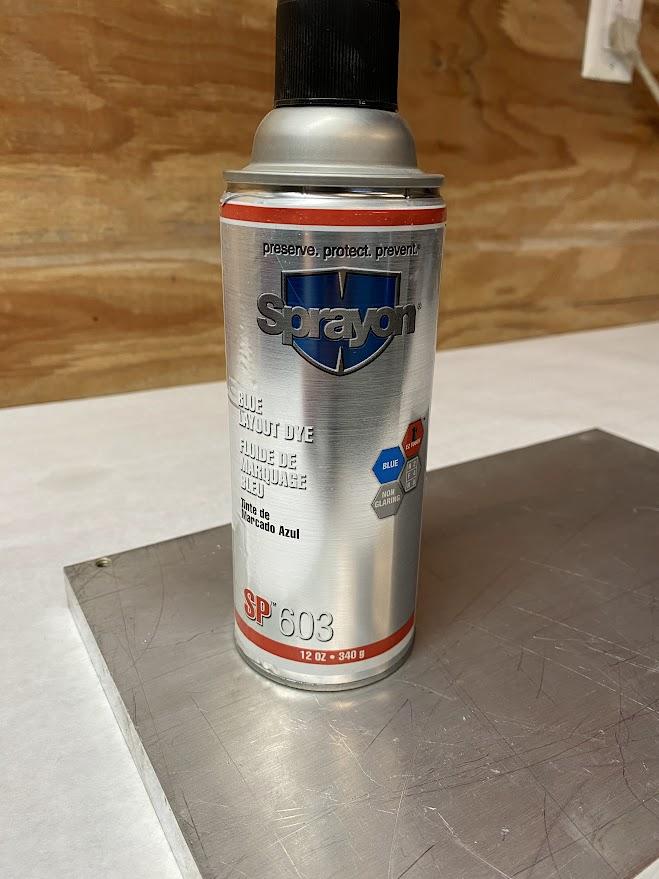
The process of benchwork requires the machinist to machine to the lines established in the layout process. This is a visually demanding process where the lines guide all machining actions. Factors that aid in this process are good quality lighting that reduces shadows, sharp scribing tools that provide small, crisp lines, and a dull surface that does not reflect light. High-contrast surface layout dye was invented to provide matte and reduce glare.
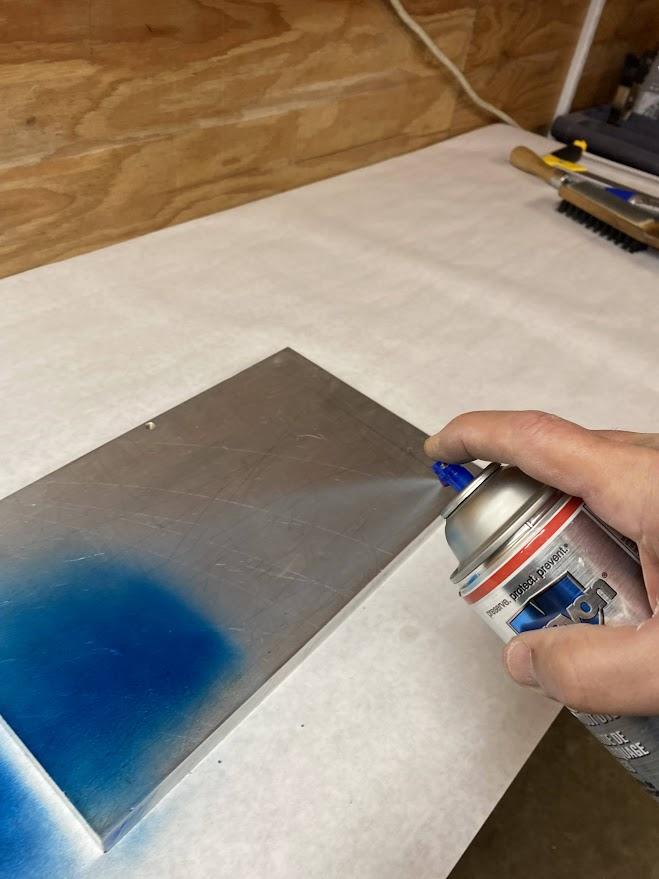
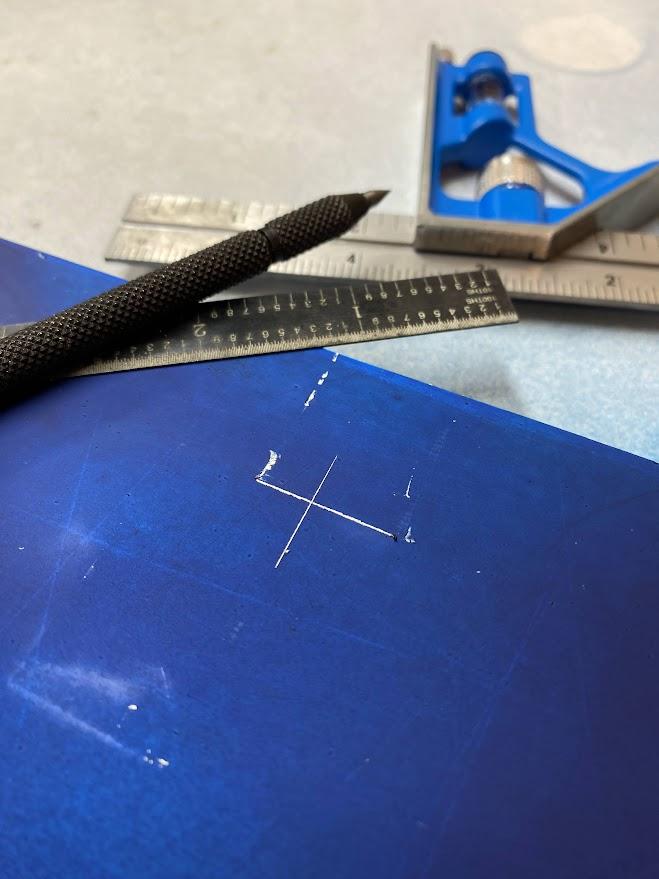
Layout Dye is a contrasting color used to provide a solid color base layer on which layout lines are scribed. A scribe is a tool with a sharp point used to scratch lines during layout operations. Layout fluid removes glare from a work surface and provides a uniform, deep color that contrasts with scribe lines, enabling the machinist to see the lines easier. Layout fluids are applied to the surface by spray, brush, or roller. The fluid is designed to dry quickly and adds no thickness to the part. Care must be used when applying layout fluid because it is difficult to remove from porous surfaces if spilled. Be sure to keep away from inspection surfaces until the fluid has dried. Be aware of splatter and over spray during application. Always place the lid back on the bottle to prevent accidental spillage.
Before using any chemical, it is a good idea to visit the manufacturer’s website and read any technical sheets provided (here is an example for a brand of layout dye). Technical sheets provide directions, features, material compatibility, and health and safety information.
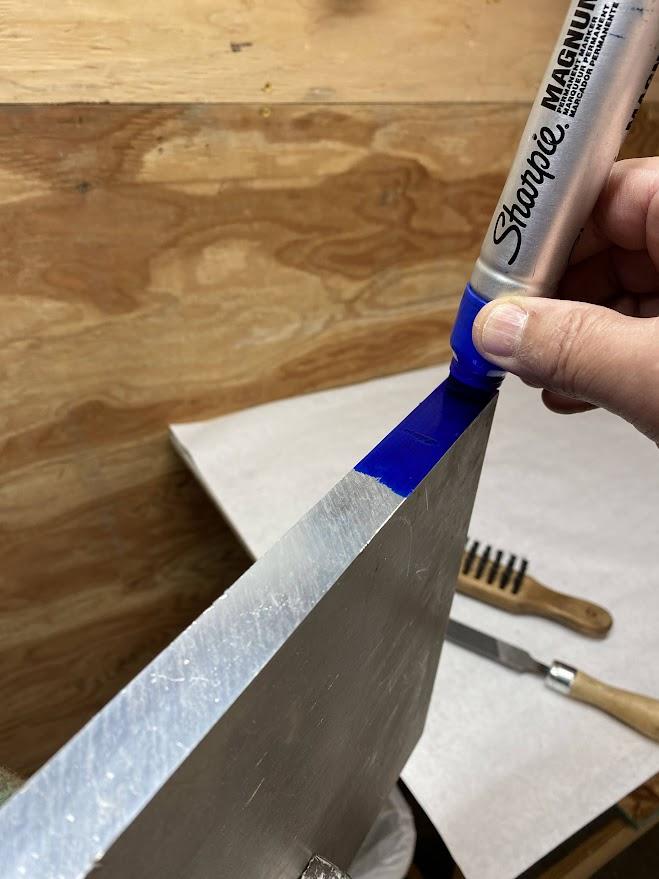
A suitable alternative to layout fluid is permanent marker. They provide a selection of colors, tip shapes and widths. The applicator is a felt tip which does not spill or drip. There is the added advantage of being easily procurable at most art supply stores or online, and they are not flammable. The major downside is that they do not cover as well as a layout fluid and you will lose some contrast, making layout lines harder to see.
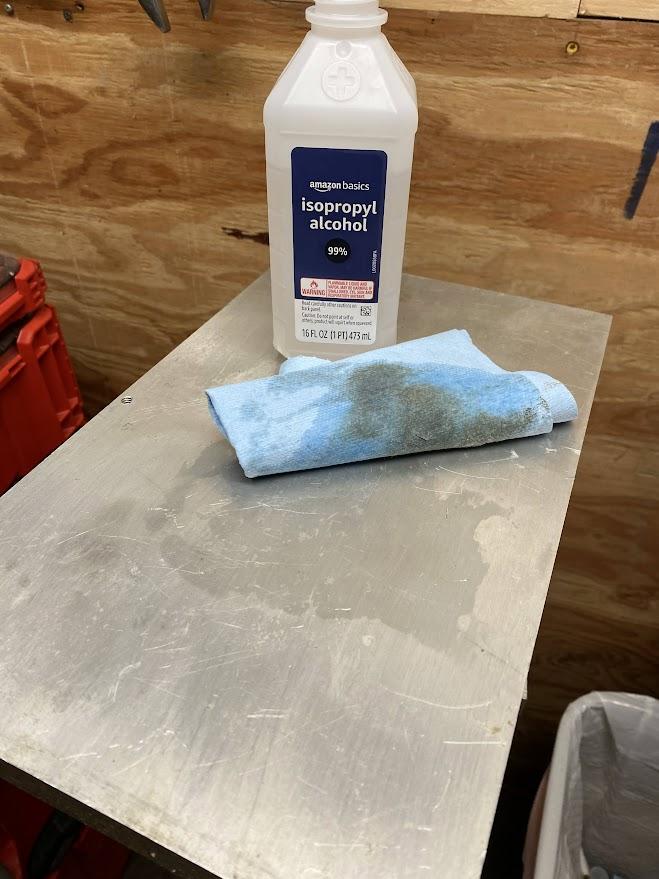
Before applying a layout fluid, you should first clean your part. The surface will need to be clean, dry and free of grease and oil to allow the dye to adhere in a favorable manner. Layout dye manufacturers make solvents for this purpose, but alcohol or acetone make a good substitute. Choose a well-ventilated area away from ignition sources, such as grinding or cutting stations. Wear appropriate PPE, such as eye protection and gloves, before handling.
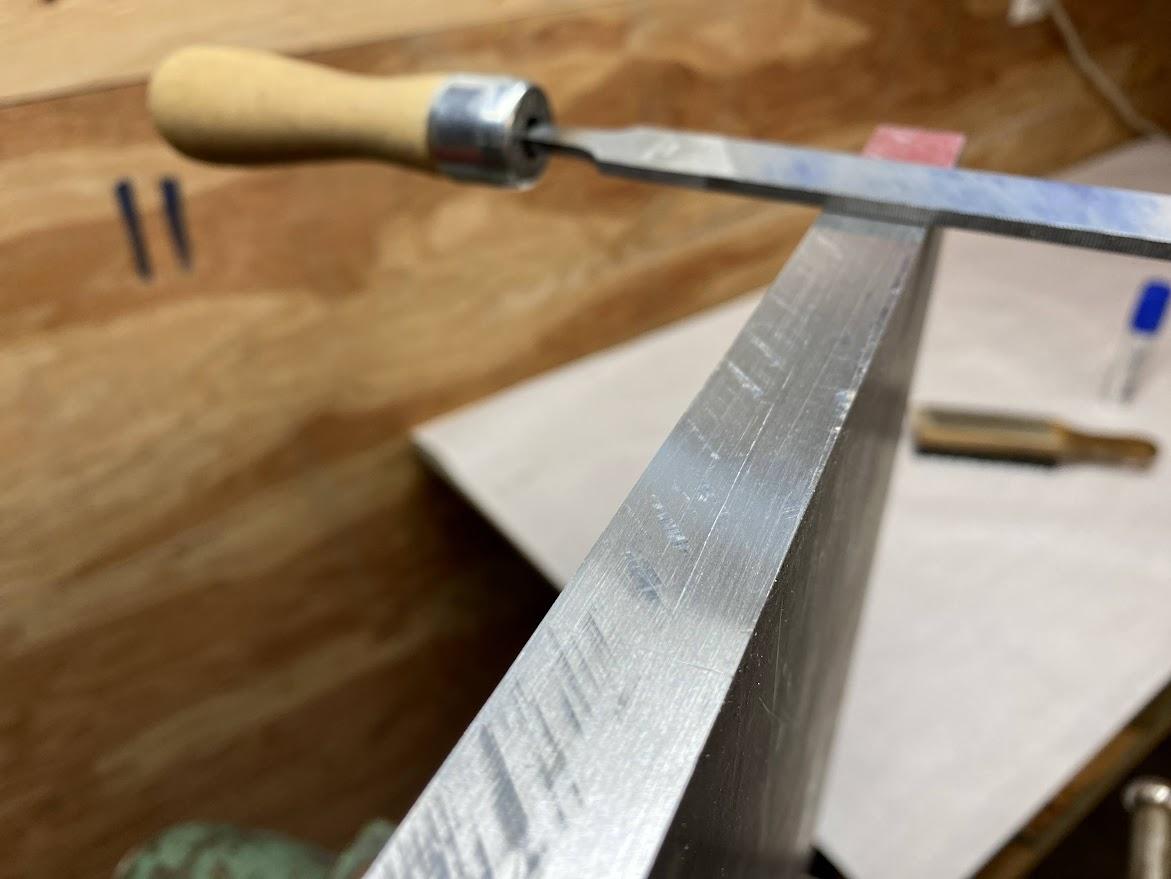
Next, you need to identify a reference edge from which layout lines will originate. Inspect the edge for burrs and straightness. If necessary, take a clean-up pass on the mill, or use a file and work the edge until it is straight and free of burrs, which will interfere with the layout tools.
Now you are ready to apply the layout fluid. Apply the dye heavily enough to provide a solid layer of contrasting color. Ensure the entire surface is covered up to the edges. Monitor for splatters or over spray. Removing the layout fluid from porous surfaces is difficult and could result in permanent staining.
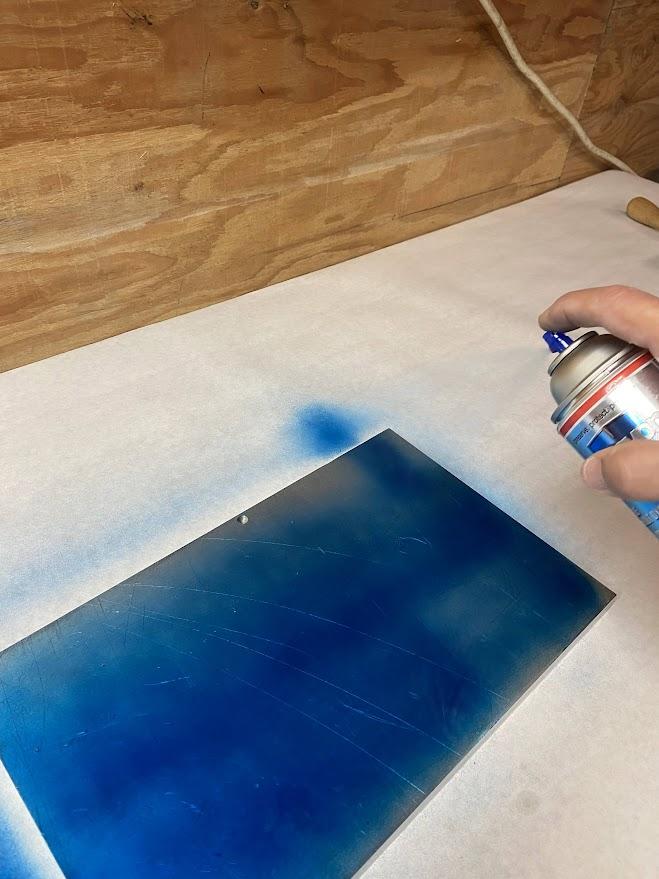
Once the surface is coated with layout dye and has time to dry, you may begin to apply layout line geometry on top of the dye.
5.4 Layout Straight Lines
There are two types of lines in layout, straight lines and arcs. Remember, we are performing semi-precise layout here, where we employ different tools and techniques to achieve the goal of accuracy. A better understanding of these factors will aid you in creating a quality layout.
The most basic of tools to create a straight line is a rule. Machinists prefer steel rules of differing lengths depending on the application. A steel rule is made from quality steel that won’t rust and has numerical increments engraved along its edges. They can be rigid or flexible and come in varying widths. Graduations are in inches, metric, fractional, or decimal.
5.5.1 Steel Rules
Precision rulers, often referred to as a scale, come in many configurations, lengths, stiffnesses, and graduations. After a caliper, the steel rule is one of the most useful tools. The six-inch rule sits nicely in a shirt pocket and can be used for quick, semi-precise measurements.
The steel rule has four edges on which graduations are etched. Graduations can be in 8ths, 16ths, 32ths and 64ths of an inch, as well as 10ths, 50ths and 100ths. The metric ruler has 1/2 mm and 1 mm graduations. Some rulers come with markings on the short end of the ruler to fit into tight spaces.
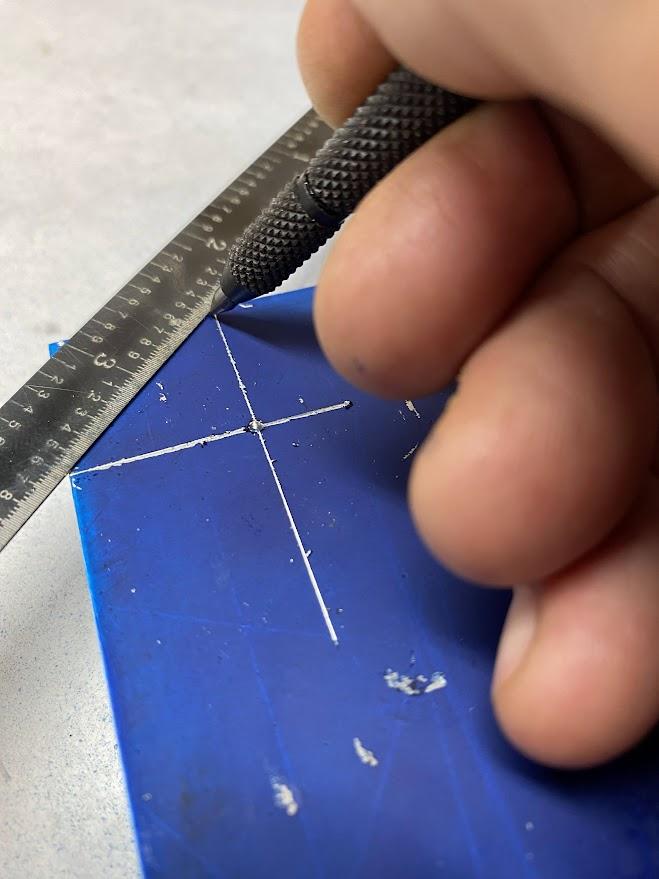
To layout a straight line with a steel rule, the operator must visually line up the edge of the rule with a layout mark. This step is the most critical. A misplaced ruler will produce a misplaced scribe line, so take time to align the ruler accurately.
Once the ruler is in place, use a sharp scribe to drag along the edge of the ruler, being careful not to move the ruler during the scribing process. Tilt the scribe to ensure the point is against the edge of the ruler.
5.5.2 Firm Joint Caliper
Another low tech method for creating a straight line parallel to an edge is to use a special type of firm joint caliper referred to as an odd leg caliper, where one leg is straight and used for scribing and the other leg is bent and designed to follow the edge of the stock. A firm joint caliper is a comparison device that has two legs that are held together by friction.
Parallel refers to the relationship between two items, such as a layout line and the edge of the stock, which extend in the same direction.
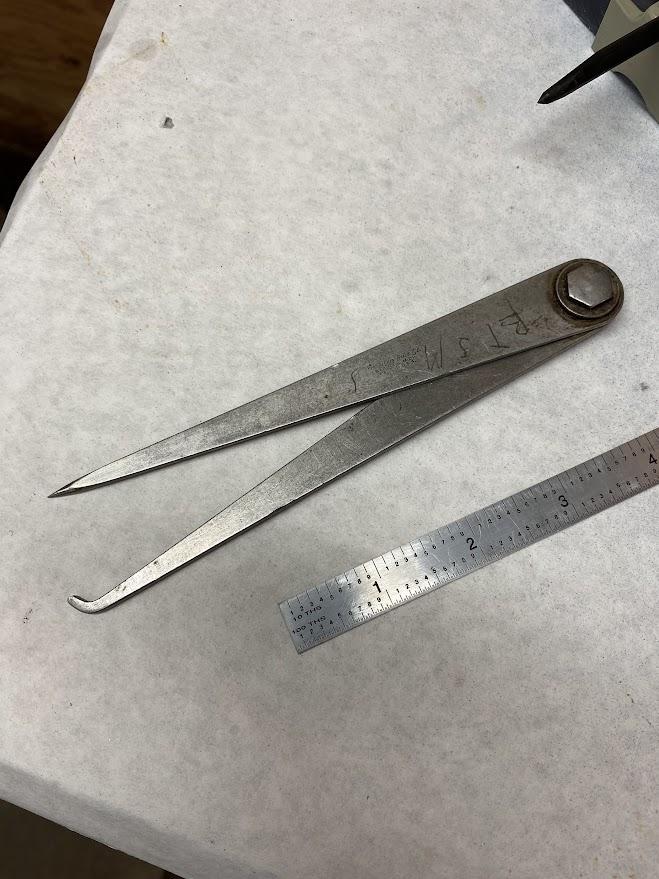
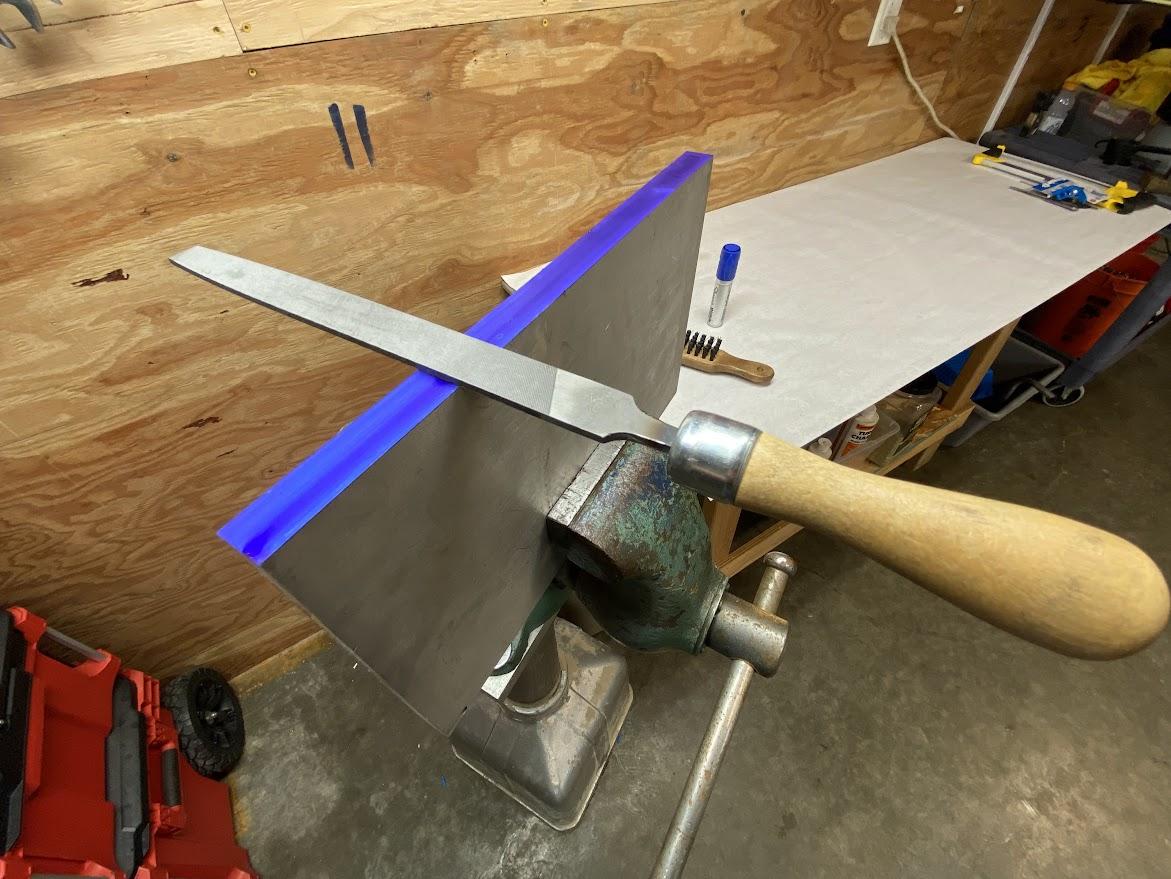
For this operation, the edge of the stock must be flat and free of burrs. Draw file the edge if necessary to achieve this condition. Draw filing is a finish filing process intended for removing a small controlled amount of material and achieving a smooth finished surface.
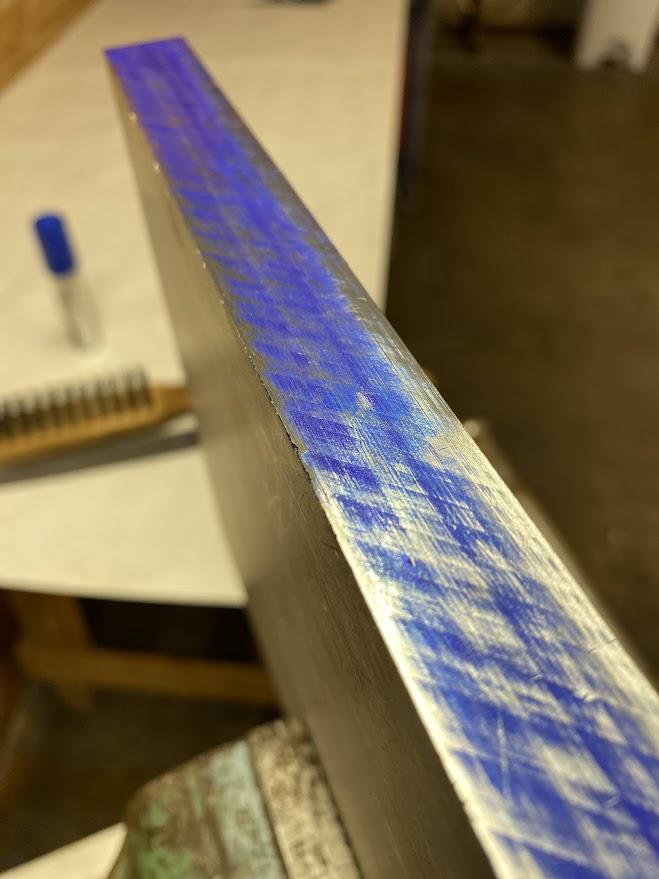
Keeping the file perpendicular (at a right angle) to the stock, drag the file in the direction of the cutting edges on the file and inspect the edge for high/low spots. Layout dye or permanent marker can be applied to the edge to make this process easier.
An odd leg caliper must be set using a ruler to establish the distance from the edge of the stock to the straight layout line. This is the first level for possible error so take your time and do it accurately.
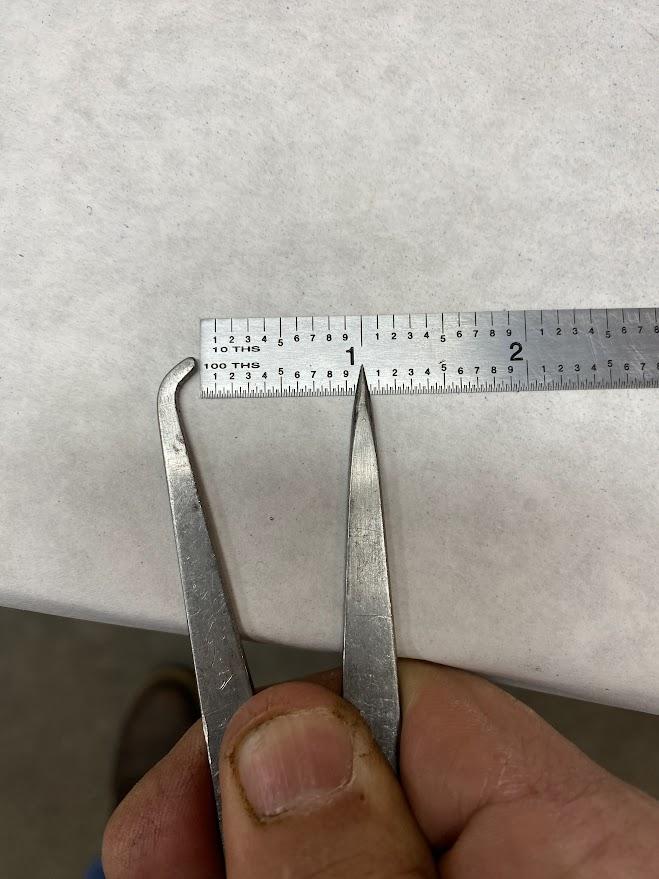
Place the bent leg of the caliper against the end of the ruler and move the scribe leg until it measures the distance desired. If the caliper has a locking system, apply the lock. If friction is used to maintain the caliper position, ensure you do not move the legs during use.
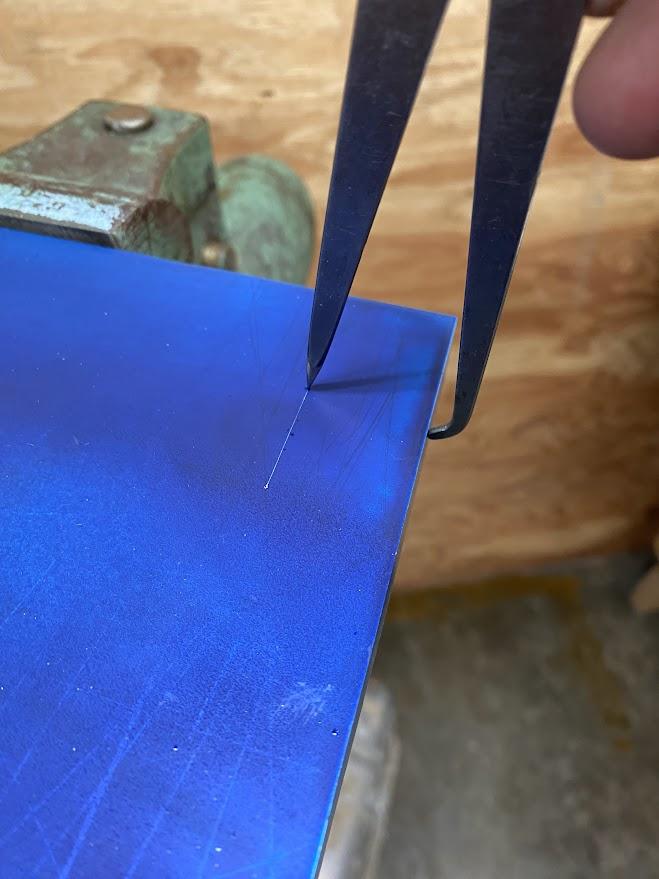
To transfer the distance setting from the ruler to the stock, the operator may use the bent leg to follow the edge of the stock while dragging the scribe point against the material to leave a line. Grip the caliper in such a manner as to not shift the leg spacing during use.
5.5.3 Squares
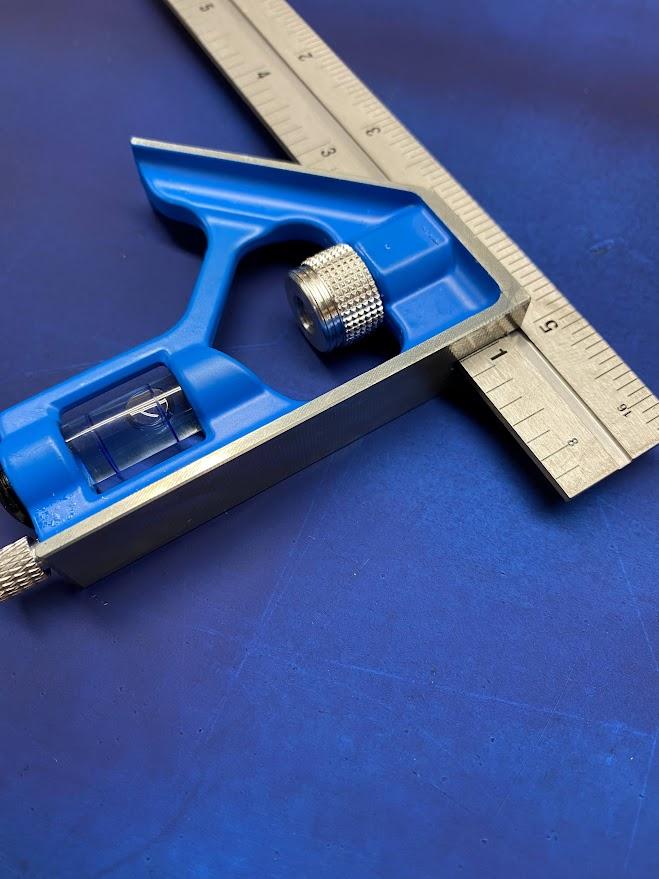
A layout tool used to create straight lines in relation to the stock’s edge is called a square. The term square also refers to the perpendicular relationship between the datum reference of the edge and the layout line which is at 90° to the edge. For example you may be asked to square a line from the top edge of the stock. This would be a line perpendicular to the top edge. Precision squares come in fixed and combination types. Combination types can also be used to create lines at a 45° angle to an edge. This is useful when laying out a chamfer.
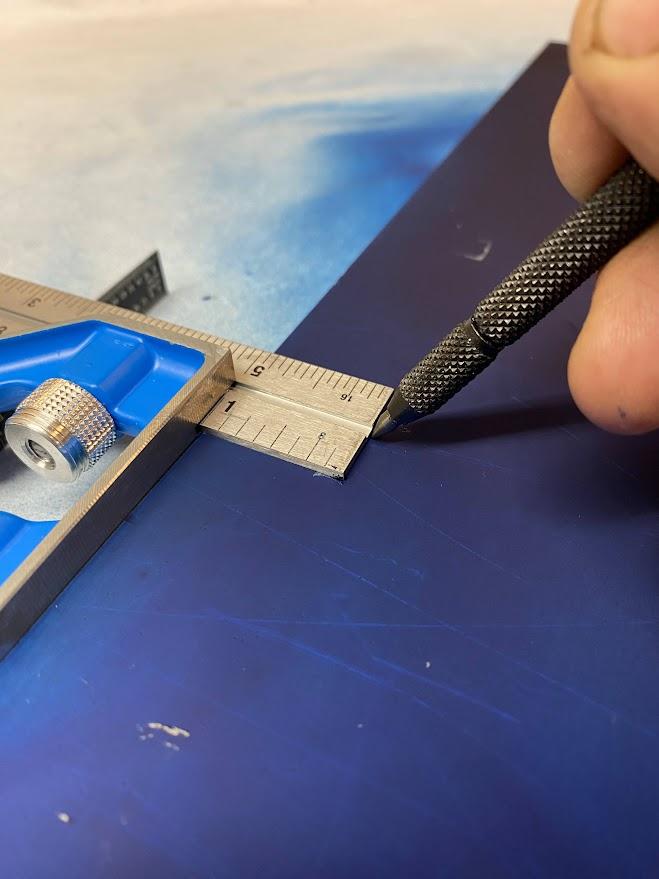
A square is the preferred tool to create a perpendicular line primarily due to its construction. A square has one edge on the square body referred to as the fence which is used to reference the datum edge. It is flat and usually large enough to allow the operator a firm grasp. The beam is the flat ruler-like blade of metal which you will use to scribe the line and they come in varying lengths.
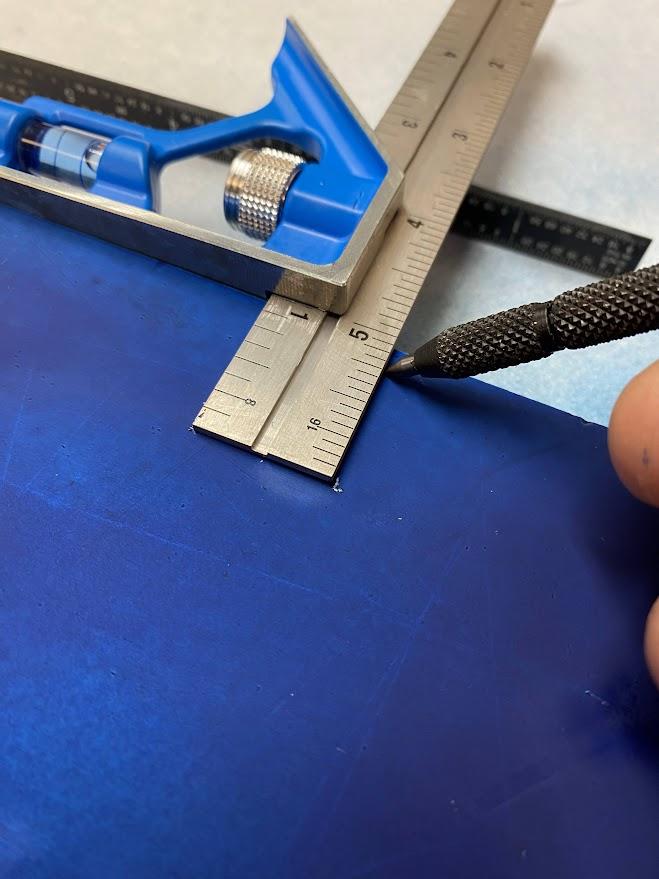
Prepare the datum edge of the stock to ensure flatness and lack of burrs. Lay the blade down flat against the stock and position the square in the desired position to scribe a line. While holding the square in place, grad the scribe along the edge of the blade ensuring the point of the scribe is against the blade.
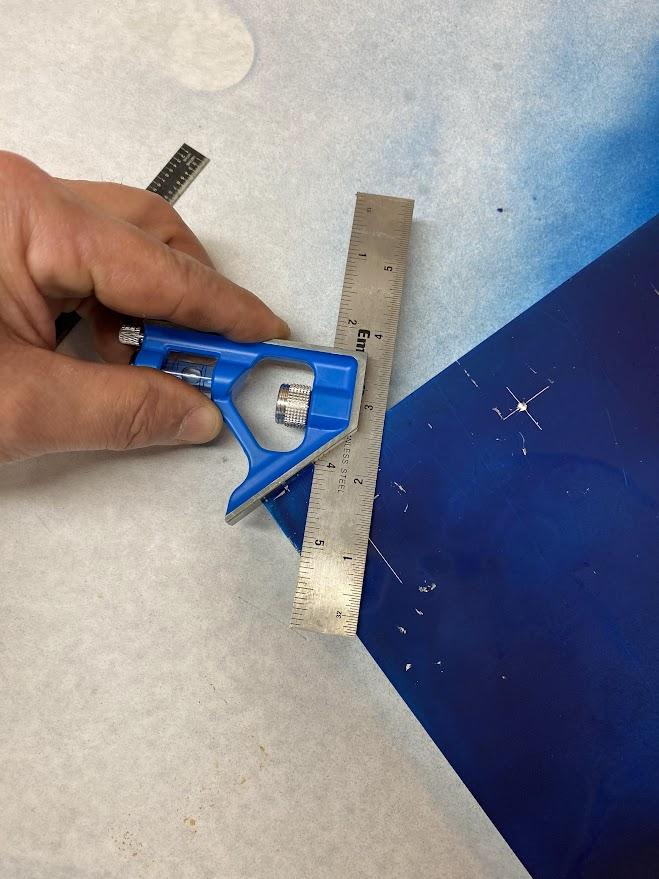
To use the 45° function of a combination square, the operator must reference the other fence on the square body and place that face against the stock.
5.5.4 Slide Caliper
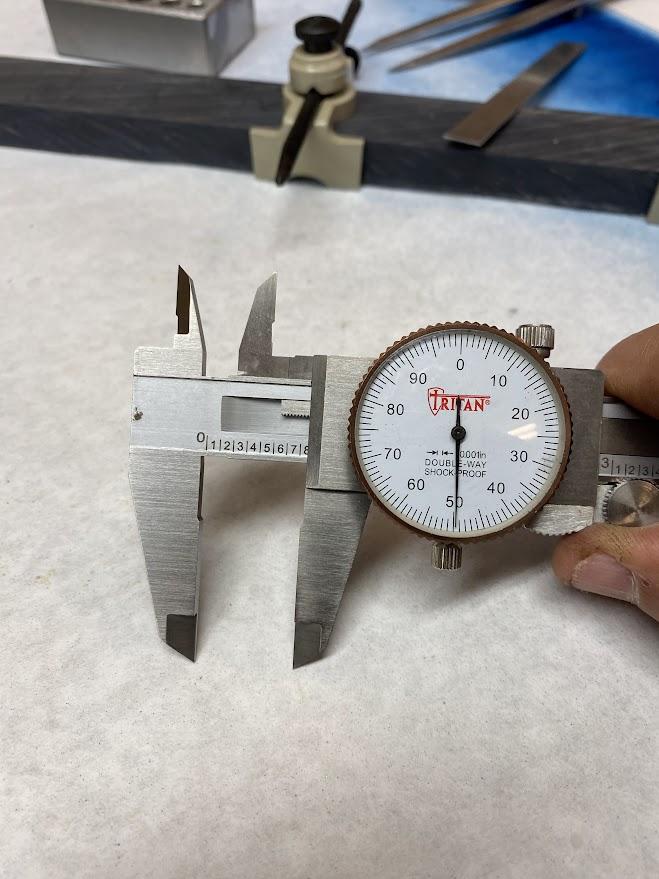
In the figure above, the operator is using the slide wheel to position the caliper at the desired distance (1”). The slide lock (above) must be applied to maintain the distance setting on the caliper.
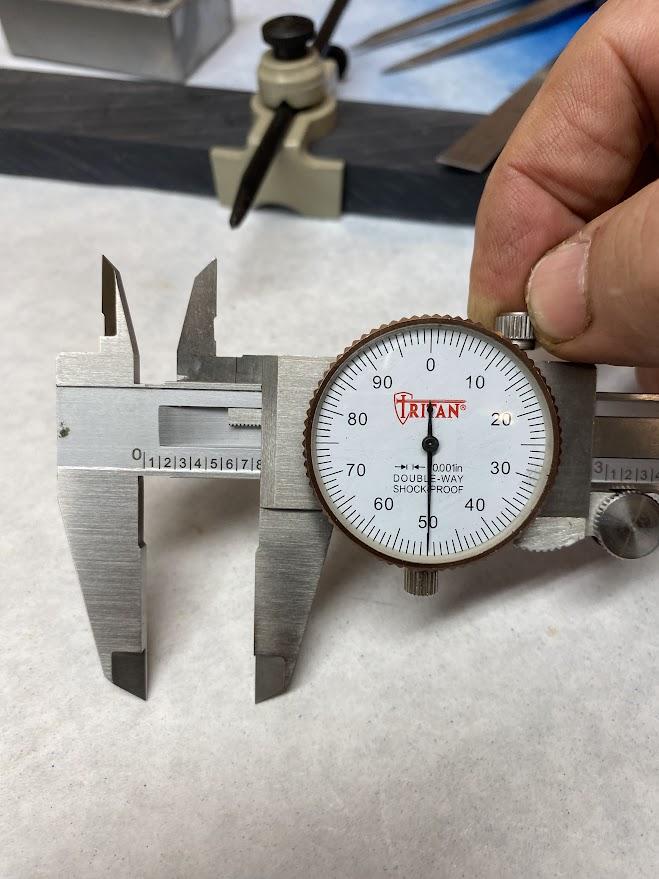
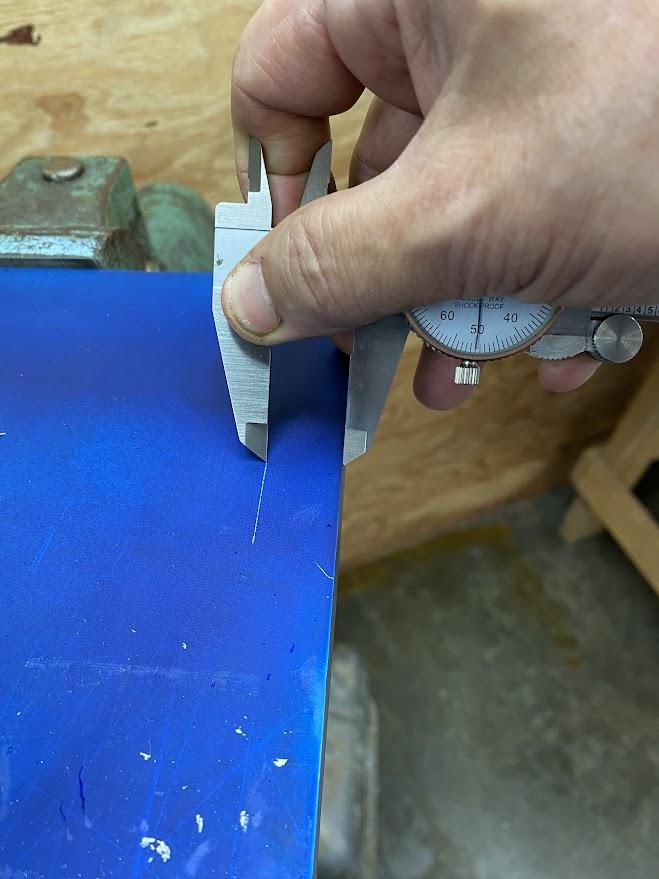
While using the datum edge of the stock to guide the movable leg of the caliper, apply pressure to the stationary leg with just enough force to leave a scribe line while dragging the caliper along the edge.
5.5 Arcs
The other type of layout line is the arc. An arc is any portion of a circle which is measured in radius. There are specialty tools for creating arcs and there are simple tools we can use to create arcs for layout. Let us begin with purpose-built tools first.
5.5.1 Divider
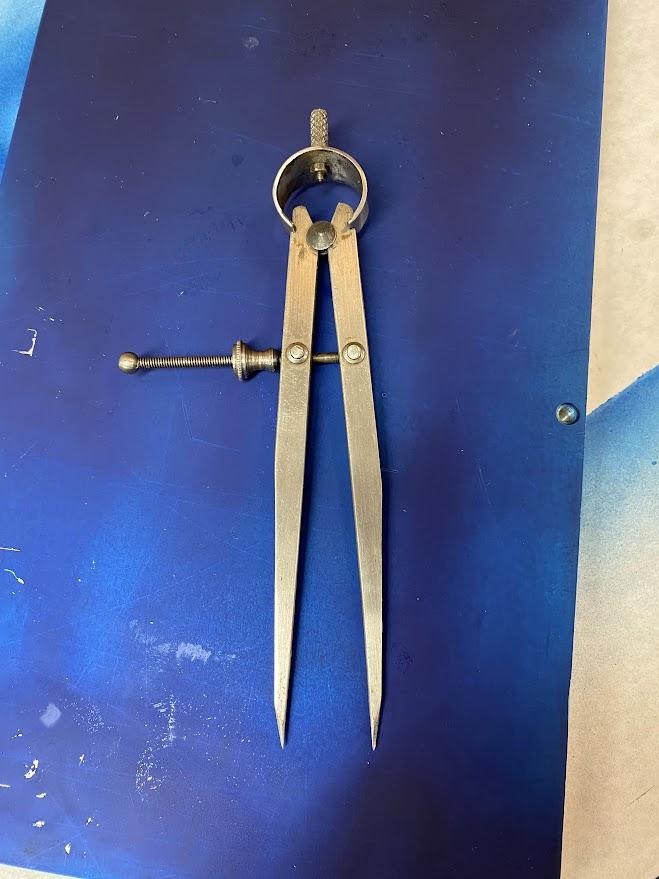
A divider is a tool with two equal length legs which terminate in points.
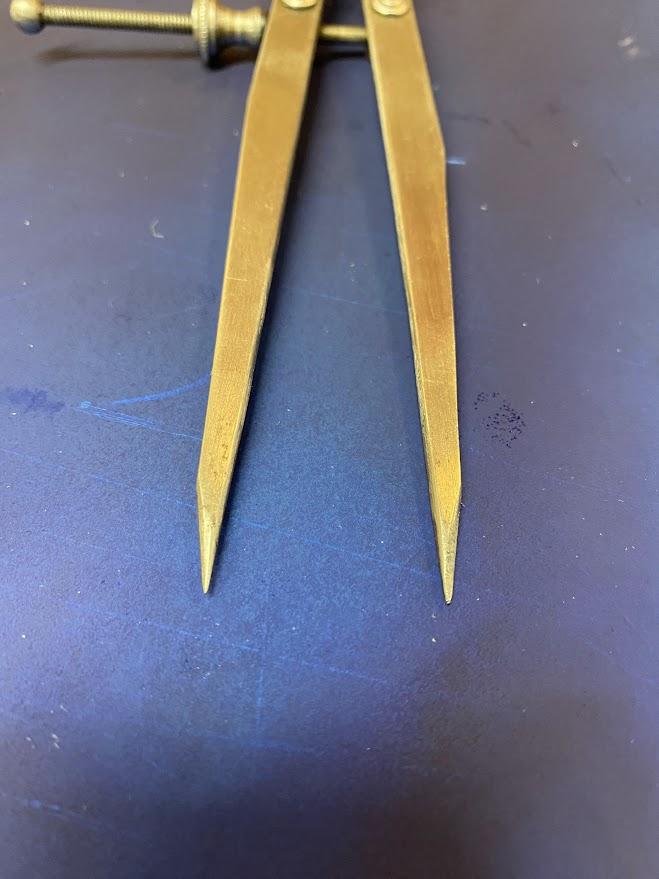
The tips need to be sharp and pointy. In the figure above, some maintenance has been performed over the years to aid in maintaining the points.
The two legs come together at a pivot point. In the example above, the leg adjustments are performed by tightening or loosening the adjustment nut to bring the legs together or farther apart.
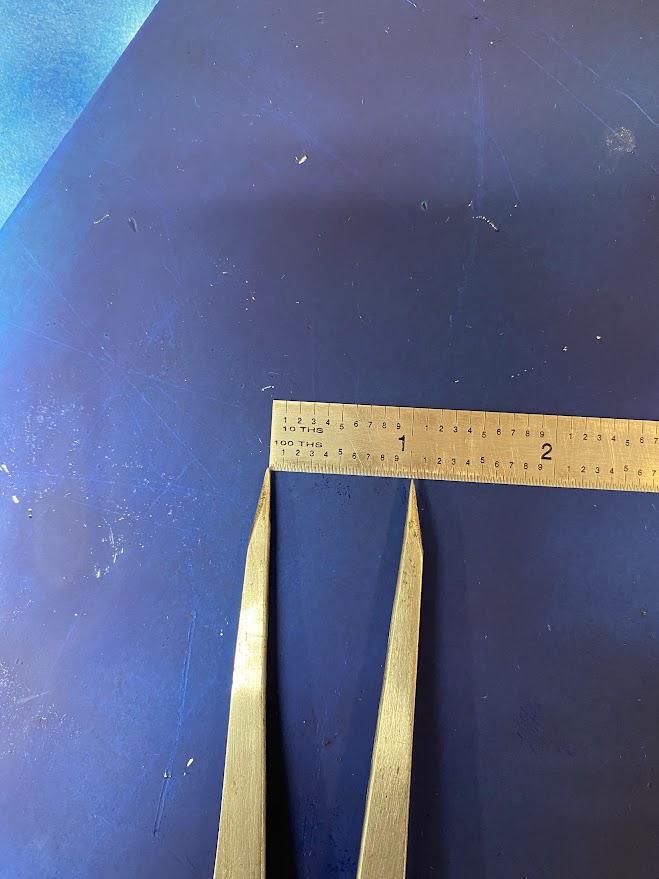
A ruler is used to set the distance between points. This will be the radius of the arc. Once again, sharp points will aid in accurate settings.
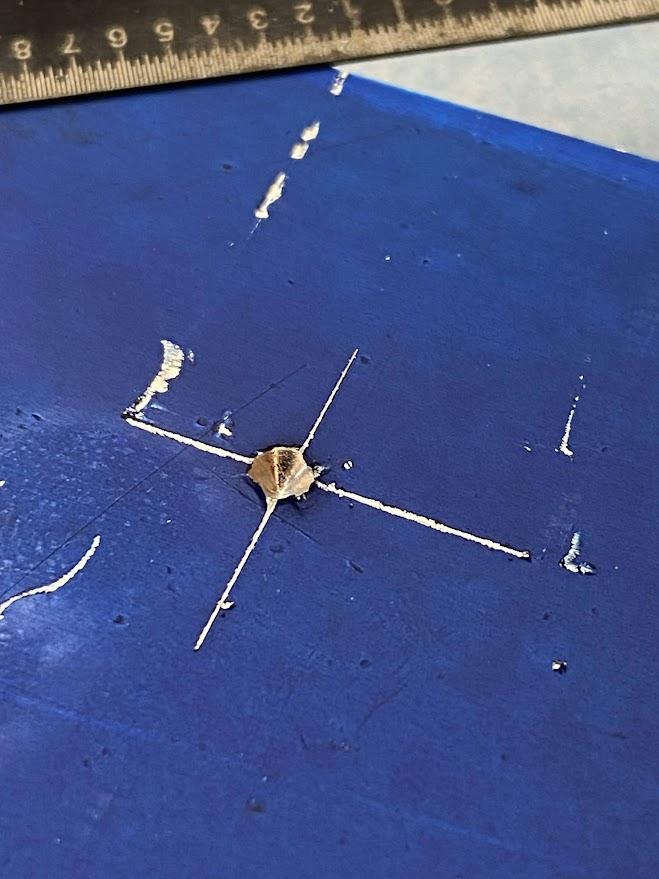
A punch is used to create a conical divot at the center mark of the layout lines. A punch is a tool that is designed to be struck with a hammer. The term conical means cone-shaped, such as an ice cream cone. The point from the divider will reference this punch mark as a center for the arc scribe. This punch mark is rather heavy because it was made with a center punch. A prick punch leaves a smaller divot and is easier to align with the layout lines.
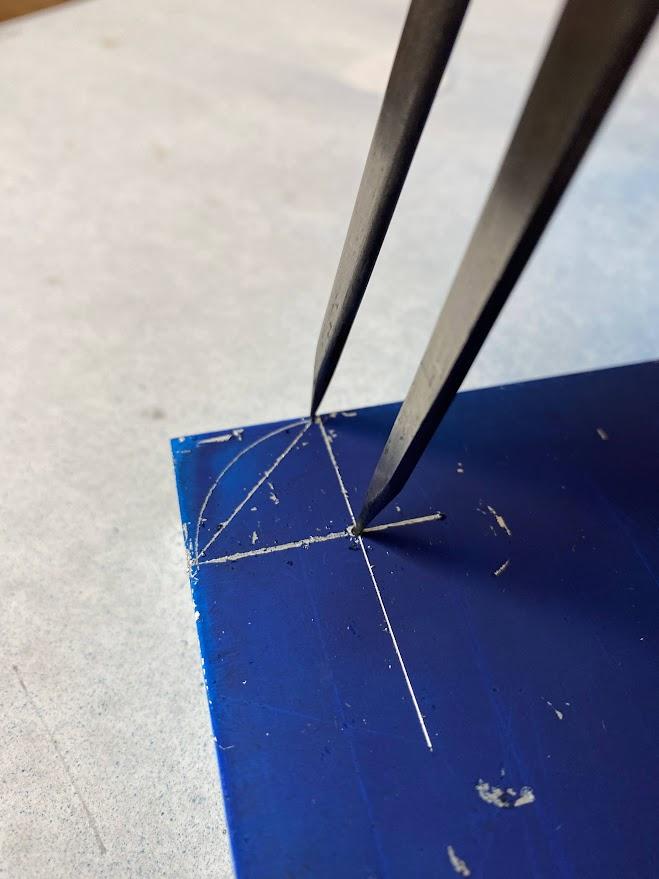
Gently turn the divider around the pivot point of the punch mark to create a clean radius. Dragging the points a couple of times will create more contrast, but be careful not to damage the lines from multiple attempts.
5.5.2 Trammel
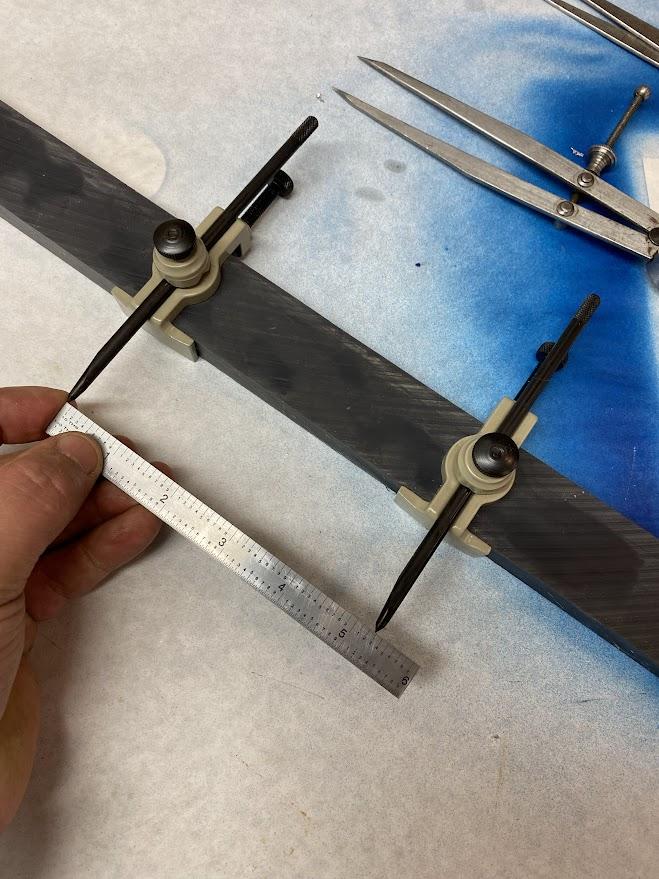
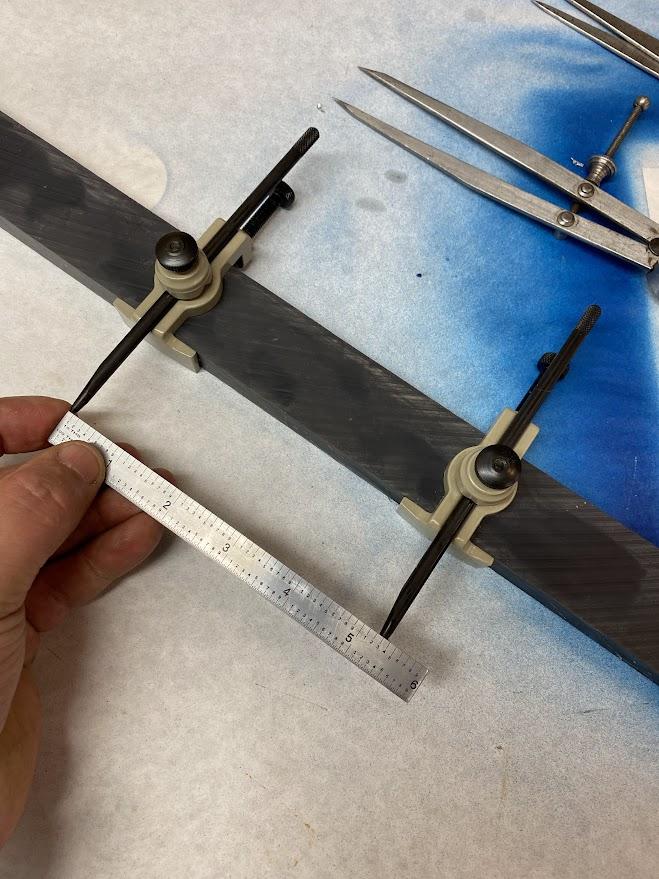
Two trammel points clamped to a straight piece of stock. / Photo Credit: by Damon Donner, for WA Open ProfTech, © SBCTC, CC BY 4.0
A trammel shares some similarities with the divider in that it uses two points to create an arc; however, a trammel is used for arcs that are too large for smaller tools such as a divider. The trammel’s points are mounted on a beam, which is supplied by the operator. In the figure above, the points are set larger than 5 inches but are only limited by the size of the beam and the ability to set the point distances accurately.
5.5.3 Gage Pins
What type of circular equipment do we have an abundance of in a machine shop? Gage pins are accurately sized and almost infinite in their selection, usually up to one inch.
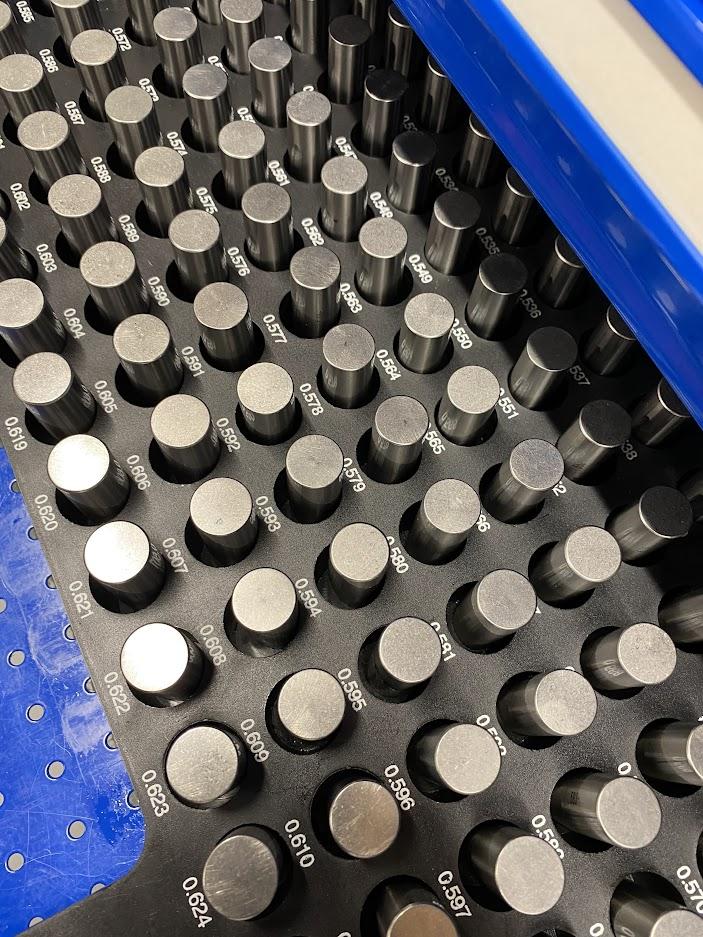
When using a gage pin to lay out an arc, remember to select the pin for the radius of the arc.
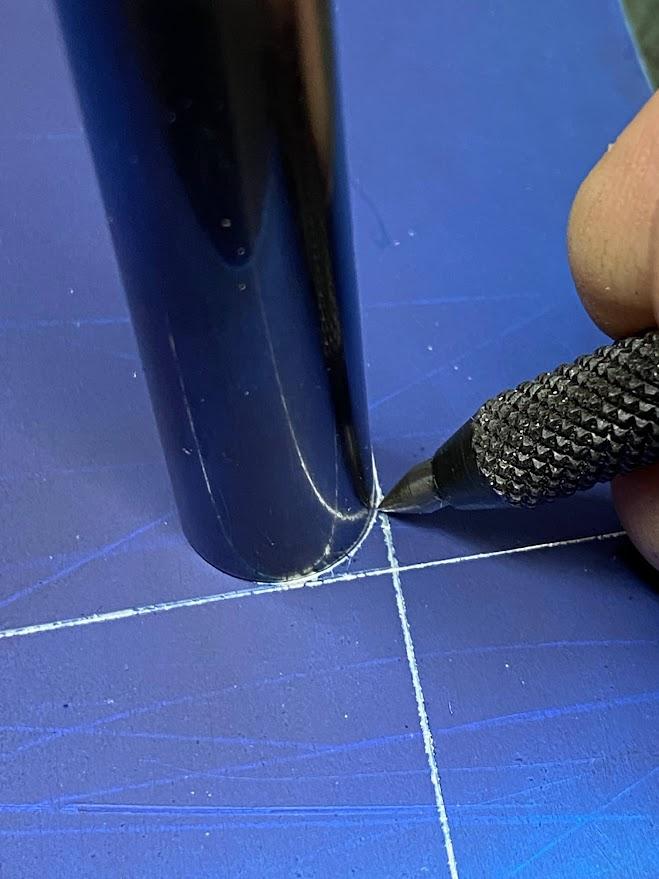
A gage pin is not easy to hold still while tracing the circumference, and the ability of the operator to align the pin with the layout lines also takes some care. Use a gentle touch when scribing the lines to prevent moving the pin.
5.5.4 Radius Gages
Radius gages are another tool we have at our disposal, but there is a concern we need to address. We are using measuring equipment to perform layout. This is not an accepted practice unless the equipment has been set aside for this purpose. Check with your supervisor before using any inspection equipment to perform layout.
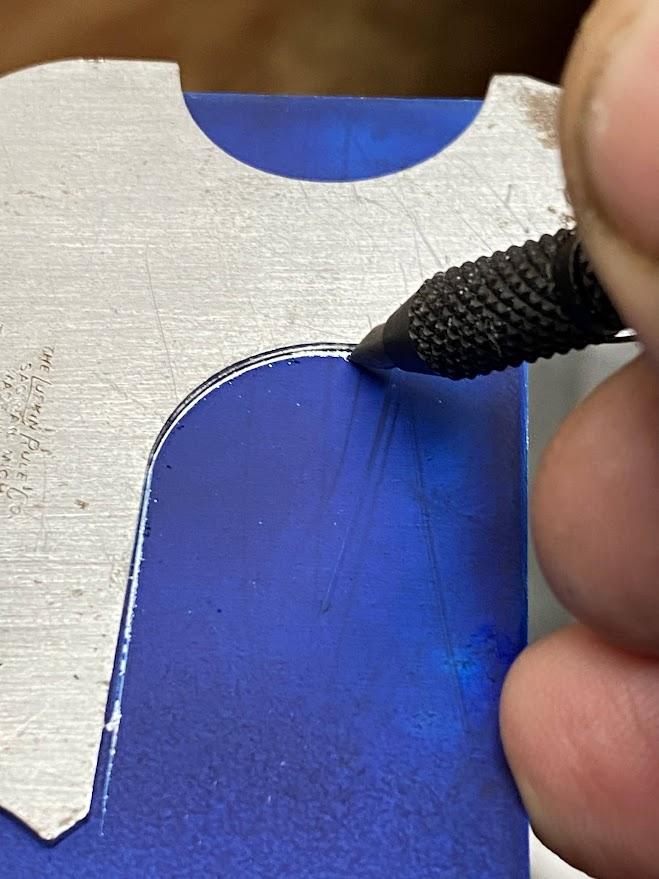
Select the correct radius and place it on the reference marks. In the figure above, two straight lines are laid out, which need a radius where they meet. The radius gage is much easier to control during the scribe process.
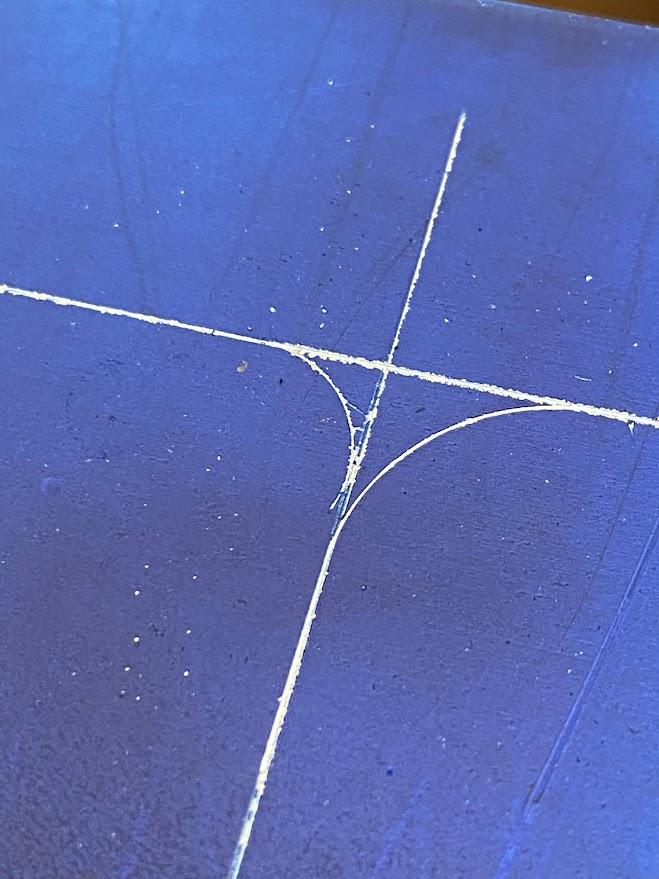
The arc to the left in the figure above was created with a gage pin, and the arc to the right was created using a radius gage. More pressure could be applied with the radius gage, which permitted a deeper scribe.
Using two hands, turn the die handle clockwise to cut the threads. Just like cutting tapped threads, stop every half turn and break the chips loose. Continue with this cut and break process until the threads are cut to the length necessary.
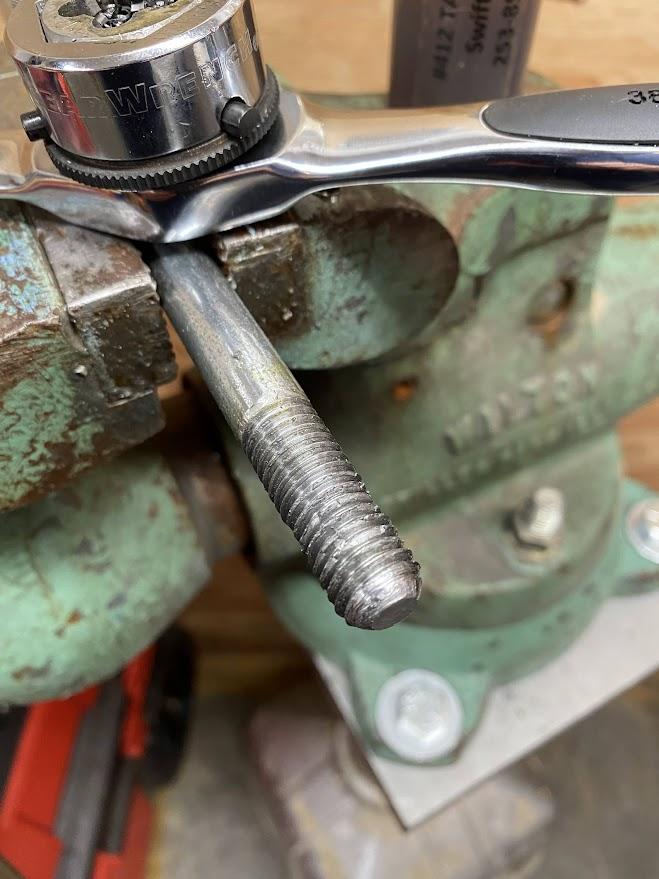
After the thread depth has been reached, remove the die and inspect and dress the threads. The thread profile may need to be dressed with a file to remove any burrs created during the threading operation.
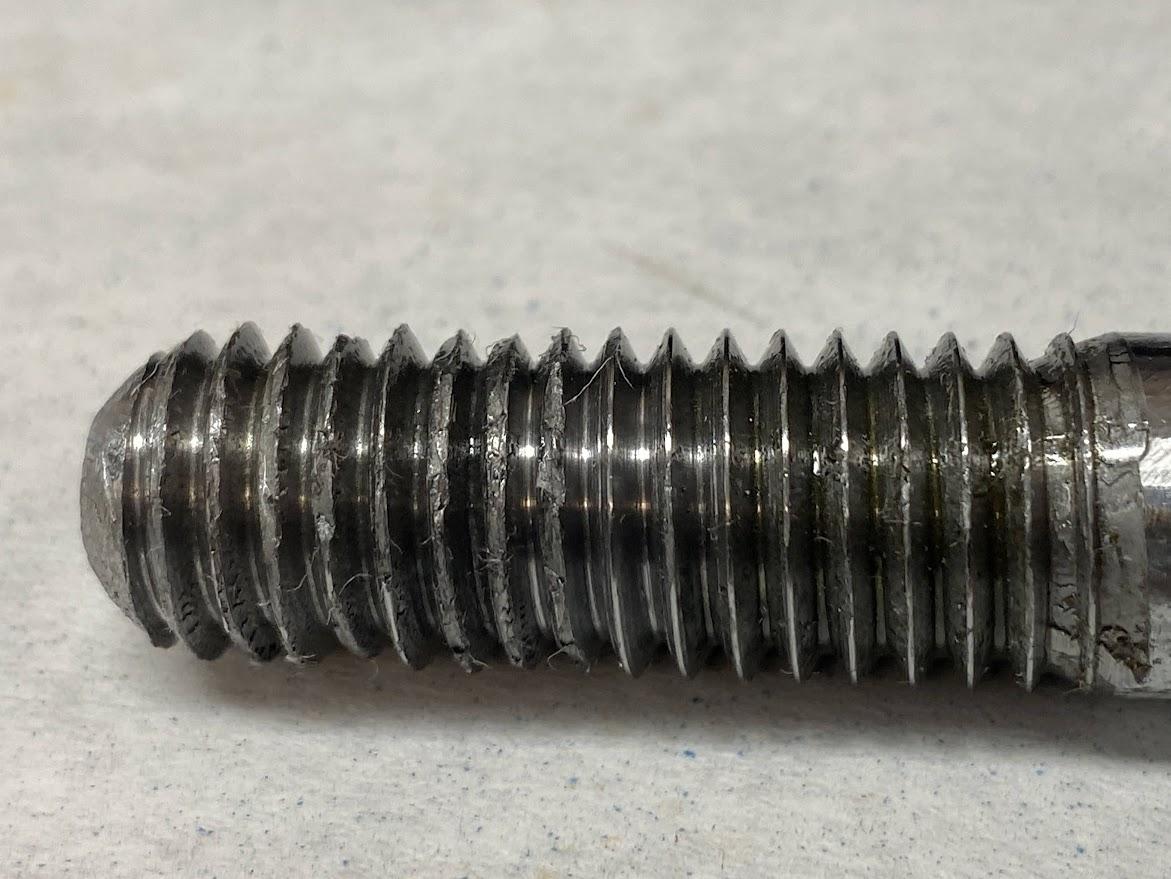
Notice the contrast in thread quality in the figure above. The threads at the start of the operation were cut dry (not using cutting oil), and the threads toward the end had thread cutting fluid applied.
Thread cutting fluid lubricates the cut, which reduces stresses created at the cutting edge of a die. Depending on the material being threaded, select the correct cutting lubricant to ensure optimal performance.

