Chapter 8 Part 6: Drill Presses
DRILLING
What is it?
Drilling is the primary machining process of creating a hole by using a twist drill. The twist drill can be turned by many different machines to create holes. The drill press is a basic machine used in a machine shop to create semi precision hole positions that are square to a surface. The main design feature of the drill press is to spin tools and apply pressure perpendicular to a workpiece; these features are essential for an accurately drilled hole.
Step by step process for drilling:
- Layout holes to be drilled on material.
- Center punch hole locations.
- Clamp part securely in drill vise.
- Do not clamp the vise to the table.
- Select a center drill with a pilot slightly larger than the chisel point, or a spot drill with the body larger than the chisel point.
- Mount the tool in a drill chuck.
- Adjust the table height or position.
- Calculate and select the spindle speed for the tool that will be used to spot the hole. Consider the fact that the spindle speed is based on the largest diameter where the tool and the workpiece meet.
- Apply a drop of oil to the center punch mark.
- Gently bring the spotting tool down to the center punched mark on the part with the right hand, while precisely positioning the vise with the left hand. Leaving the vise unclamped will allow the vise to float on the table and more precisely align with the center punch mark.
- If using a center drill, drill down to where the countersink just starts to enter the work. Be careful of the pilot, as it is somewhat delicate and can easily be broken off in the part. If using a spot drill, drill down to where the diameter the tip of the spot drill makes is slightly larger than the chisel point of the drill.
- A general rule for drill press operations is to clamp work to the table, or use a vise rotation stop if the cutting tool is over 1/2 inch. Above 1/2 inch, the tool’s grip on the part can become stronger than the operator’s grip on the vise. Use the spotting tool to align the vise and part during the clamping process if necessary.
- Calculate the spindle speed for the drilled hole required of the part.
- Mount the appropriate twist drill in the drill chuck.
- Add a drop of oil to the marked spot.
- Turn on the spindle and advance the twist drill into the marked spot.
- Push with light force to initiate the cut. Increase the force until a curling chip is formed by the cutting edge.
- Chattering may occur until the entire tool tip is in the formed hole and the bit becomes stabilized by the margins.
- Continue cutting with moderate pressure.
- Occasionally break the chips by backing the drill quickly out of the hole as they reach 3-6 inches in length, or if the chips quit coming out of the flutes.
- Ease up on the pressure as the tool begins to break through the backside of the part.
- Examine the drilled hole.
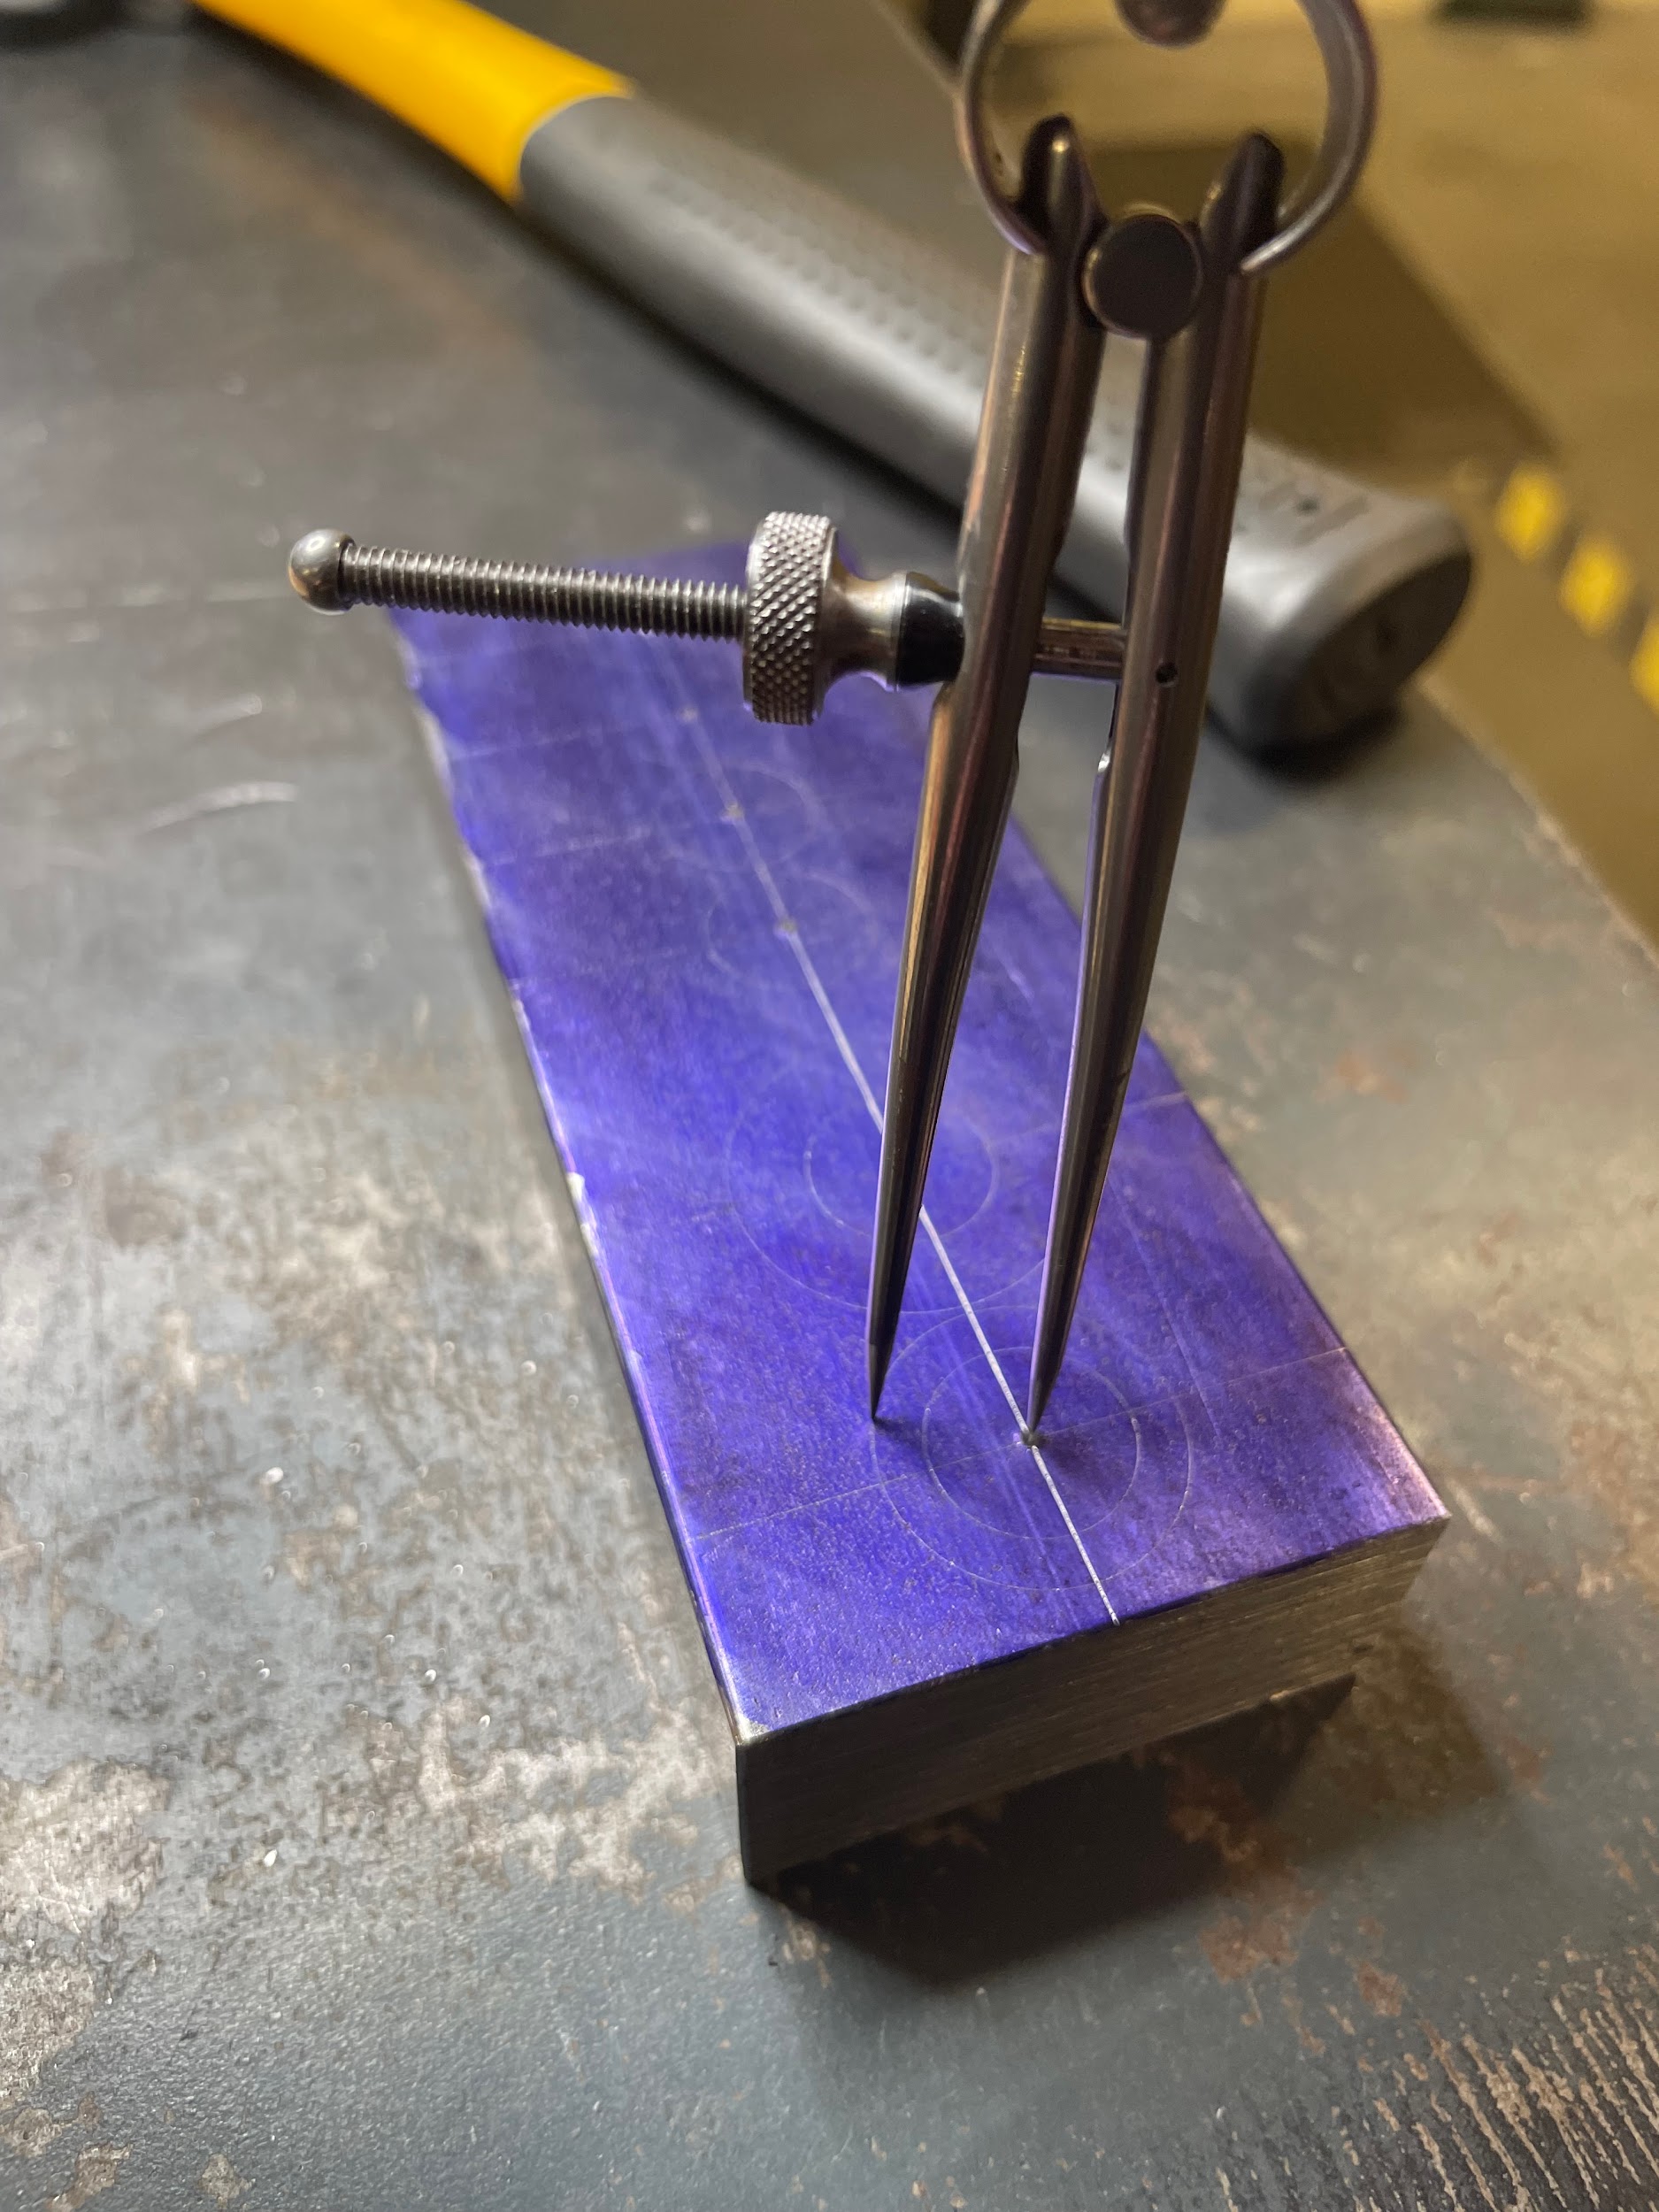
Step 1: Layout holes to be drilled on material.
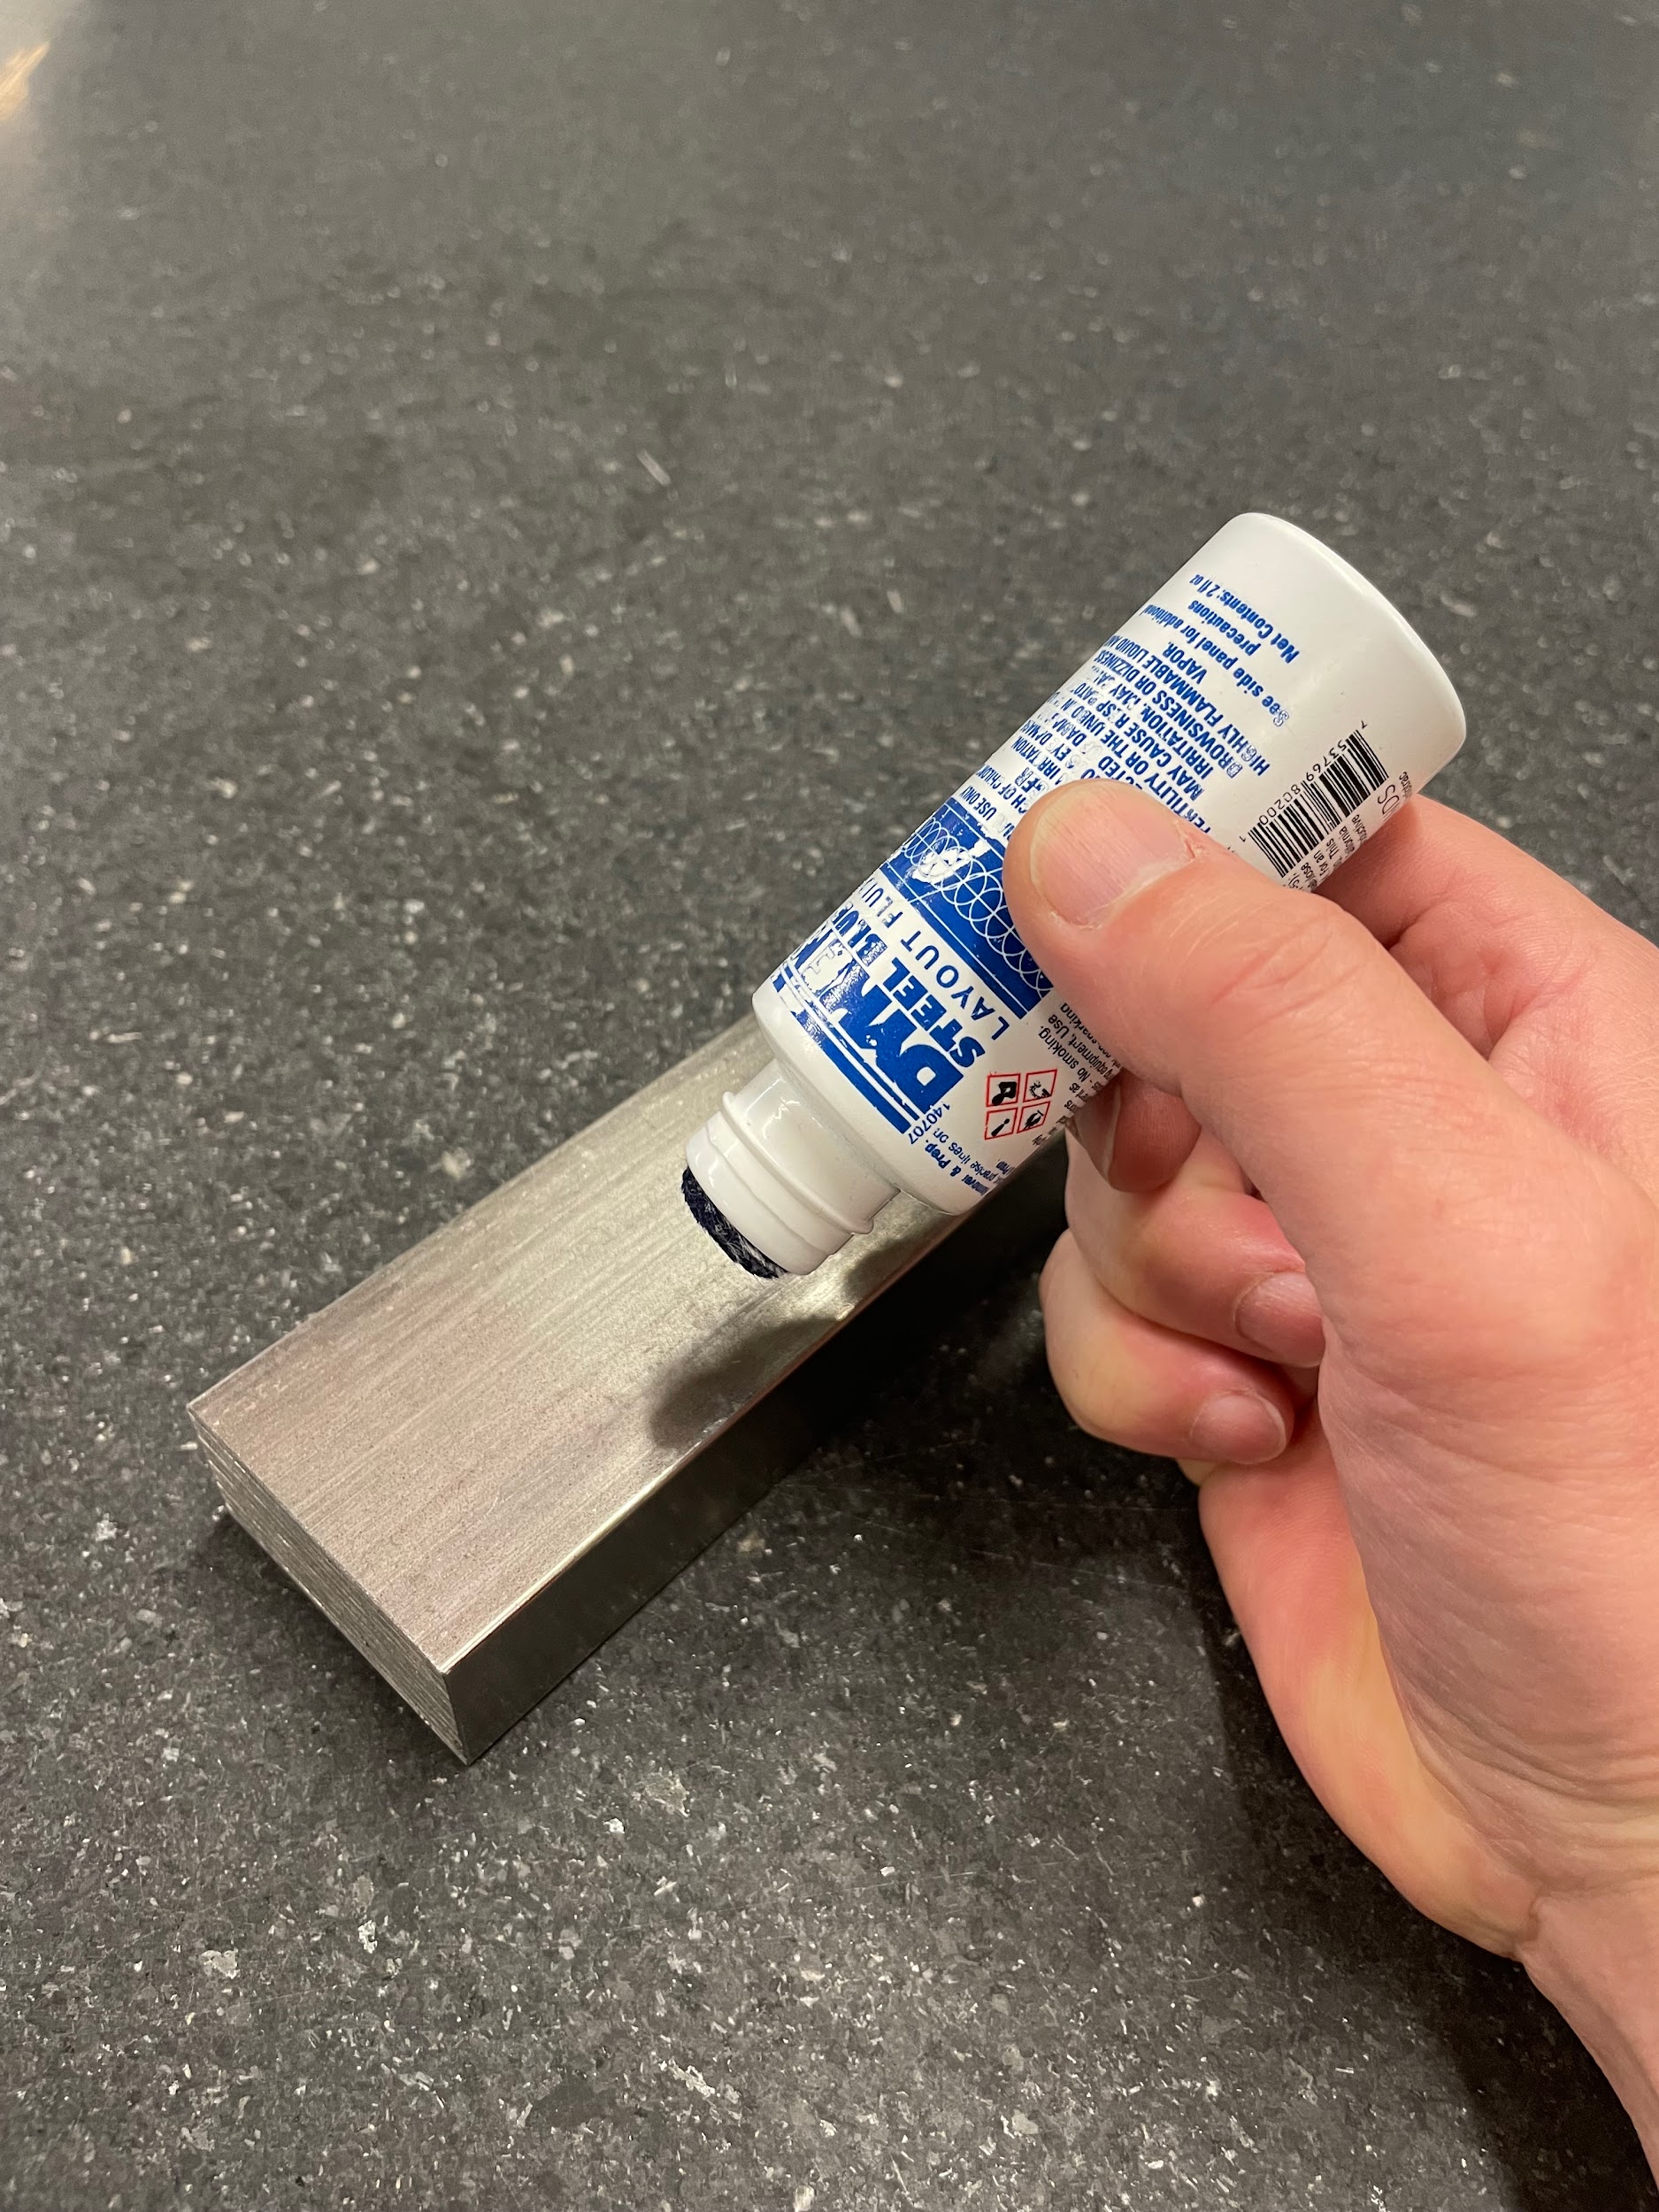
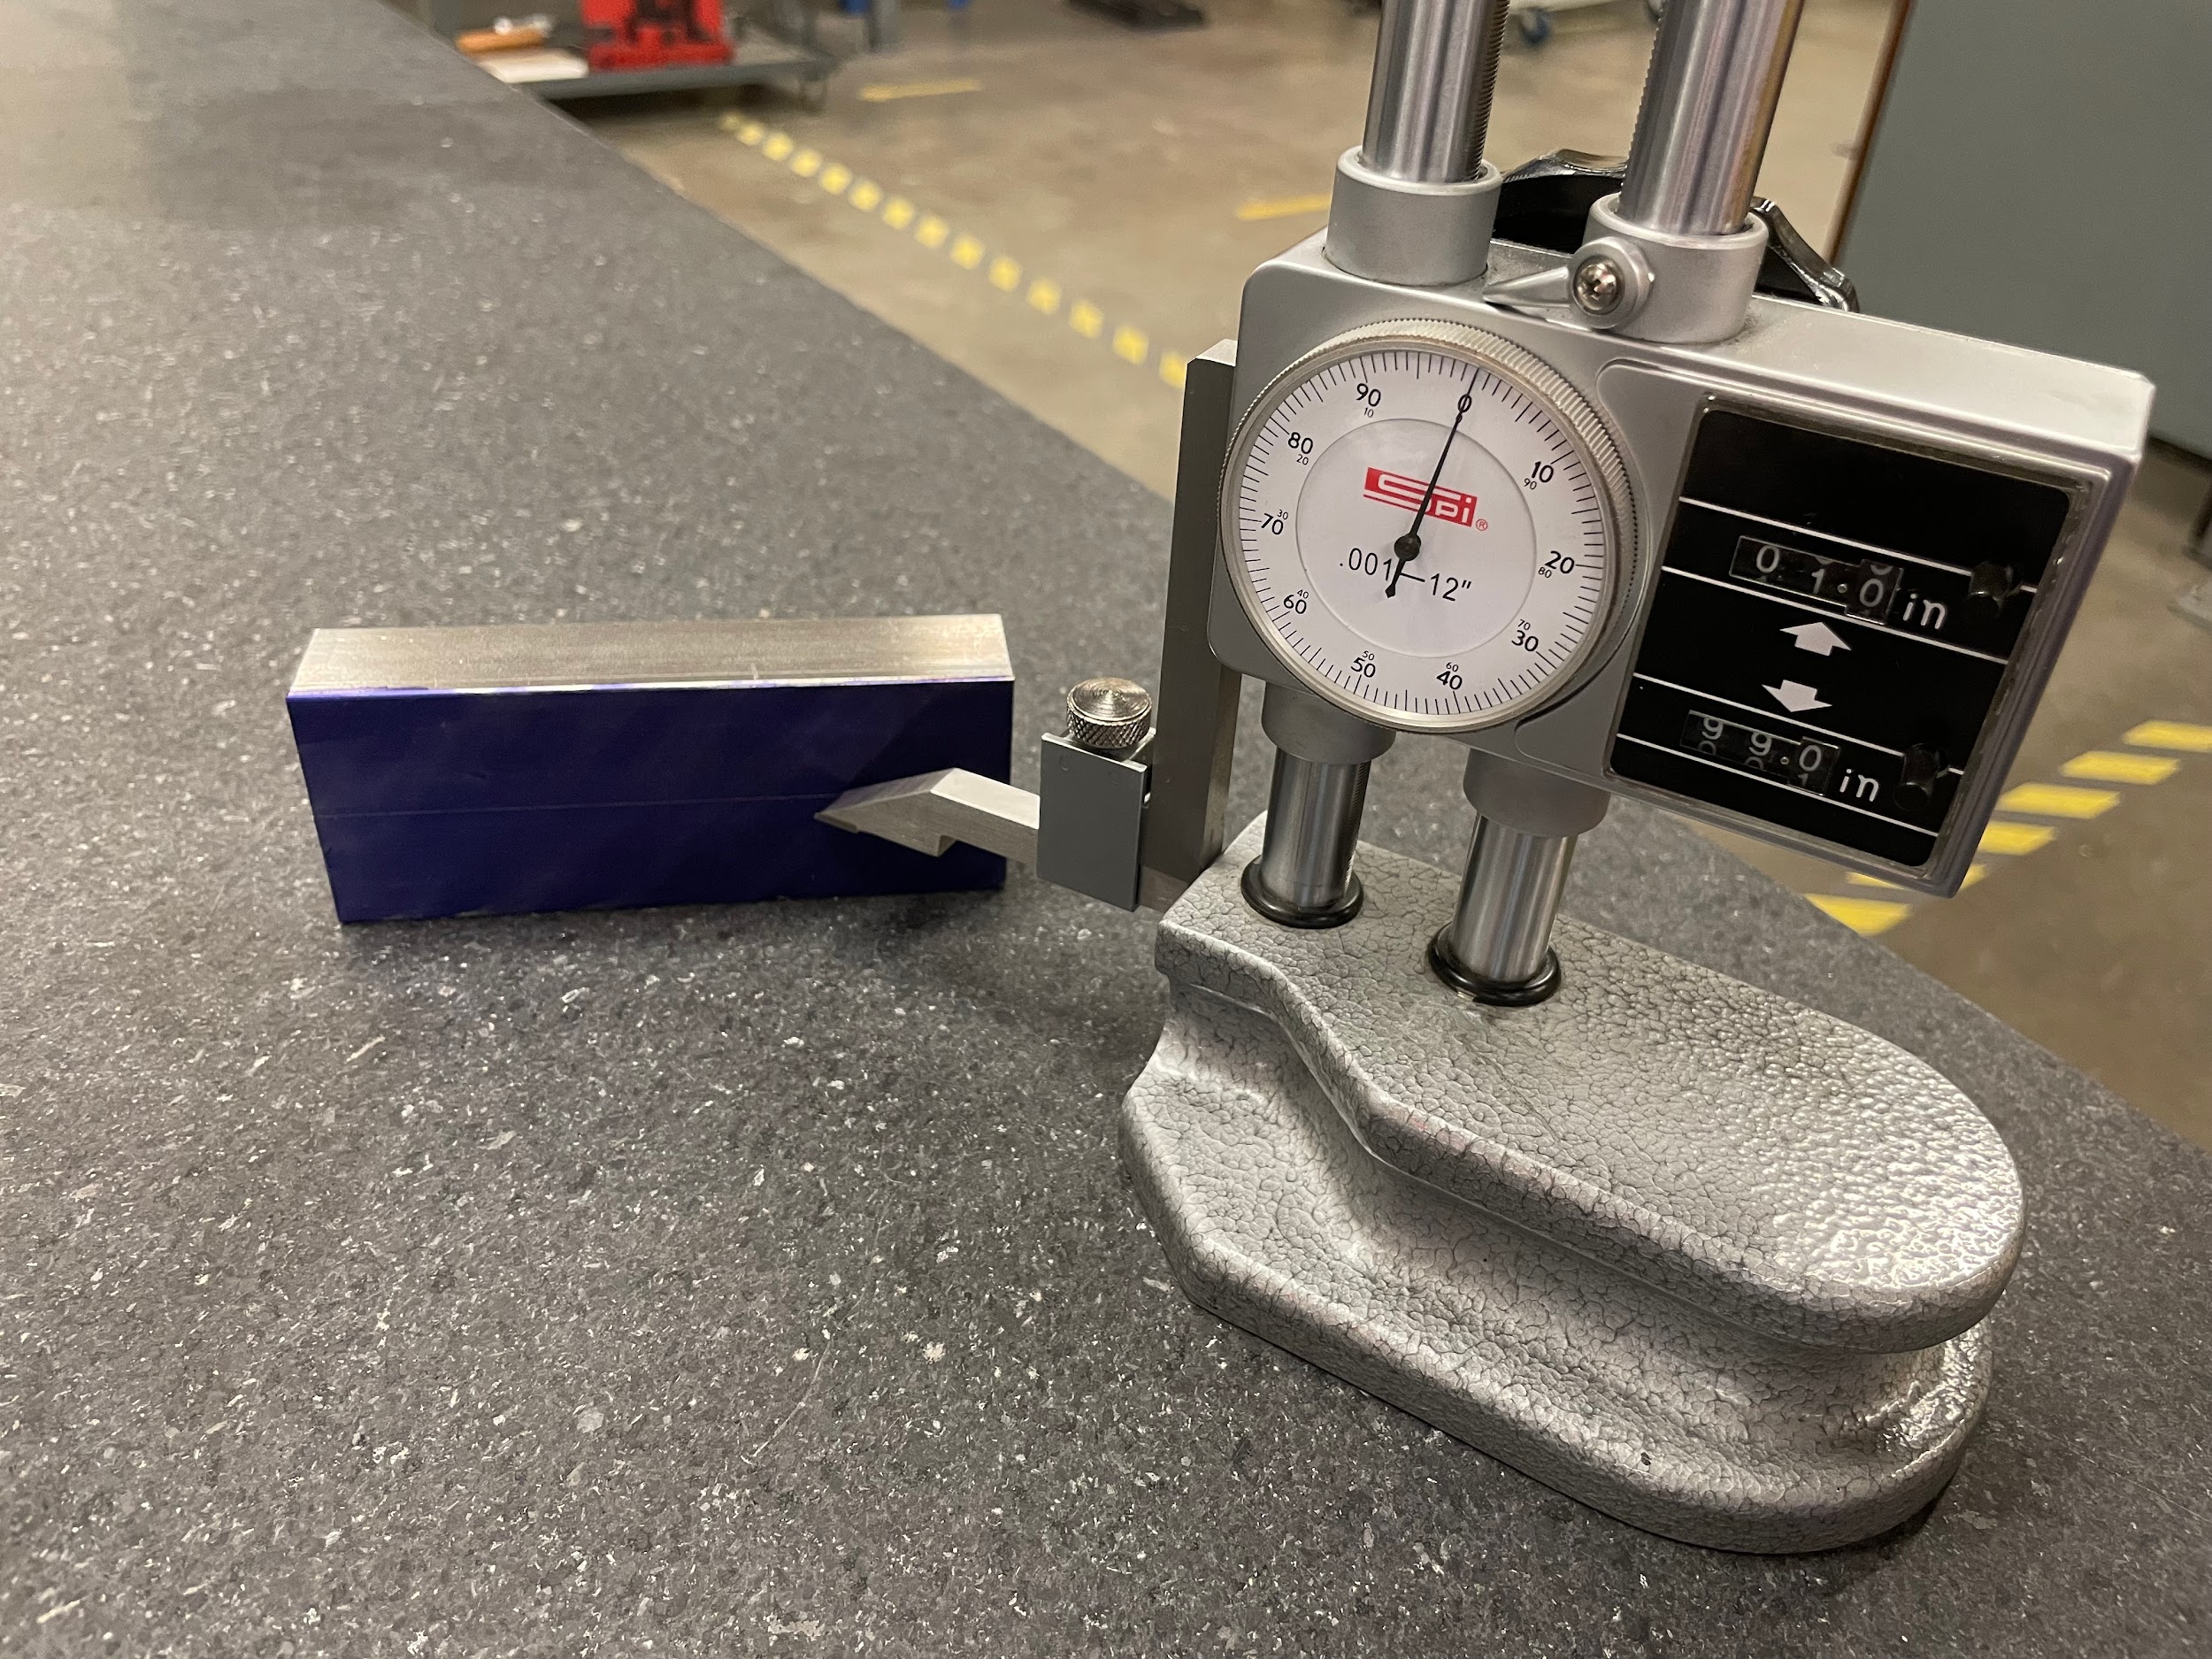
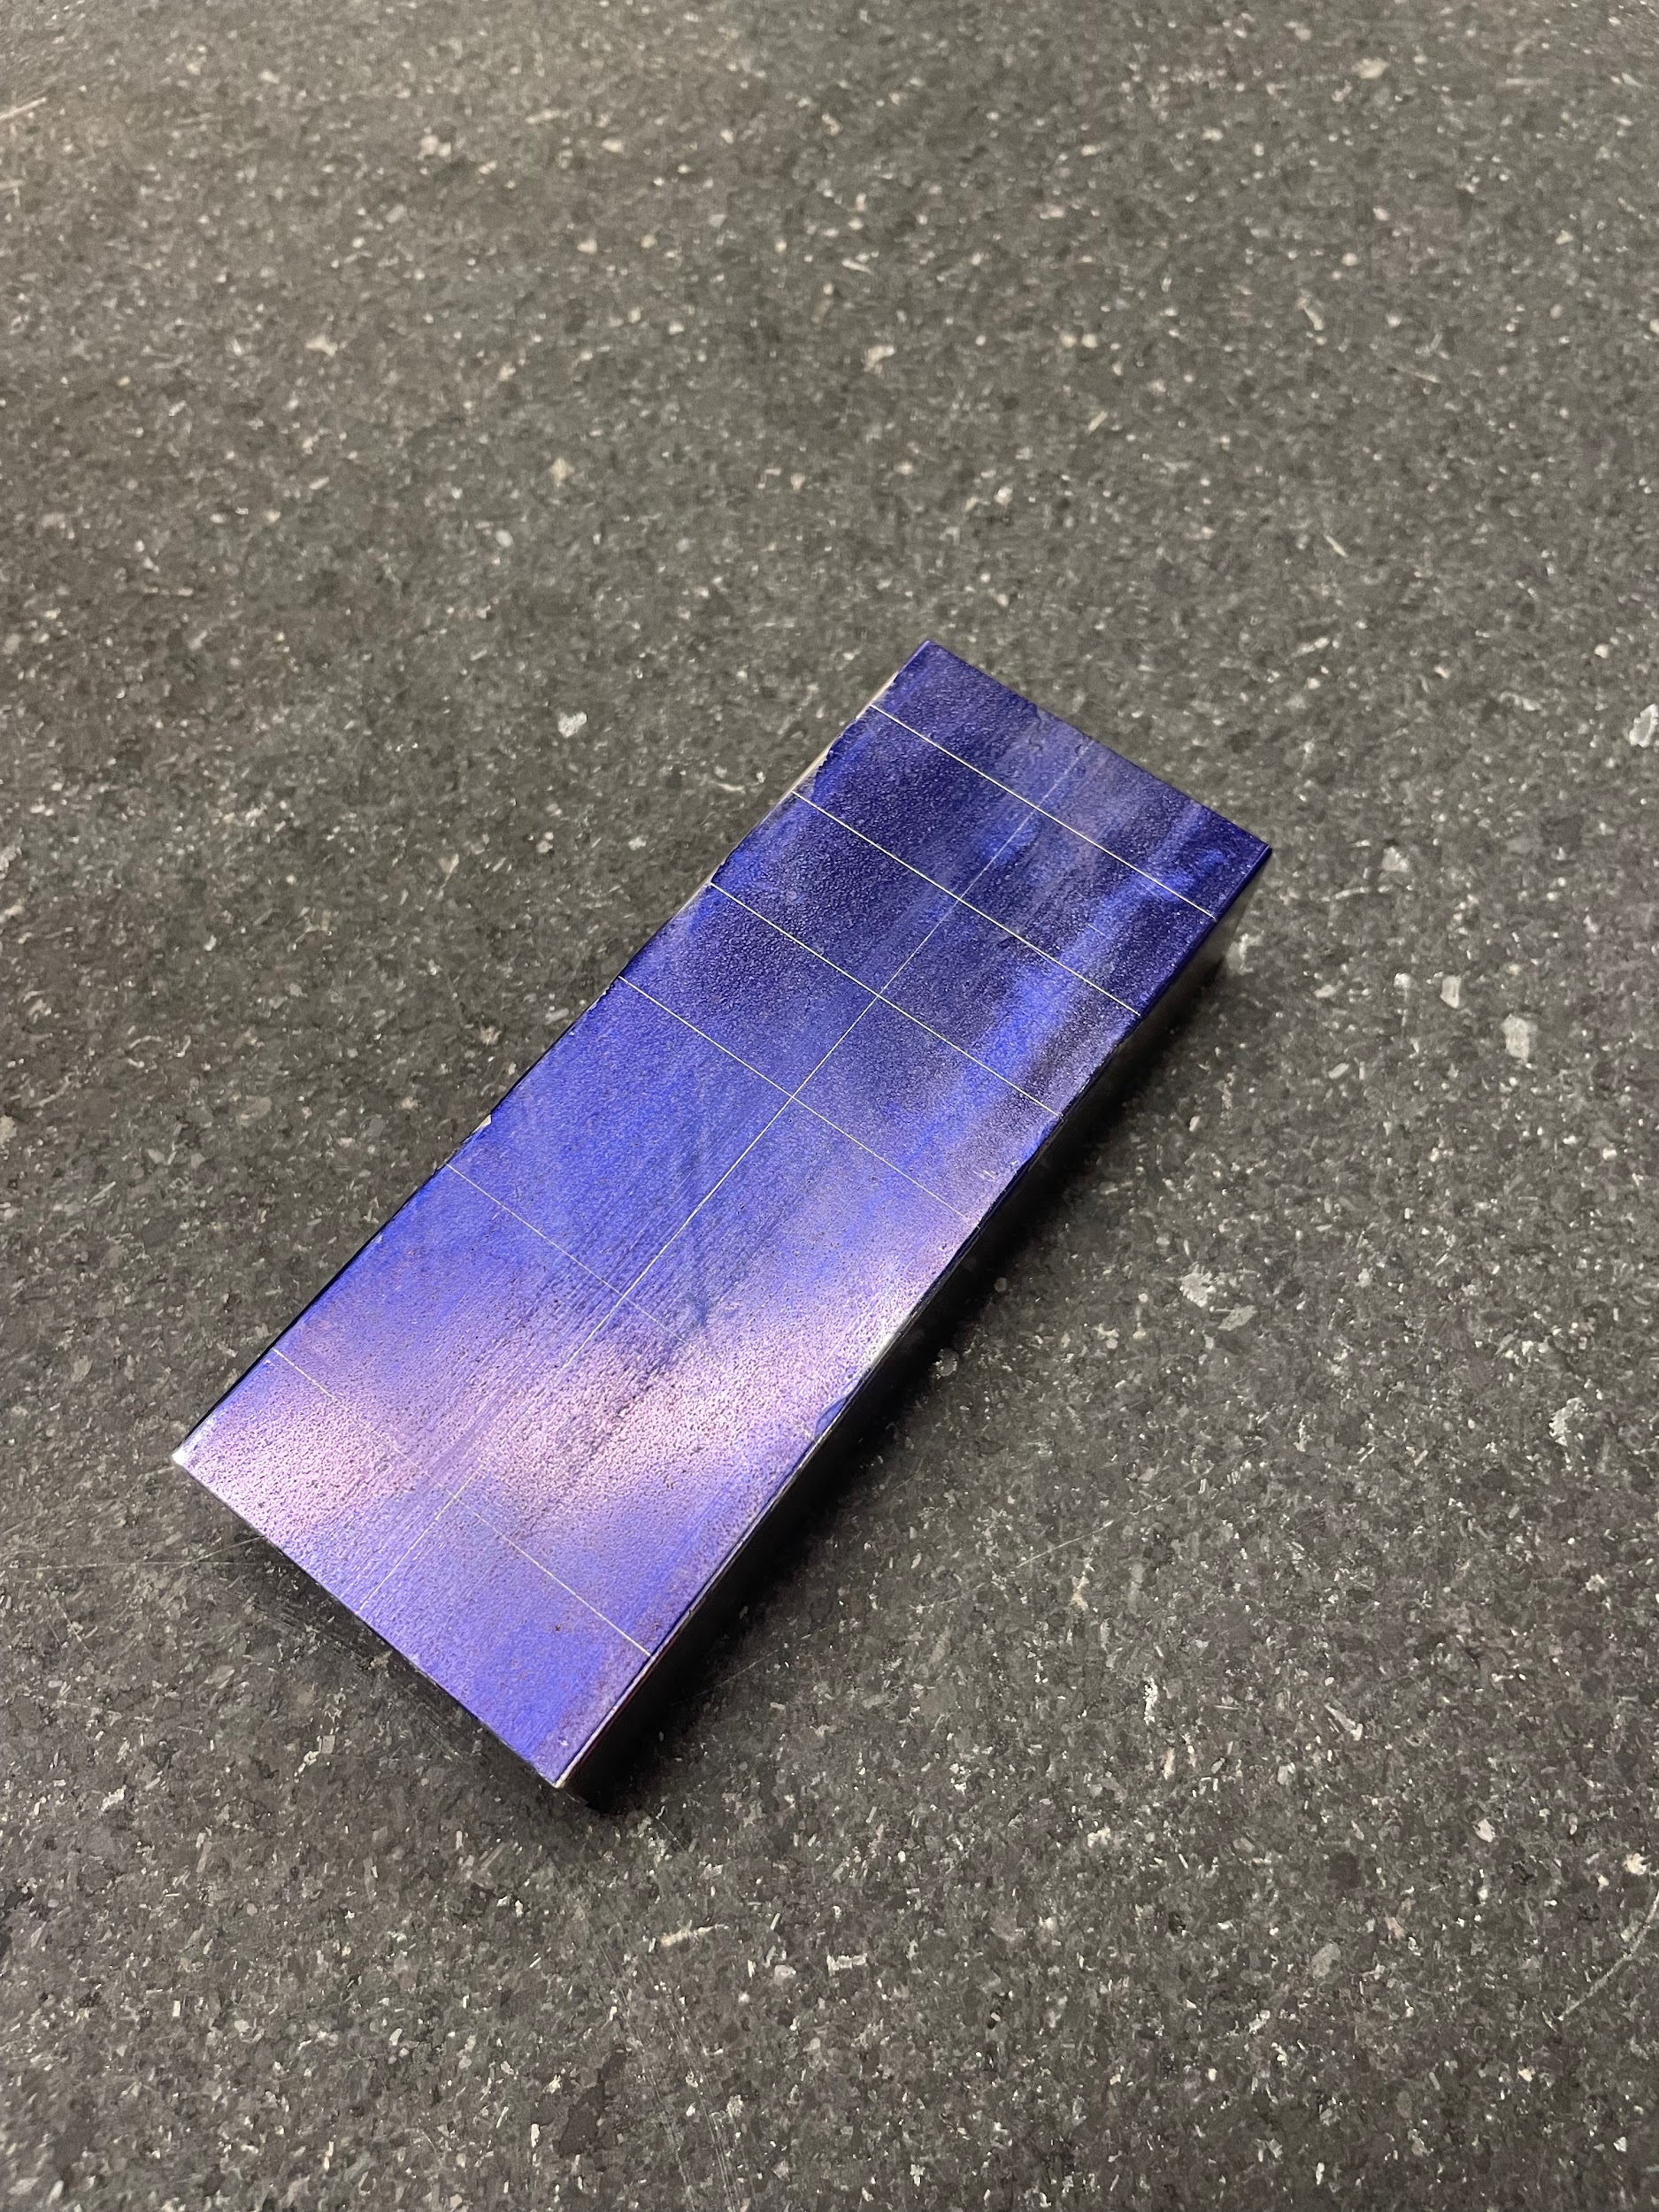
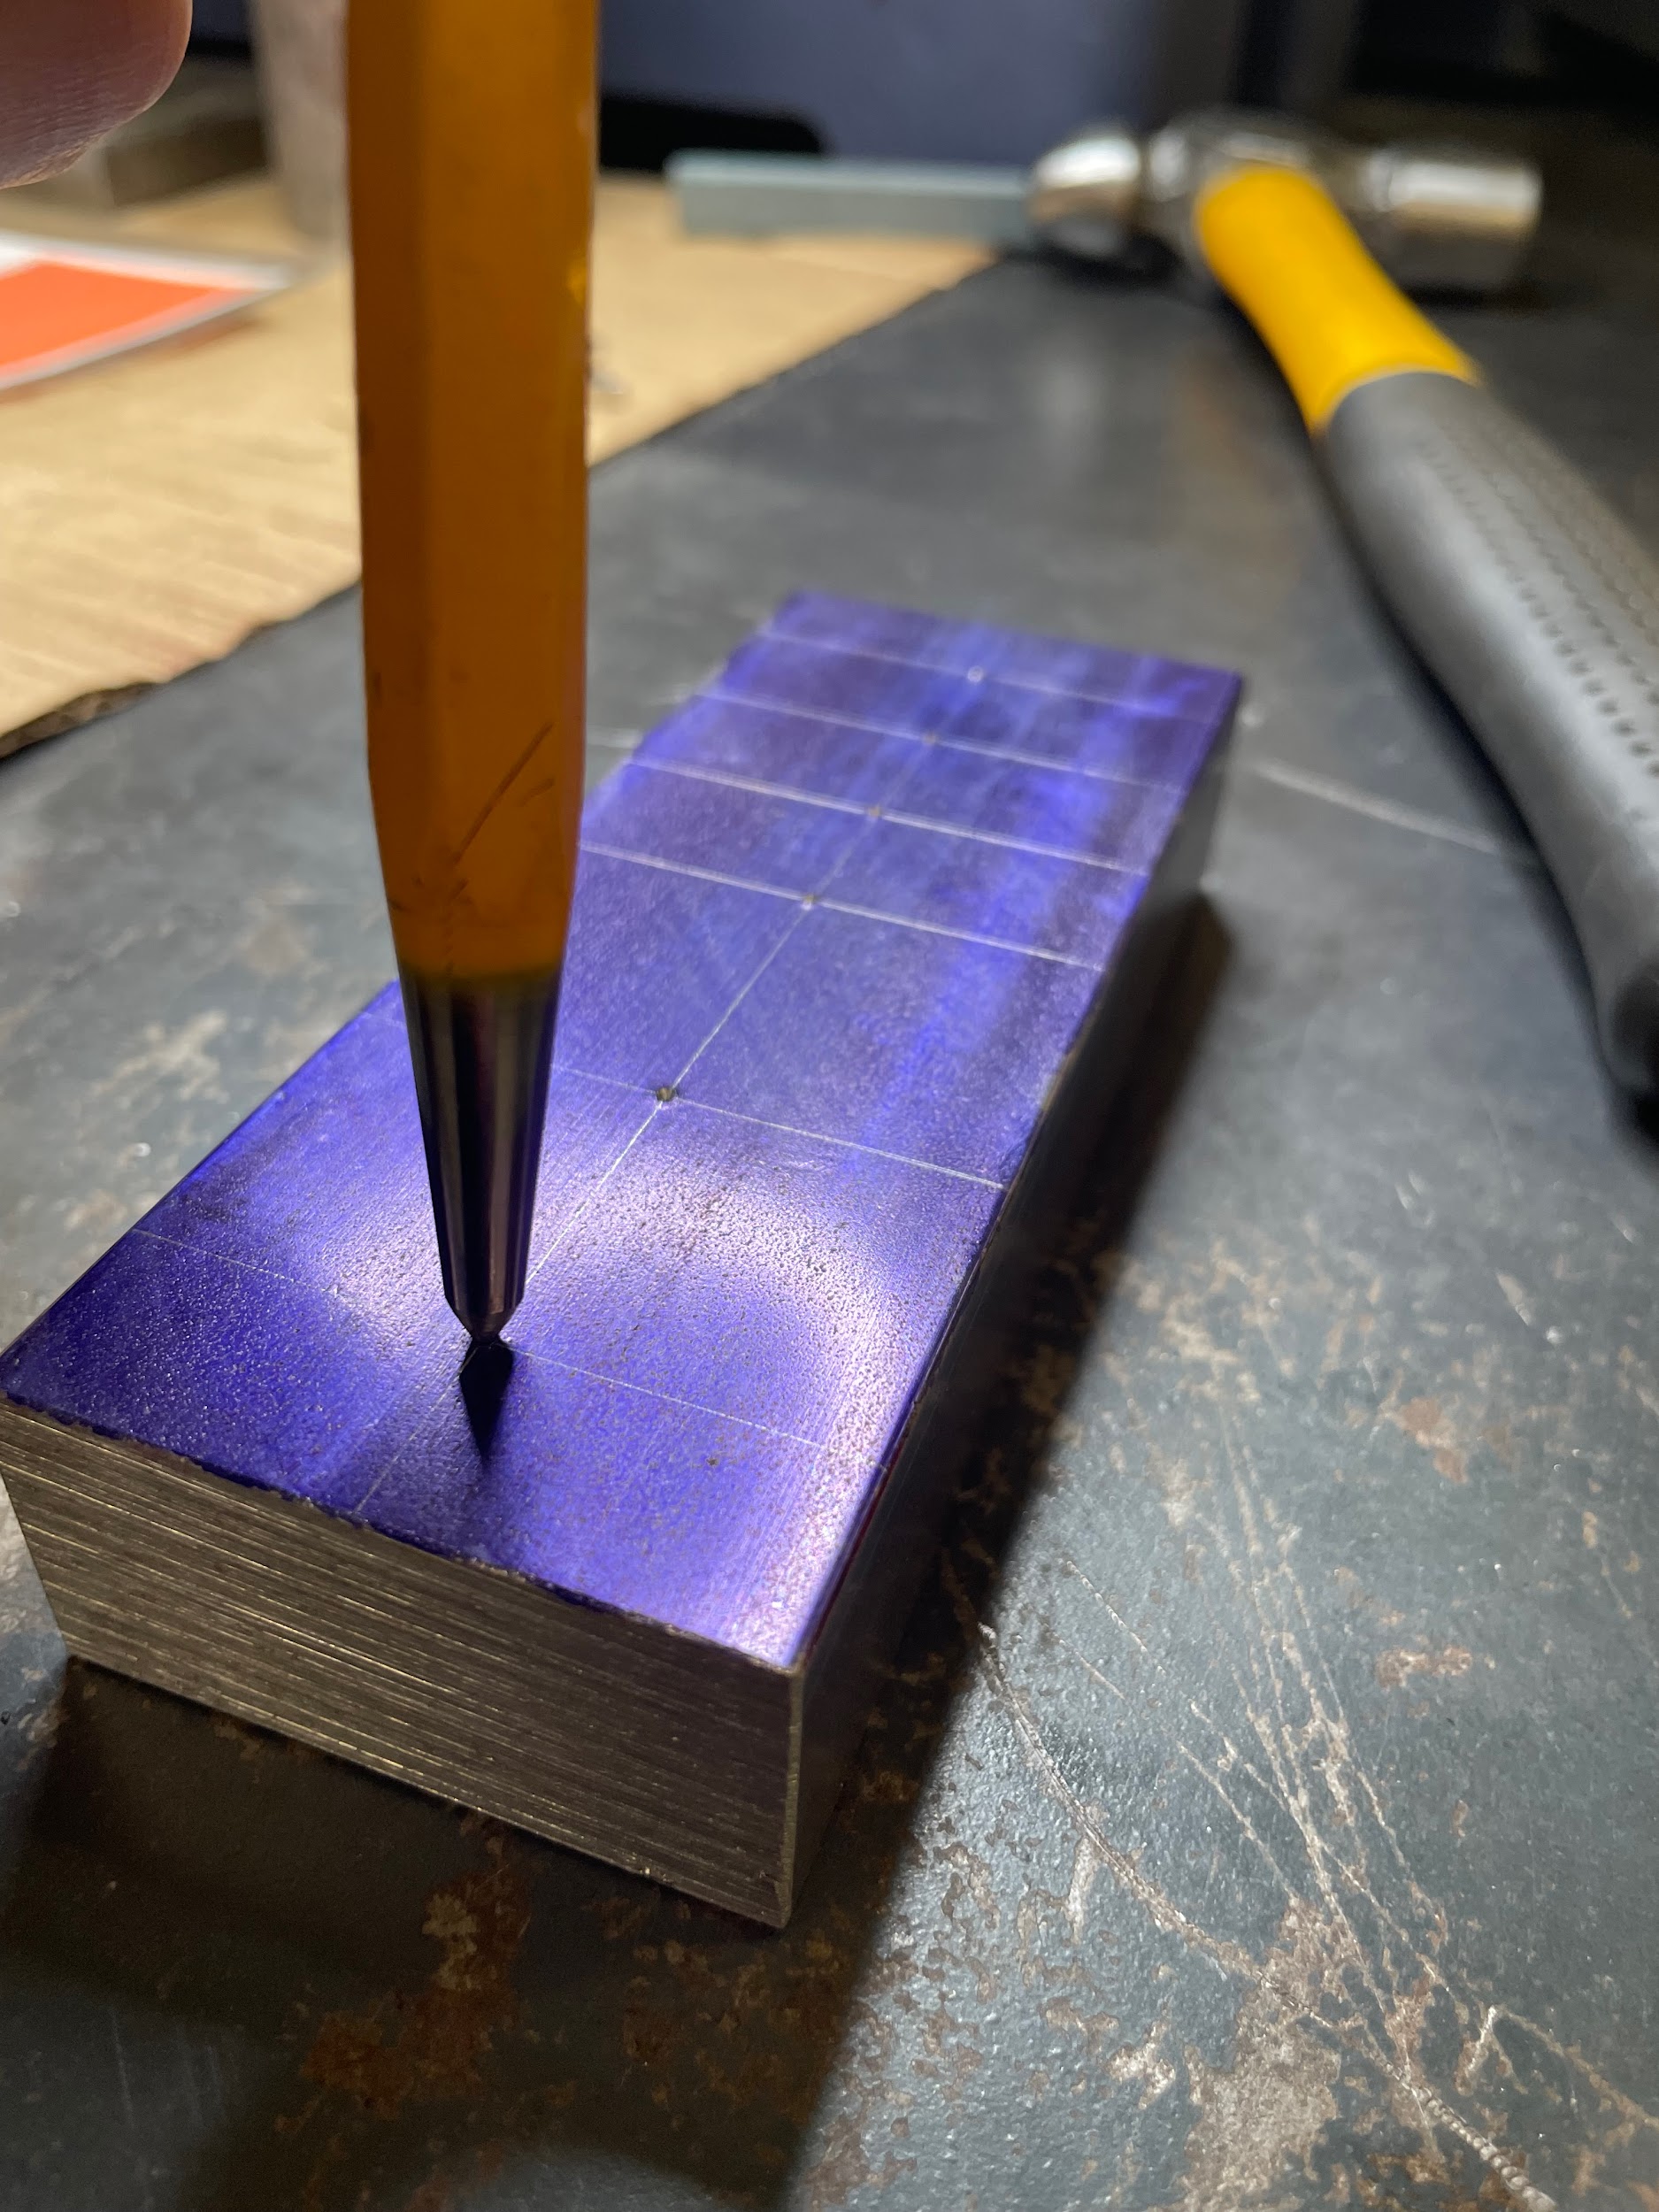
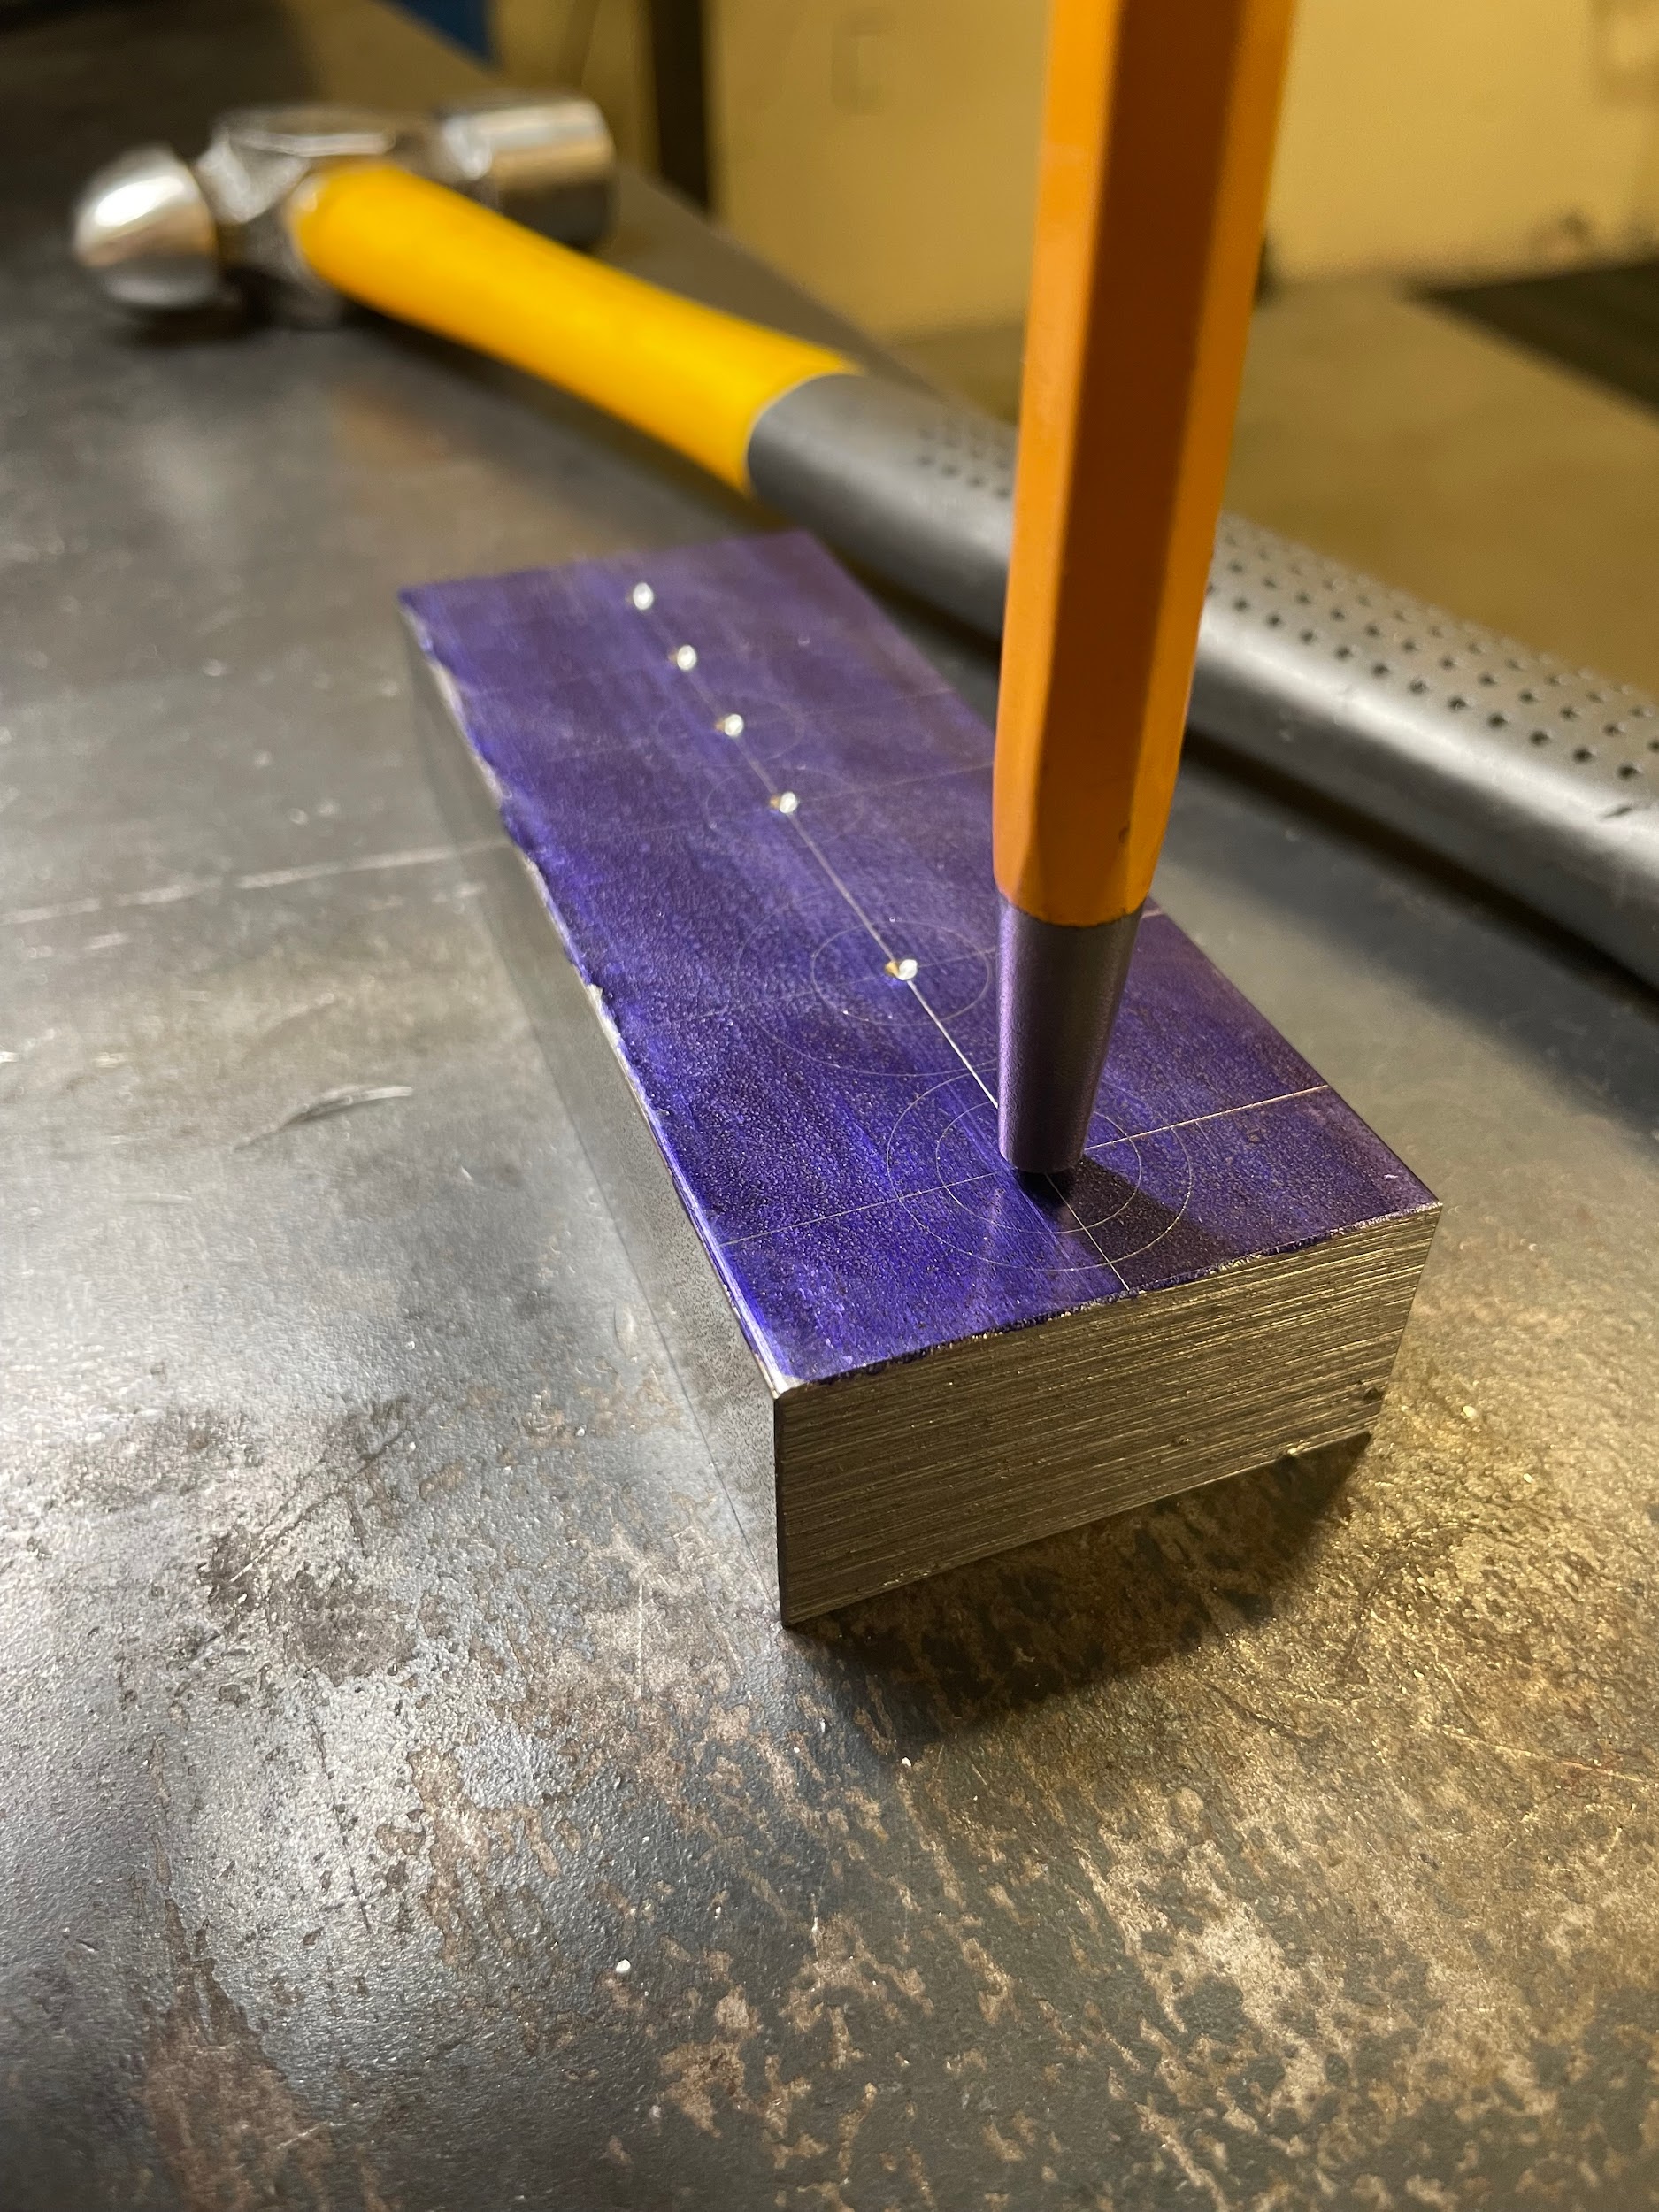
Step 2: Center punch hole locations.
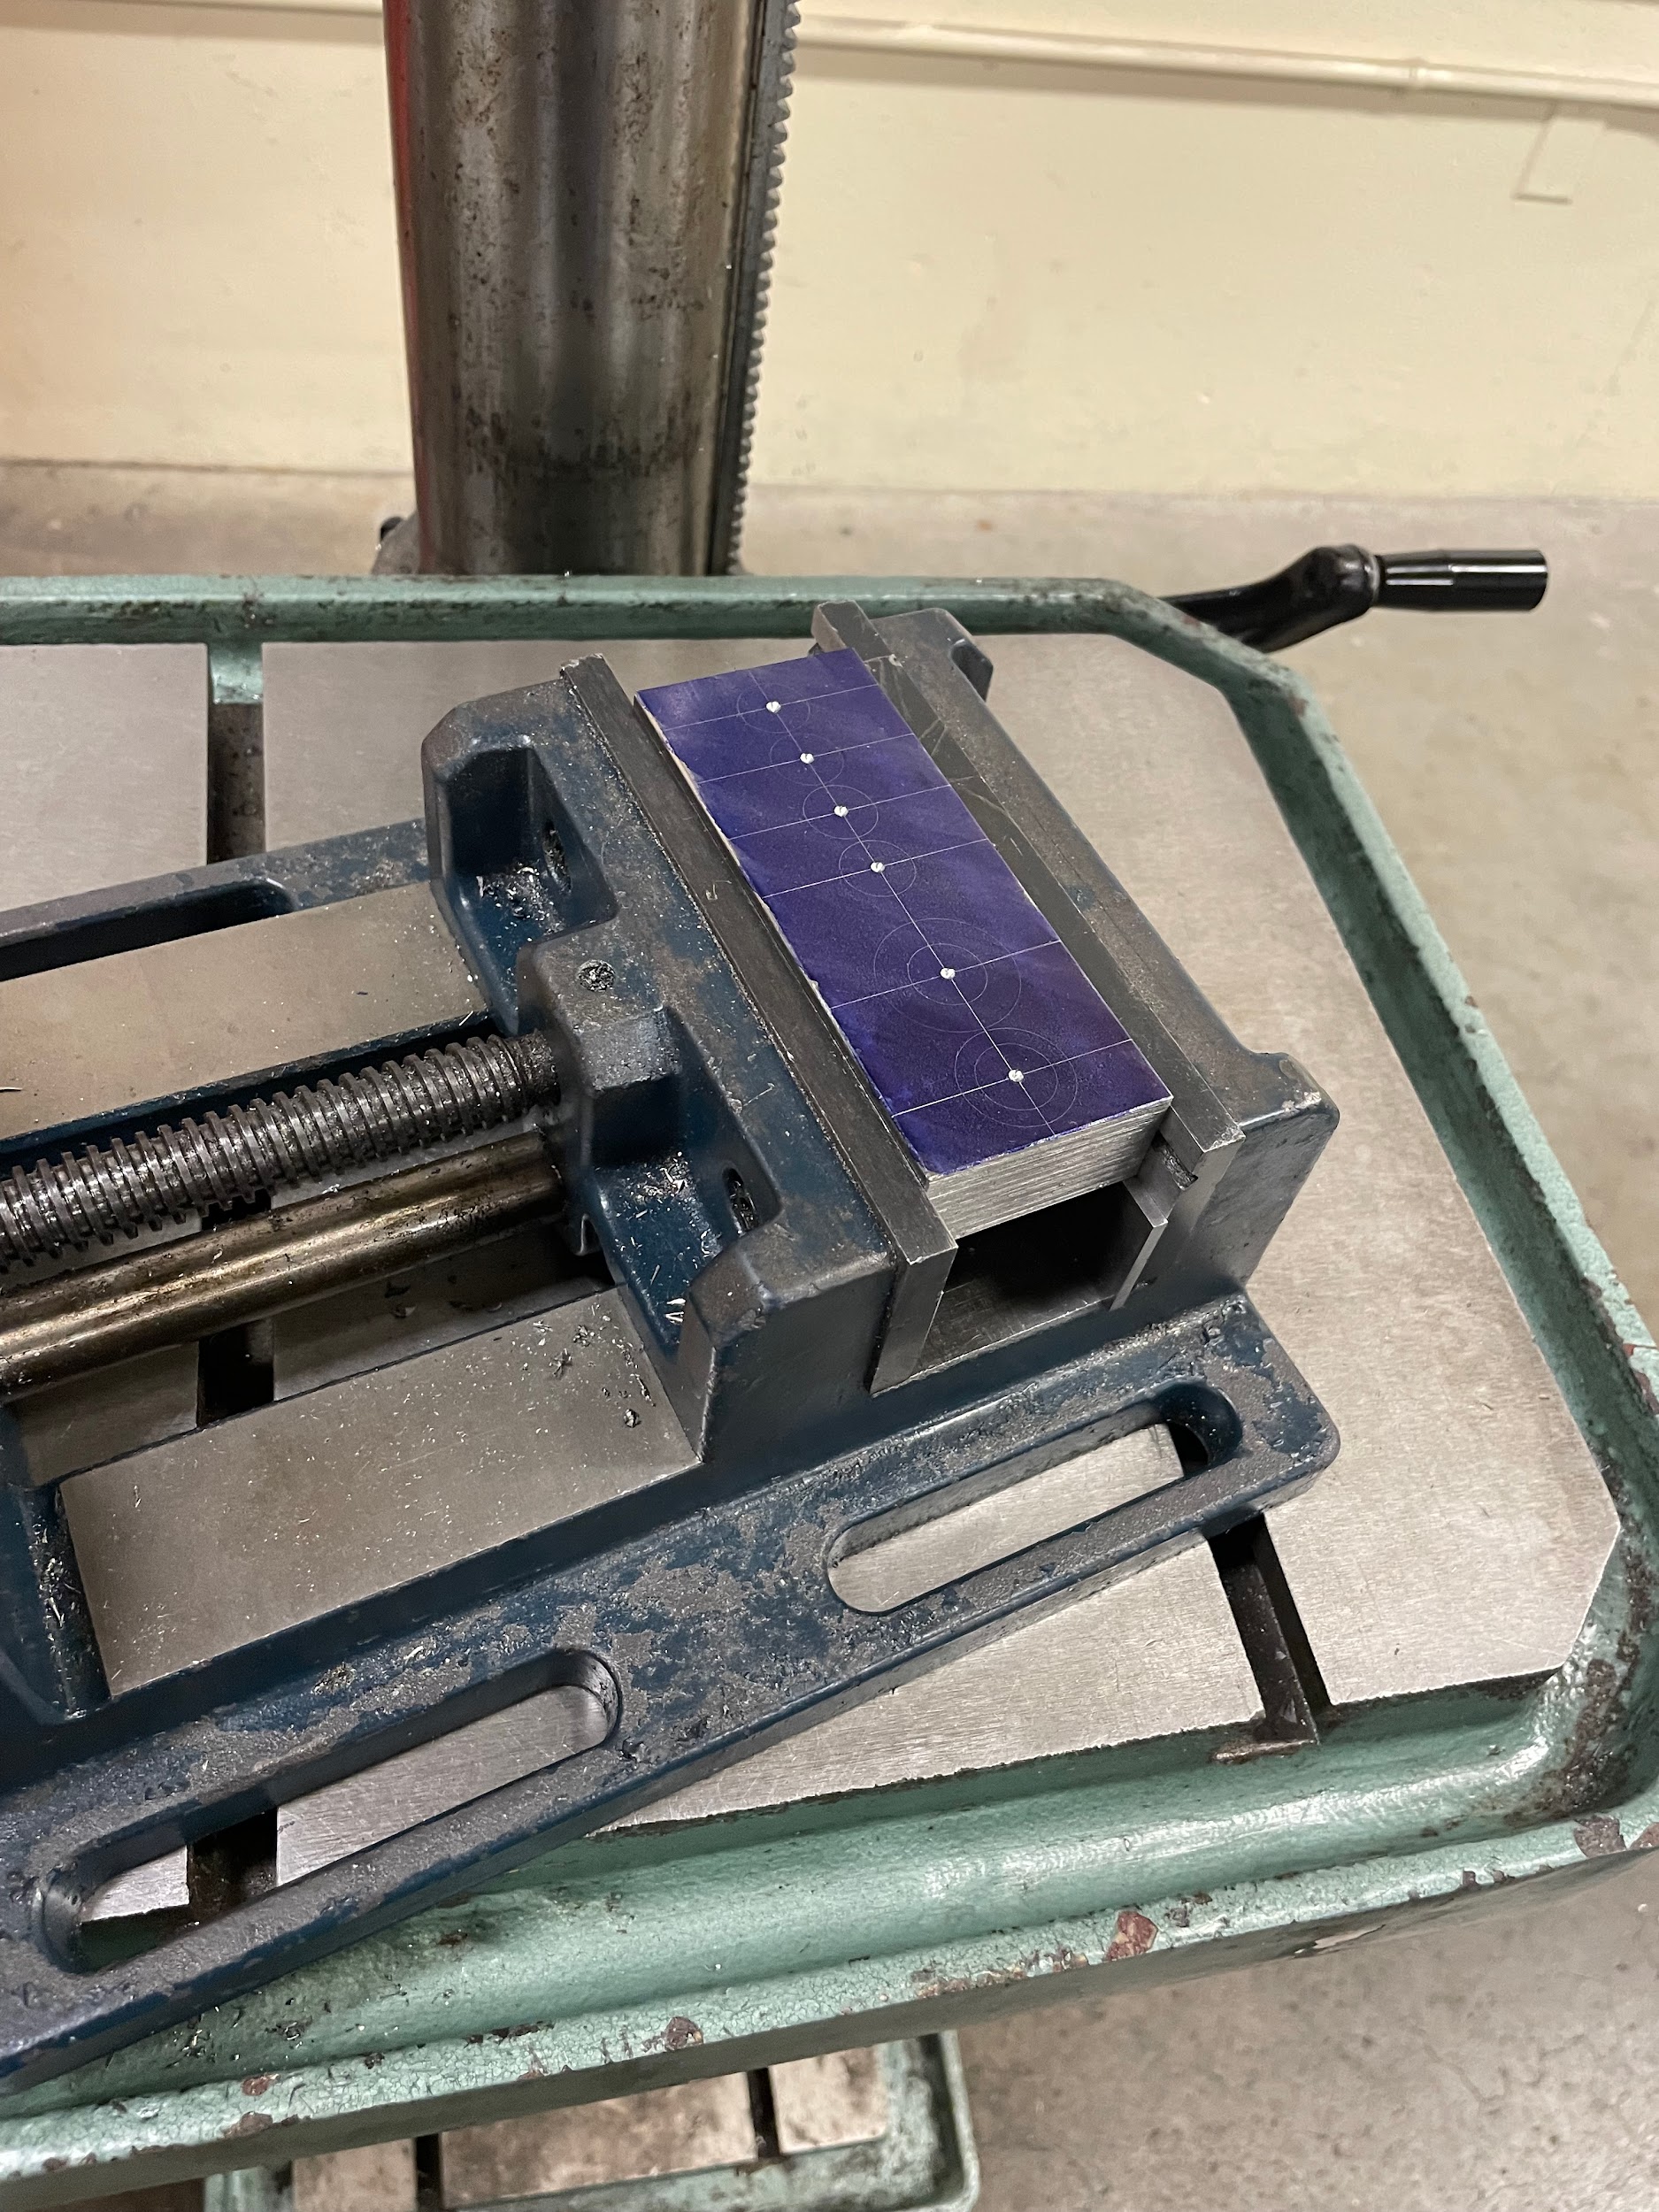
Step 3: Clamp part securely in drill vise.
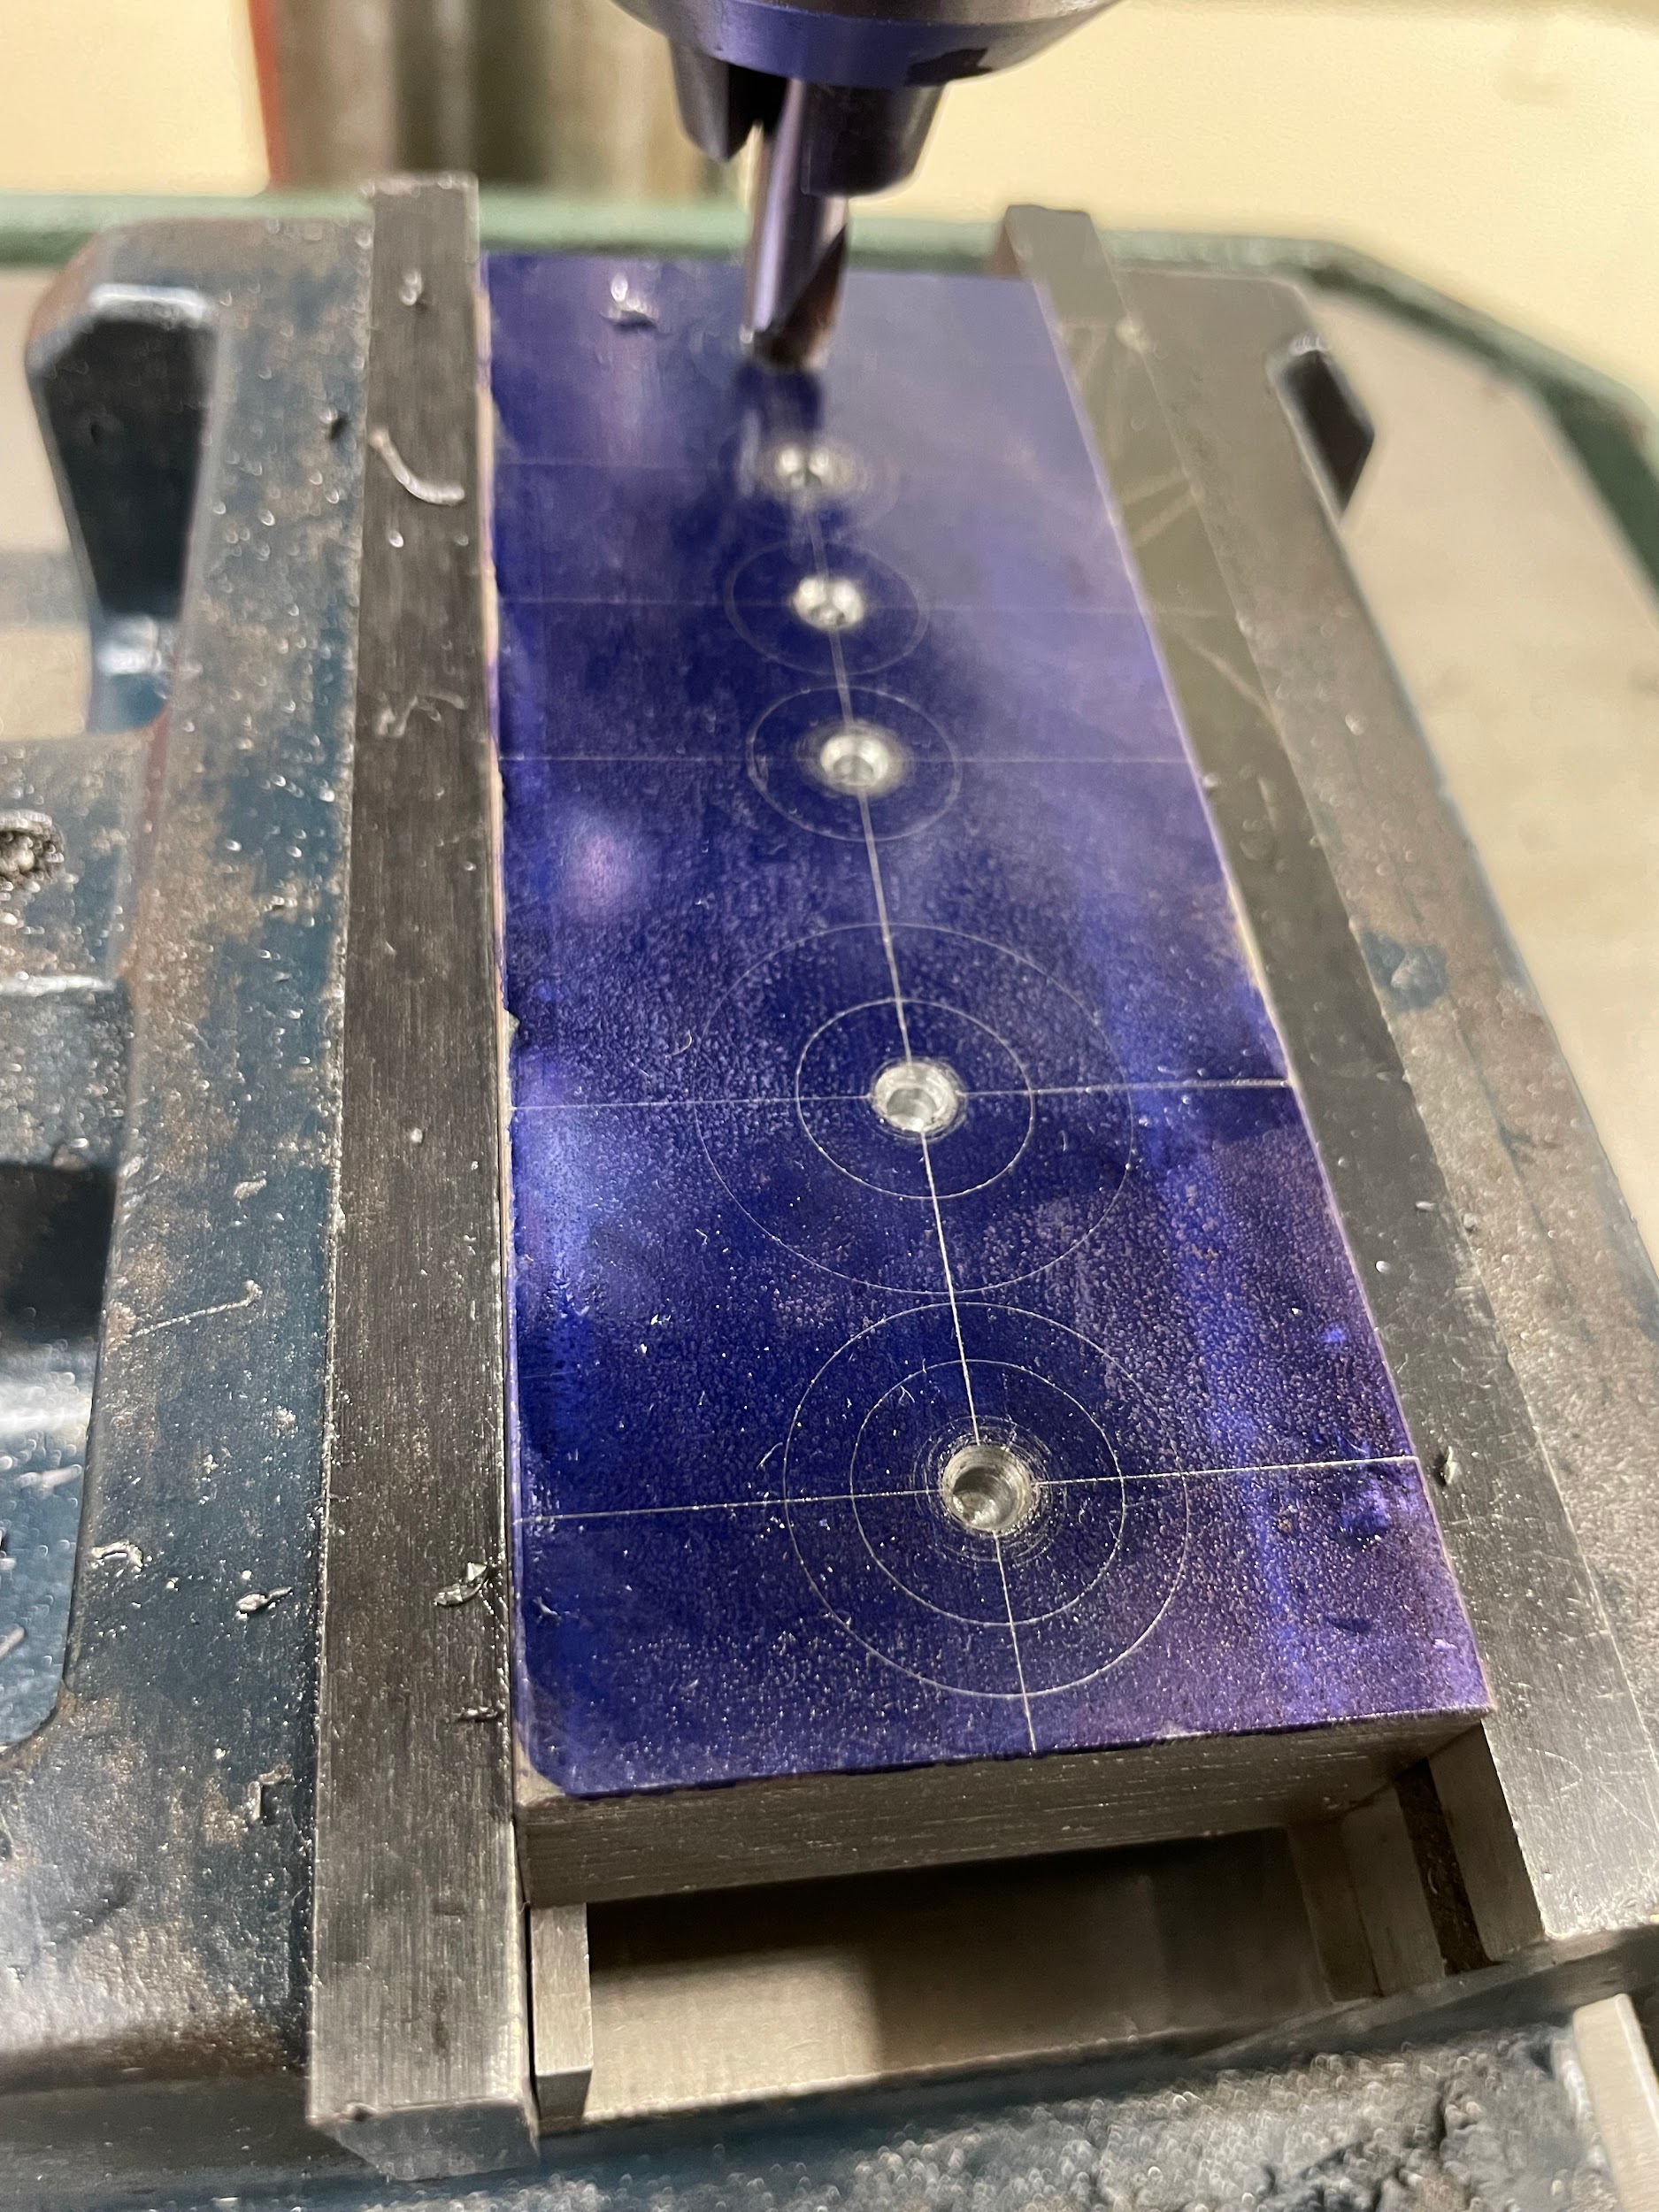
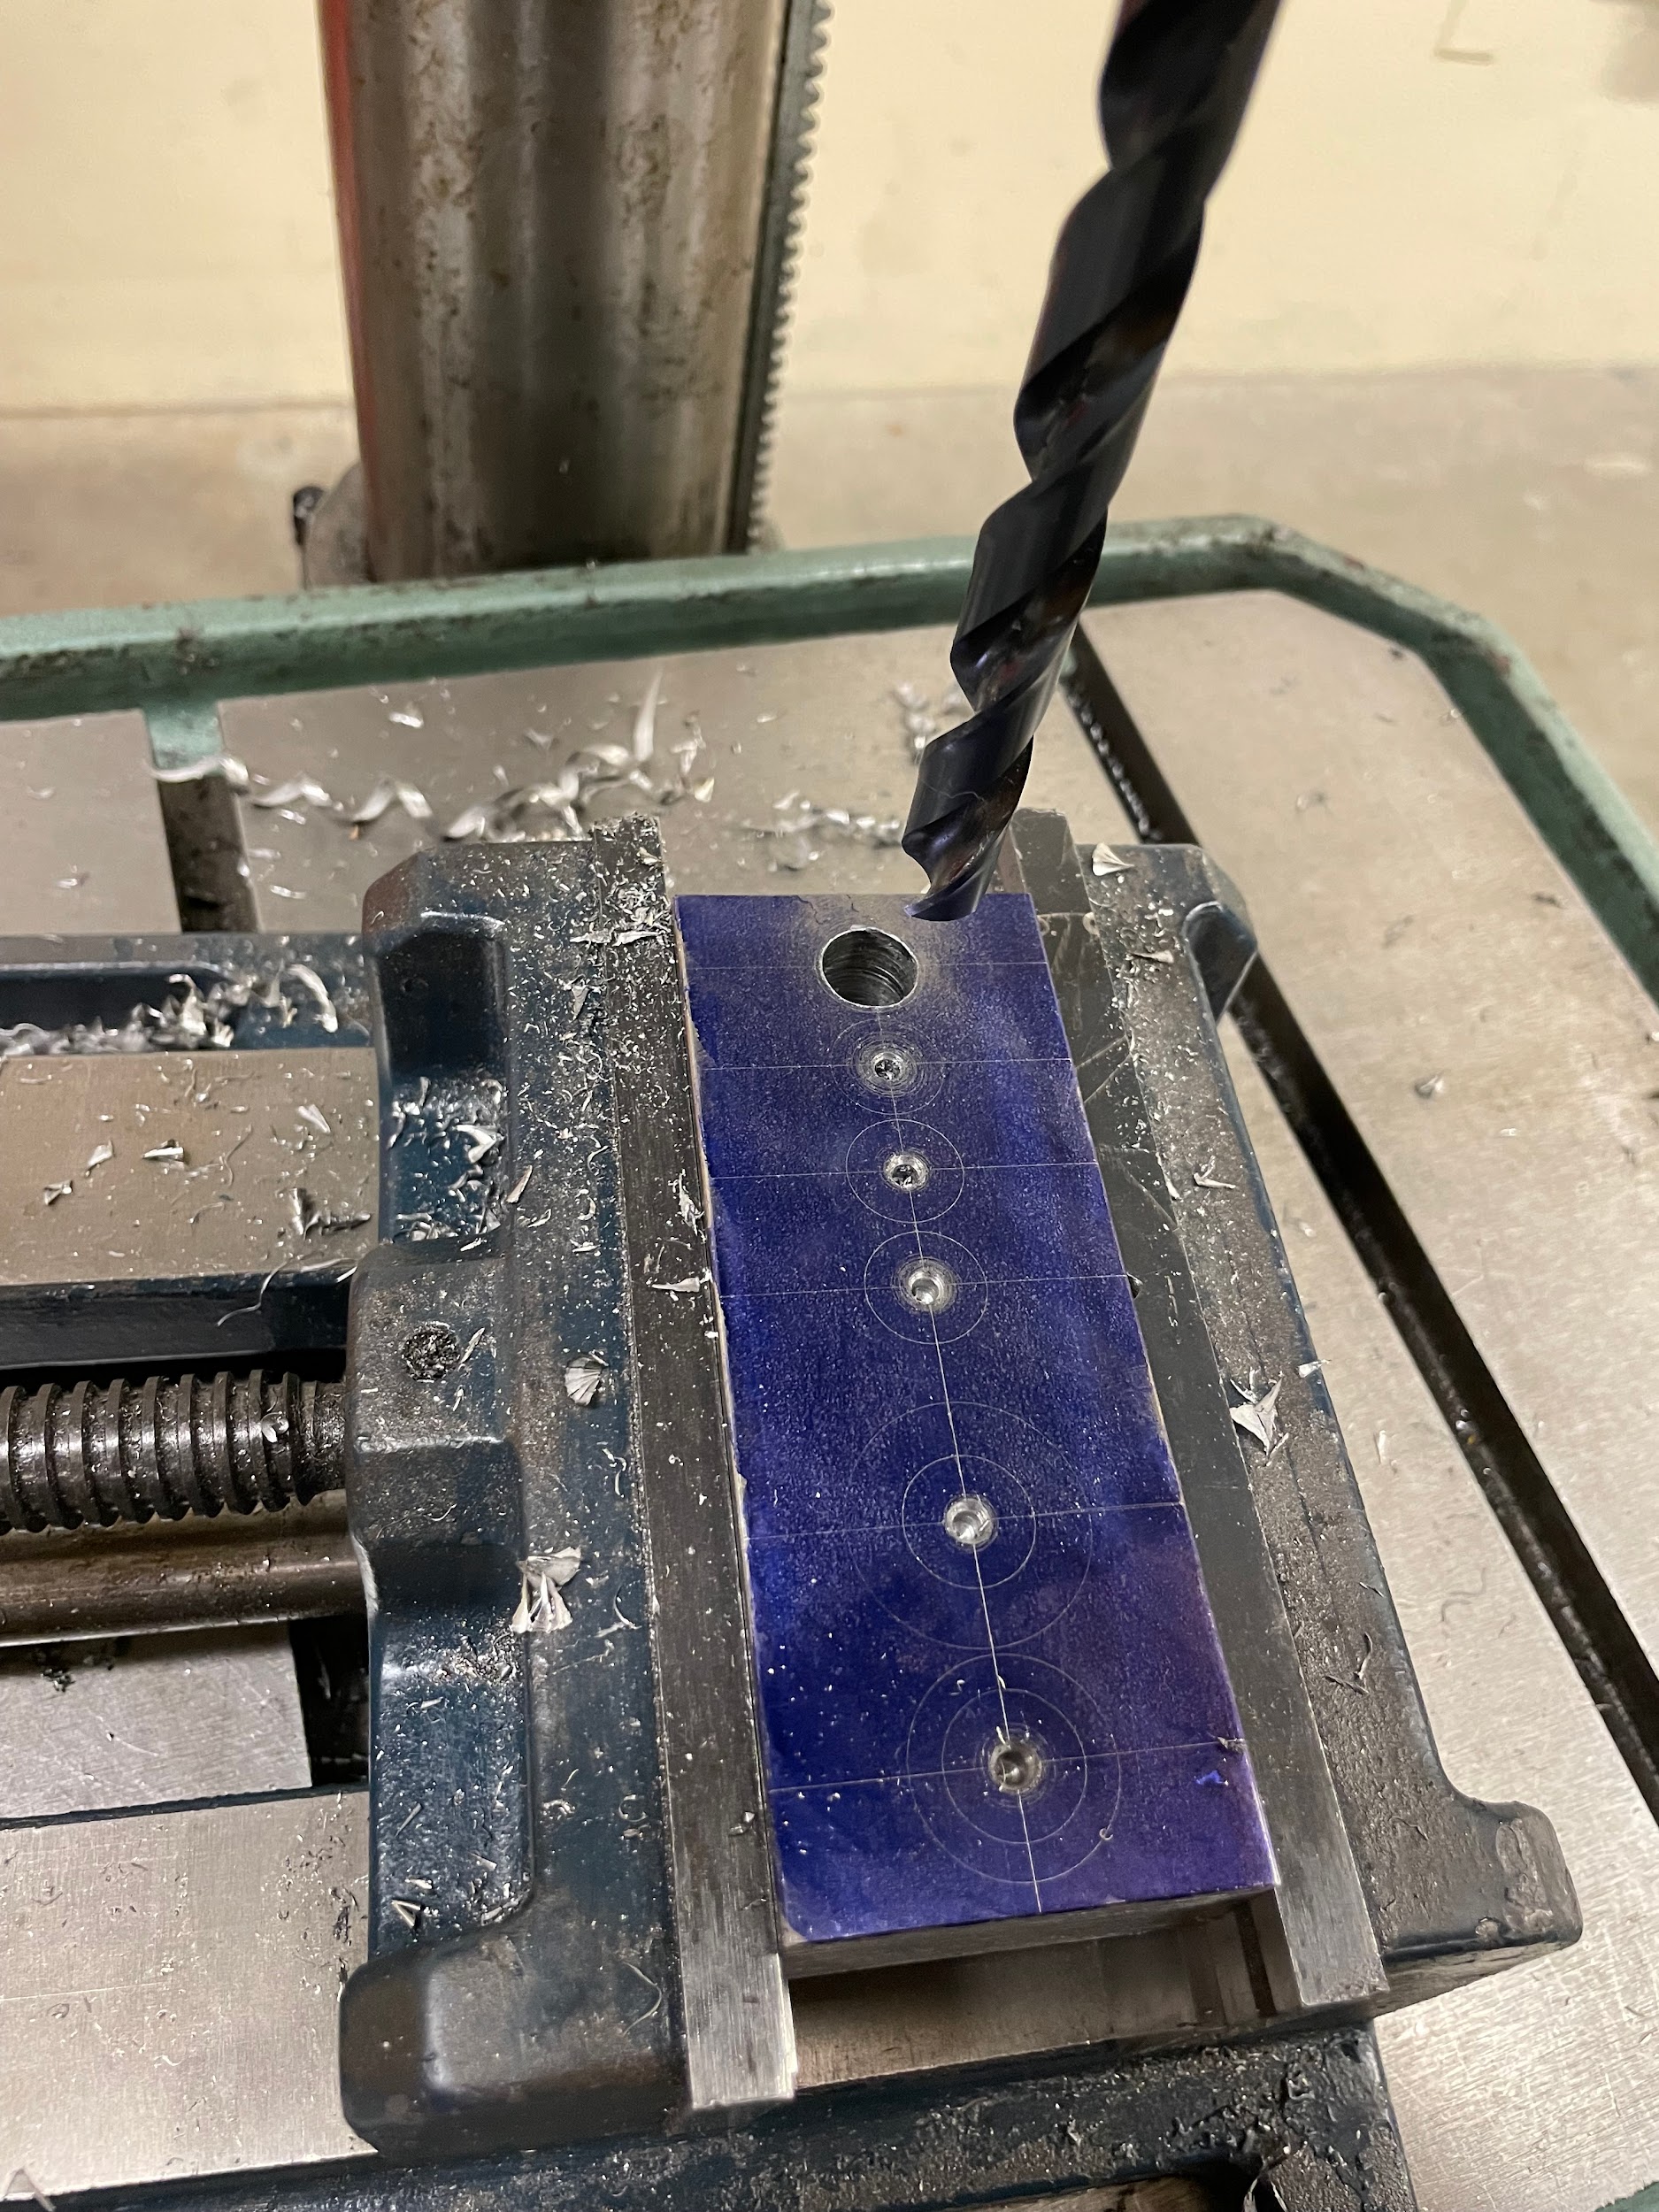
Step 10: Gently bring the spotting tool down to the center punched mark
Do it on the part with the right hand, while precisely positioning the vise with the left hand. Leaving the vise unclamped will allow the vise to float on the table and more precisely align with the center punch mark.
Tolerances
Drilled holes may have a specific tolerance callout on the print that needs to be adhered to. Regardless of this tolerance, a quality twist drill should be held to cutting no larger than .005 over the size of the bit itself. If a bit is cutting larger than .005 there are other issues at play and should be investigated further.
Drilling large holes and pilot drilling
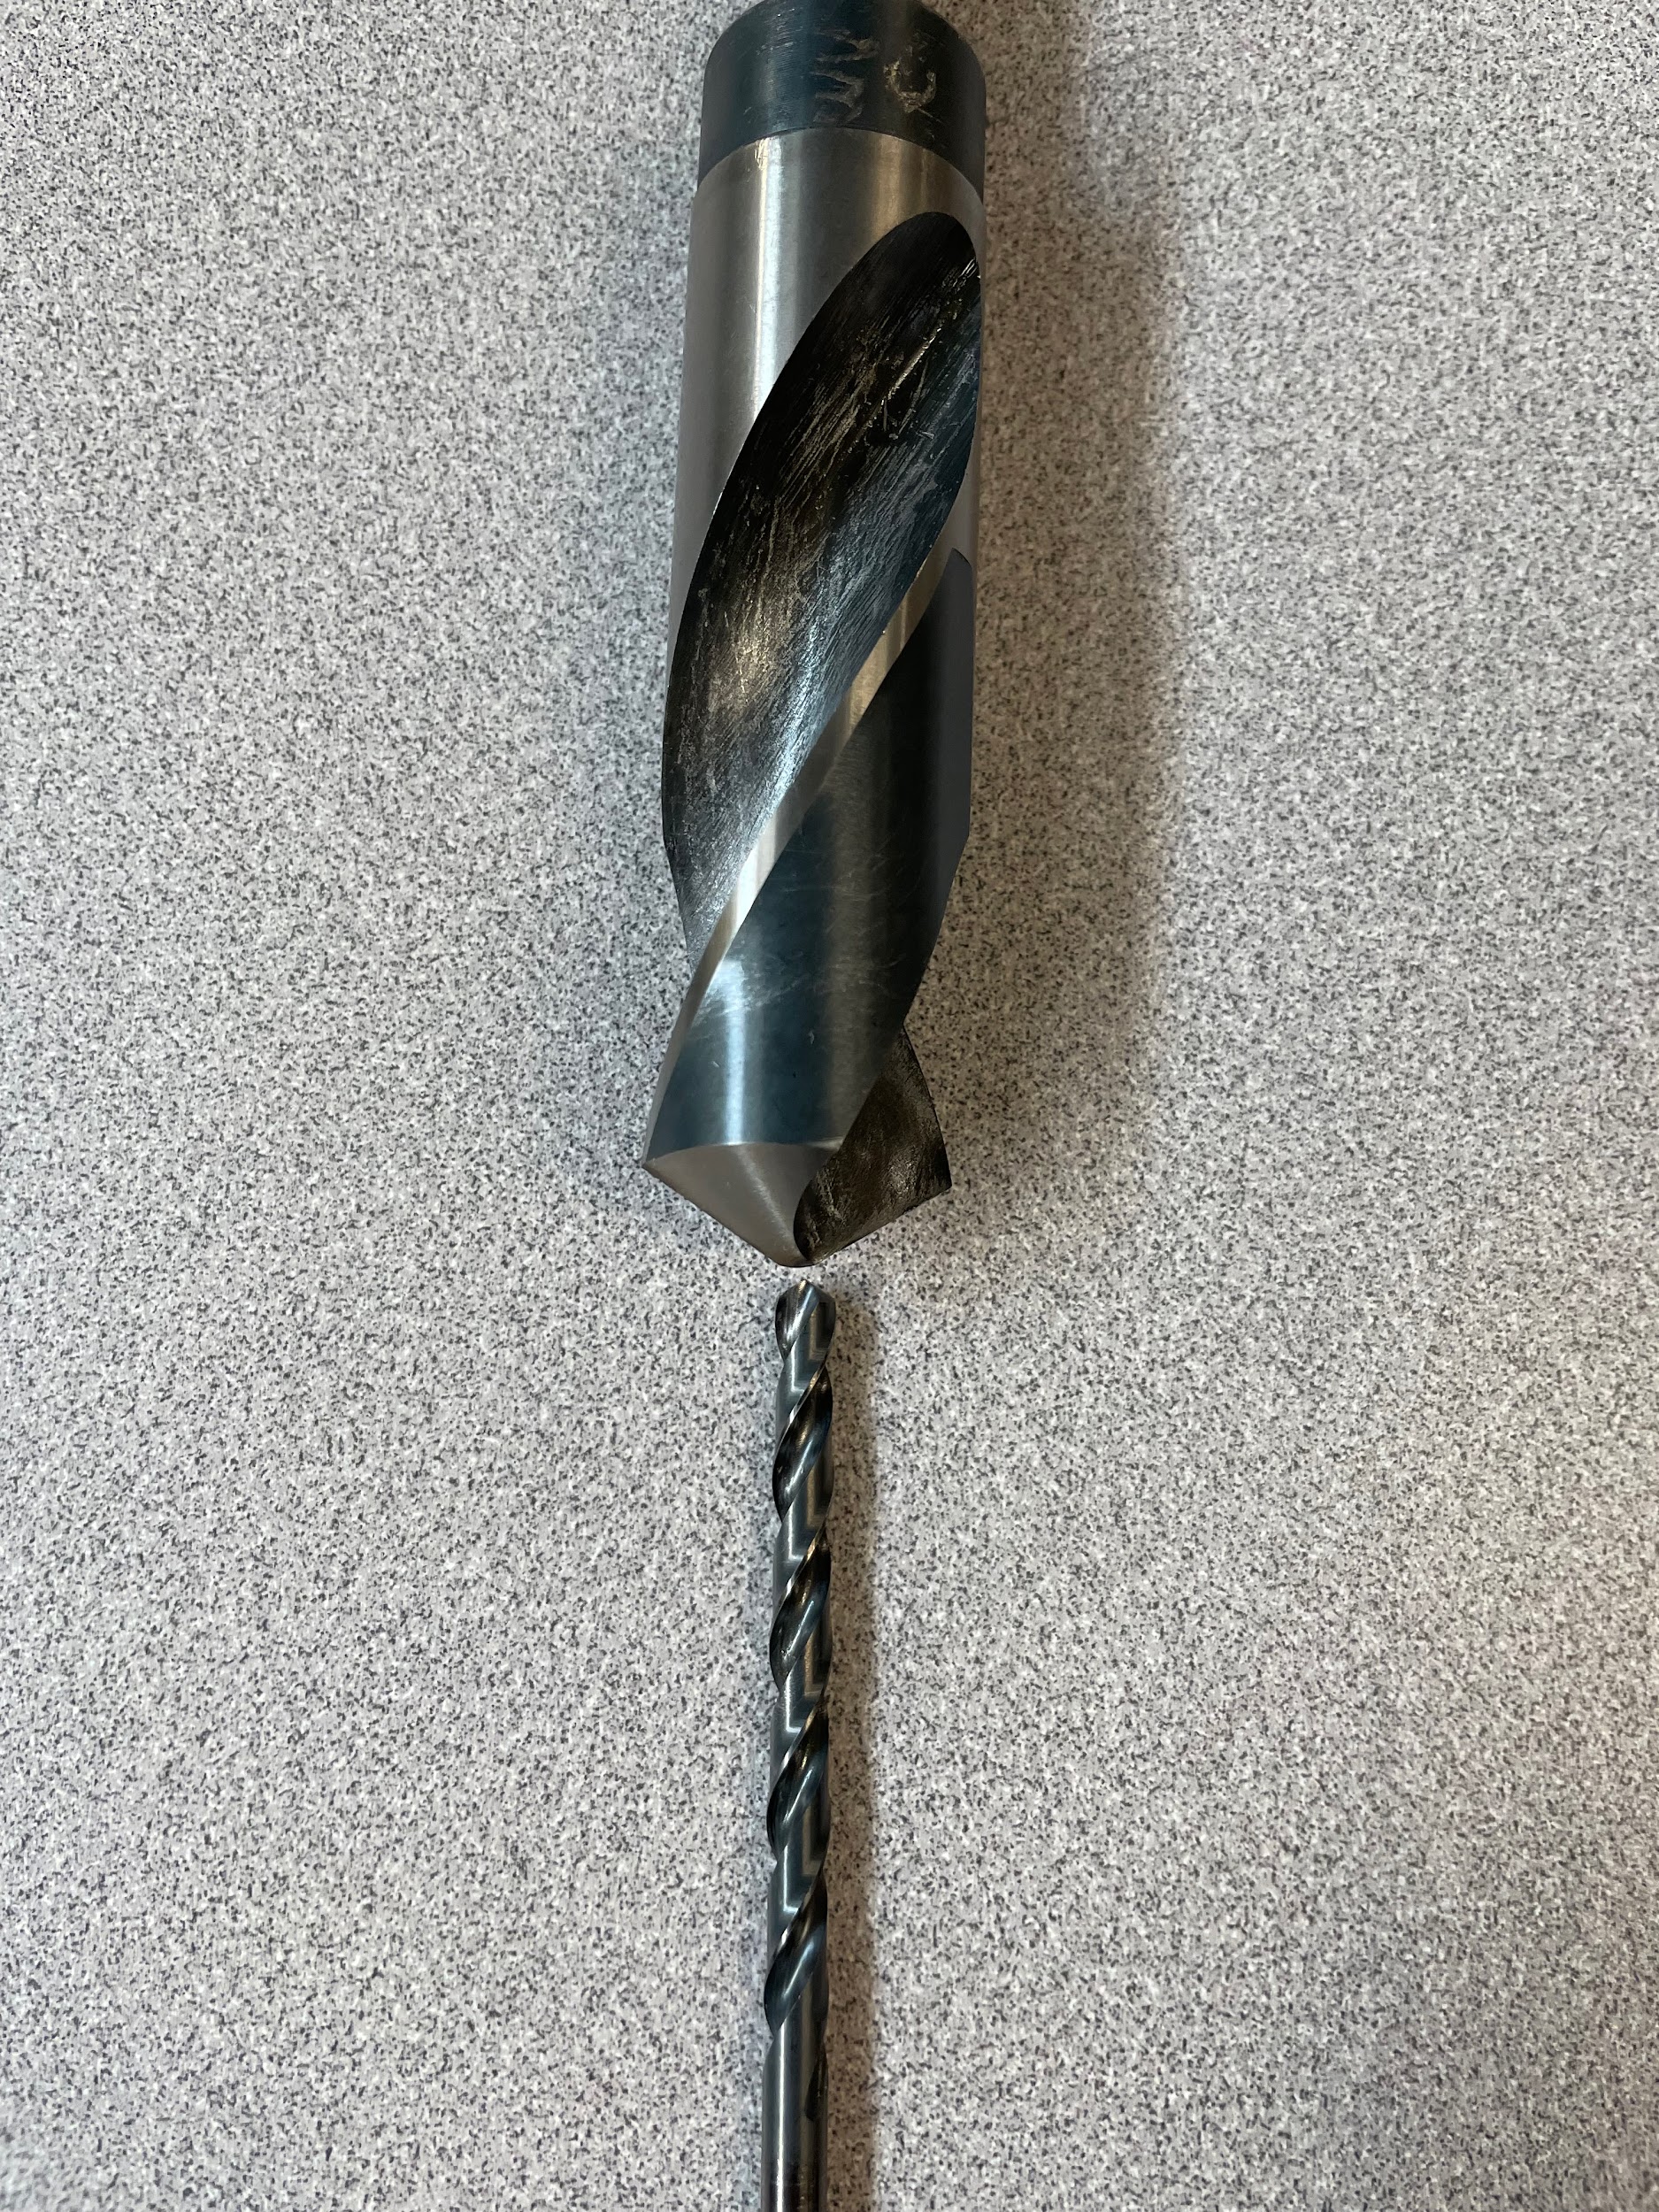
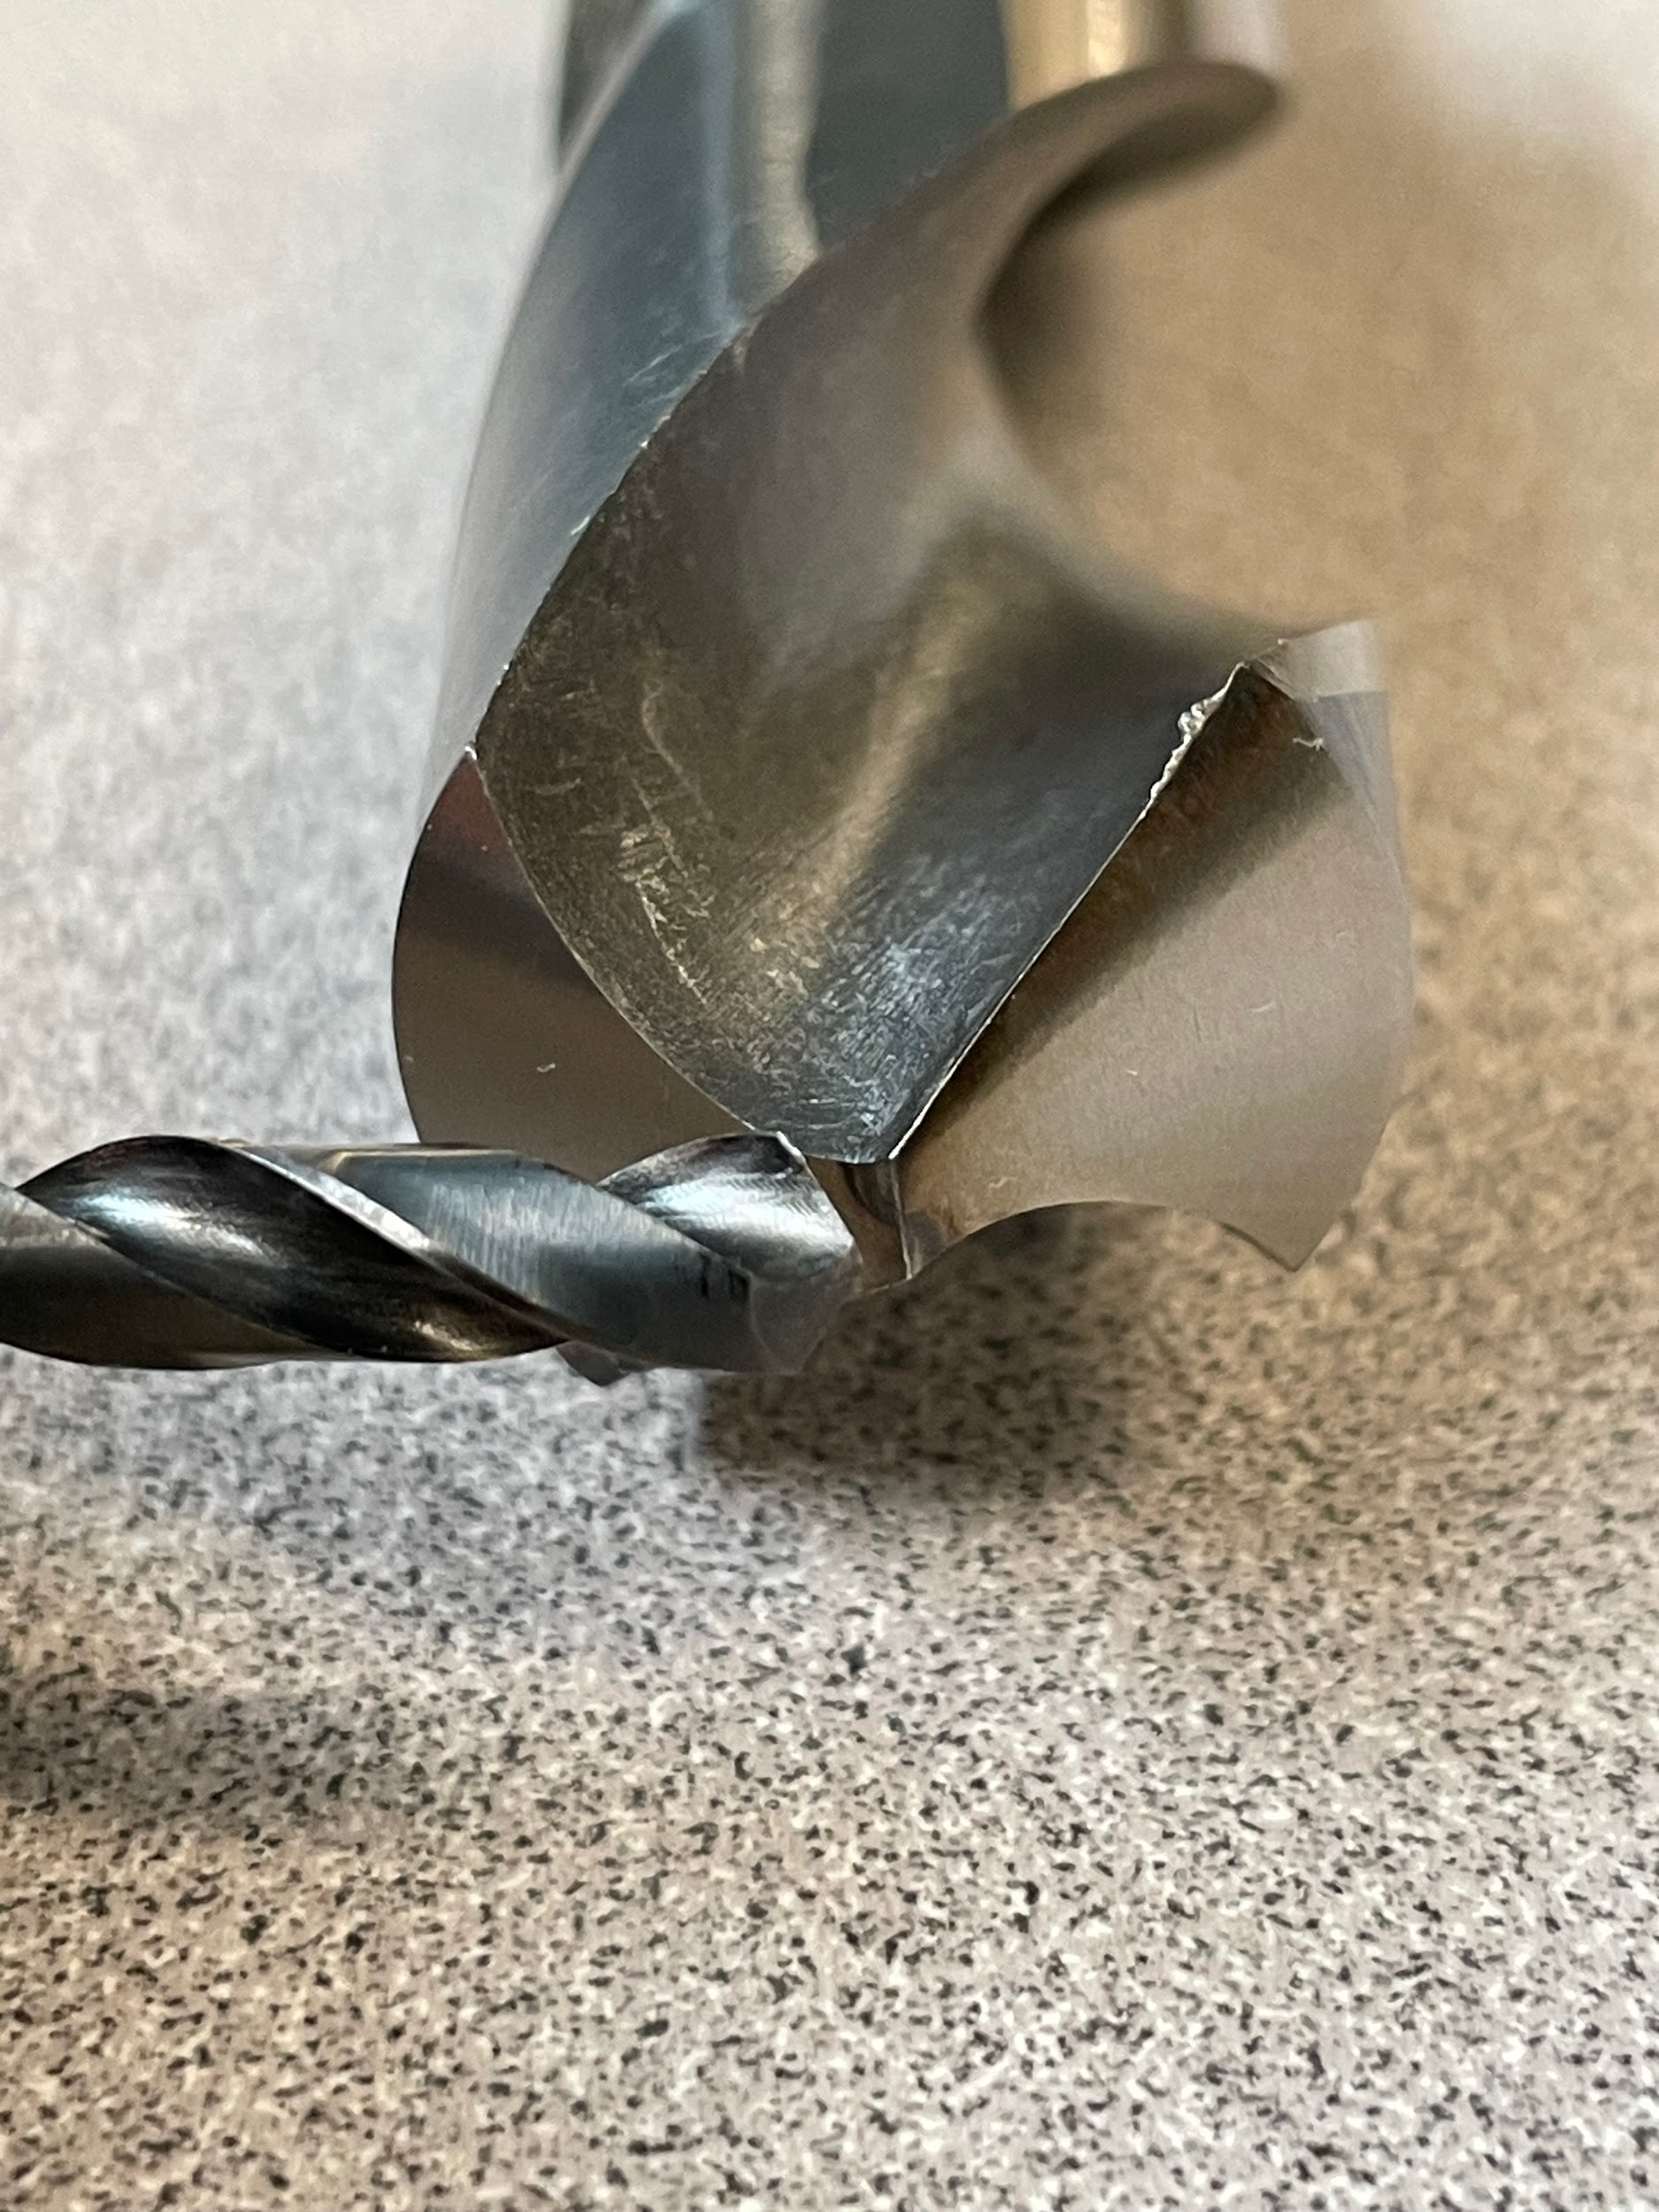
When large holes need to be drilled, over ½”, it is sometimes necessary to drill a pilot hole for the larger drill to follow. One reason to use a pilot hole is that the chisel point on large drills can become too long and may produce unwanted heat, friction, and lengthy cut times. Another reason to pilot drill is because the machine used may lack the horsepower required to plunge the entire large bit in one pass. Generally speaking, whenever pilot holes are drilled, they should only be slightly larger than the chisel point of the larger twist drill. If too large of a pilot bit is used, the drill may cut too freely causing chatter because of the lack of tool pressure. Another precaution is stepping up twist drill sizes in small increments. At first this may seem like the perfect answer, but these cuts will put all the work on the very end of the cutting edges, at the margins, overheating or damaging them. If multiple bits are to be used because of horsepower restrictions, it is best to decide what the largest bit diameter that a particular machine can handle, and use that for calculating the successive bits. This will keep the optimal cutting edge engaged in the work at each step. Below is an example of needing to drill a 1” hole, but the drill press at hand only has enough power to drill a 7/16” hole.
1” / .4375” = 2.285
3 drills are needed of equal size.
1” / 3 drills = .333
The first drill should be somewhere around .333, maybe a fractional size or two larger because the smallest twist drill will be the easiest to turn.
The second drill should be somewhere around .666, again maybe the closest available fractional bit size larger.
The third bit at 1” will take the most power and should have the least size jump.
In theory, this formula should get an operator close to where each bit is cutting an efficient amount while still allowing for the need of a little extra torque at each successive step.
REAMING
What is it?
Reaming is the secondary machining process of enlarging and smoothing a previously drilled hole with a reamer. Reaming creates a new hole with an increased surface finish that meets tighter tolerances. Reamed holes are often used for dowel pins or other mating parts that require a close fit.
Prior allowances
Before a hole can be reamed, a smaller hole must be drilled in the same location. This difference in size between the drilled hole and the finished ream size is known as the ream allowance. The size of the initial hole is a percentage of the ream size. Smaller holes require less allowance, and larger holes require more. If proper allowance is not given, the hole may not clean up, or it may have chatter problems. If there is too much allowance, and the reamer has to perform too much work, the hole might become oversized, or the reamer could load up with material and ruin the finished hole. Knowing that the theoretical correct size can be calculated, the machinist could select that size twist drill for the initial hole, if that bit exists. Sometimes the theoretical bit size isn’t common, or doesn’t exist in a fractional inch drill index. For that reason, it is common practice to use 1/64 allowance for reams up to 1/2 inch, and 1/32 allowance over 1/2 inch.
Step by step process for reaming:
- Drill a ream allowance hole per the steps in the drilling process.
- Insert the reamer in a drill chuck.
- Install a rotational restriction device if one doesn’t already exist.
- Touch the reamer off to the top of the work and set a depth stop. Generally speaking, reamed holes have a more accurate depth than drilled holes.
- Calculate the speed and approximate the feed for reaming. Keep in mind that the speed for reaming will be about half as fast as the allowance bit size.
- Lube reamer and hole with cutting oil.
- Turn the spindle on and adjust the spindle speed.
- Gently bring the quill down to about .100 off the work while lining up the hole.
- In one smooth, yet faster, motion, ream the hole to depth.
- Turn off the spindle.
- Pull the reamer from the hole.
- Examine the reamed hole.
“Step 3: Install a rotational restriction device if one doesn’t already exist.“
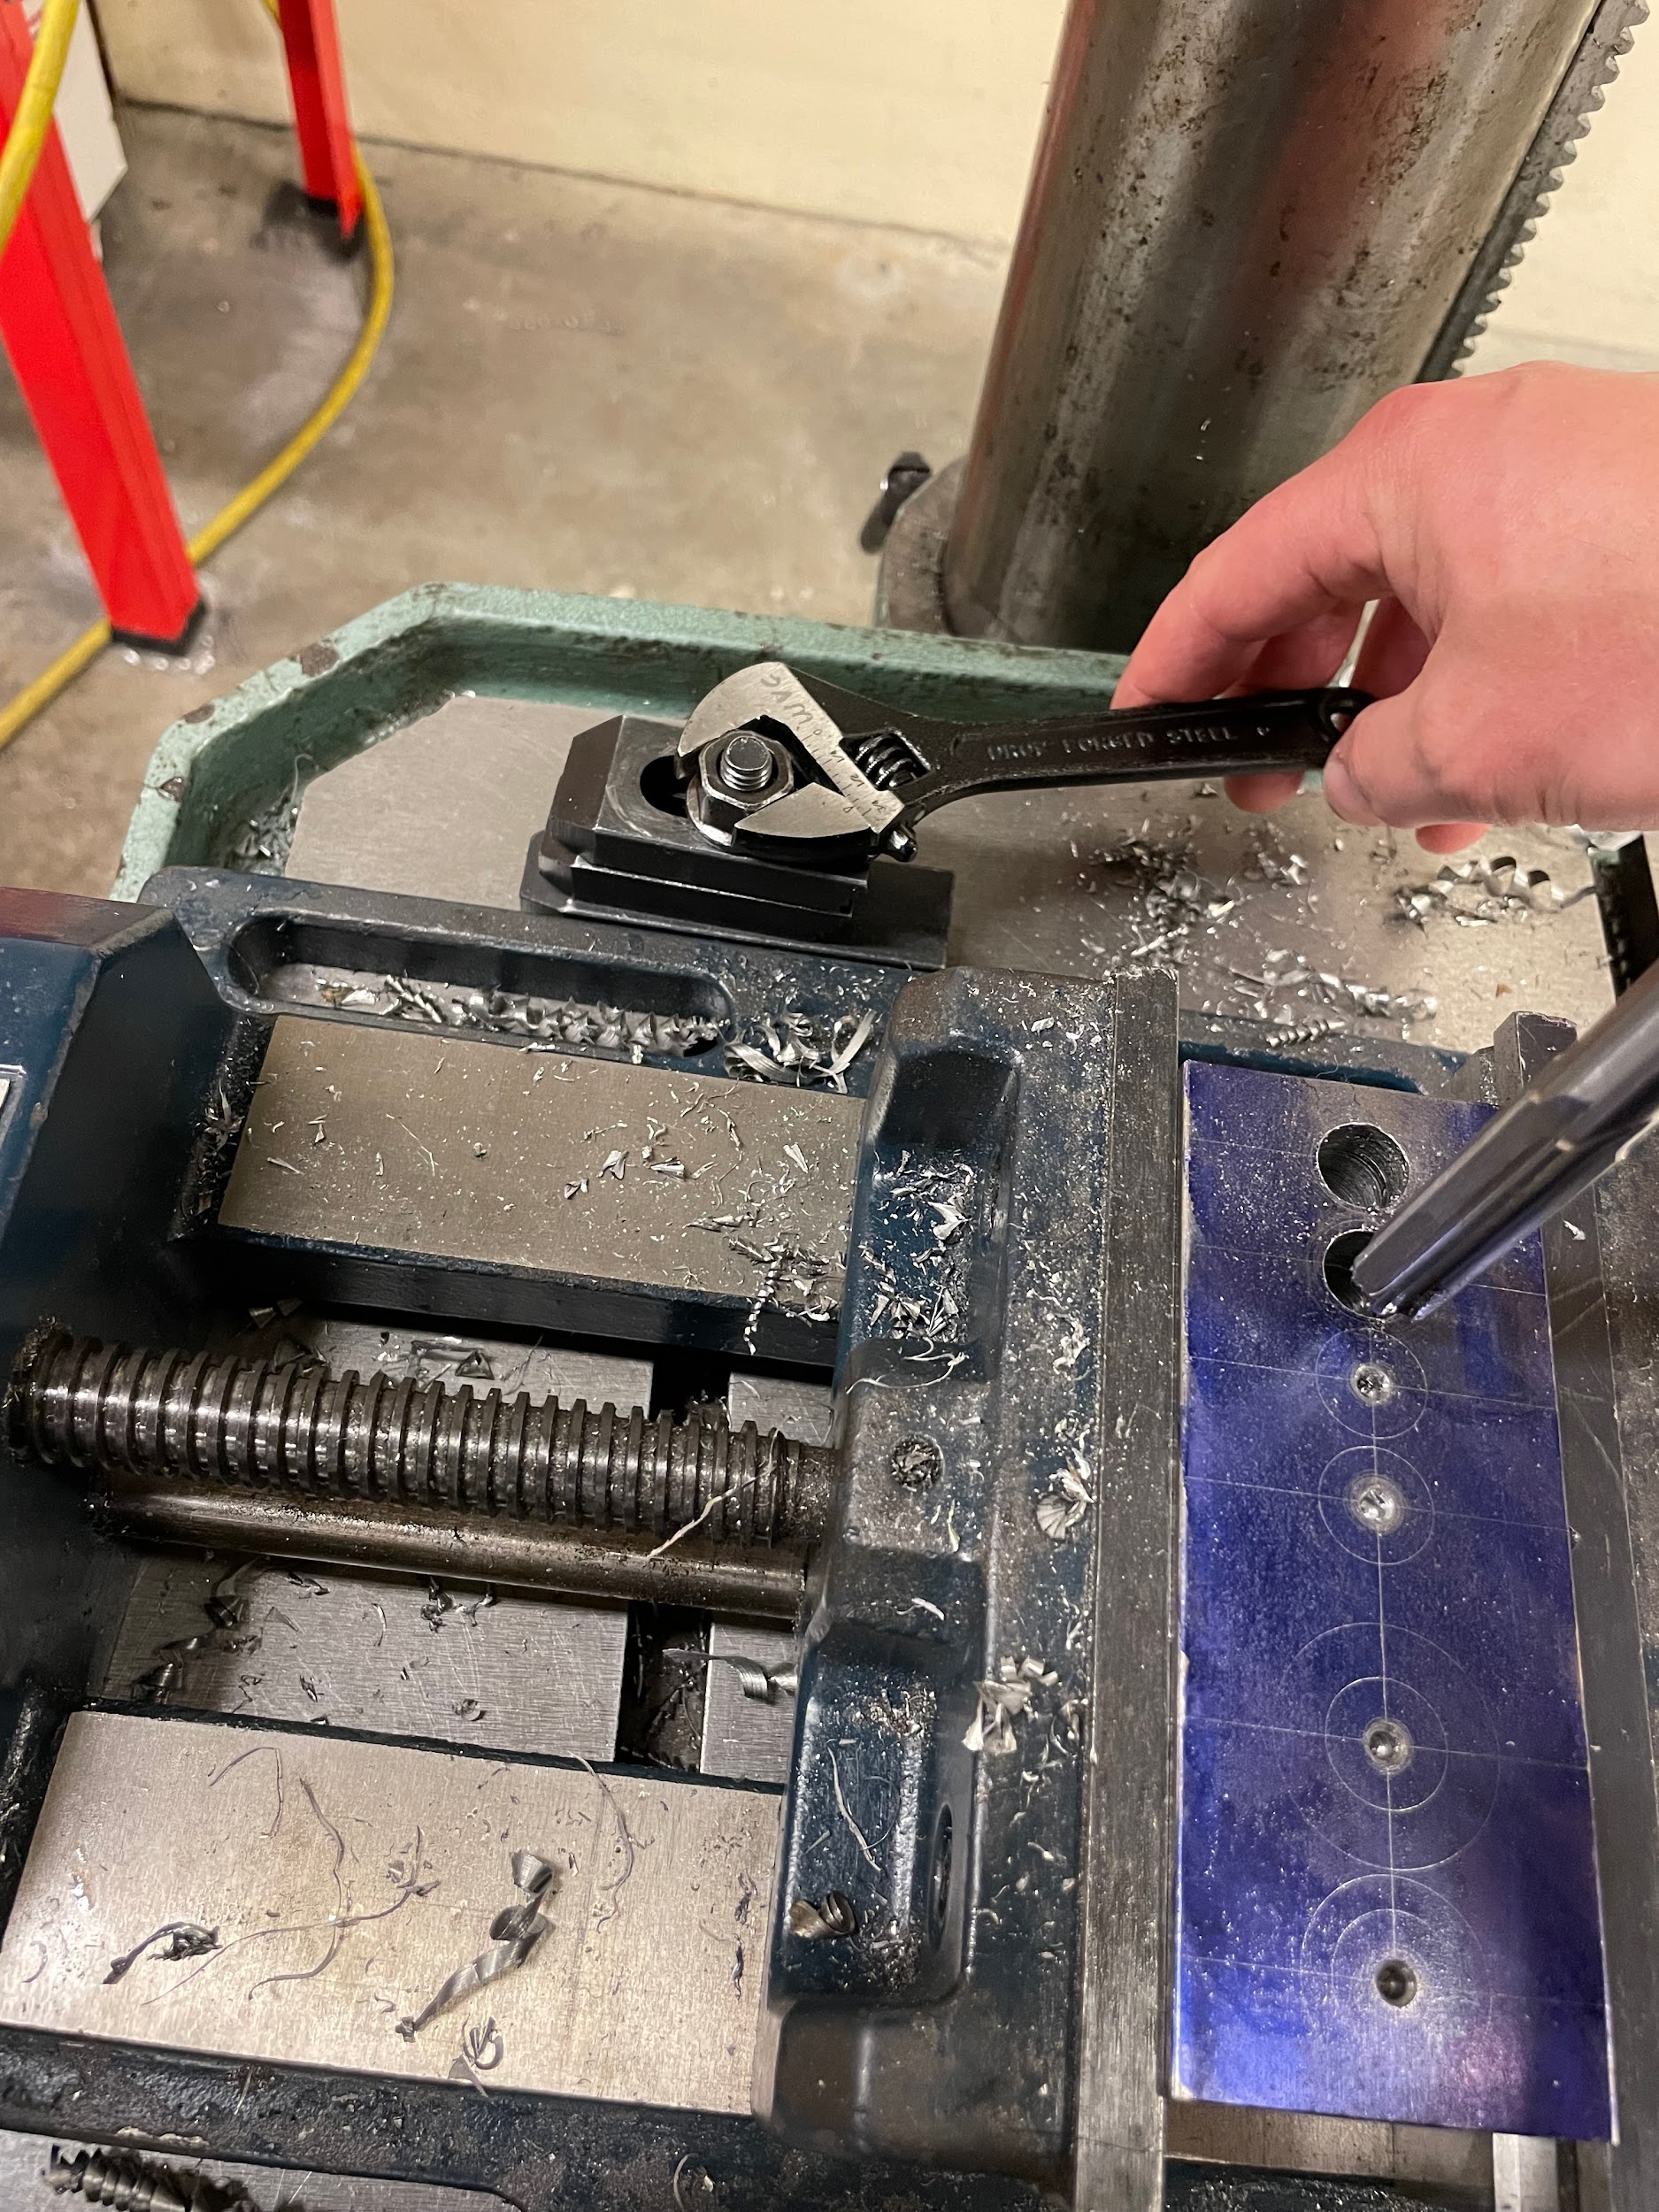
“Step 9: In one smooth, yet faster, motion, ream the hole to depth. “
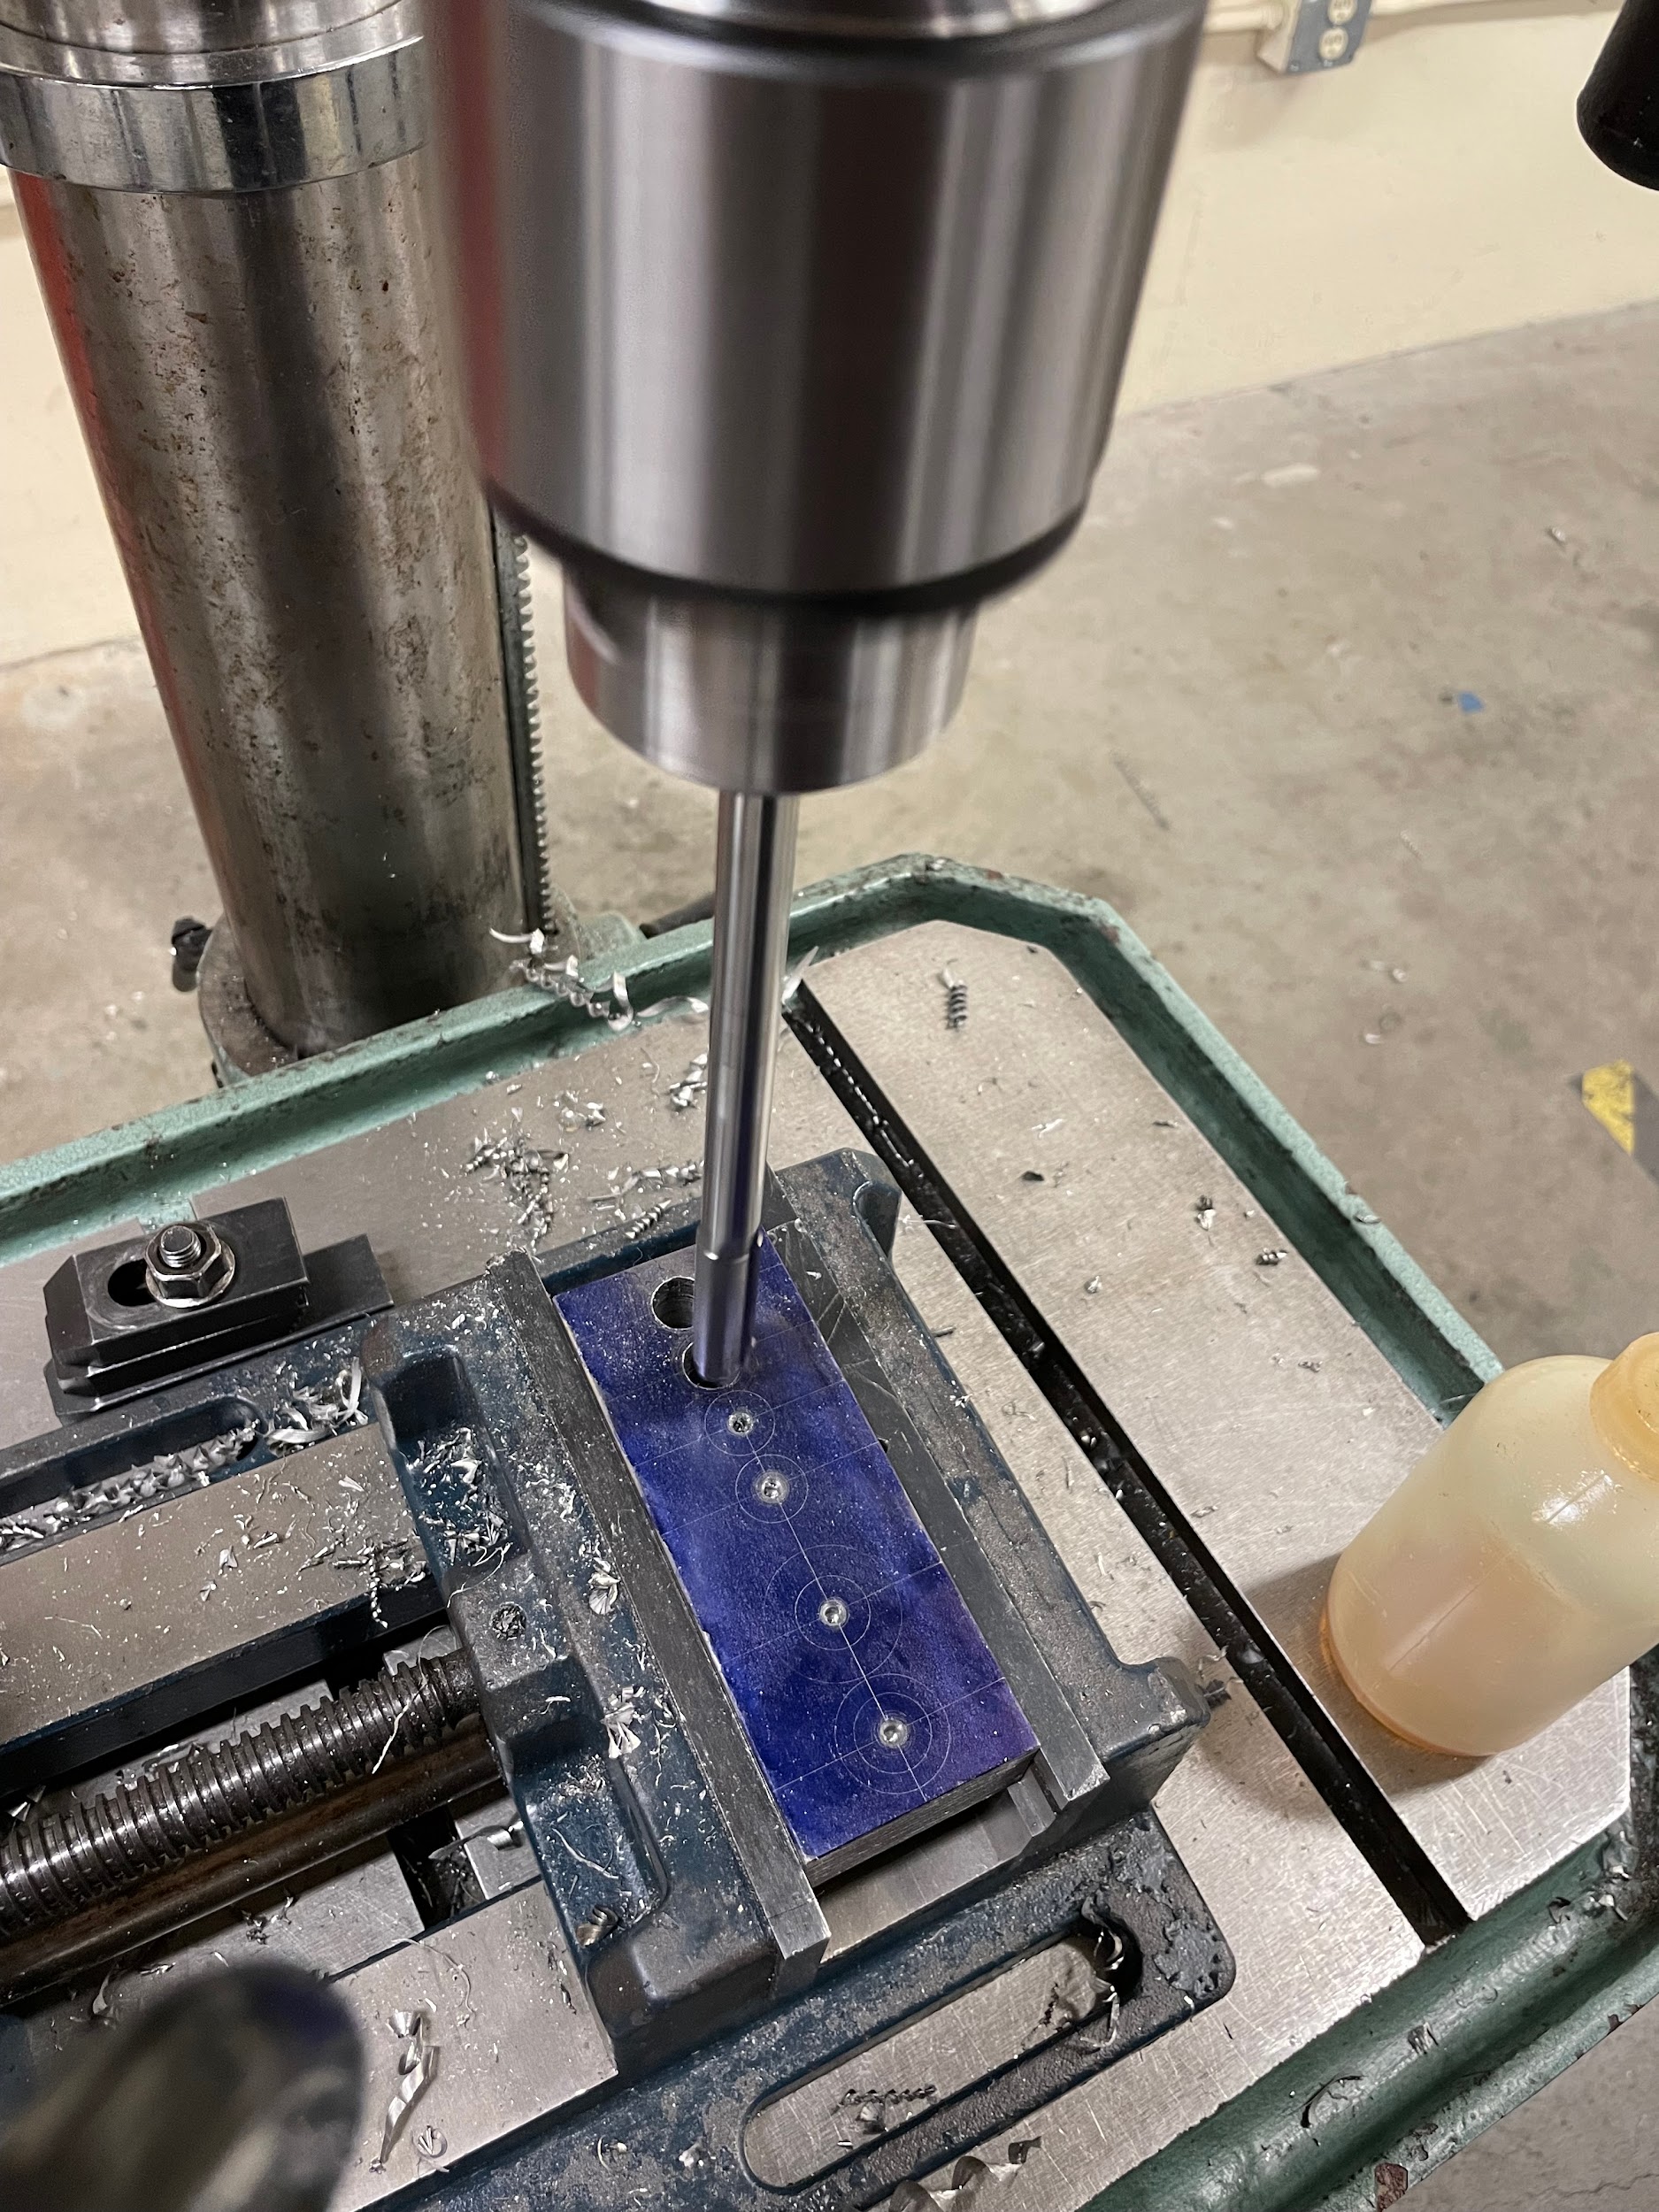
Author’s Tip
Reaming is what I like to call a one-and-done operation. With a lot of cutting operations, we get the chance to make a trial cut, measure, adjust the machine, and make the finished cut to size. With reaming, however, you get what you get. Sometimes you hit a home run, and sometimes you strike out your first time at the plate. For that reason, I like to grab a scrap piece of material and make a couple test holes to get the process down before moving onto the real part. This gives you the opportunity to alter your approach and dial things in so you can make the first part a good part.
Tolerances
A reamed hole has a tighter tolerance and surface finish requirement than a drilled hole. Often, this heightened tolerance is called out on a print. In general terms, a reamer should be capable of reaming within .001 of its advertised size.
TAPPING
What is it?
Tapping is the secondary machining process where threads are cut on the inside of an existing hole using a tap. Tapped holes are generally a means for screw thread fasteners to engage with machined parts creating a mechanical connection.
Prior allowances
Before threads can be cut in a part, a hole must be drilled. The hole will be drilled to what machinists call the tap drill size (TDS). Generally speaking, TDS leaves enough material for 75% thread engagement. TDS is easy to calculate or figure out. One quick and easy way most machinists use is by looking at a decimal equivalency chart. Most charts have the common course and fine unified TDS listed, as well as metric TDS. Another method is to use a formula to calculate the TDS. The formula is:
TDS = Nominal Dia. – 1/N
In this formula the nominal diameter refers to the size of the bolt. “N” is the number of threads per inch. For example, If a TDS for a 3/8-16 bolt is required, the equation would look like this.
TDS = 3/8 – 1/16
TDS = .375 – .062
TDS = .313
Step by step process for tapping by hand:
- Drill the positions for the tapped holes using the TDS.
- With a center finder, or the tap drill, align and secure the vise to the table.
- Instal a spring loaded tap guide into the chuck.
- Lube the hole and the tap.
- Place the tip of the tap into the hole and the point of the tap guide into the center on the back of the tap. If the tap doesn’t have a center, use a tee handle tap wrench that has a center in it.
- Pull the quill down to load the tap guide.
- Gently turn the tap with a wrench or tap handle to depth.
- Examine the threaded hole.
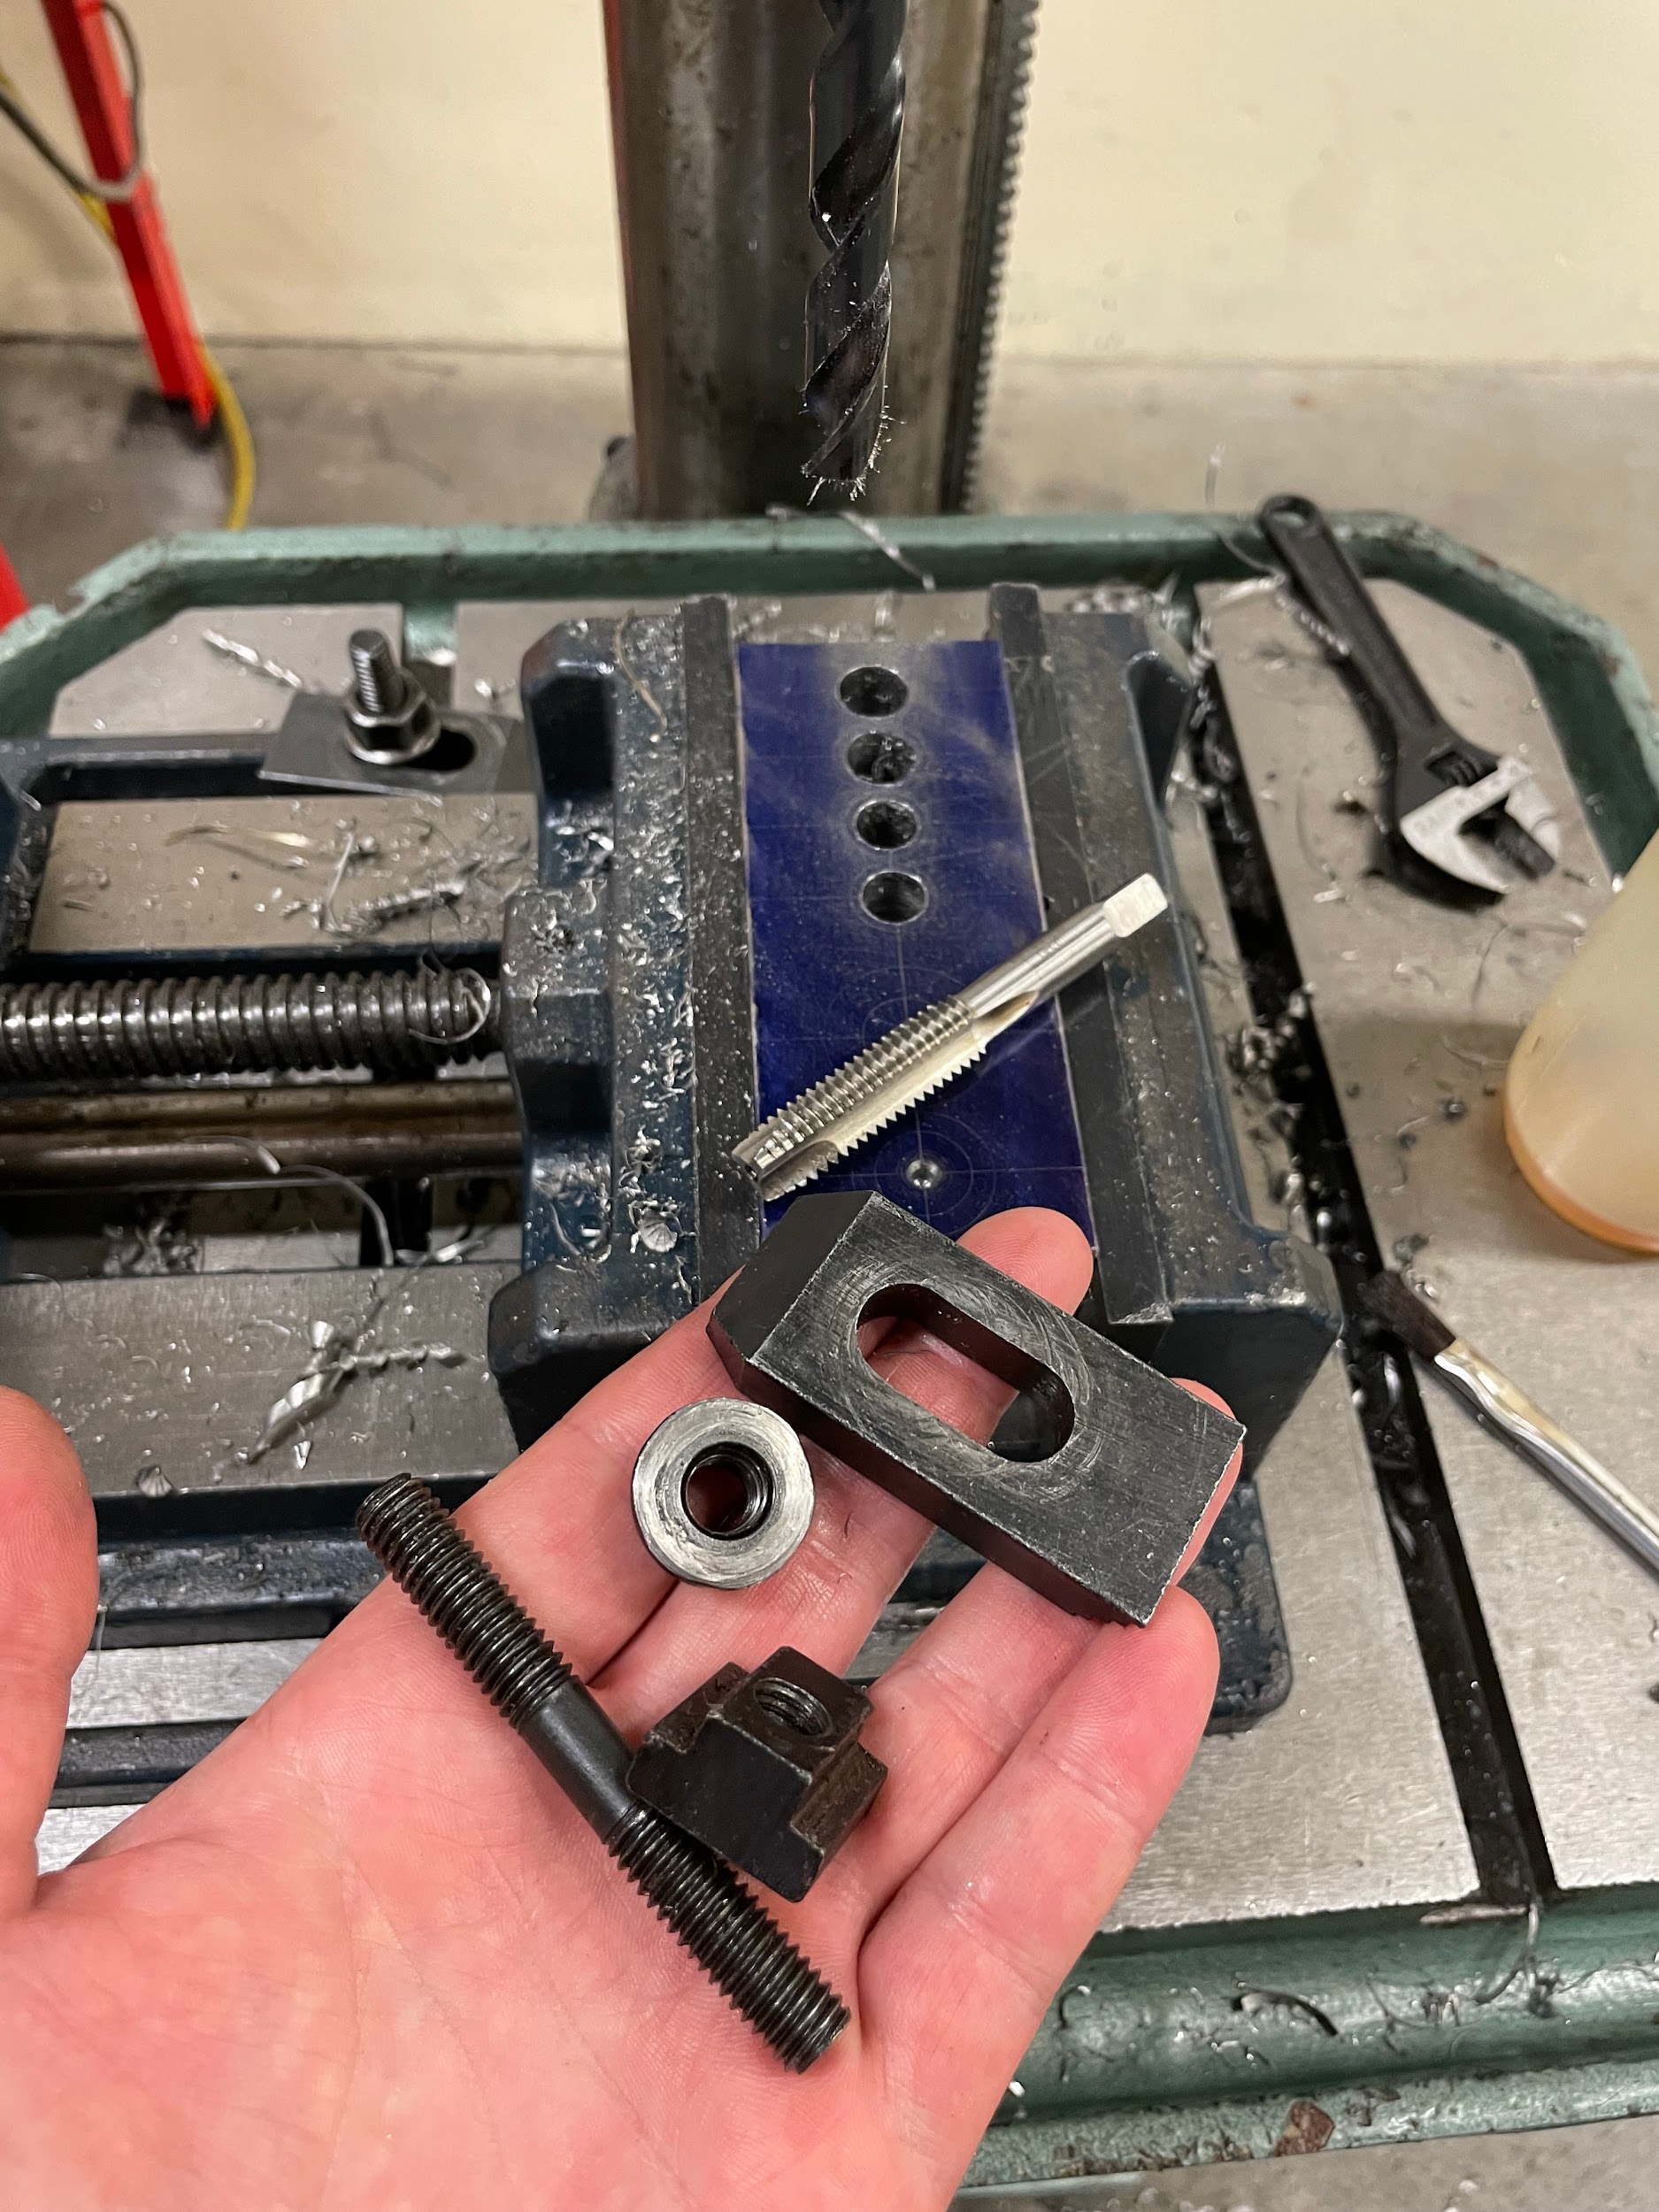
“Step 2: With a center finder, or the tap drill, align and secure the vise to the table.“
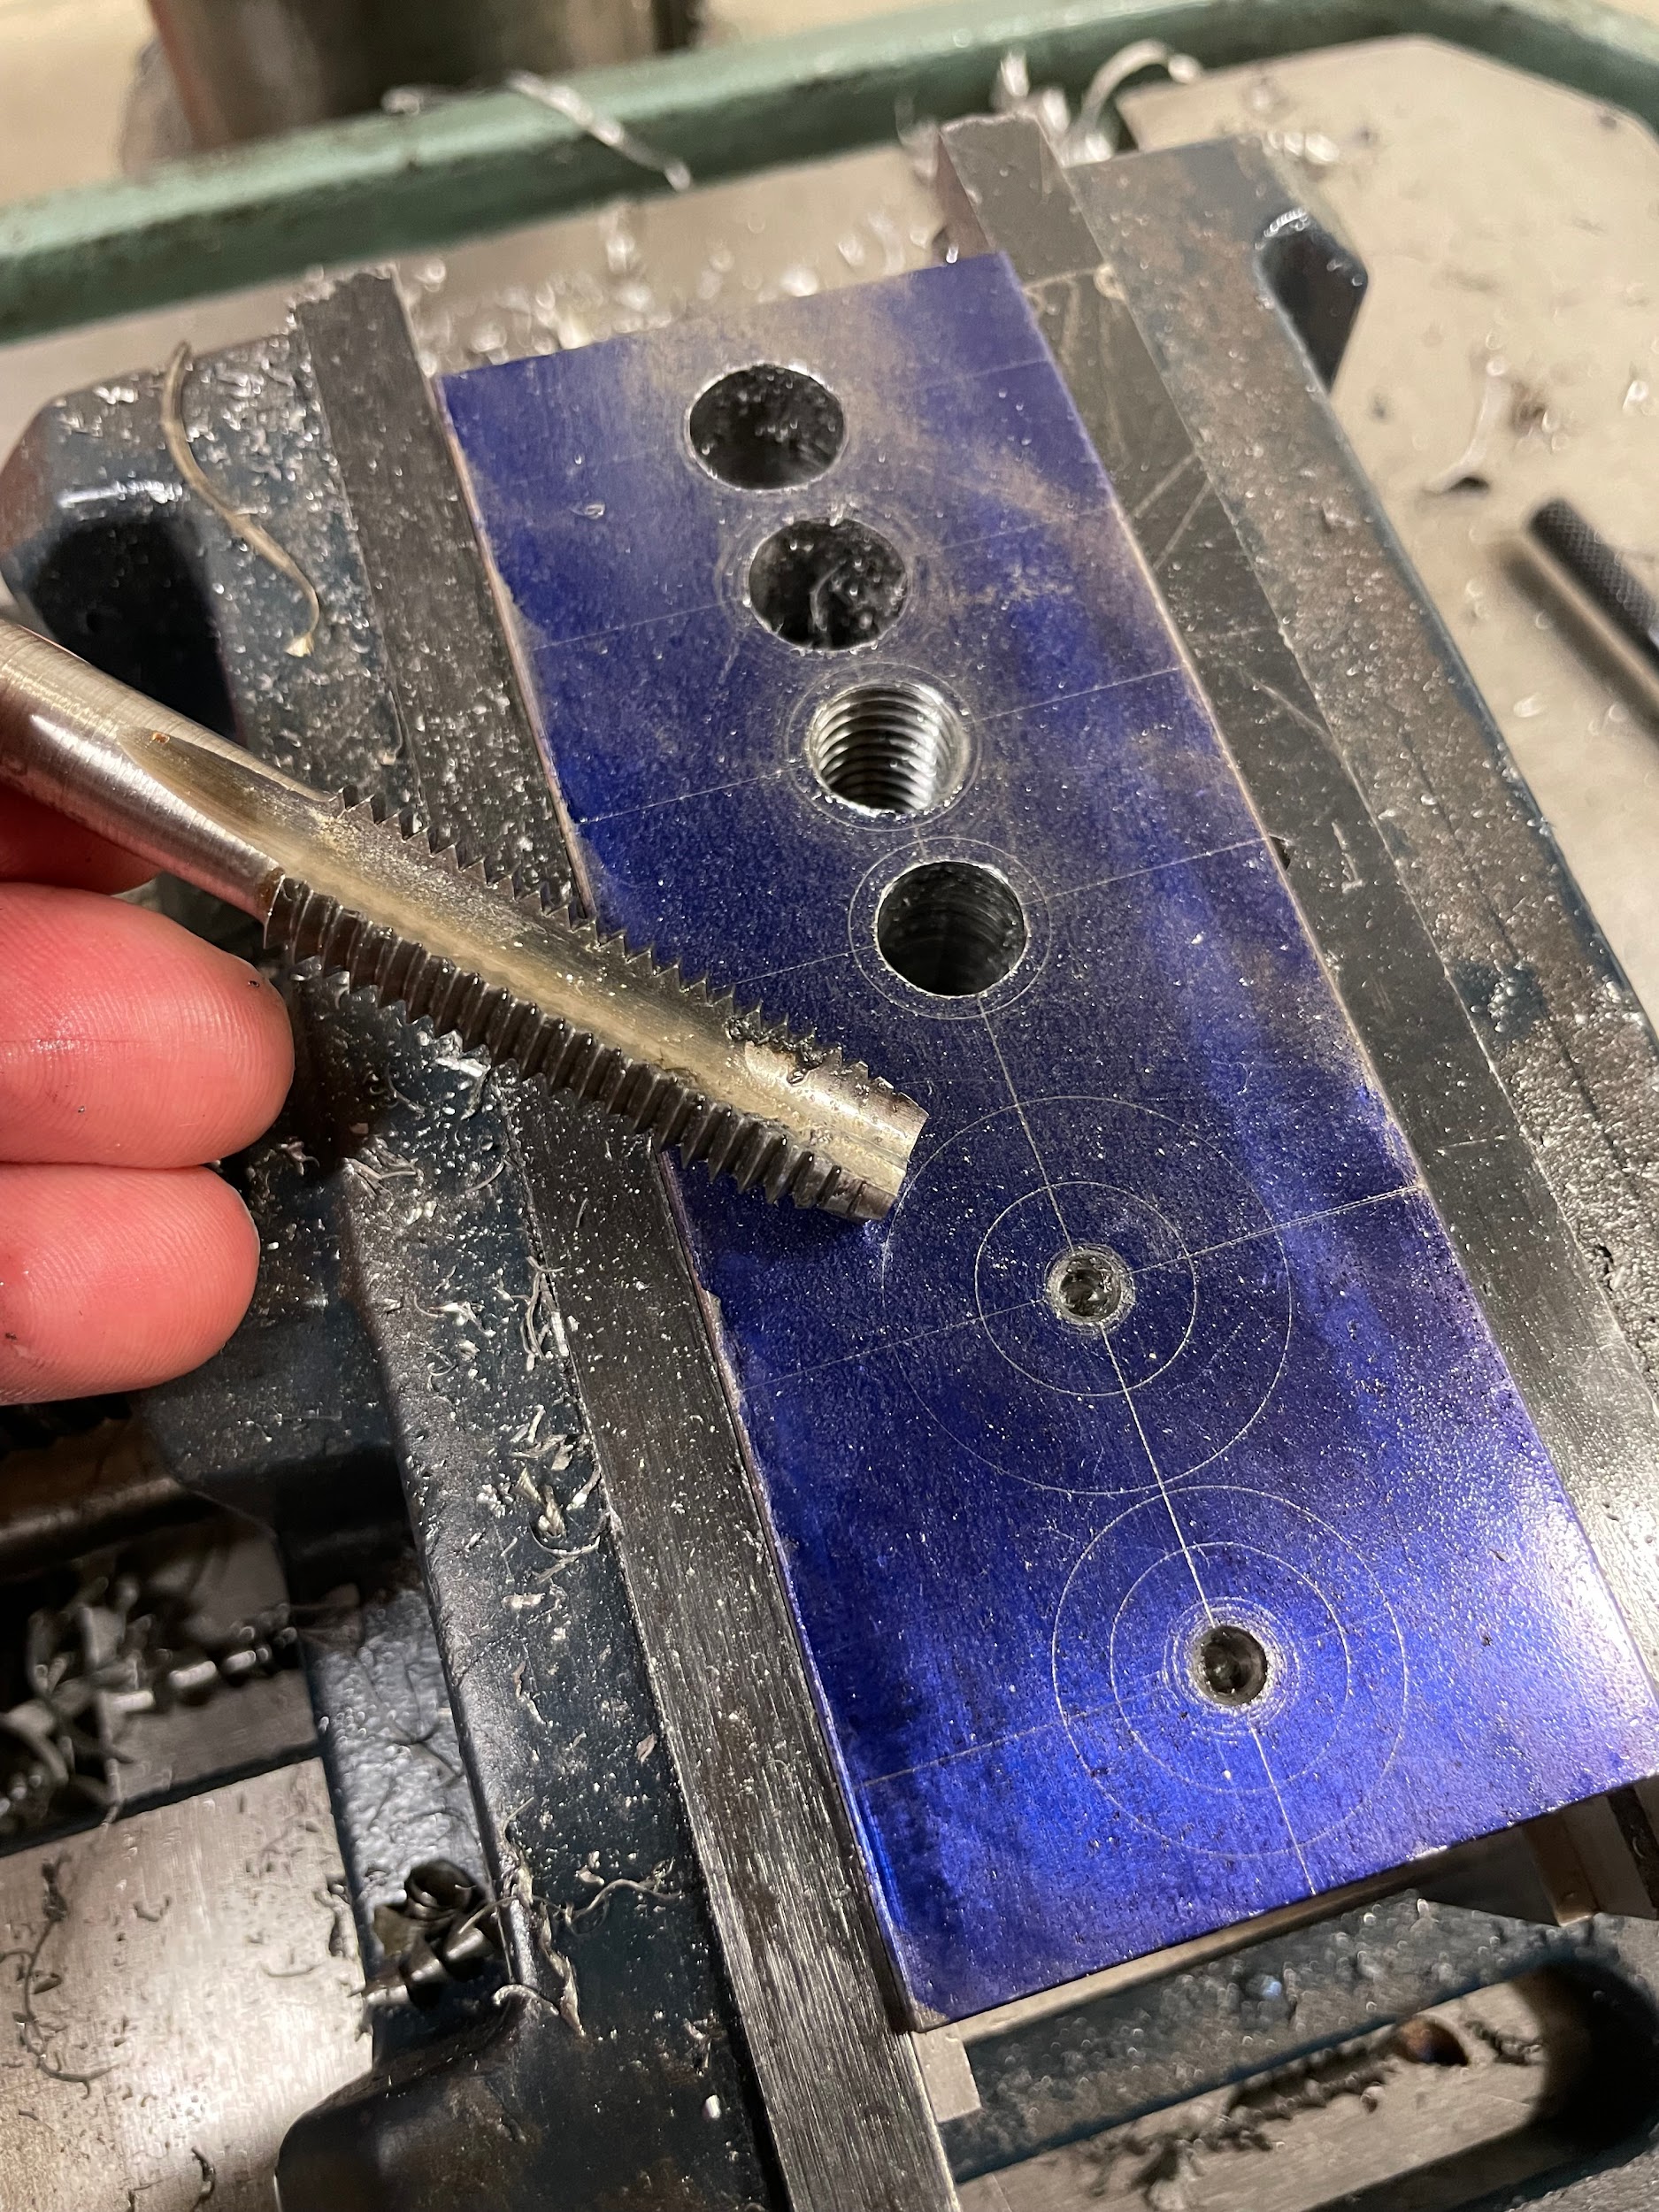
“Step 8: Examine the threaded hole.“
Step by step process for power tapping:
- Drill the positions for the tapped holes using the TDS.
- With a center finder, or the tap drill, align and secure the vise to the table.
- Install the tap into the drill chuck, tap holder, or tapping head.
- Lube the hole and tap with cutting oil.
- Select a slow speed, about 100-200RPM.
- Pull the tap into the hole with moderate force to get the first thread to catch, the tap will then feed itself into the hole.
- Once the tool is at depth, reverse the spindle if using a drill chuck or tap holder on a machine that allows it. If the machine doesn’t have a reverse, just shut off the spindle and back tap out by hand. Some tapping heads will have an auto reversing feature that allows the operator to simply pull up on the quill handle to change gears and reverse the motion of the spindle.
- Examine the tapped hole.
“Step 2: With a center finder, or the tap drill, align and secure the vise to the table.“
“Step 4: Lube the hole and tap with cutting oil.“
“Step 6: Pull the tap into the hole with moderate force to get the first thread to catch, the tap will then feed itself into the hole.“
Author’s Tip
I personally power tap anything ⅜” or larger. Let the machine do the hard work. Anything ¼” or smaller I tap by hand. Small taps are easily broken. 5/16” inch taps, I could go either way, depending on how much I want to push my luck. How many parts are there? How much are the parts worth? Are there extra parts? How many taps do I have? Ask yourself these important questions before power tapping below ⅜”.
Tolerances
Depending on the class and fit requirements of the thread, the tolerance will differ. On the least precise end of the scale, parts may only require that a test bolt be able to thread into the hole to be considered good. On the other end of the scale, the machinist would be required to measure the TDS to ensure proper thread engagement, and then a go, no-go gage would be used to test both the pitch diameter and form of the thread.
COUNTERSINKING
What is it?
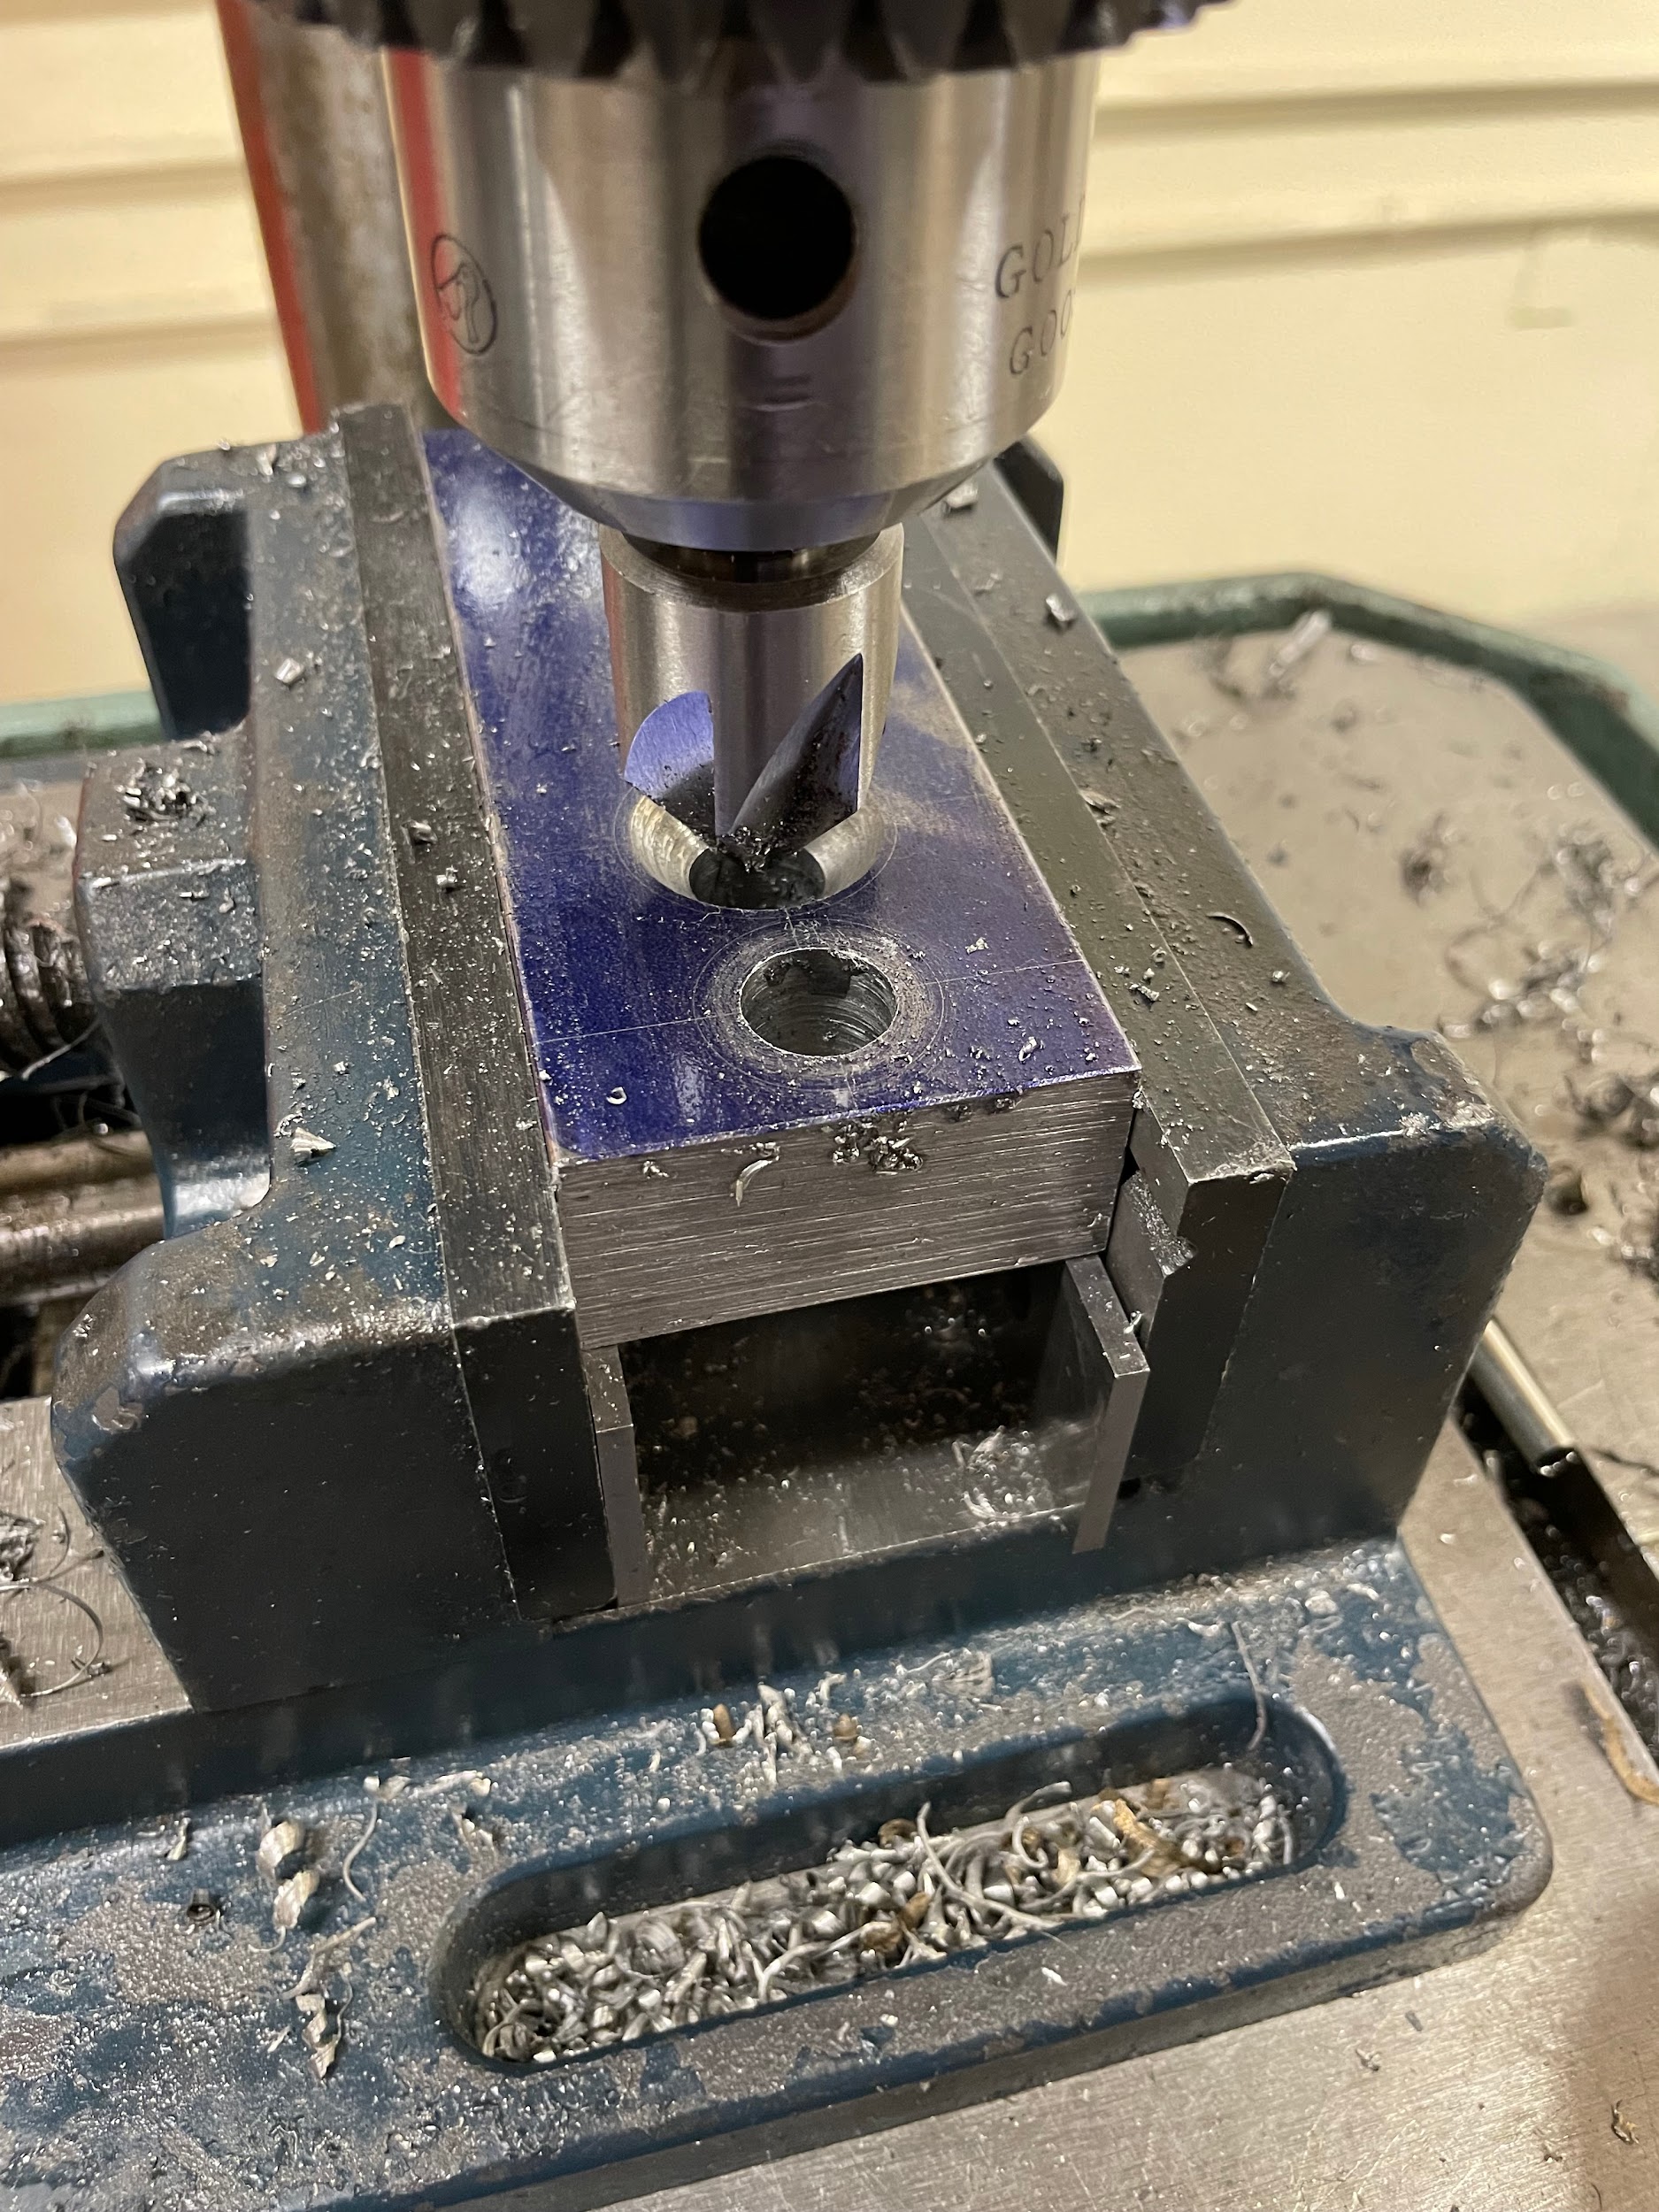
Countersinking is the secondary machining process of creating a conical shape at the top of a hole using a countersink. This recess is to accommodate flat head machine screws below the surface, or to chamfer an existing hole.
Prior allowances
Countersinking is a secondary hole operation that requires an initial hole that will then be countersunk. The hole size drilled before countersinking will vary by application and is generally indicated on a print. If no size is indicated, a good machining reference book (such as Machinery’s Handbook) can be used to select the hole size for the application.
Step by step process for countersinking:
- Drill all hole locations with the appropriate sized twist drill.
- Select a countersink tool large enough to fully create the counterbore. If the large diameter of the counterbore needs to be 1/2”, a 5/8 or larger countersink should be used.
- Calculate the spindle speed of the countersink by using the largest diameter the tool will touch the material. If the operator is unsure of this size, they may look up the diameter in a reference book. Alternatively, the top of a fastener can be measured for spindle speed reference. Calculate the speed based on a twist drill of that large diameter, and then use the countersinking speed reduction, 1/4 of the speed for countersinking, to set the final speed.
- Calculate the depth of the countersink. The angle of the countersink, the diameter of the through hole, and the diameter of the top of the hole can be used to estimate the depth.
- Bring the quill down, slowly positioning the countersink to touch fully at the top of the hole.
- Set the depth stop of the drill press quill movement.
- Raise the quill.
- Apply a couple drops of oil to the top of the material, allowing them to slide down the sides of the hole.
- Start the spindle.
- Hold the drill vise firmly and pull the quill handle to enter the hole and cut the countersink. This can generally be done in one pull without pecking.
- Examine the countersunk hole.
“Step 5: Bring the quill down, slowly positioning the countersink to touch fully at the top of the hole.“
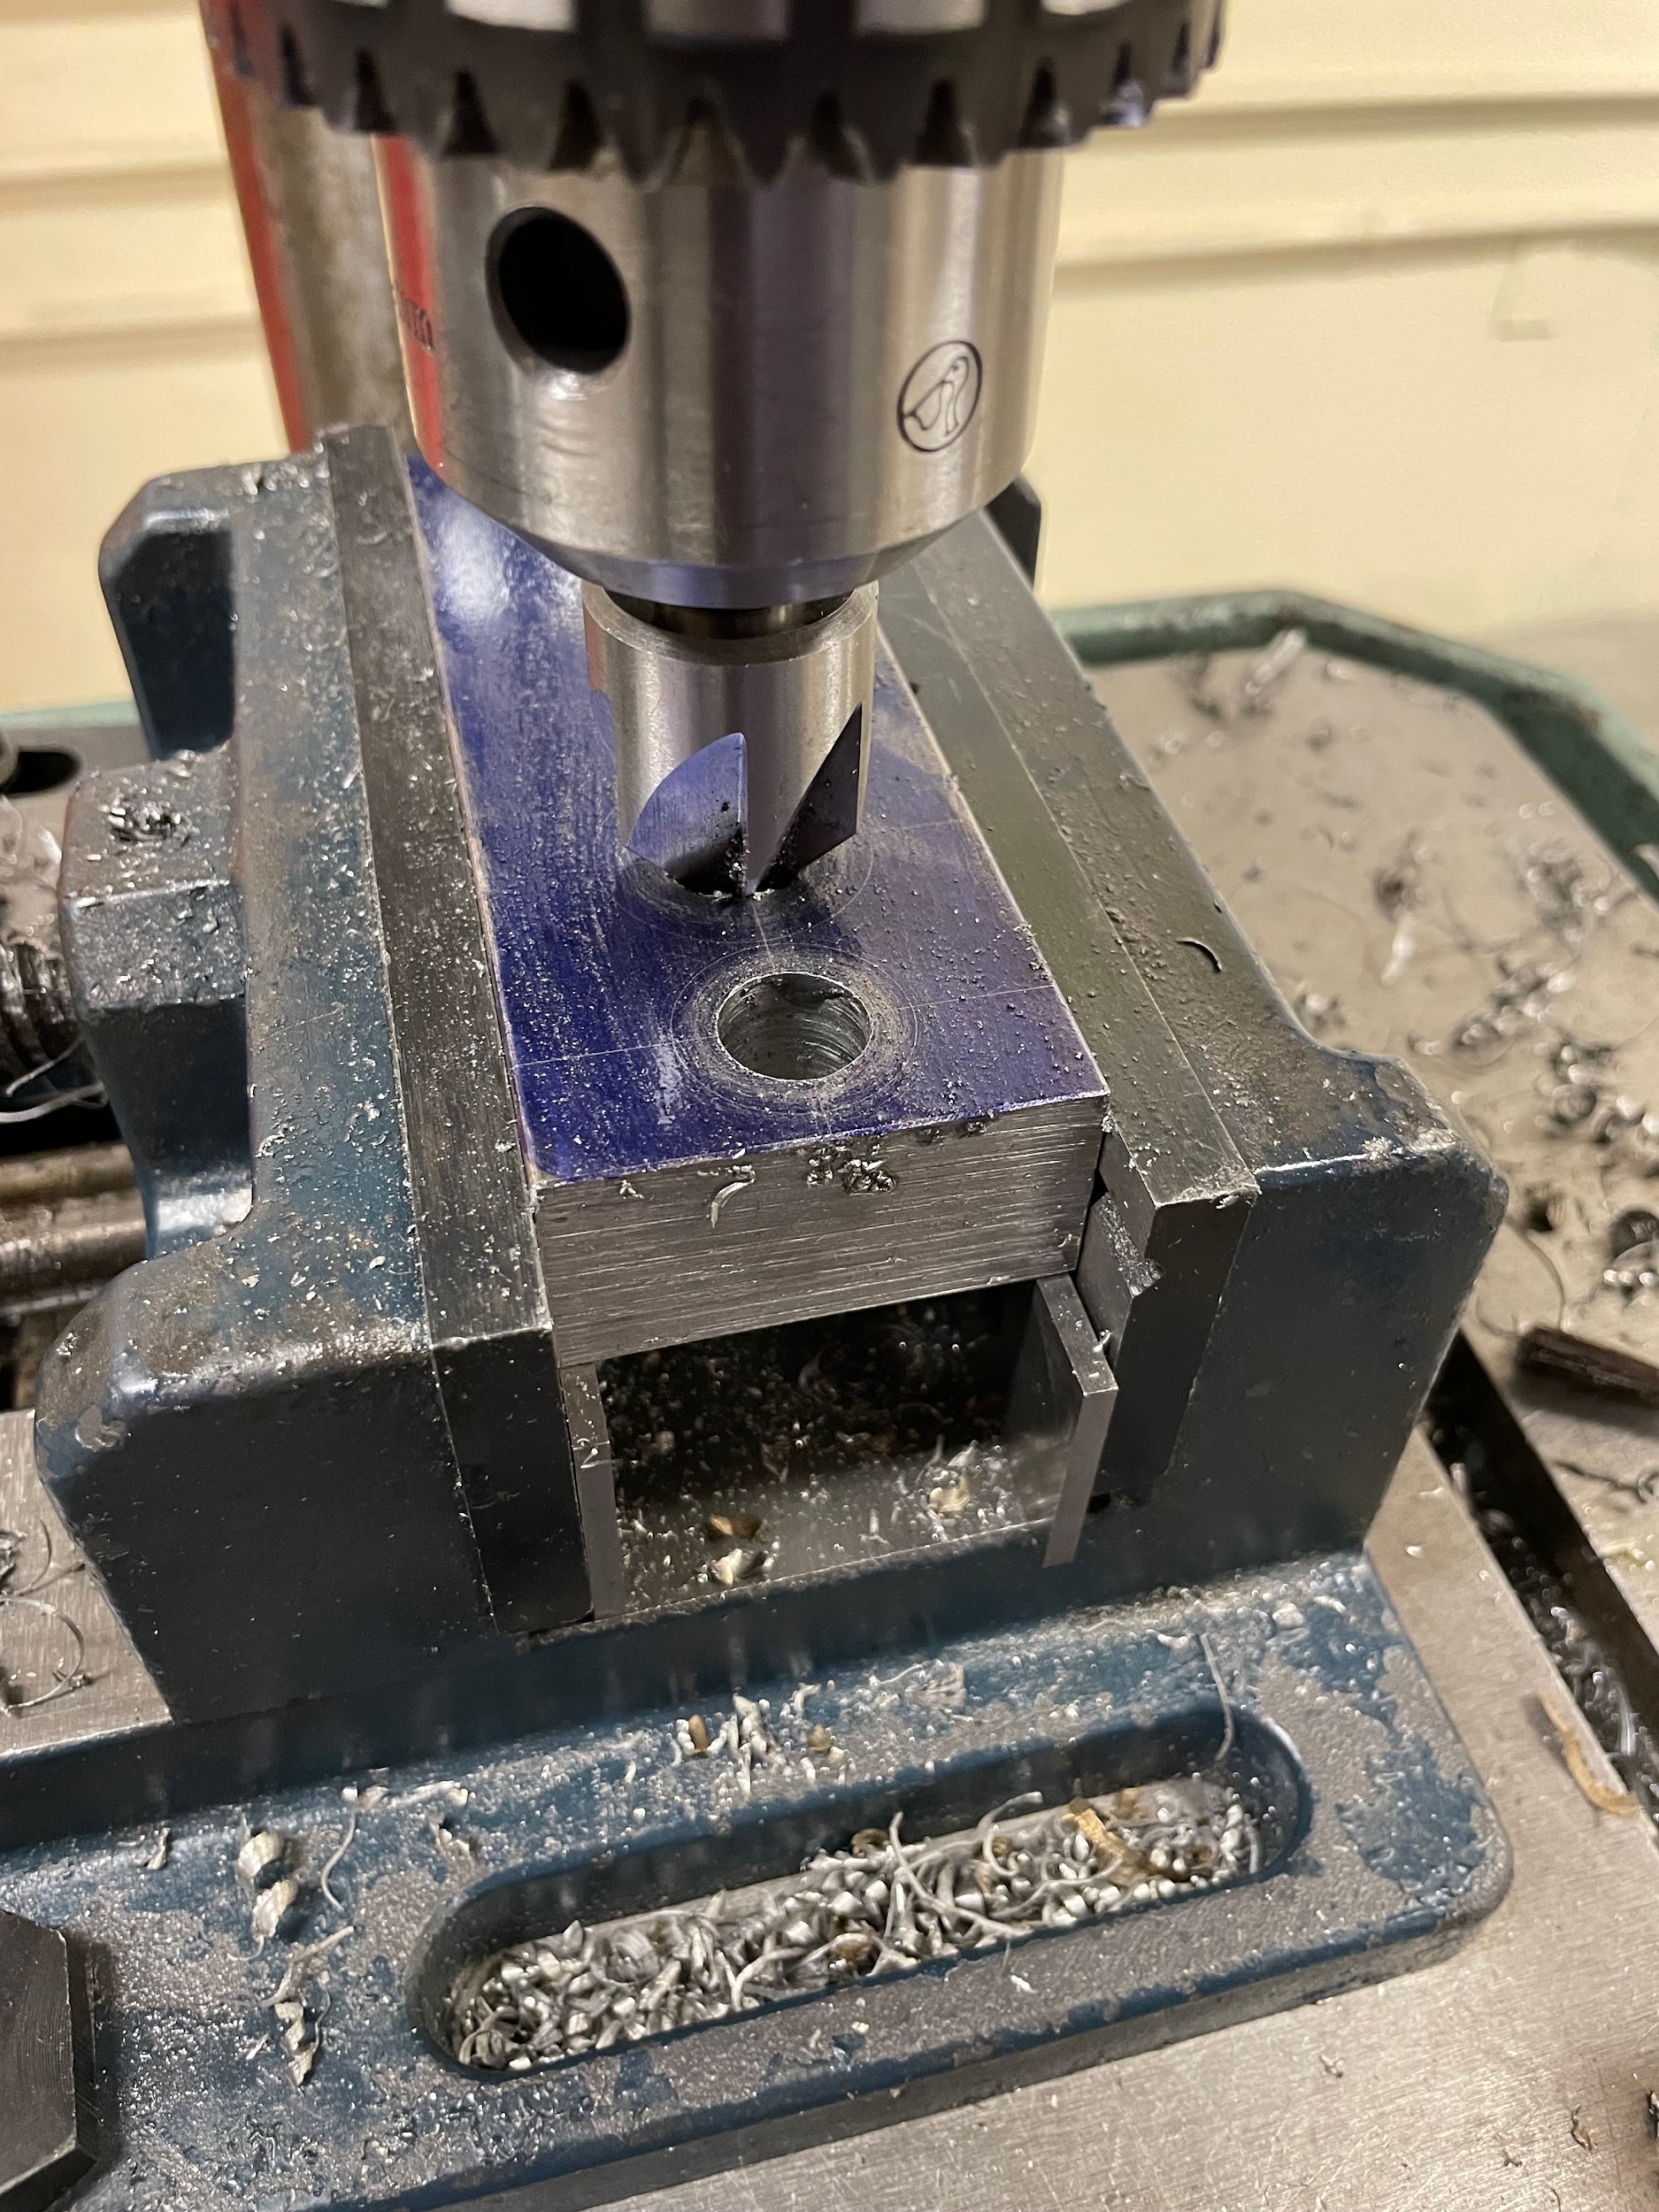
“Step 11: Examine the countersunk hole.“
Author’s Tip
- On occasion, a countersinking operation can chatter and may require slower spindle speeds than calculated, faster feed rates, alignment and clamping of the vise, or all of the above. I try to assess the quality of the countersink early and make appropriate adjustments before coming to full depth.
- Calculating the depth of a countersink can be tricky. Even with the correct math and accurate measurements, it is hard to hit depth on the first try. Sometimes you end up shallow, other times too deep and scrap the part. For that reason, I always aim for 1/32 to 1/16 of an inch shallower than calculation. That gives me an opportunity to measure my depth and then adjust the quill stop of the machine in order to hit tolerance.
Tolerances
Countersink tolerances may vary by application. Use of a reference manual will help determine the correct tolerance for the application.
COUNTERBORING
What is it?
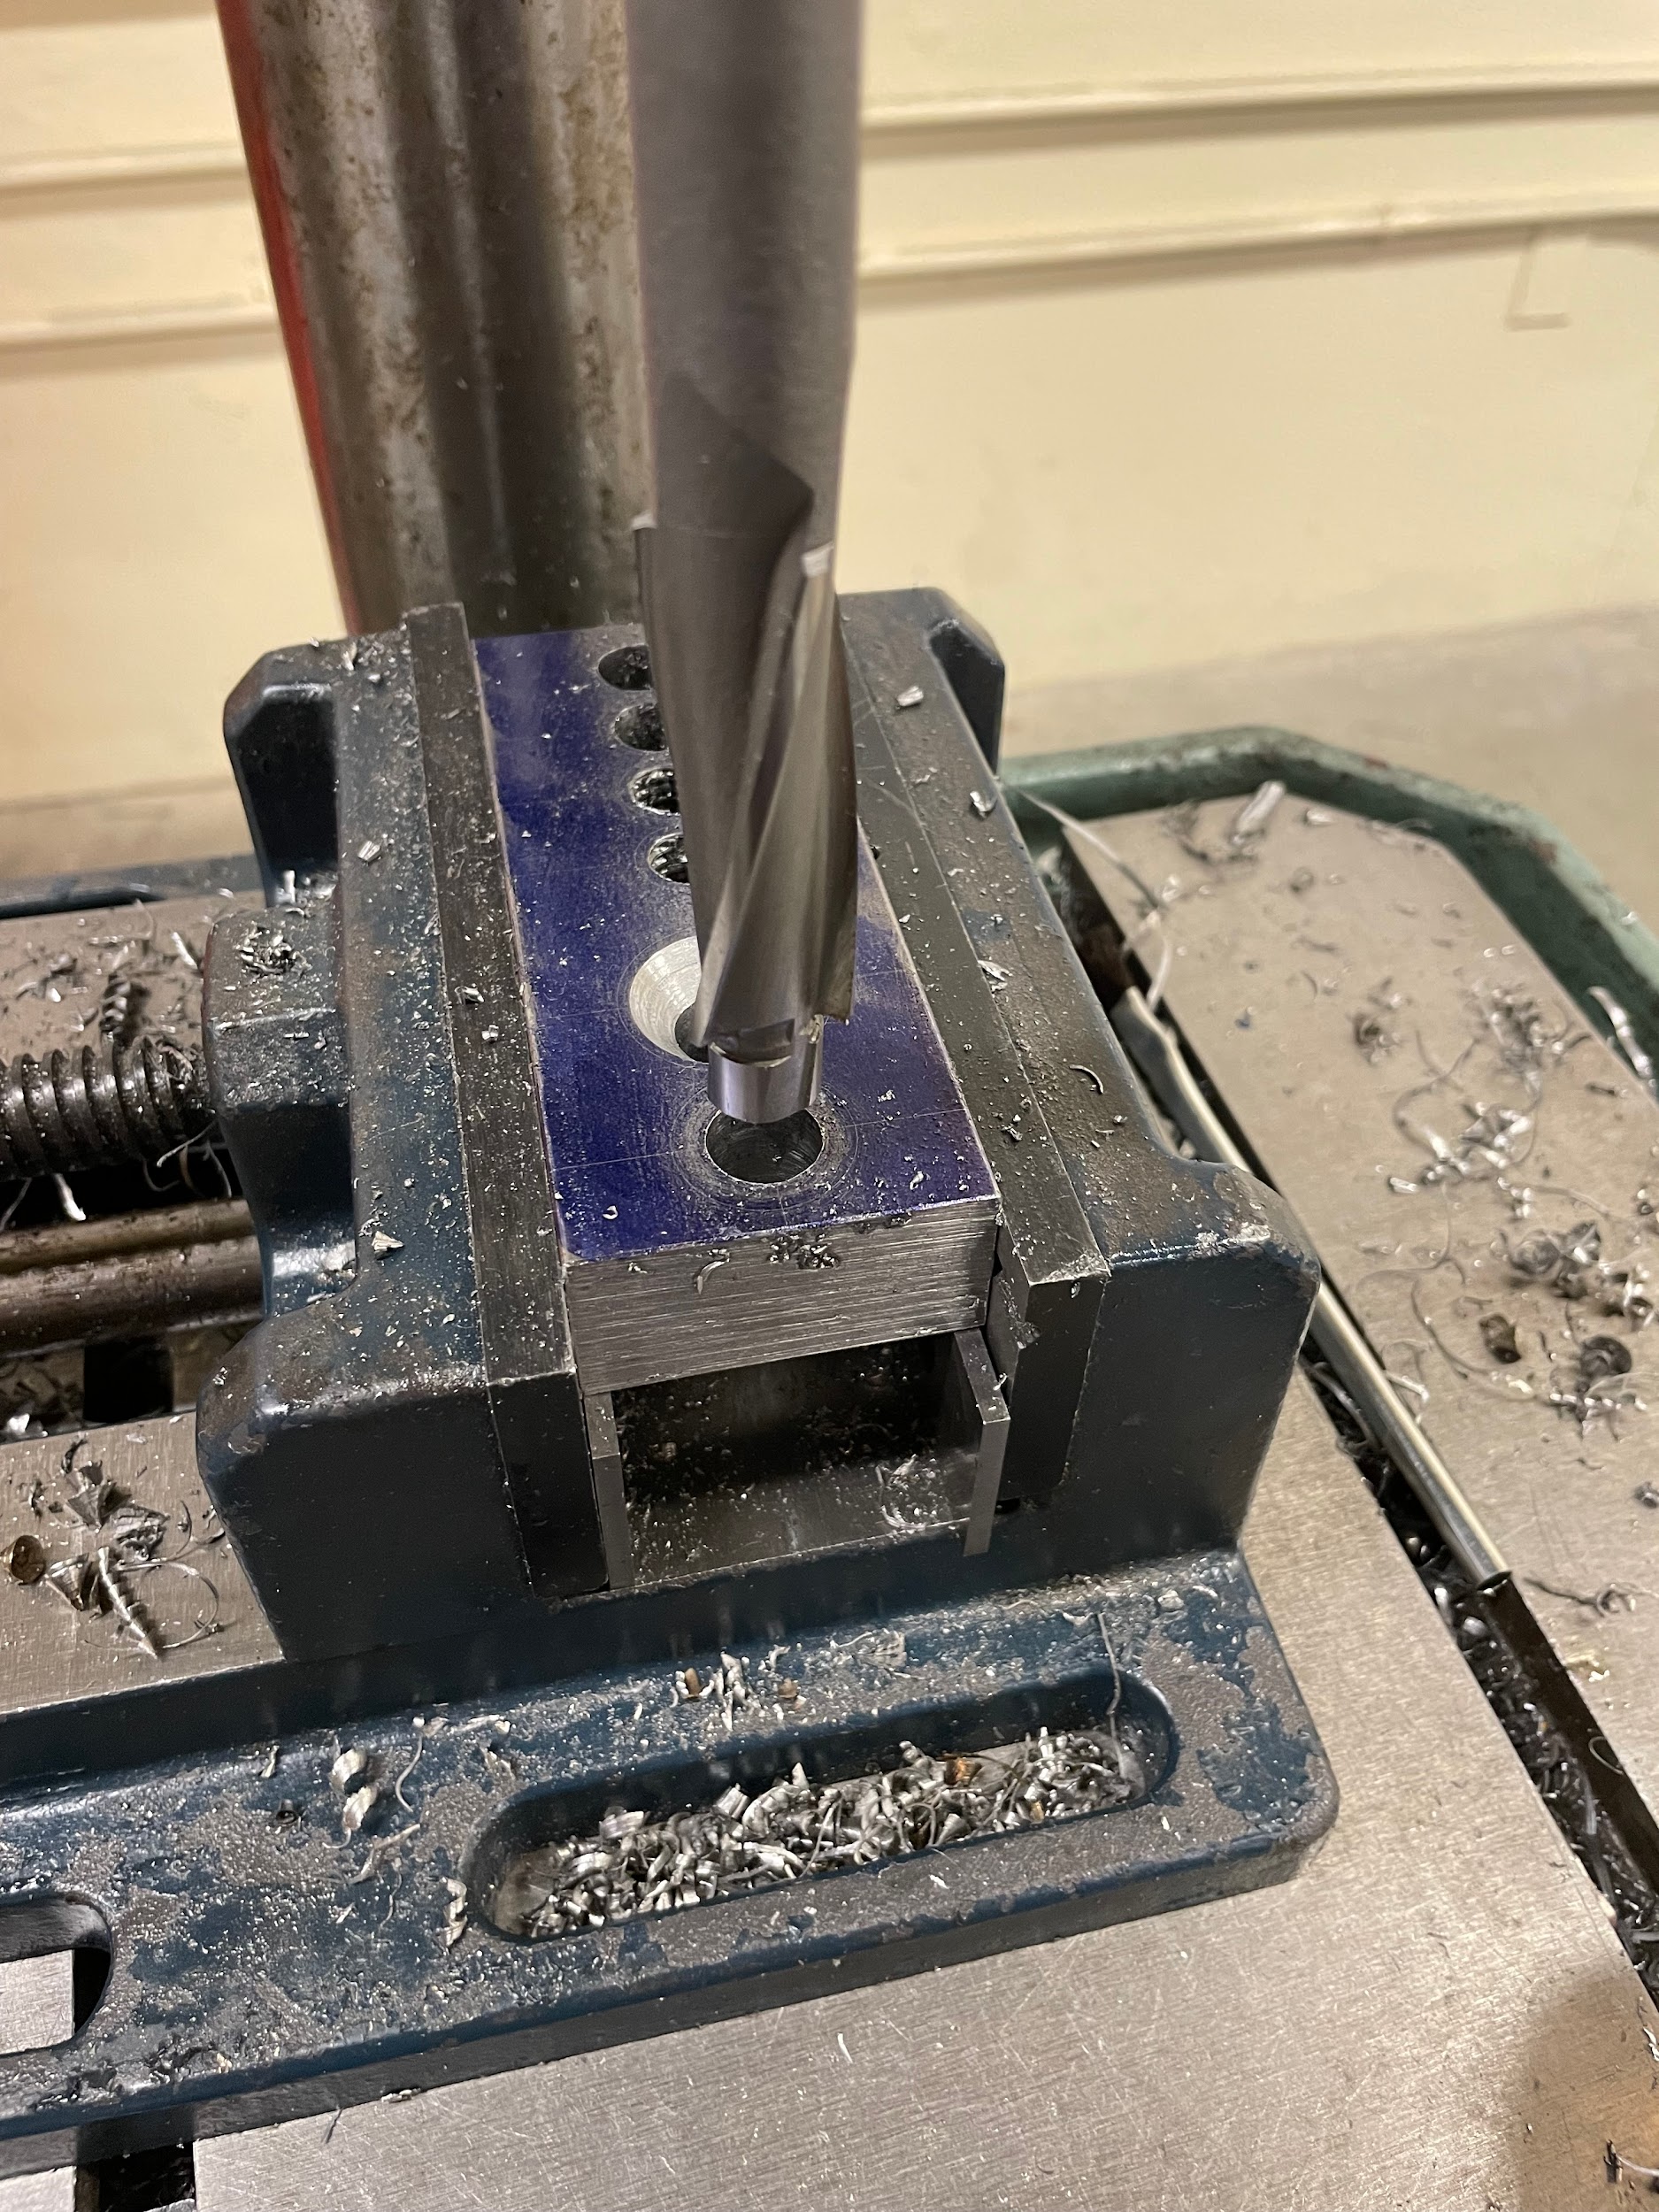
Counterboring is the secondary machining process of creating a cylindrical shape at the top of a hole using a counterbore. Counterbored holes are often used to recess socket head cap screws below the surface of a part.
Prior allowances
Before counterboring on a drill press, a hole is required first. The size of that hole is often given on a print with the allowance built in. General fastener clearance is 1/64 to 1/32 of an inch. The pilot at the end of standard counterbores is going to be 1/64 to 1/32 larger than the nominal size of the bolt for that reason.
Step by step process for counterboring:
- Drill all hole locations with appropriate sized twist drill.
- Select a counterbore and insert it into the drill chuck.
- Calculate the spindle speed of the counterbore by using the largest diameter the tool will touch the material. If the operator is unsure of this size, the top of a fastener can be measured for reference. Calculate the speed based on a twist drill of that large diameter, and then use the counterboring speed reduction, 1/4 of the speed for counterboring, to set the final speed.
- Calculate the depth of the counterbore. The print is often a good indicator of counterbore depth. If depth isn’t indicated on the print, a manufacturing reference book will have general depth information.
- Bring the quill down slowly, positioning the counterbore to touch fully at the top of the hole.
- Set the depth stop of the drill press quill movement.
- Raise the quill.
- Apply cutting oil to the counterbore flutes and to the top of the material, allowing them to slide down the sides of the hole.
- Start the spindle.
- Hold the drill vise firmly and pull the quill handle to enter the hole and cut the counterbore. This may require small pecking to break chips.
- Examine the counterbored hole.
“Step 2: Select a counterbore and insert it into the drill chuck.“
Tolerances
Counterboring tolerance for general fasteners are usually just clearance, meaning the depth and the diameter might not be critical, and can use standard tolerances found in manufacturing reference books. However, sometimes a counterbore is for more than general fastener use, and will require tighter tolerance. In these cases, the print will reflect this and give the proper tolerance.
SUMMARY
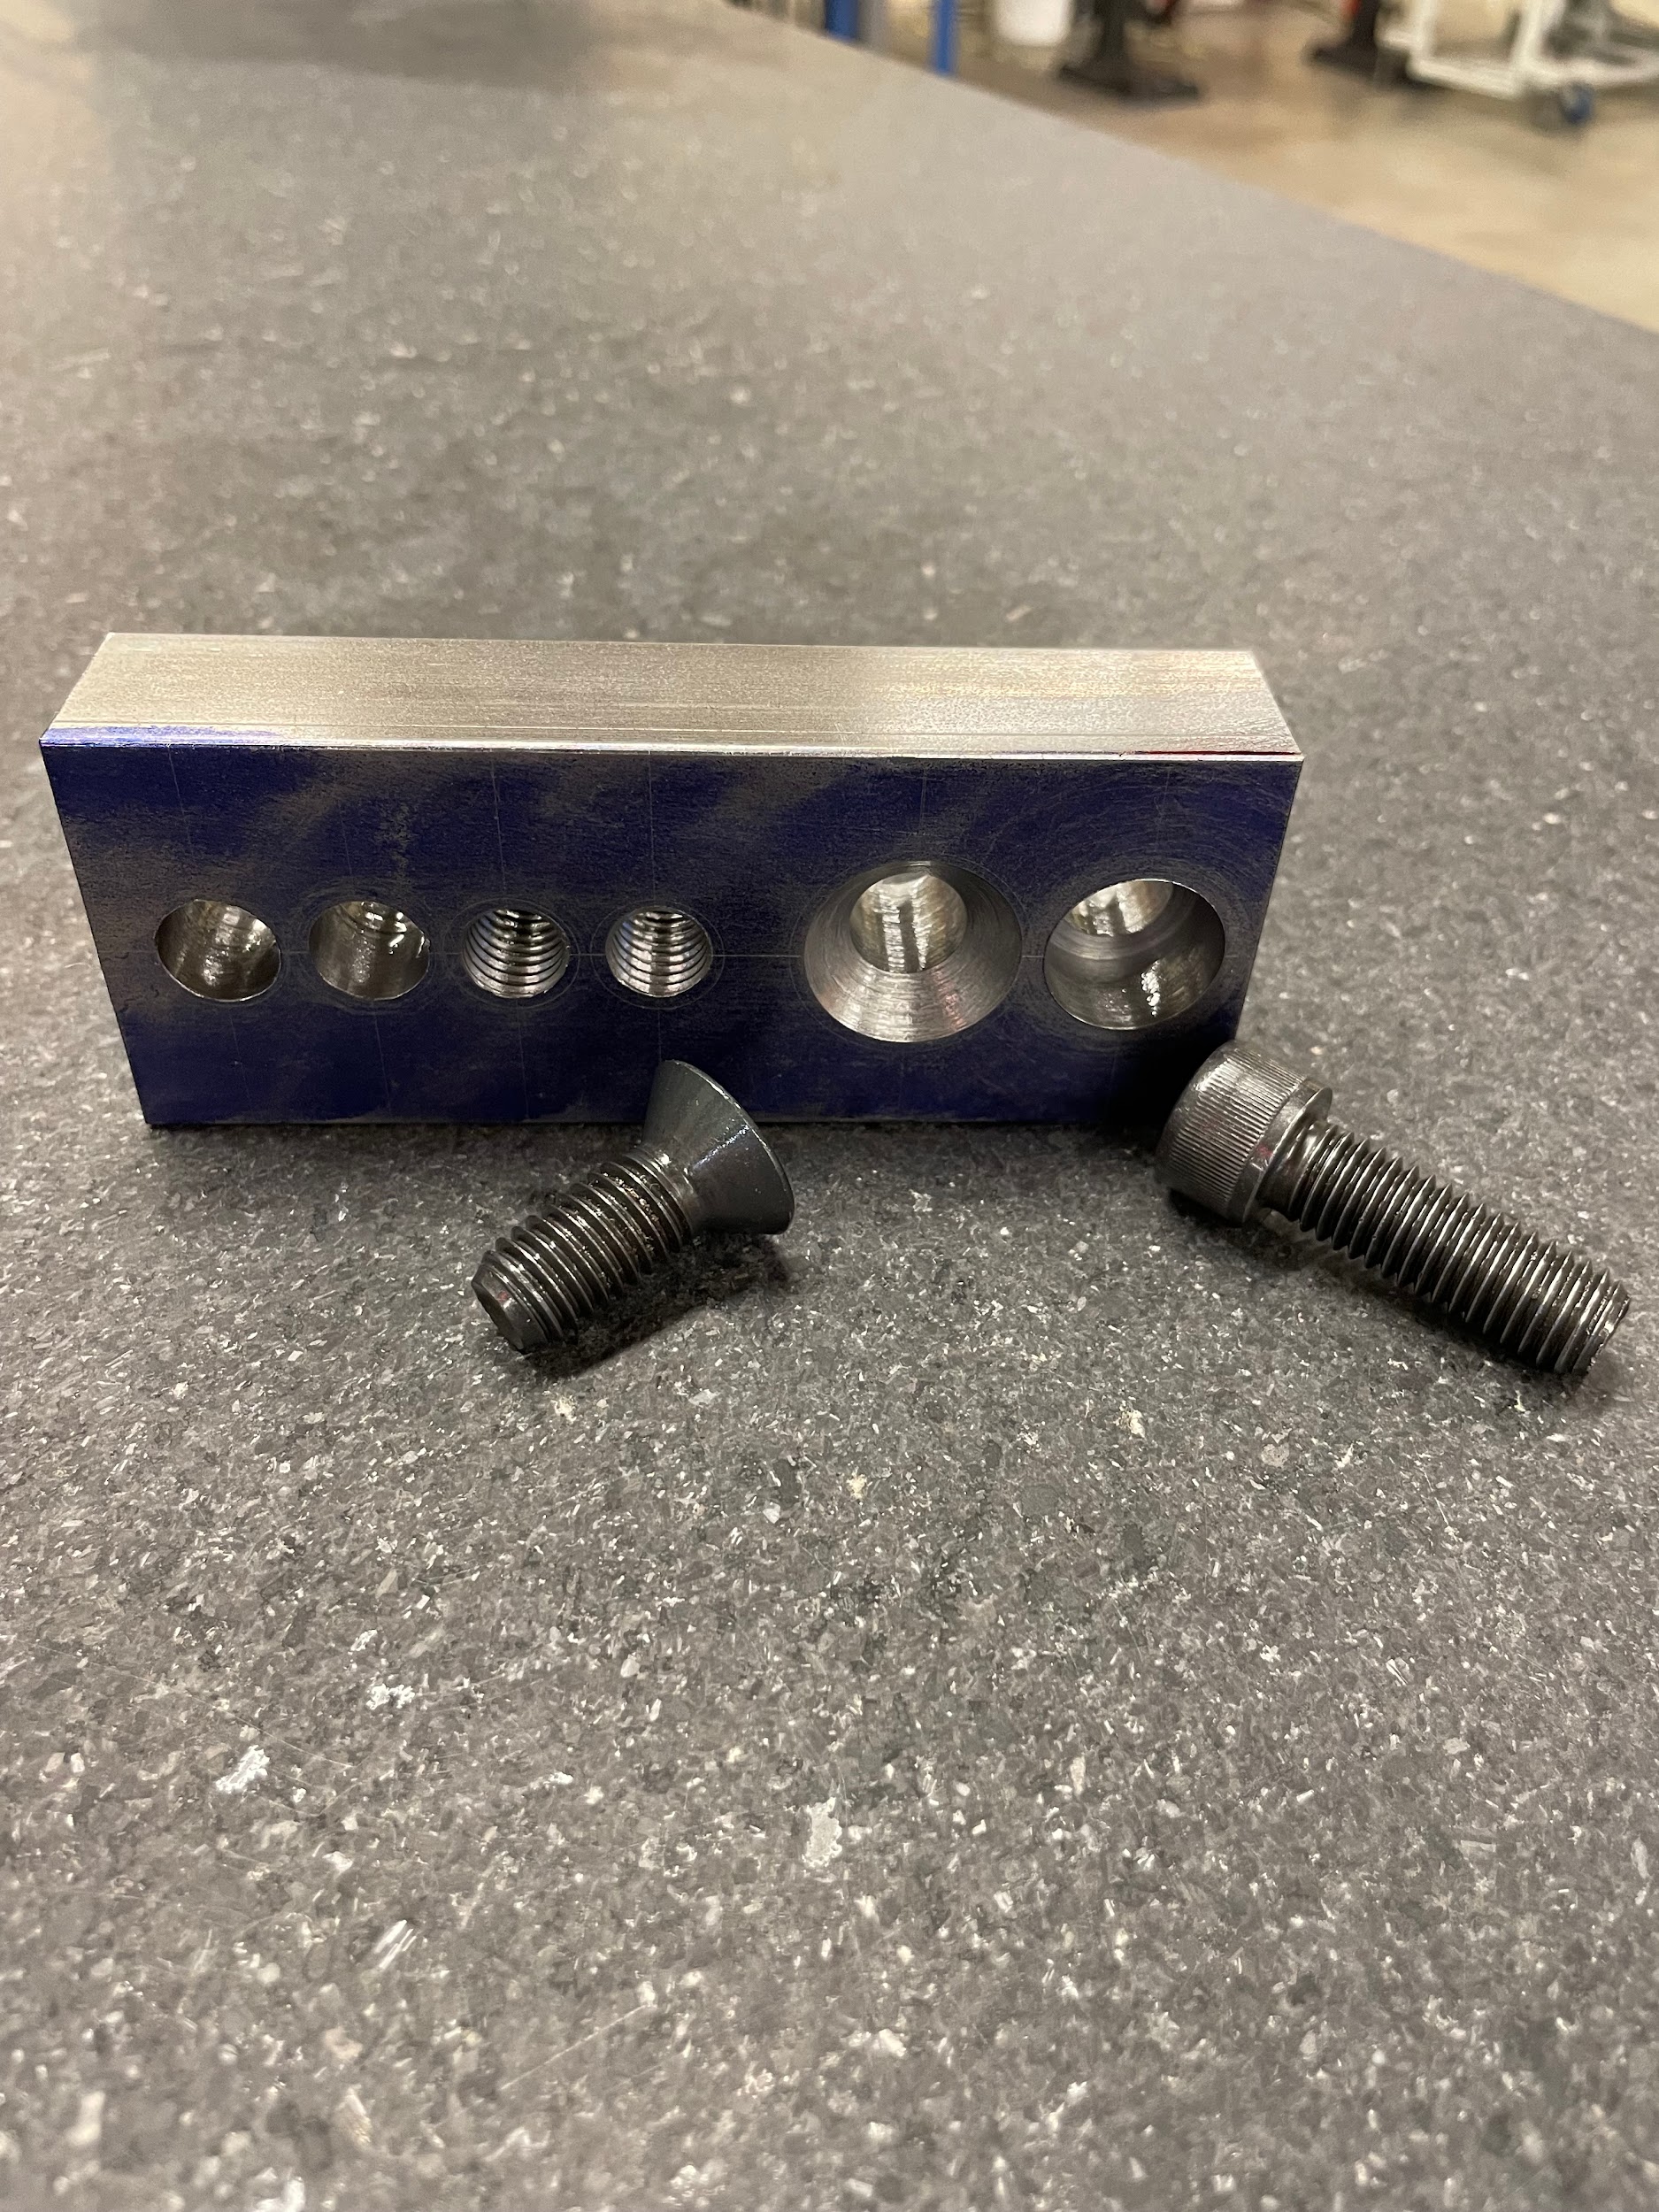
Drill presses are simple yet effective machines that are capable of so much more than just drilling. From drilling and reaming, to tapping, countersinking, counterboring, and more, drill presses are versatile. The drill press is one of the simplest of the machine tools in a shop and lays the foundation for learning many higher end skills. The knowledge gained from calculating the spindle speed of a twist drill can be built upon to calculate the spindle speed on a lathe. The knowledge gained from using a depth stop can be built upon to cut steps on a milling machine. The drill press is one of the first pieces in the manufacturing puzzle that a machinist must master.
REVIEW QUESTIONS
- What are some of the hazards a machinist may encounter when operating a drill press and how might they avoid them?
- What should be done to a drill press at the end of every shift during use?
- List the drill press components and state their purpose.
- List and describe a few tool holding and work holding solutions found on a drill press.
- List a few cutting tools used on a drill press and describe what makes them unique.
- List and describe the purpose of the parts of a twist drill.
- Explain how to calculate spindle speed on a drill press.
- What happens to the calculated spindle speed when we use tools other than twist drills on a drill press?
- How are precision tapers removed and installed on a drill press?
- What is a datum and where might they come into play in drill press work?
- How would a machinist spot a hole and why would they do it?
- Name a hole making process and give a brief account of the steps required to accomplish it.
References
Apex Tool Group. (n.d.). About us: Jacobs story. Jacobs Chuck. Retrieved May 23, 2024, from http://www.jacobschuck.com/about/
Hernigou, P., Queinnec, S., & Flouzat Lachaniette, C. H. (2013). One hundred and fifty years of history of the Morse taper. International Orthopaedics, 37(10), 2081–2088. https://doi.org/10.1007/s00264-013-1927-0
Modern machinery (Vol. 5). (1899). Modern Machinery Publishing. https://www.google.com/books/edition/Modern_Machinery/hZzmAAAAMAAJ

