Chapter 9 Part 7: Manual Vertical Milling Machines
ANGLE MILLING
What is it?
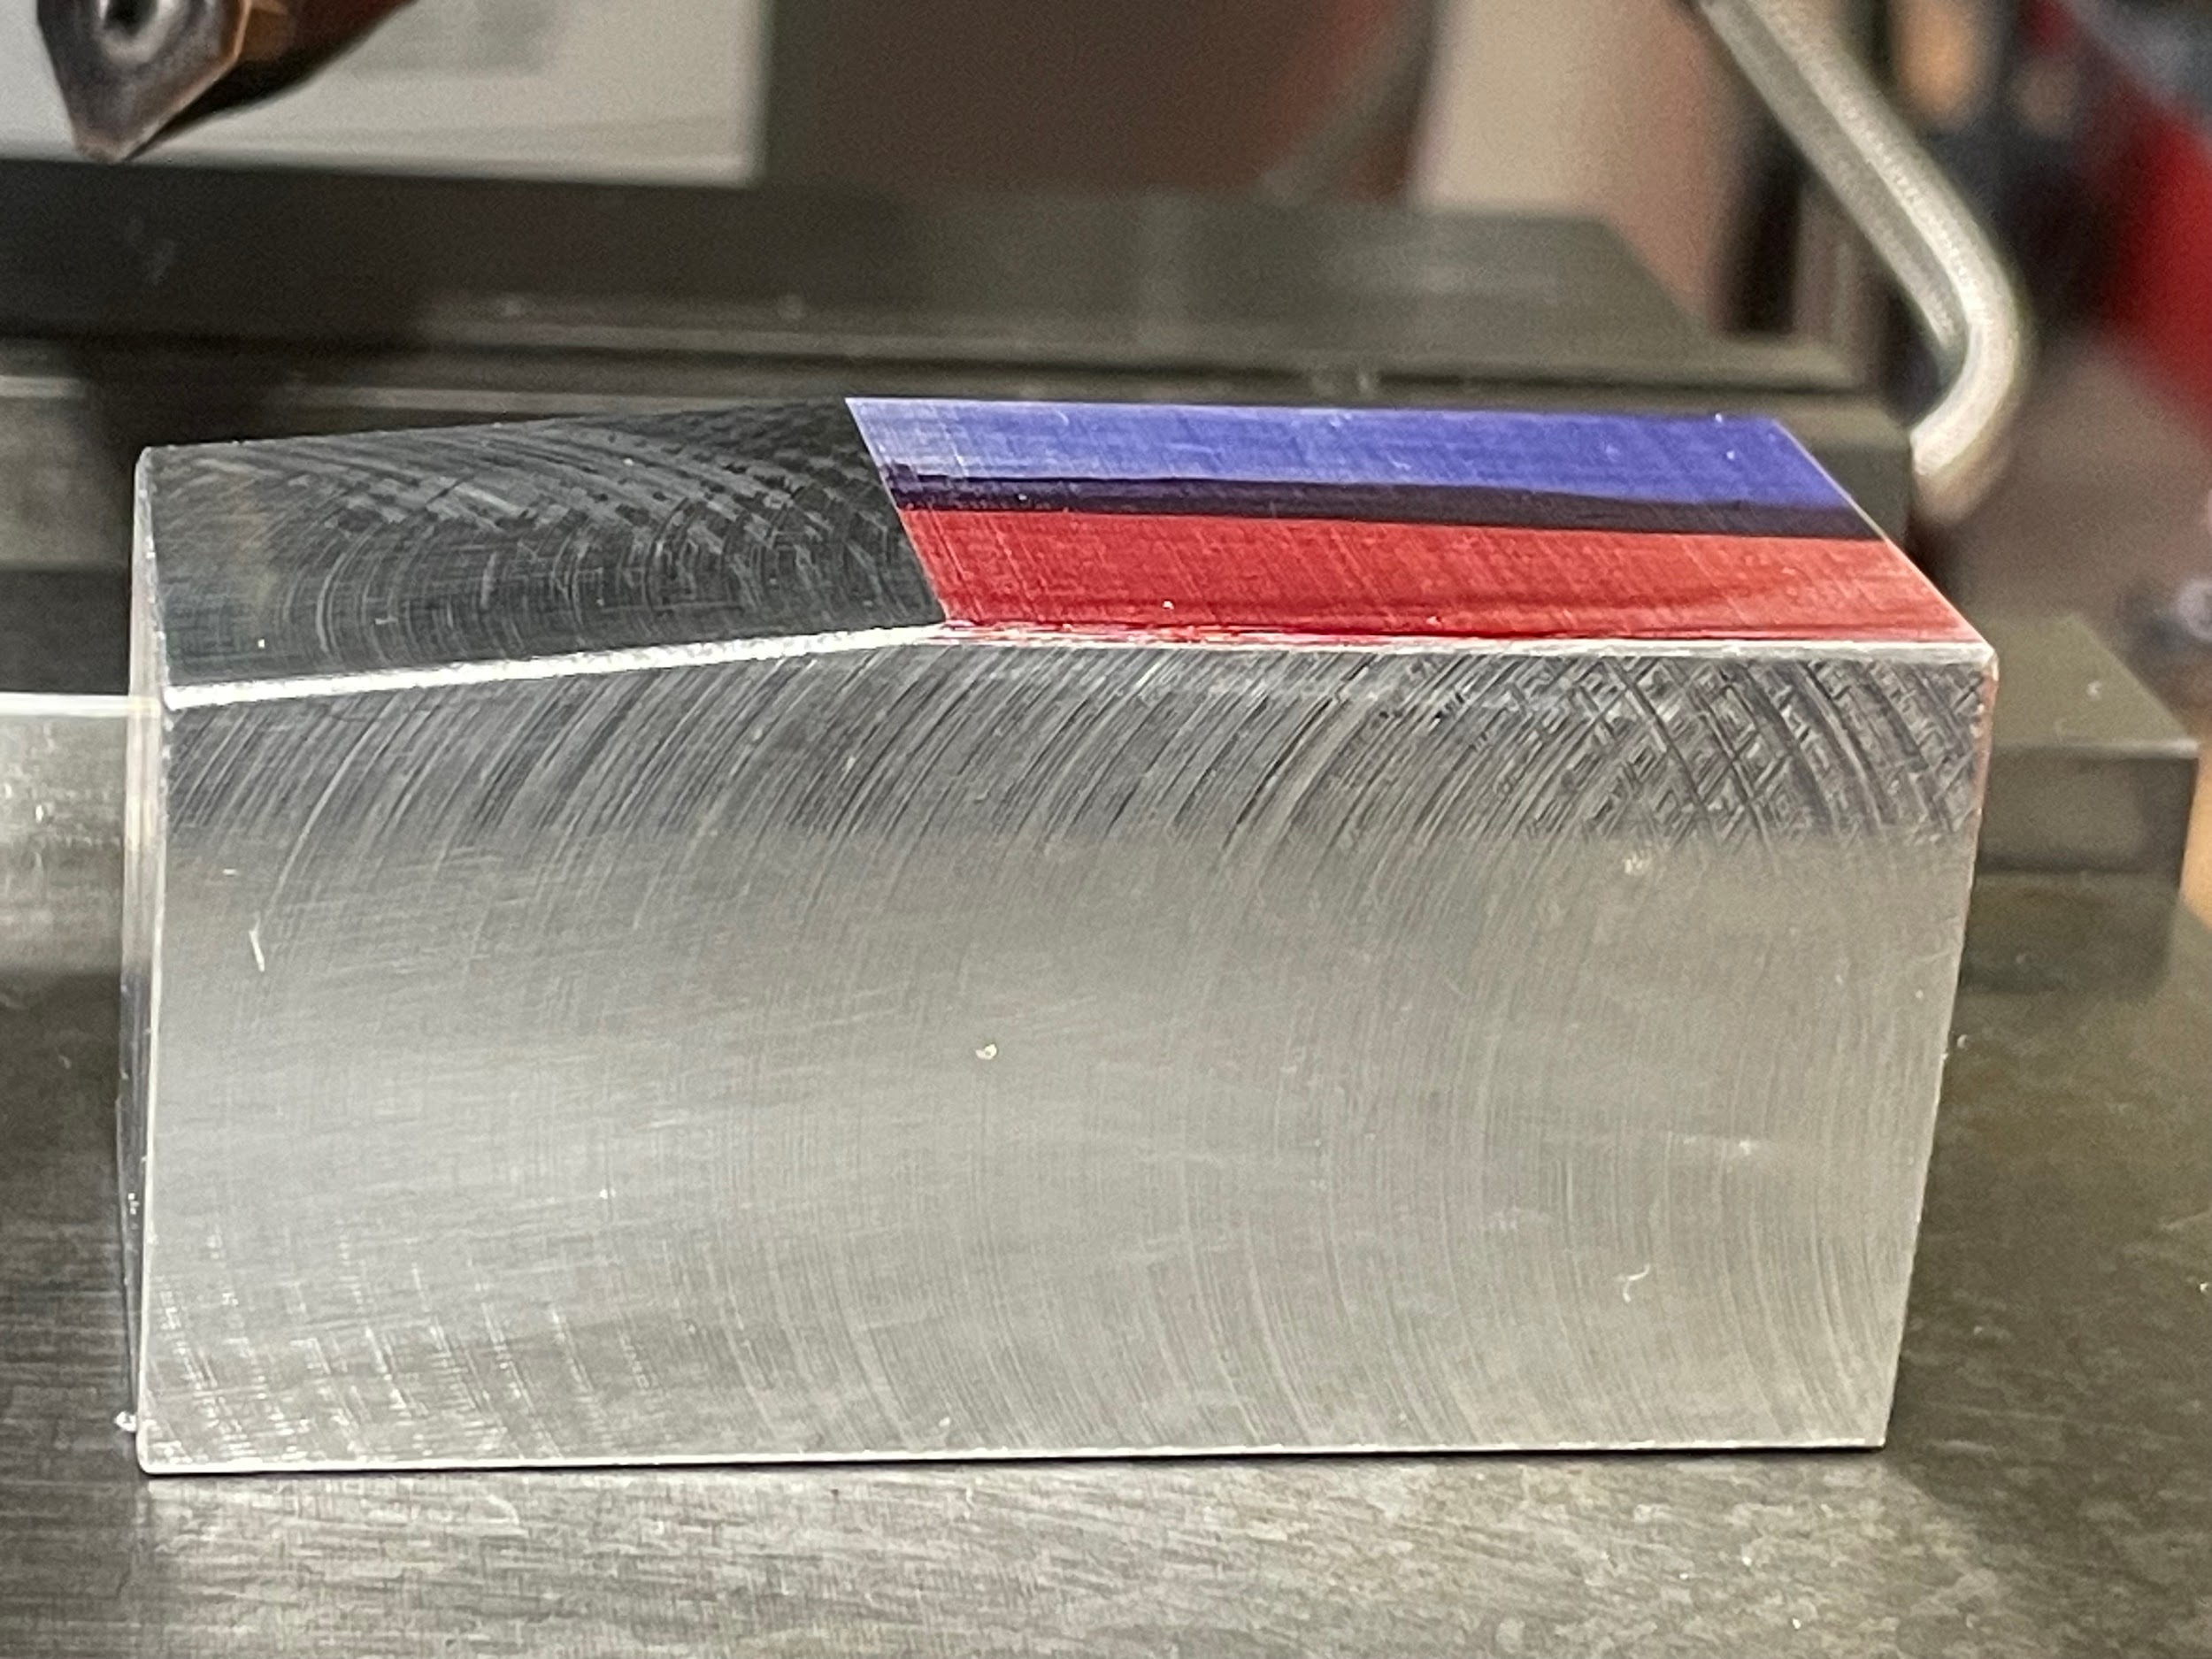
Angle milling is the process of creating an angled cut on a workpiece. This can be done in multiple different ways on a manual milling machine.
Holding the part in a vise at an angle is a good option for angle milling. This option is the quickest and can often be accomplished by using angle blocks. For added precision, dialing in the parts using trigonometry and a drop indicator is a popular method.
Adjusting the milling head at one or more of the joints that attach the head to the ram is another method of creating angle cuts. This is a good option if there are many parts to be machined; however, if there are just a few parts, altering the milling head can be cumbersome to re-tram in.
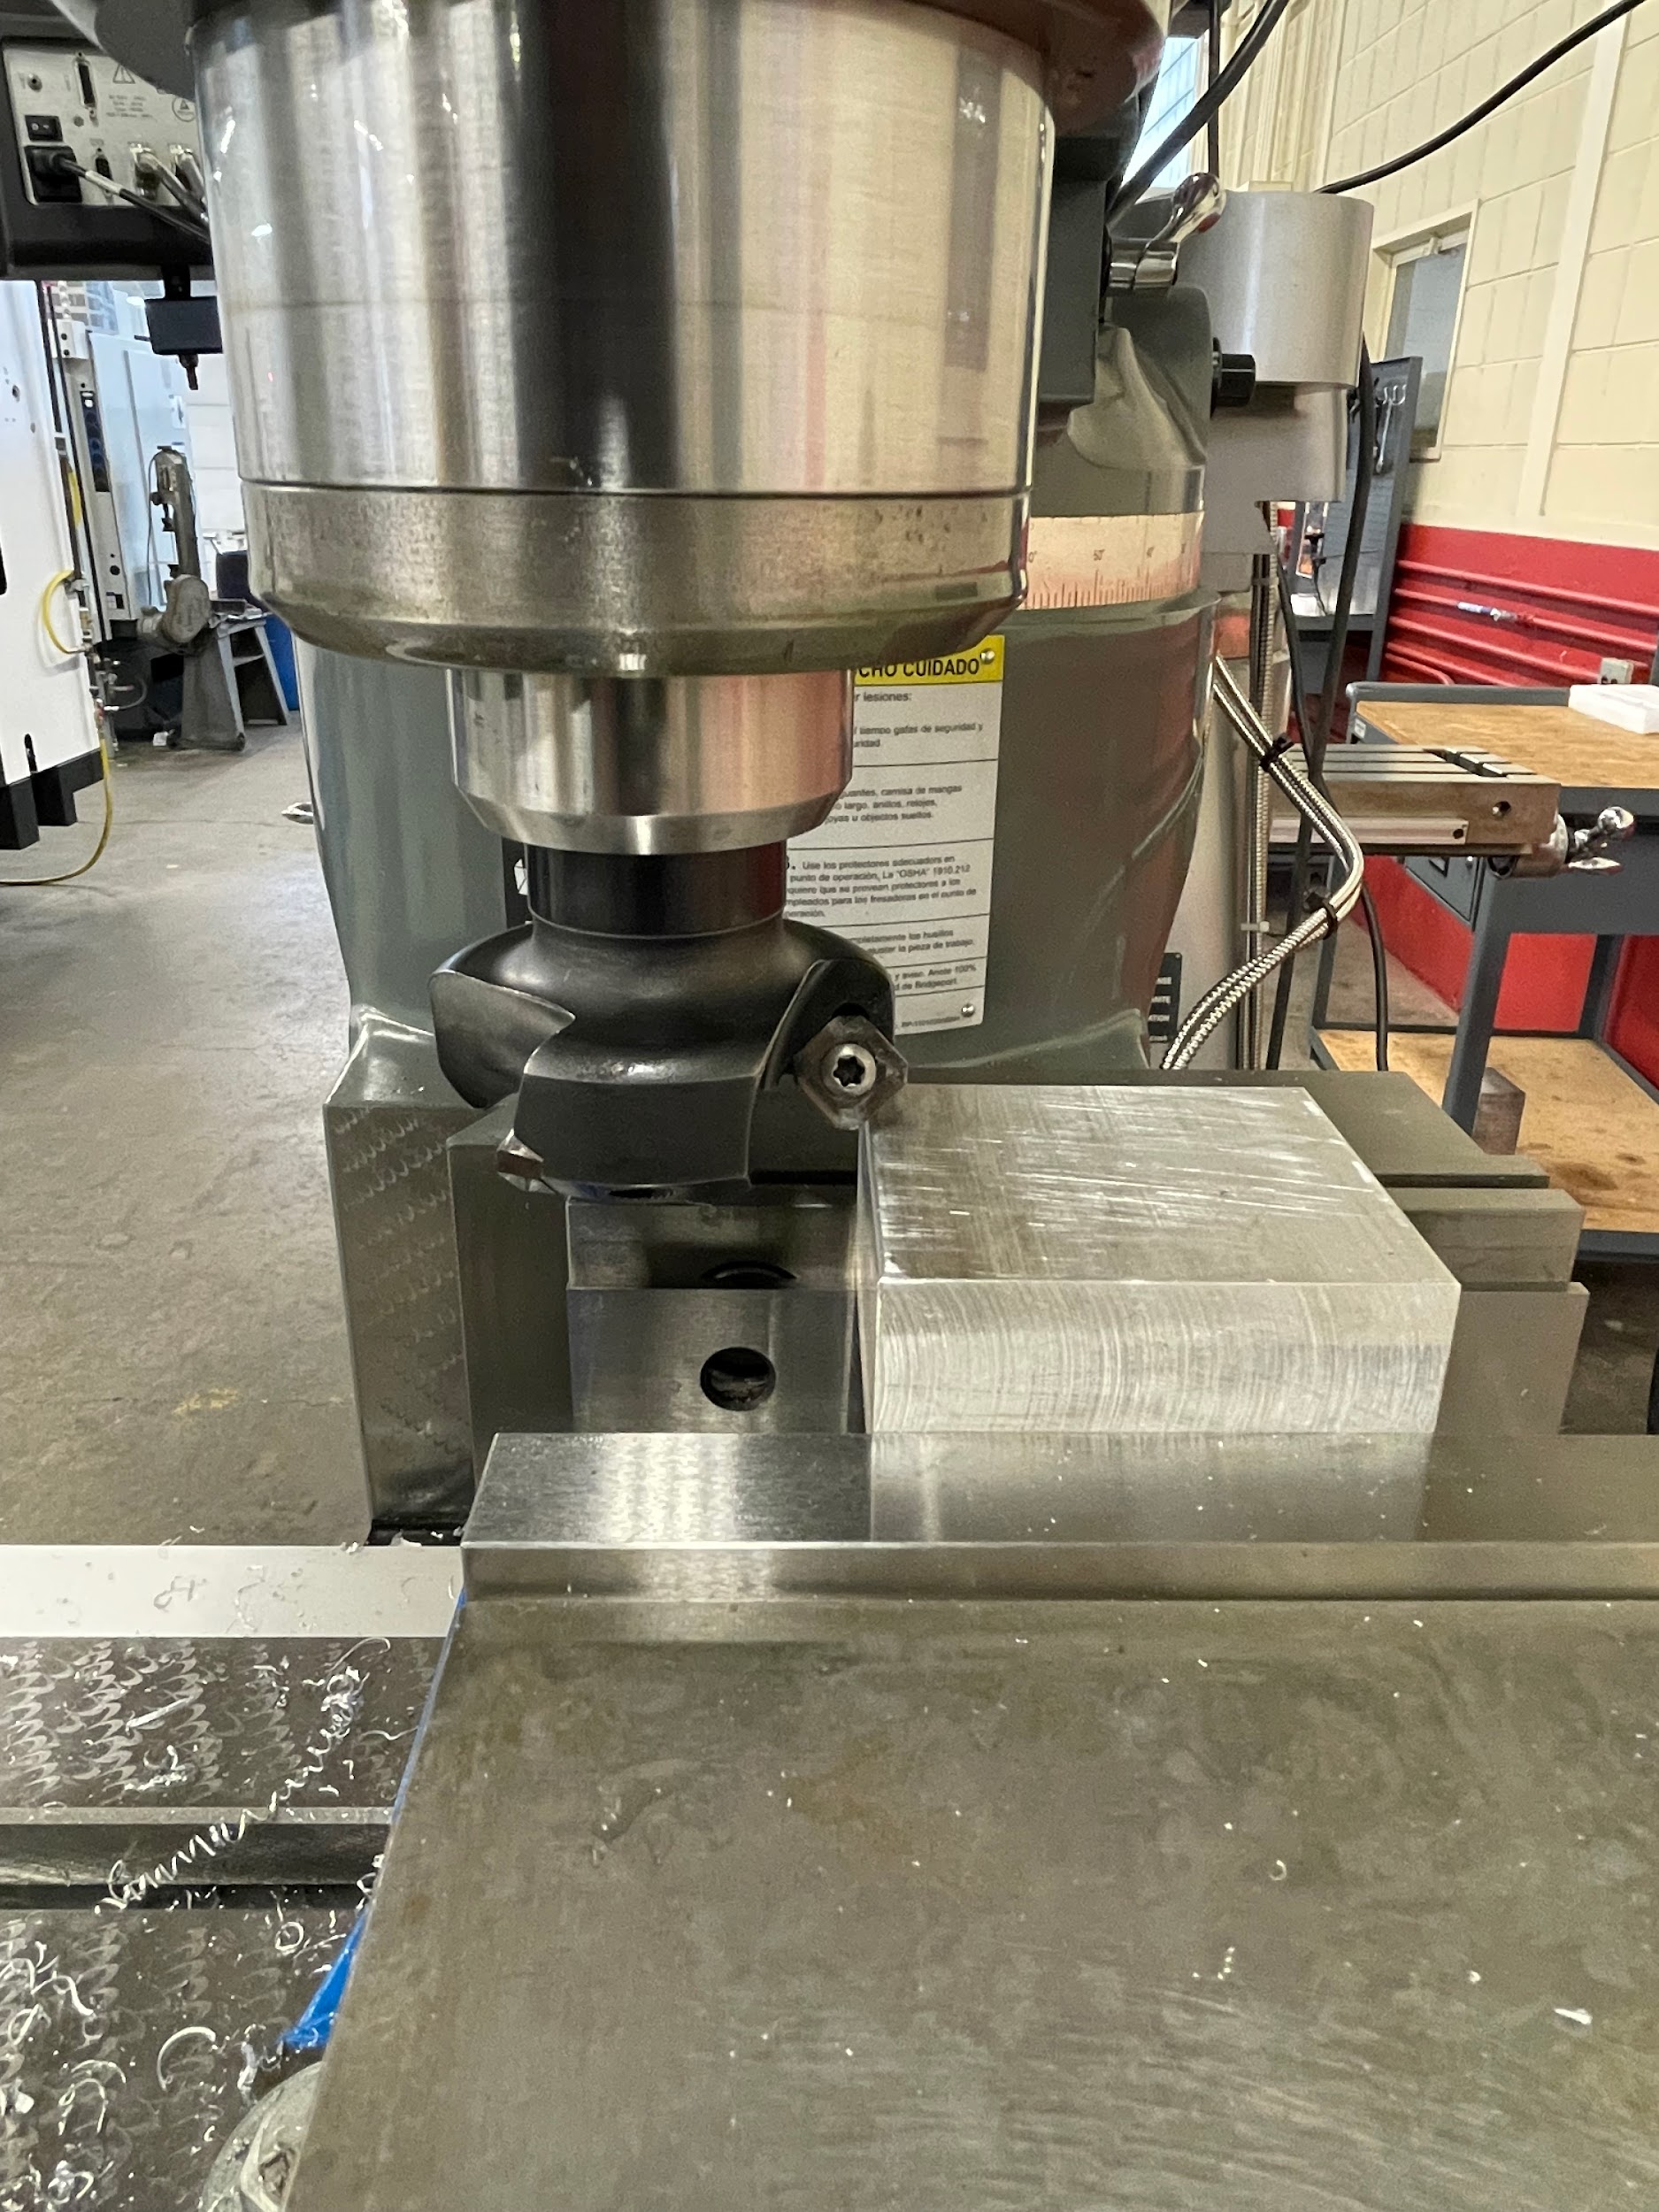
Smaller angular cuts, like chamfers, often utilize form cutters ground to the precise angle needed. For 45 degree angles that don’t need to be extremely accurate, the angled edges of a face mill work well.
Custom fixtures are a great option if high volumes of parts are to be cut at angles. A fixture can hold the part at a specific angle and allow for the angle to be milled on the part. This isn’t the best option for just a couple parts because a fixture will take extra time to design and machine.
Step by step process for milling an angle using angle blocks:
- Select an angle block that corresponds to the angled feature of the part.
- Load the part, along with the angle block, in the vise on parallels.
- Load an end mill or face mill into the milling machine. Generally a tool that will accomplish the cut in one pass.
- Calculate the spindle speed and feed rate for the tool selected.
- Turn on the spindle and adjust the speed.
- Lock the quill.
- Gently touch the tool off to the prominent corner by raising the knee.
- Zero the knee.
- Calculate the amount to be removed from the part using right angle trigonometry.
- Remove the necessary material over multiple passes using face milling cuts.
- Turn off the spindle.
- Lower the knee.
- Clean and inspect the feature.
“Step 1: Select an angle block that corresponds to the angled feature of the part.“
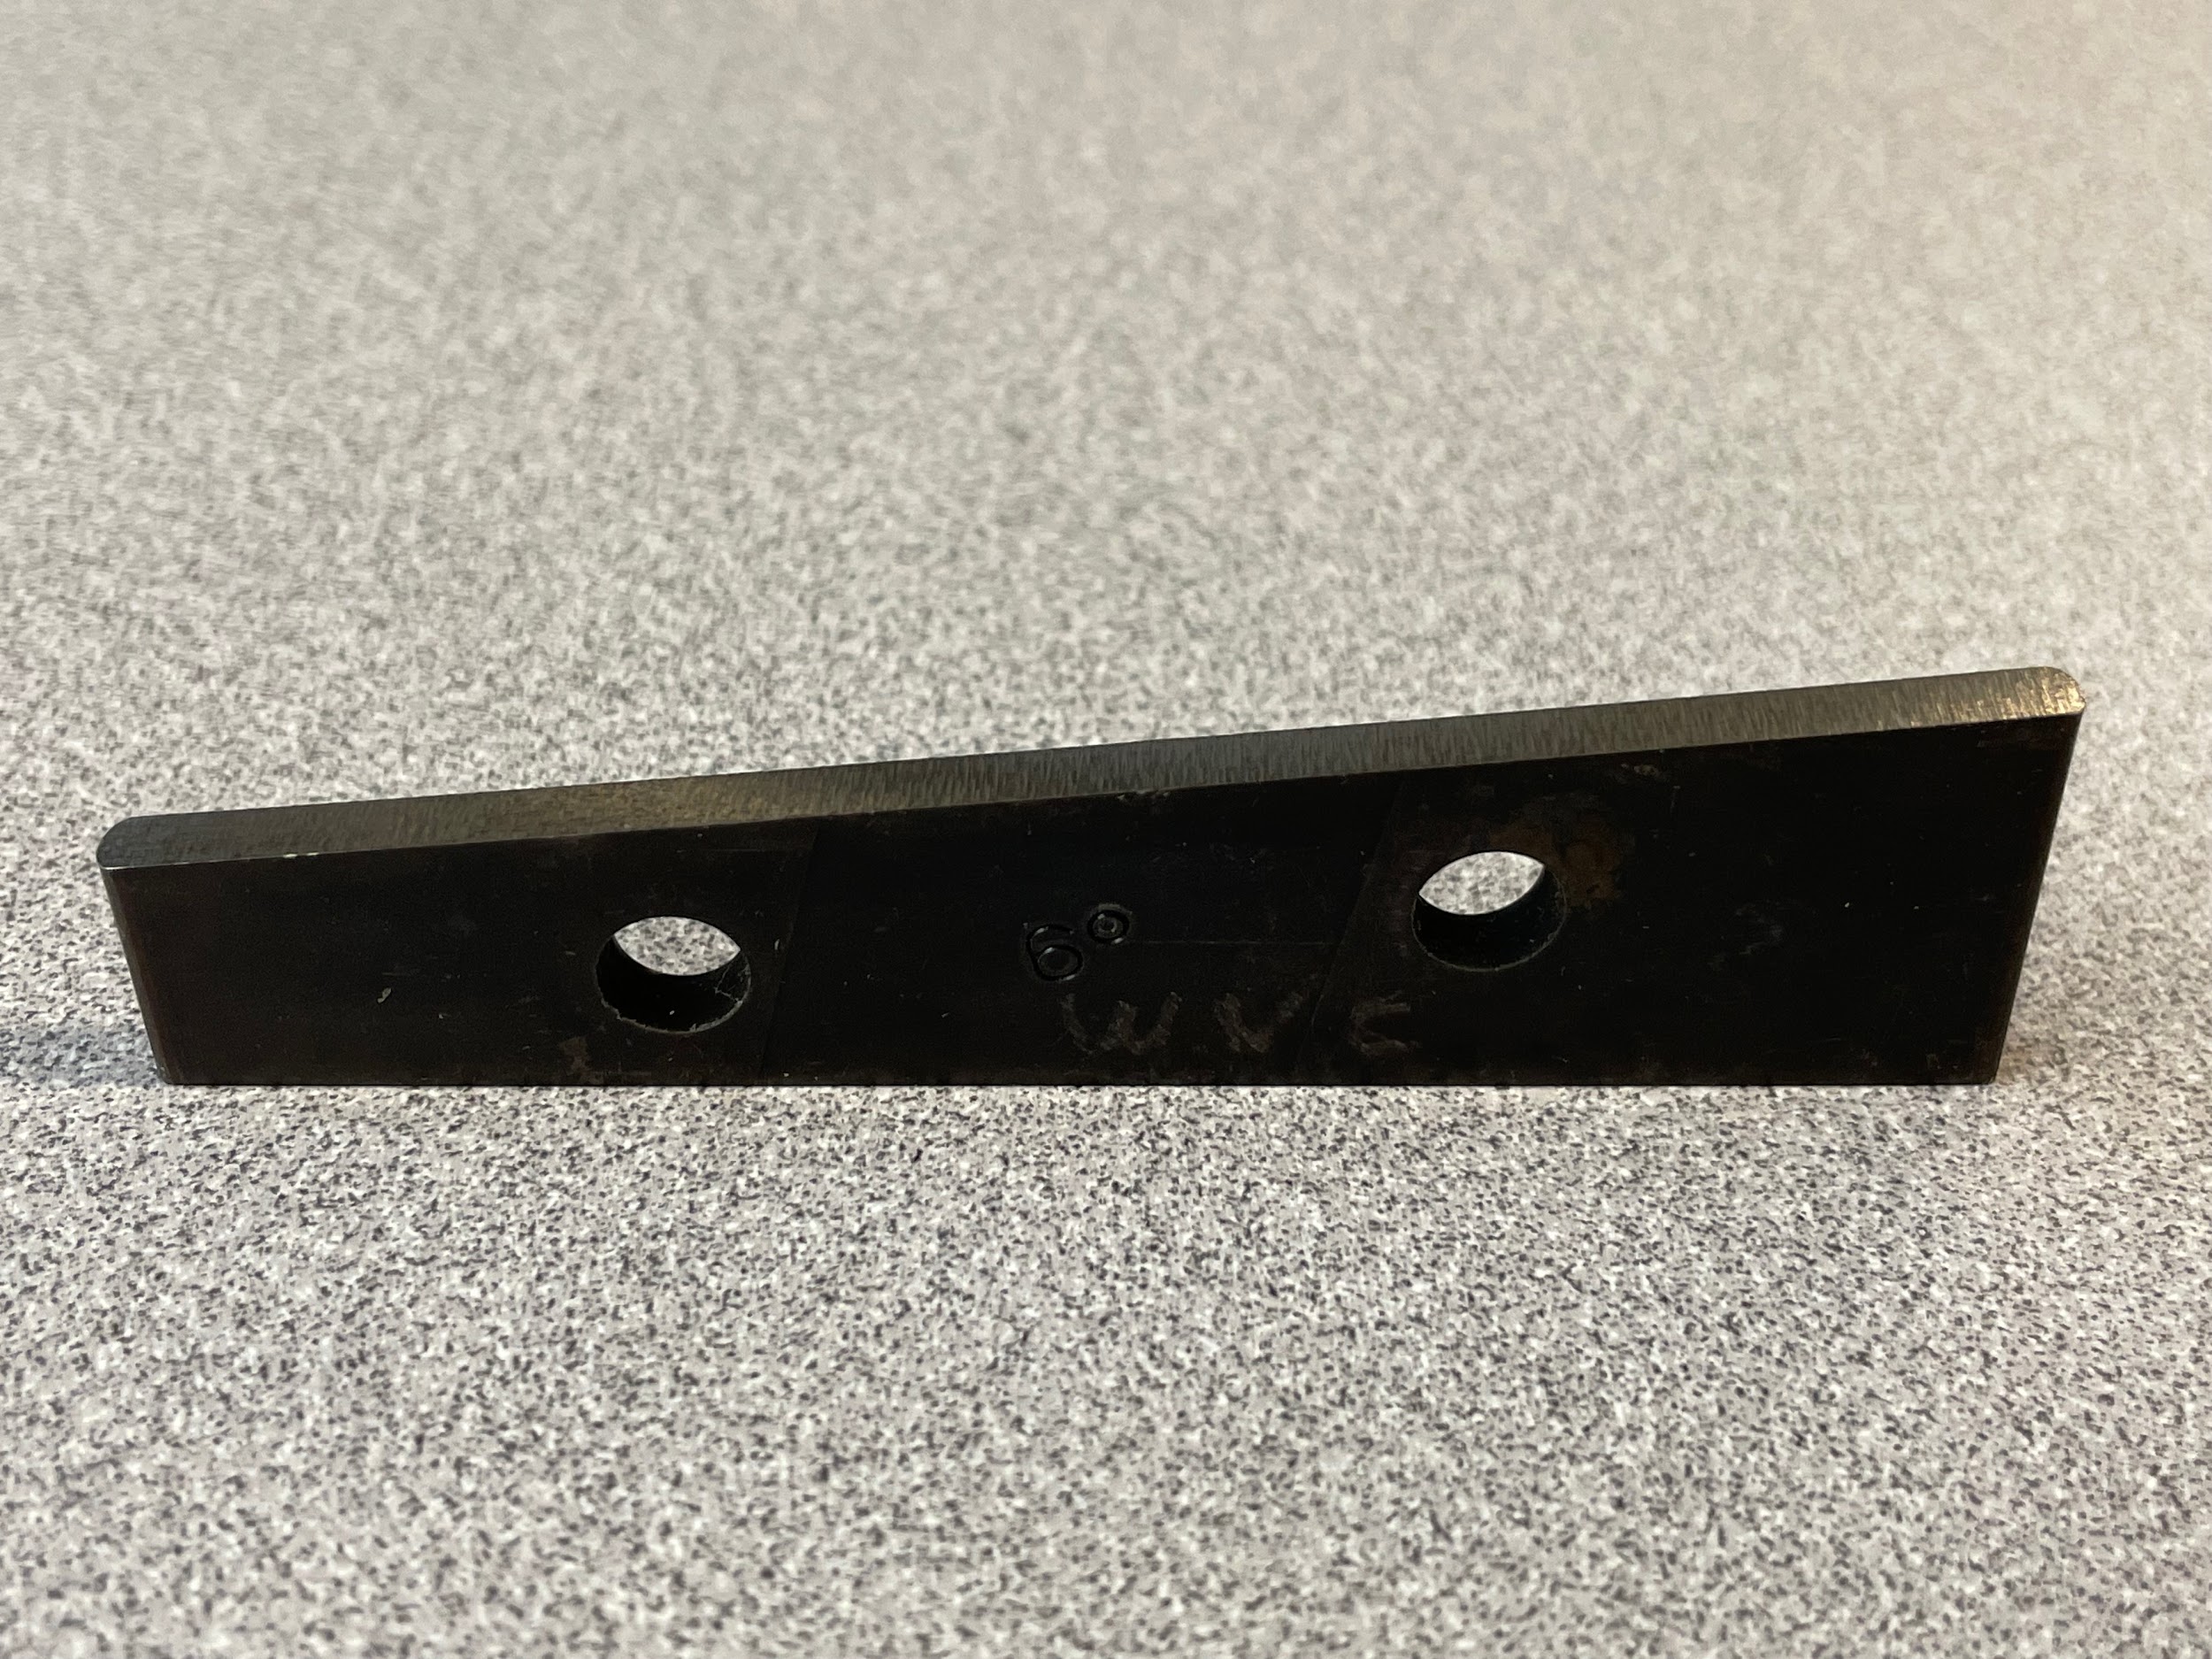
“Step 2: Load the part, along with the angle block, in the vise on parallels.“
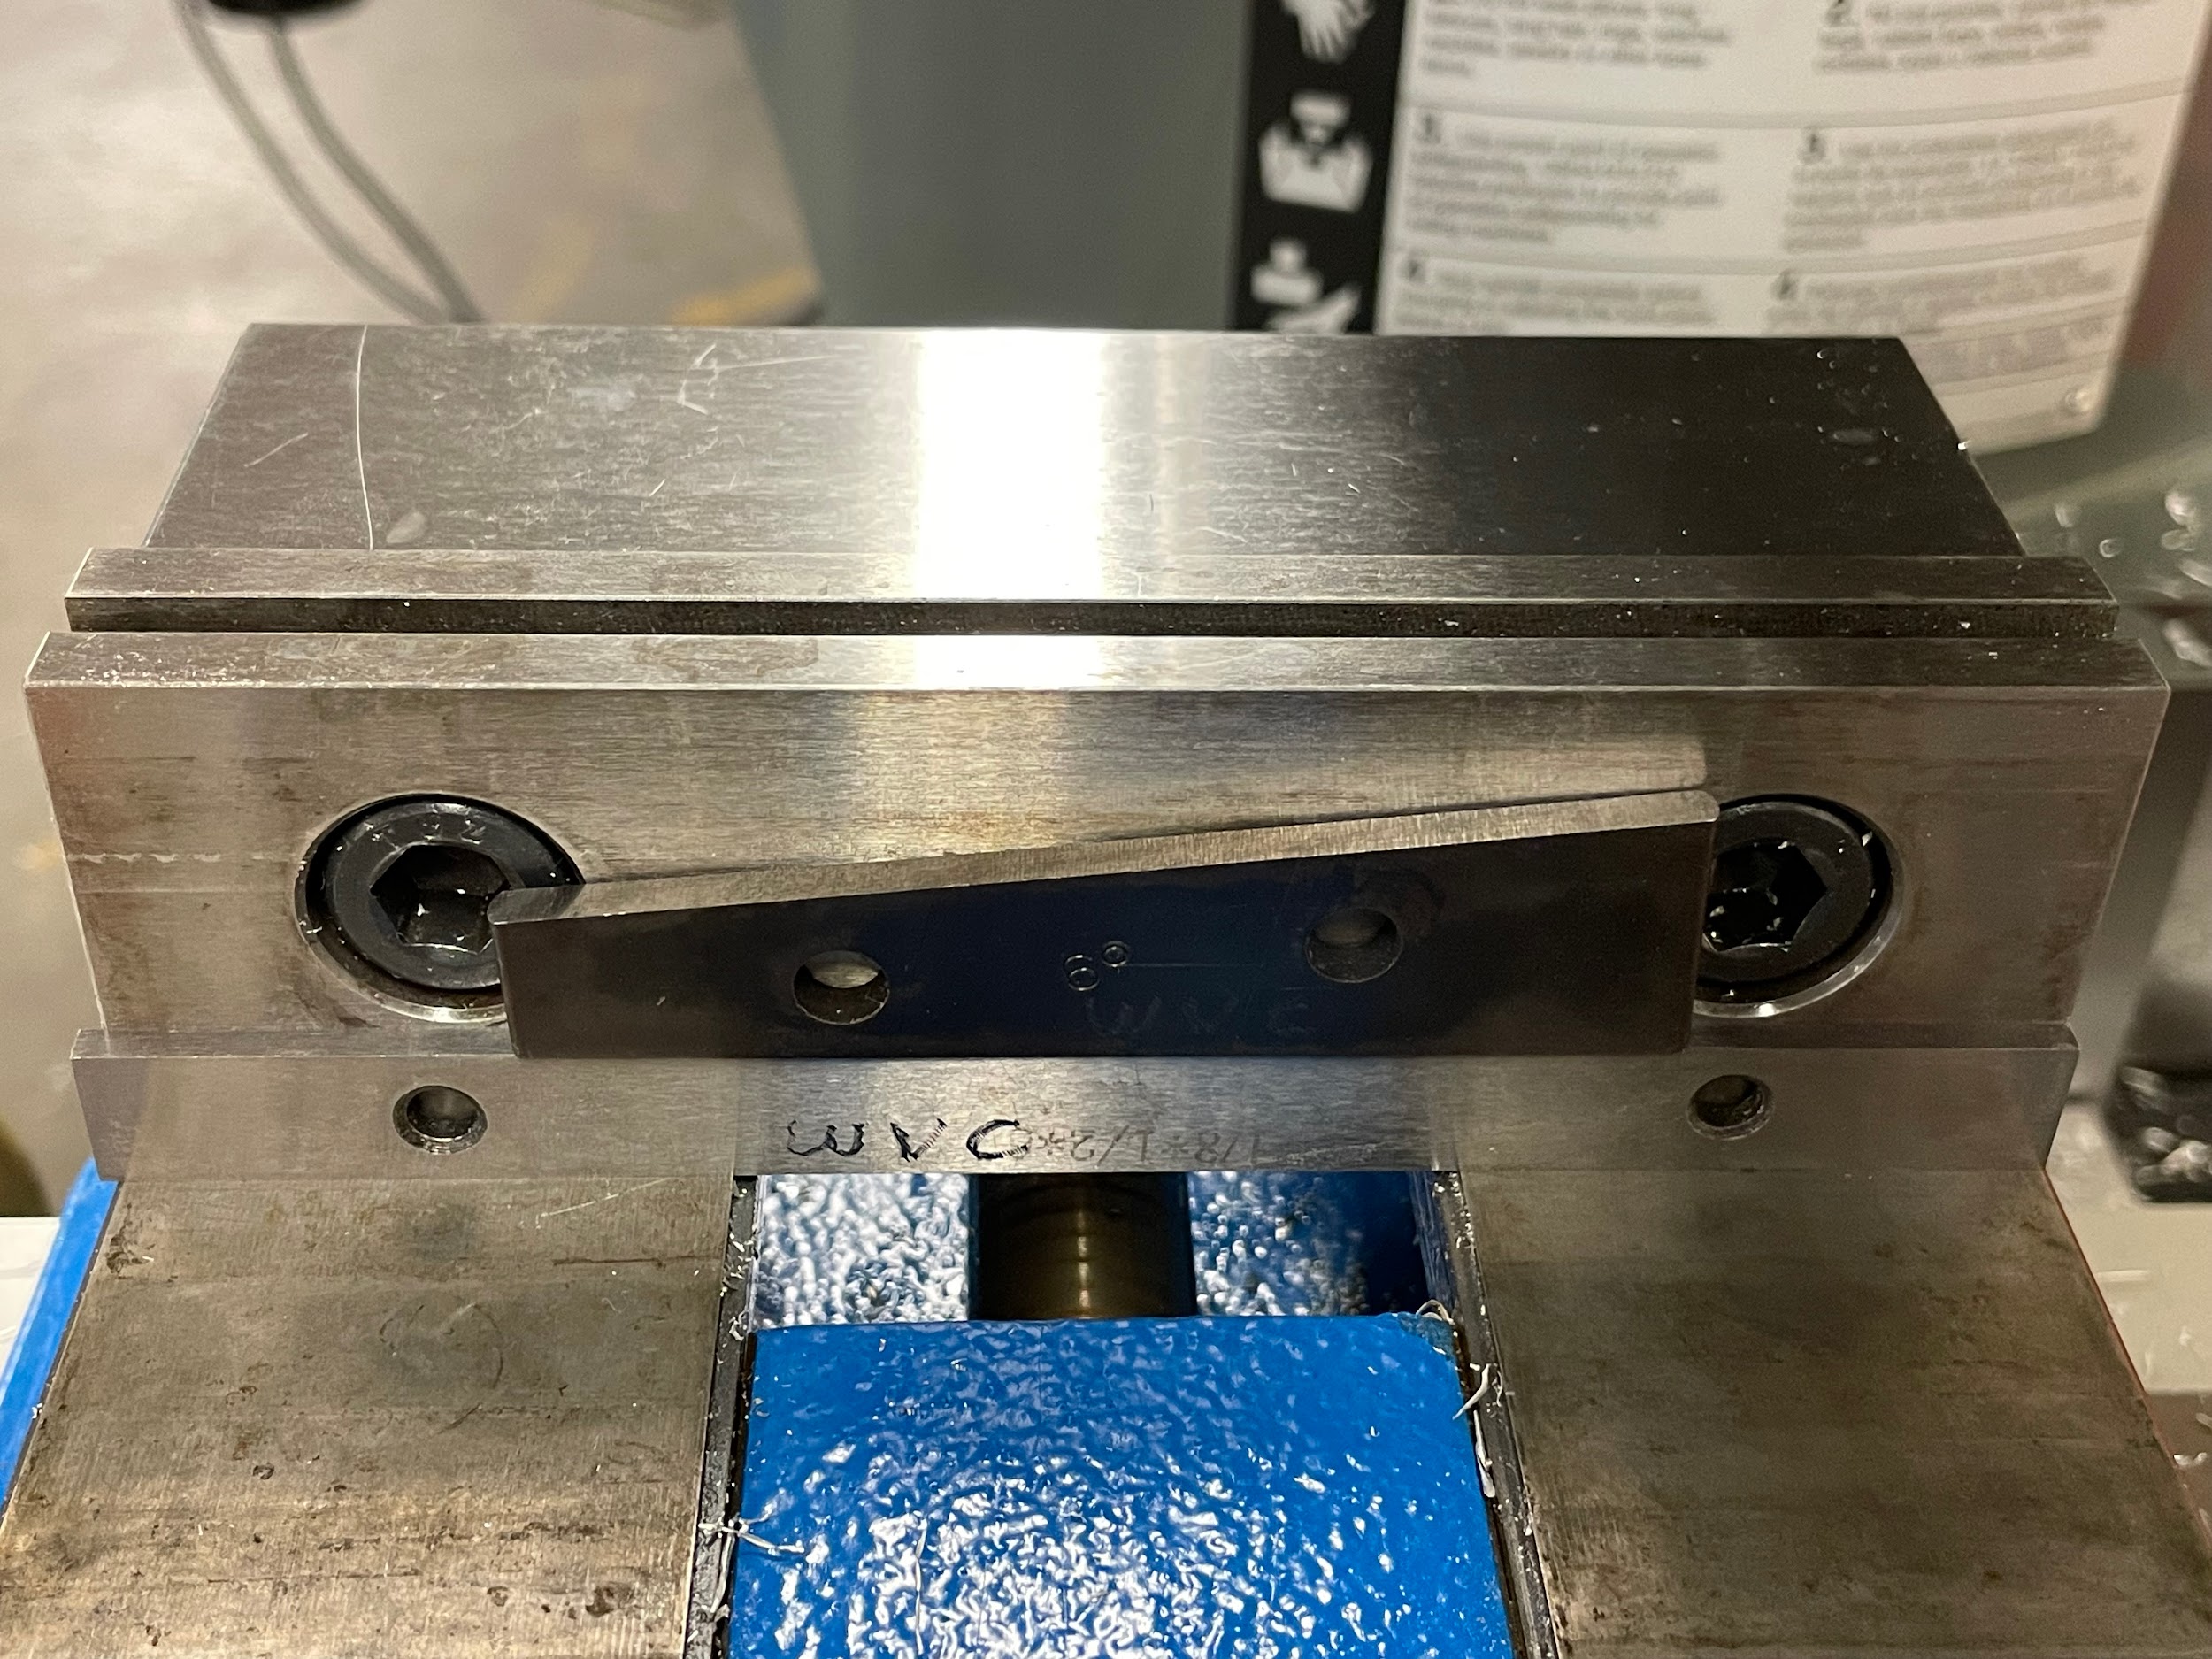
“Step 2: Load the part, along with the angle block, in the vise on parallels.“

Step by step process for milling an angle by dialing in the part at an angel in the vise:
- Load the part in the vise, one end on parallels, handled at the approximate angle of the required cut.
- Lightly tighten the vise.
- Attach a drop indicator to the head so that the indicator shaft is vertical.
- Calculate the amount of the vertical leg of the triangle associated with the angular cut. In the example shown, a 6 degree angle is to be cut. The operator can use whatever horizontal distance they like, but one that is an even number and easy to calculate is best. In this example, 1.000” is used. The surface of the part makes up the hypotenuse, the operator moving the table makes one leg of the triangle, and the drop of the indicator makes the other leg. Knowing that the angle and one leg are give, and the other leg is in question, the tangent formula will be used. The calculation looks like this:
-
- Tan angl = opp/adj
- Tan 6° = Z/1.000”
- x1.000” x1.000” Tan 6° x 1.000” = Z/1.000” x 1.000”
- Tan 6° x 1.000” = Z
- .105” = Z
-
- Raise the knee so the indicator is depressed by at least .100 more than the amount of the calculated drop.
- Remove any backlash in the table movement and zero the graduated collar.
- Zero the indicator.
- Move the table by exactly 1.000.
- Read the drop in the indicator. If the drop isn’t accurate to the calculated leg, gently adjust the part and remeasure until the drop is within tolerance.
- Load an end mill or face mill into the milling machine. Generally a tool that will accomplish the cut in one pass.
- Calculate the spindle speed and feed rate for the tool selected.
- Turn on the spindle and adjust the speed.
- Lock the quill.
- Gently touch the tool off to the prominent corner by raising the knee.
- Zero the knee.
- Calculate the amount to be removed from the part using right angle trigonometry.
- Remove the necessary material over multiple passes using face milling cuts.
- Turn off the spindle.
- Lower the knee.
- Clean and inspect the feature.
“Step 1: Load the part in the vise, one end on parallels, handled at the approximate angle of the required cut.“
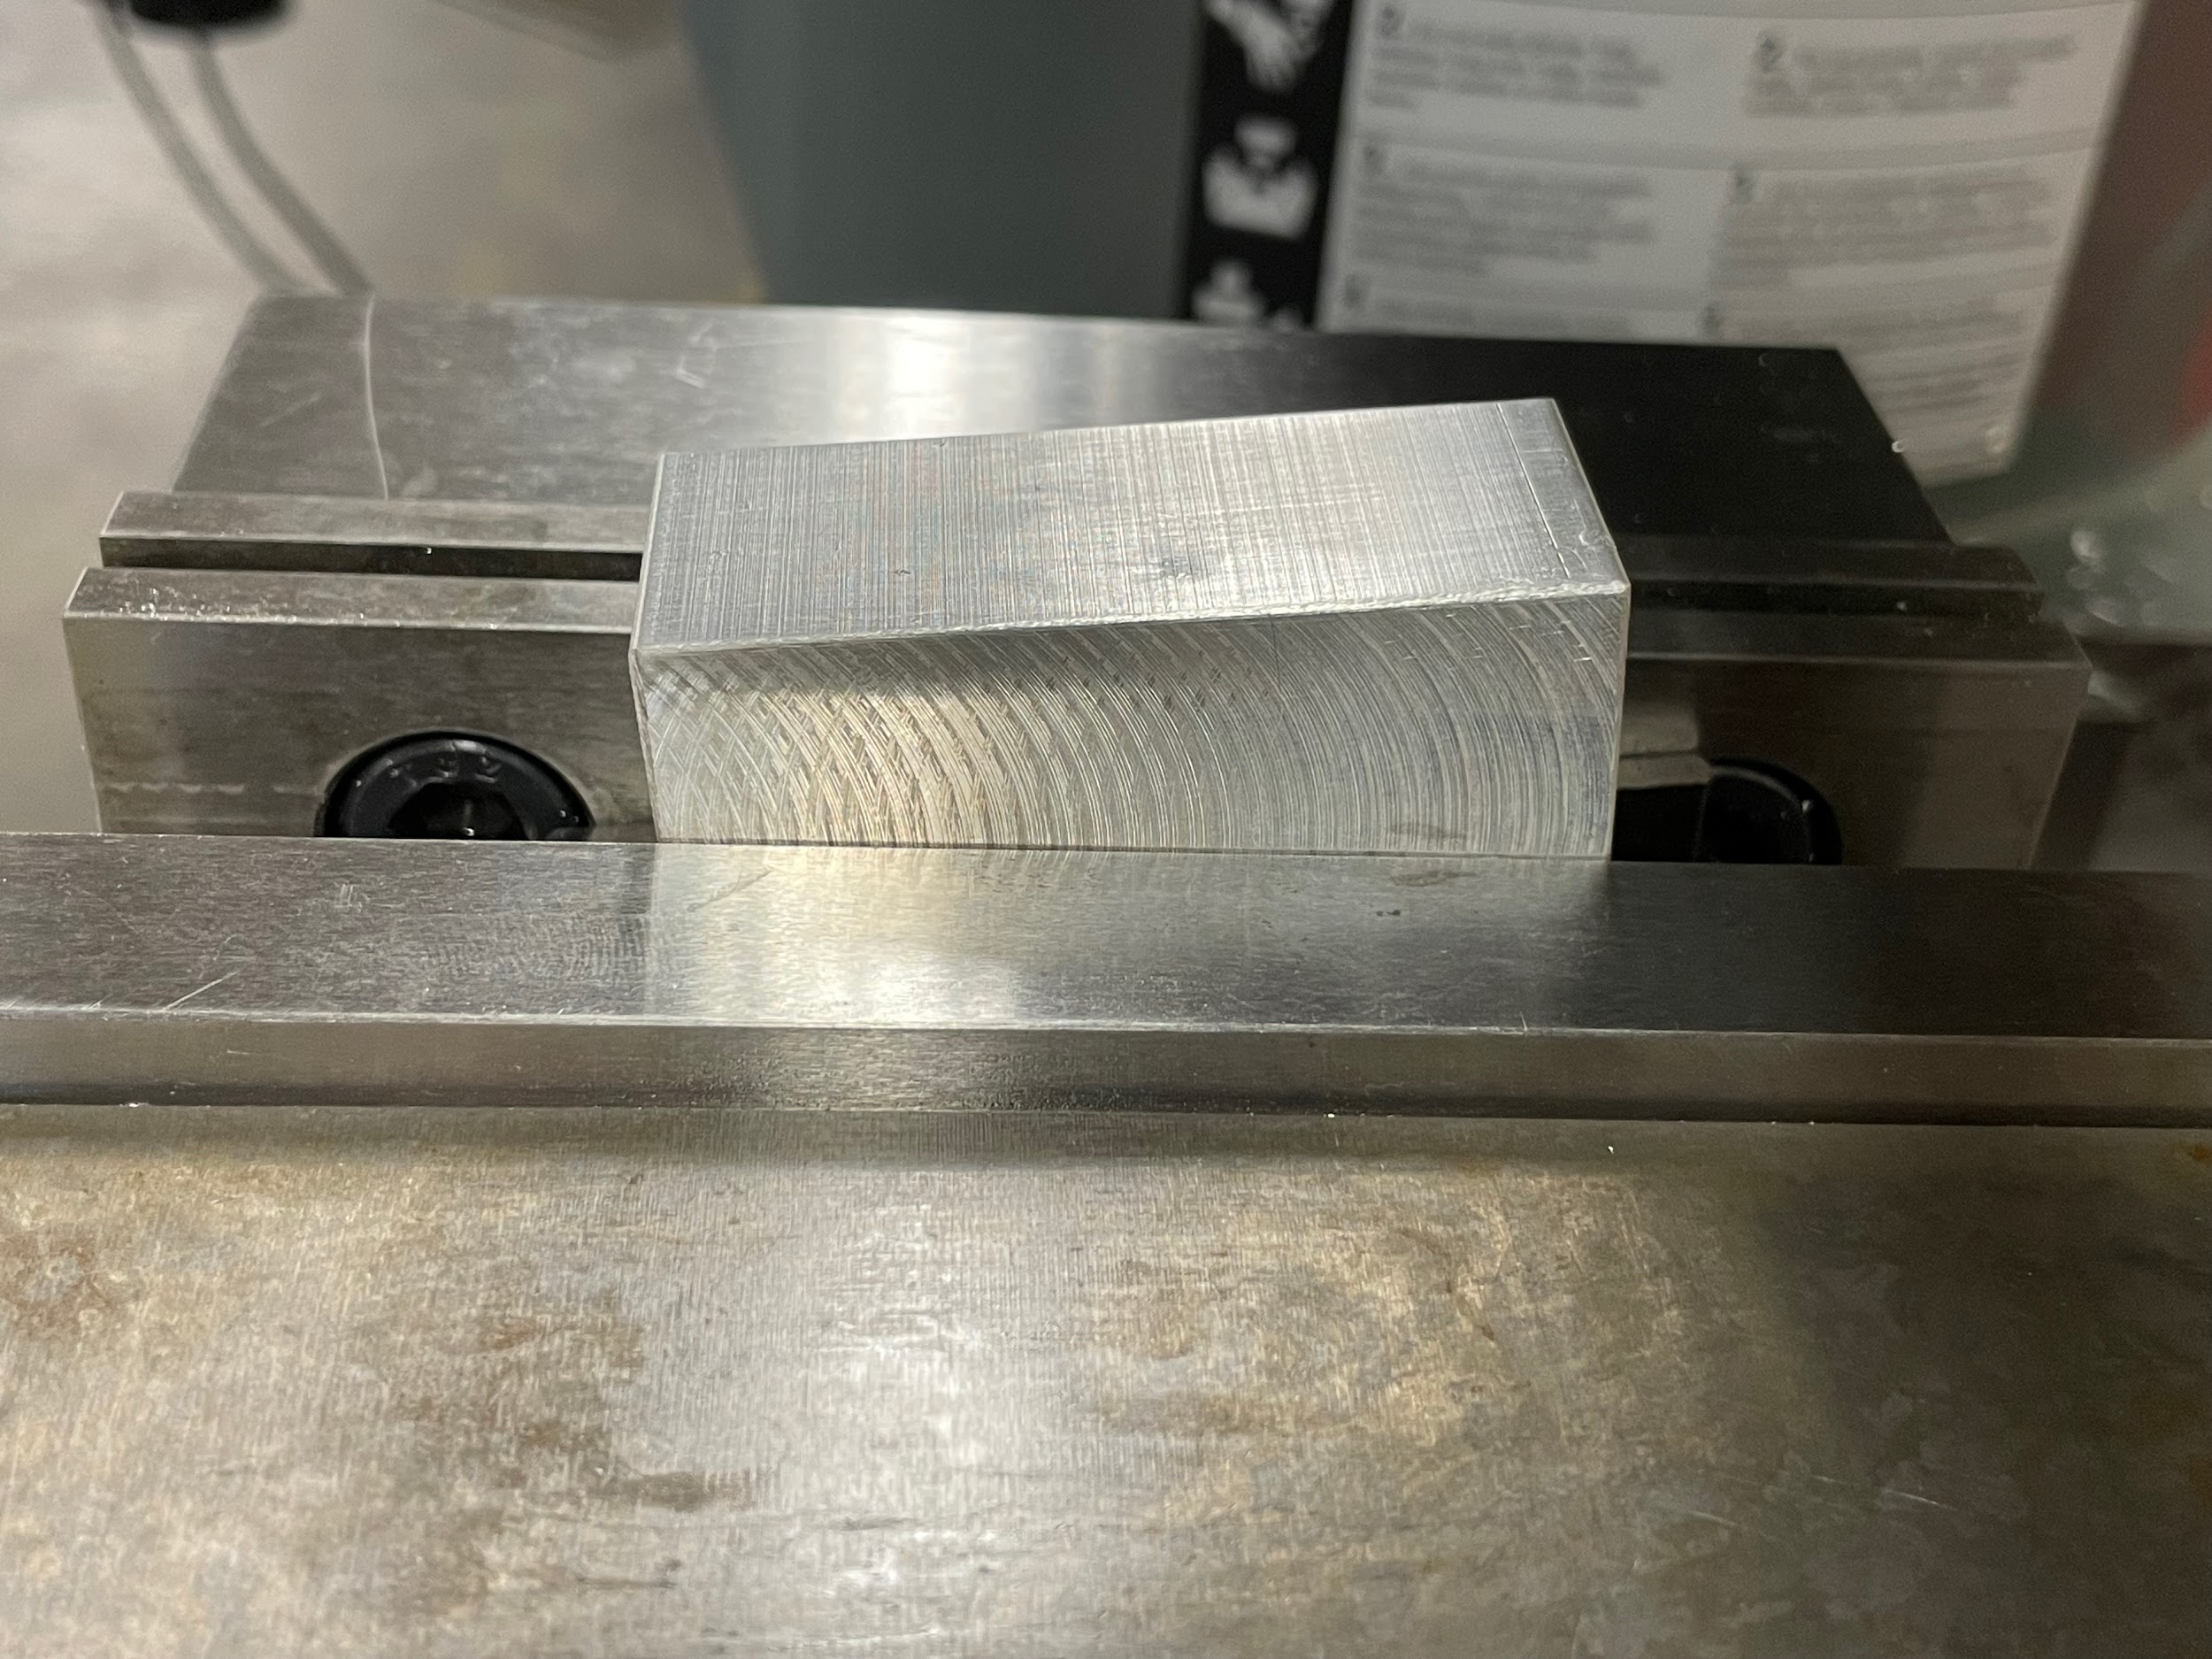
“Step 3: Attach a drop indicator to the head so that the indicator shaft is vertical.“
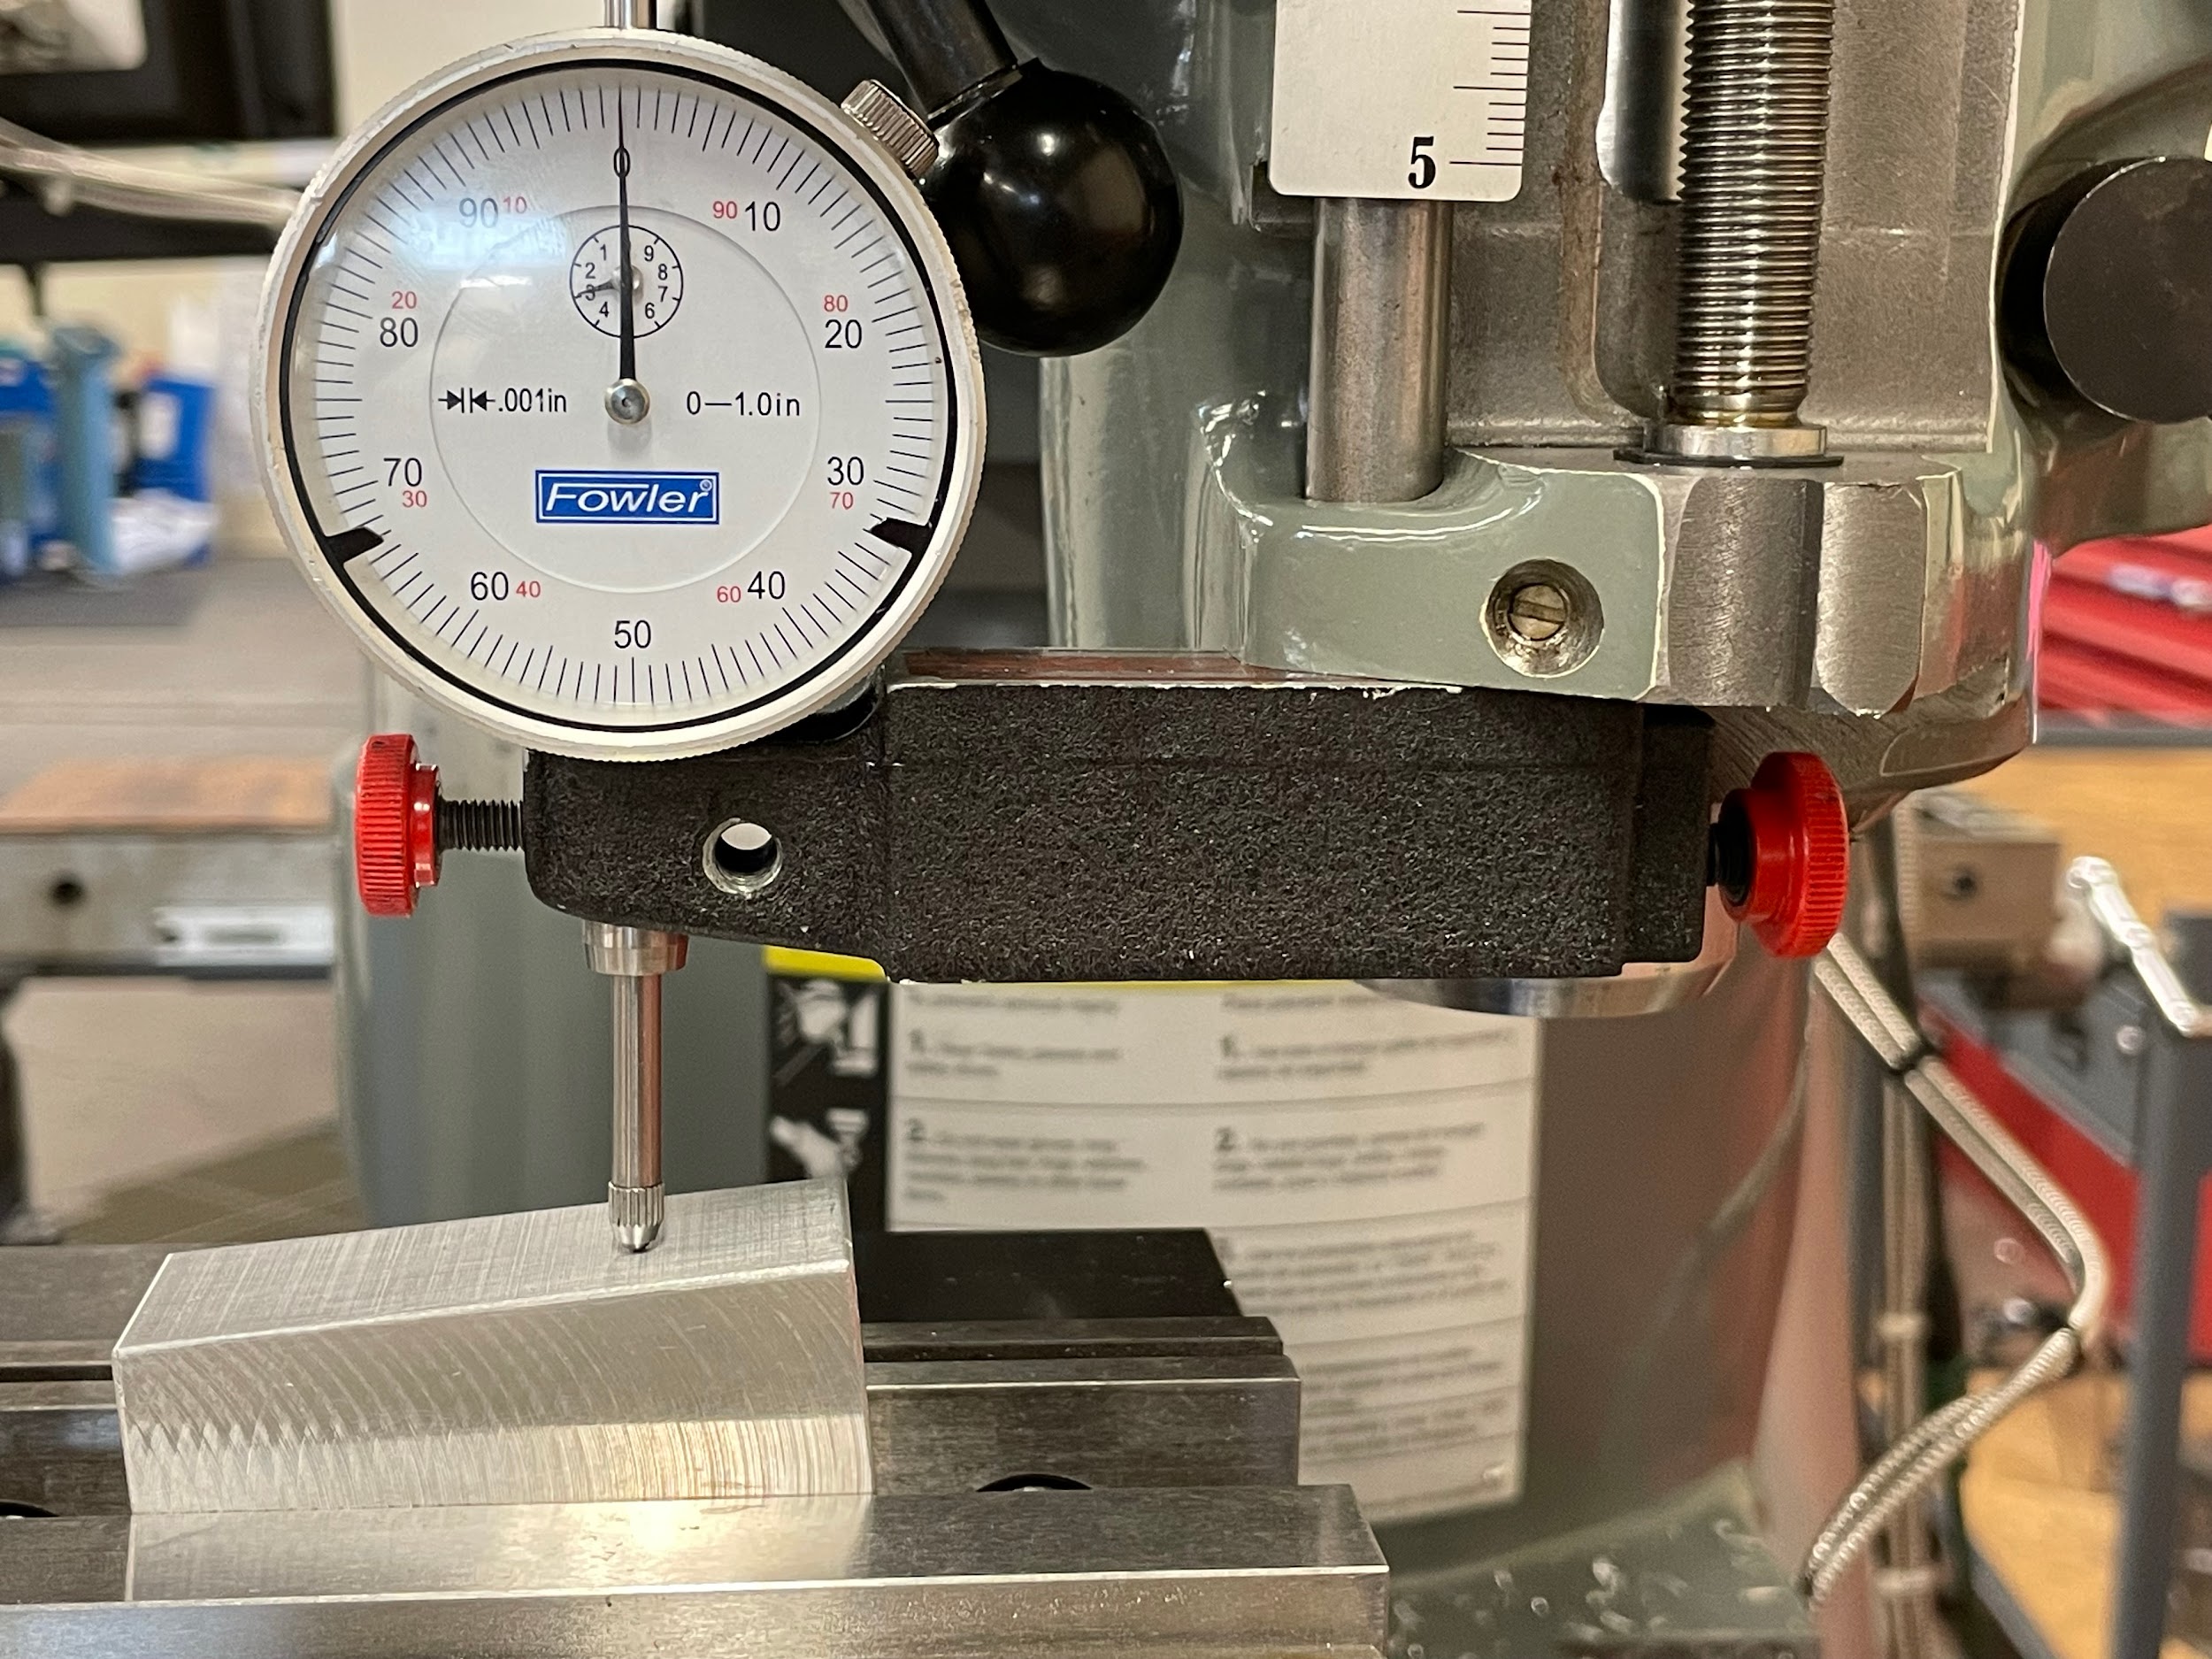
“Step 7: Zero the indicator.“
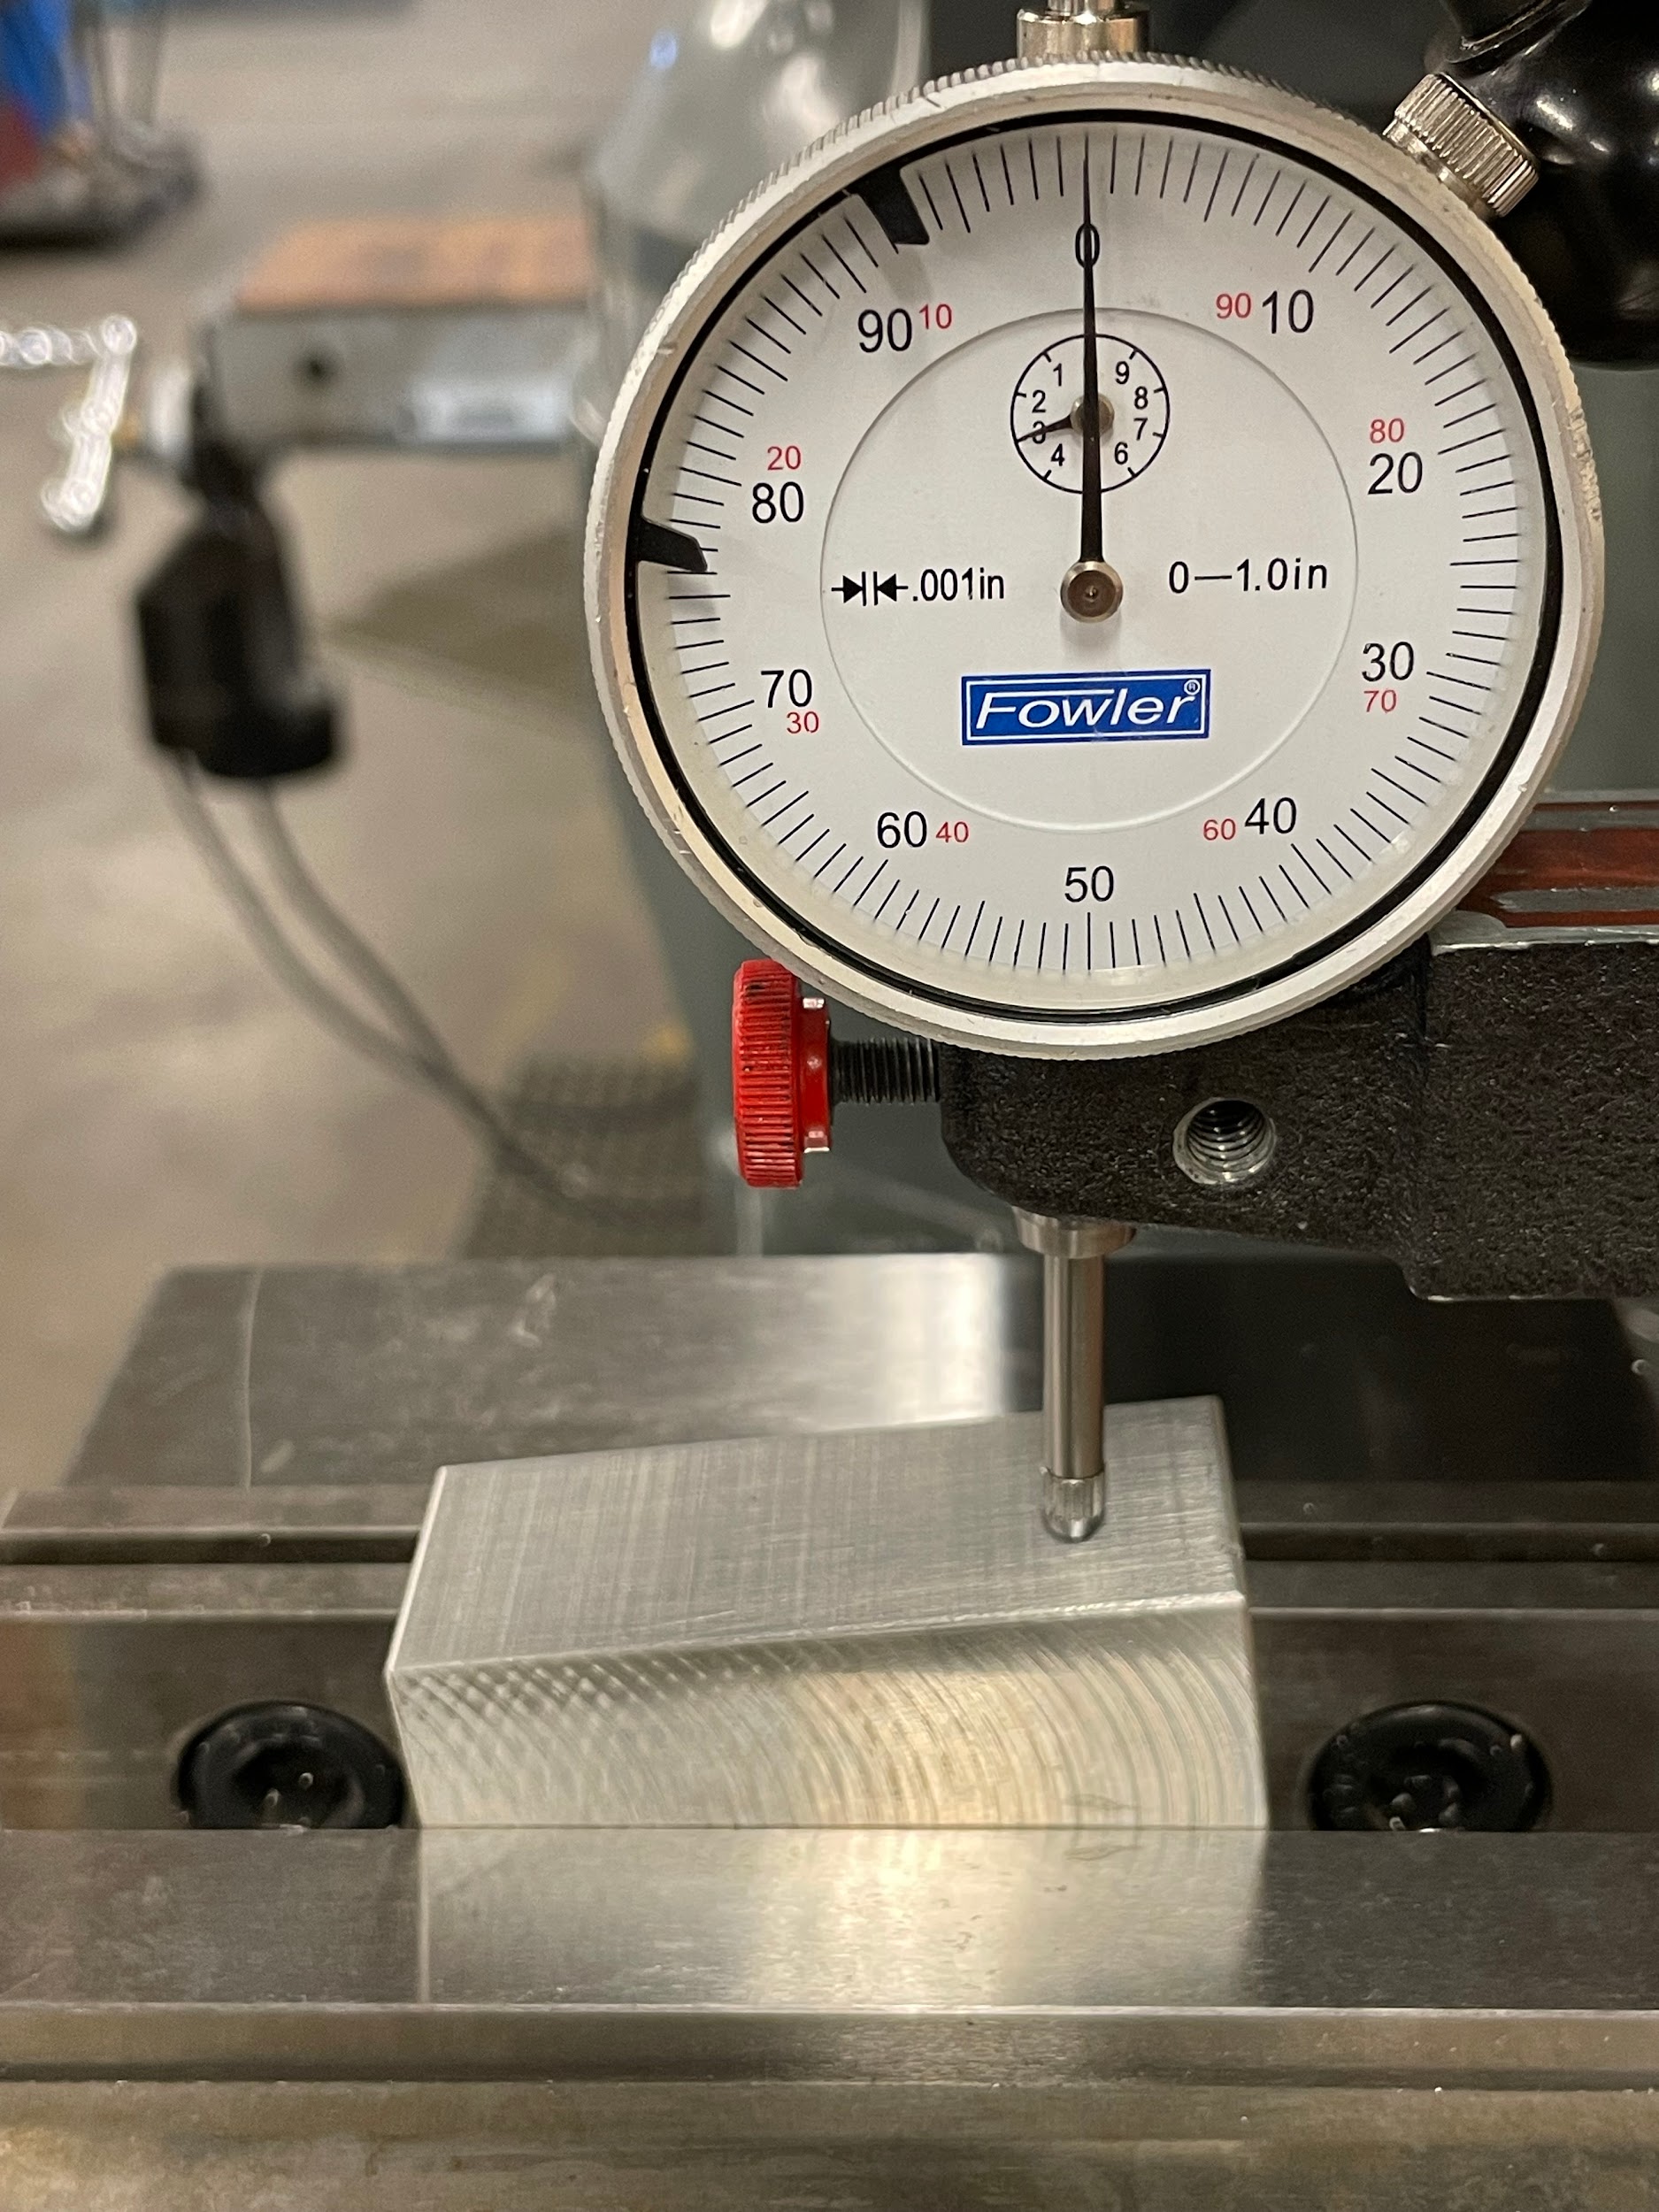
“Step 14: Gently touch the tool off to the prominent corner by raising the knee.“
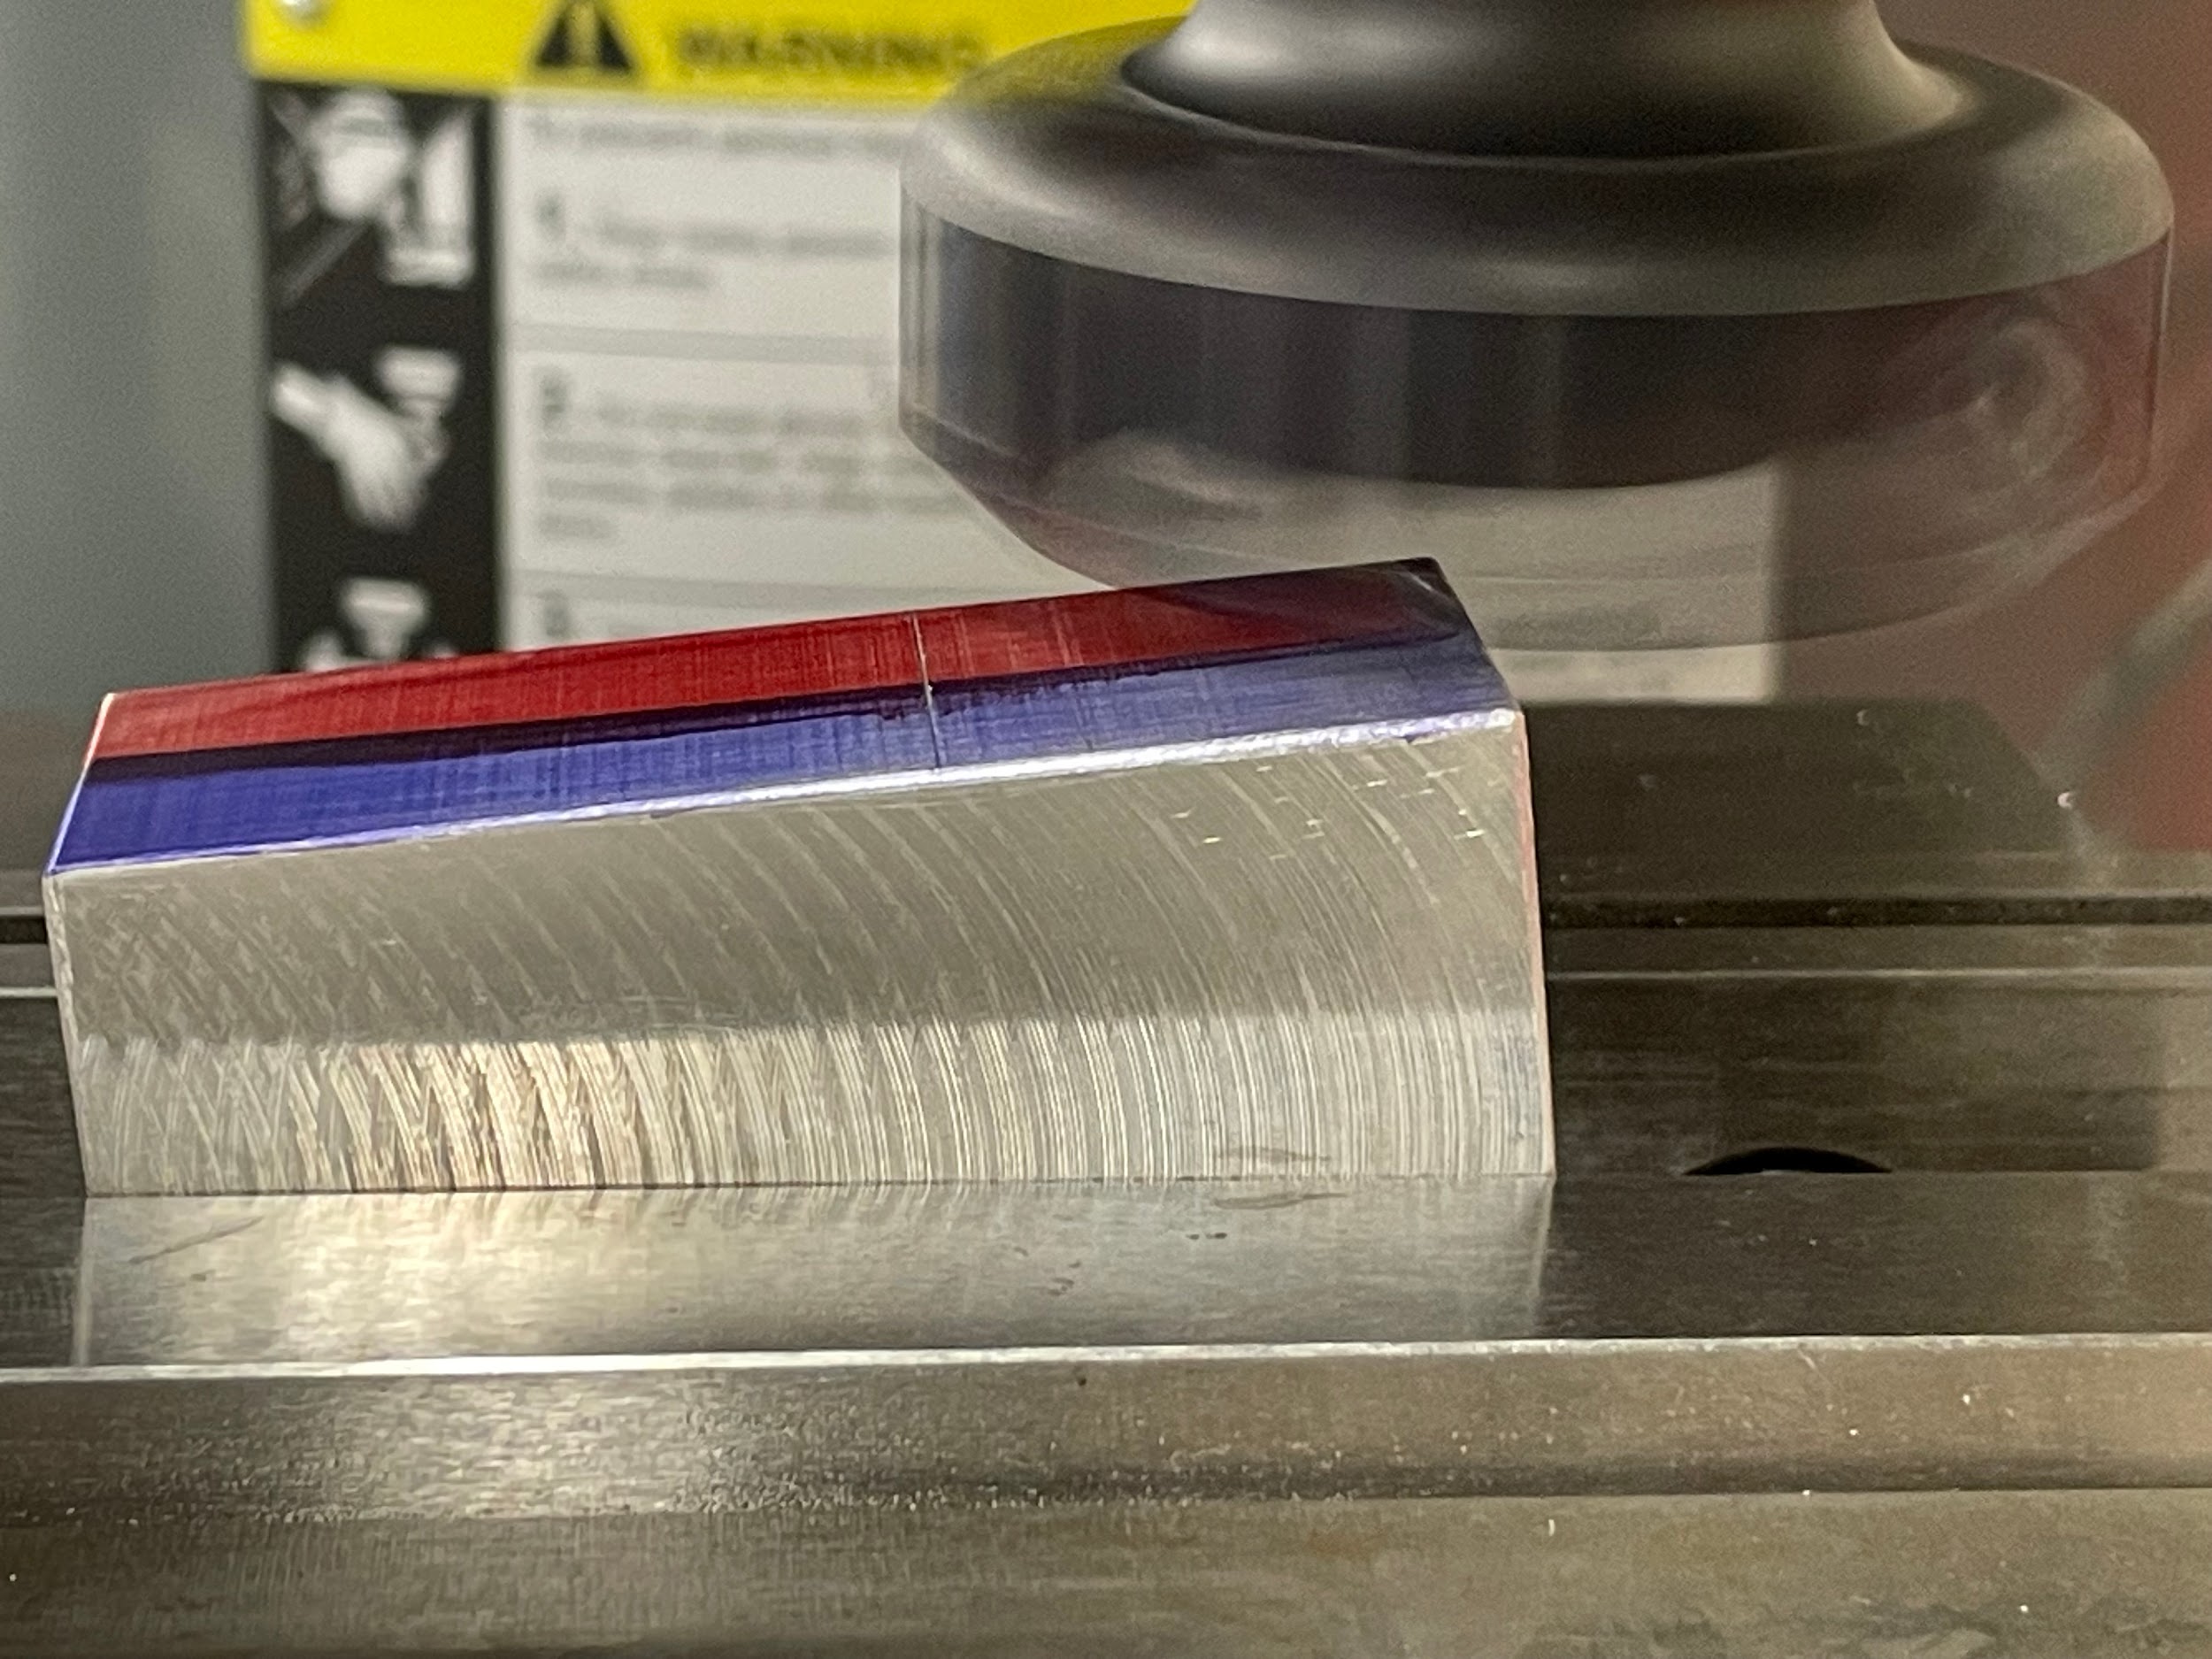
“Step 17: Remove the necessary material over multiple passes using face milling cuts.“
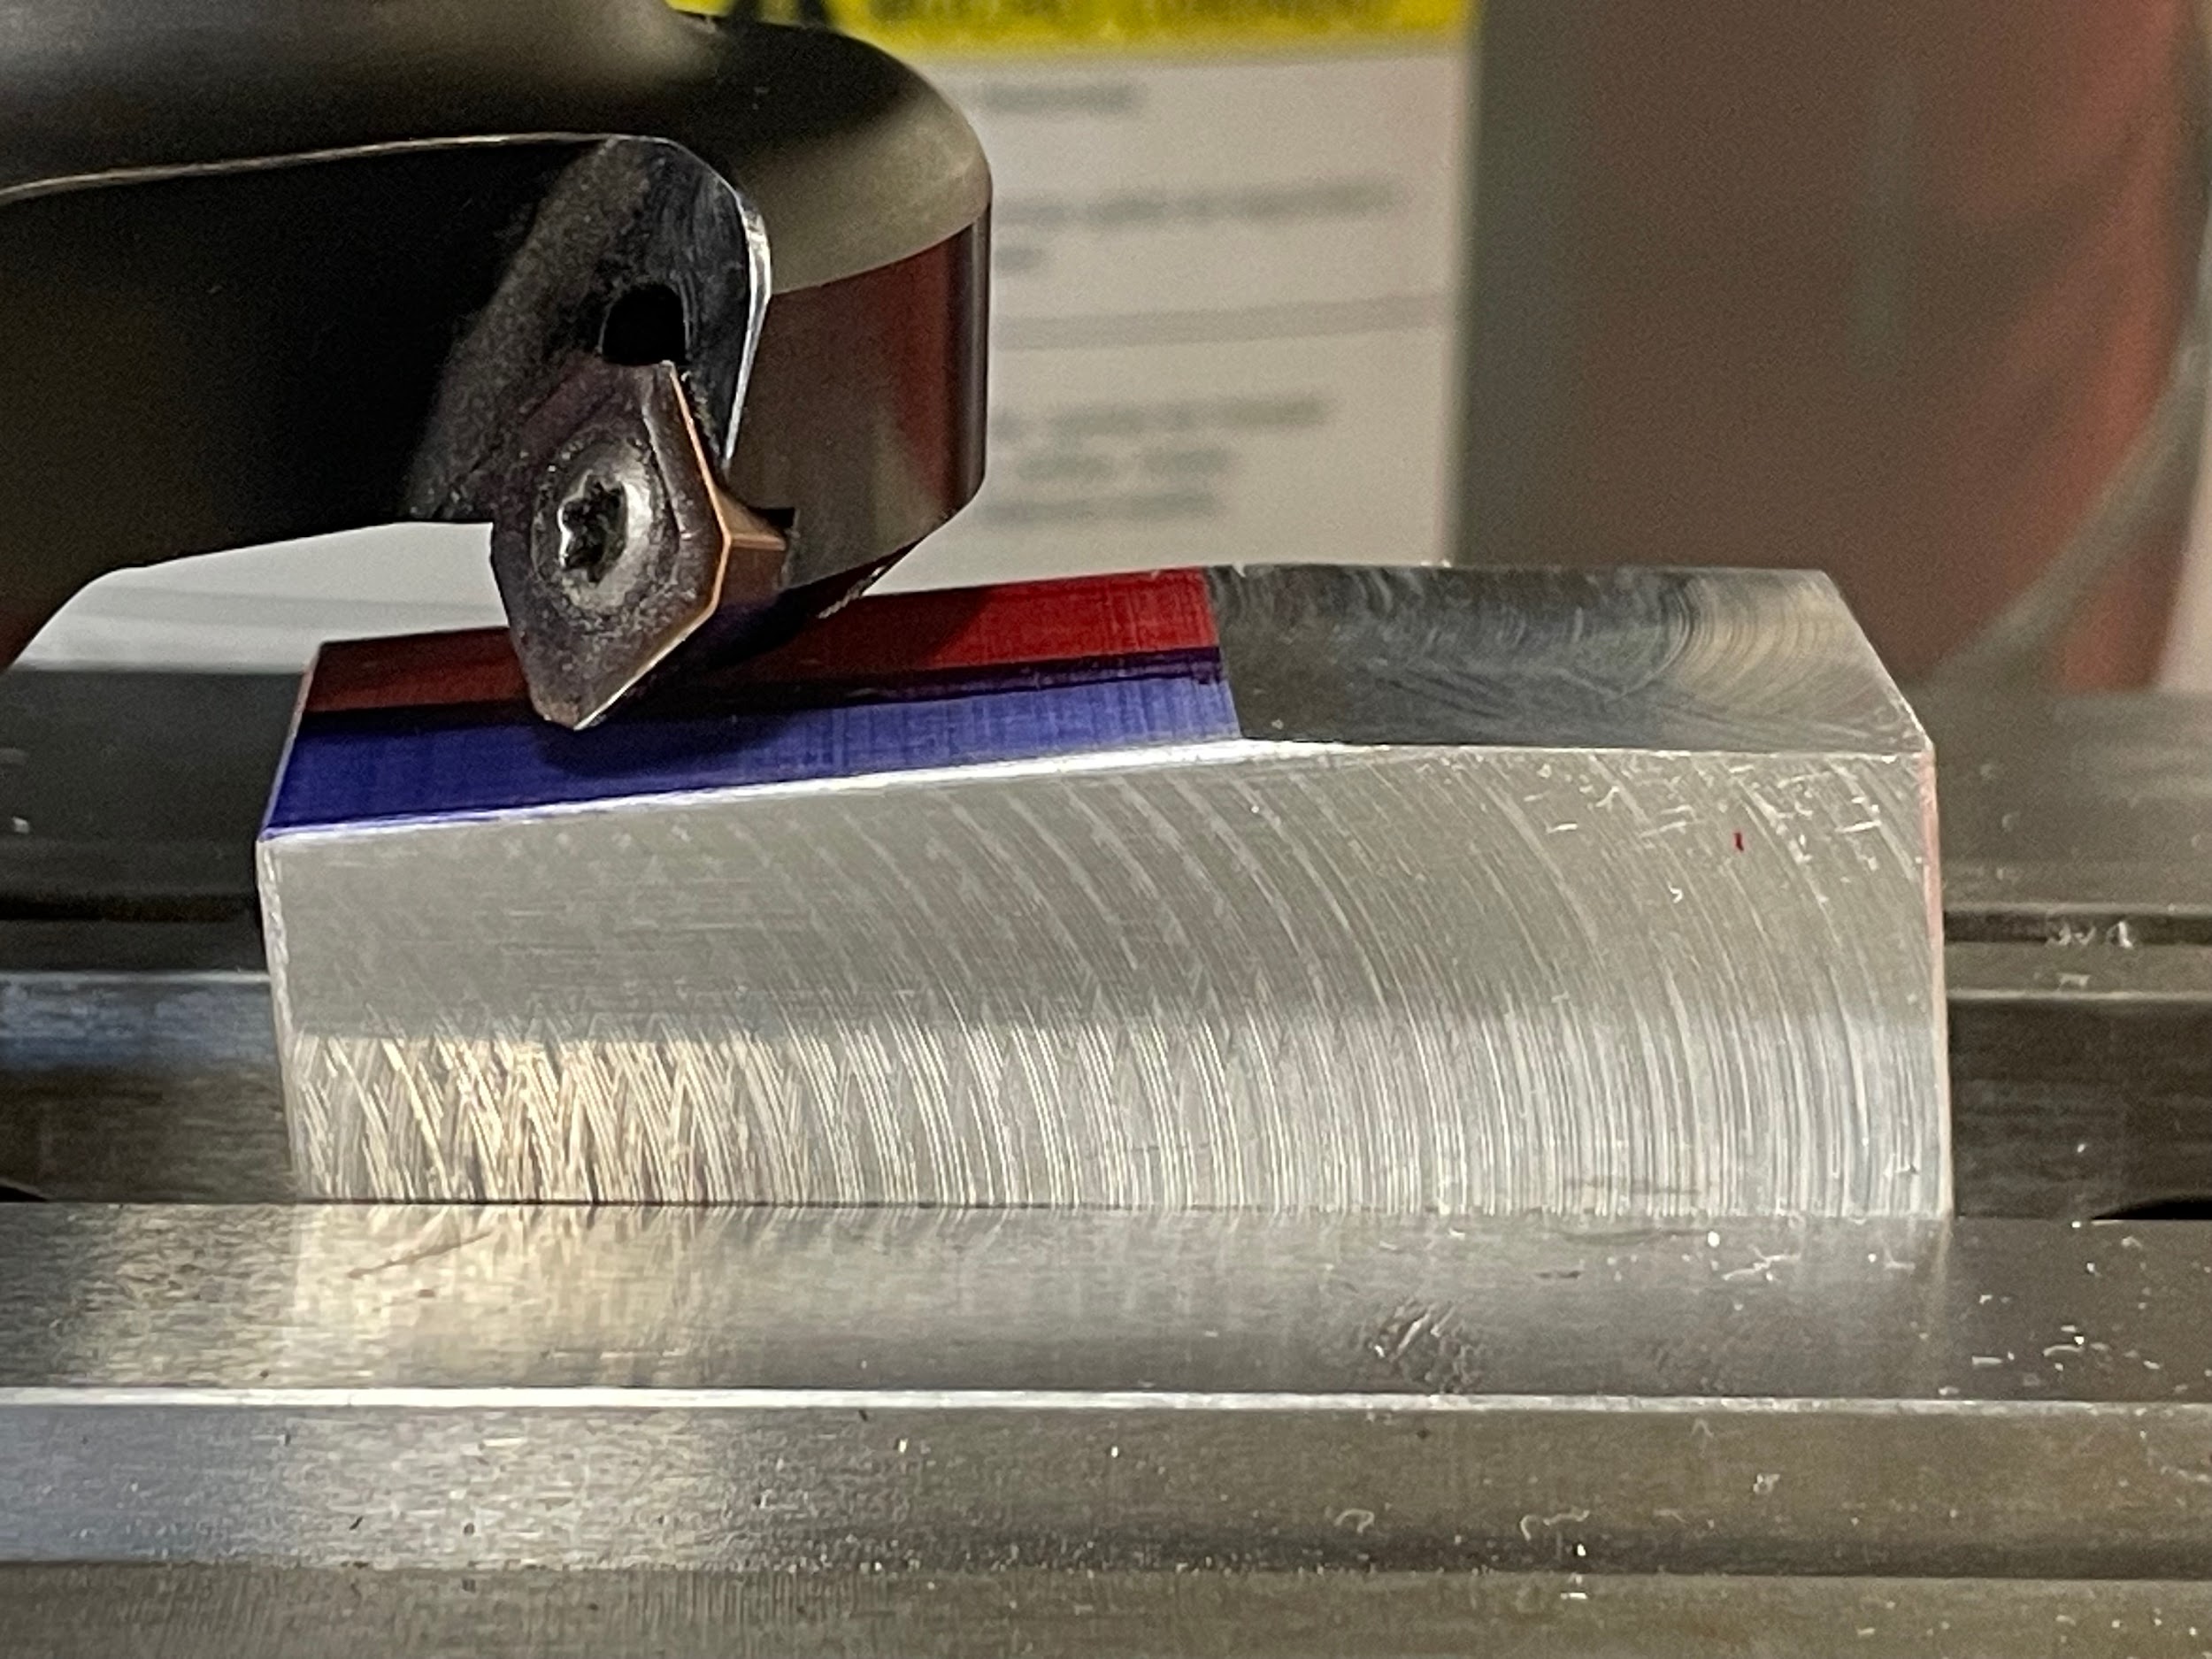
Step by step process for milling angles by tilting the milling head:
- Load the part flat in the vise on regular parallels.
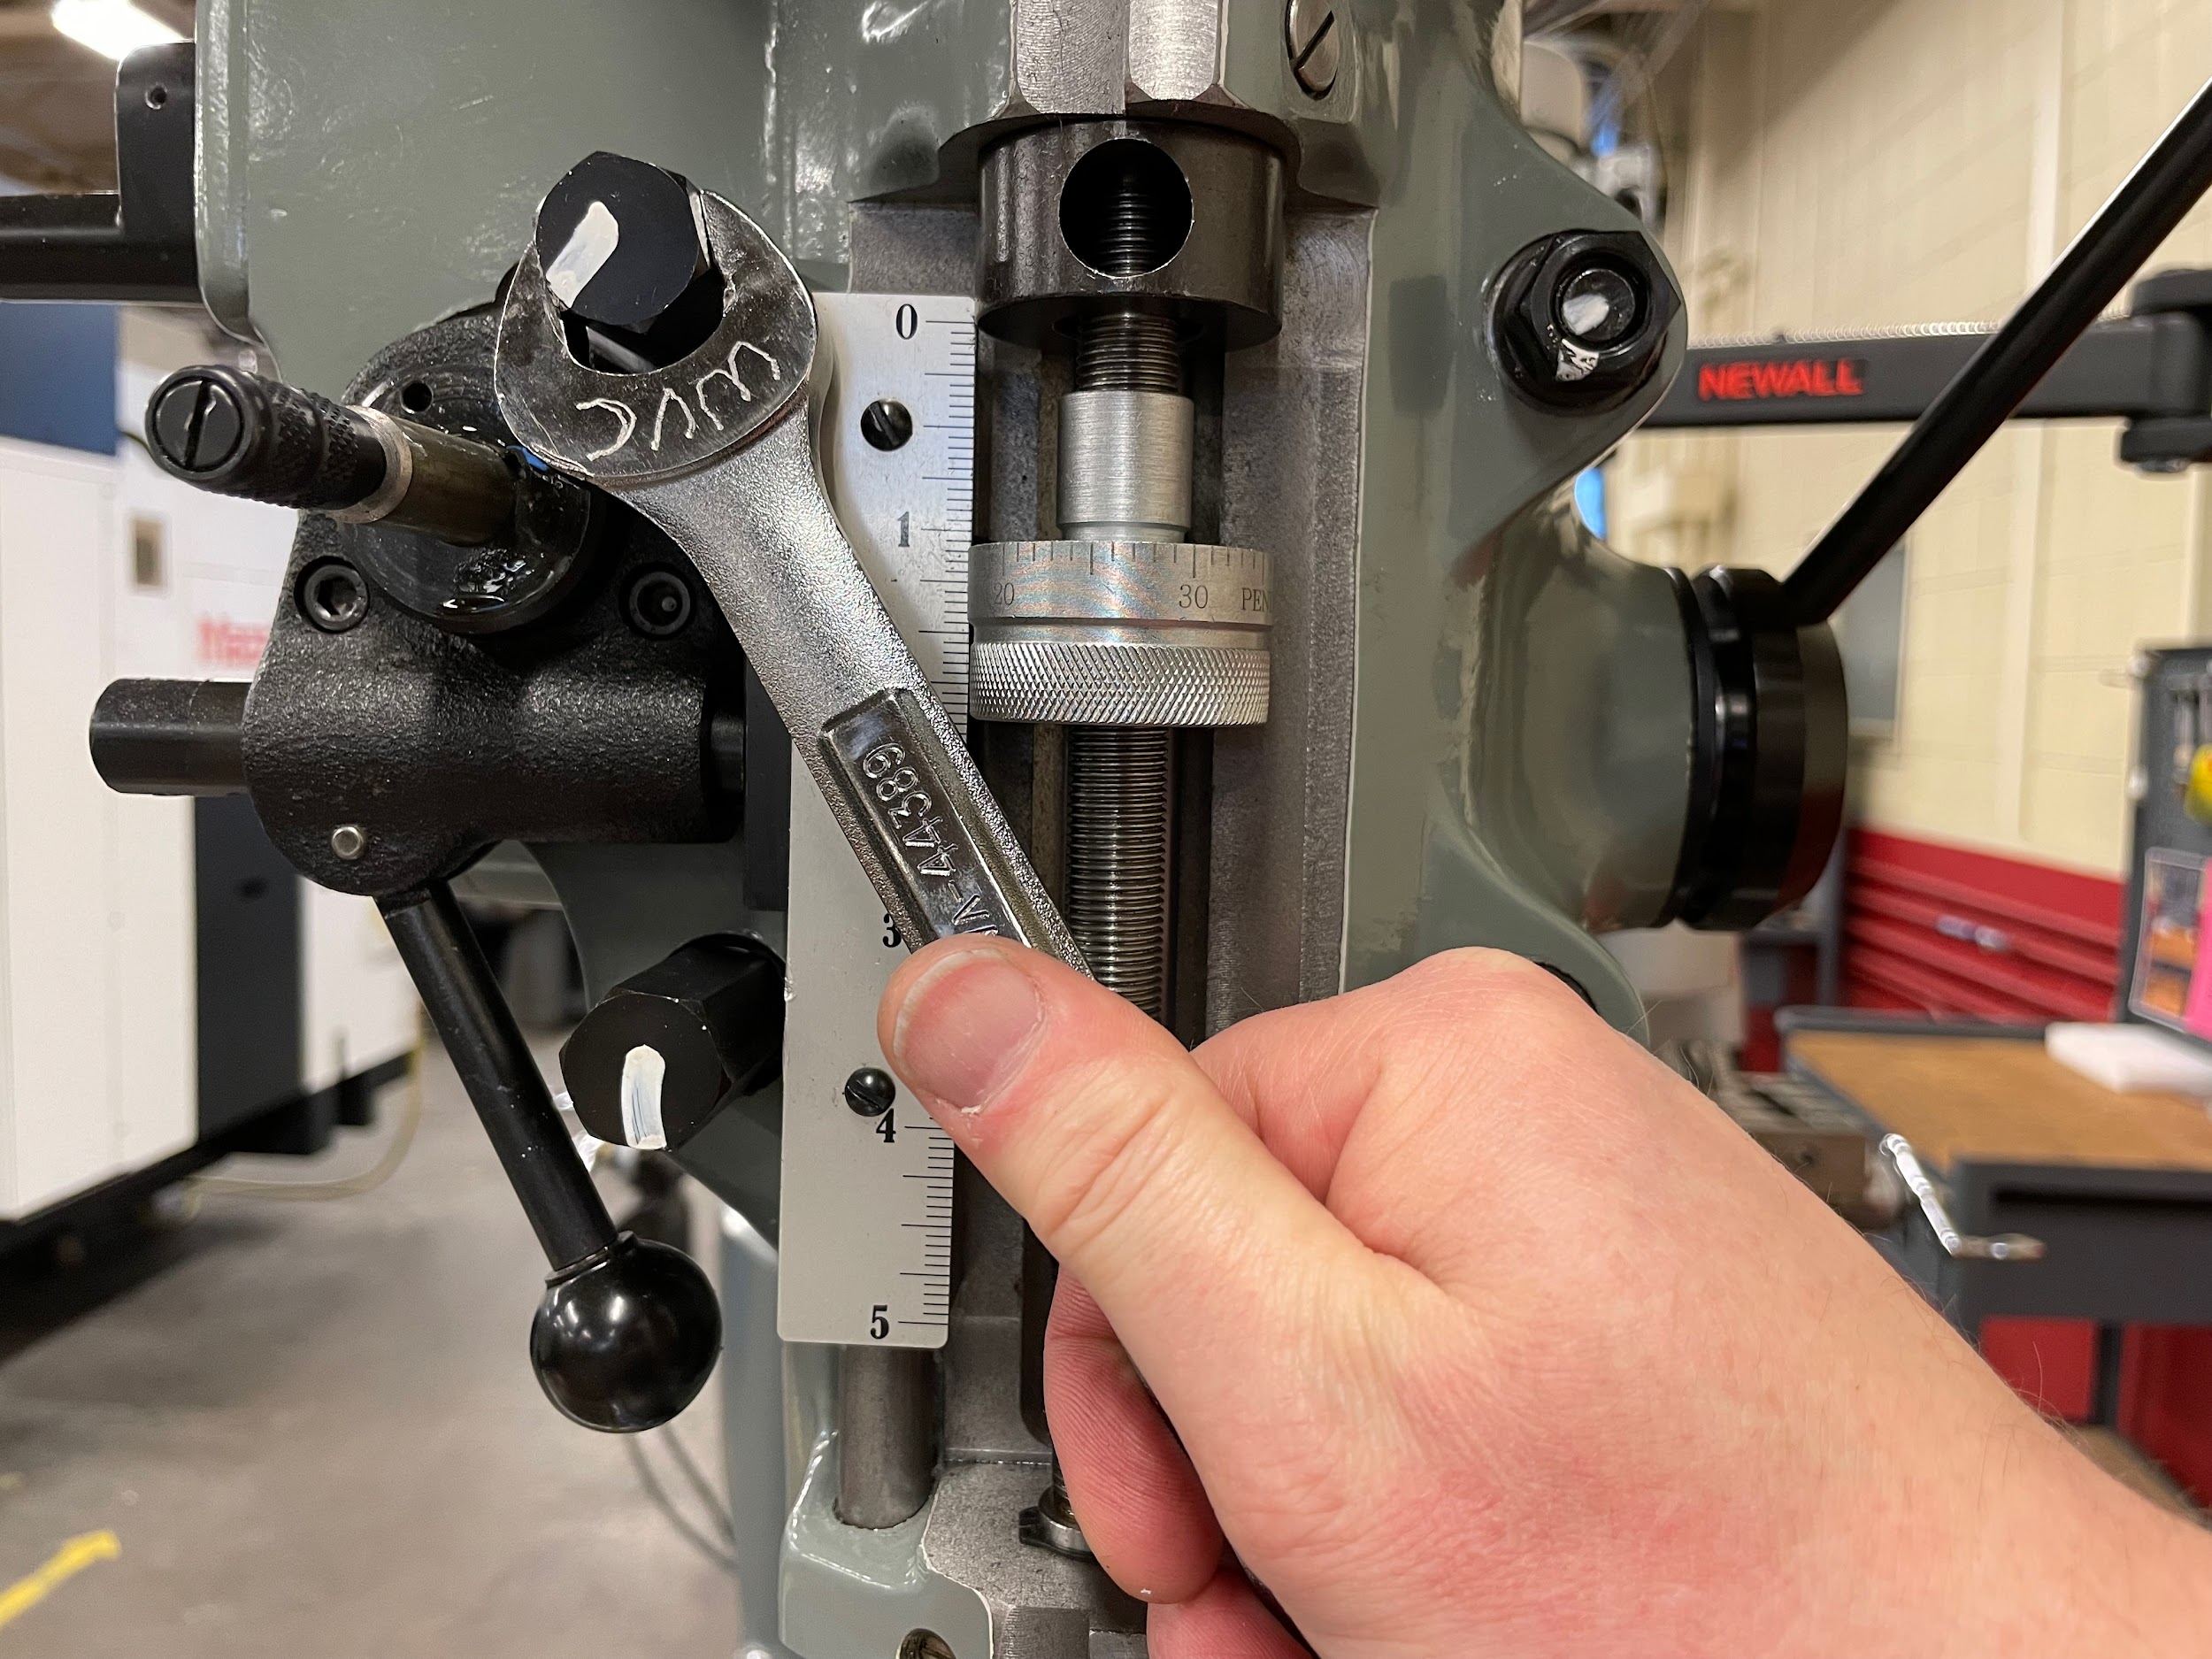
- Loosen the fasteners that lock the movement of the head.
- Adjust the head to the approximate angle required.
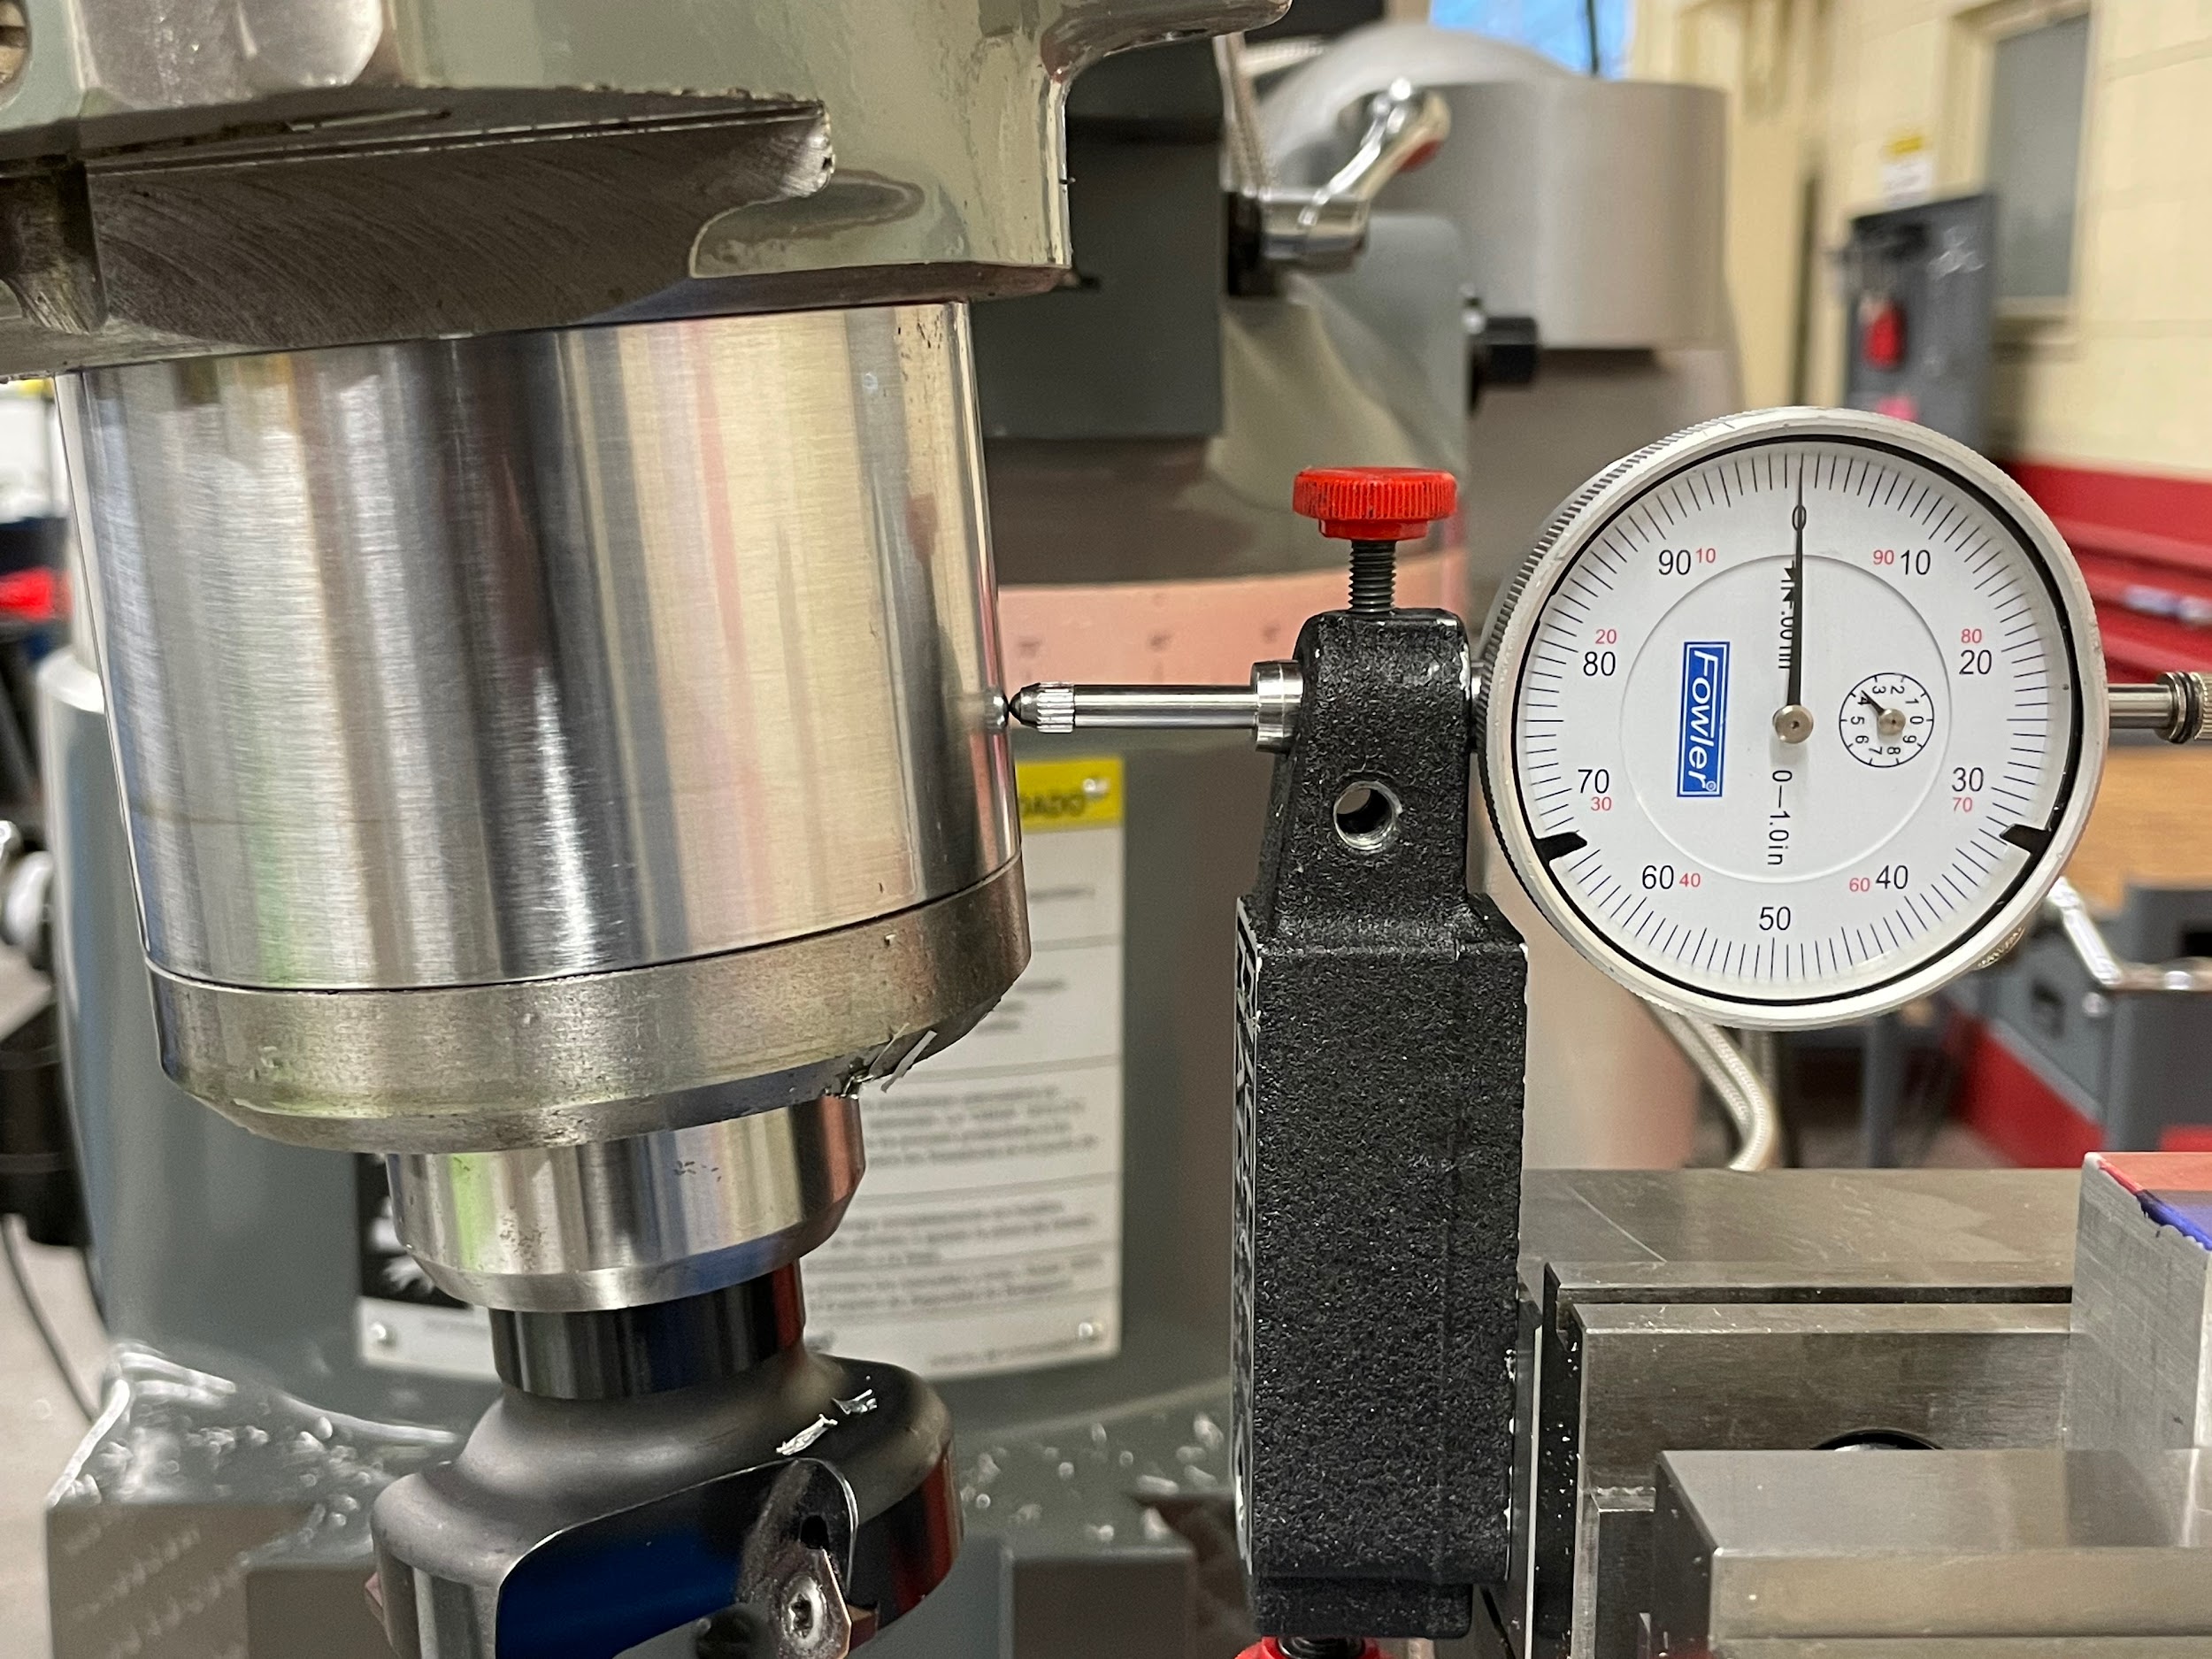
- Attach a drop indicator to the vise so that the indicator shaft is pointed vertically or horizontally at a precision surface of the head. Two examples are shown, one using the milled surface on the bottom of the head and one using the side of the quill.
- Calculate the amount of the desired leg of the triangle associated with the angular cut. In the example shown, a 6 degree angle is to be cut. The operator can use whatever intentional movement distance they like, but one that is an even number and easy to calculate is best. In this example, 1.000” is used. The surface of the head makes up the hypotenuse, the operator moving the table or the knee makes one leg of the triangle, and the drop of the indicator makes the other leg. Knowing that the angle, and one leg are given, and the other leg is in question, the tangent formula will be used. The calculation looks like this”
- Tan angl = opp/adj
- Tan 6° = Z/1.000”
- Tan 6° x 1.000”= Z/1.000” x 1.000”
- Tan 6° * 1.000 = Z
- .105” = Z
- Move the indicator so the shaft is depressed by at least .100 more than the amount of the calculated drop.
- Remove any backlash in the table/knee movement and zero the graduated collar.
- Zero the indicator.
- Move the table/knee by exactly 1.000.
- Read the drop in the indicator. If the drop isn’t accurate to the calculated leg, adjust the head and remeasure until the drop is within tolerance.
- Tighten the fasteners that secure the head movement to 50 ft./lbs.
- Load an end mill or face mill into the milling machine. Generally a tool that will accomplish the cut in one pass.
- Calculate the spindle speed and feed rate for the tool selected.
- Turn on the spindle and adjust the speed.
- Lock the quill.
- Gently touch the tool off to the prominent corner by raising the knee.
- Zero the knee.
- Calculate the amount to be removed from the part using right angle trigonometry.
- Remove the necessary material over multiple passes using face milling cuts.
- Turn off the spindle.
- Lower the knee.
- Clean and inspect the feature.
“Step 2: Loosen the fasteners that lock the movement of the head.“
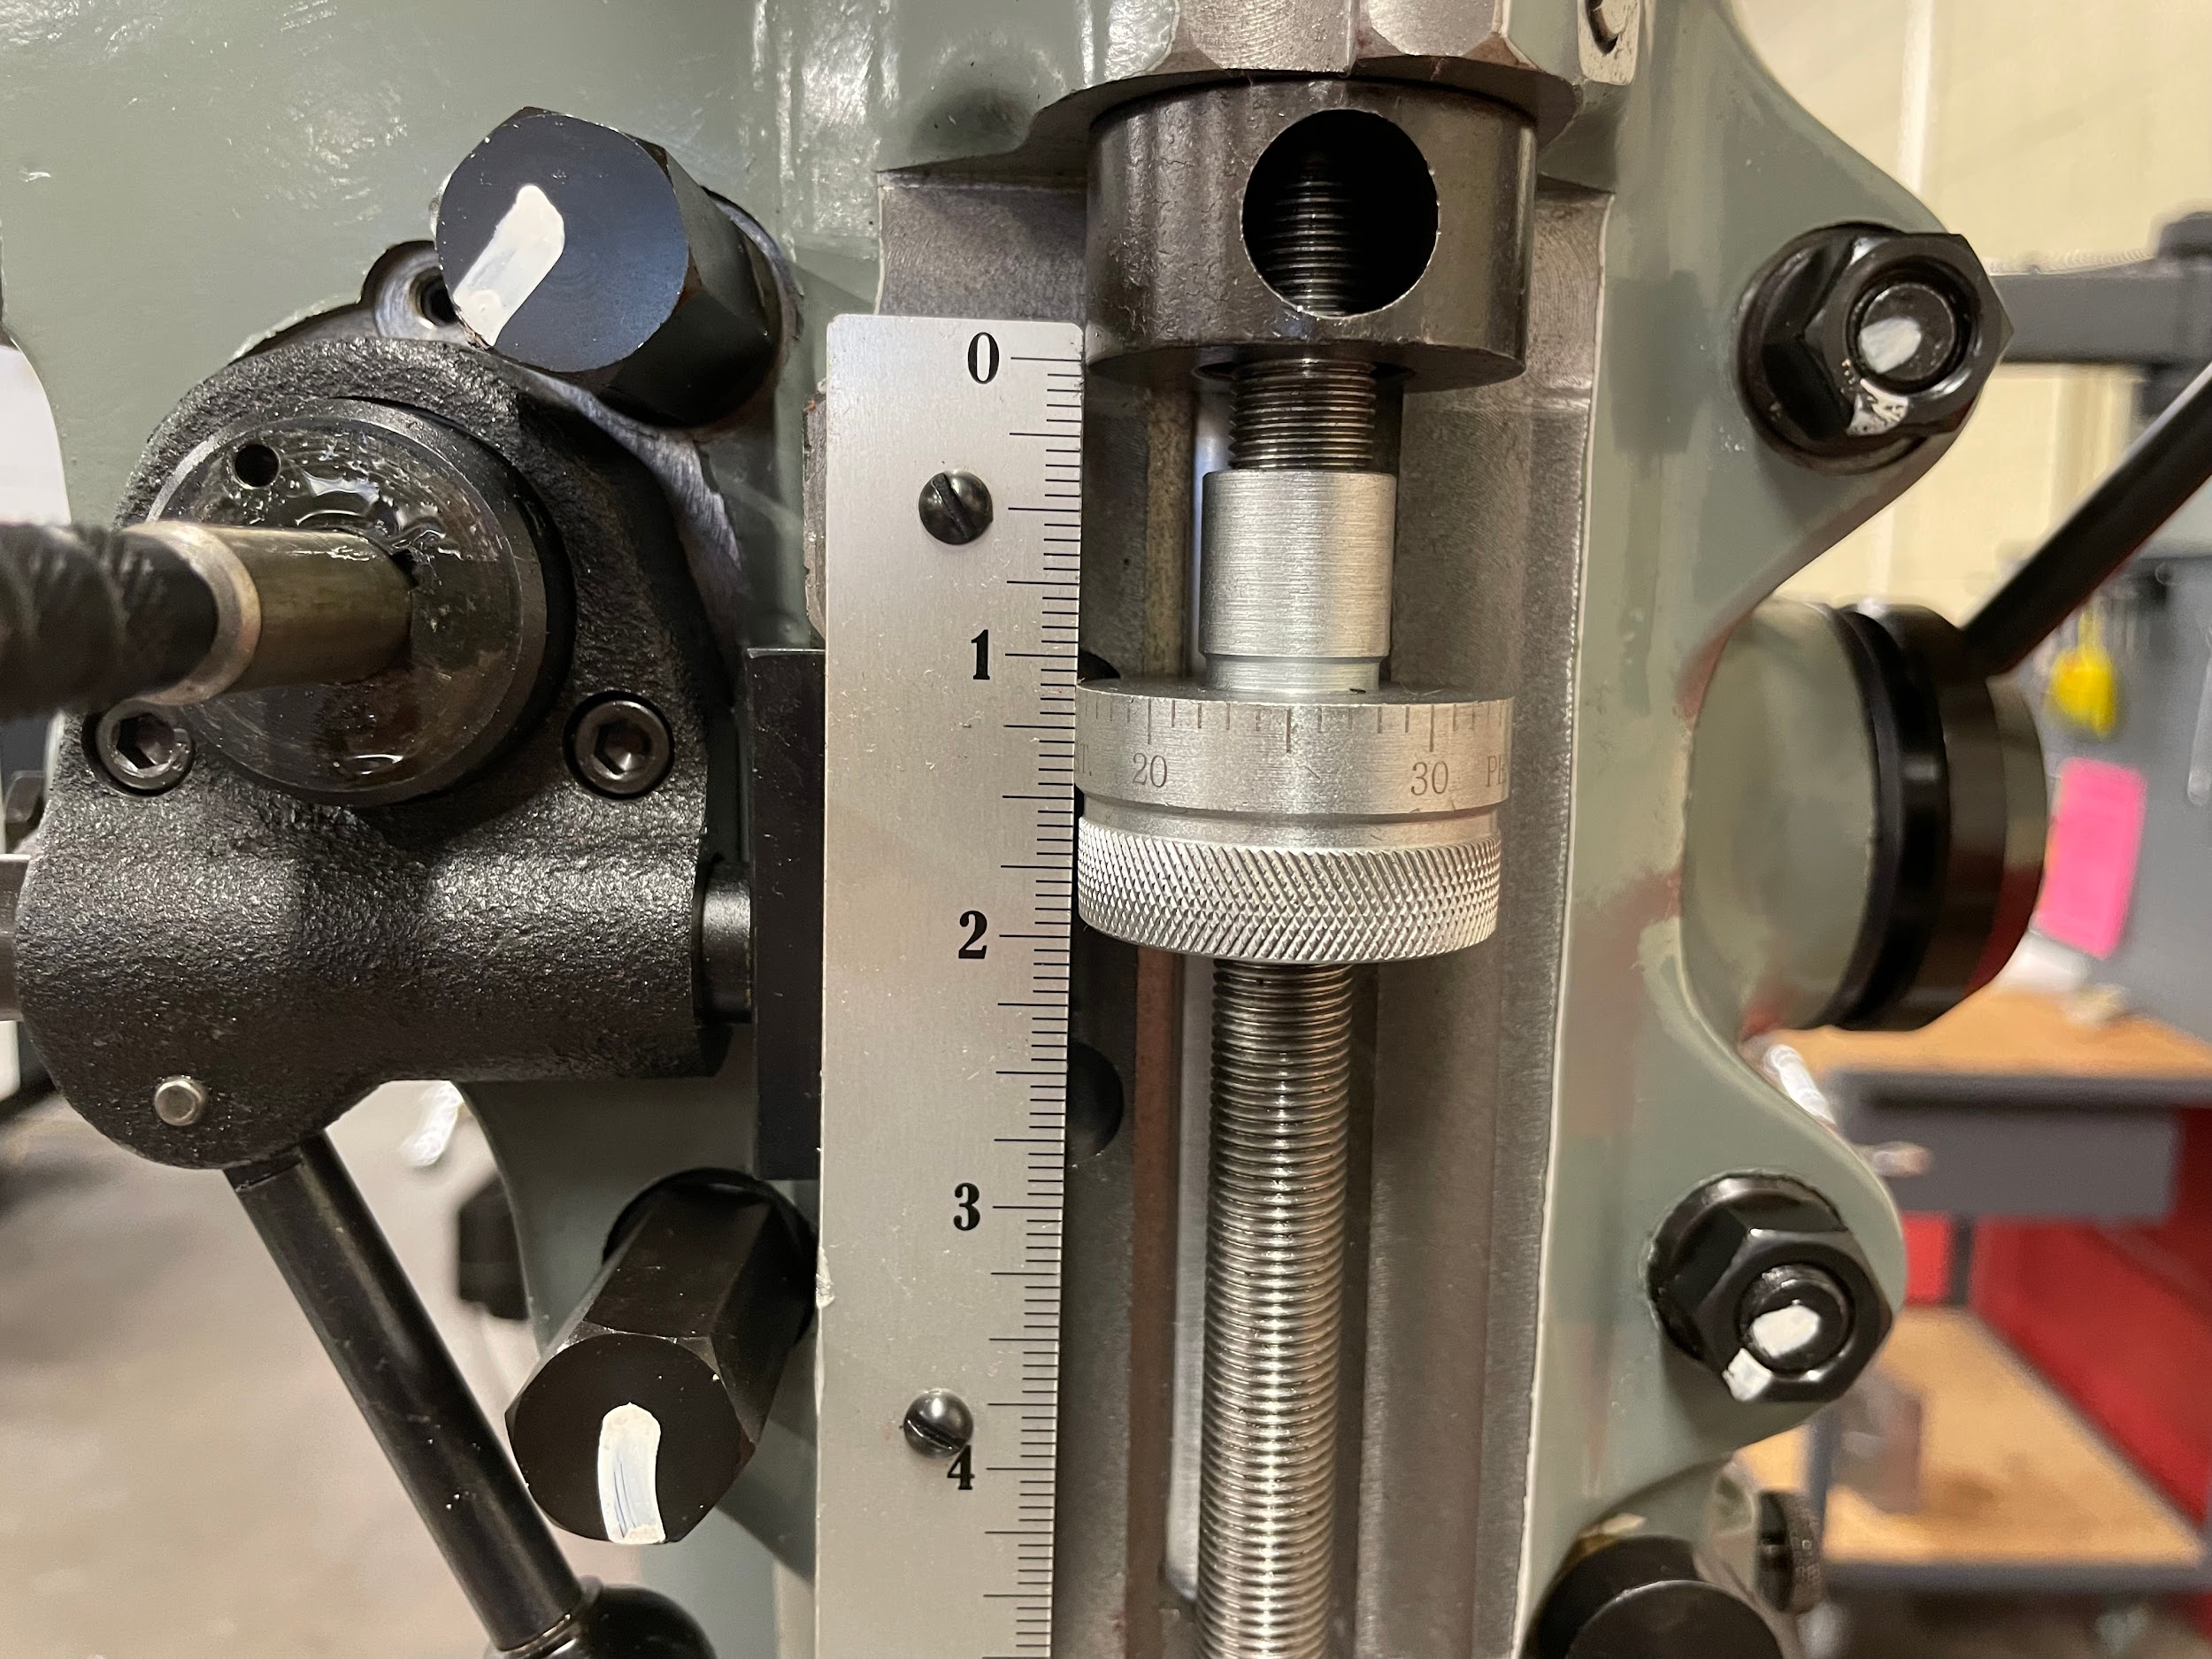
“Step 2: Loosen the fasteners that lock the movement of the head.“
“Step 3: Adjust the head to the approximate angle required.“
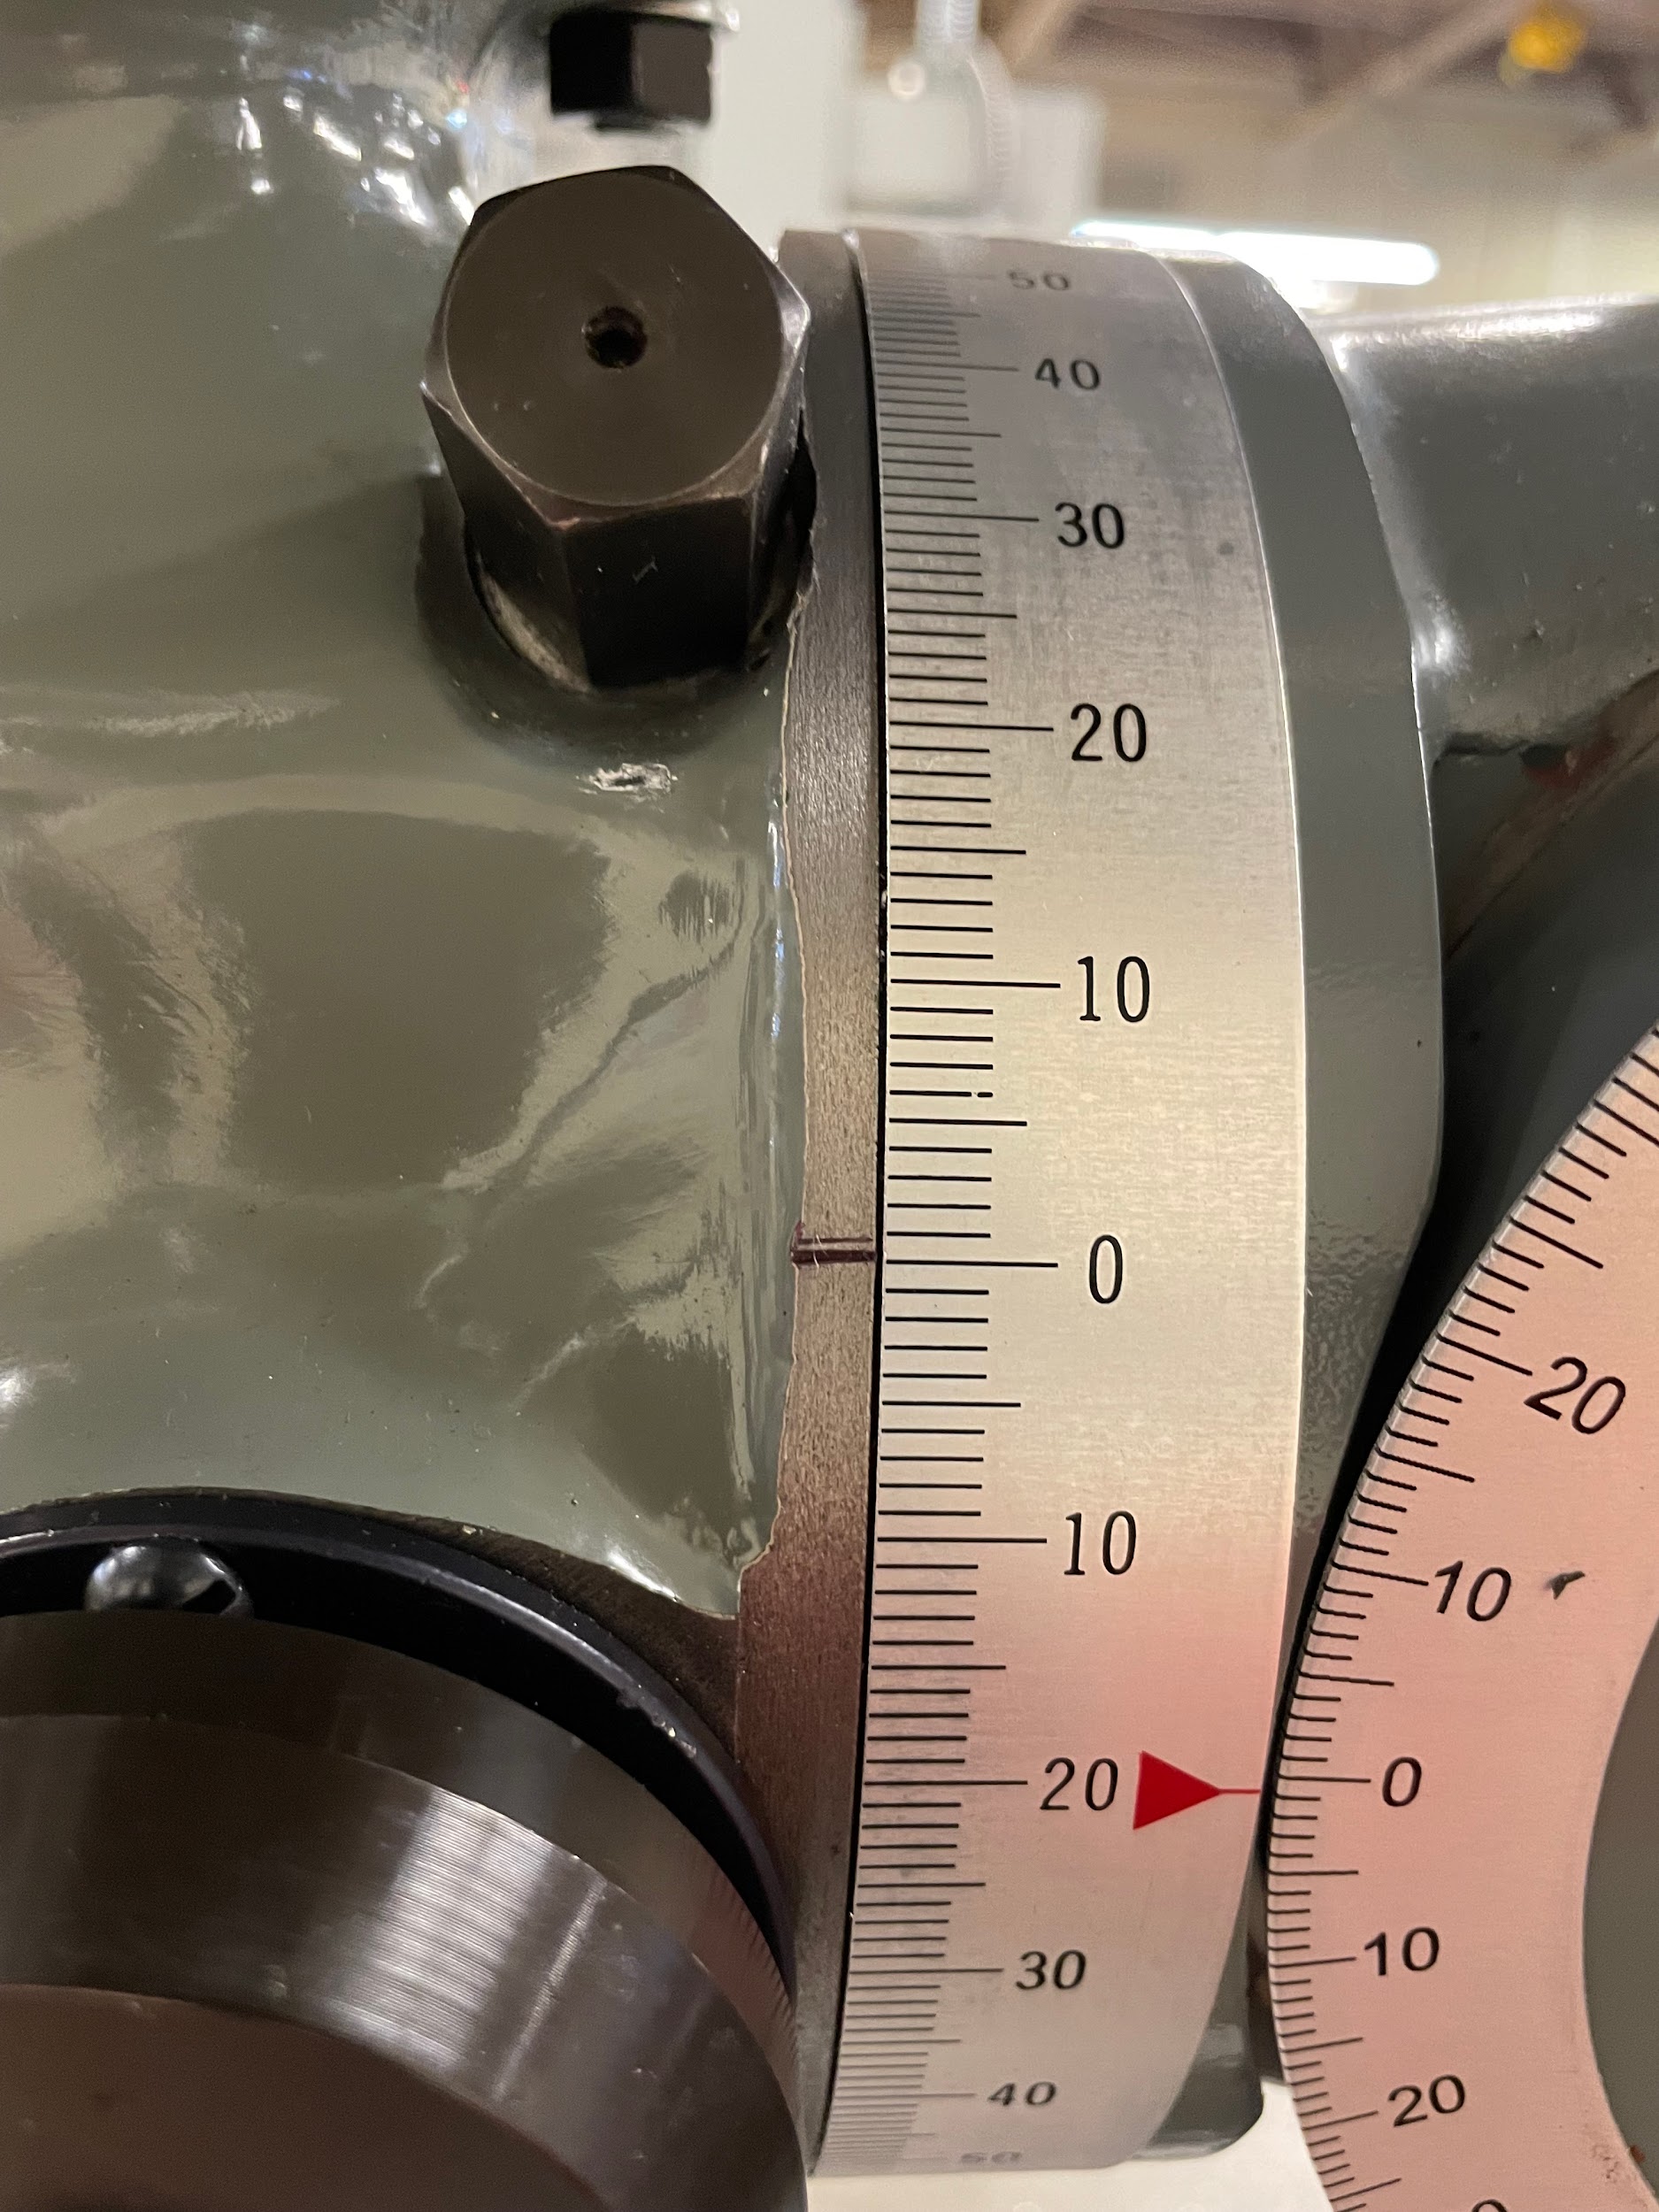
“Step 3: Adjust the head to the approximate angle required.“
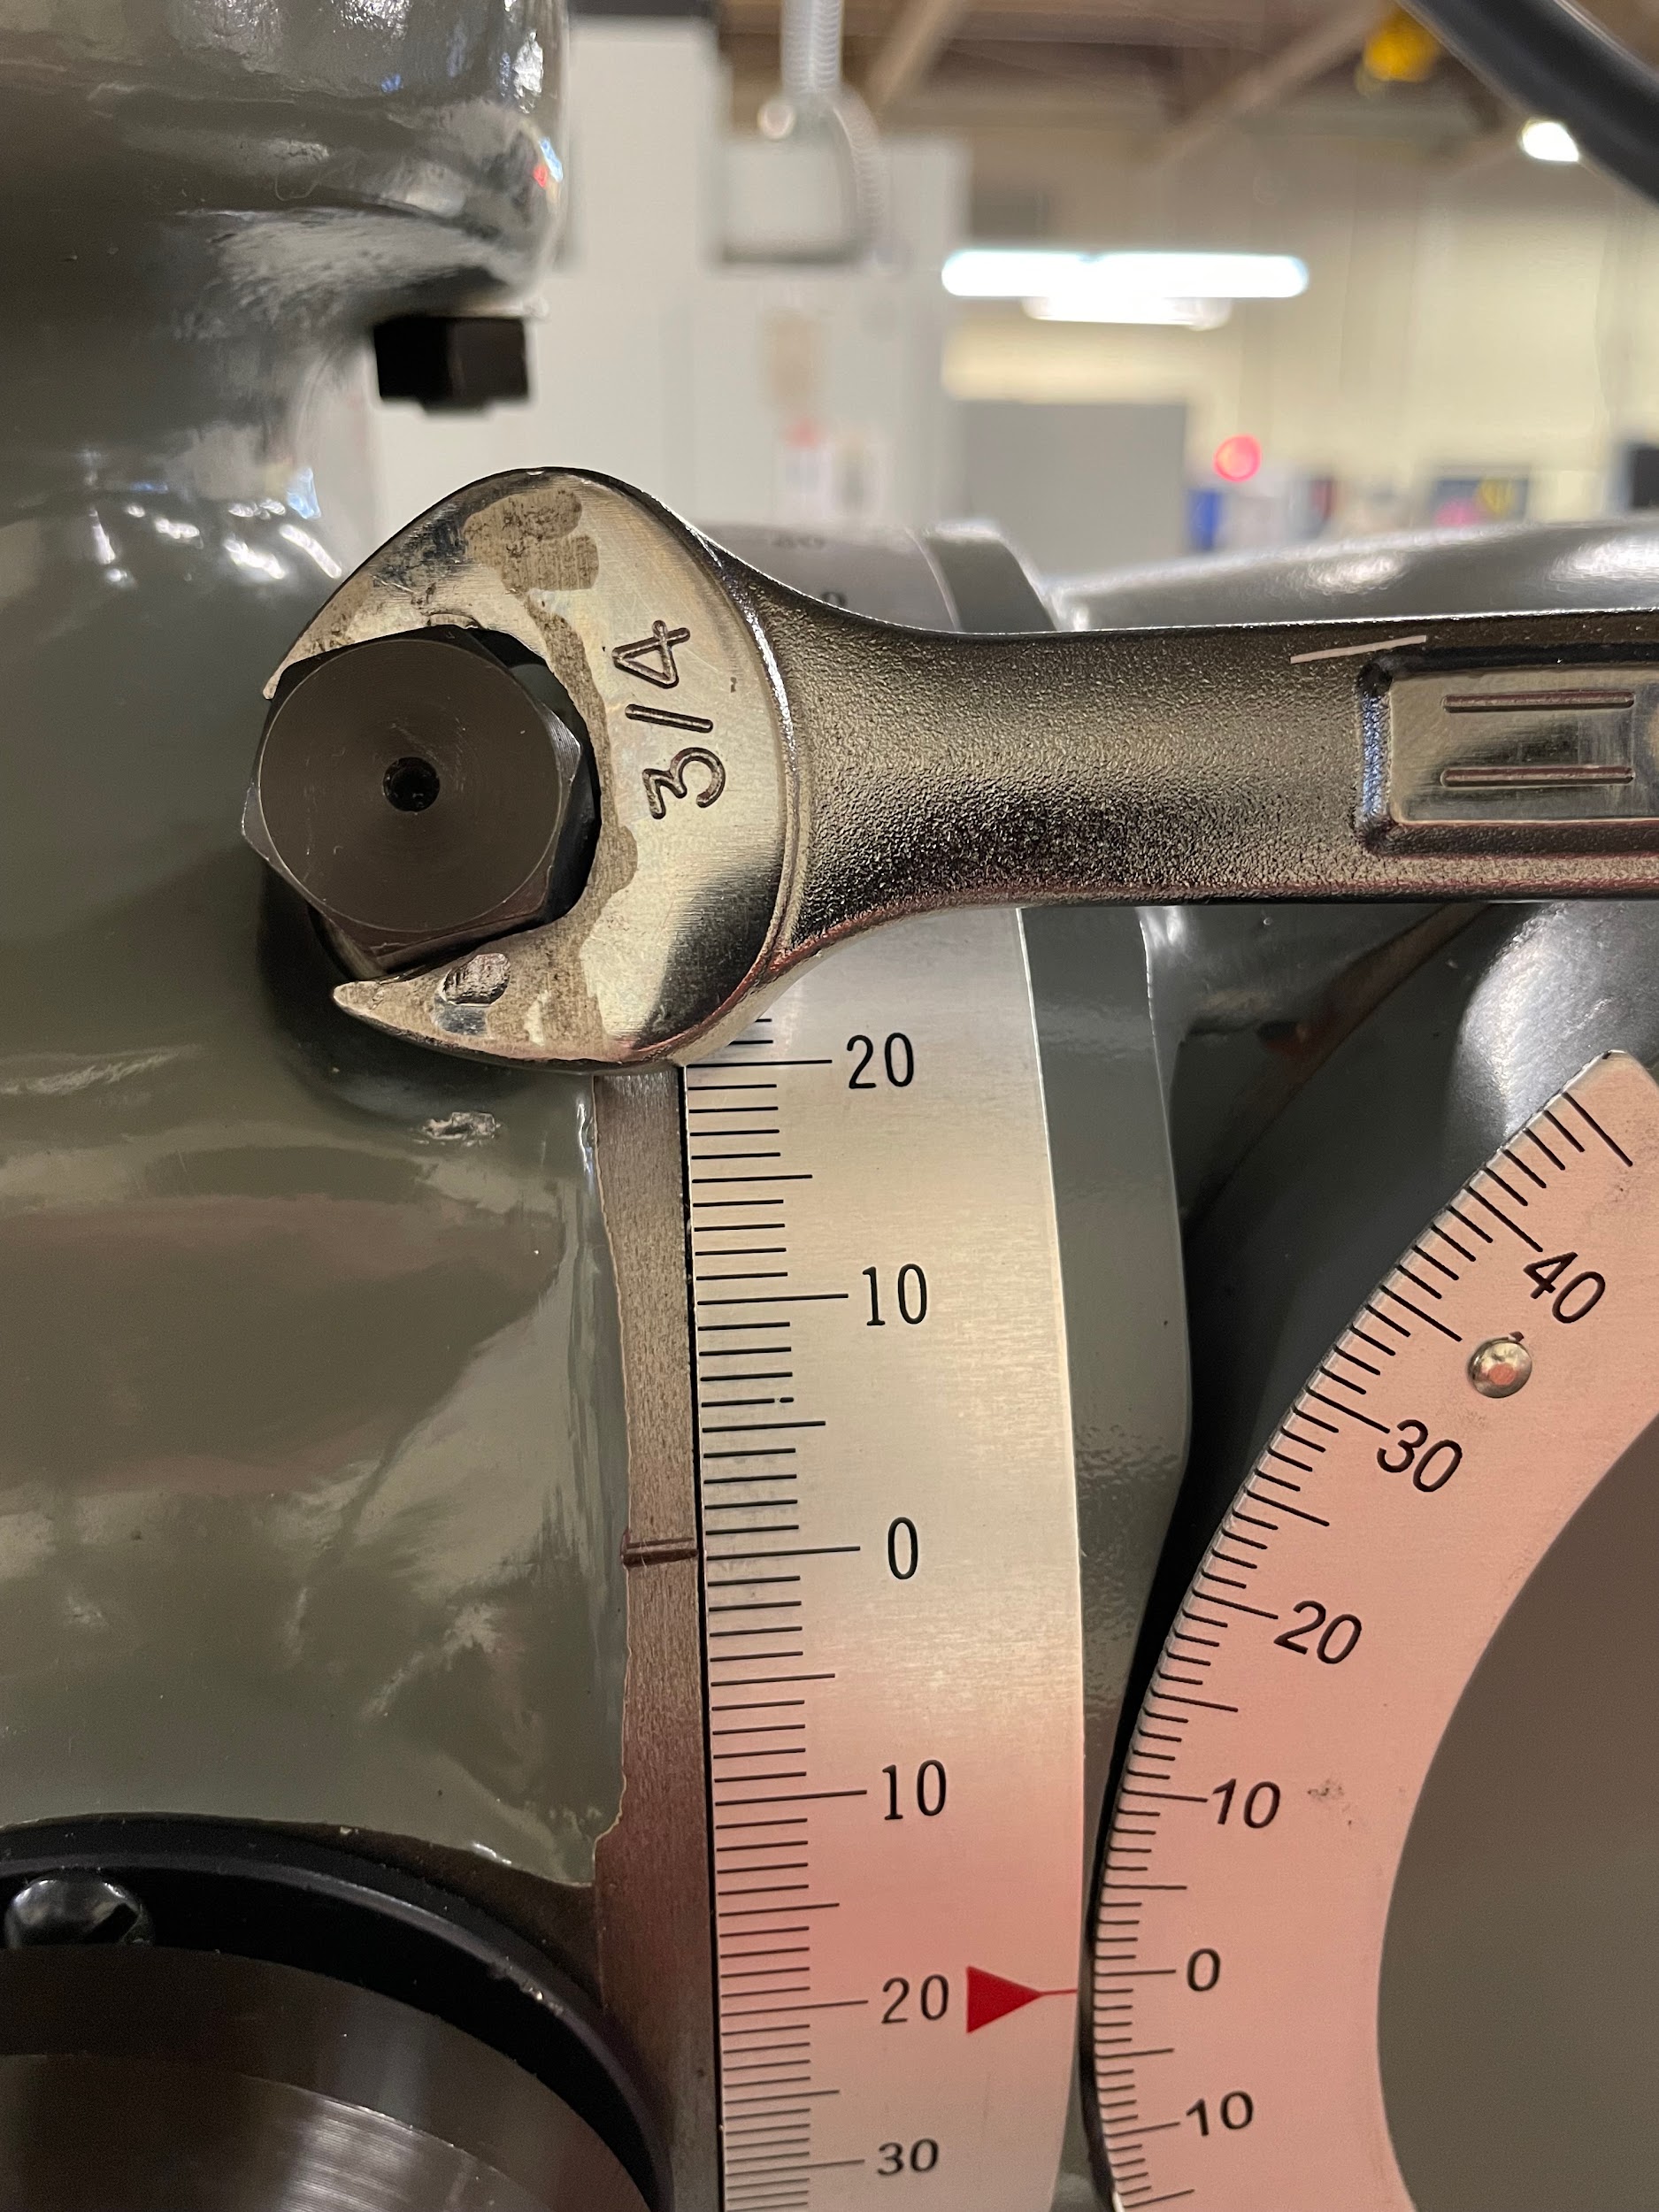
“Step 4: Attach a drop indicator to the vise so that the indicator shaft is pointed vertically or horizontally at a precision surface of the head. Two examples are shown, one using the milled surface on the bottom of the head and one using the side of the quill.“
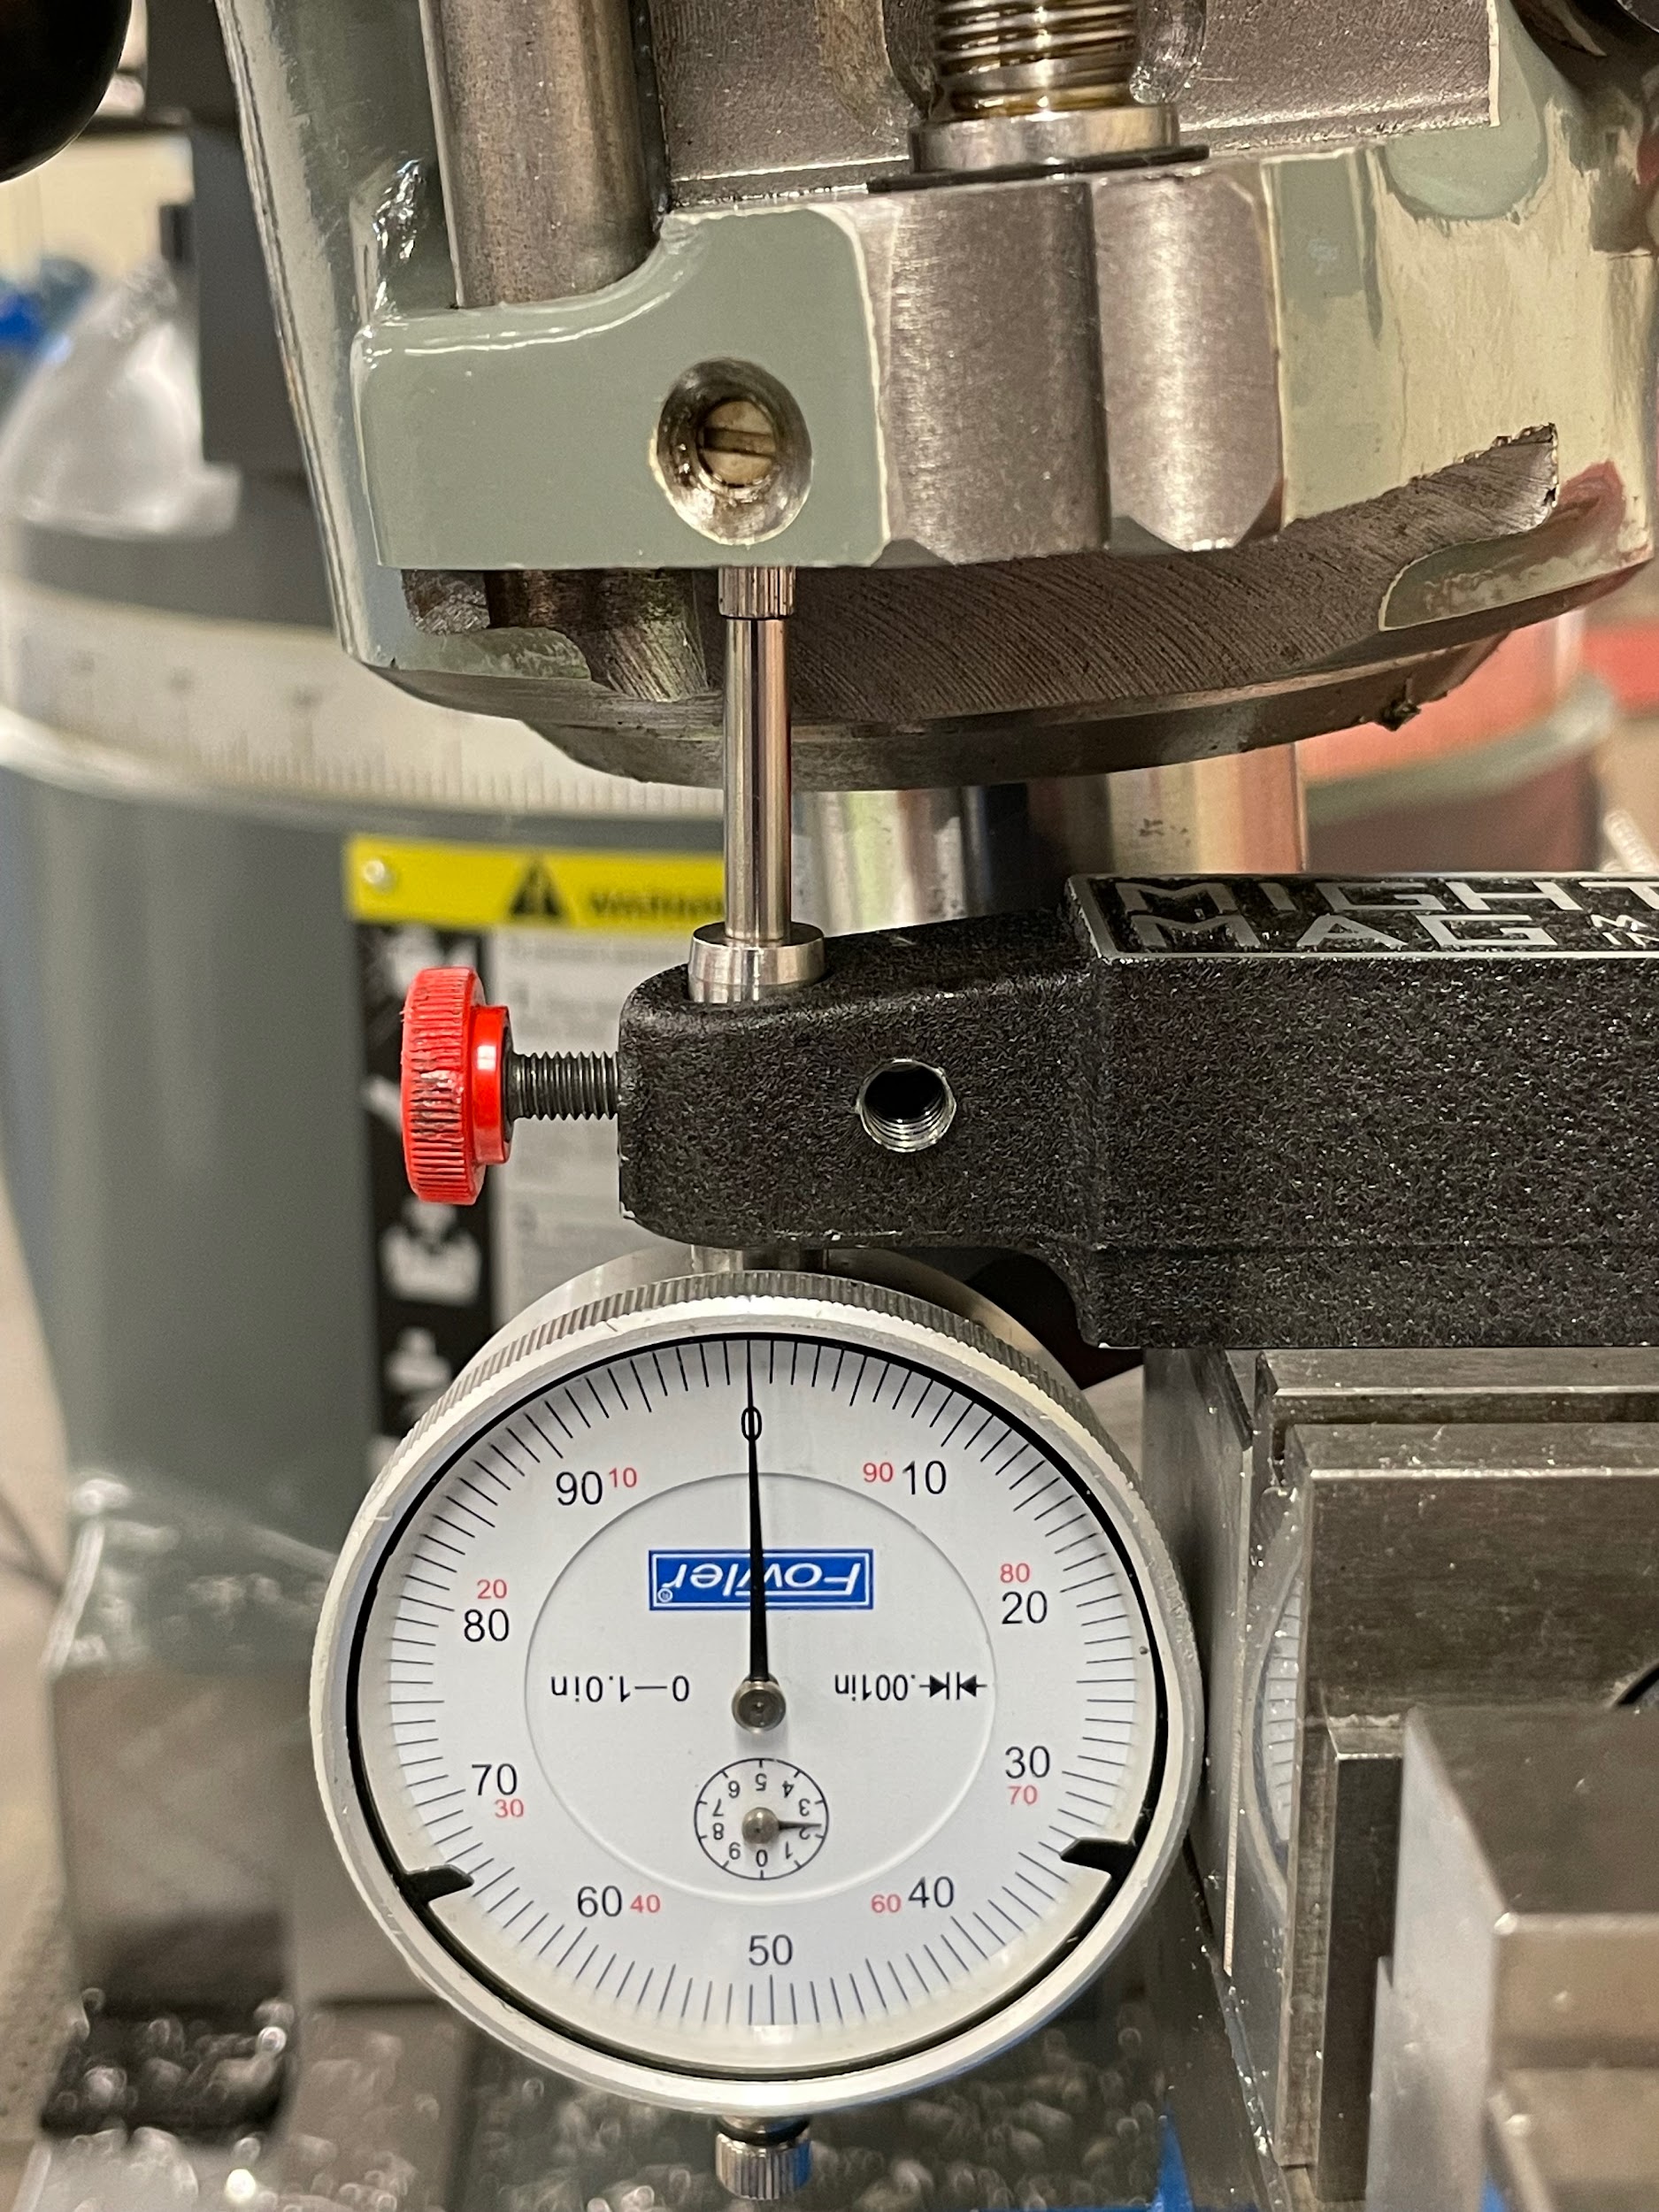
“Step 4: Attach a drop indicator to the vise so that the indicator shaft is pointed vertically or horizontally at a precision surface of the head. Two examples are shown, one using the milled surface on the bottom of the head and one using the side of the quill.“
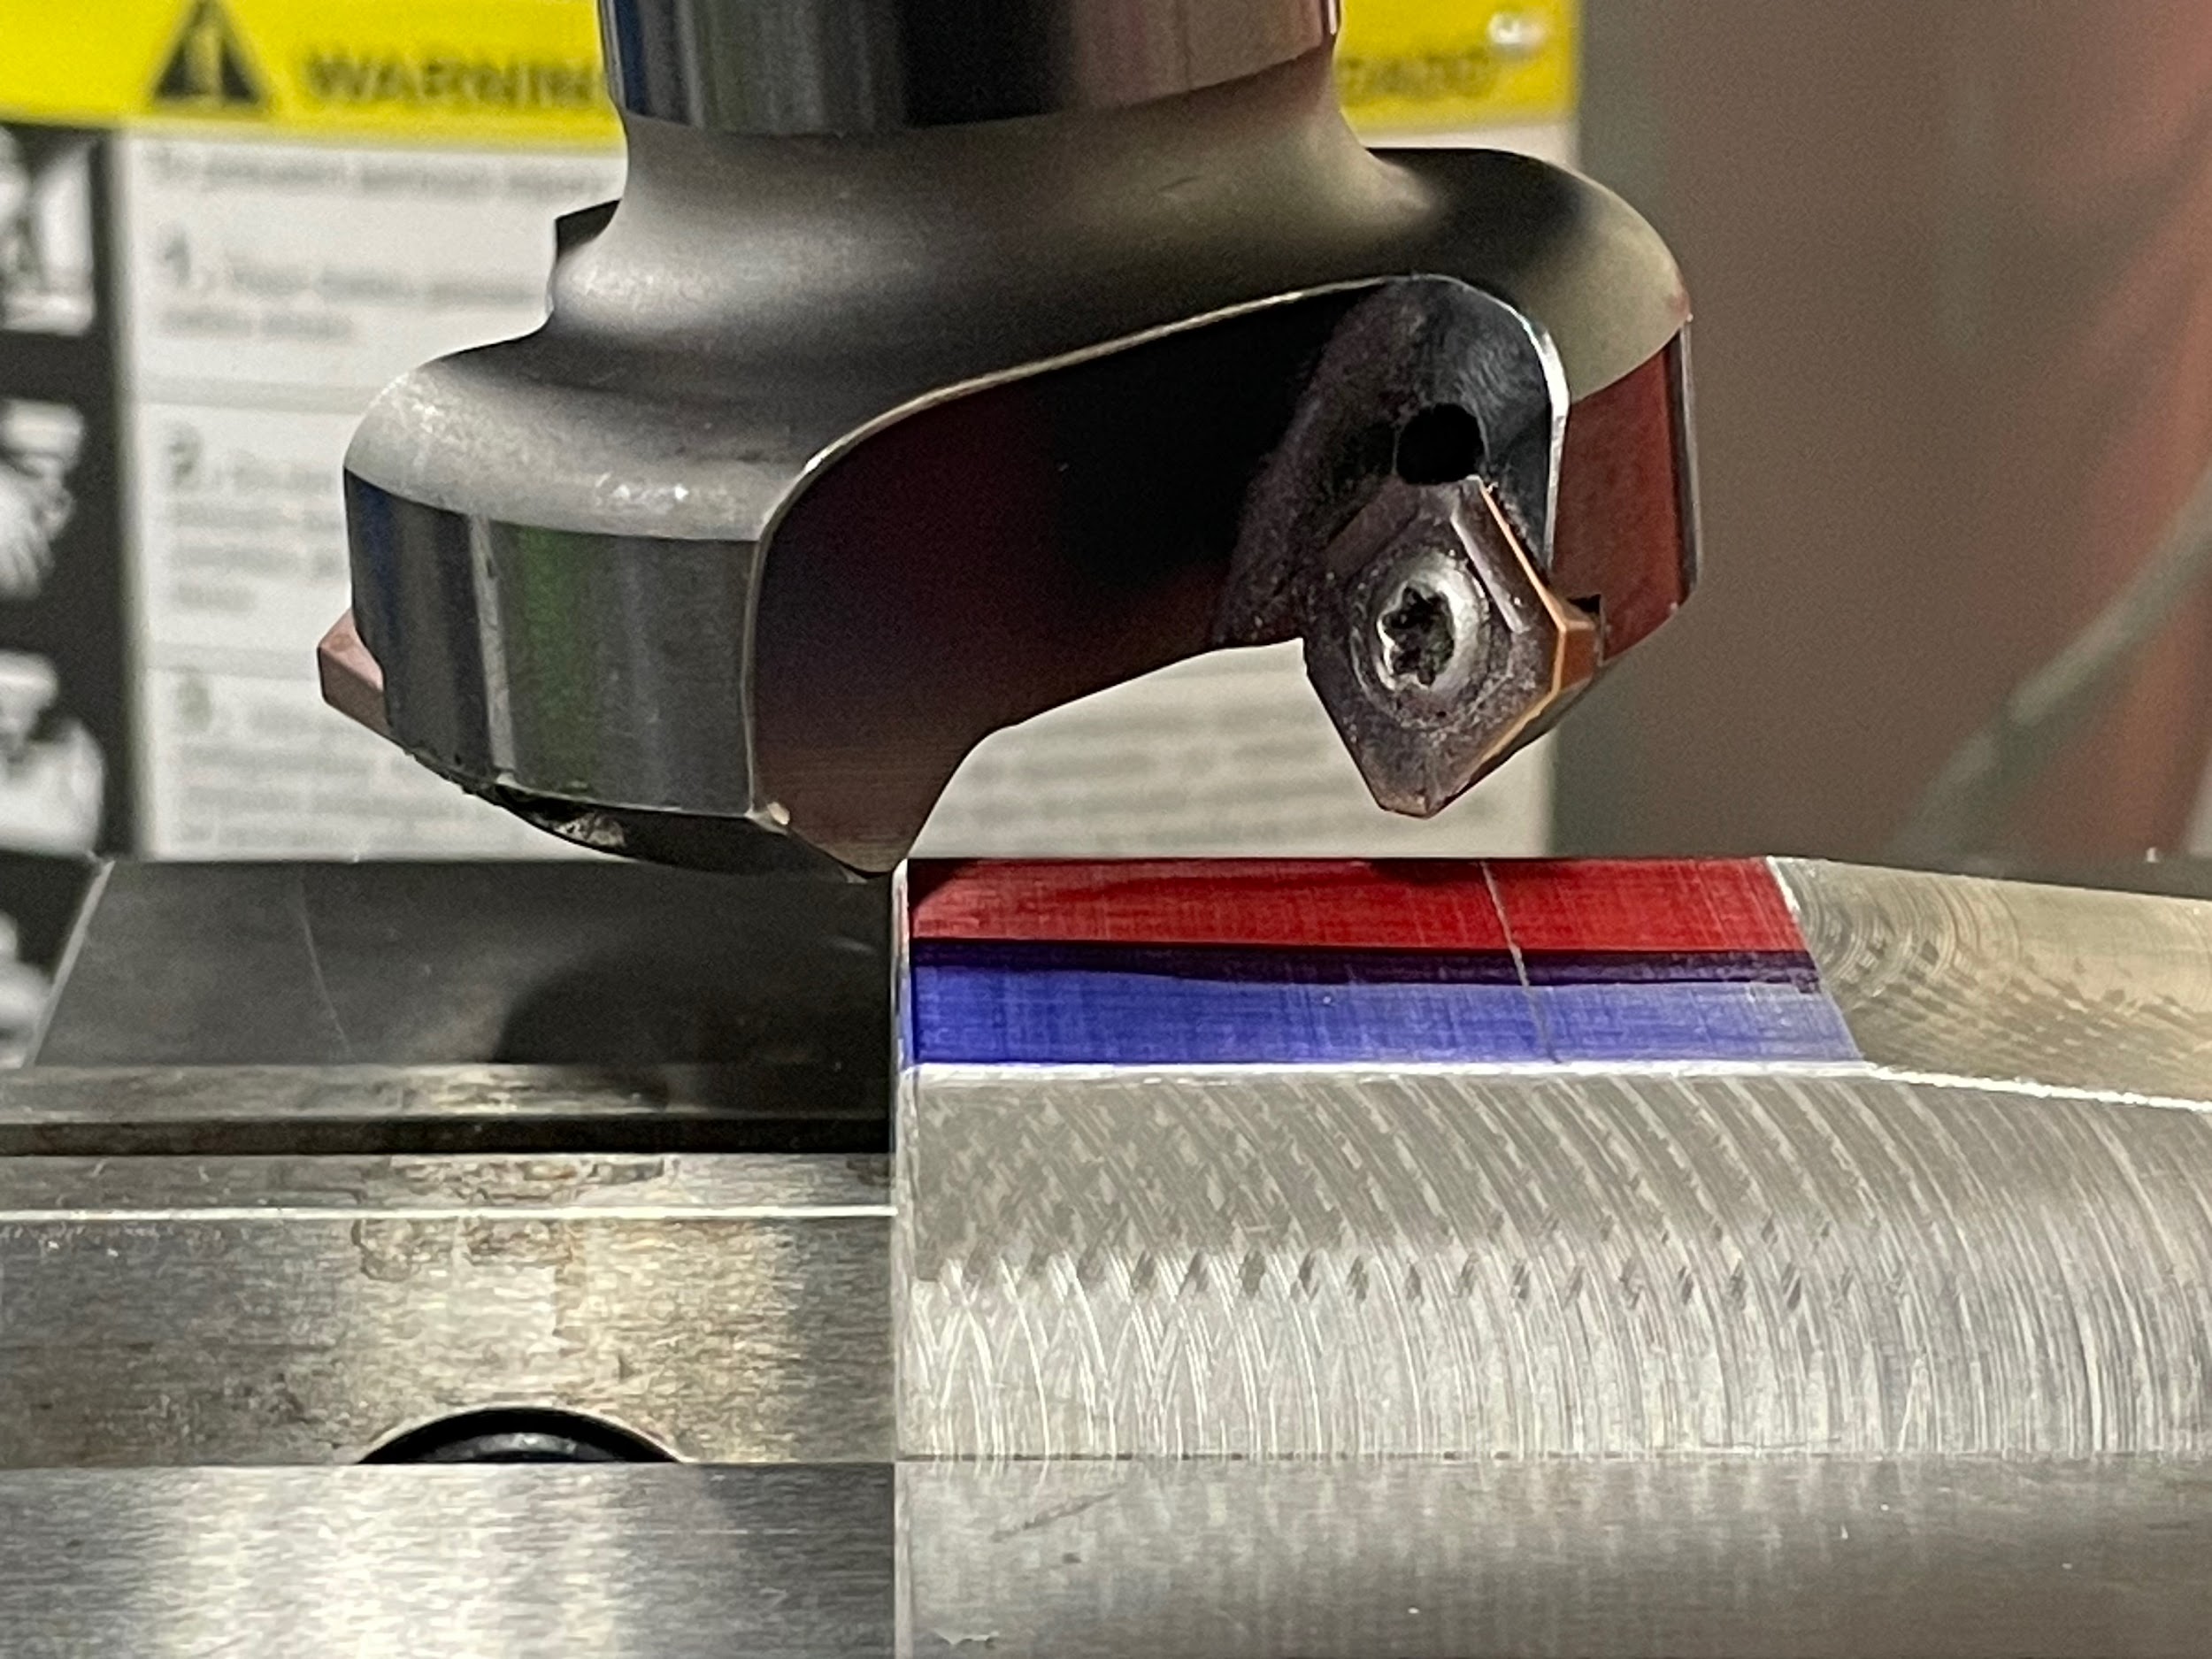
“Step 16: Gently touch the tool off to the prominent corner by raising the knee.“
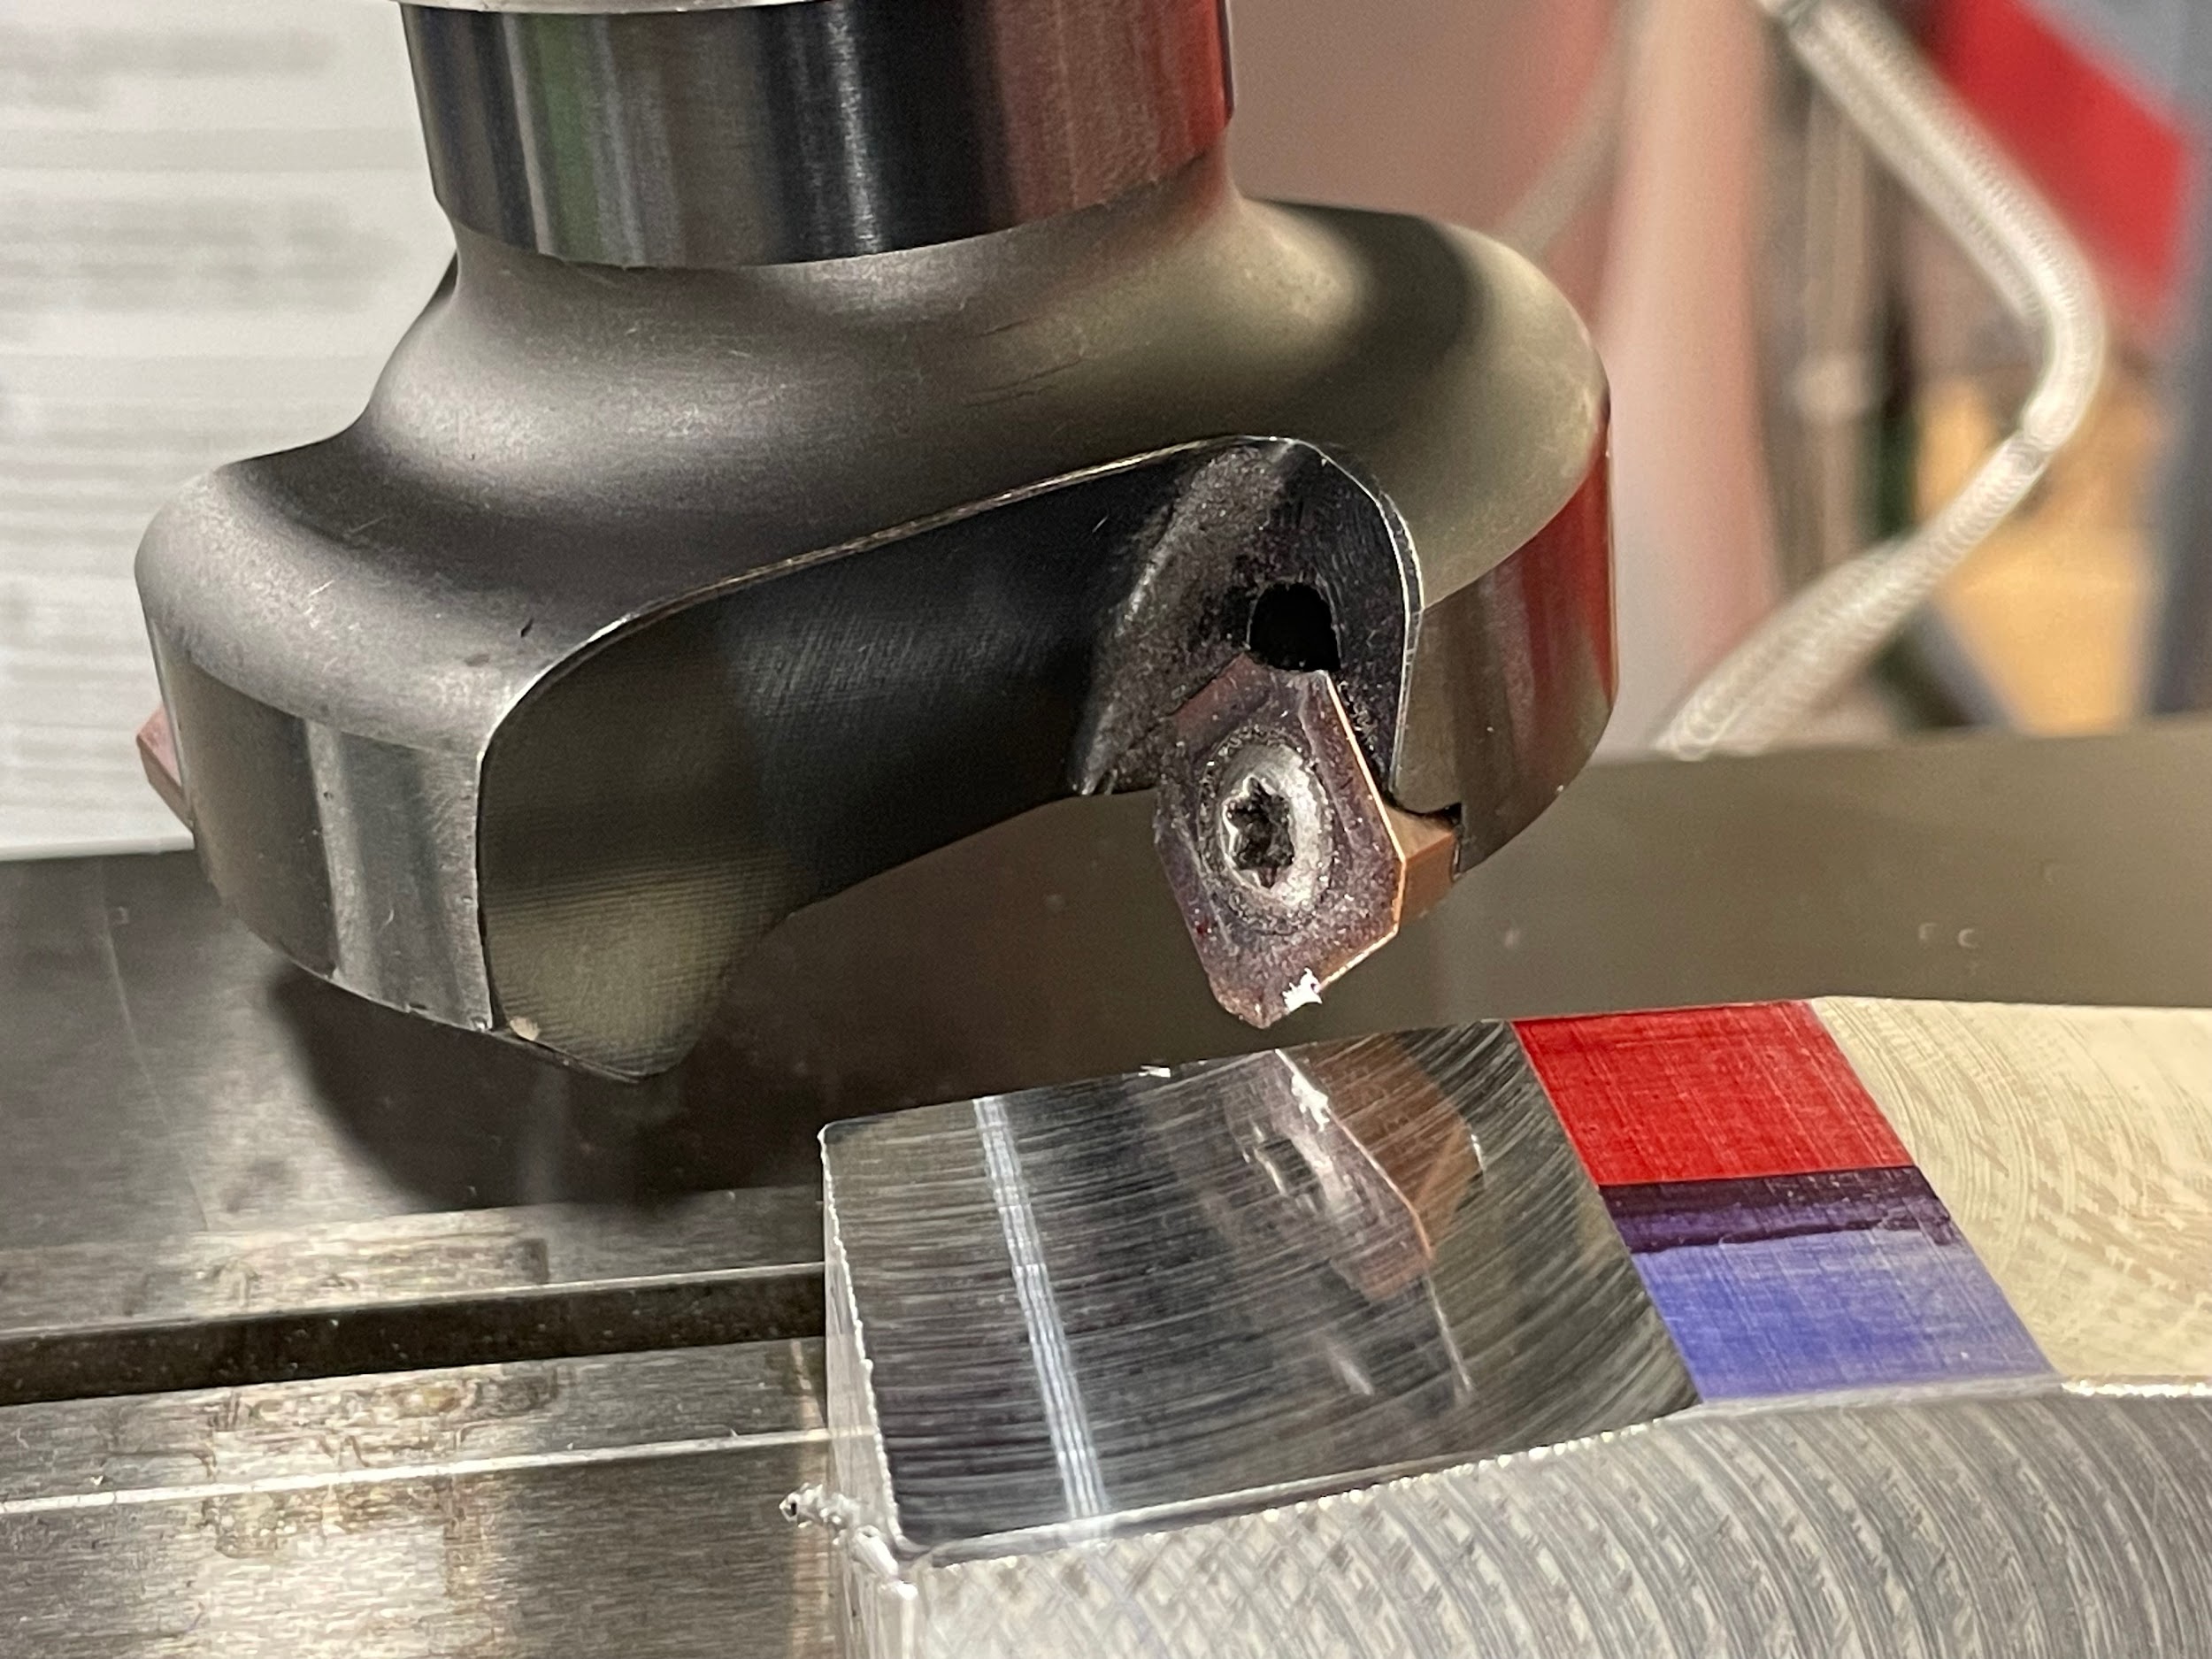
“Step 19: Remove the necessary material over multiple passes using face milling cuts.“
Step by step process for cutting 45 degrees chamfer angles:
- Load the part in the vise on parallels.
- Load a chamfer mill or face mill that has a 45 degree angle into the milling machine.
- Calculate the spindle speed and feed rate for the tool selected. Remember to base the calculation on the largest diameter of the tool that will touch the material.
- Turn on the spindle and adjust the speed.
- Lock the quill.
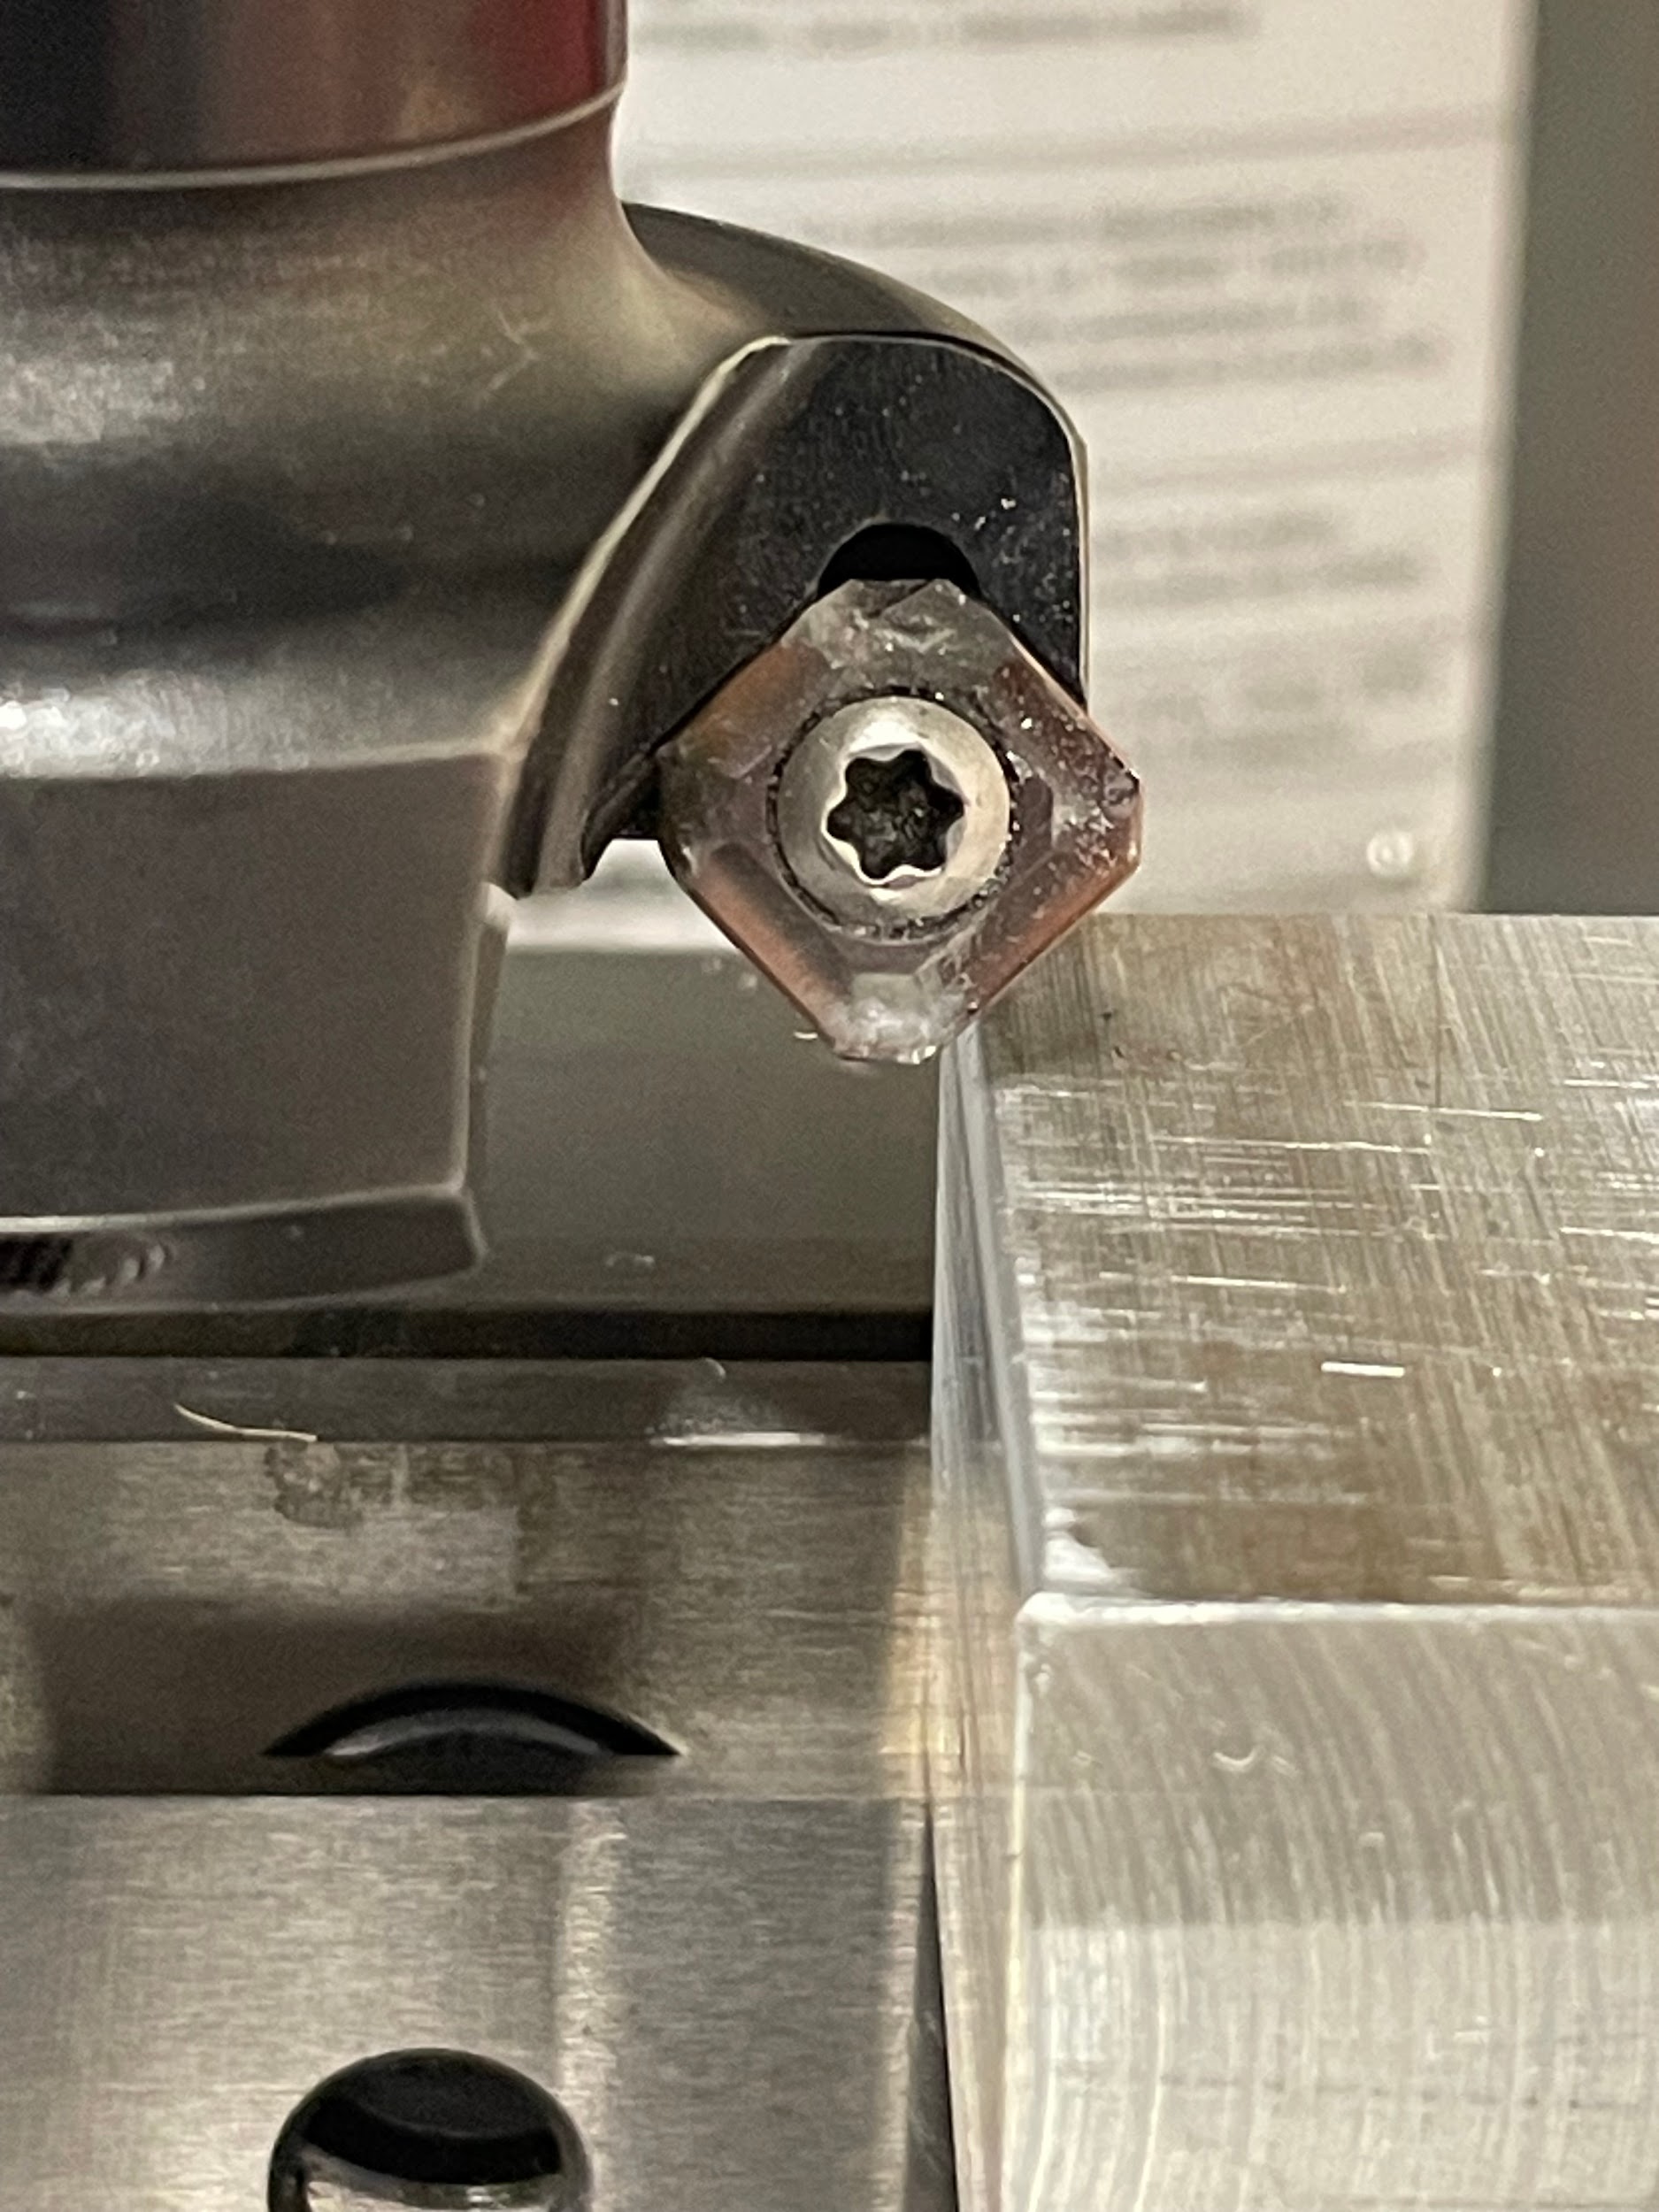
- Gently touch the 45 degree angle of the tool off to the corner of the part by raising the knee.
- Zero the knee or zero the table movement.
- Move the tool off the work.
- Adjust the knee or the table by the amount of chamfer indicated on the print. To determine which to adjust, inspect what part of the tool angle has been touched to the part. If it is near the top of the angle, adjusting the table movement is probably the best. If it is near the bottom, raising the knee is probably best. Whichever method is employed, the length of the chamfer on the tool can not be overrun, or an undesirable step will result.
- Lock the table.
- Cut the chamfer by moving the saddle.
- Turn off the spindle.
- Lower the knee.
- Clean and inspect the feature.
“Step 1-2: Load the part in the vise on parallels. Load a chamfer mill or face mill that has a 45 degree angle into the milling machine. “
“Step 6: Gently touch the 45 degree angle of the tool off to the corner of the part by raising the knee.“
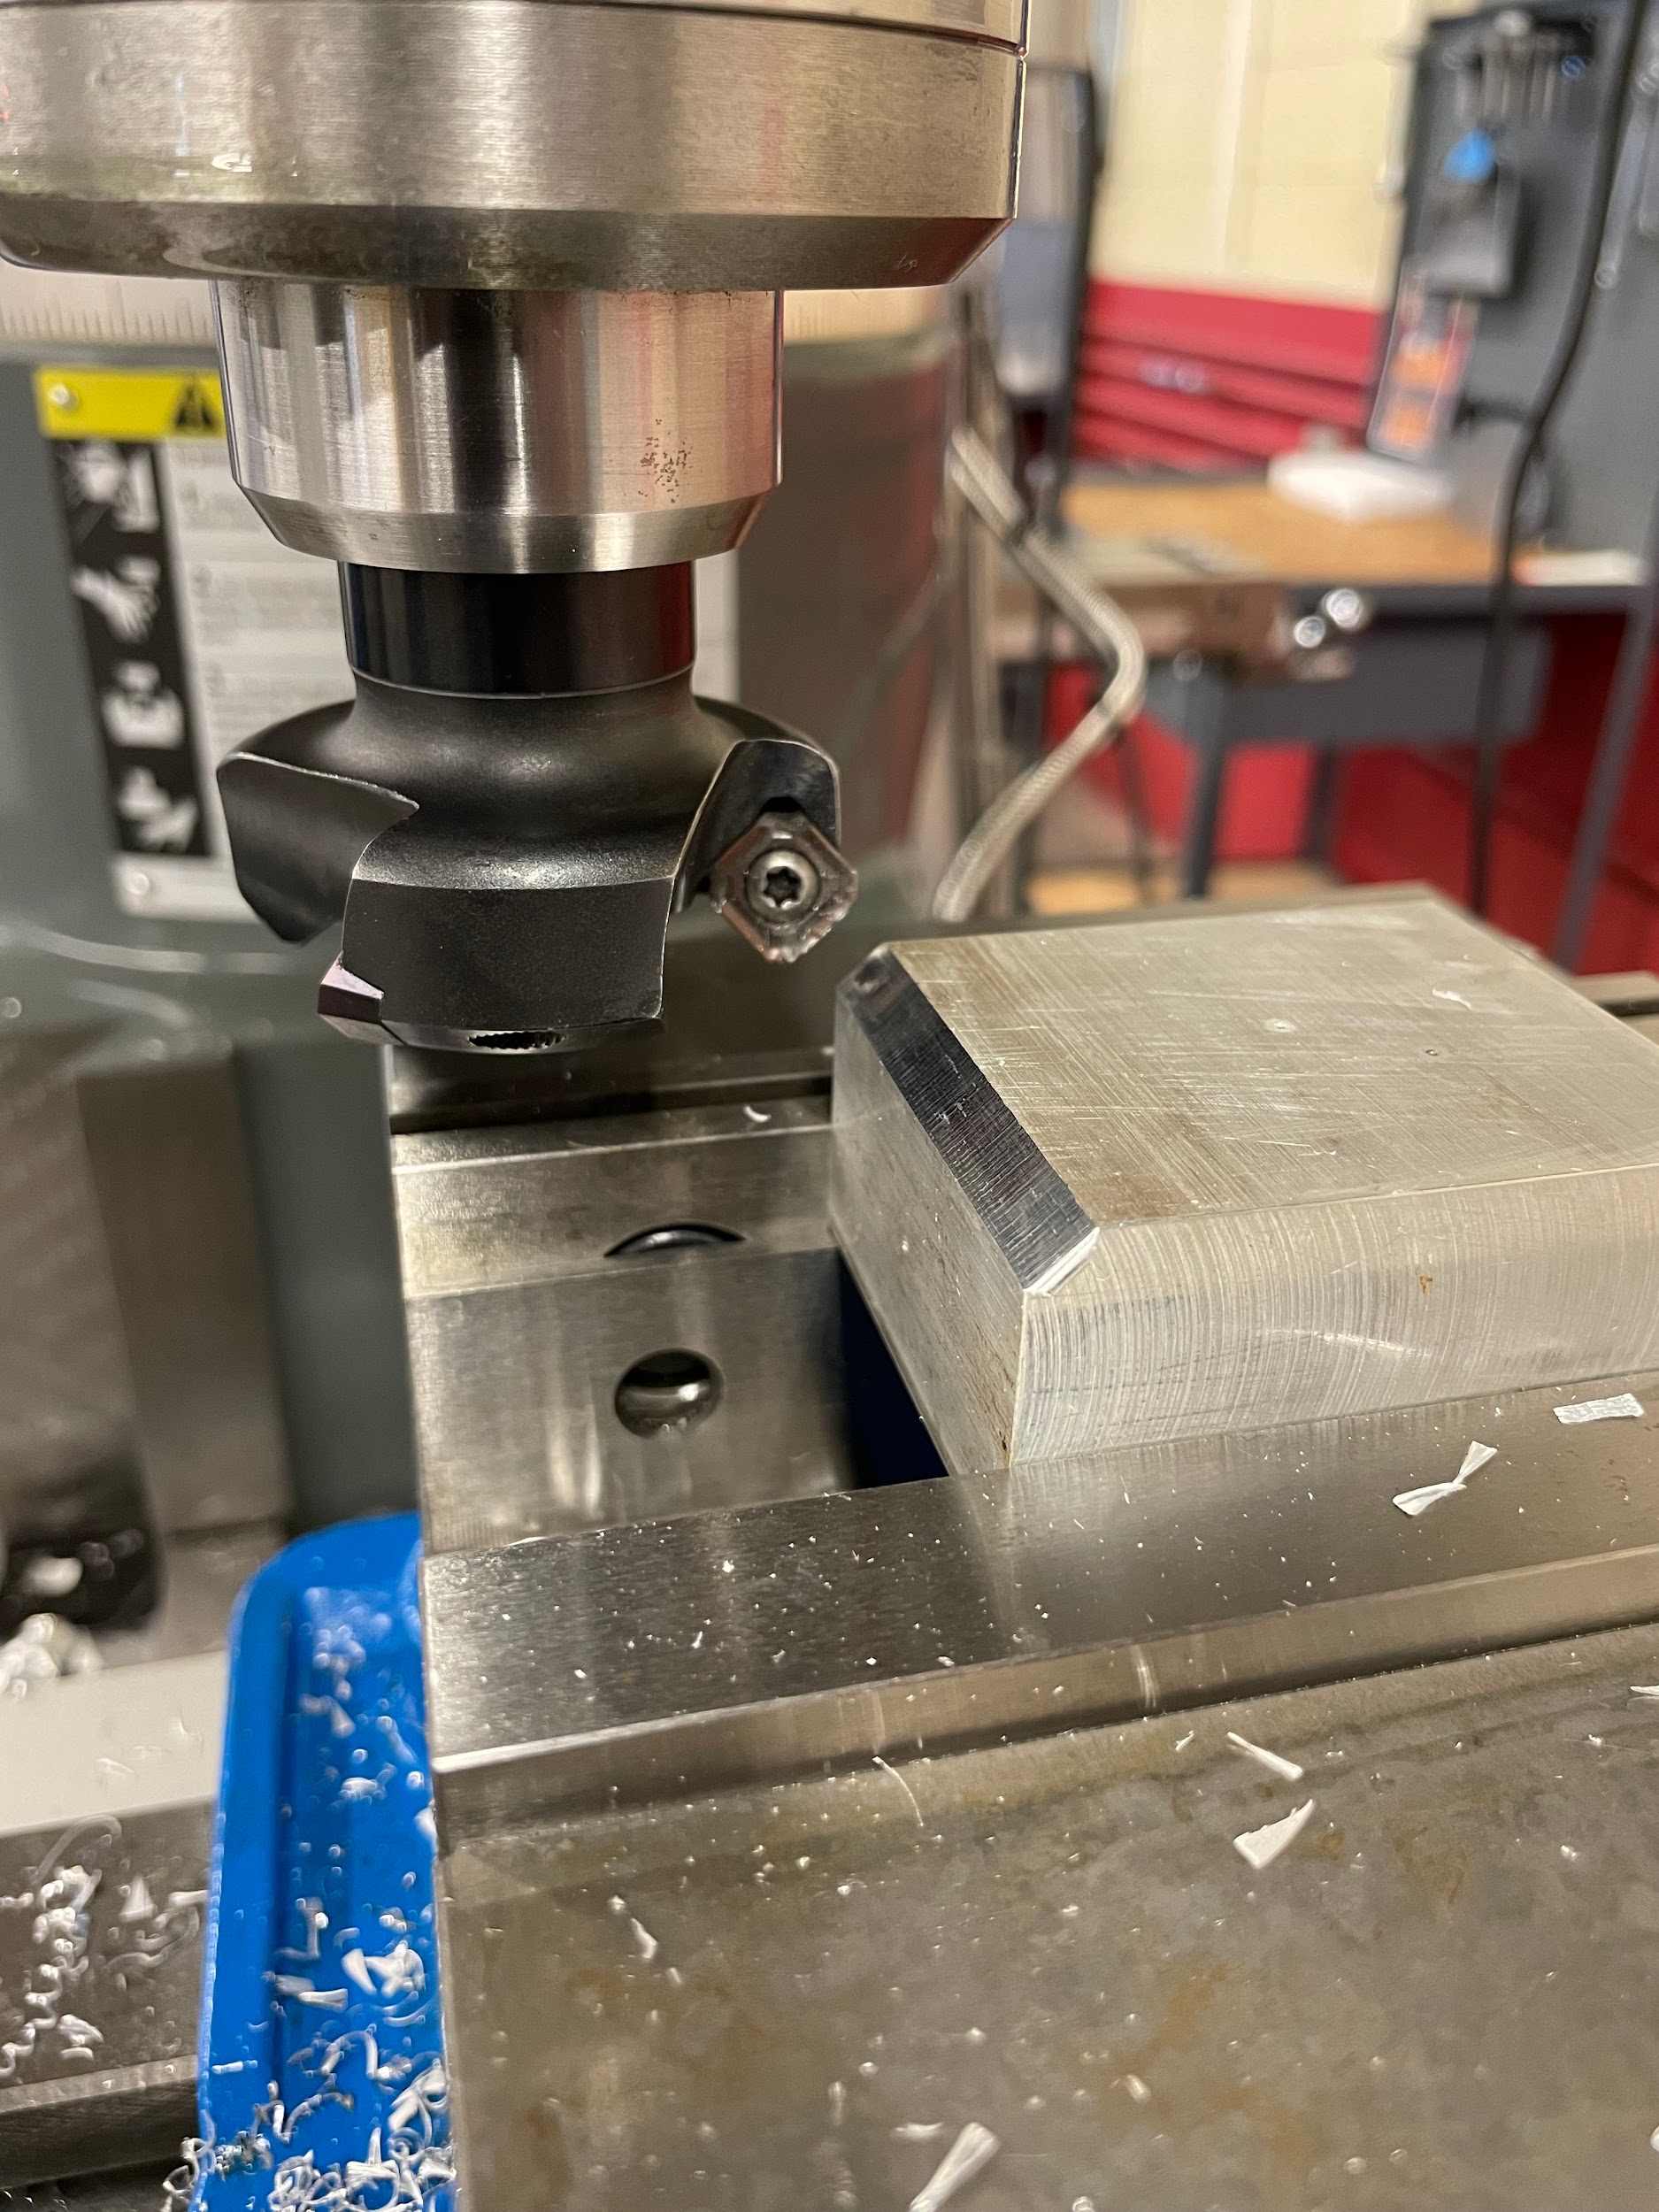
Author’s Tip
I am often machining a one-off part that needs an angular cut. I prefer the simplicity of holding the part at an angle in a vise and applying face mill style cuts, versus making a fixture or adjusting the milling head. It just makes sense to use the most time-saving option. However, instead of using parallels, I will often use an indicator and math to set the part in the vise at the correct angle. Sometimes I do this because no parallels exist at the angle I am attempting to cut, or maybe I am needing an angle that is more precise than the parallels are capable of holding. To use this method, you must first calculate a measurable scenario using the angle you wish to cut. This scenario will change based on the size of the part. I generally use the largest sizes I can because they will give the most accuracy. For instance, if my part is 1-½” long, I would use 1” or larger for my measuring scenario versus ¼”. I will use the angle desired and the selected leg length in order to calculate the length of the other leg. After this calculation, I install a drop indicator on the milling spindle and touch it near the top of my part that is set at approximately the required level. I then zero the indicator and zero the table movement. Now I will run the indicator along the part at the exact distance I used as the long leg in the calculation. Next, read the indicator; this represents the length of the short leg. Using only a .001” resolution indicator, you can get a very accurate result this way, depending on the length you are allowed to use as the long leg.
RADIUS CUTTING
What is it?

Radius cutting is the process of creating a radius on an edge with a corner rounding tool. This radius is most often created on a 90 degree corner. These cuts are used to remove corners that might be damaging to other components, as a design element , or simply for aesthetic reasons.
Step by step process for radius cutting:
- Load a corner rounding milling tool into the milling spindle.
- Calculate the spindle speed for the maximum diameter of the work the tool will contact. The spindle speed is generally 1/4 the speed for form milling to that of standard milling because of the amount of tool in contact with the work. The longer the linear length of cutting edge touching the work, the greater the chance for chatter to occur.
- Touch off the top edge of the radius tool.
- Feeler gage
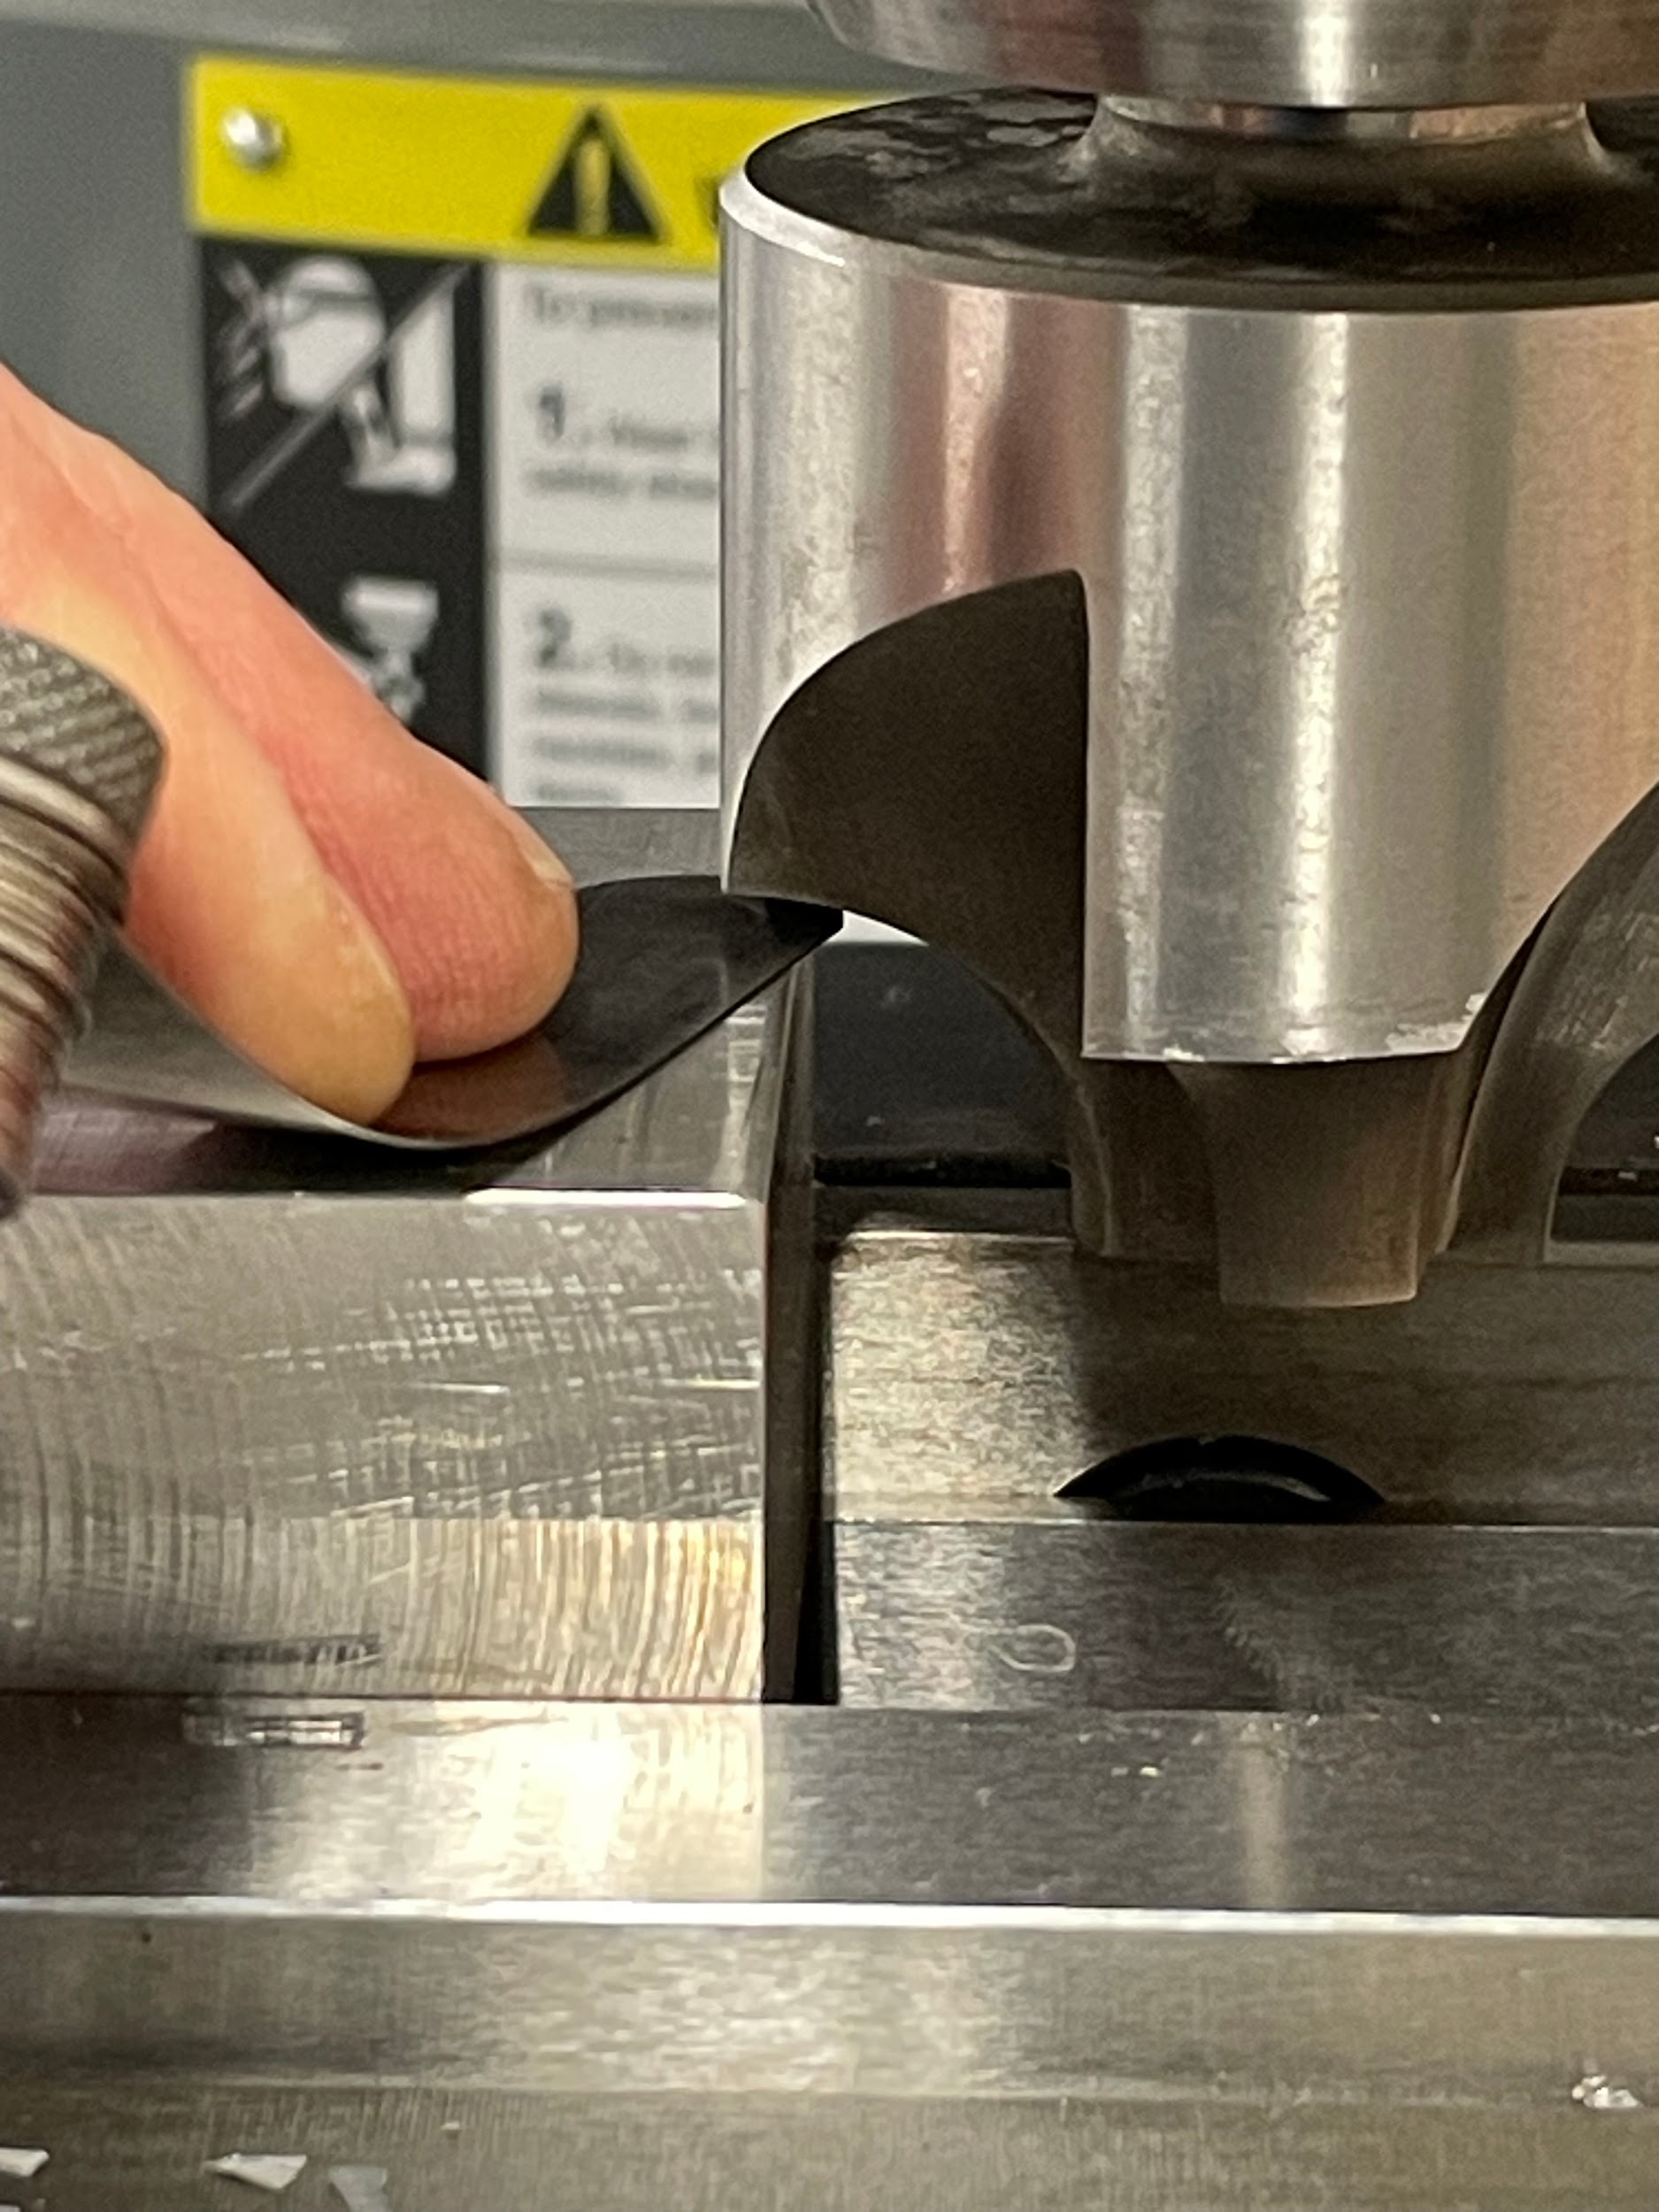
- Touch the flat edge of the tool to the face of the work using the knee and a feeler gage.
- Set the knee hand wheel to zero.
- Back the tool off the part by moving the table.
- Raise the knee by the amount of the feeler gage and re zero the knee.
- Layout dye
- Touch-off the tool to the top of the work to remove the dye.
- Set the knee hand wheel to zero.
- Feeler gage
- Touch off the center edge of the radius tool.
- Feeler gage
- Touch the end diameter of the tool to the side of the work using the table and a feeler gage.
- Set the table hand wheel to zero.
- Back the tool off the part by moving the knee.
- Move the table by the amount of the feeler gage and re-zero the table.
- Feeler gage
- Layout dye
- Touch-off the tool to the side of the work to remove the dye.
- Set the table hand wheel to zero.
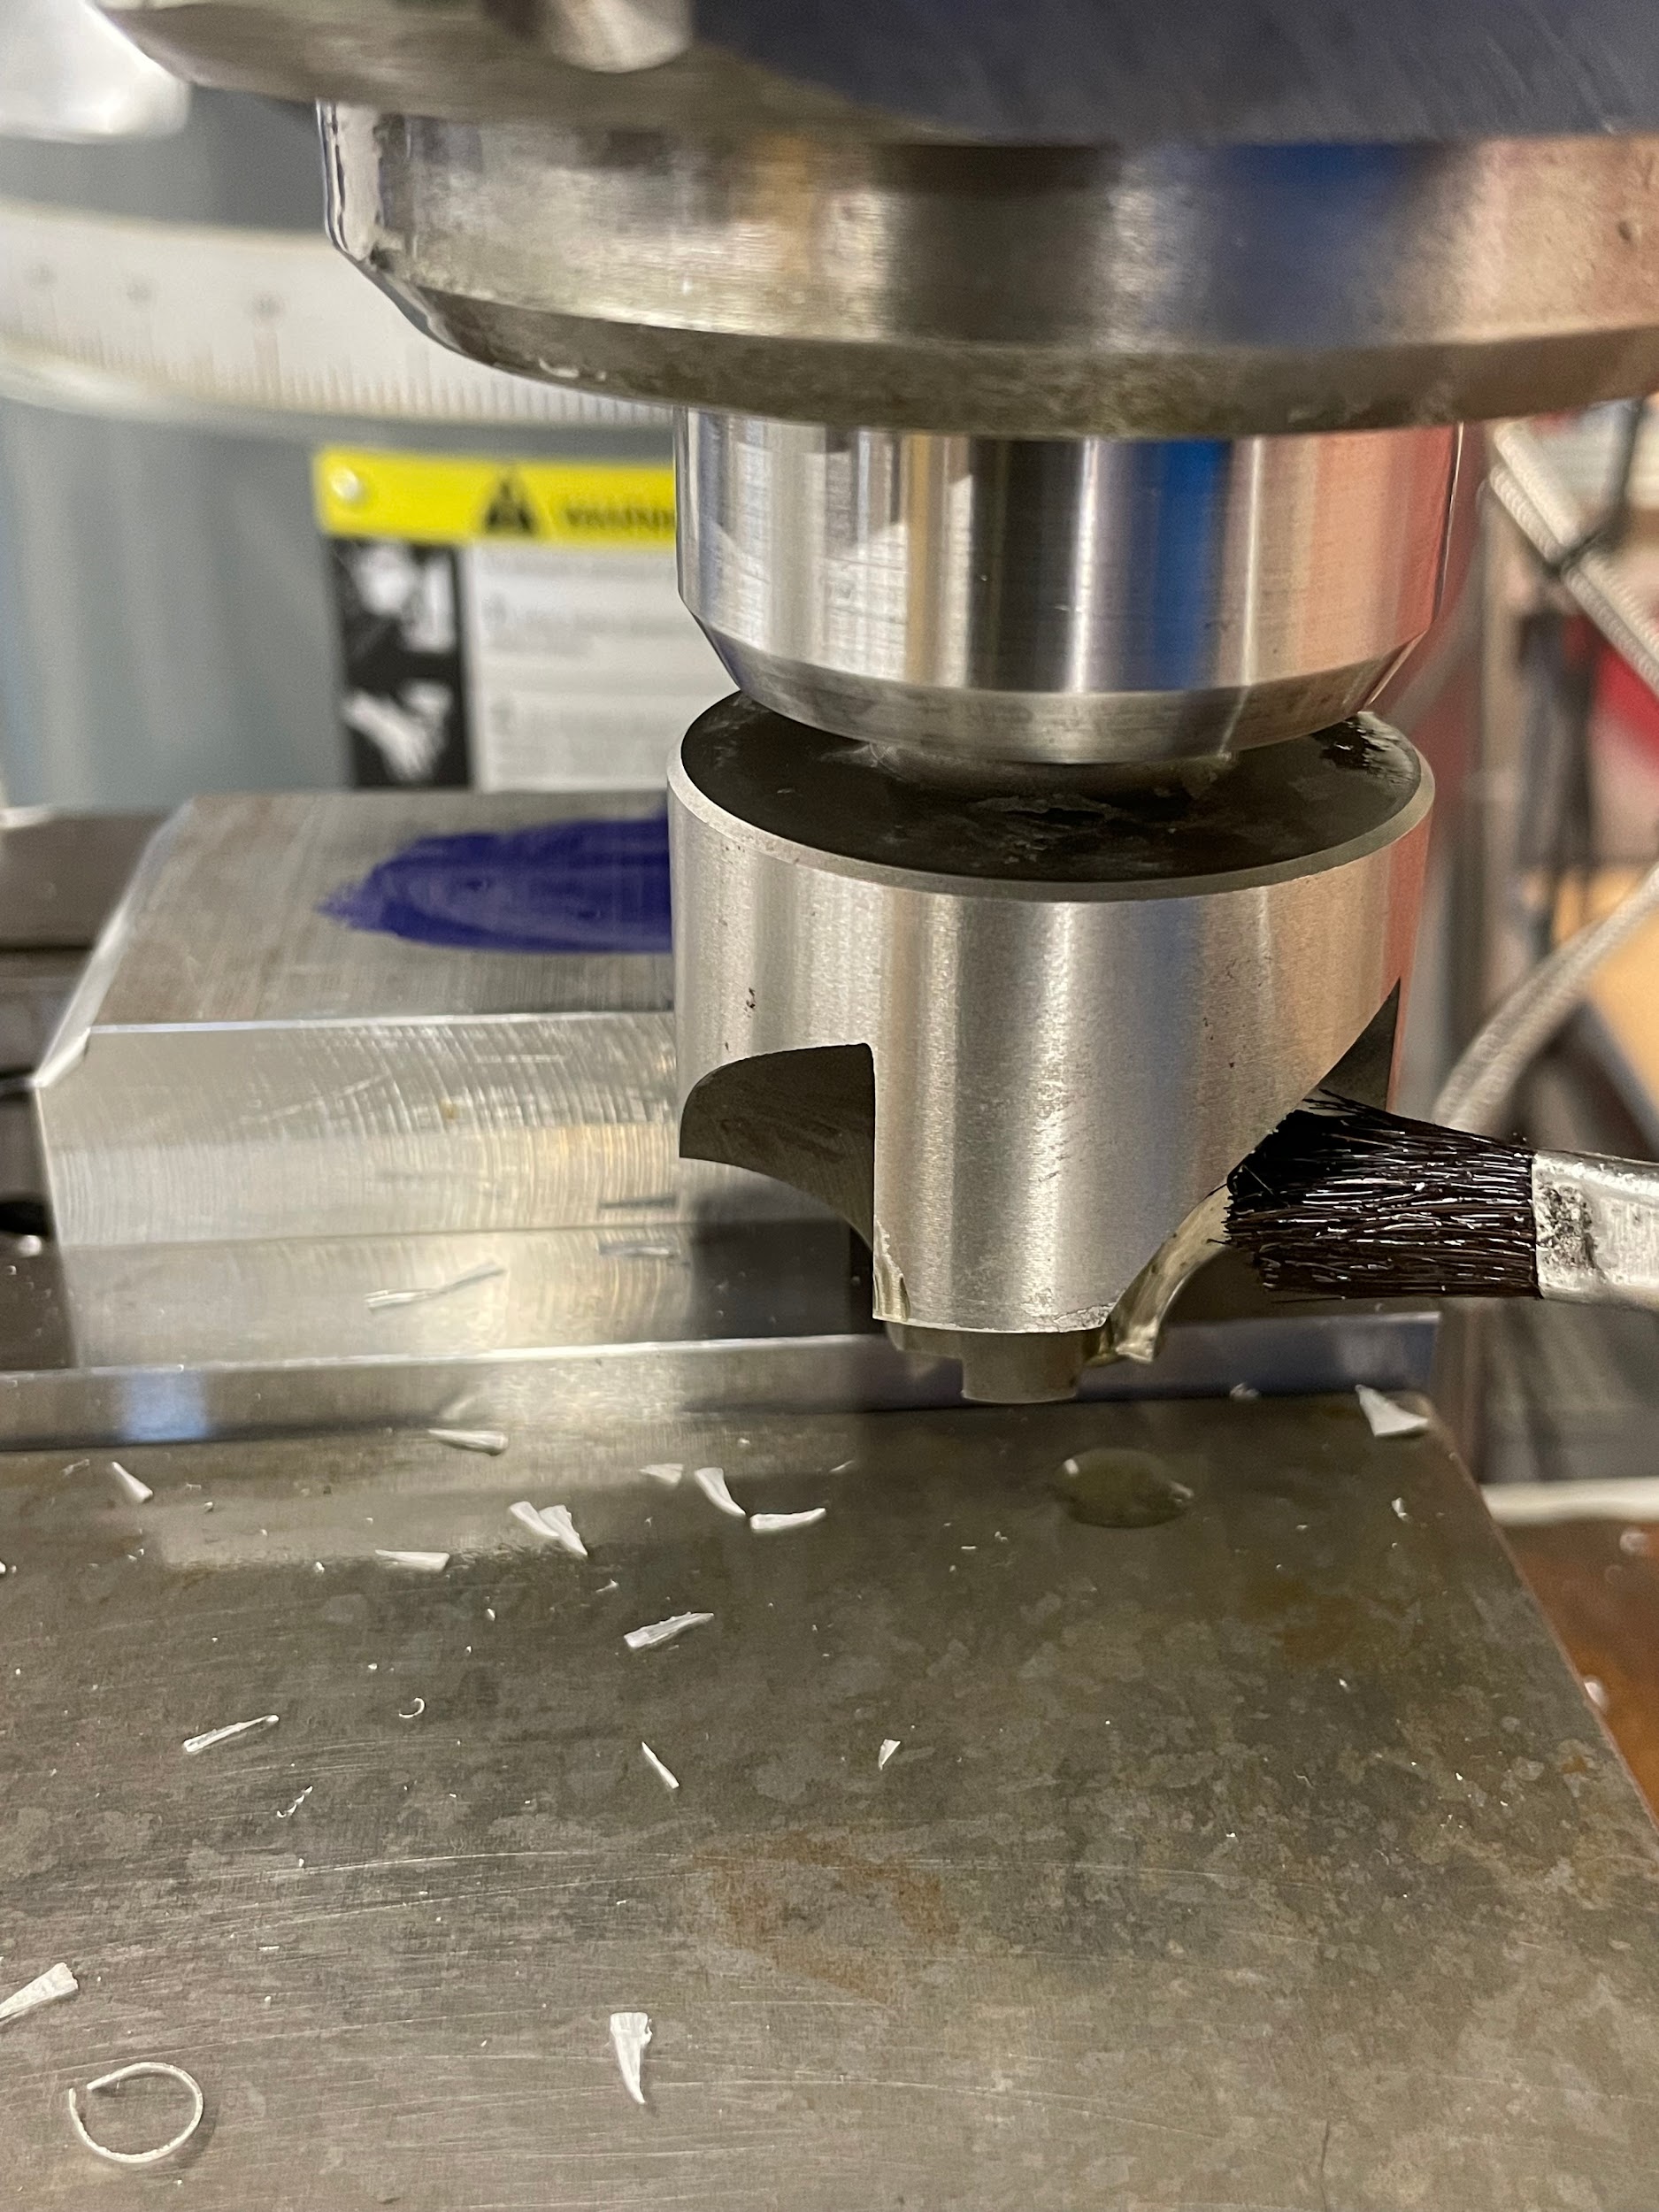
- Lube the tool.
- Start the spindle and adjust the speed.
- For a small radius, it may be created in one cut, whereas a larger radius may require multiple cuts. Adjust the cutting tool depth accordingly.
- Cut across the length of the material.
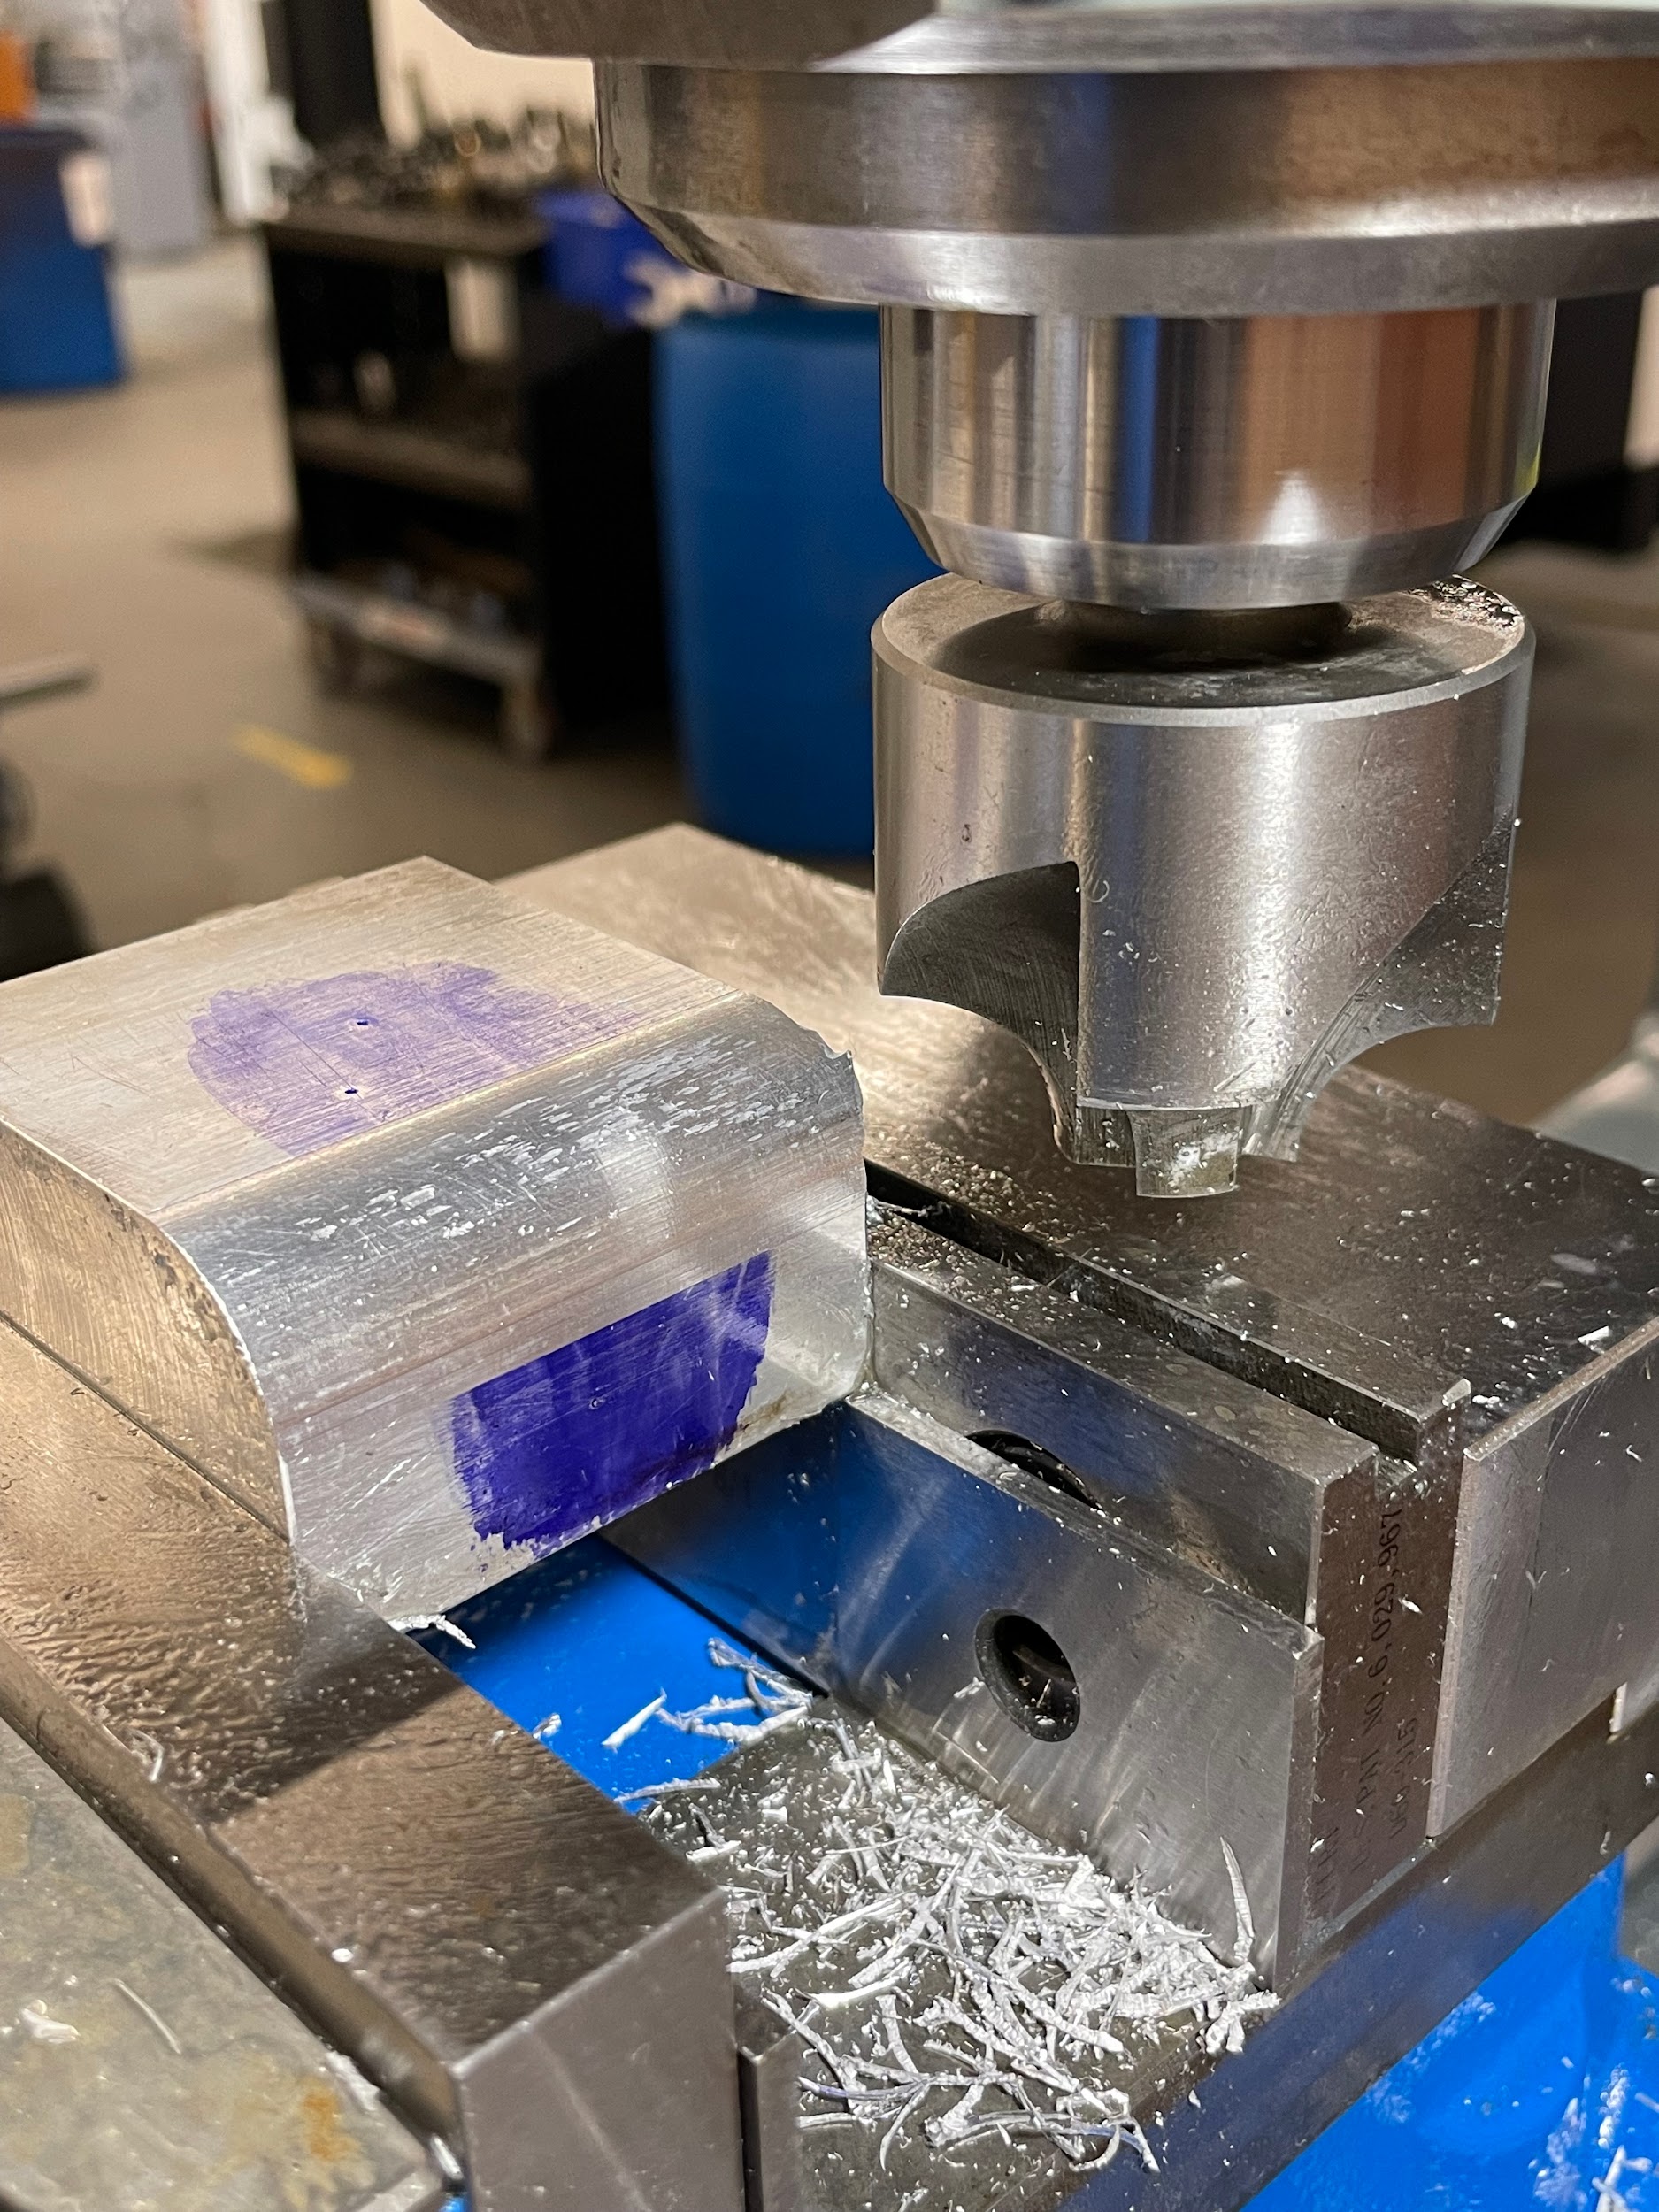
- Similarly, perform the remaining cuts while making depth changes with the handwheels toward their zero point.
- Back the tool off and measure with a radius gage.
“Step 1: Load a corner rounding milling tool into the milling spindle.“
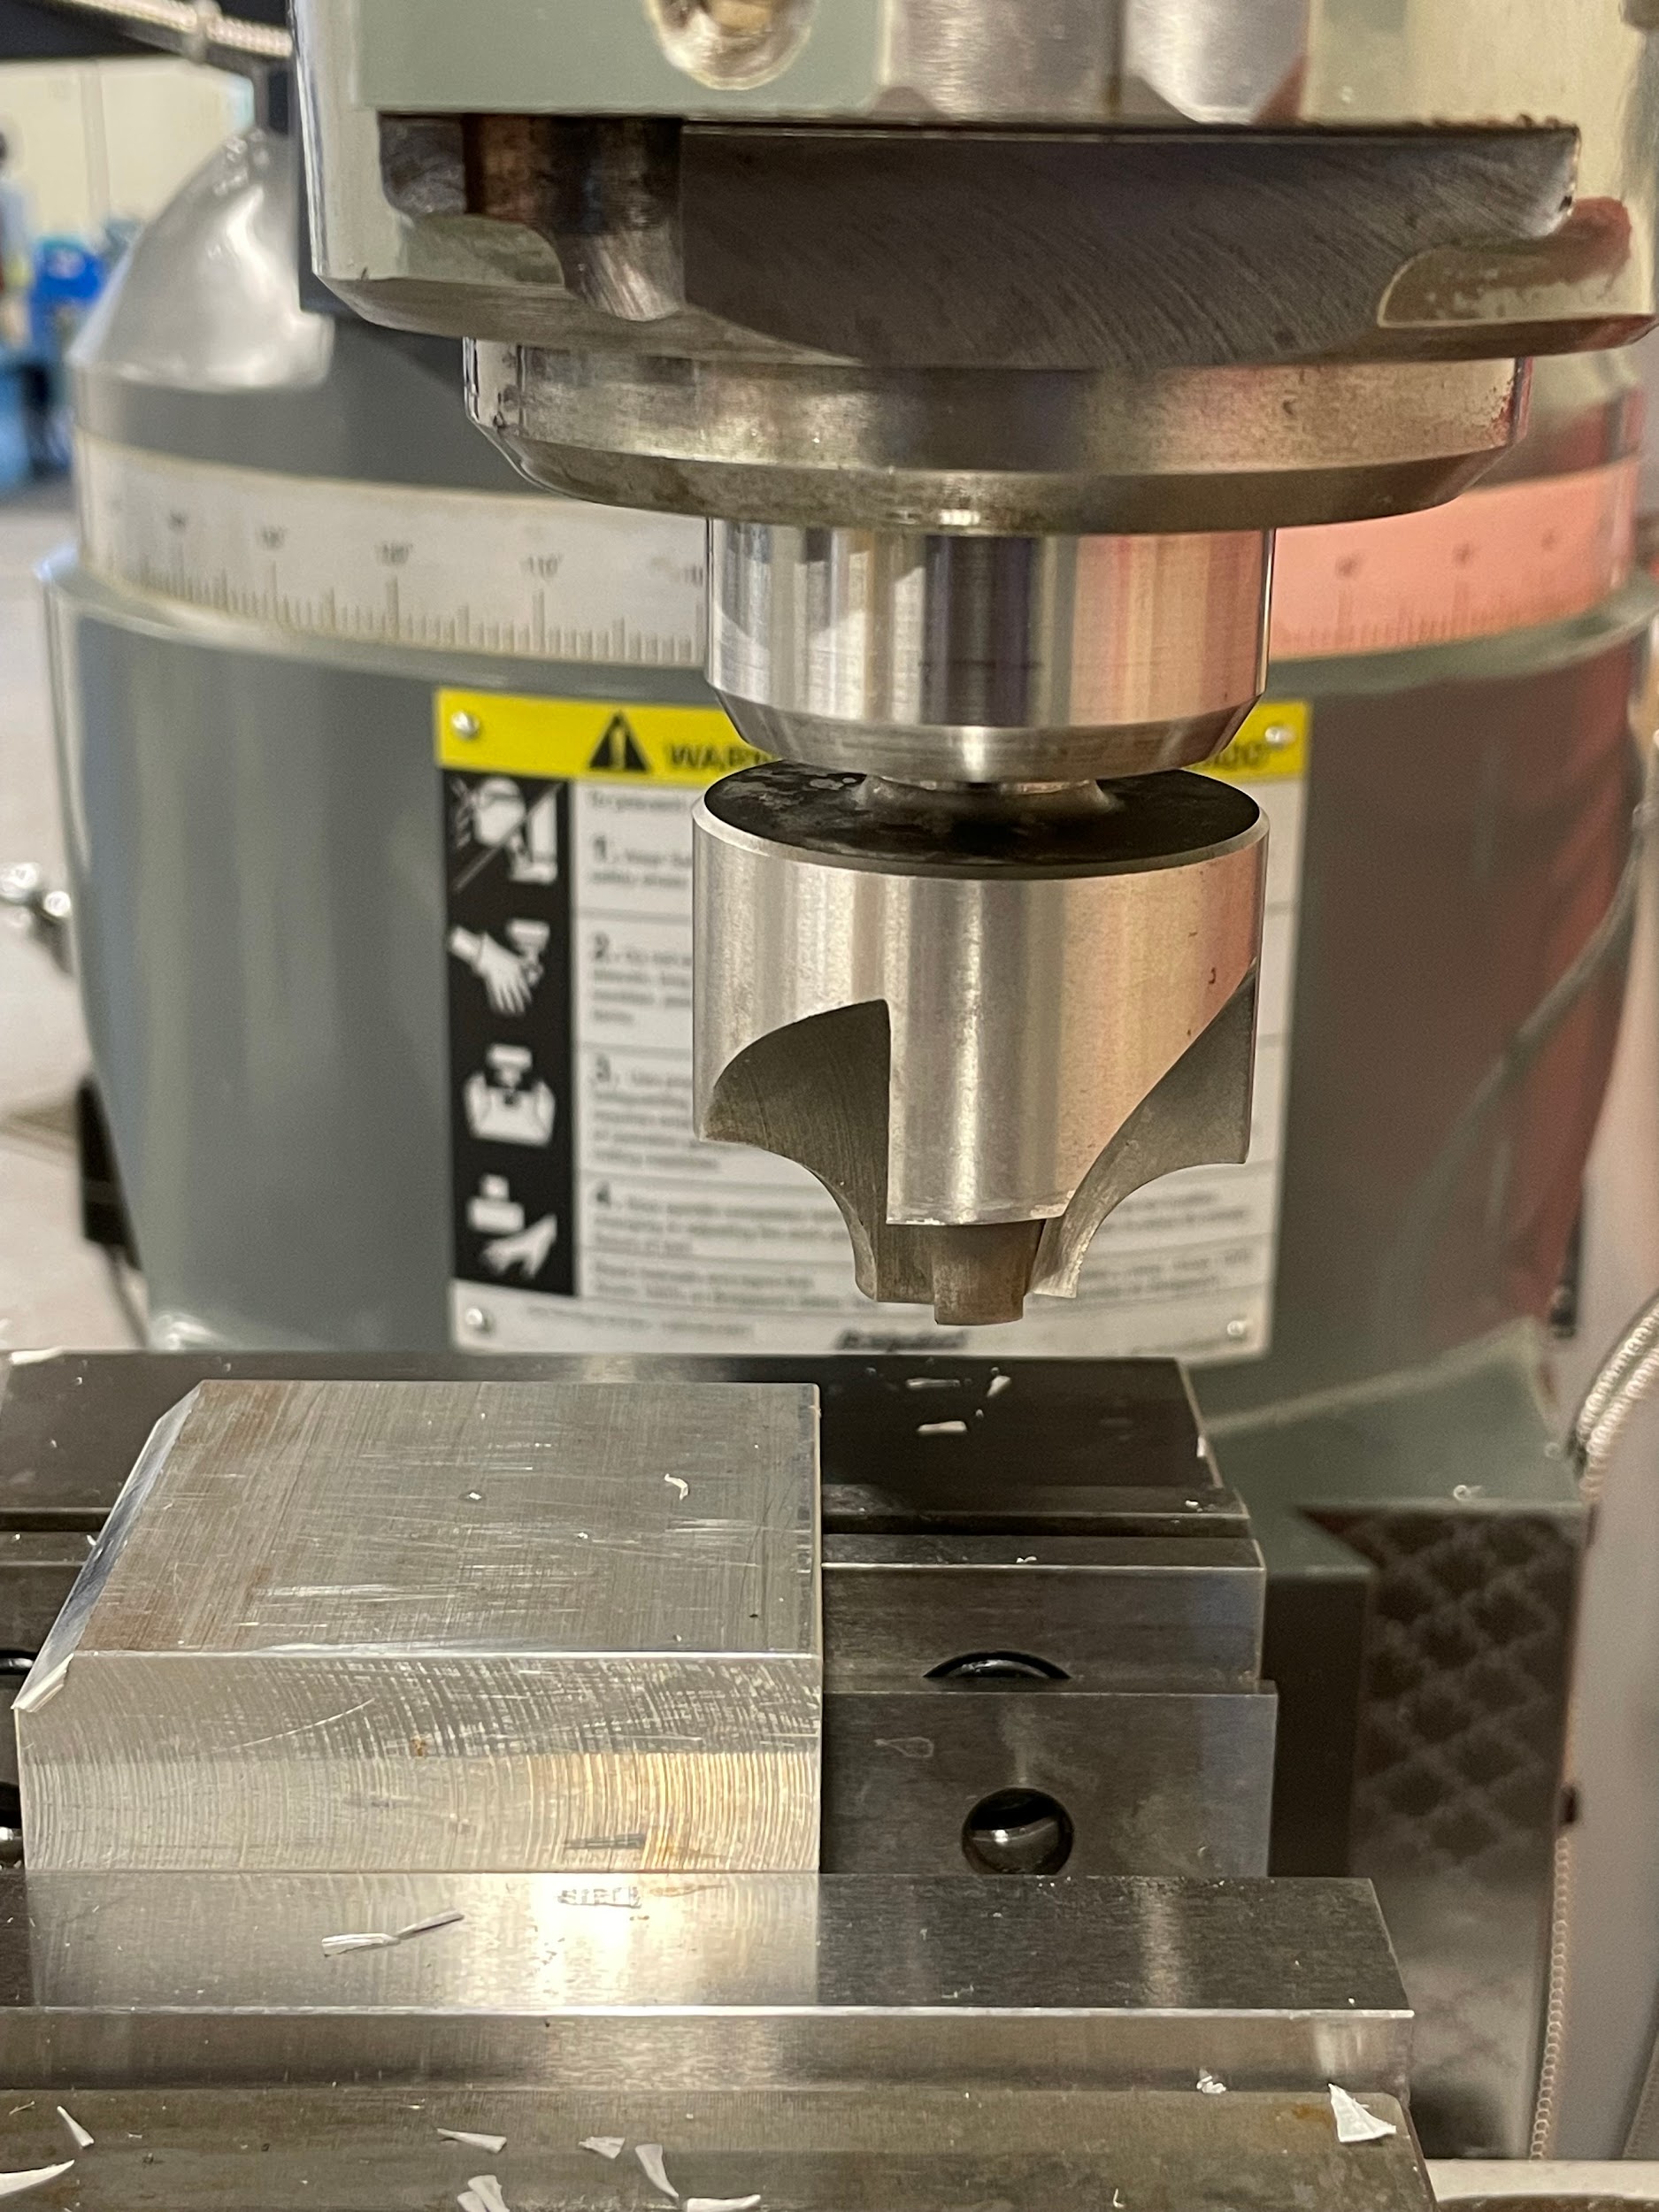
“Step 3-1-1: Touch the flat edge of the tool to the face of the work using the knee and a feeler gage.“
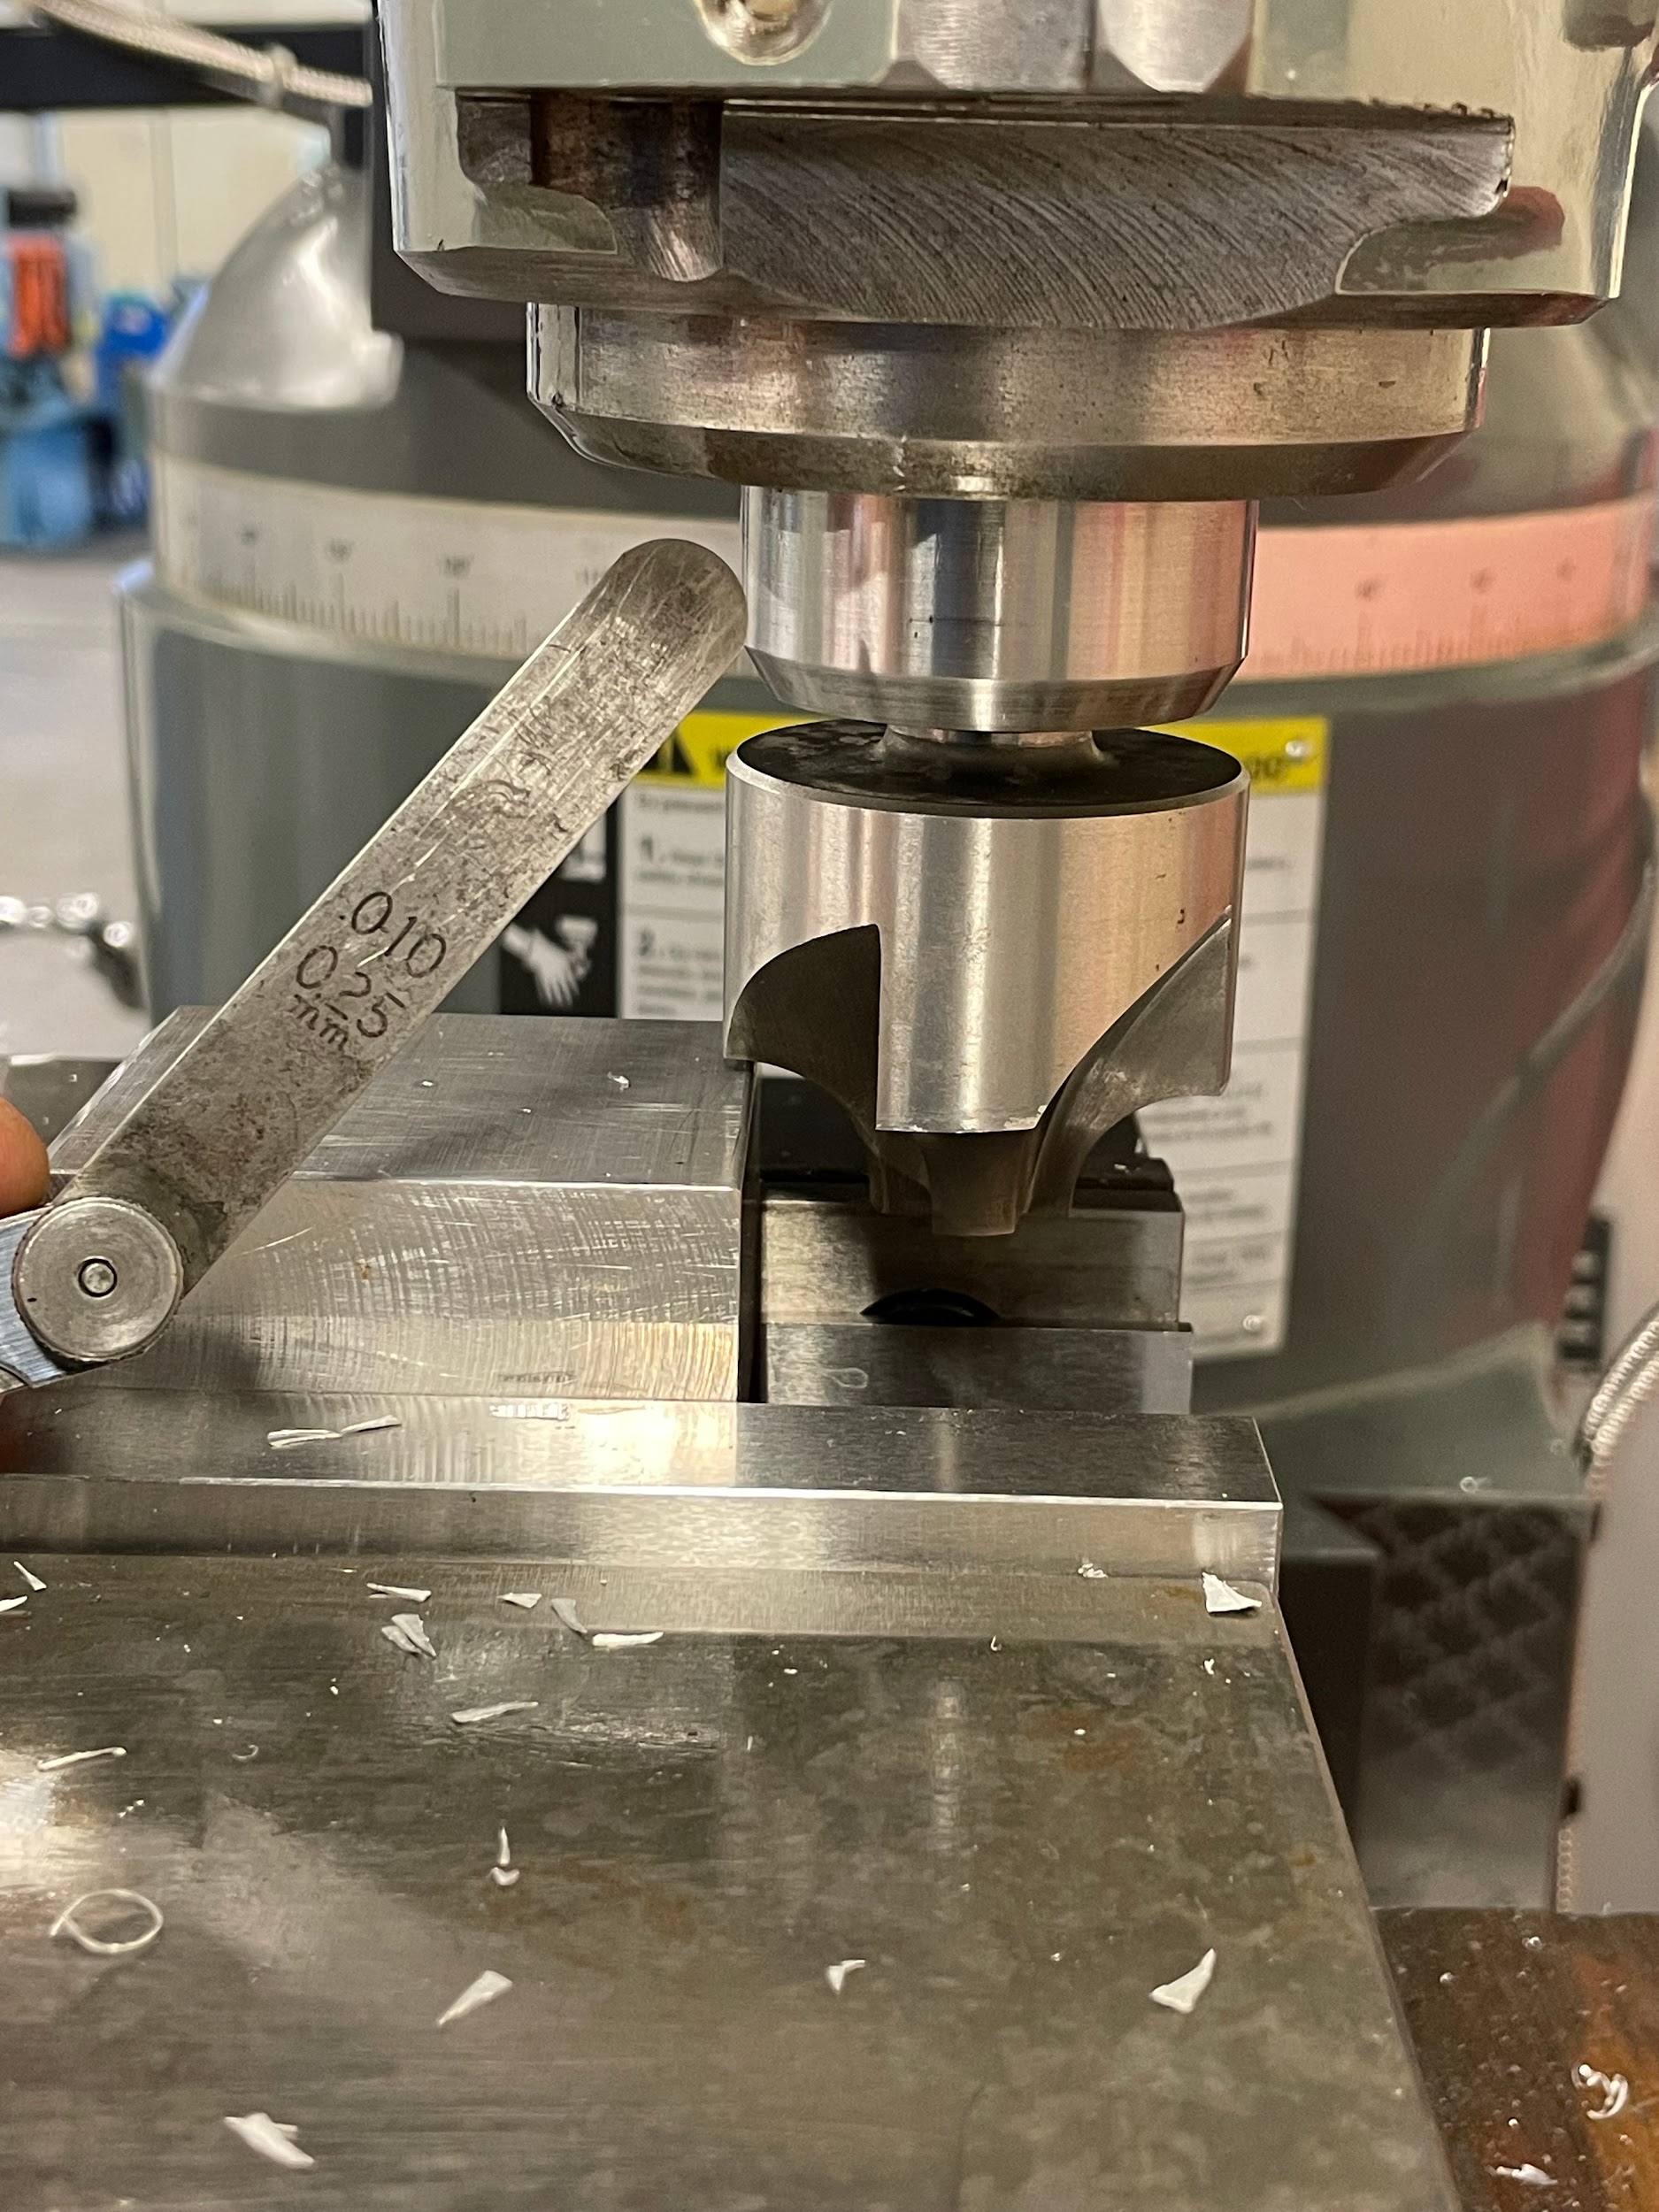
“Step 3-1-1: Touch the flat edge of the tool to the face of the work using the knee and a feeler gage.“
“Step 5: Lube the tool.“
“Step 9: Similarly, perform the remaining cuts while making depth changes with the handwheels toward their zero point.“
BORING
What is it?
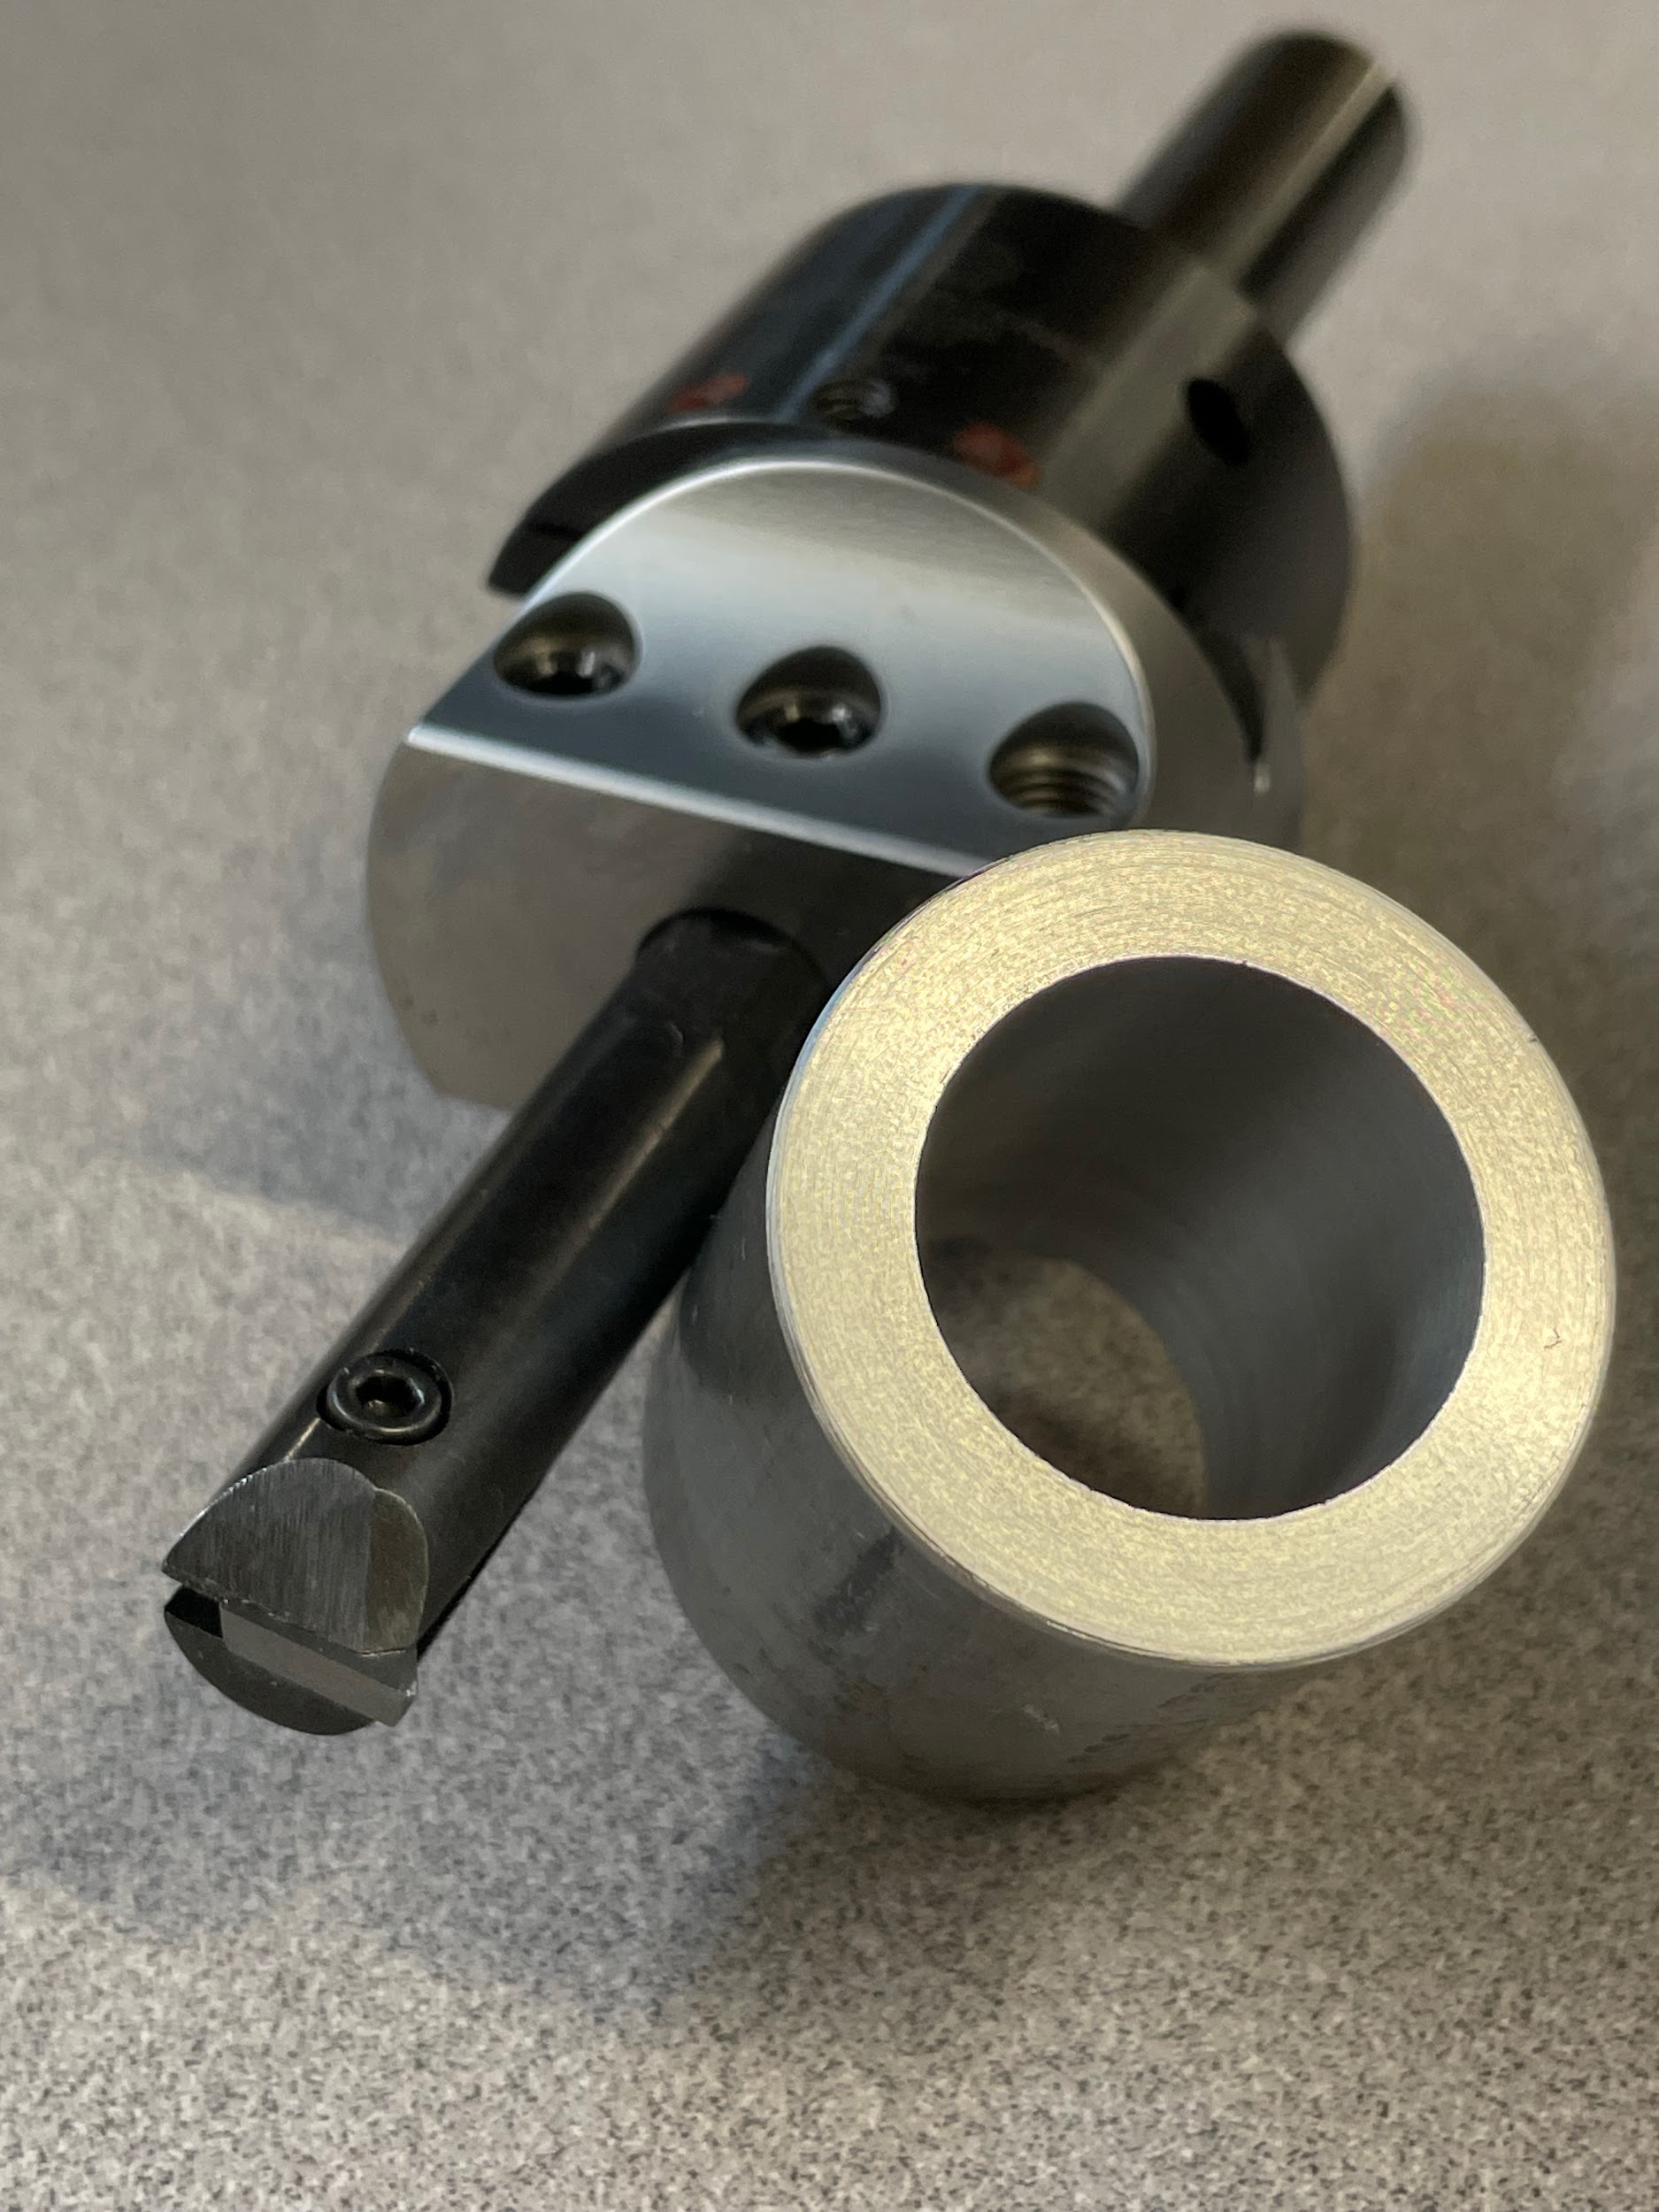
Boring is the process of enlarging a previously drilled hole using a tool called a boring head. Boring a hole is often used when a straighter, more accurate hole is needed or a larger hole is required than twist drills are available for. Unlike most hole-making procedures that can walk as the cut is being made because of tool flexibility, a bored hole is straight and true to the spindle axis of the milling machine.
Step by step process for boring:
- Edgefind and position the machine at the center of the hole.
- Lock the table and saddle movement.
- Drill the largest hole possible at the center of the bore layout. Removing material through drilling is much quicker than boring.
- Install a boring head into the milling machine.
- Install a boring bar into the appropriate hole in the boring head and secure it with the set screw.
- Raise the knee to where, when the quill is at the top of travel, there is about ½ of space between the tool and the work.
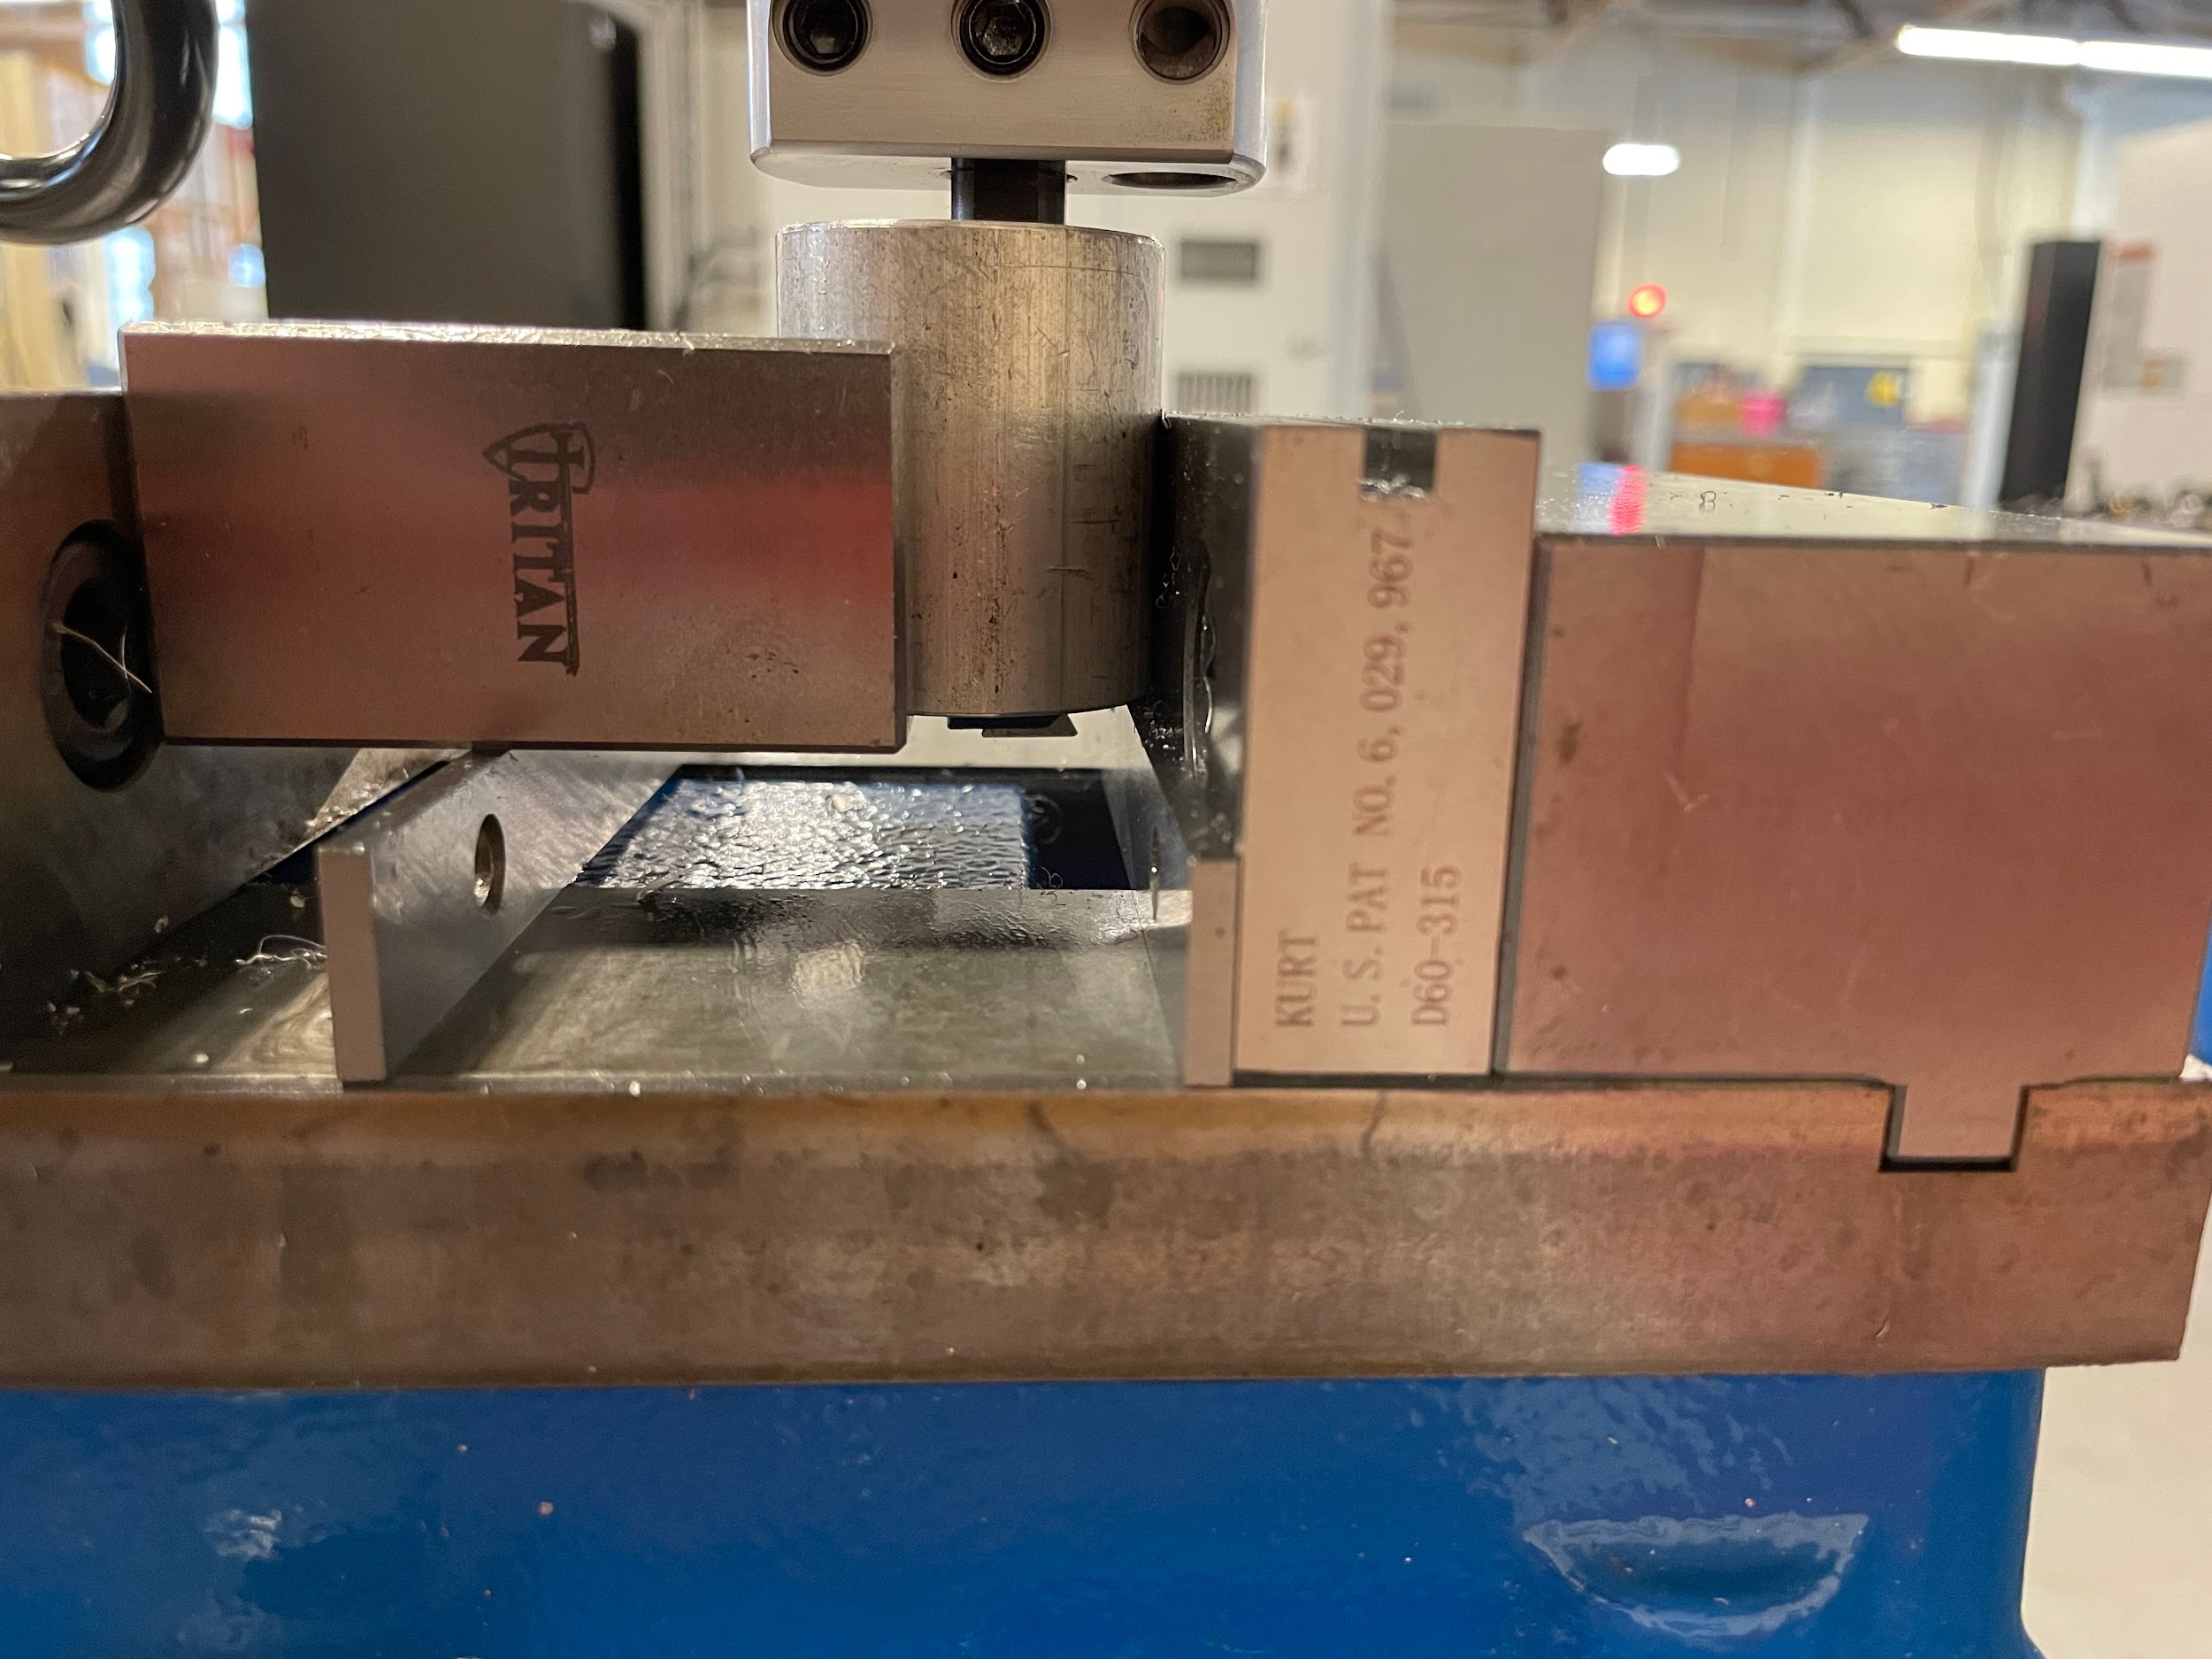
- Pull the quill handle down to where the tool is sticking through the hole by about ⅛” and set the quill stop.
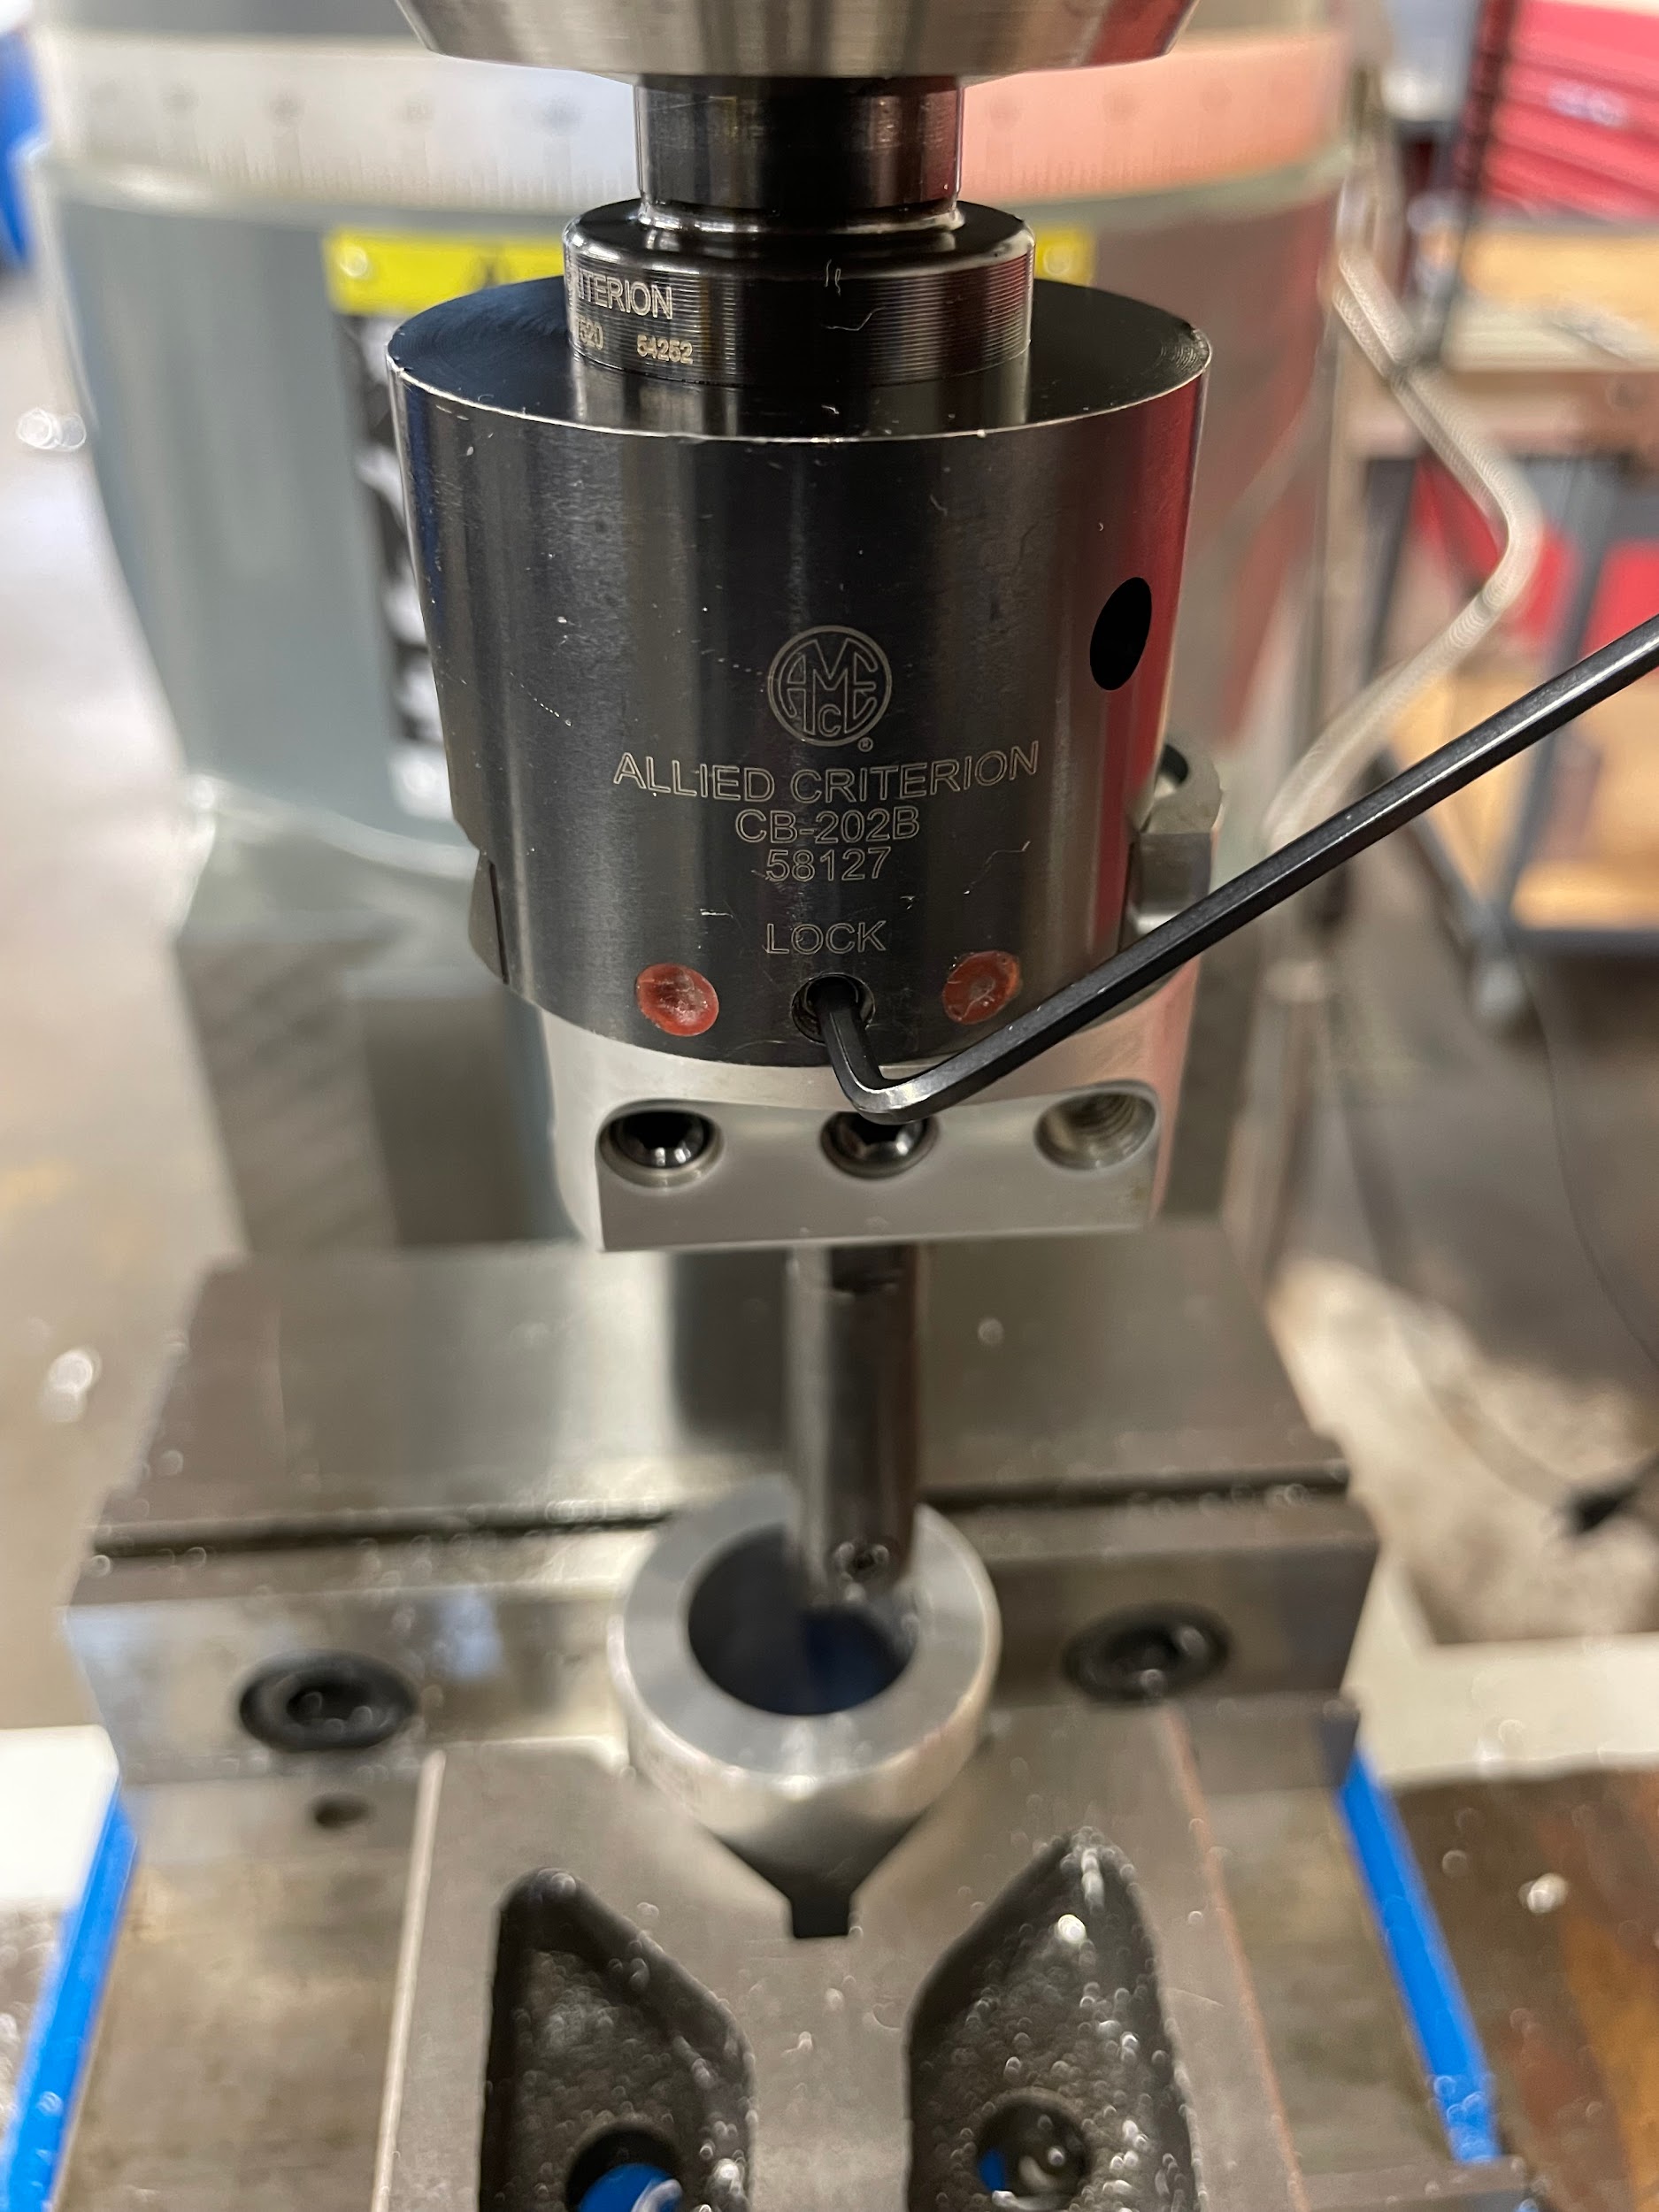
- Adjust the boring head so that the cutting edge of the bar slightly touches the drilled hole by loosening the lock on the dovetail and turning the hex in the dial face.
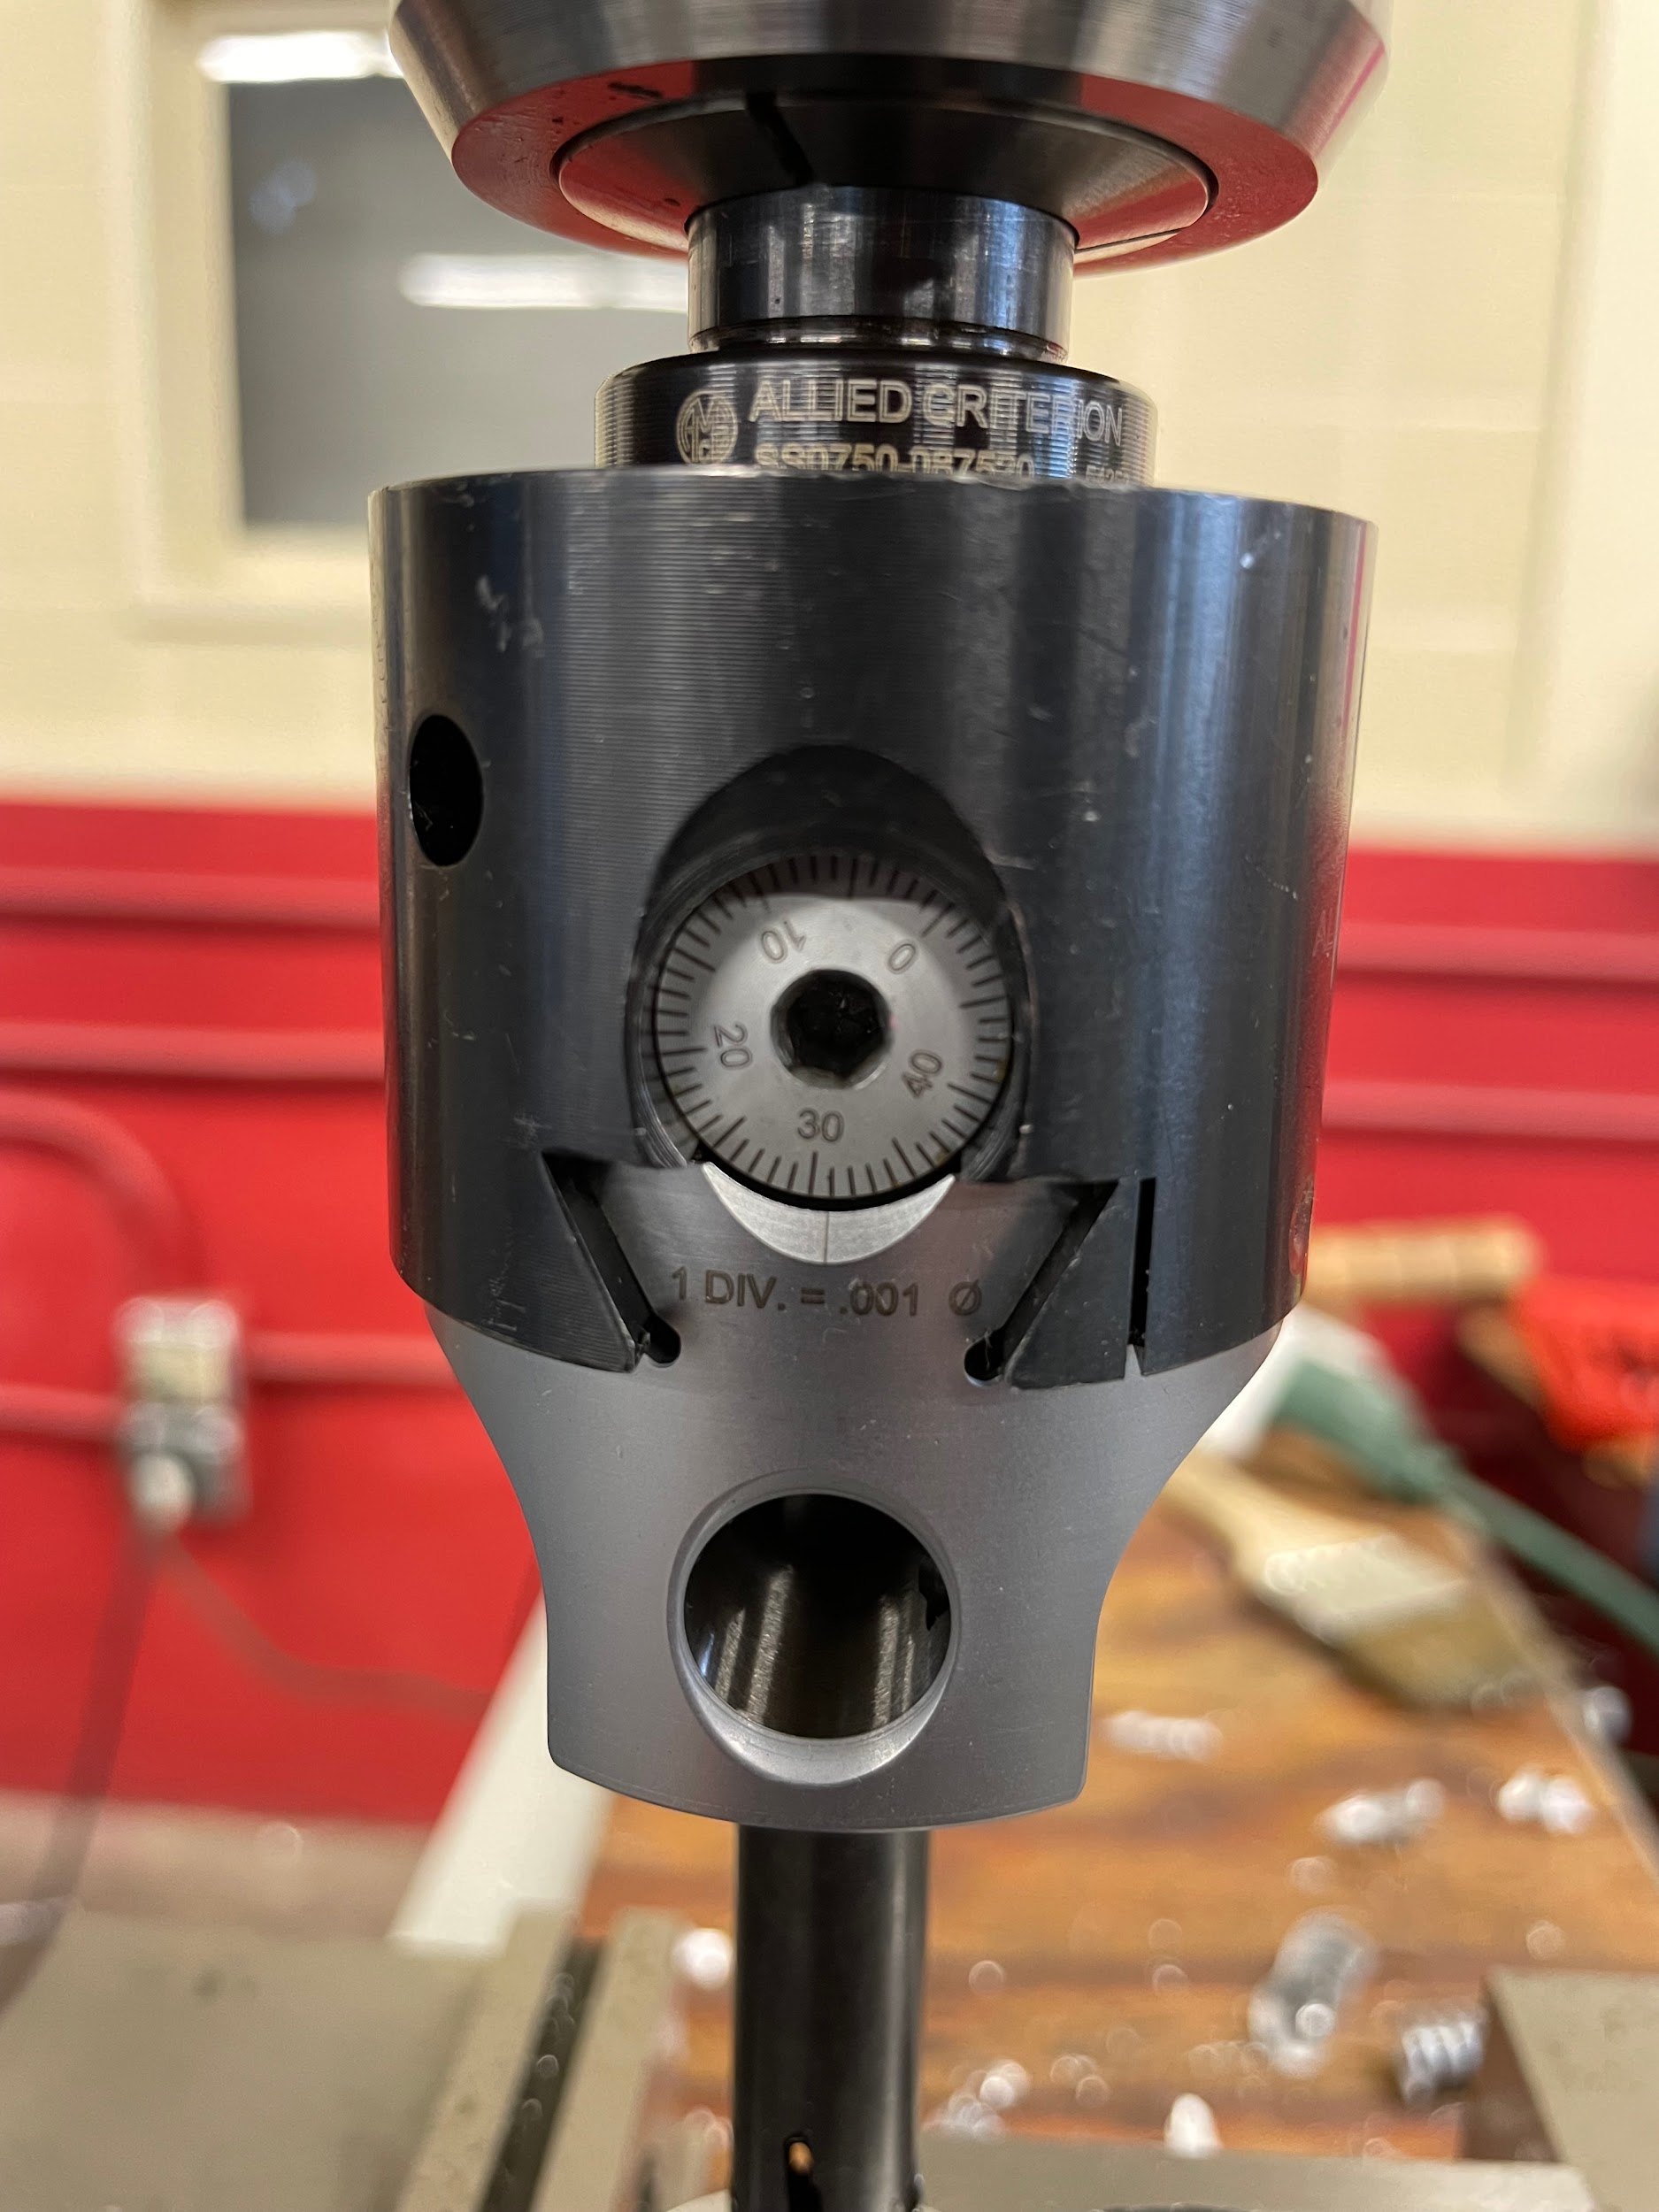
- Adjust the boring head to take an initial cut. Depths of cut for a boring head will vary based on material, cutter, and conditions. Roughing cuts may be .020-.050, whereas finishing cuts may be .003-.010 or less.
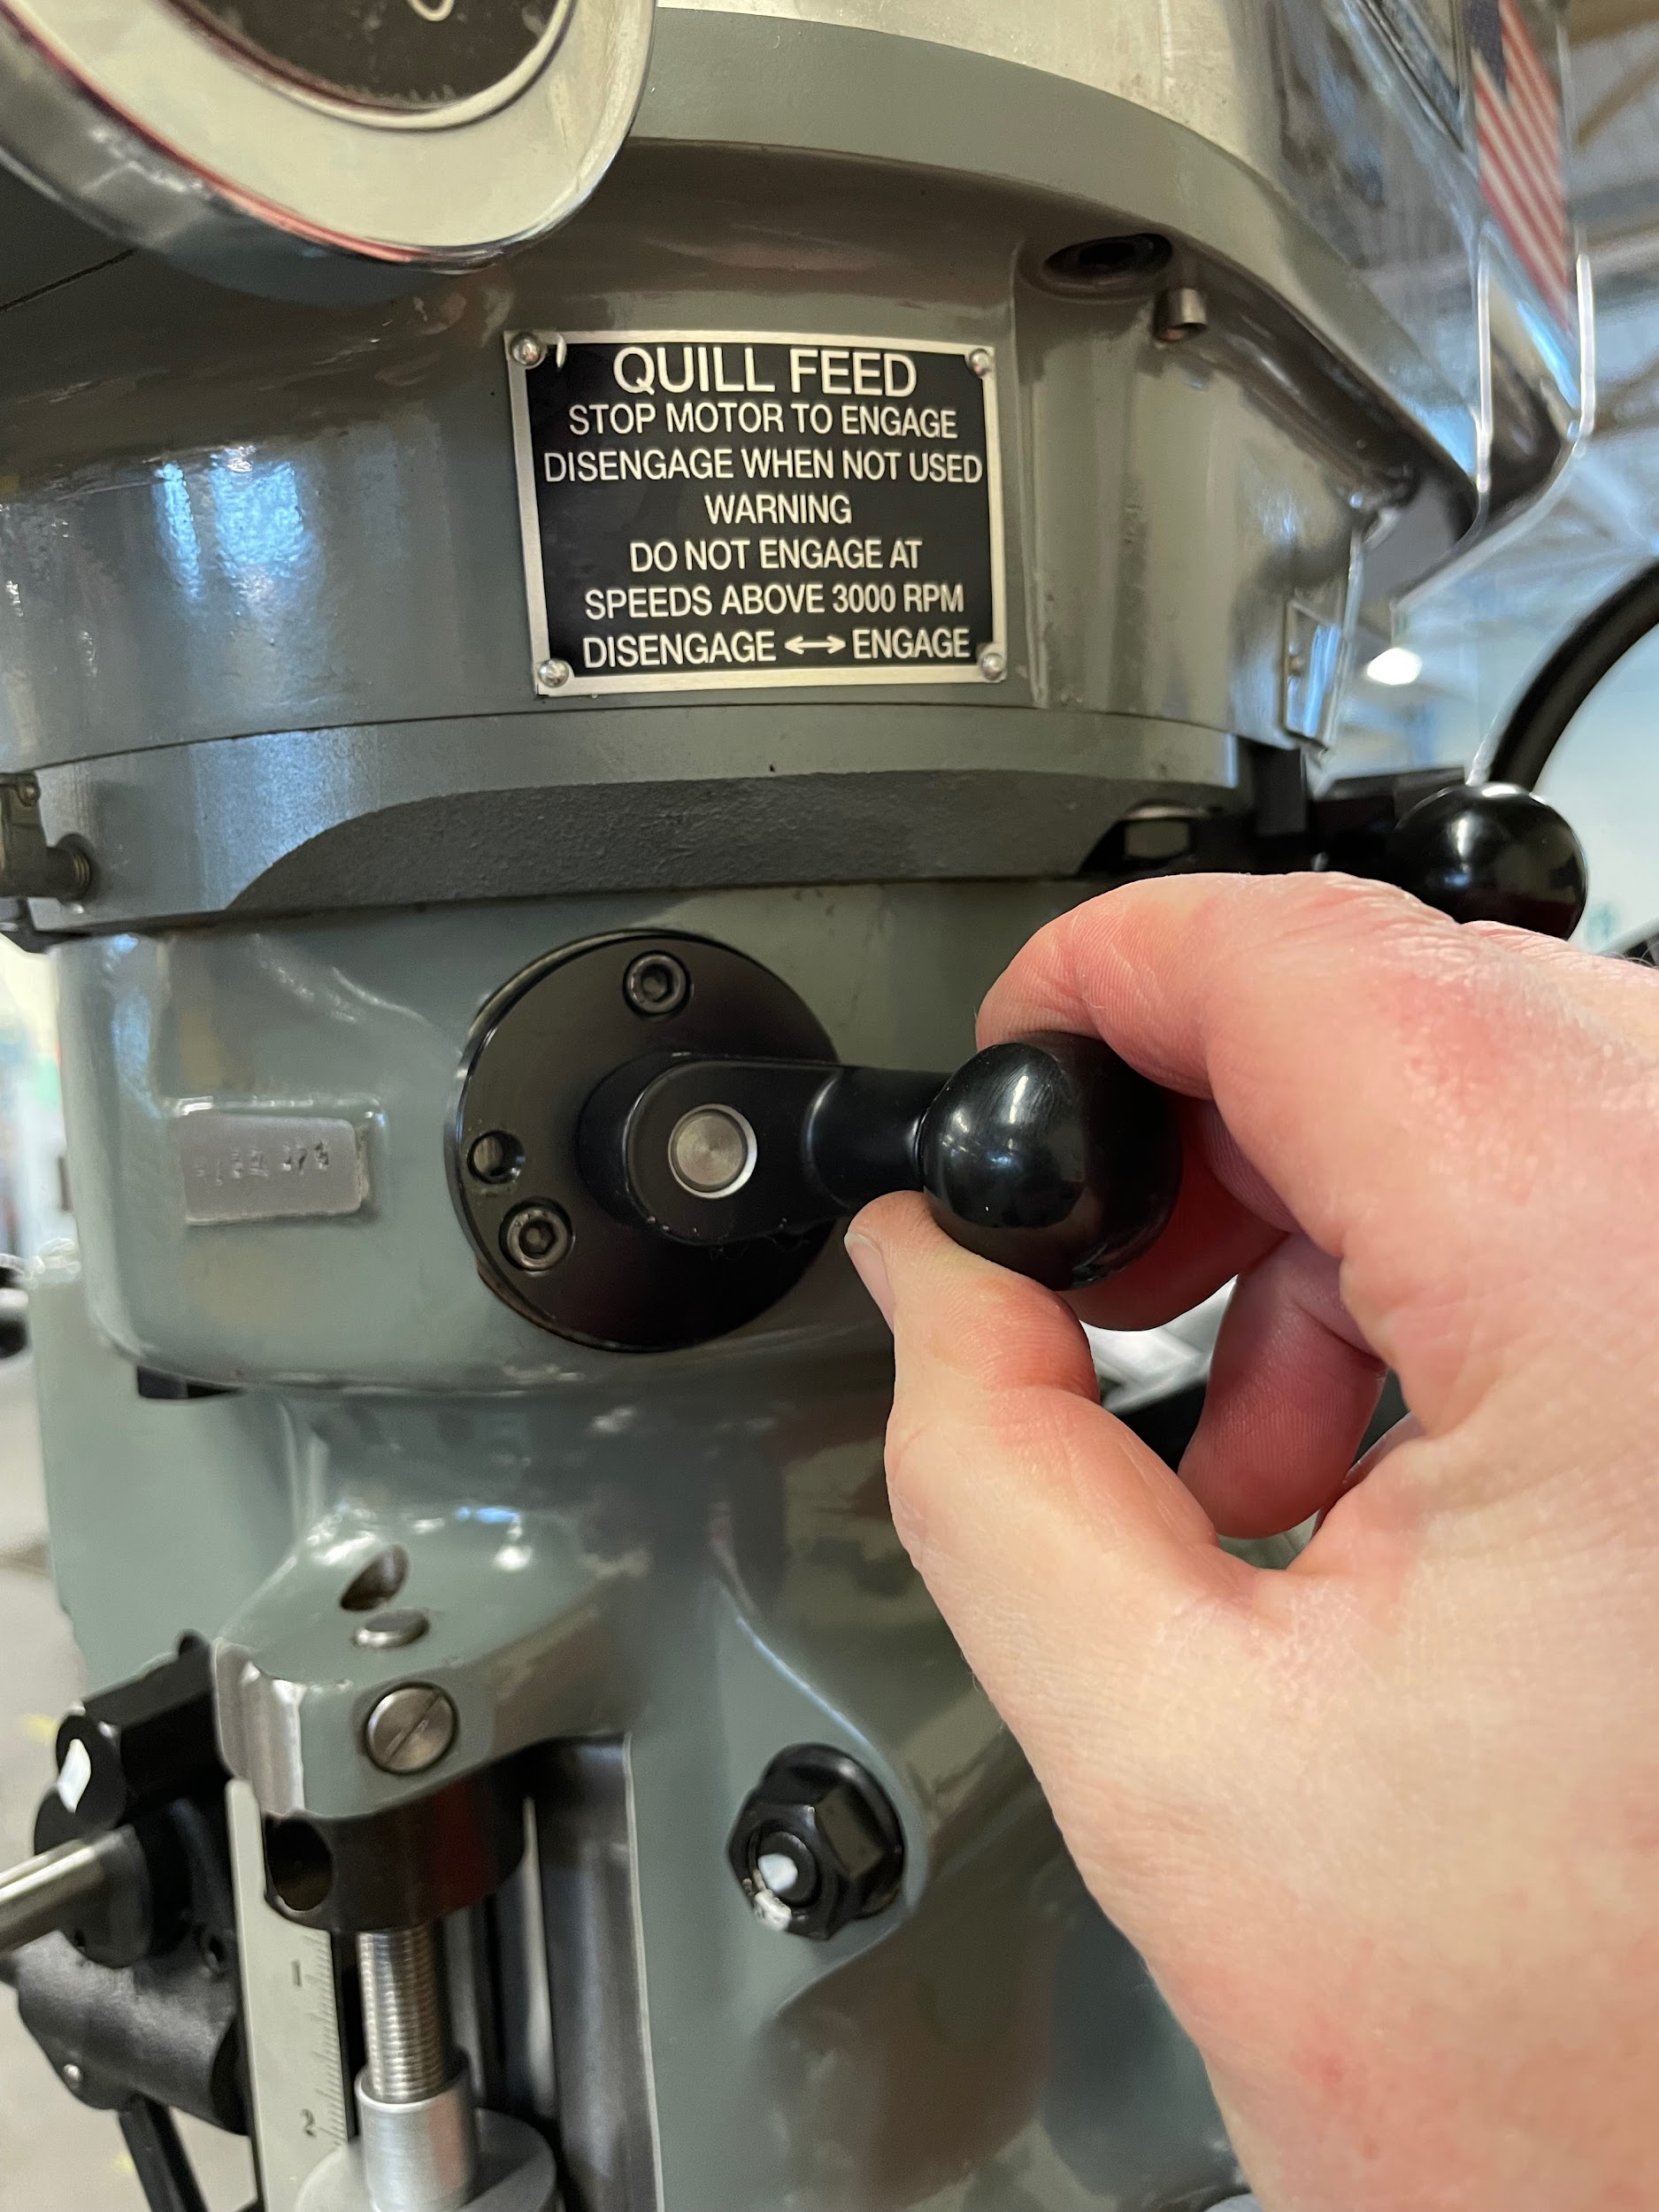
- Move the quill feed engagement knob, located on the right side of the head, from disengage to engage. This can only be accomplished while the spindle is off.
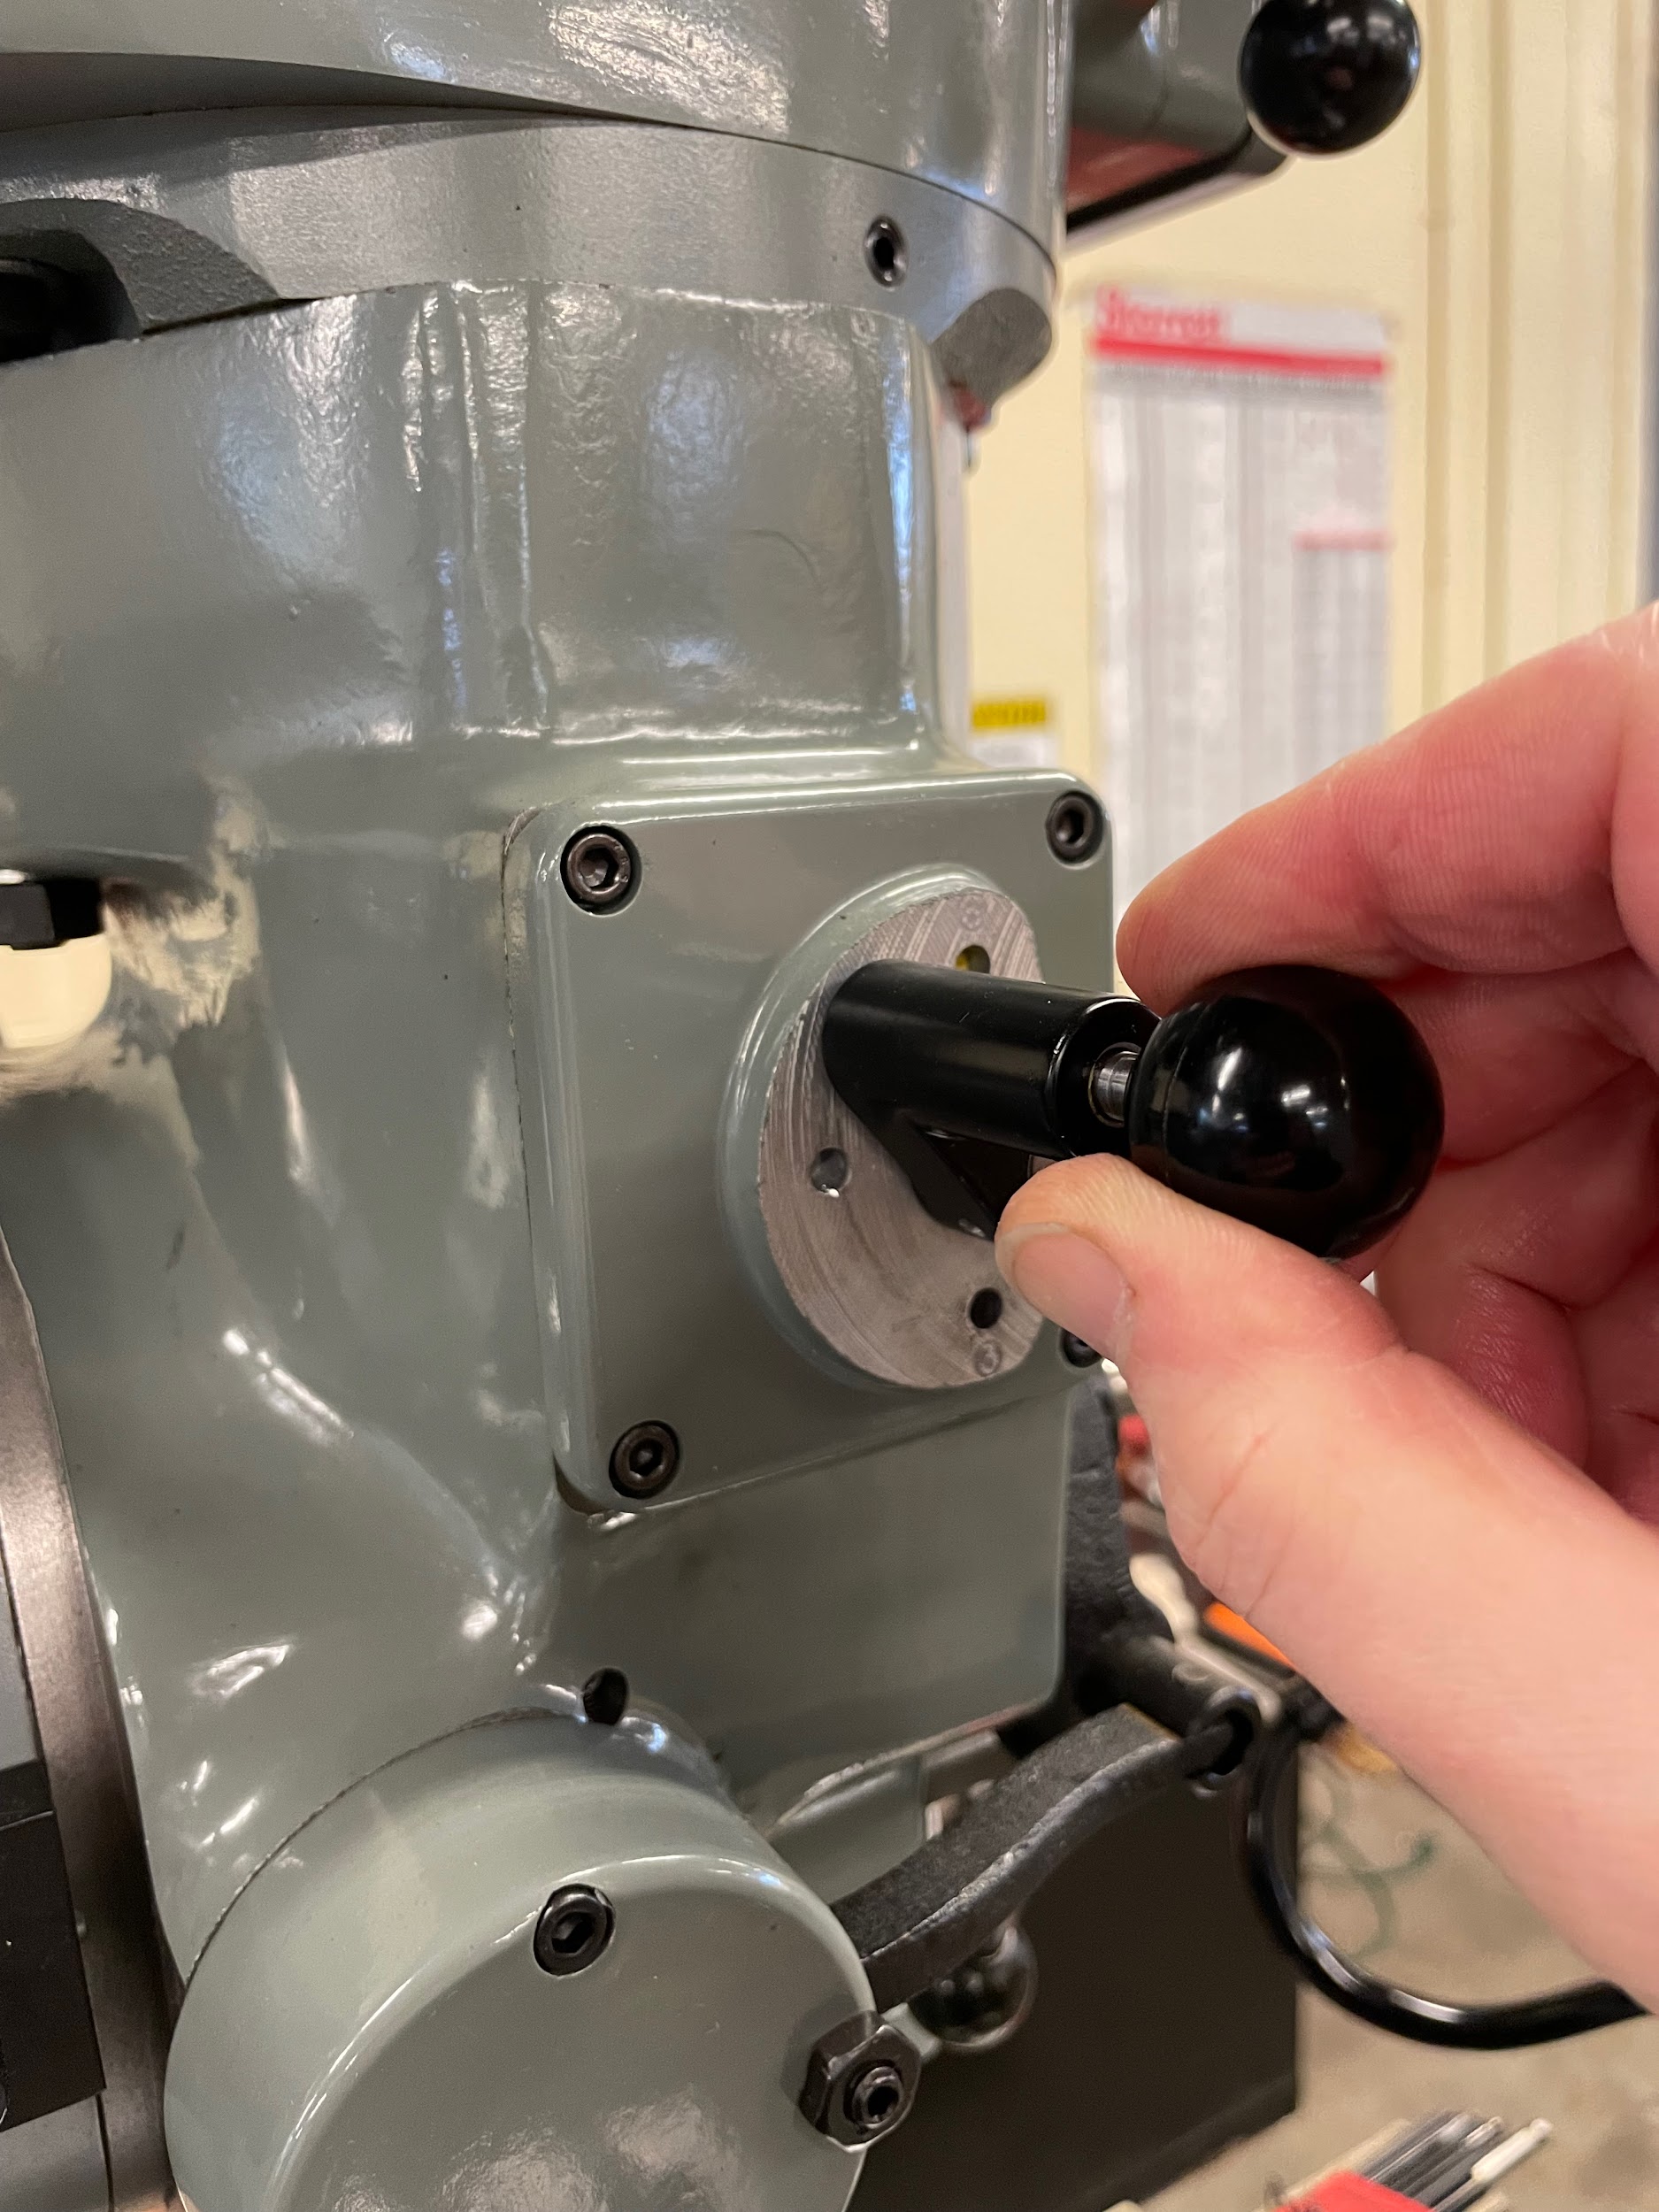
- Select the quill feed increment, in IPR, on the left side of the mill. Some are labeled .006, .003, and .0015, but some are just labeled high, medium, and low. This can also only be accomplished while the spindle is off.
- Lightly set the quill lock so the quill doesn’t automatically spring up on its own but so that it still moves as freely as possible.
- Calculate the spindle speed for the tool using the finished diameter of the hole.
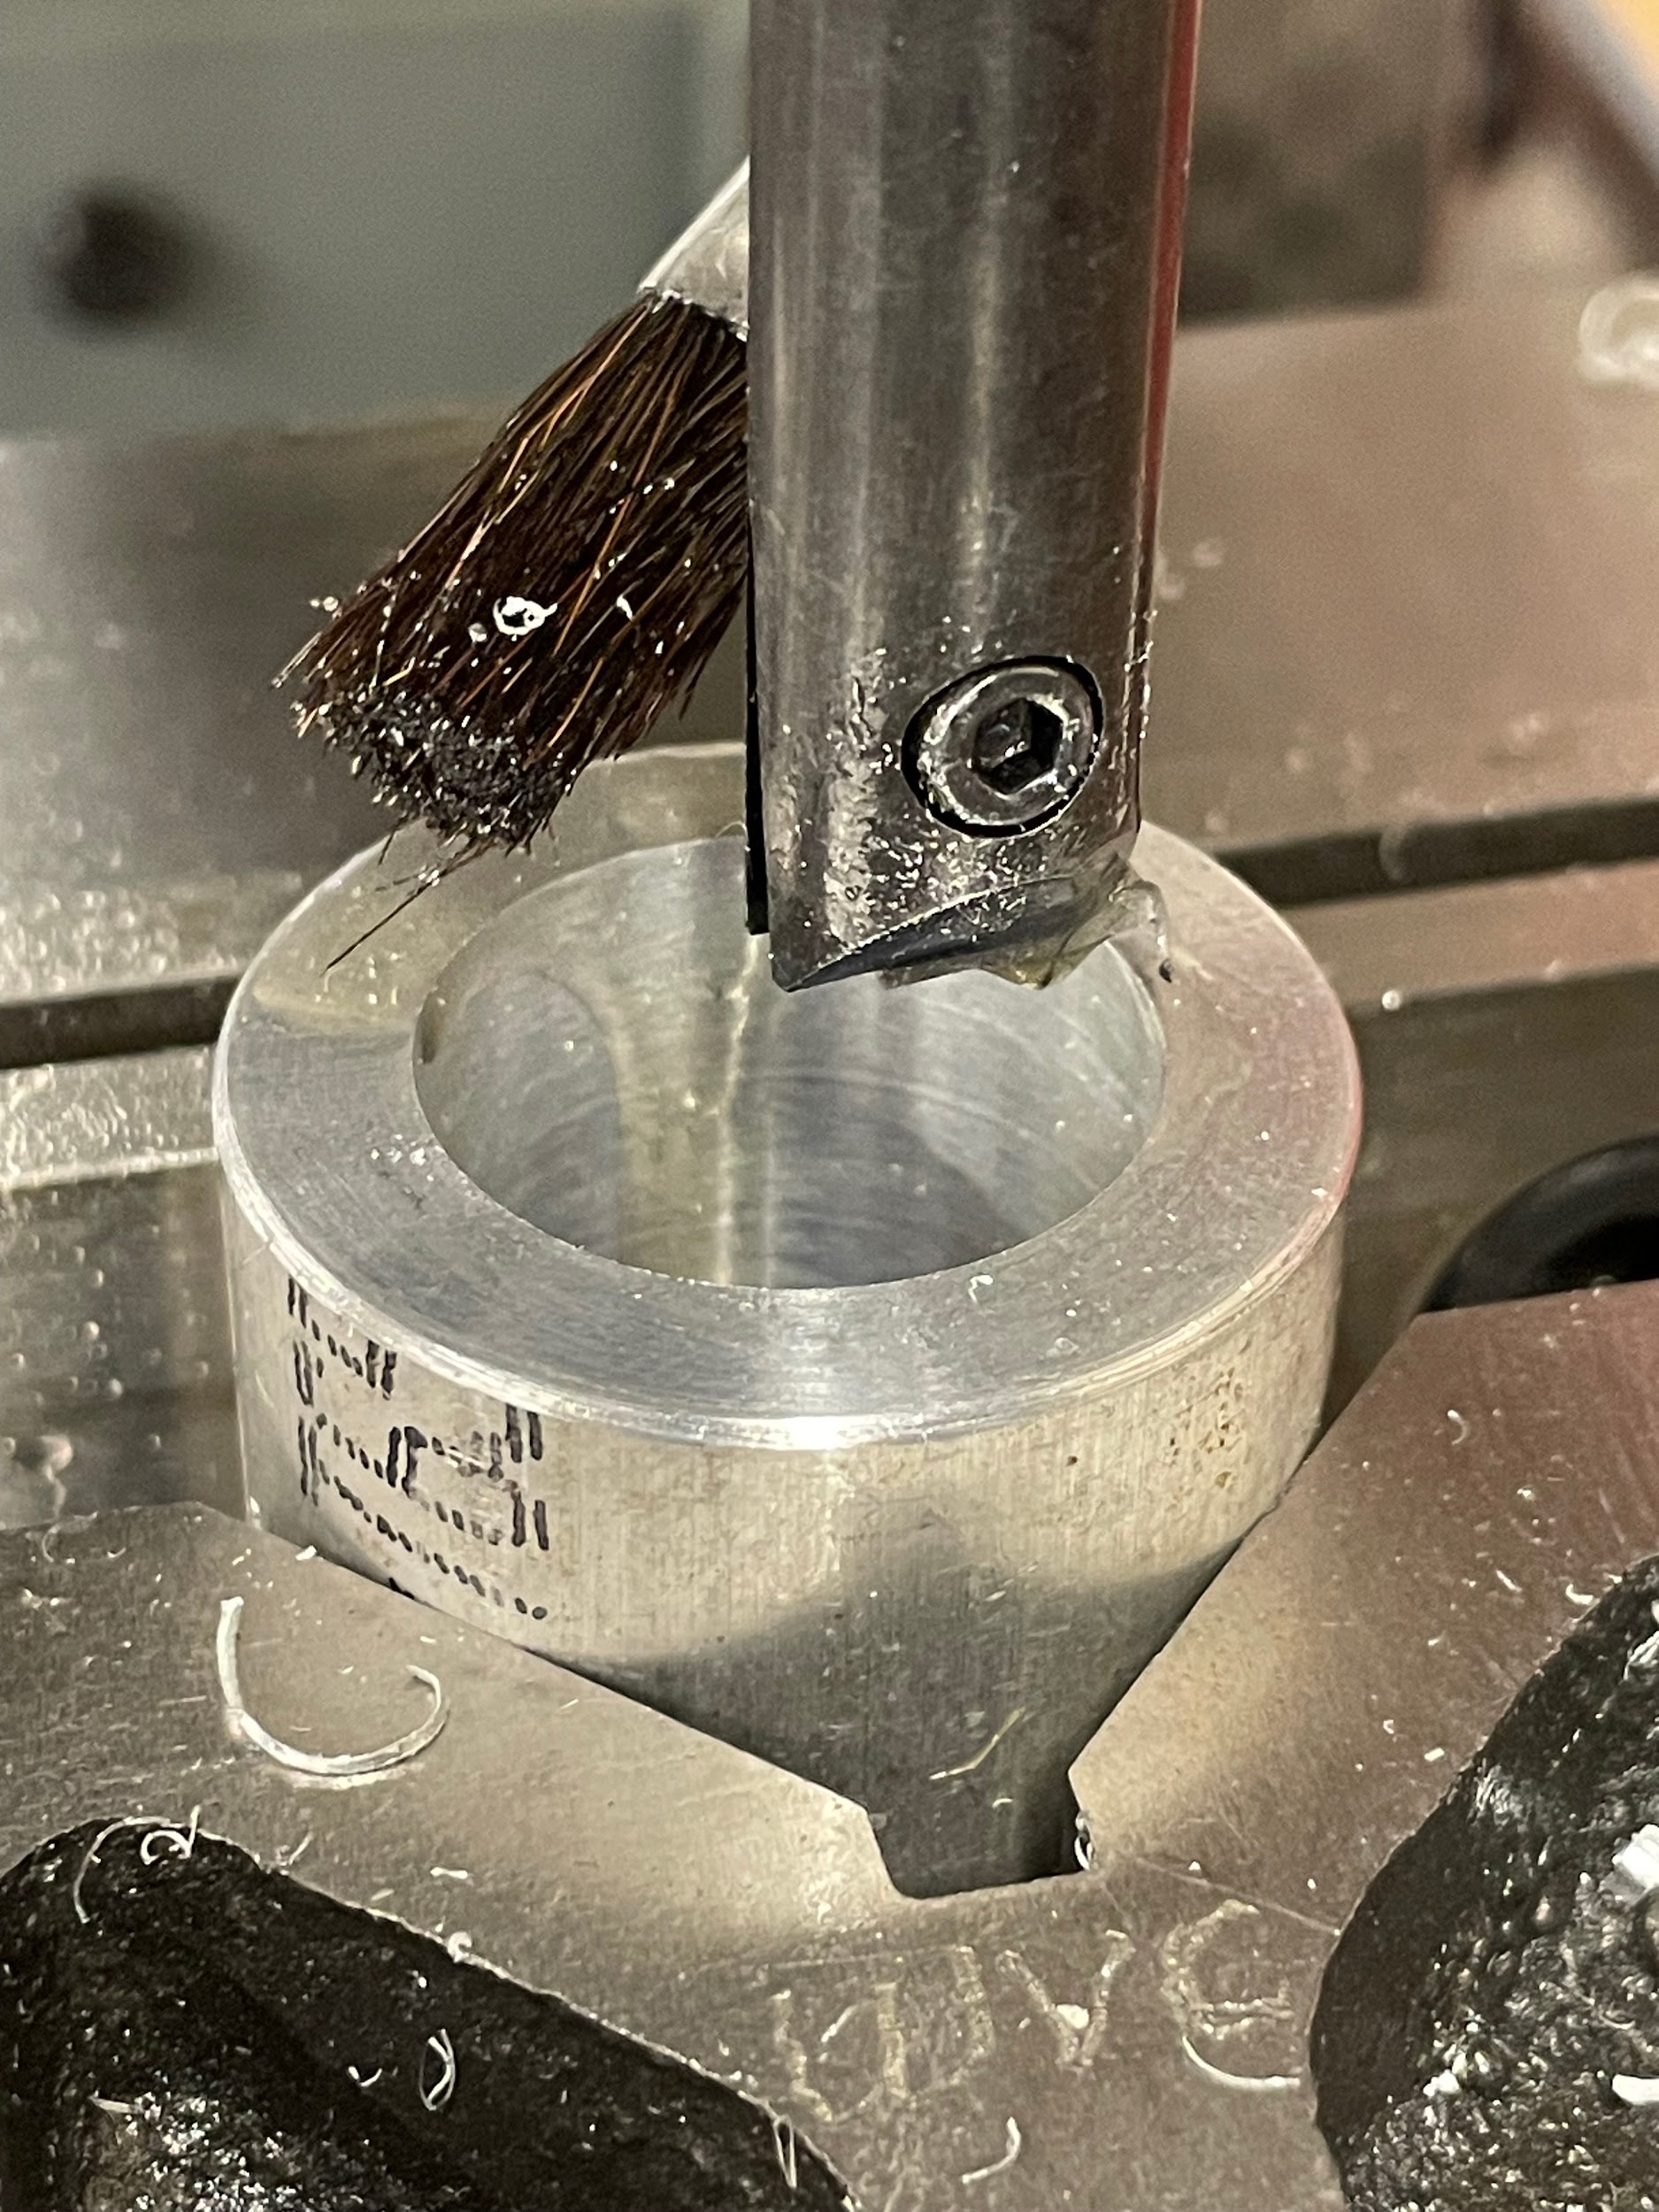
- Lube the hole.
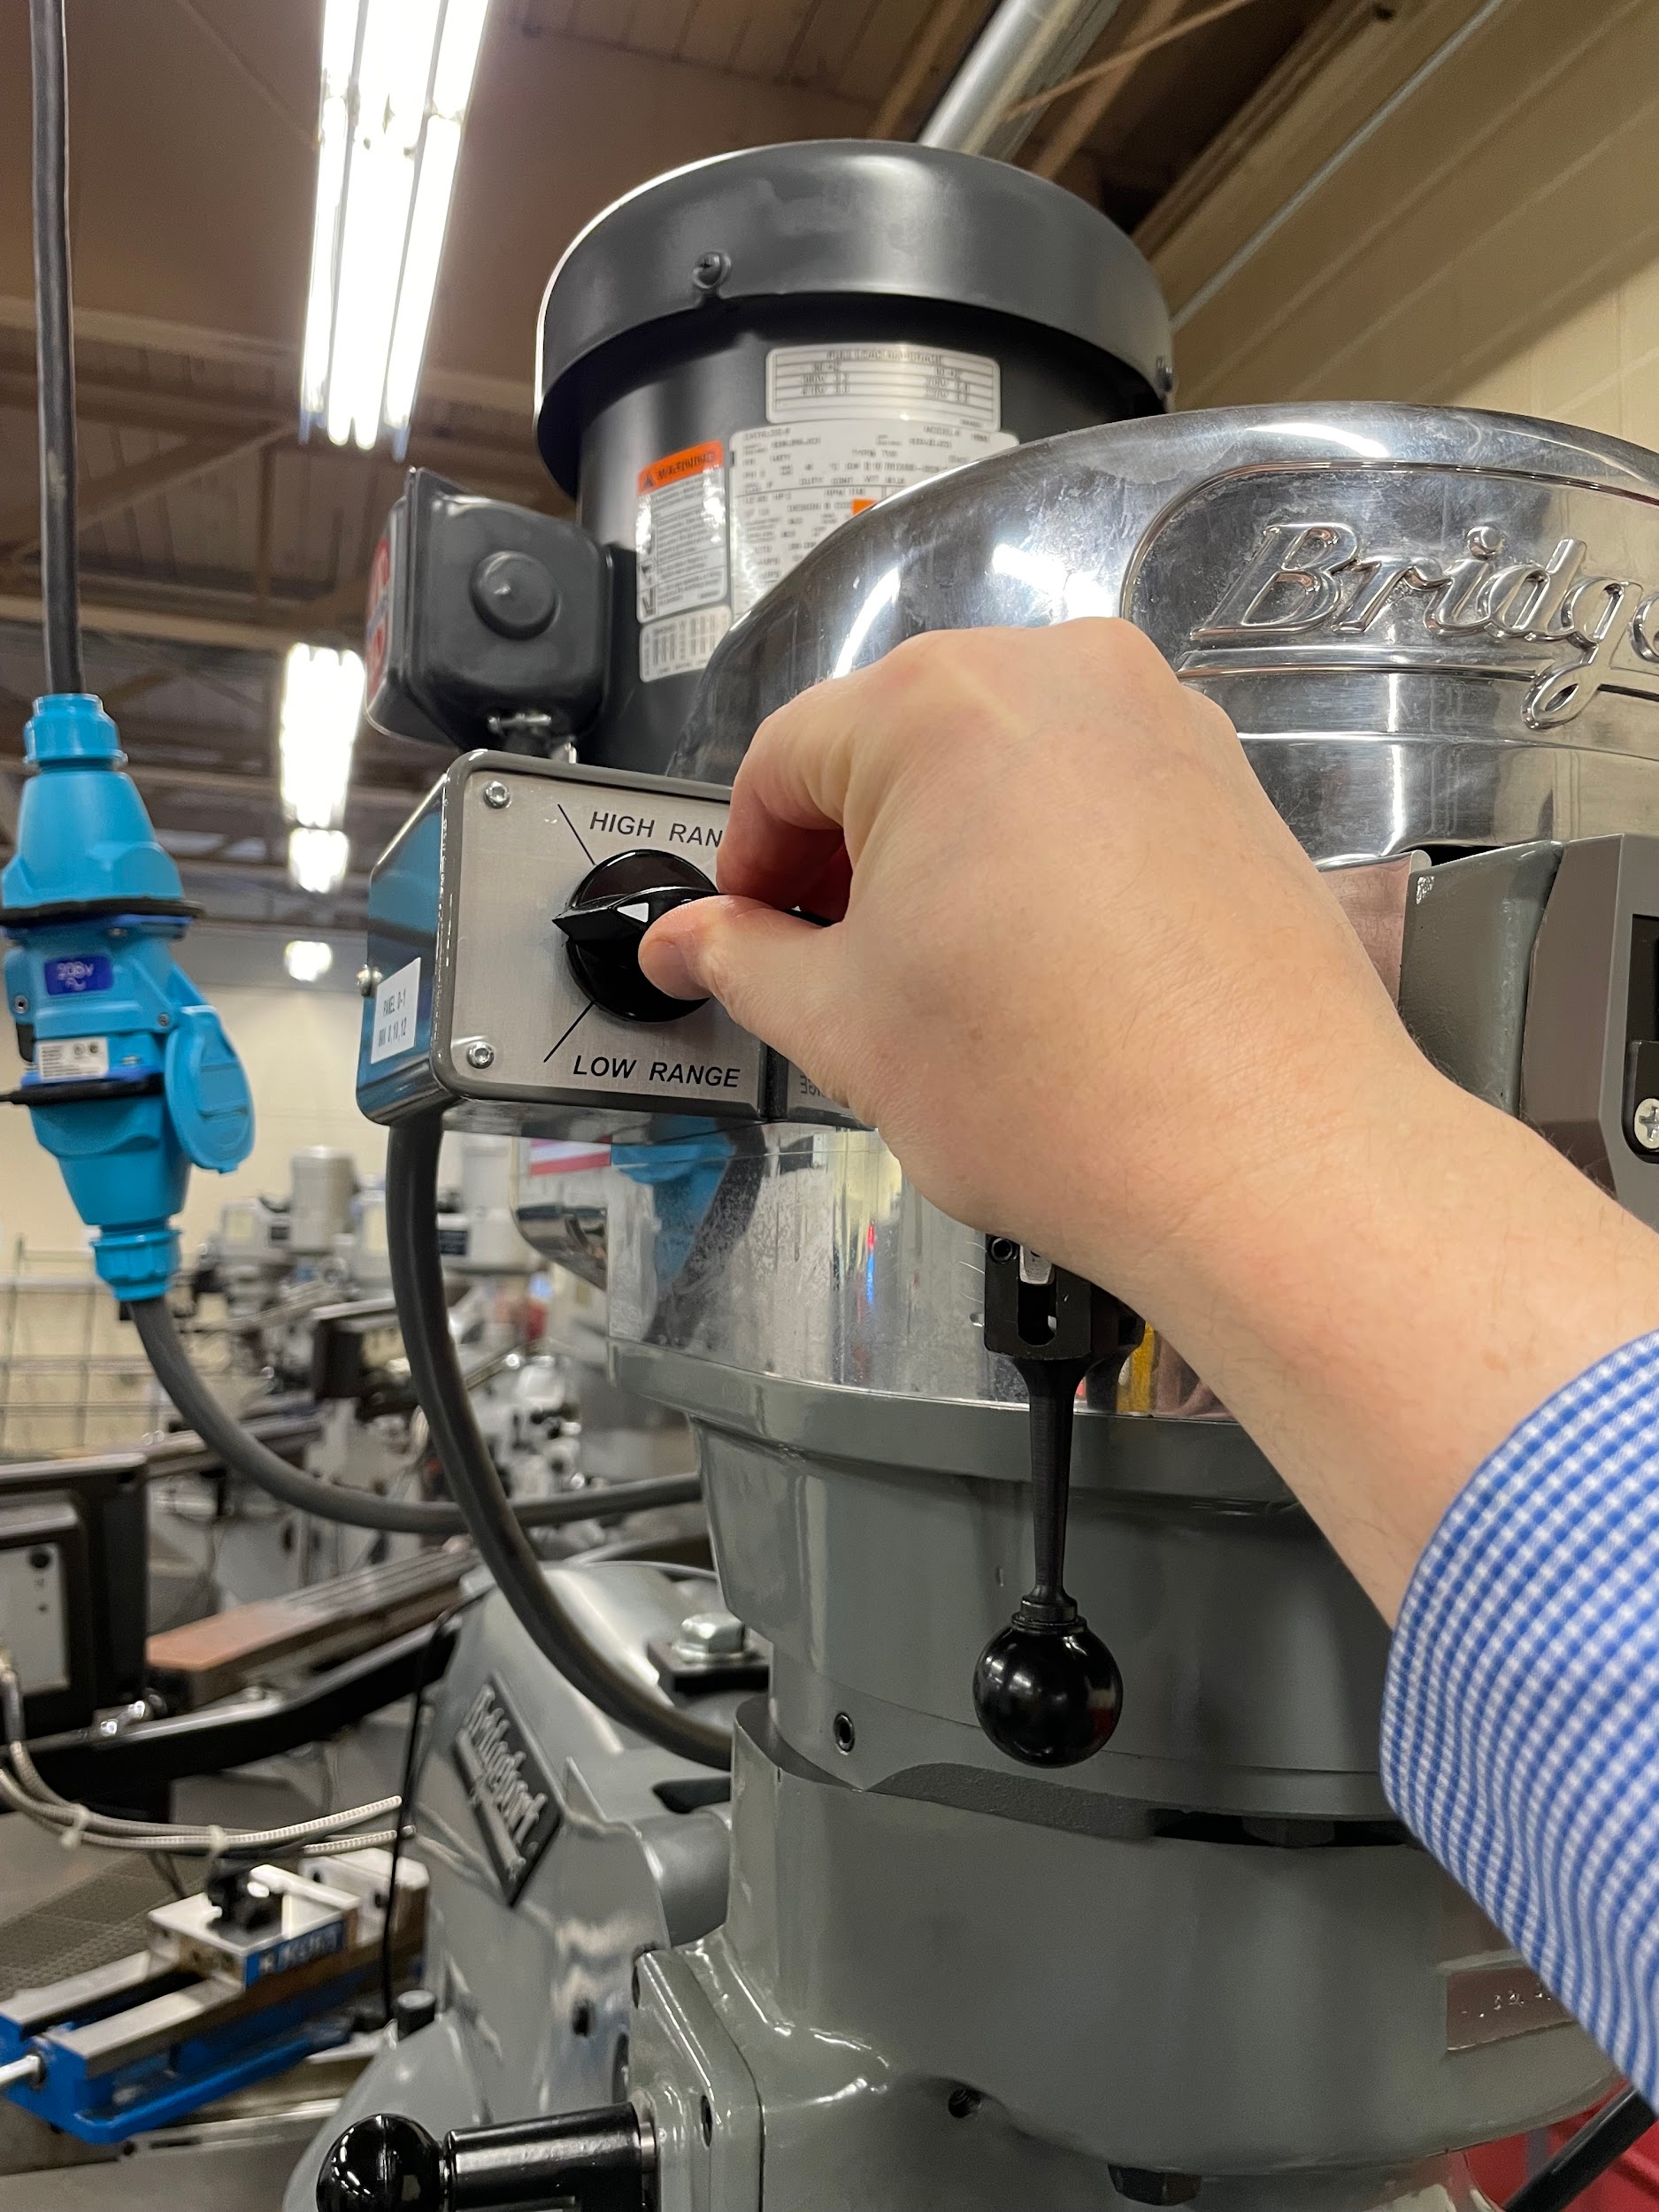
- Turn the spindle on and adjust the speed.
- In the middle of the quill fine feed handwheel, pull out or push in the engagement pin. This will set the quill feed to move either up or down.
- Now pull and briefly hold the quill feed lever on the left side of the head to start the automatic quill engagement.
- The machine will automatically feed the tool through the hole until it reaches the stop on the opposite side. At that point, the quill feed will disengage.
- Turn off the spindle.
- Manually pull the quill up through the hole. Pulling out in this fashion will keep the tool from cutting extra material on the upstroke and potentially oversizing the hole. Pulling out in this way will also indicate the amount of bar deflection during roughing passes when examining the scored line on the side of the bore. On a finish pass, the machine should be moved, or the head adjusted so scoring is absent.
- Measure the bored hole and calculate remaining material removal.
- Adjust the boring head and take additional cuts to bring the bore to size.
- Clean and inspect the feature.
- When finished, return the quill feed engagement pin and knob to their disengaged positions.
- Remove the boring head from the spindle, clean, and return it to storage.
“Step 3: Drill the largest hole possible at the center of the bore layout. Removing material through drilling is much quicker than boring.“
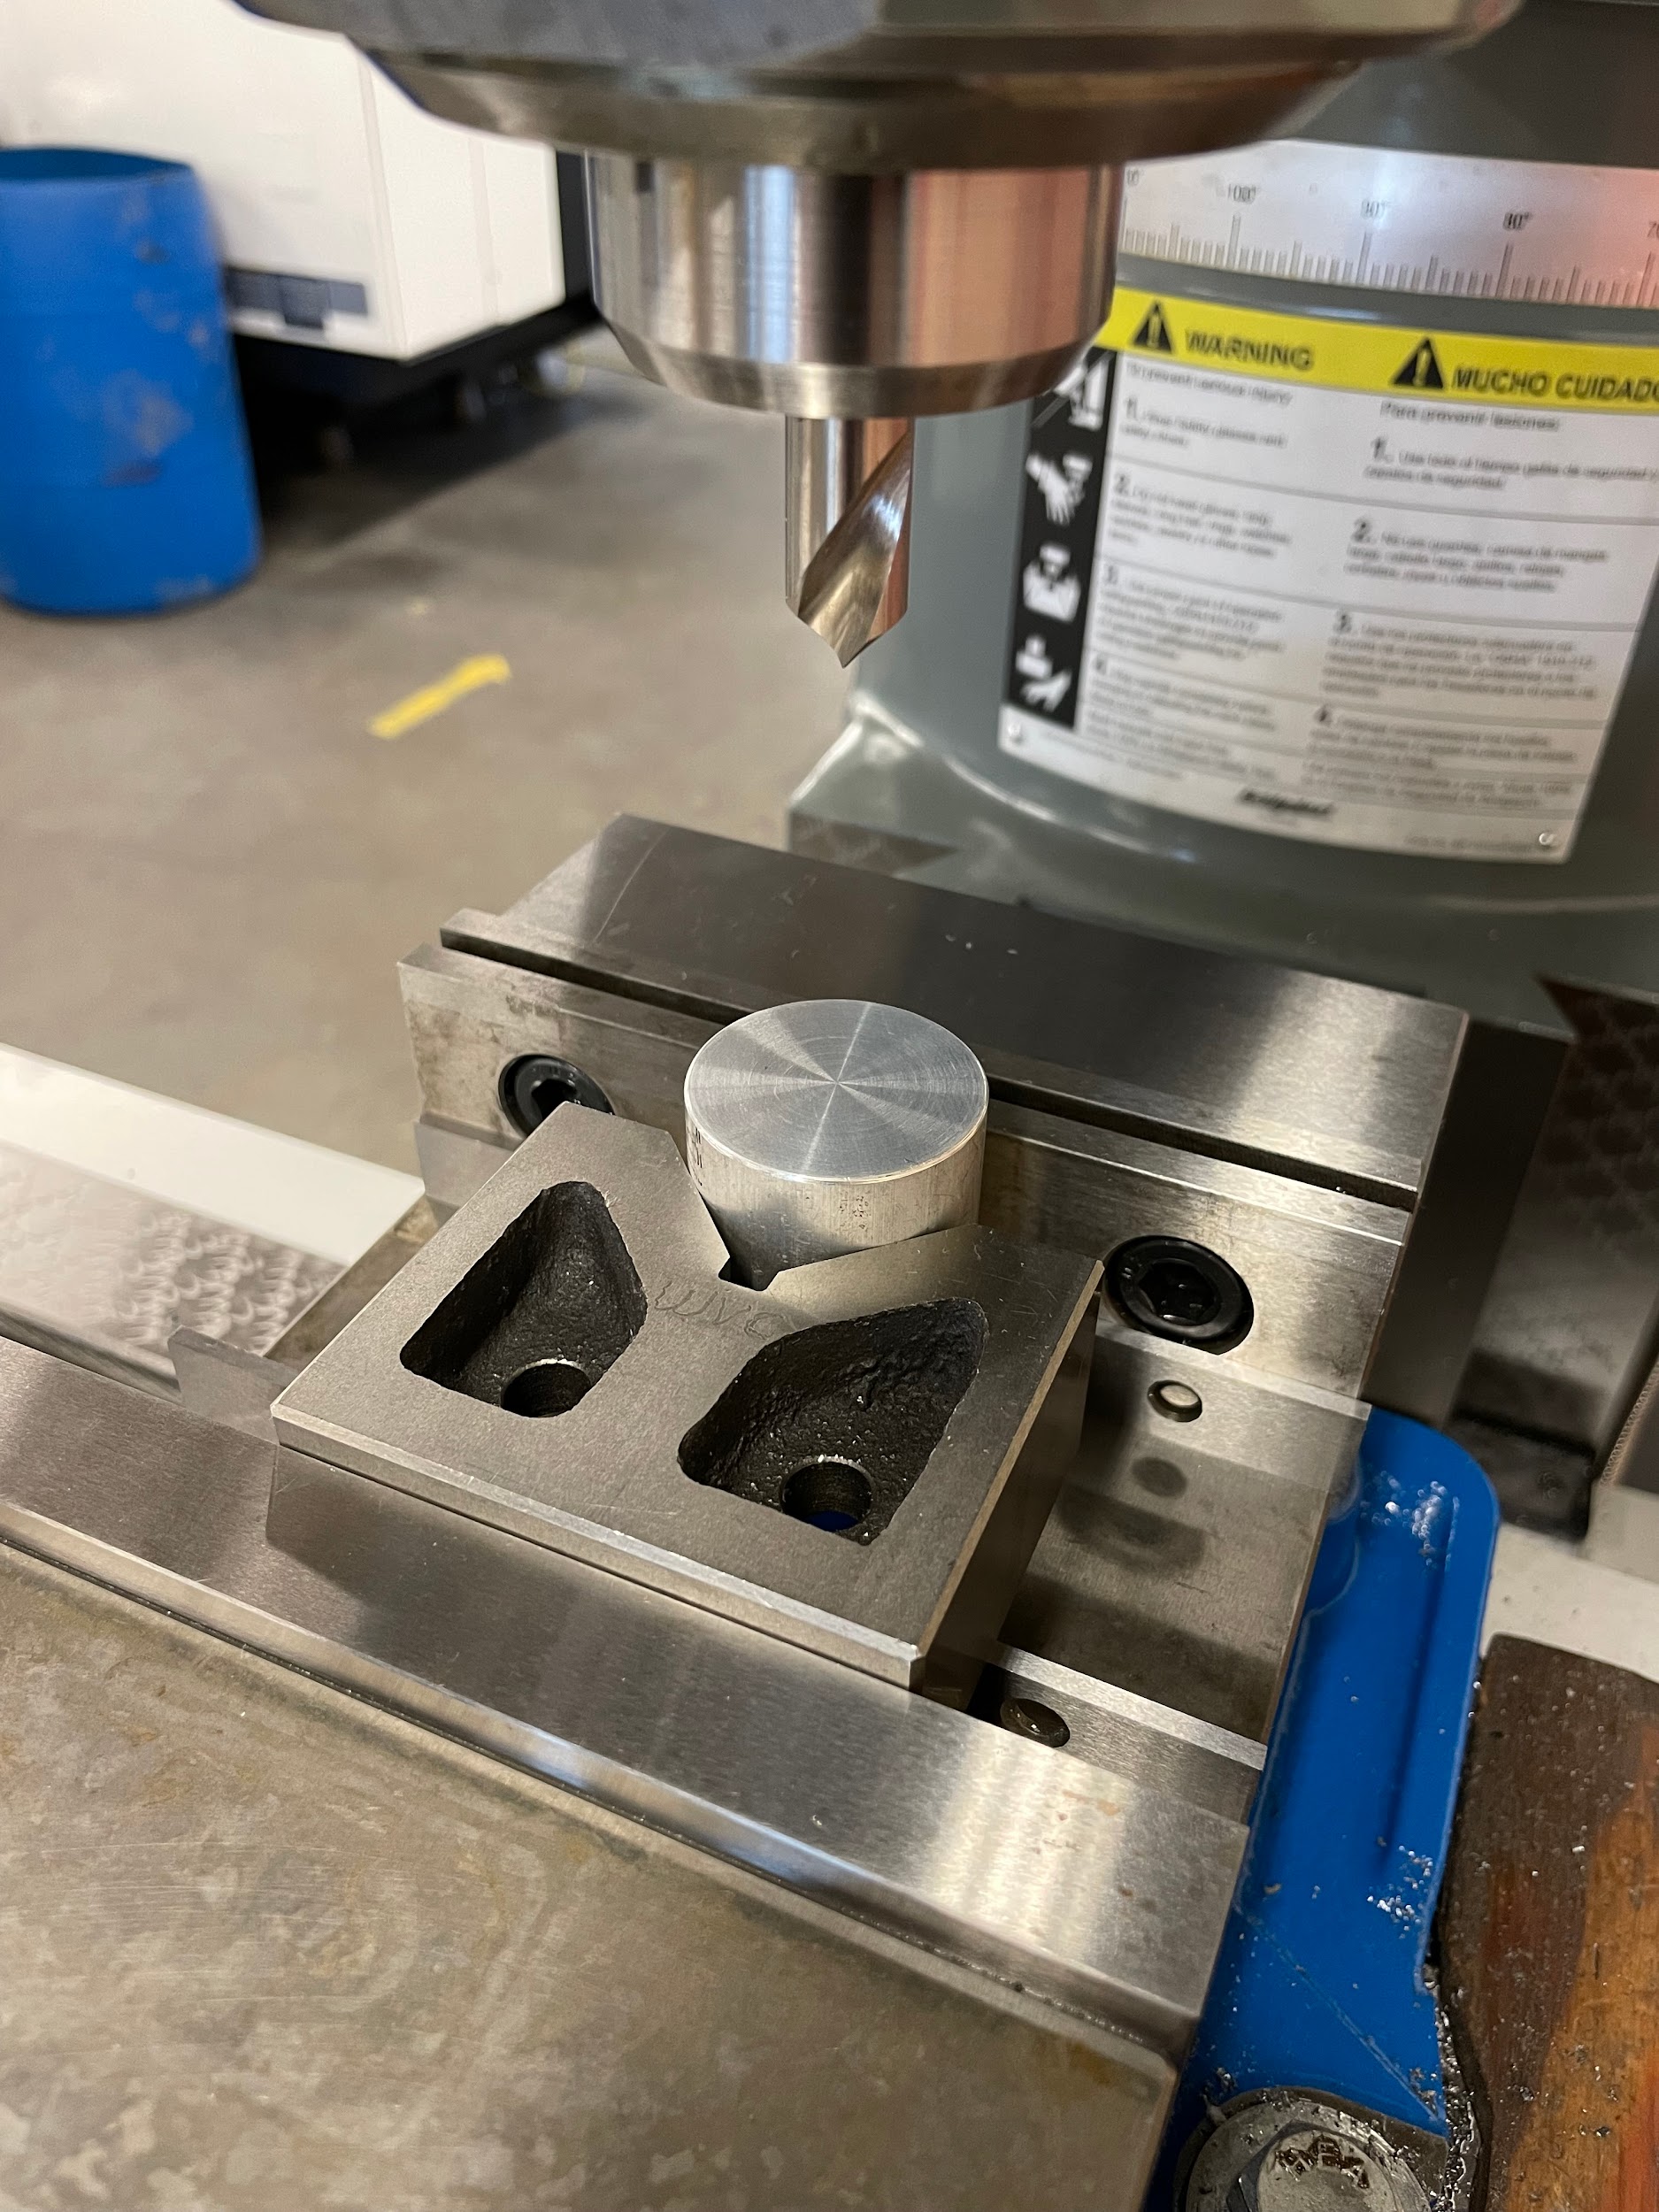
“Step 3: Drill the largest hole possible at the center of the bore layout. Removing material through drilling is much quicker than boring.“
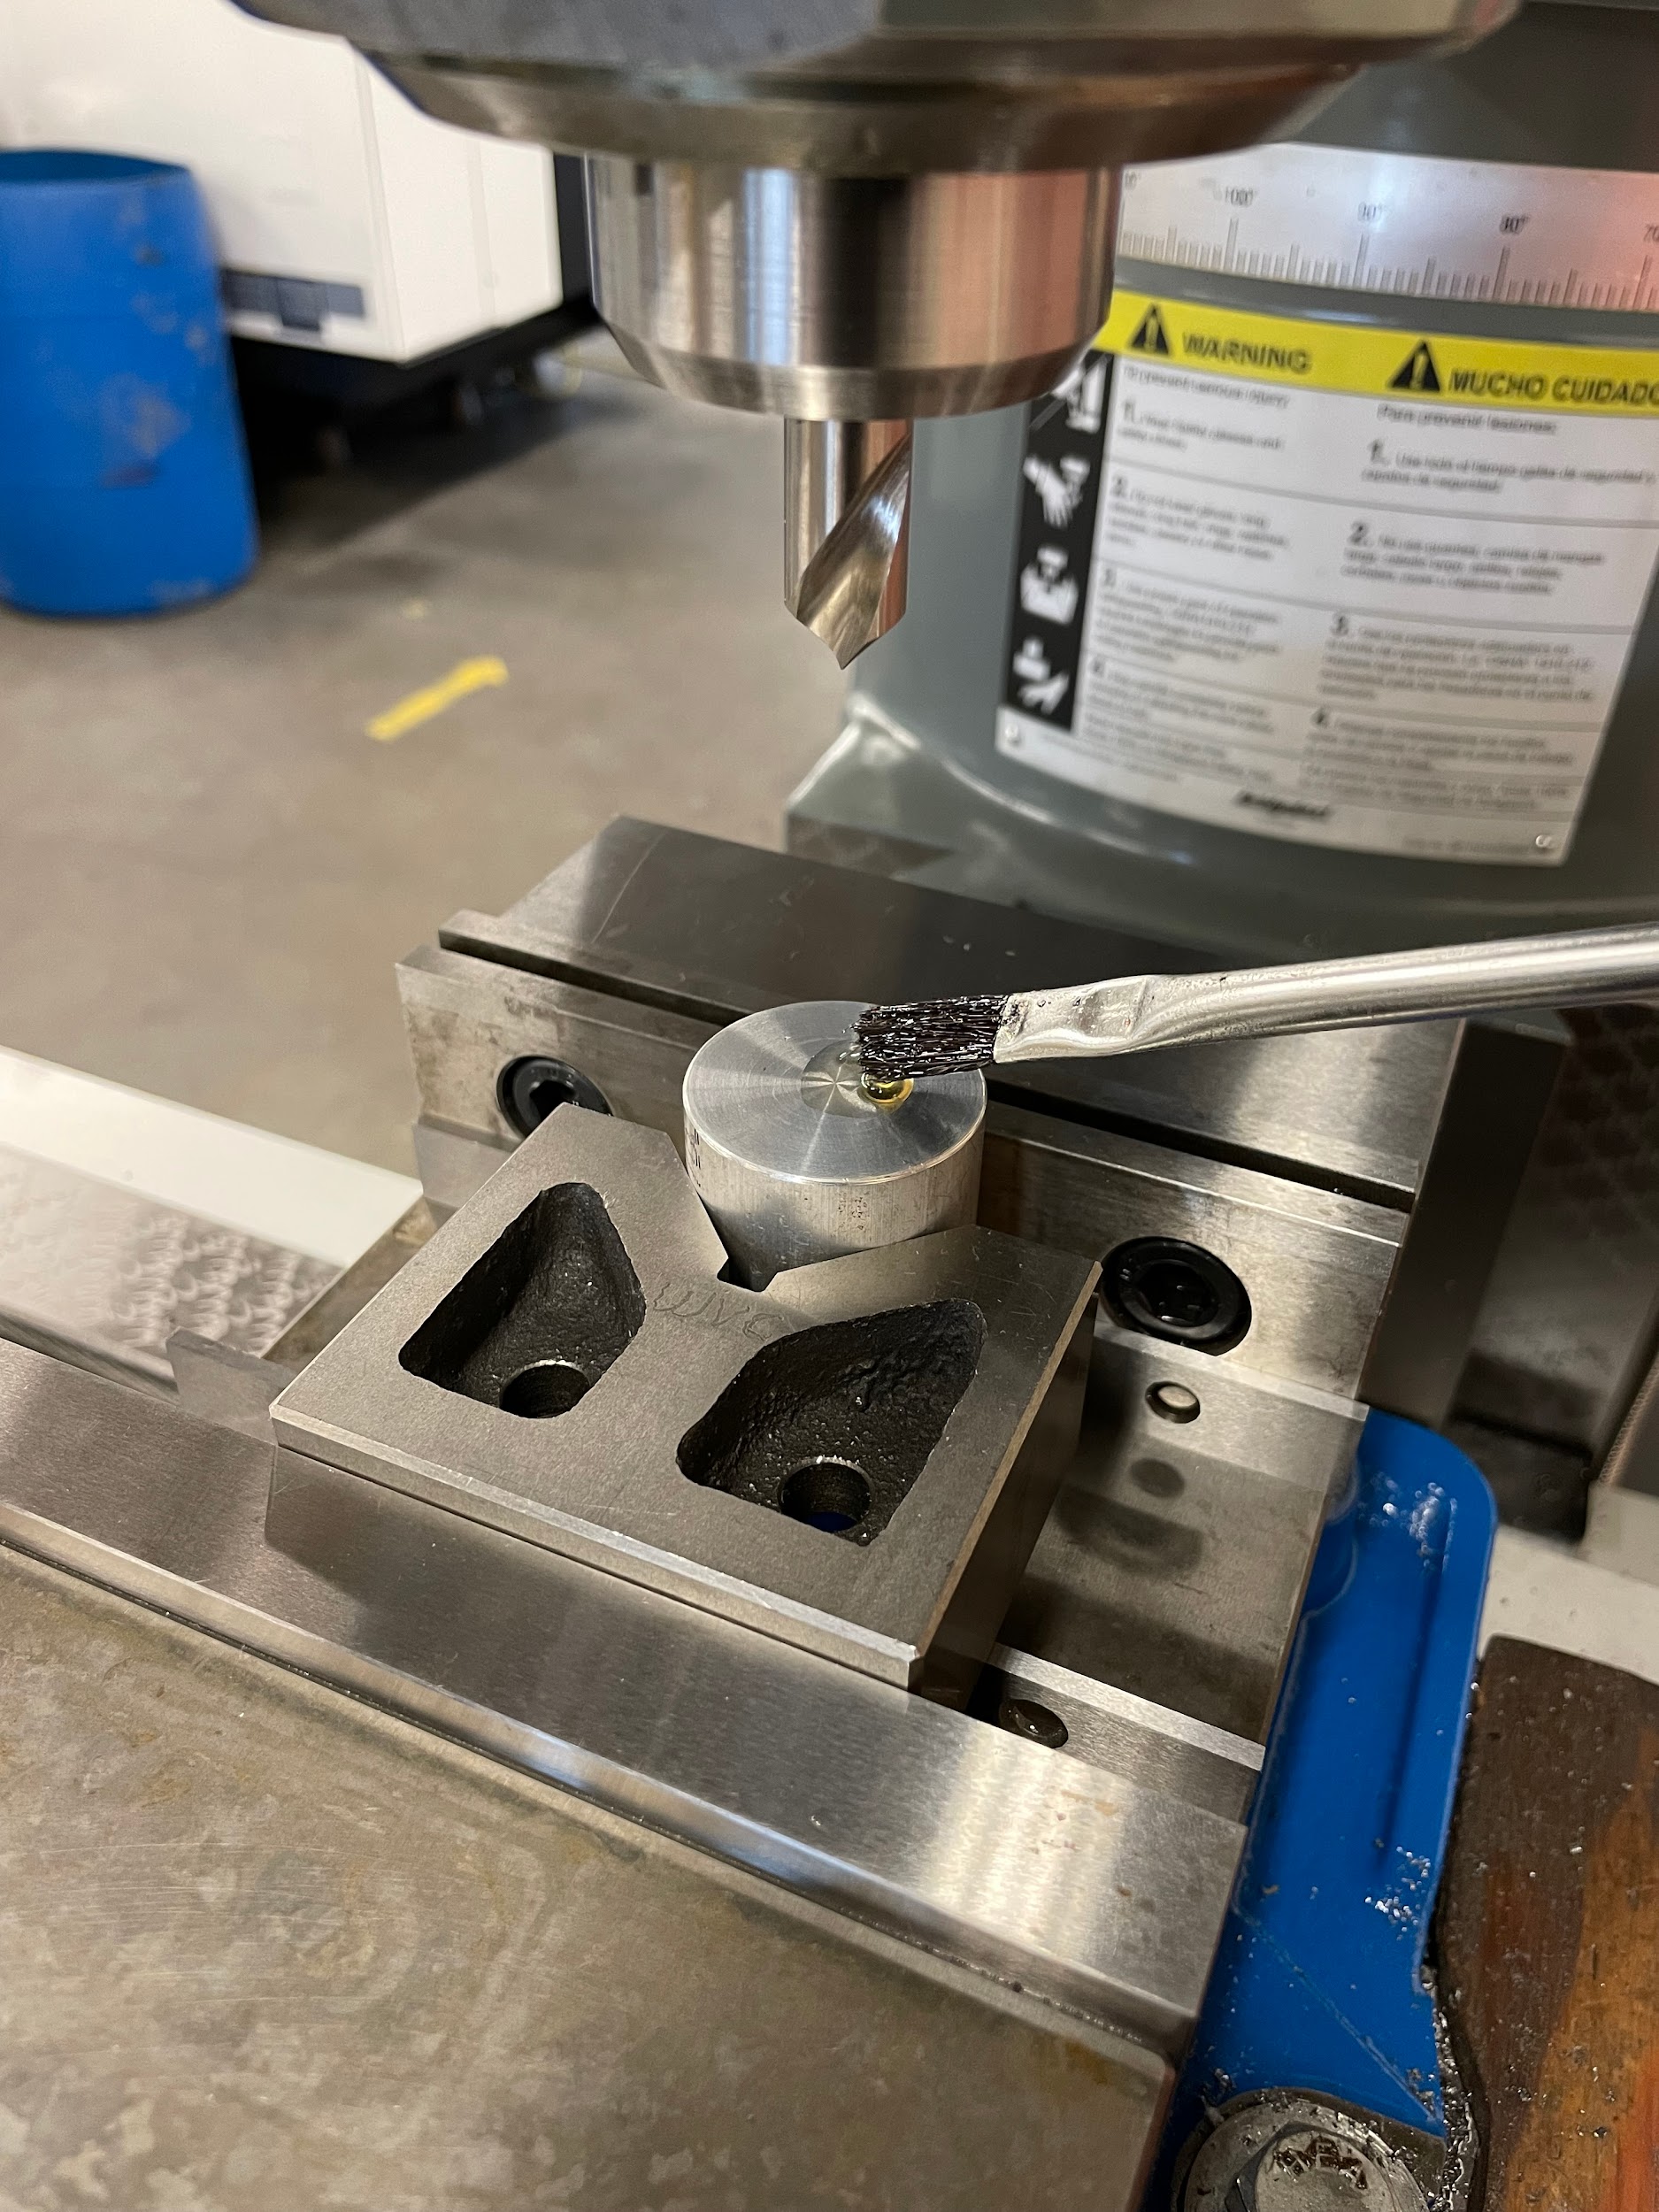
“Step 3: Drill the largest hole possible at the center of the bore layout. Removing material through drilling is much quicker than boring.“
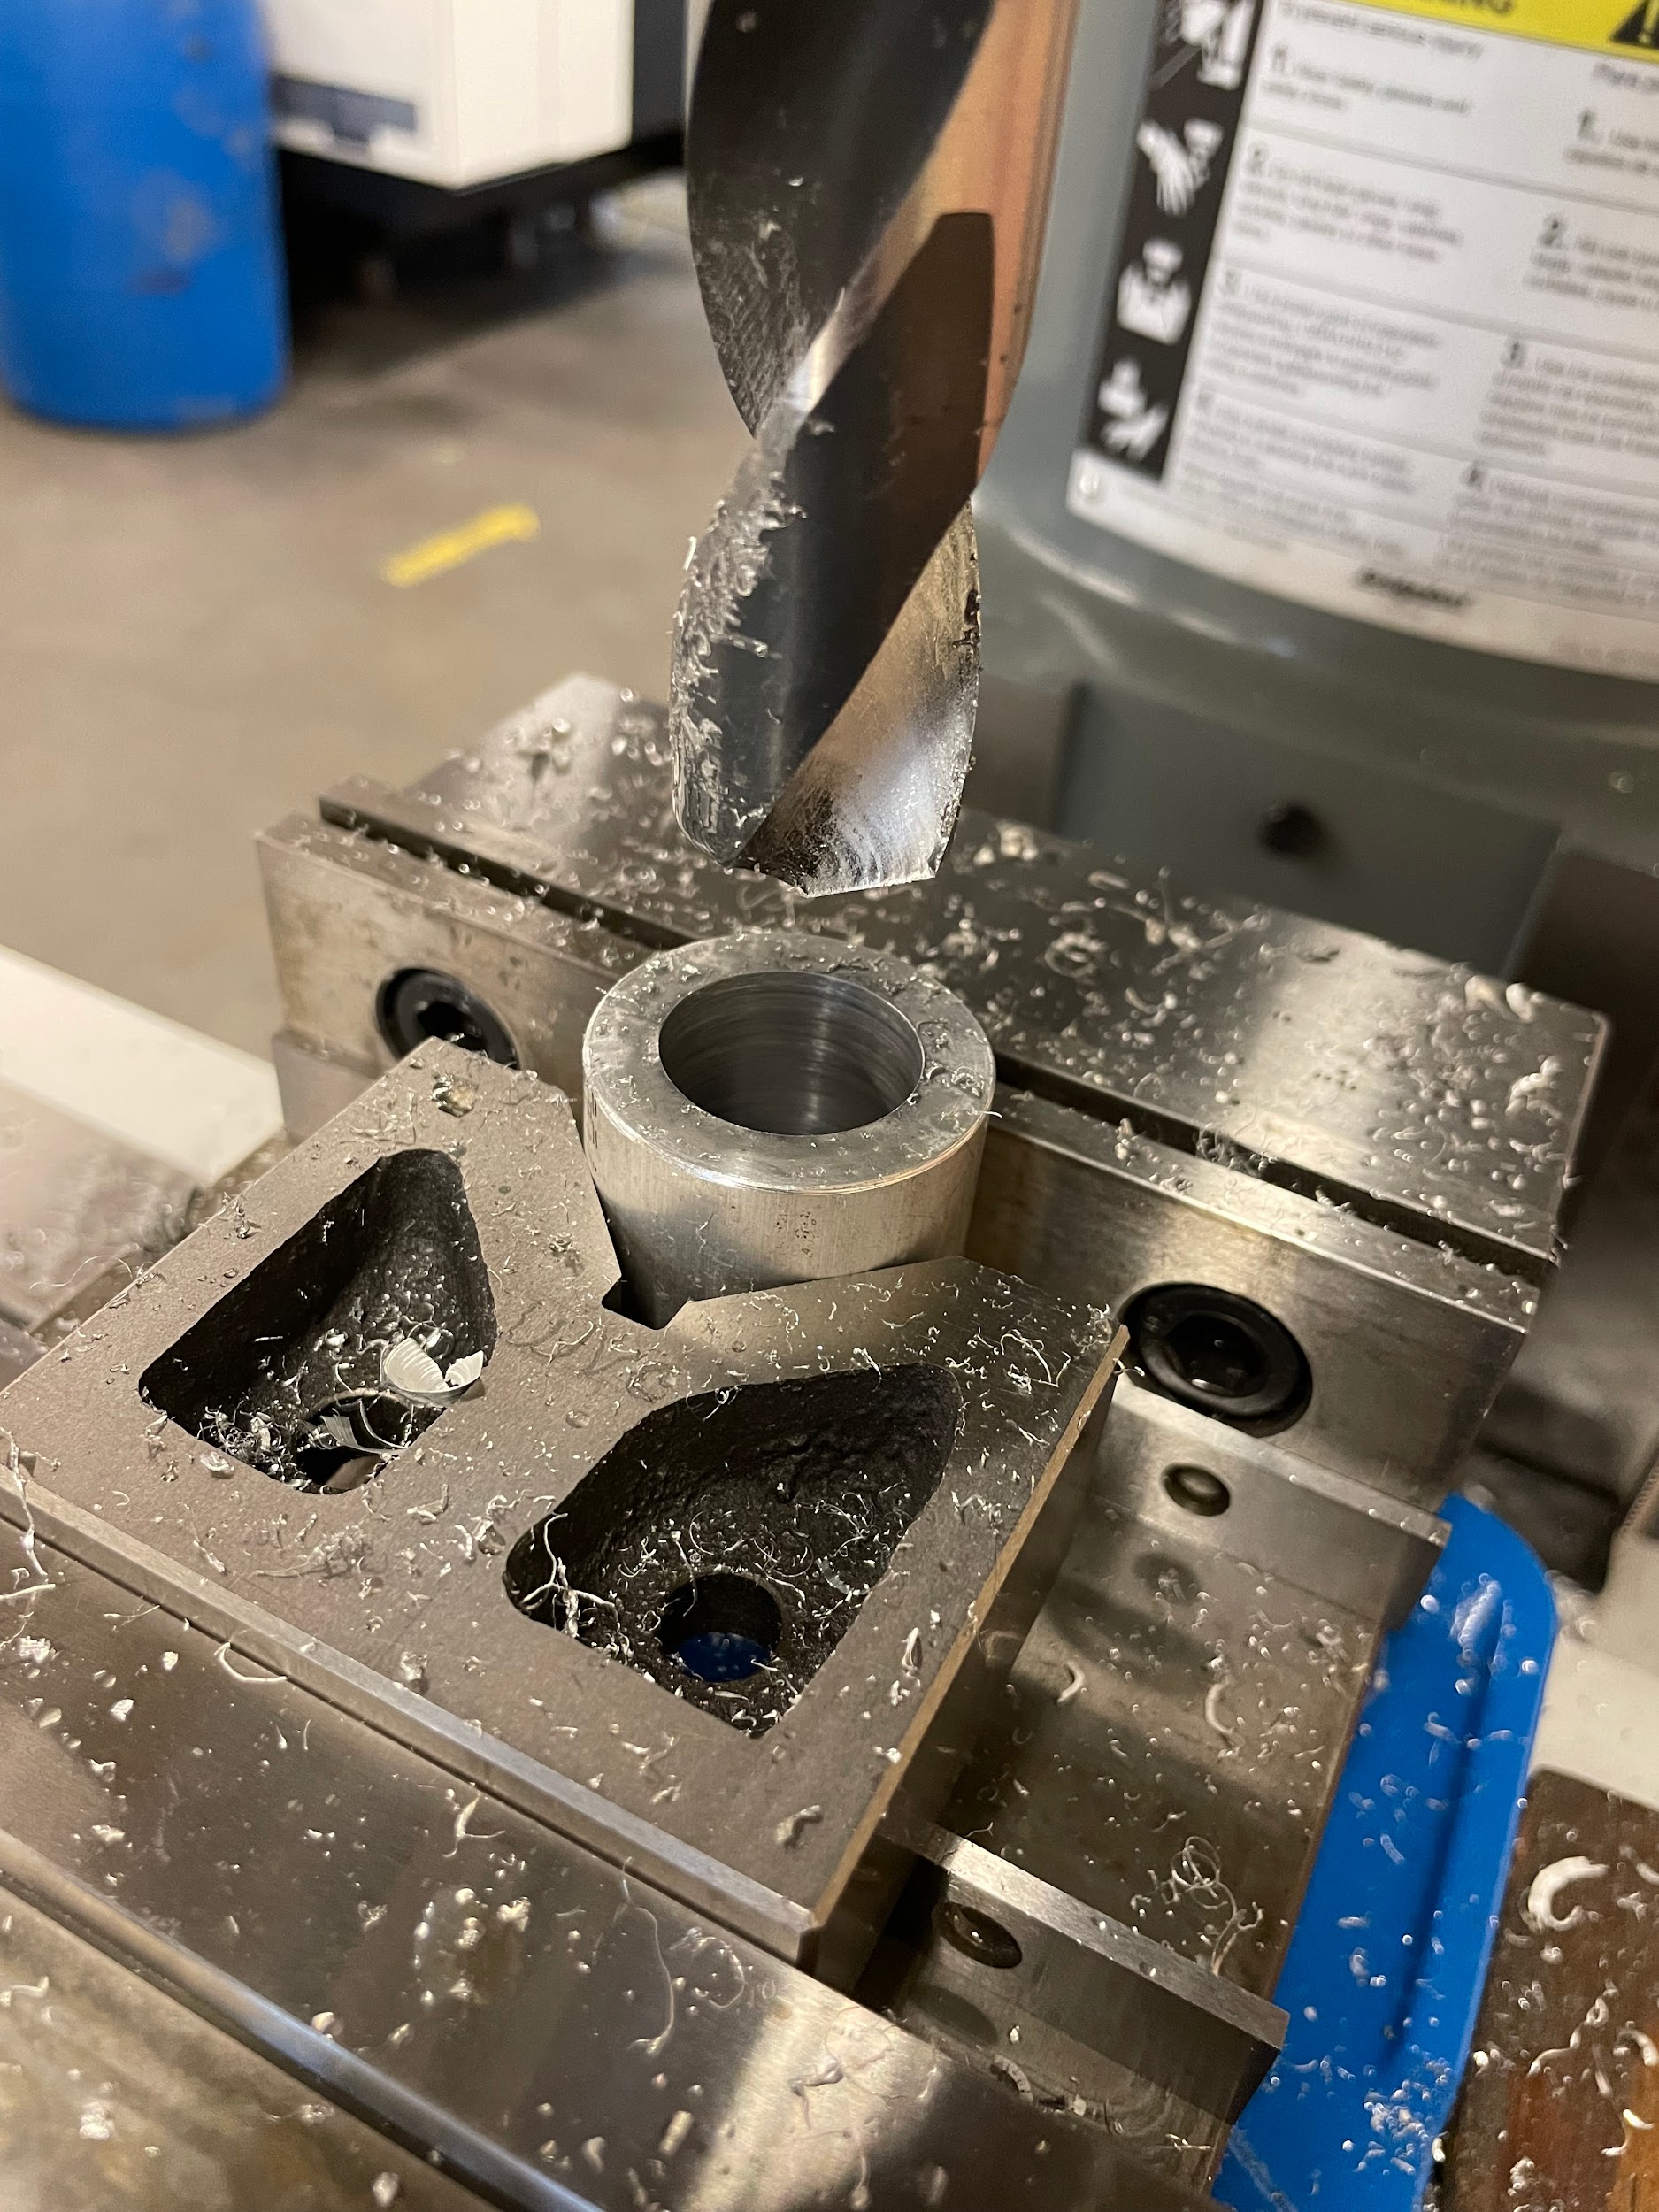
“Step 4: Install a boring head into the milling machine.“
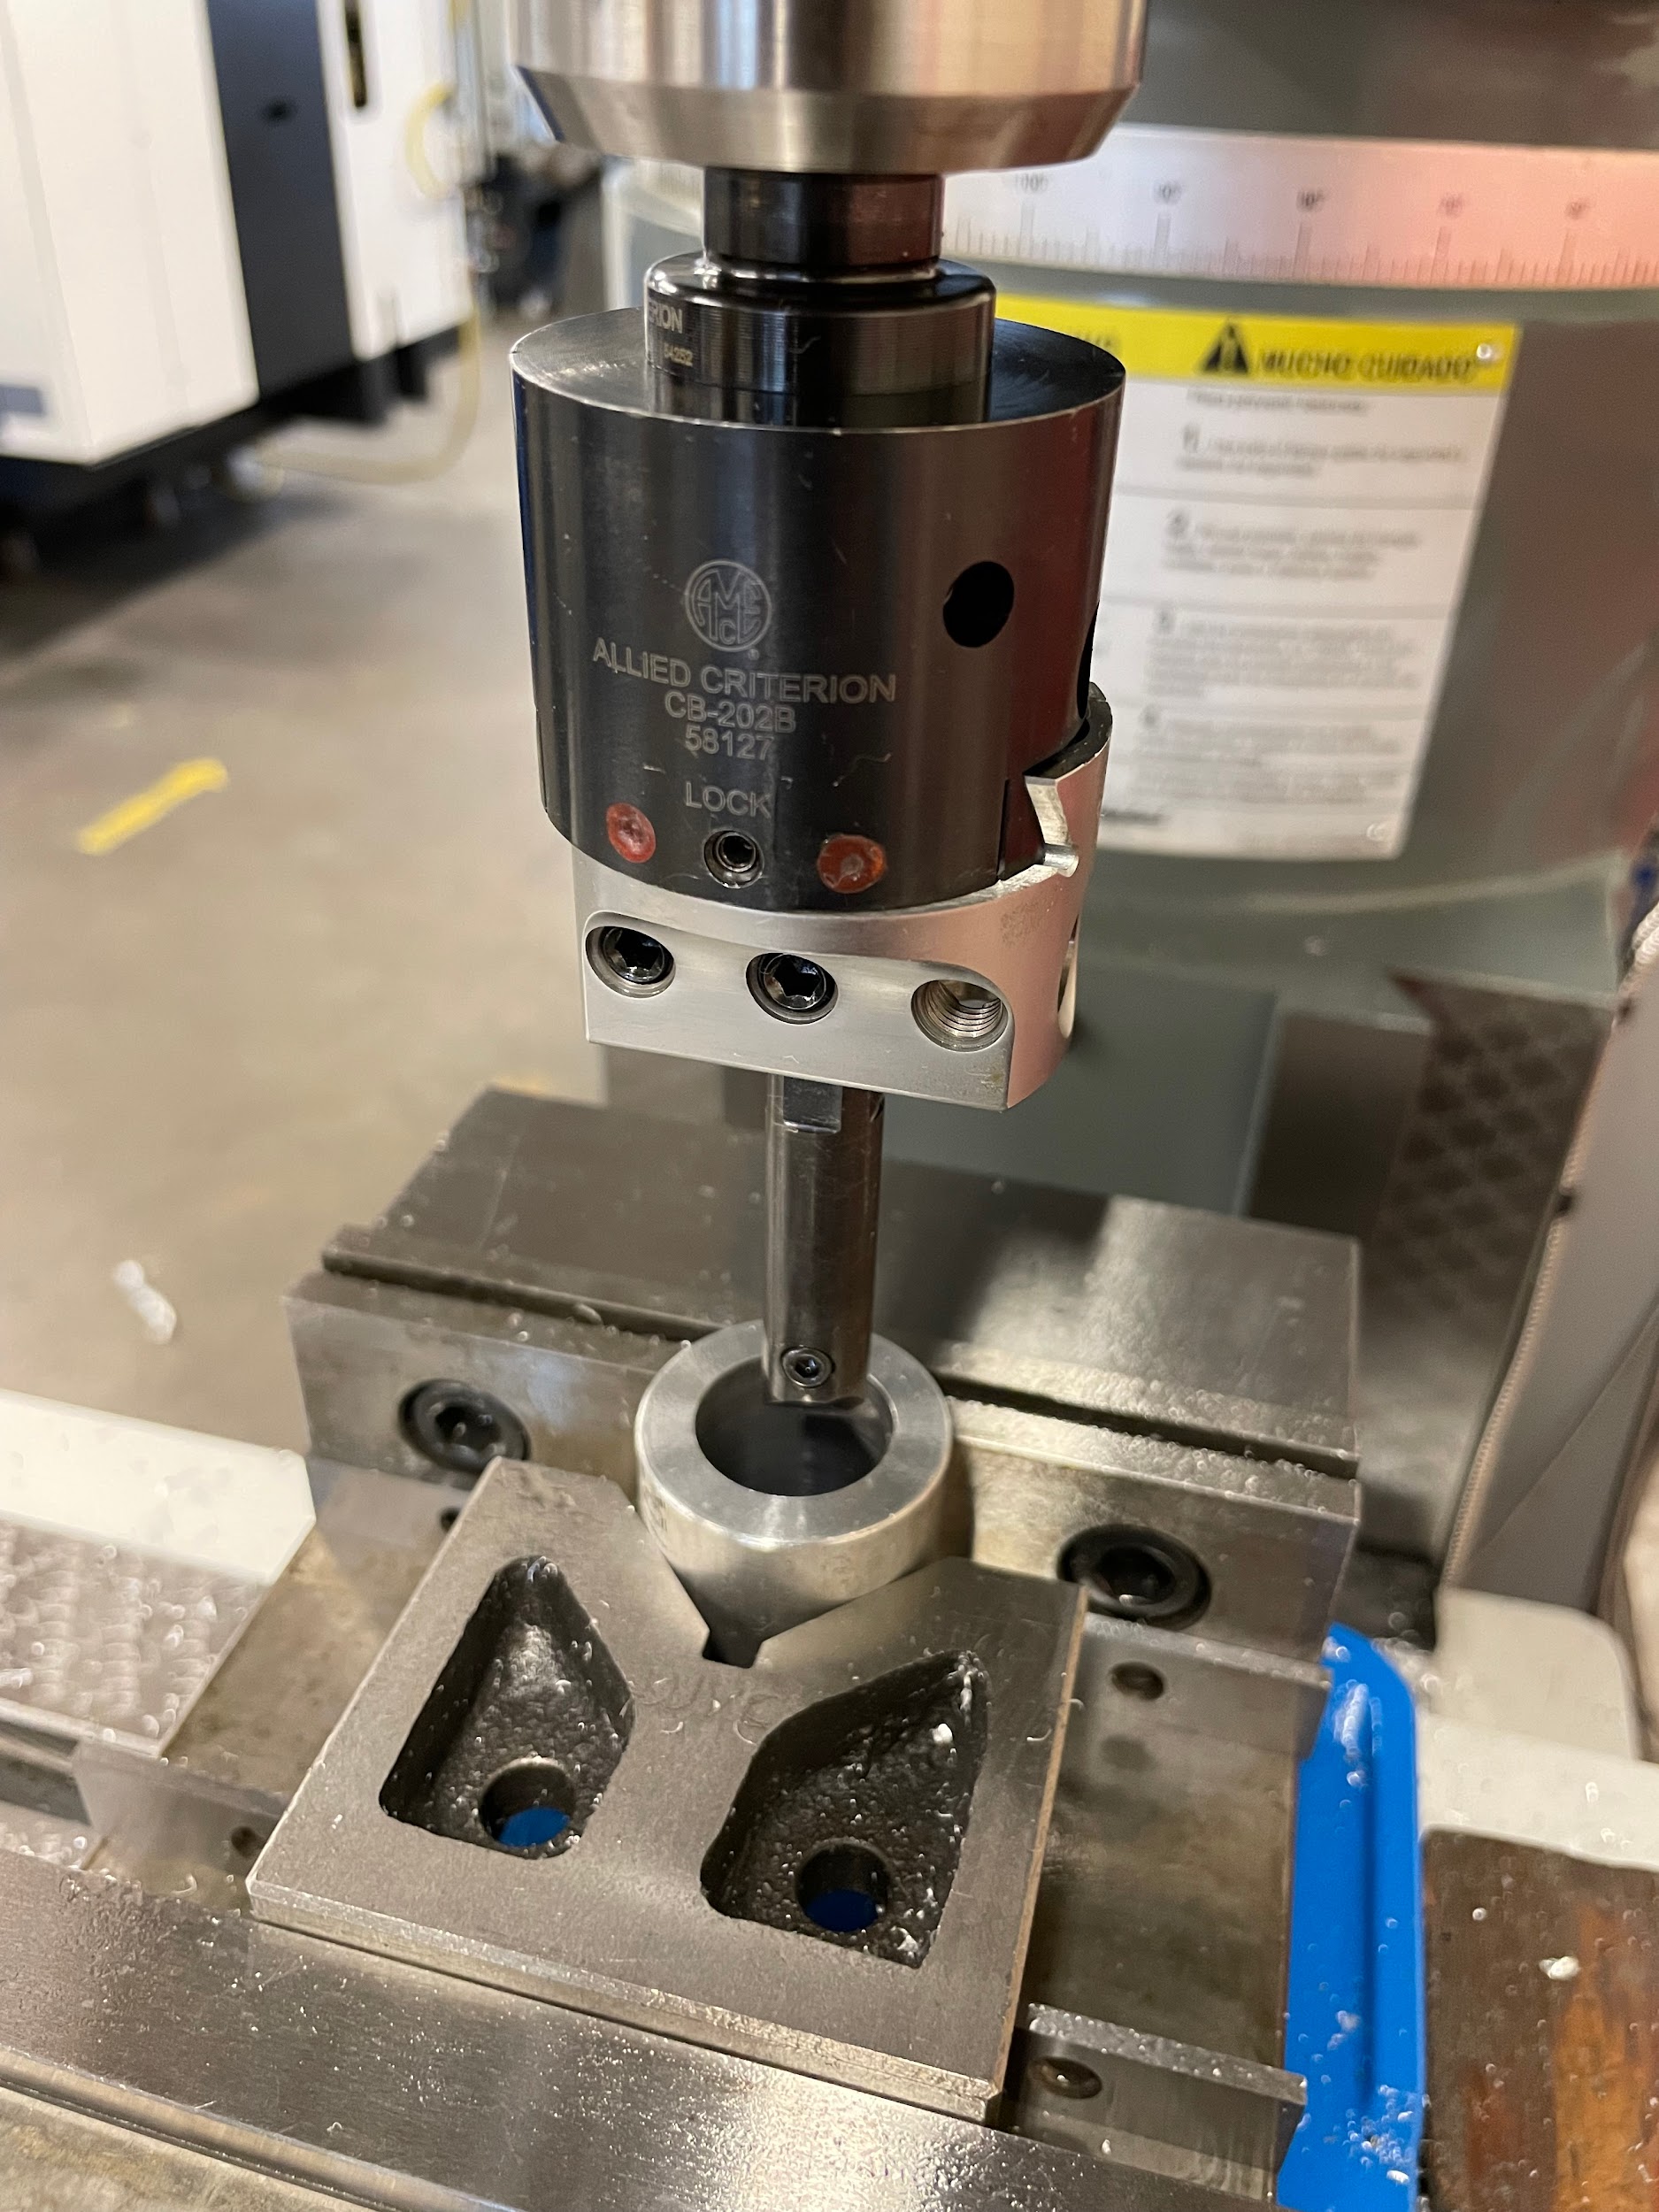
“Step 7: Pull the quill handle down to where the tool is sticking through the hole by about ⅛” and set the quill stop.“
“Step 8: Adjust the boring head so that the cutting edge of the bar slightly touches the drilled hole by loosening the lock on the dovetail and turning the hex in the dial face.“
“Step 9: Adjust the boring head to take an initial cut. Depths of cut for a boring head will vary based on material, cutter, and conditions. Roughing cuts may be .020-.050, whereas finishing cuts may be .003-.010 or less.“
“Step 10: Move the quill feed engagement knob, located on the right side of the head, from disengage to engage. This can only be accomplished while the spindle is off.“
“Step 11: Select the quill feed increment, in IPR, on the left side of the mill. Some are labeled .006, .003, and .0015, but some are just labeled high, medium, and low. This can also only be accomplished while the spindle is off.“
“Step 14: Lube the hole.“
“Step 15: Turn the spindle on and adjust the speed.“
“Step 16: In the middle of the quill fine feed handwheel, pull out or push in the engagement pin. This will set the quill feed to move either up or down. “
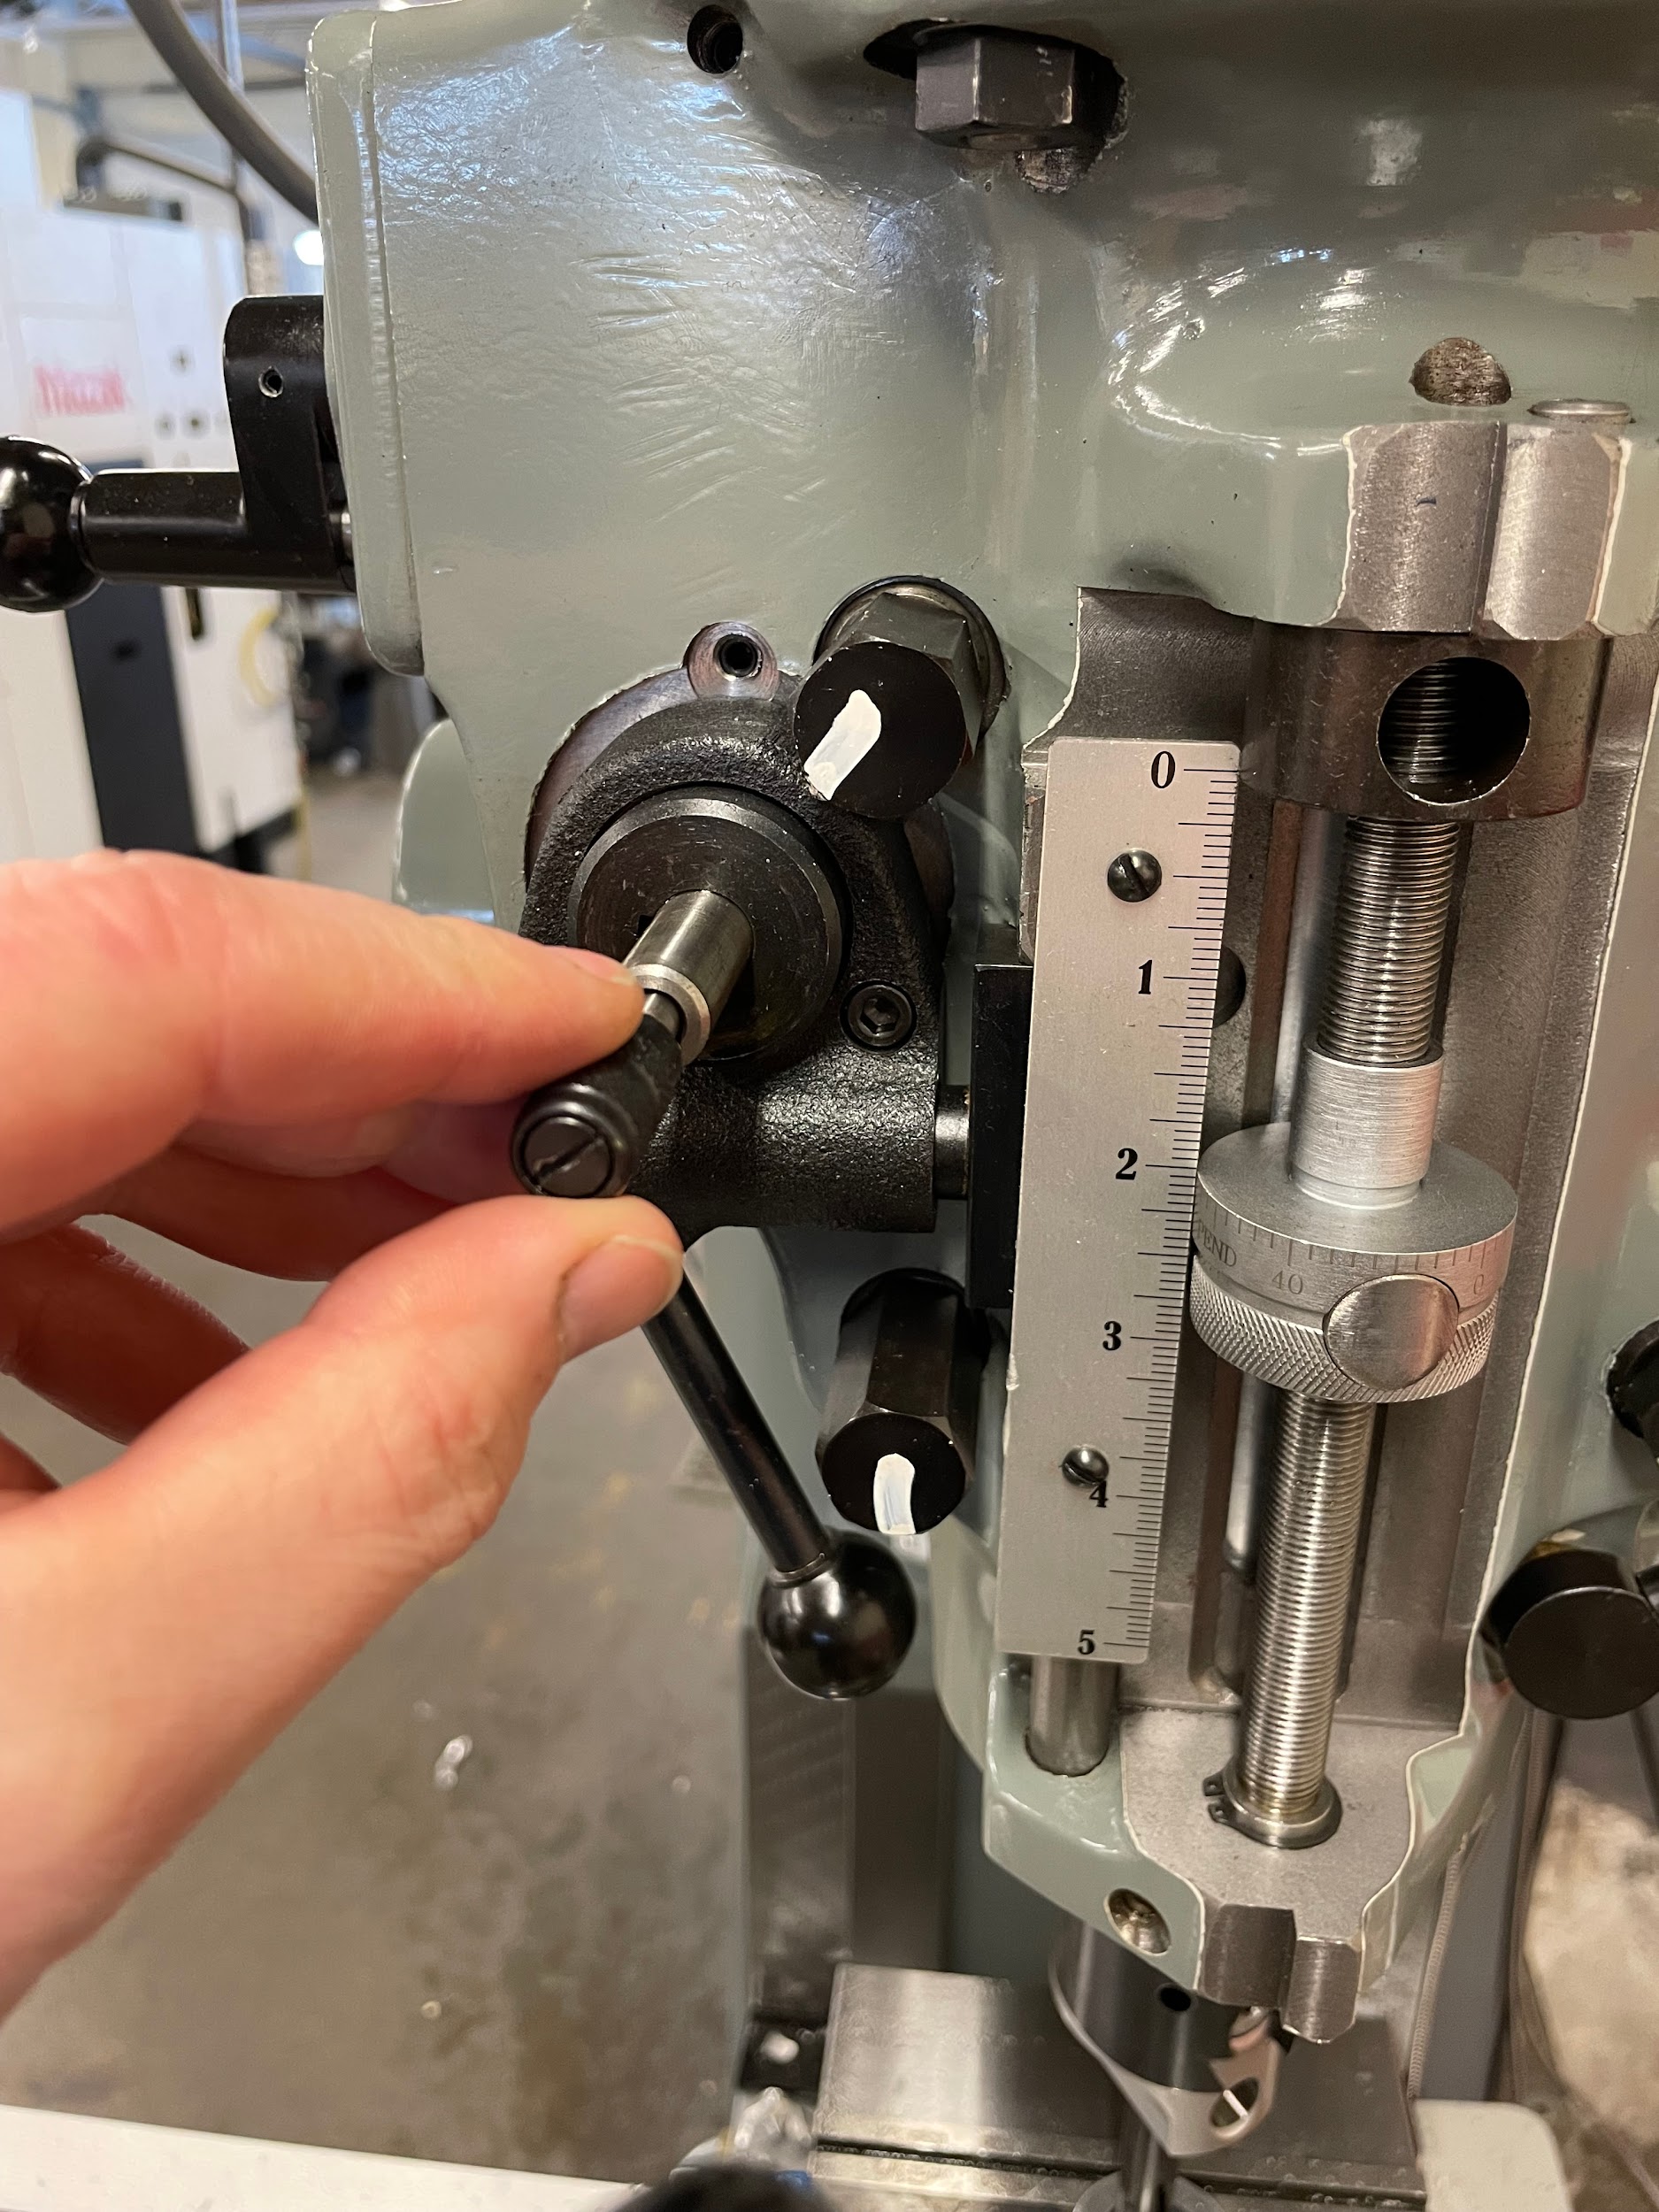
“Step 17: Now pull and briefly hold the quill feed lever on the left side of the head to start the automatic quill engagement.“
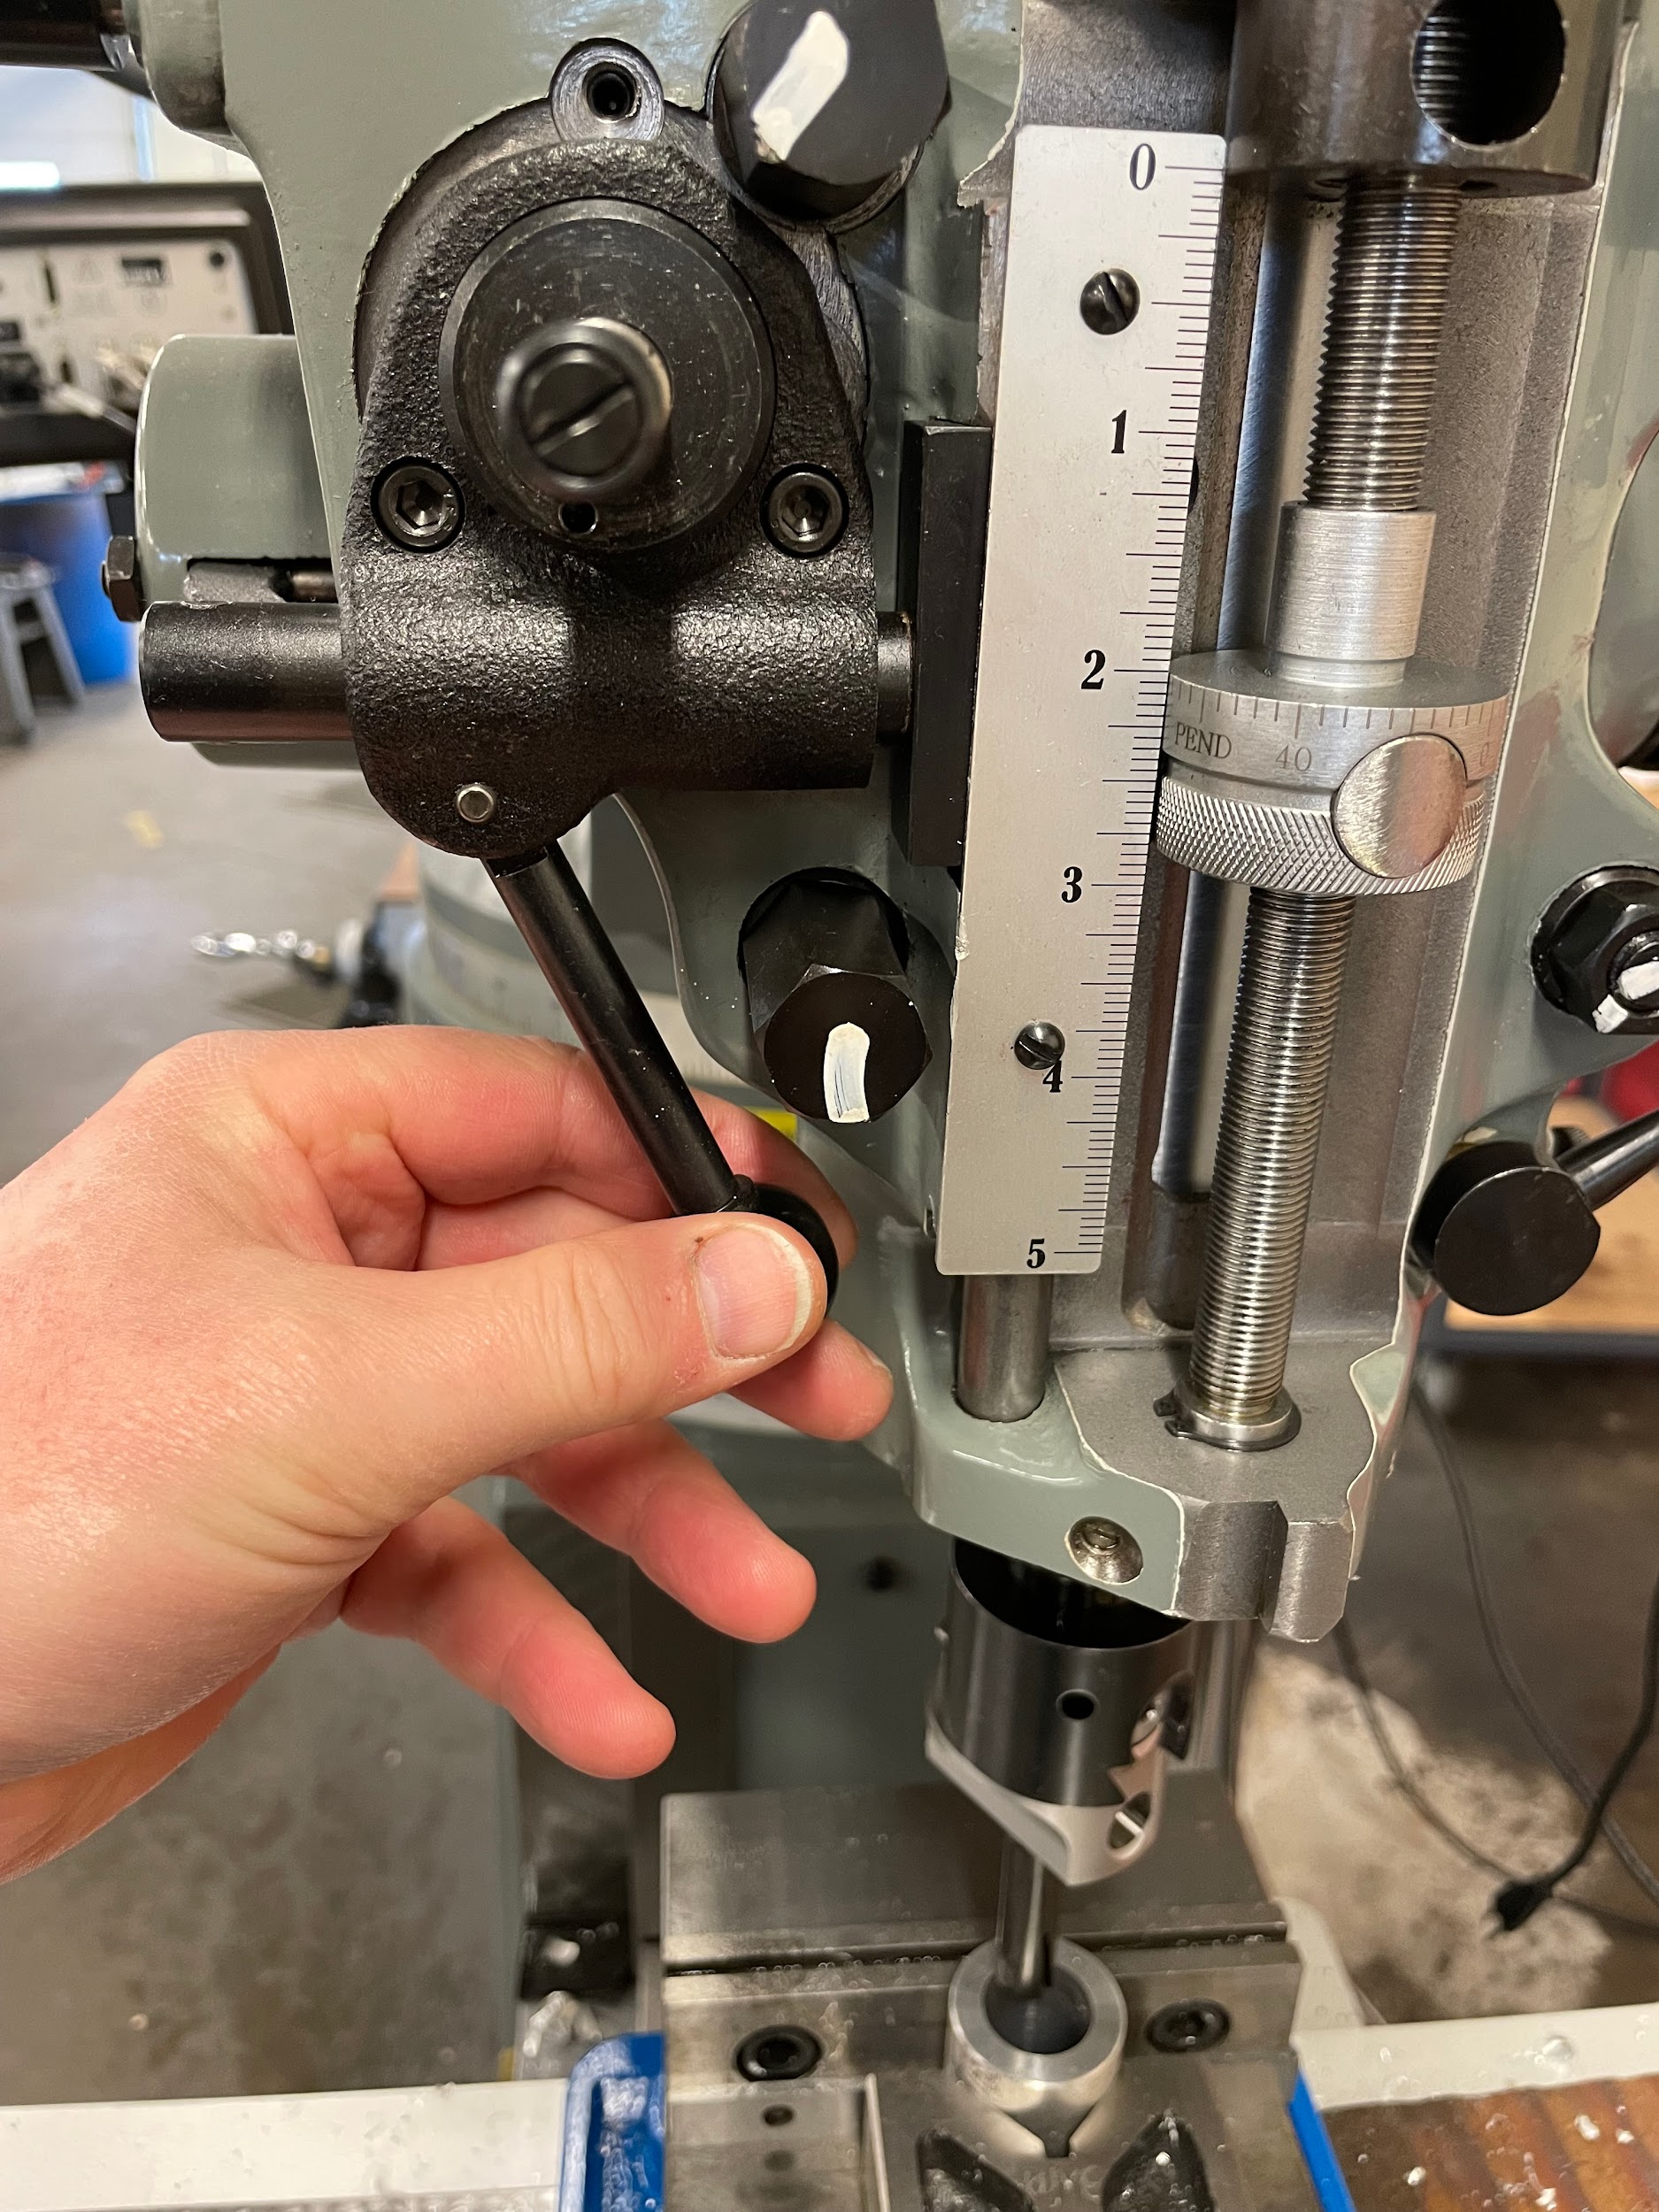
“Step 20: Manually pull the quill up through the hole. Pulling out in this fashion will keep the tool from cutting extra material on the upstroke and potentially oversizing the hole. Pulling out in this way will also indicate the amount of bar deflection during roughing passes when examining the scored line on the side of the bore. On a finish pass, the machine should be moved, or the head adjusted so scoring is absent.“
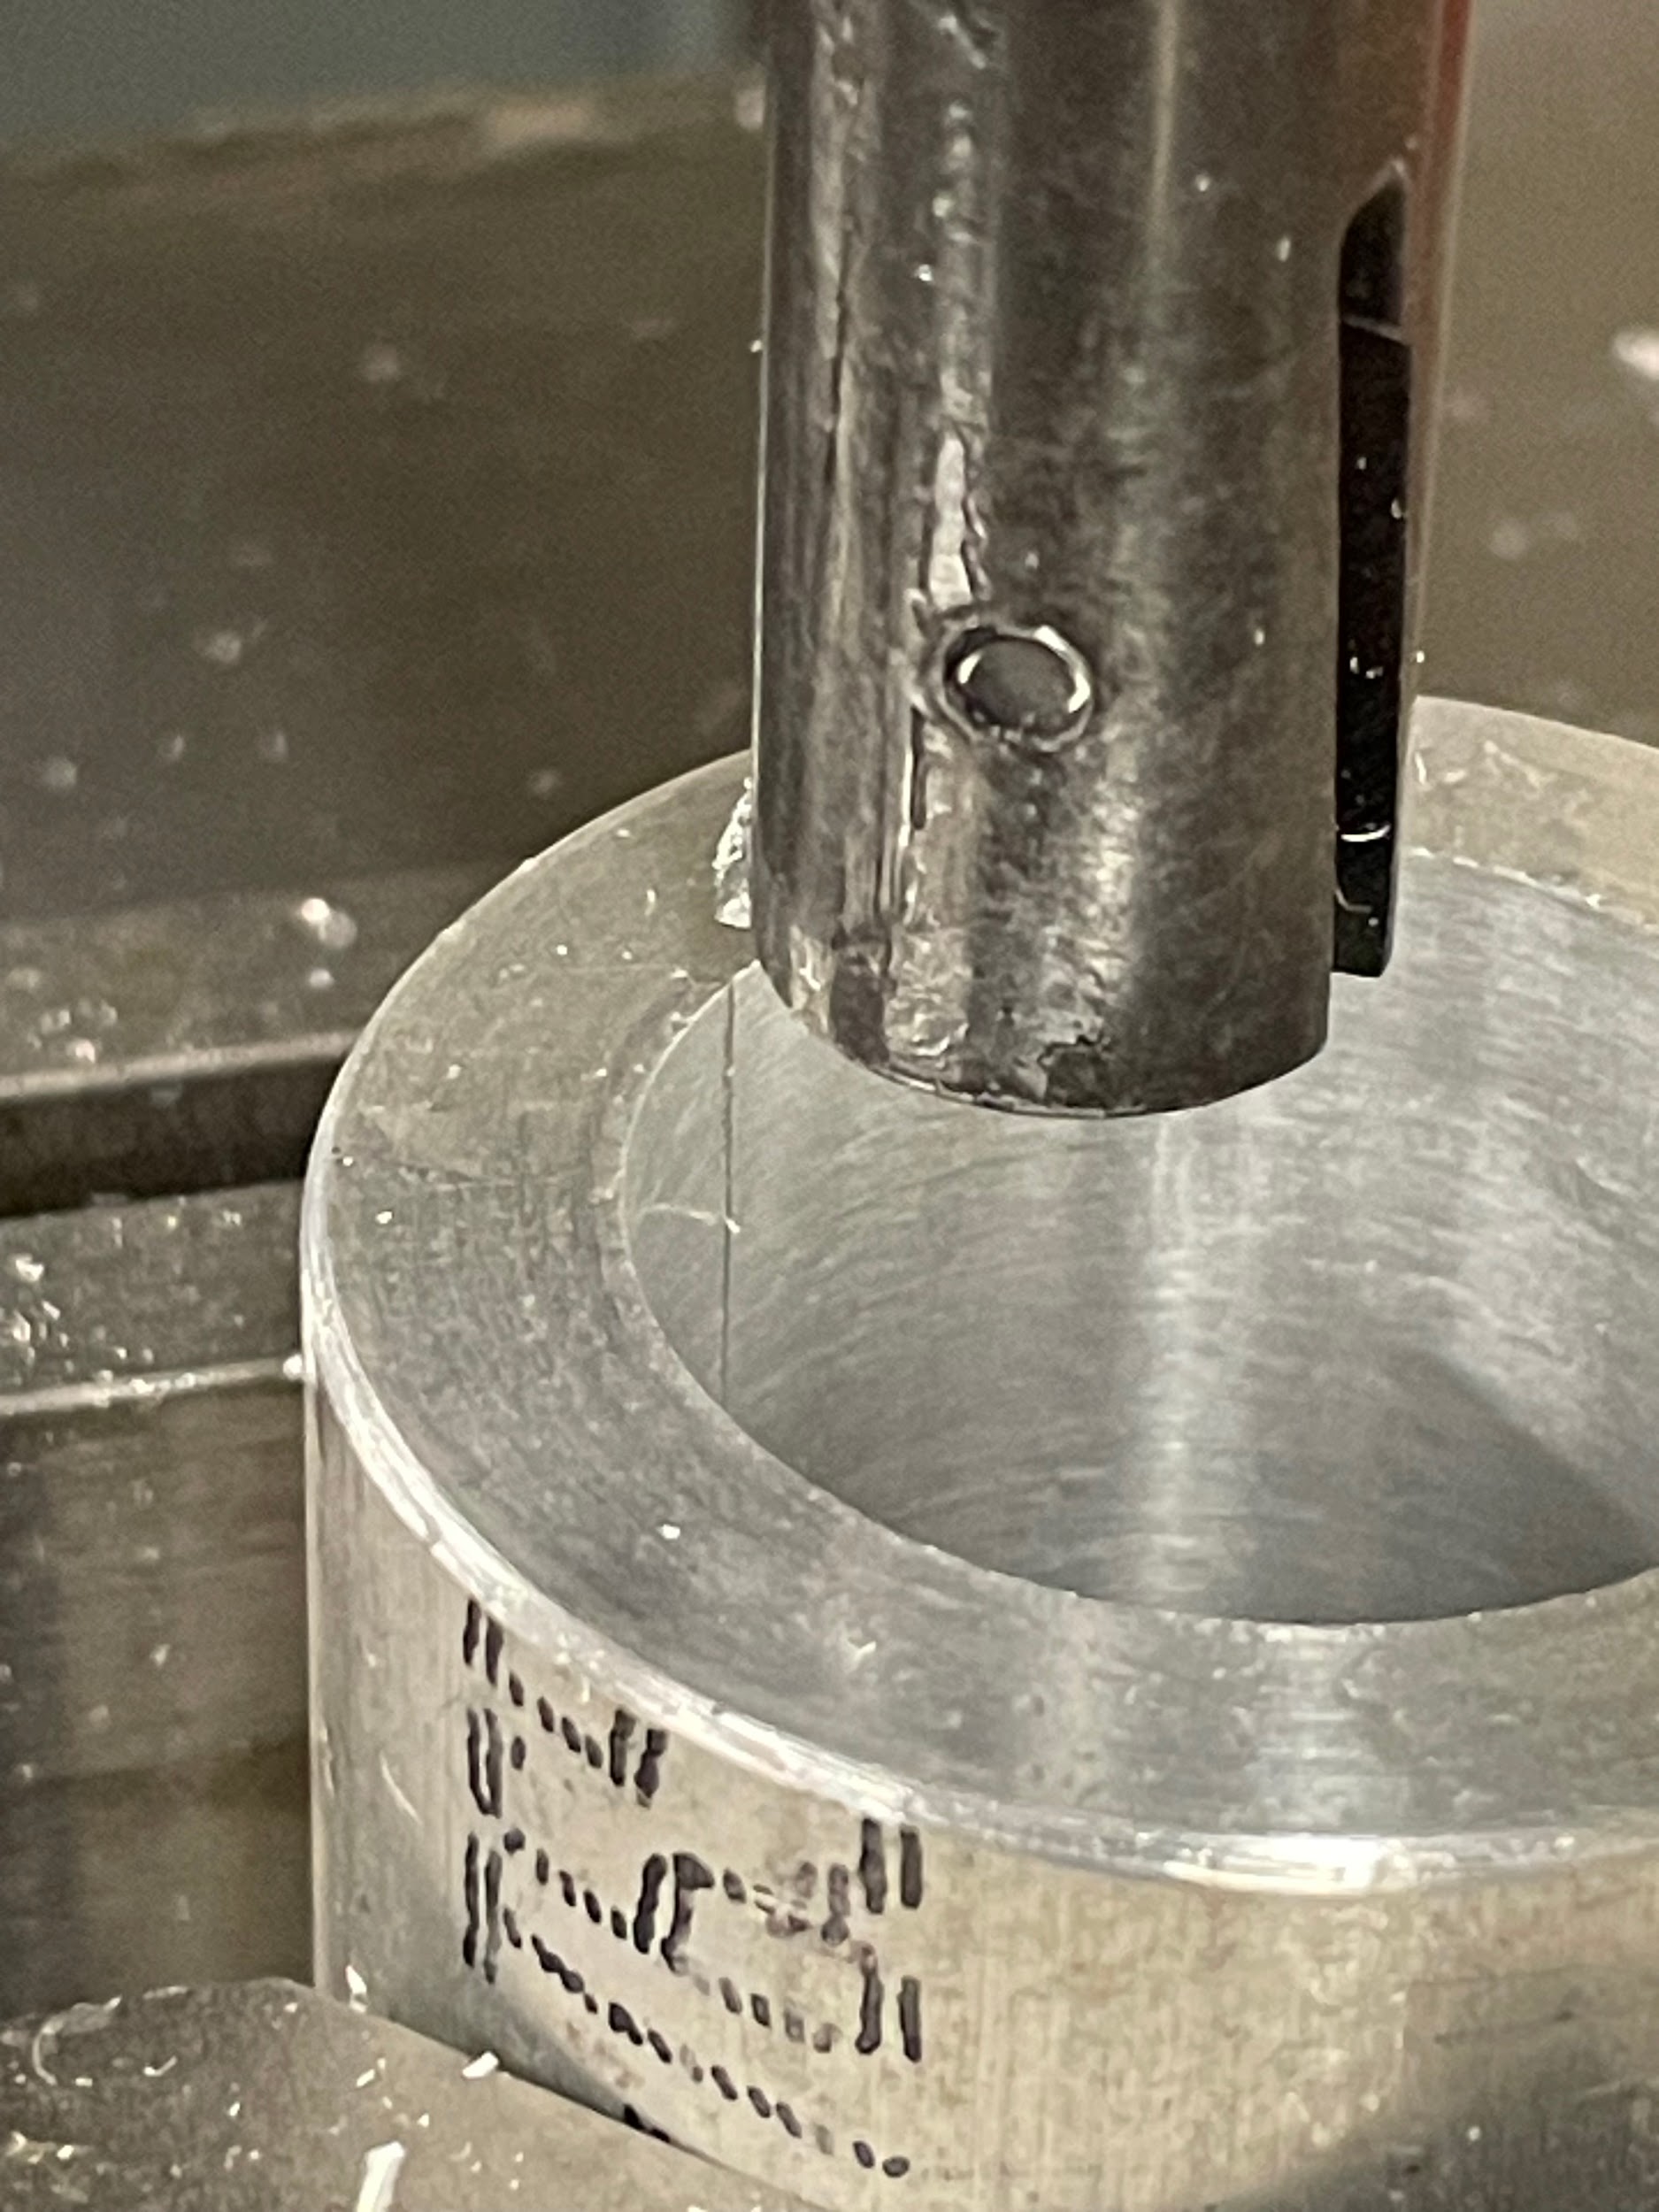
“Step 23: Clean and inspect the feature. “


