Chapter 9 Part 8: Manual Vertical Milling Machines
SLITTING
What is it?
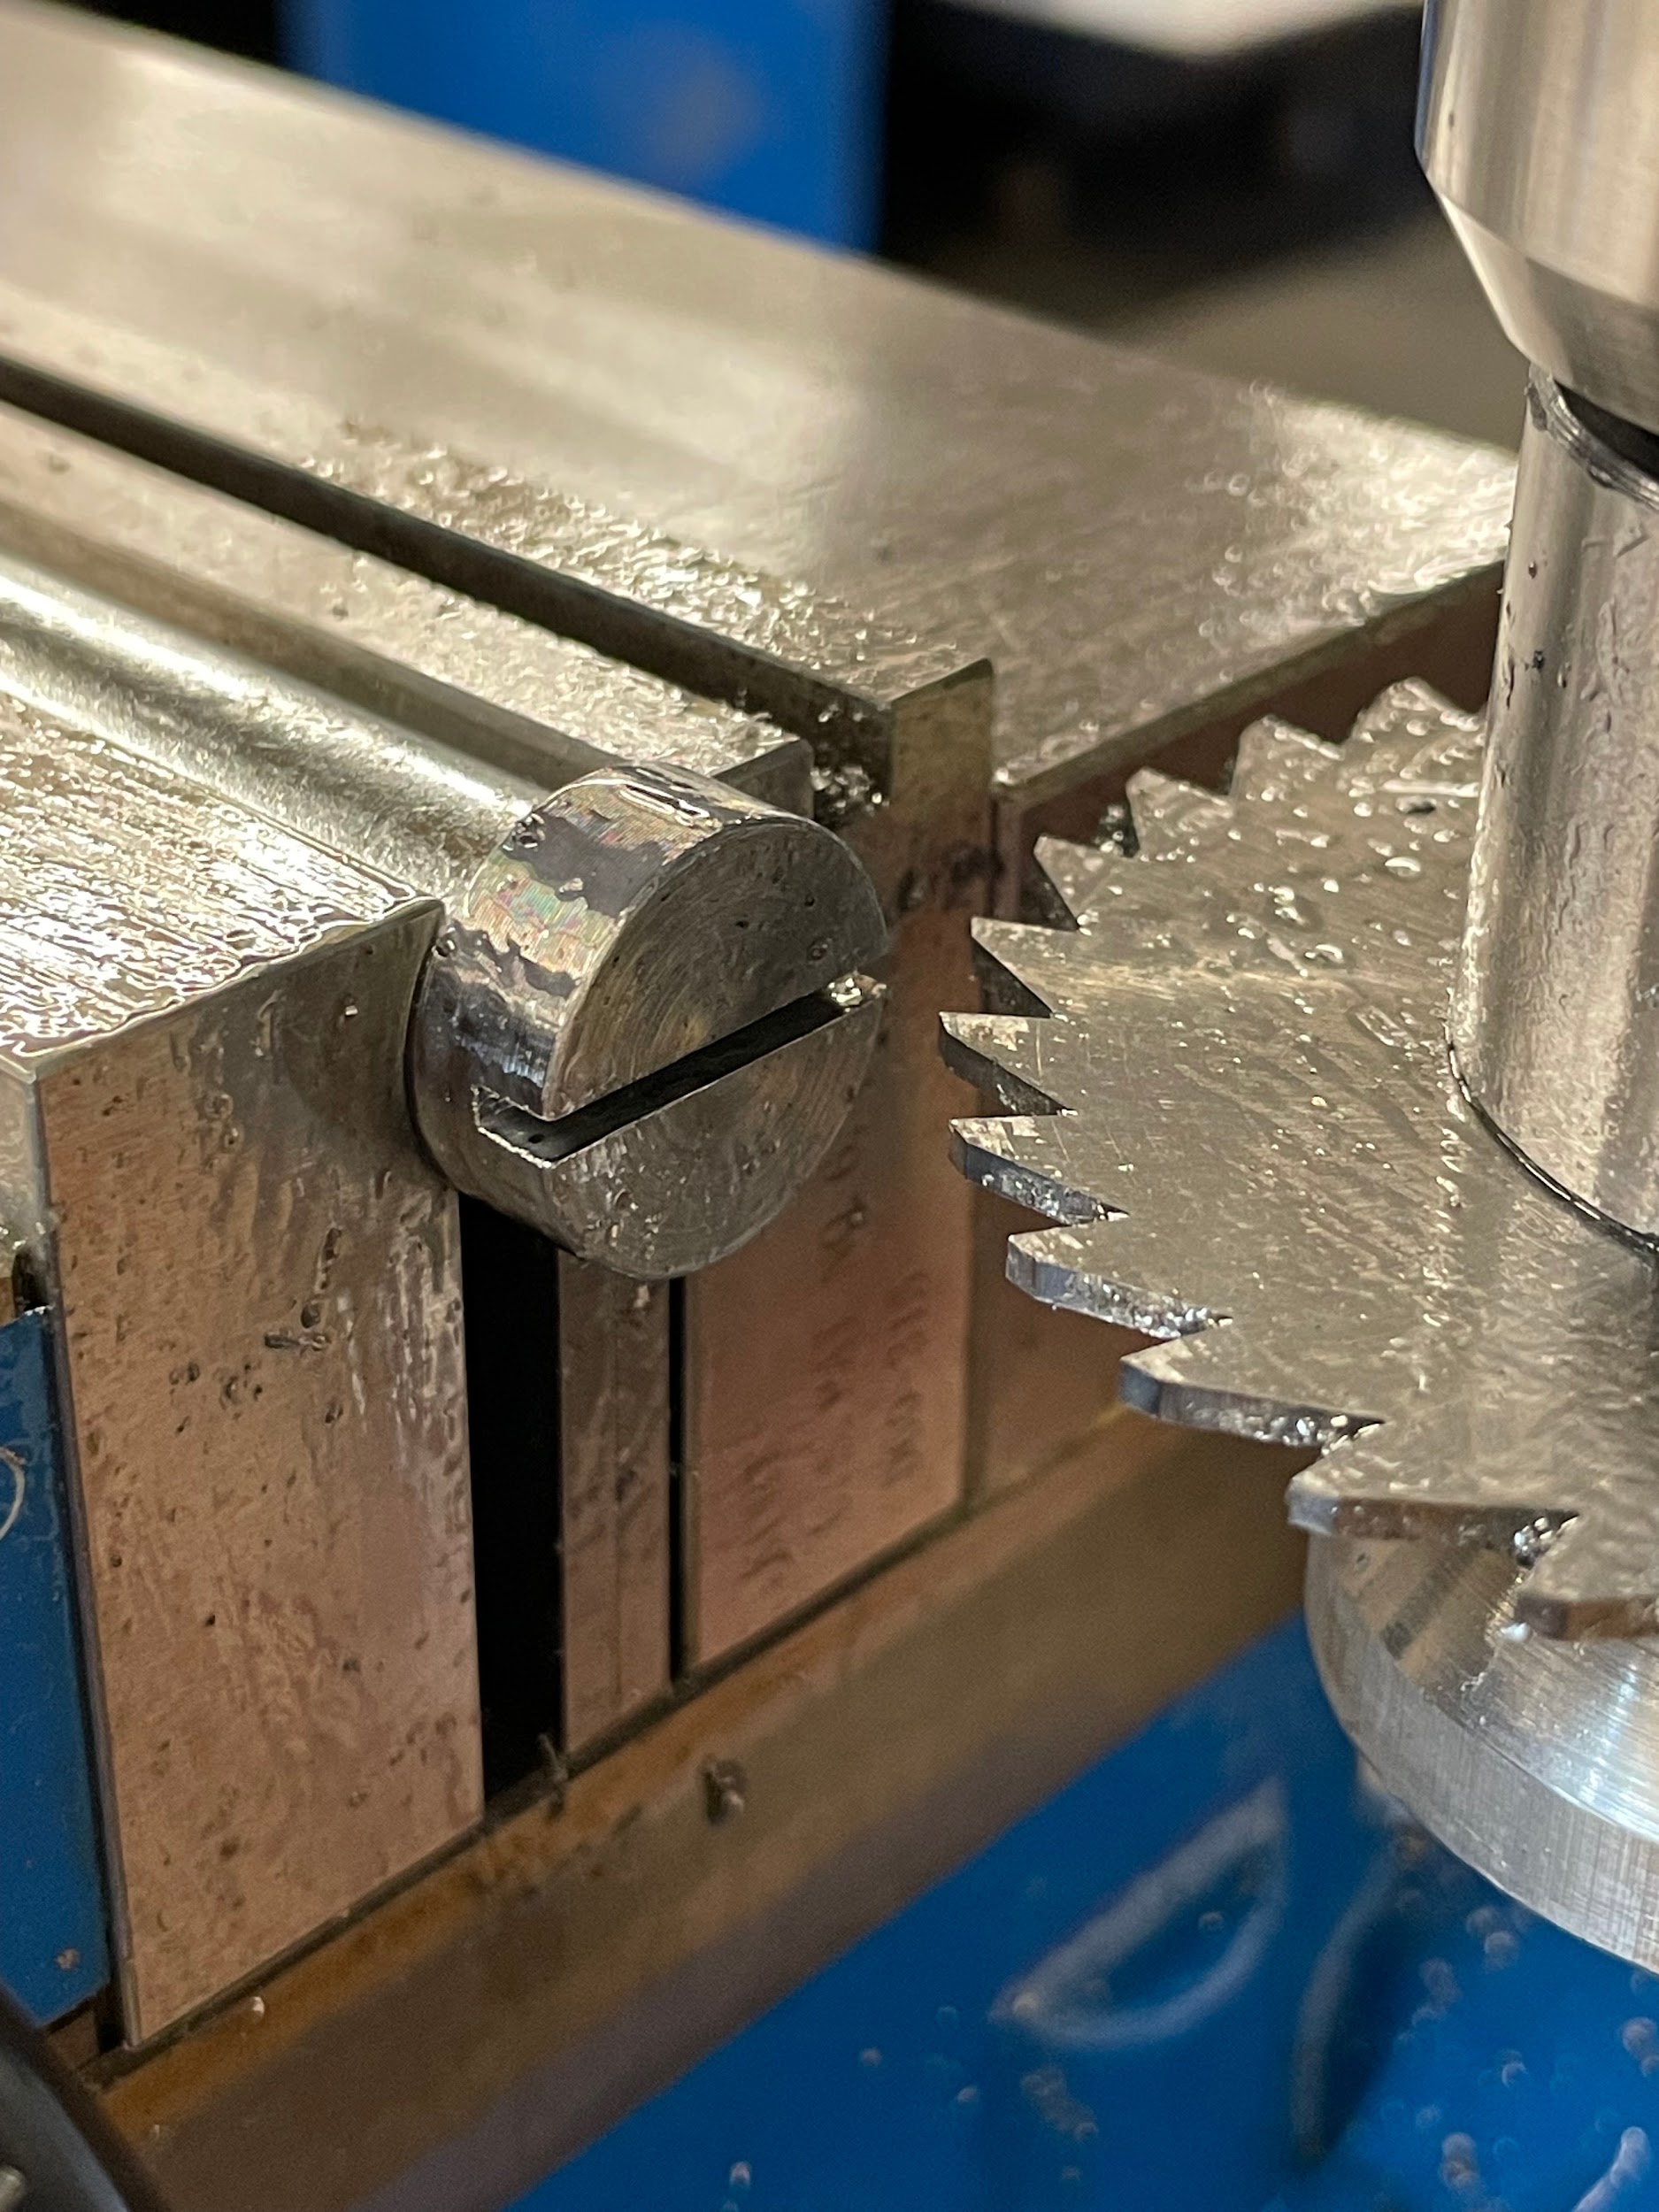
Slitting is the process of using a slitting saw in order to create small slot features or to completely remove sections of a part. Saws can come in many different shapes and sizes. Sometimes smaller than 1” in diameter and 1/32” in thickness, to over 6” diameter and ¼” thick. The variety of saws can help the machinist create intricate recessed cuts on parts and in positions that might not otherwise be possible with other tooling. Slots that go beyond 3x diameter in depth can be very difficult to create with end mills or other rotary tooling. Saws can be very useful in these situations. Sometimes a pair of parts will be made in a single piece for ease of manufacture and then precisely cut apart with a slitting saw on the milling machine.
One precaution that should be taken when using slitting saws is that they are easily broken if they become overloaded. Generally speaking, compared to other milling tools, saws have lots of teeth. Those many teeth like to have a relatively small chip load per tooth. If the CPT is too large, the saw gullets can become full, or the torque required to turn the saw will become too great, causing undue stress and causing the saw to break. On a manual milling machine, one particular way to accidentally increase the CPT too much is by climb milling, If climb milling is used while slitting, automatic advancement of the work can occur, and the CPT could easily triple, causing catastrophic failure of the saw. For that reason, when sawing on a manual milling machine that doesn’t have a backlash control device, it is best practice to use conventional milling strategies.
Author’s Tip
When I am setting up a slitting saw, I like to calculate an approximate feed using the same formula for feed as my other milling tools. The difference is that instead of calculating the CPT based on the tool diameter, like an end mill, I use the saw thickness. That will give a decent starting point for most saws.
As far as spindle speeds go, I run saws a bit slower than the traditional speed calculation. The reason for this is that they are generally large in diameter compared to thickness. This can be a great recipe for ringing and frequency resonance. I like to start off at ¼ to ½ speed, depending on the saw, and work my way up if things are going well.
Step by step process for sawing a centered slot:
- Load the saw with the characteristics required of the slot onto the appropriate arbor. If the arbor uses a screw on cap mechanism for holding the saw in place, make sure the saw is installed so that the cutting action will only tighten the cap and not loosen it.
- Load the arbor into the mill spindle.
- Load part into the vise, leaving the end to be slit overhanging the side.
- Calculate and set the spindle speed.
- Lock the quill.
- Bring the knee up and touch the bottom of the saw to the top of the part.
- Zero the knee.
- Move the saw off to the side of the part.
- Raise the knee to half the thickness of the saw blade. This will put the middle of the blade even with the top of the part.
- Zero the knee.
- Raise the knee to half the size of the part. This will put the middle of the saw in line with the middle of the part.
- Zero the knee.
- Start the spindle.
- Touch the tool off on the face of the part by moving the table.
- Zero the table handwheel.
- Move the saddle to the side of the part that will allow conventional milling of the slot.
- Adjust the saw to the desired depth of cut by moving the table.
- Lock the table.
- Lube the saw.
- Slowly move the saddle to cut the slot through the part.
- Apply oil as needed, either with a brush or small bottle.
“Step 11: Raise the knee to half the size of the part. This will put the middle of the saw in line with the middle of the part.“
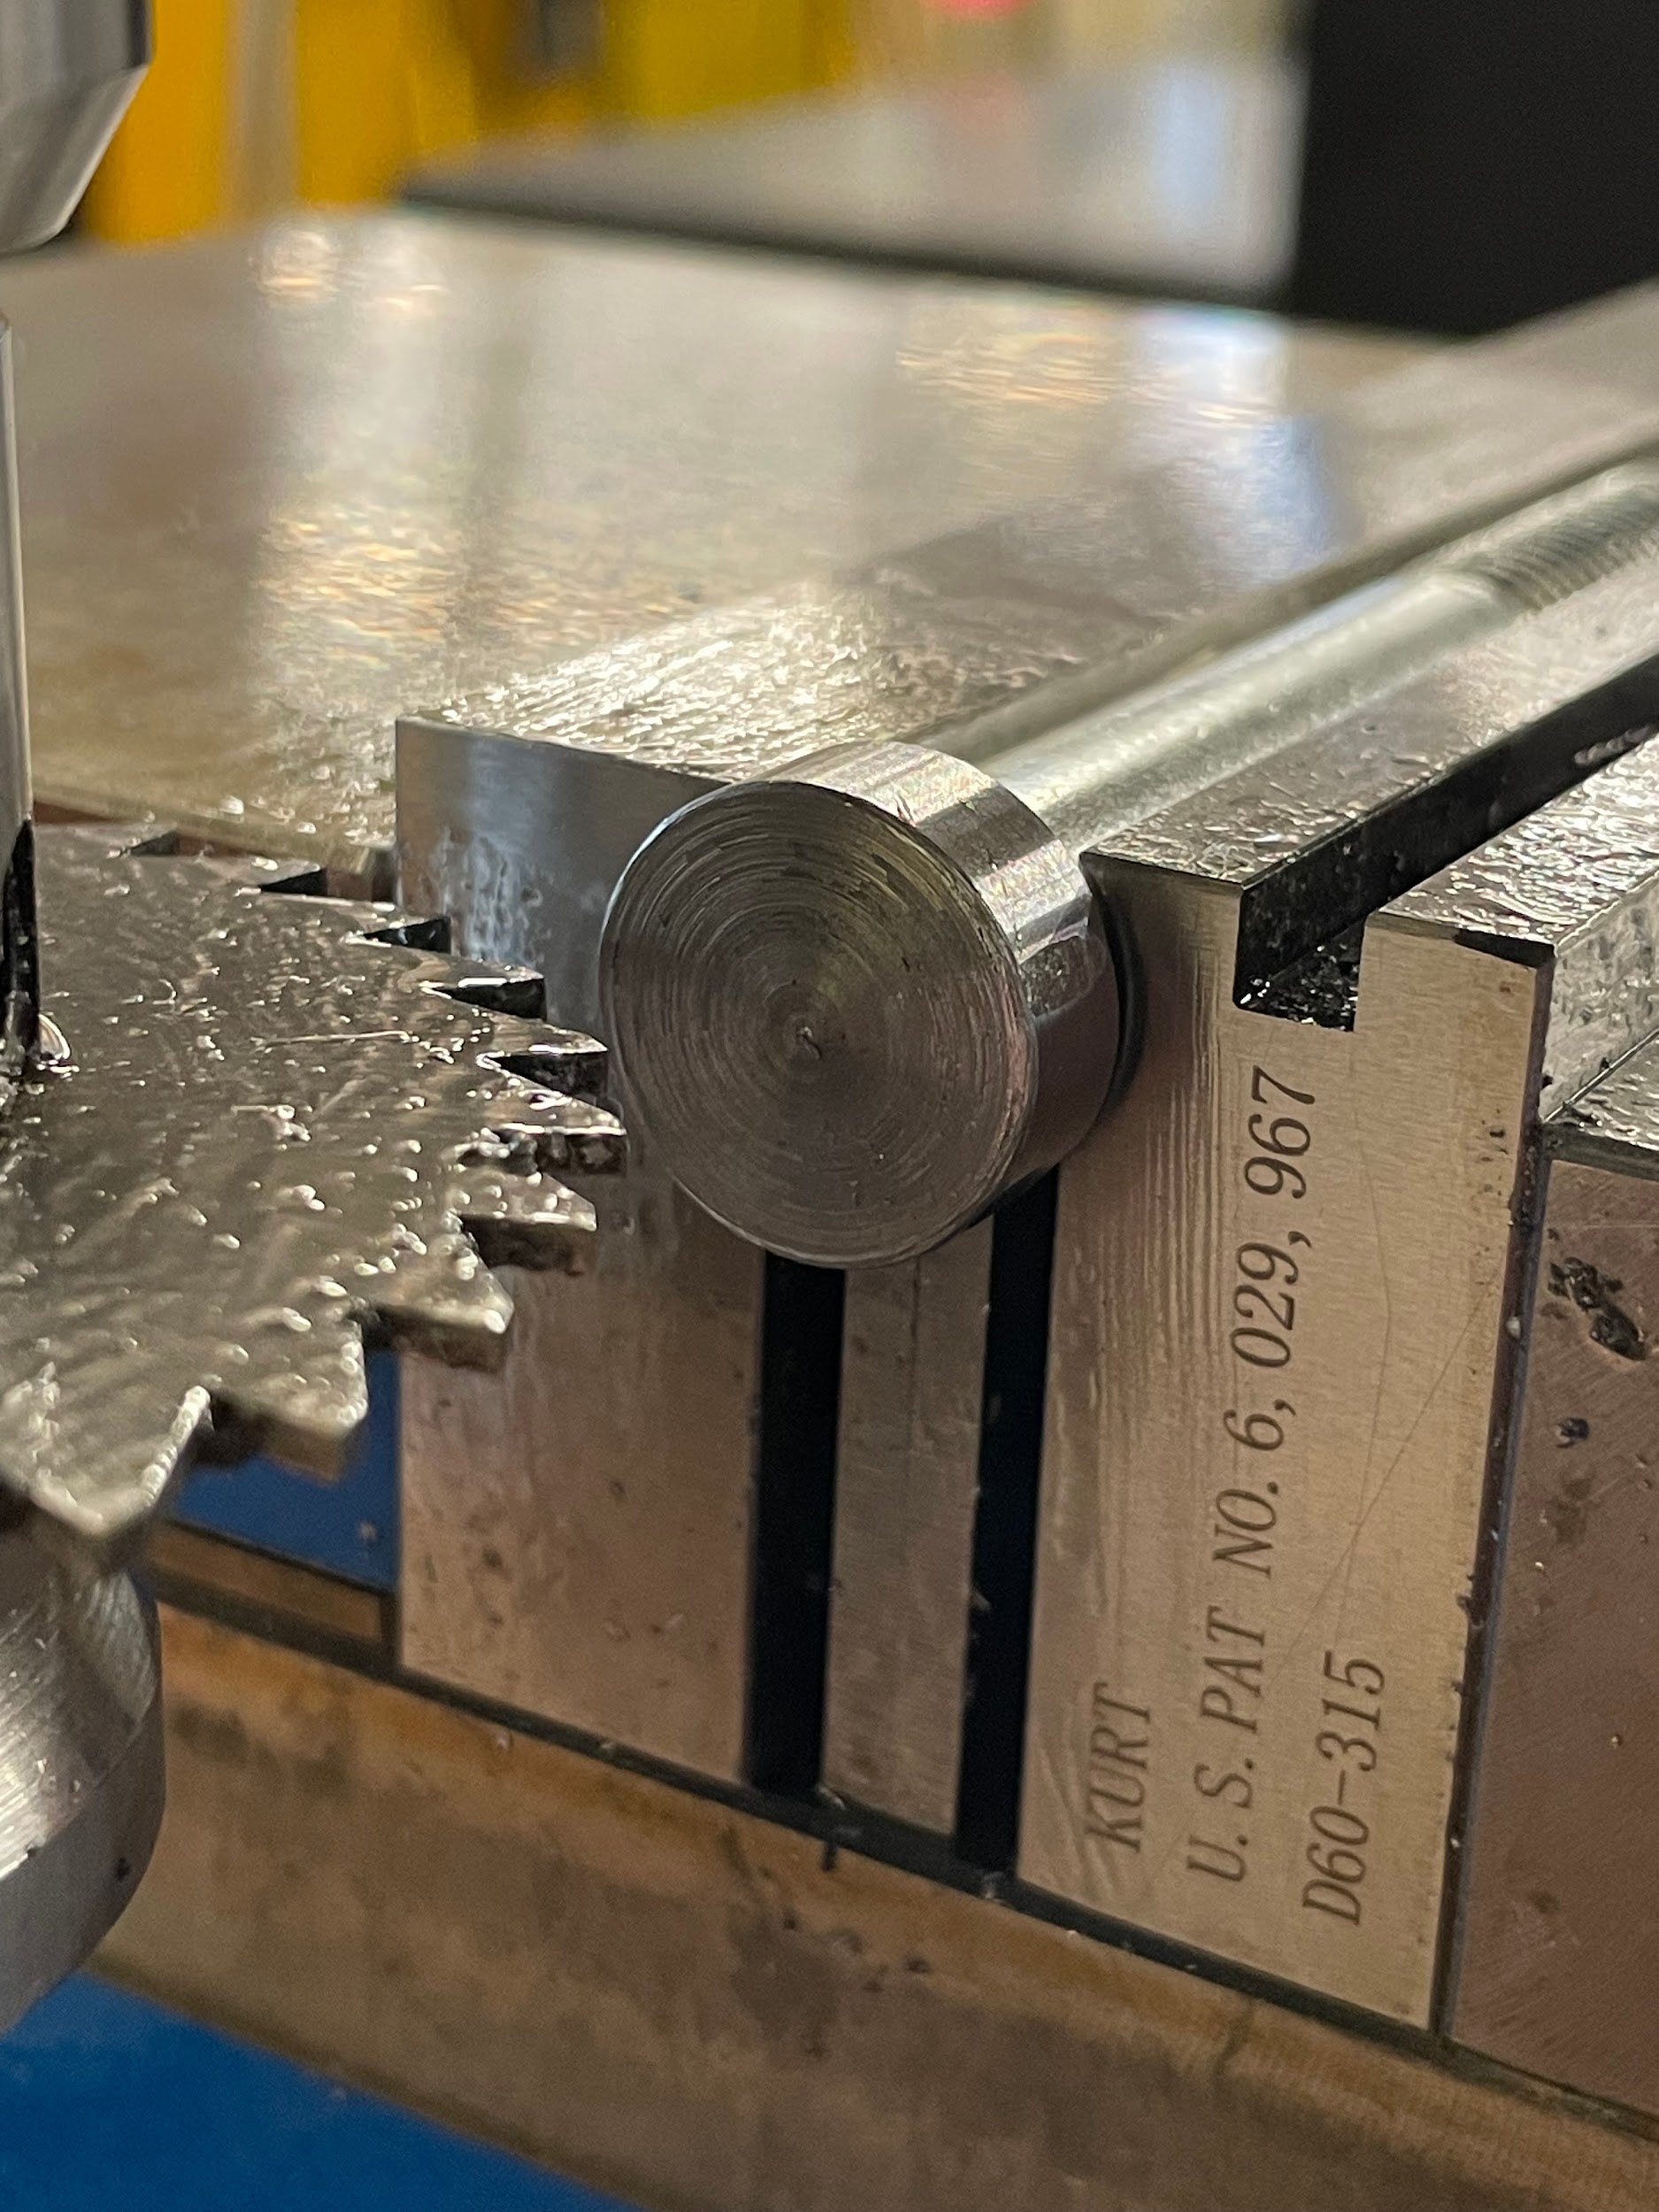
“Step 20: Slowly move the saddle to cut the slot through the part.“

INDEXING
What is it?
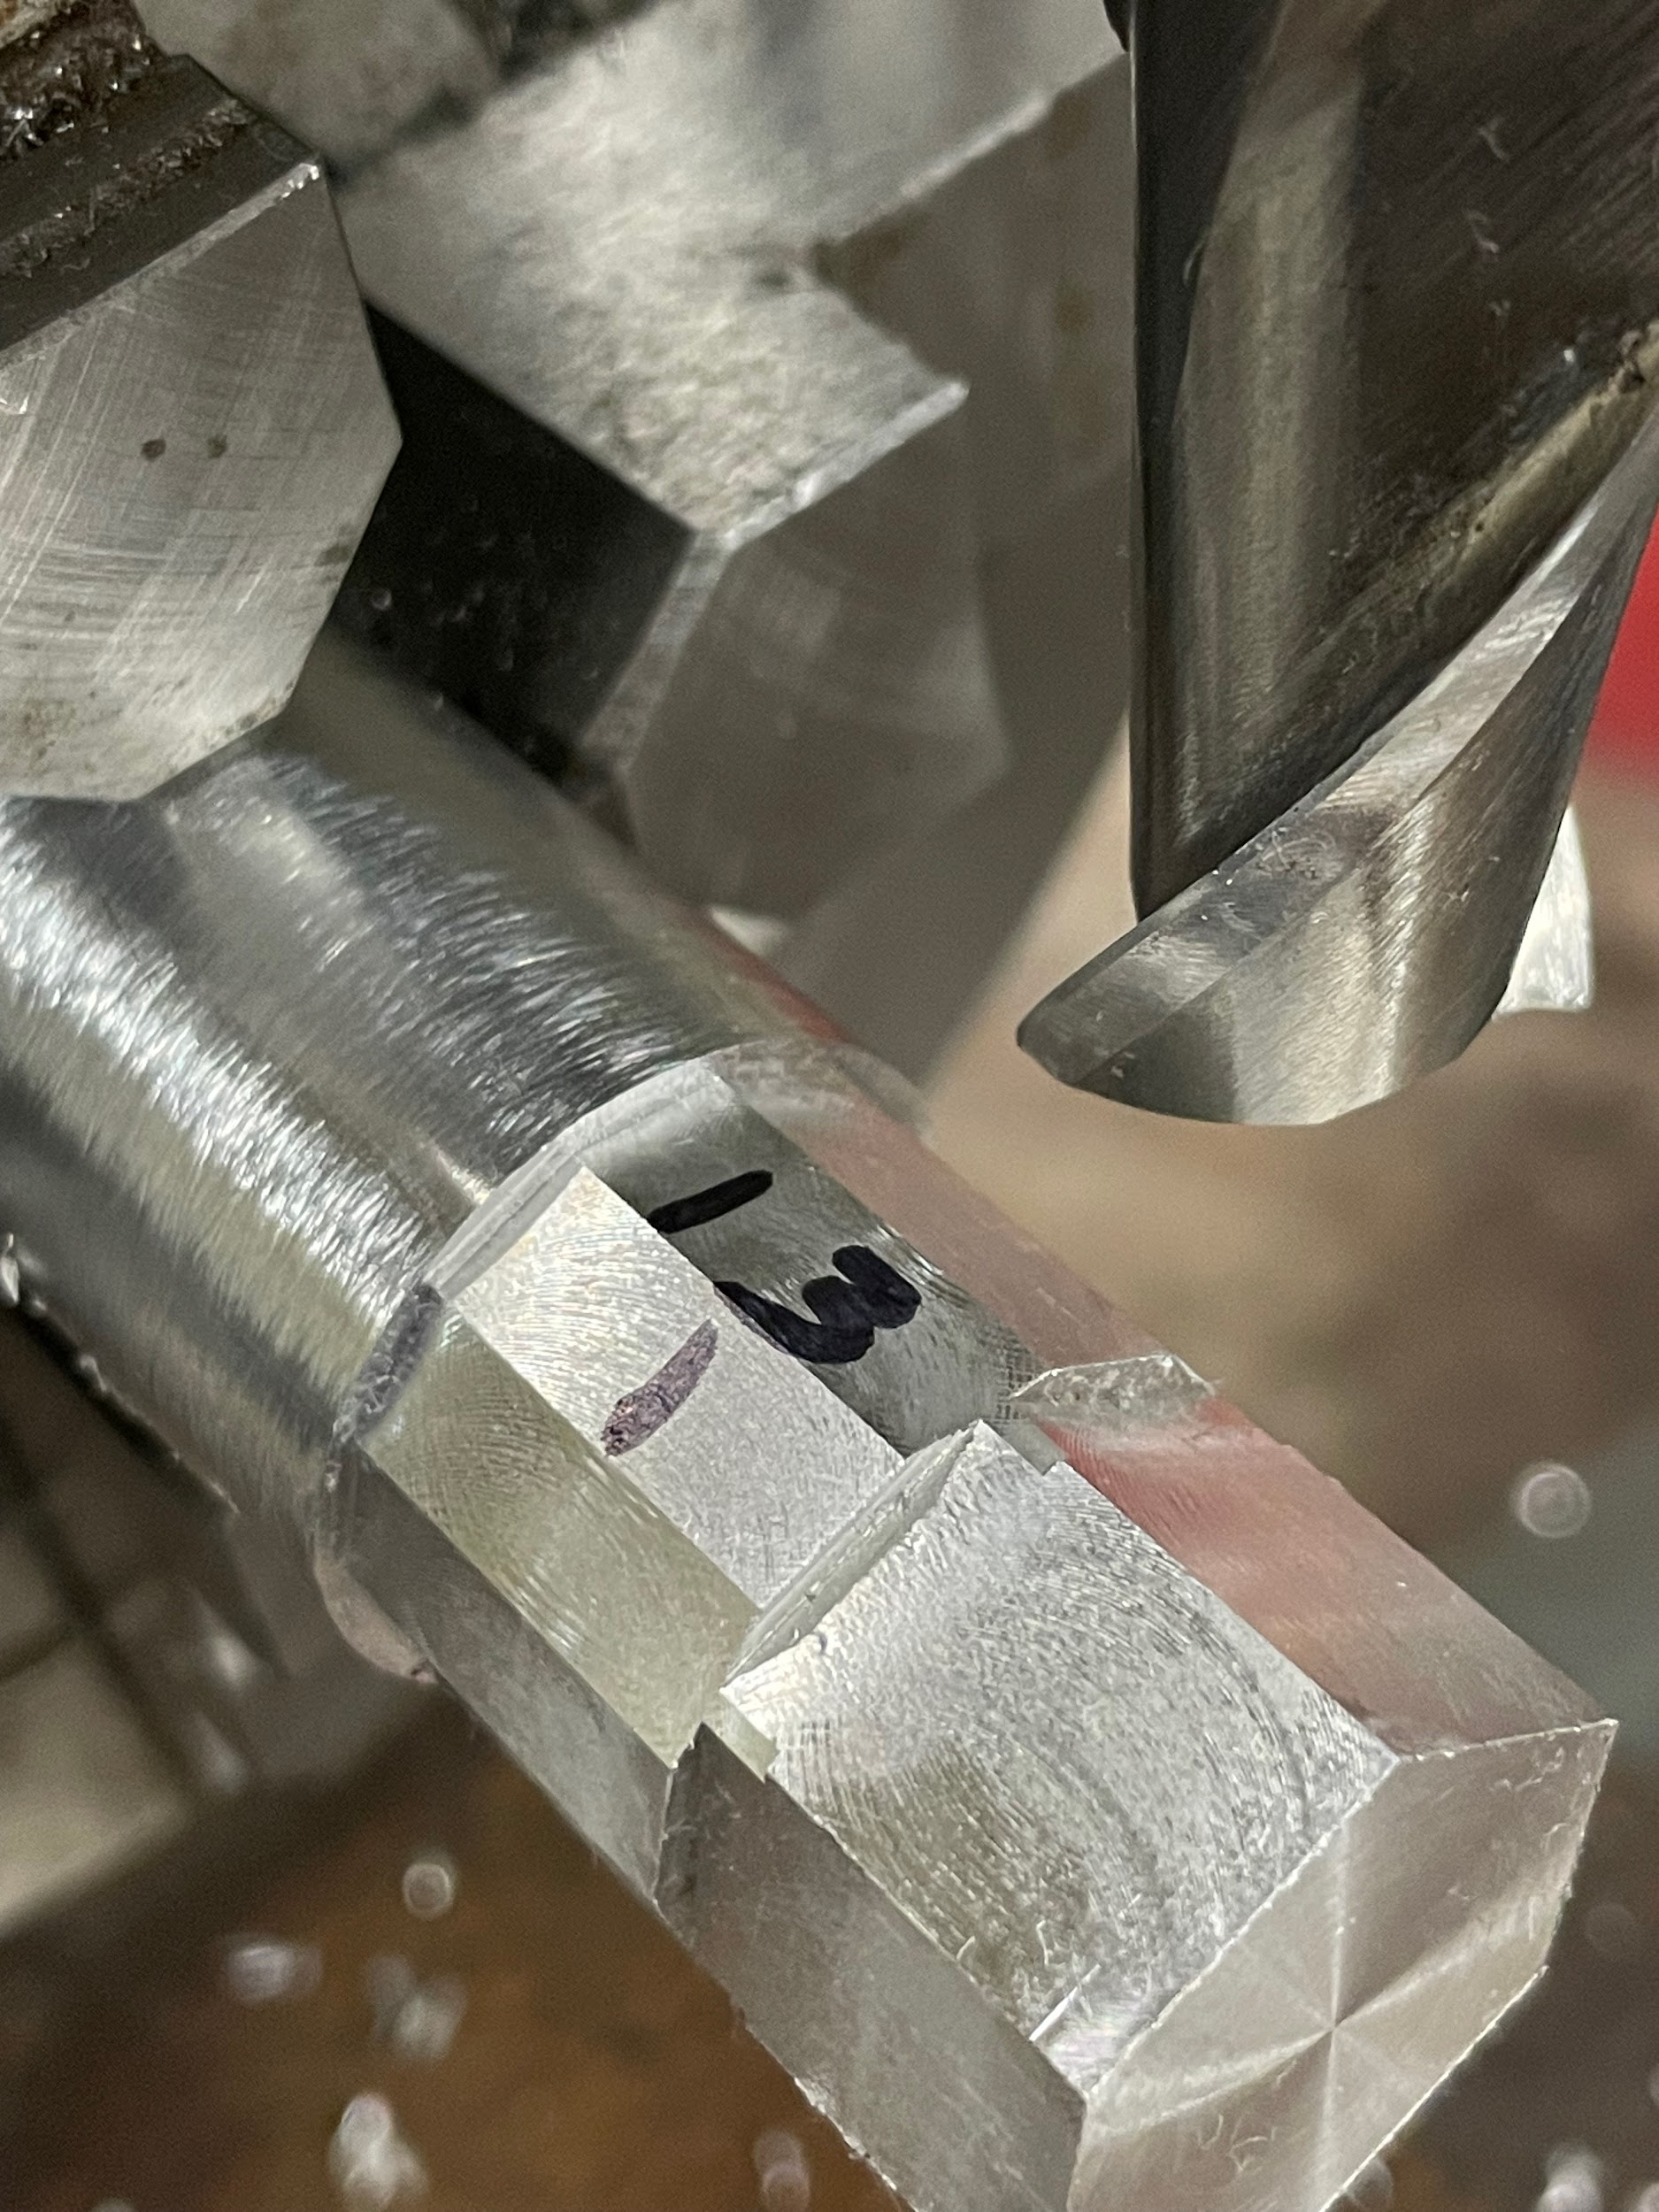
Indexing, also known as dividing, is the process of manipulating a part to machine specific features at fractions of a rotation. On a milling machine, an indexing head is used for this purpose. The indexing head is capable of quickly and easily making accurate partial rotations. Before moving forward, a few terms should be explained.
Indexing components
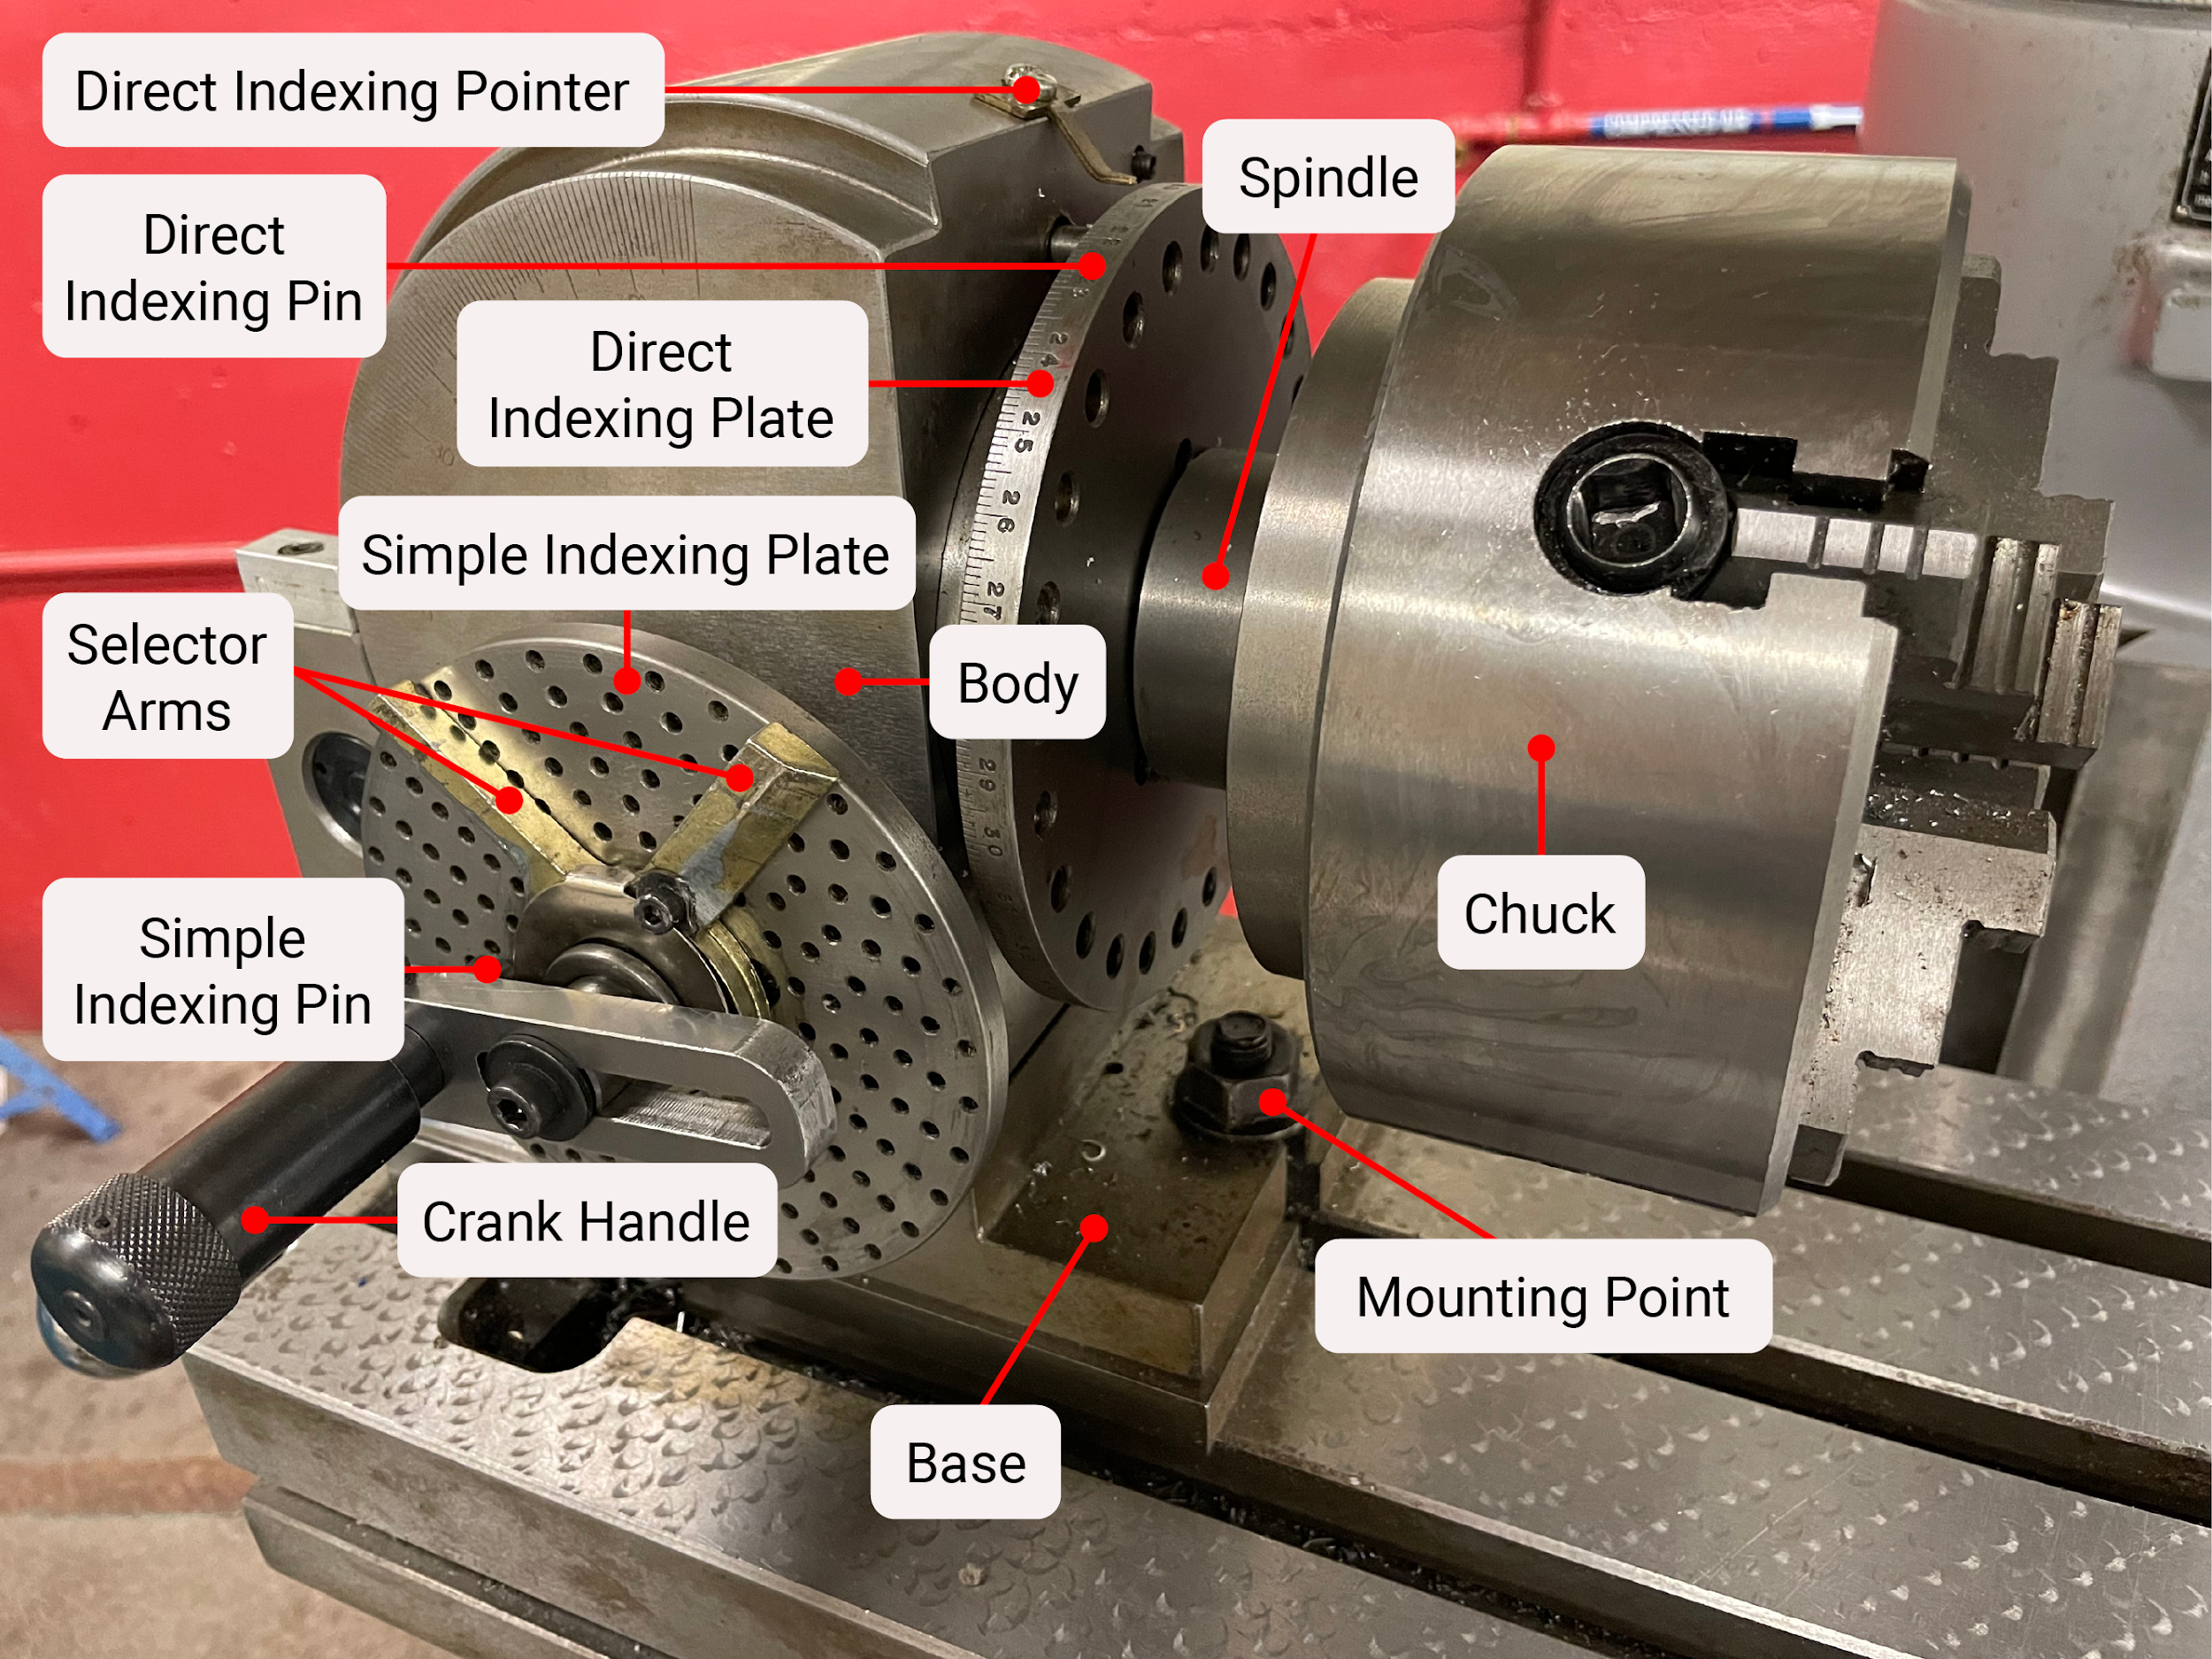
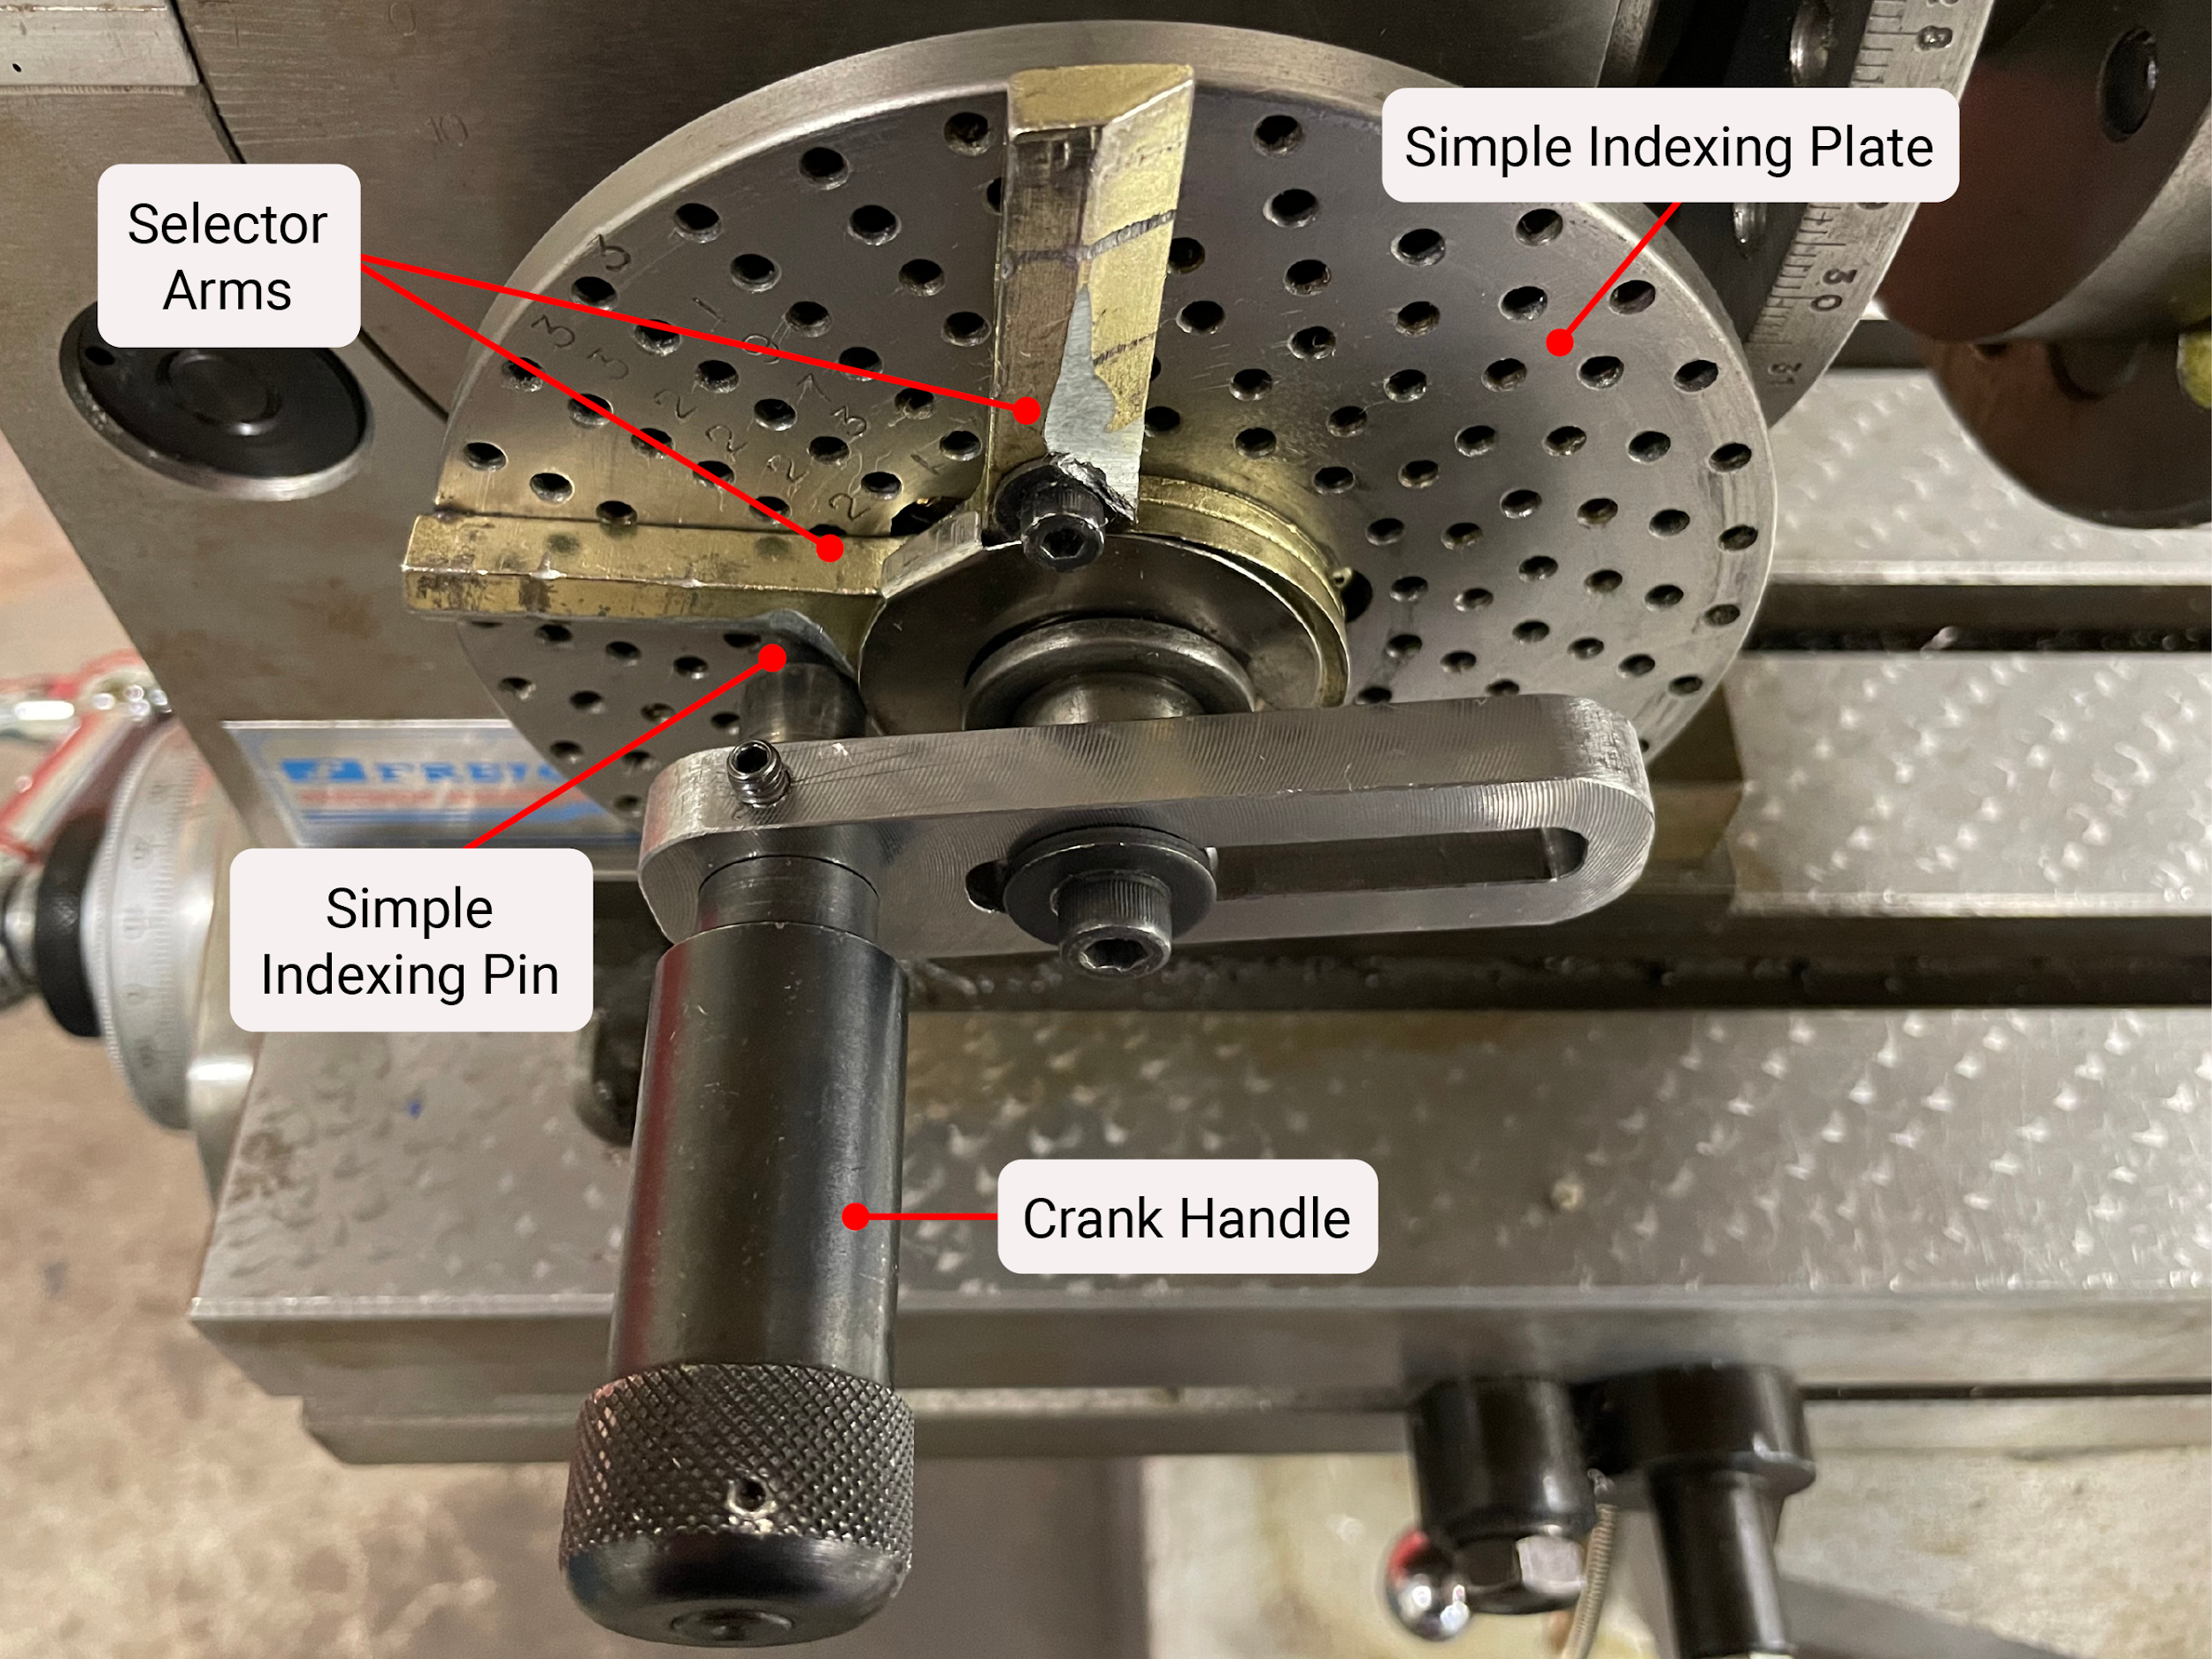
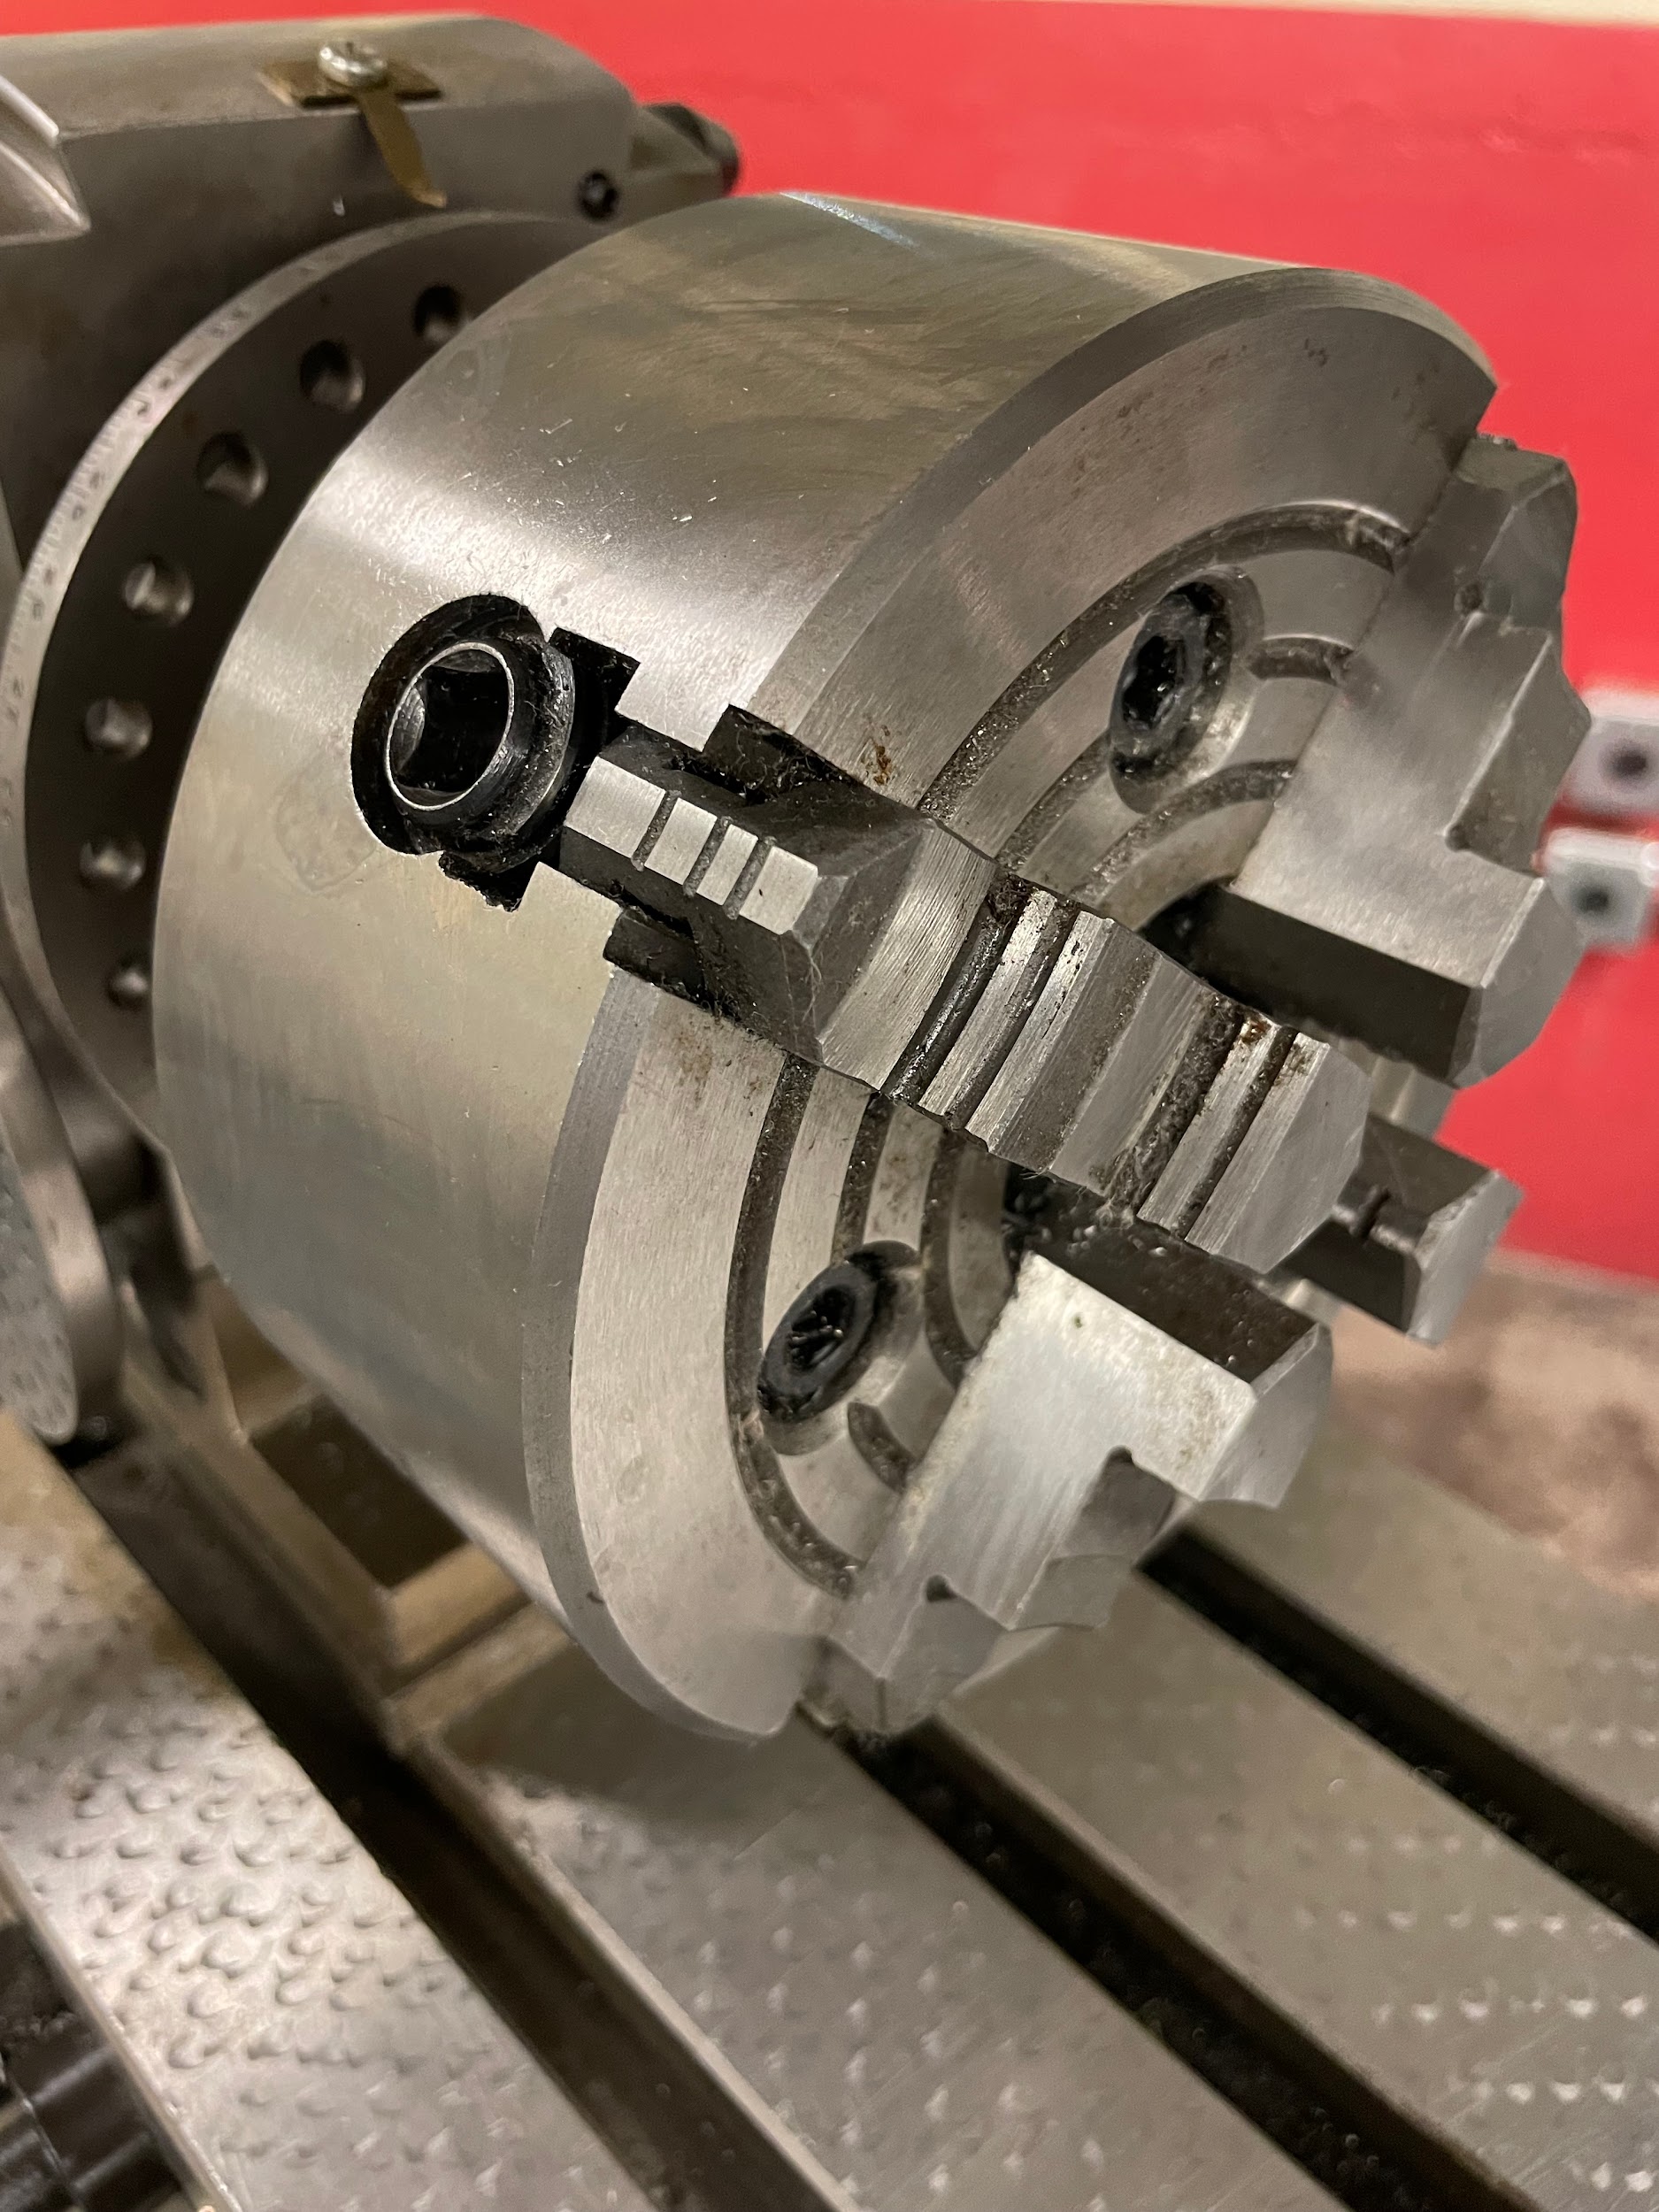
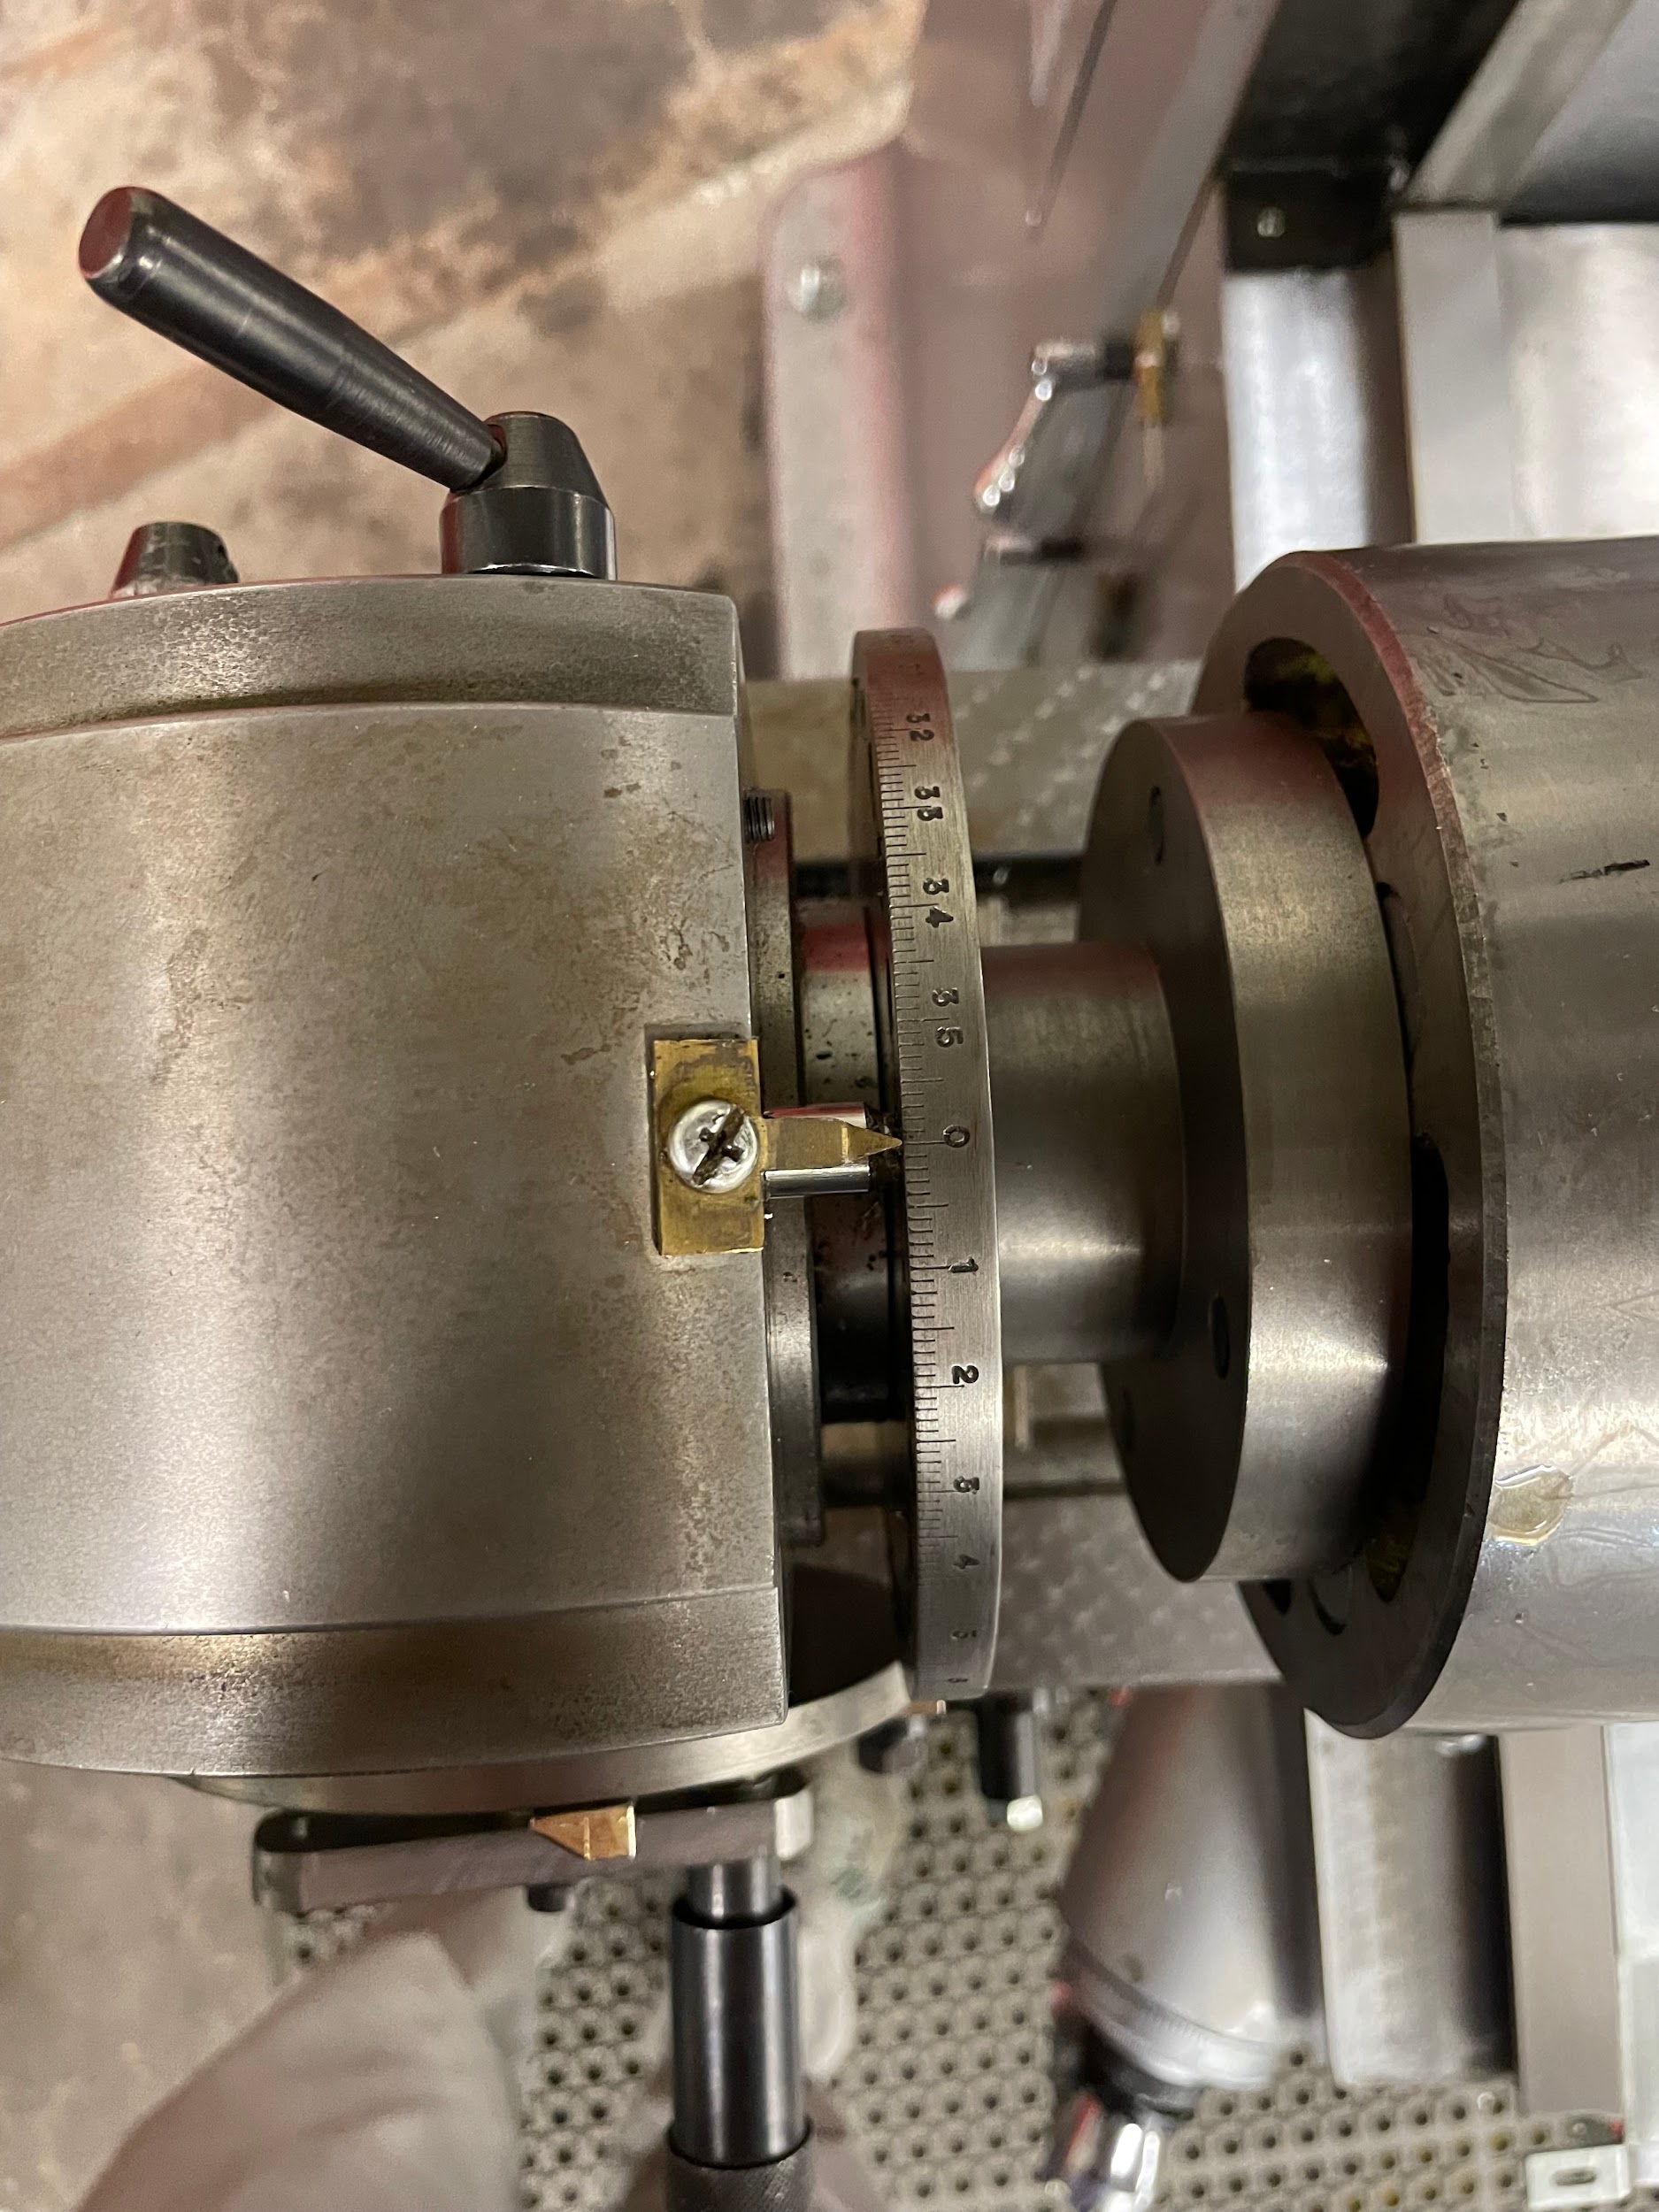
The worm gear is attached to the end of a shaft that is turned by the indexing crank. The worm gear works in conjunction with the worm wheel to adjust the indexing head turning ratio. The ratio between the two is generally 40 : 1 for indexing heads.
The worm wheel is attached to the beginning of a shaft that turns the spindle. The worm wheel works in conjunction with the worm gear to adjust the indexing head turning ratio. The ratio between the two is generally 40 : 1 for indexing heads. The worm wheel rotates one tooth for each full rotation of the worm gear.
An indexing plate is an attachment that has predetermined hole patterns precisely placed to represent fractions of a rotation. Each manufacturer has different plates. For the examples, a set of three plates will be used that have the following hole patterns.
Plate one: 15, 16, 17, 18, 19, 20.
Plate two: 21, 23, 27, 29, 31, 33.
Plate three: 37, 39, 41, 43, 47, 49.
The indexing shaft has the indexing crank attached at one end and the worm gear on the other.
The indexing crank is used to turn the shaft that has the worm gear on it. It has a slot down the middle to make it adjustable, so that in use, it can reach multiple different hole patterns on the indexing plates.
The indexing pin is attached to the indexing crank. Once the crank is turned, the pin is placed in a hole on the indexing plate to set the position.
The selector arms are loosely attached to the shaft below the indexing crank. They are held in place by gentle friction and are intended to be moved throughout the indexing process. One arm serves to indicate the position where the pin is currently in a hole, while the other arm serves as an indicator of the hole the pin should go into on the next index. The selector arms aid in the speed and accuracy of indexing.
The spindle of the indexing head has the worm wheel attached at one end and a device to locate or attach work on the other. This may be in the form of a center, a taper, or a thread. A chuck may also be attached to the working end of the spindle.
The spindle lock is used to lock the spindle in place once the indexing has been completed. Locking the spindle allows for a more rigid machining process and protects the precise components of the indexing head.
A disengagement lever gives indexing heads the ability to disengage the connection between the indexing shaft and the spindle. This feature is helpful when utilizing direct indexing features.
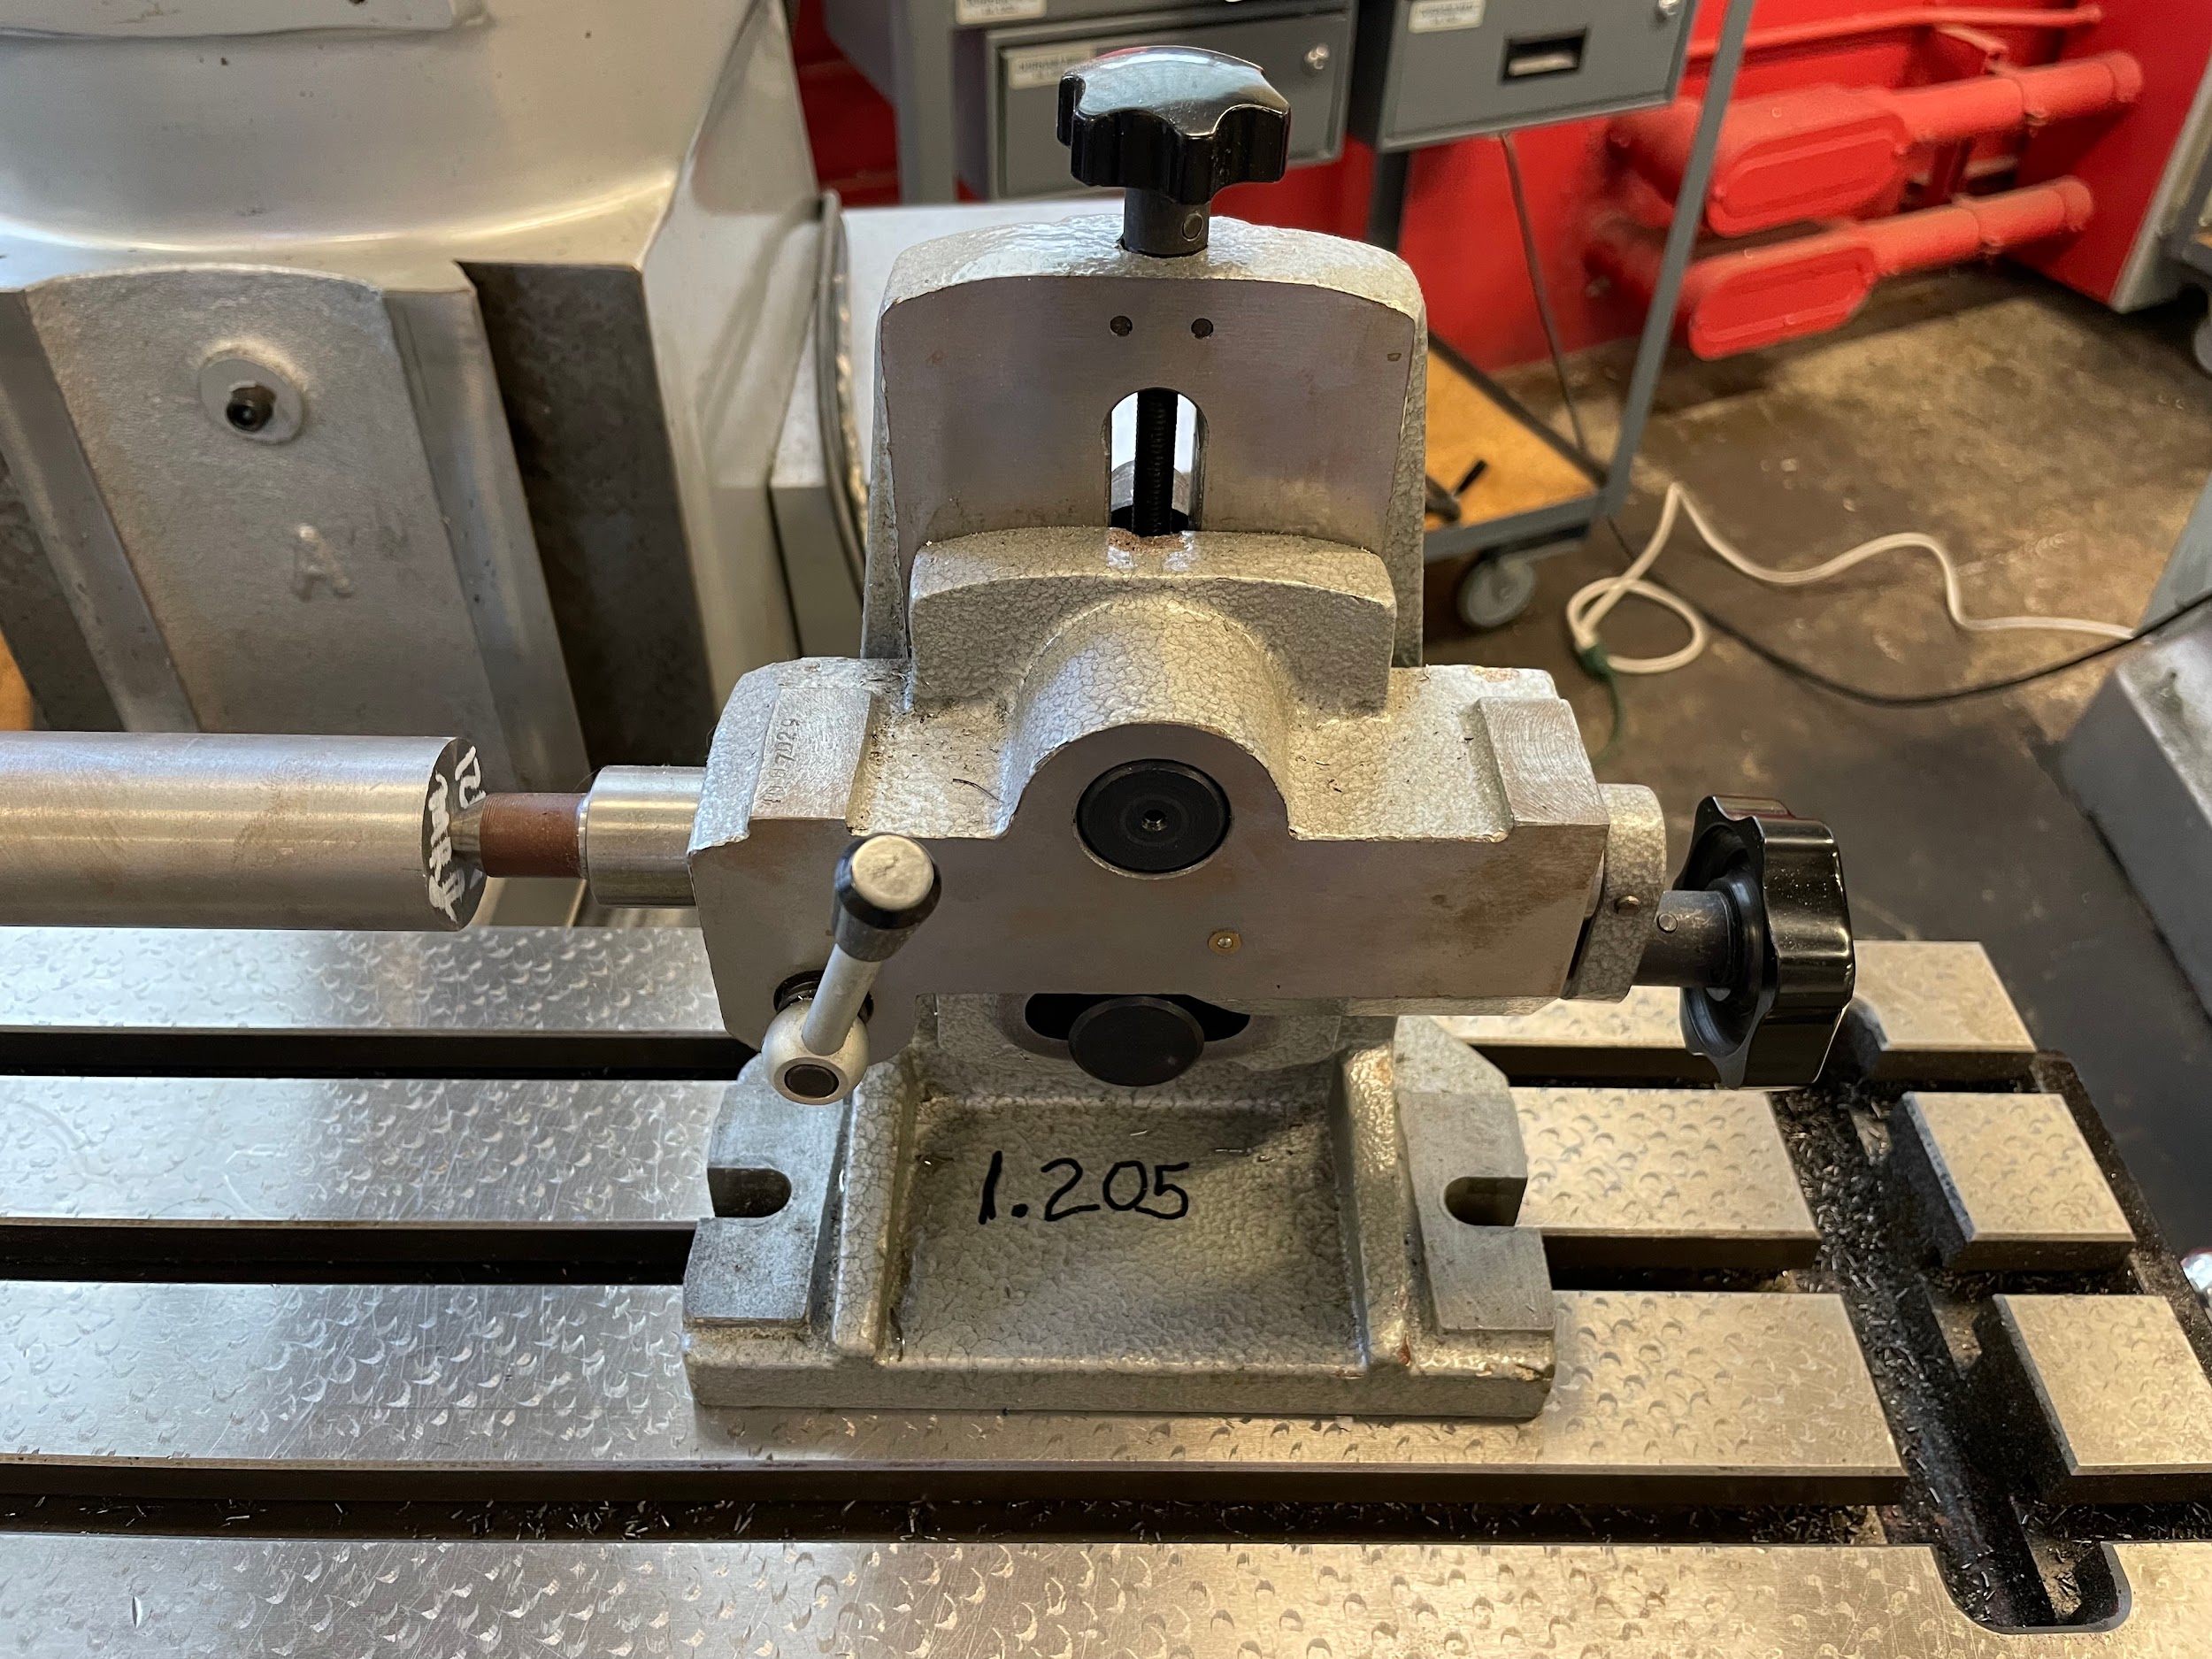
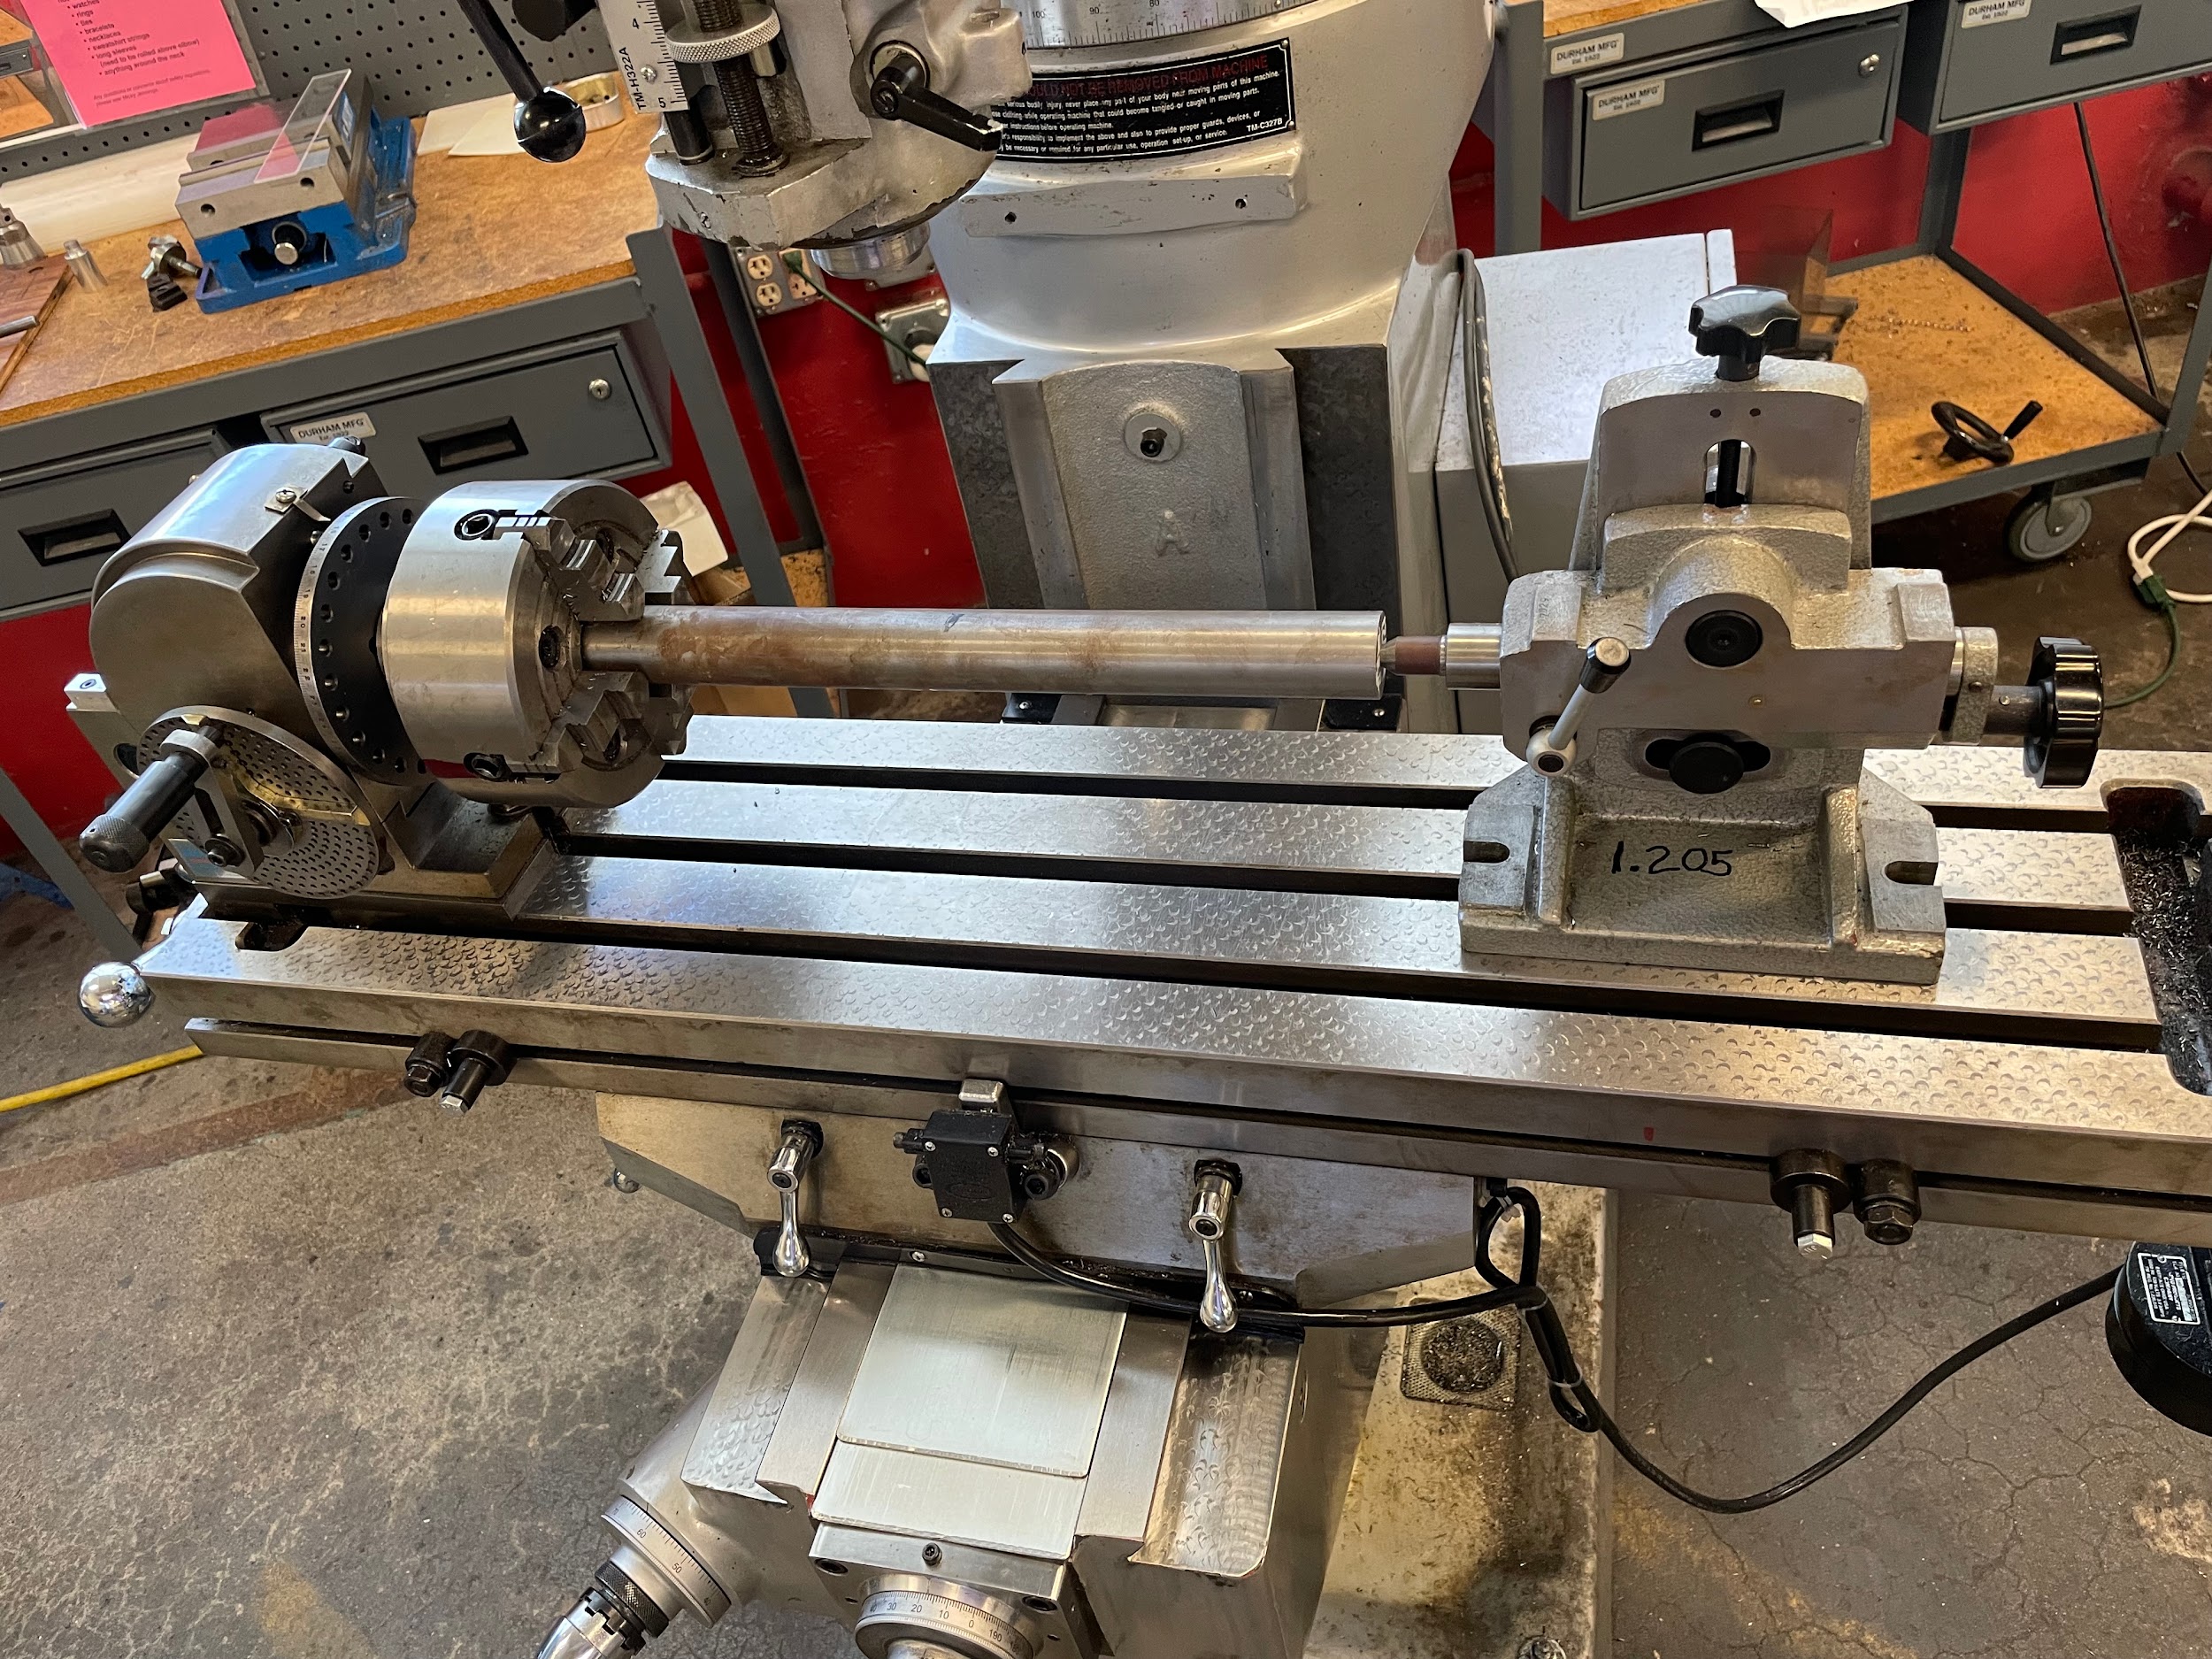
The foot stock is set opposite to the dividing head and is used to support long parts. The footstock is similar in operation to that of the tailstock on a lathe.
Direct indexing
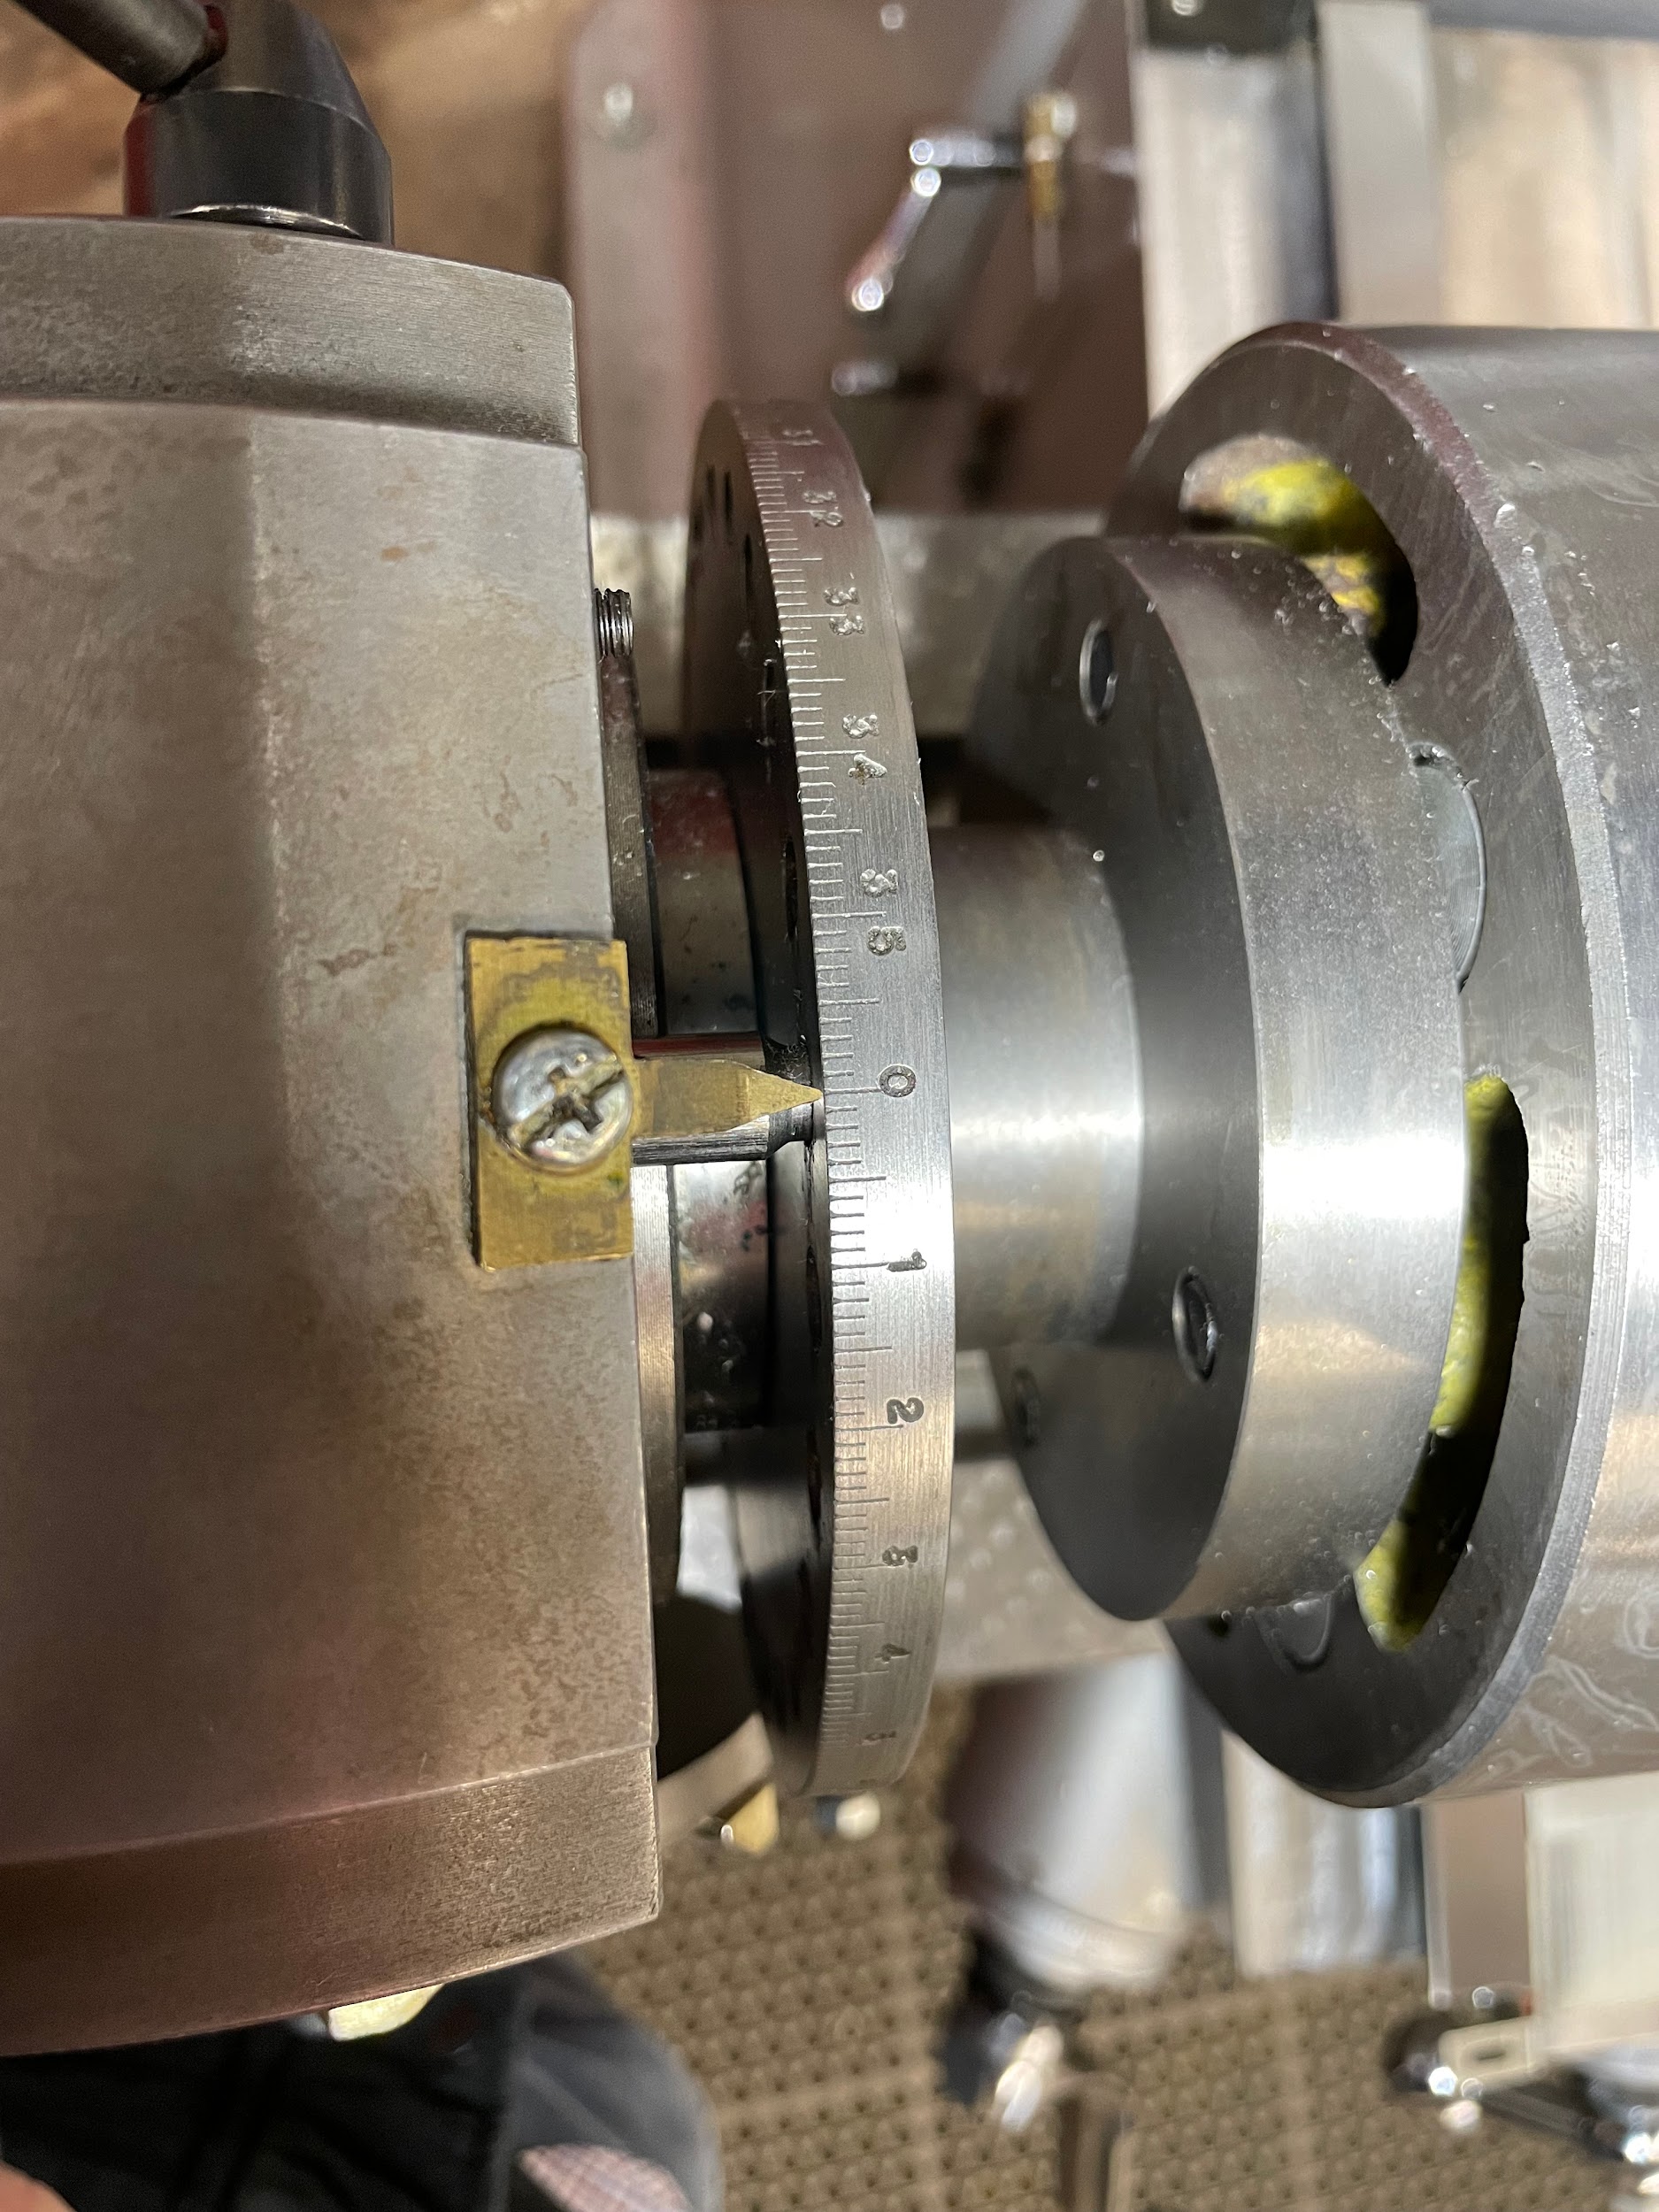
Direct indexing is a version of indexing that can be used to perform basic or routine divisions without the use of indexing plates. Direct indexing utilizes a basic system of a movable pin or gear tooth mounted on the head, and a hole or mating gear on the spindle. The increment of division of direct indexing is generally 15 degrees. This will allow for some of the general indexing needs, such as a square, a hexagon, or an octagon. To decide if direct indexing is appropriate for a part, examine the situation by asking if the number of divisions reflects an angular division that is divisible equally by 15 degrees.
Number of divisions, example
For example, if a job requires 6 equal divisions of a full rotation, take the full rotational degrees and divide by 6. Now divide that number by 15 degrees. Is that a whole number?
360 / 6 = 60
60 / 15 = 4
4 is a whole number, so direct indexing is possible.
Angle of division example
Another example is using degrees instead of numbers of divisions. Two holes need to be indexed 140 degrees apart. In this example, the step of figuring out the angle based on full rotation divided by the number of divisions can be bypassed. Just divide the required angle by the 15 degree increment of the direct indexing system, and see if the result is a whole number.
140 / 15 = 9.333
9.333 is not a whole number, so direct indexing is not possible.
Step by step process for direct indexing of a hex:
- Load a part into the four jaw chuck of an indexing head.
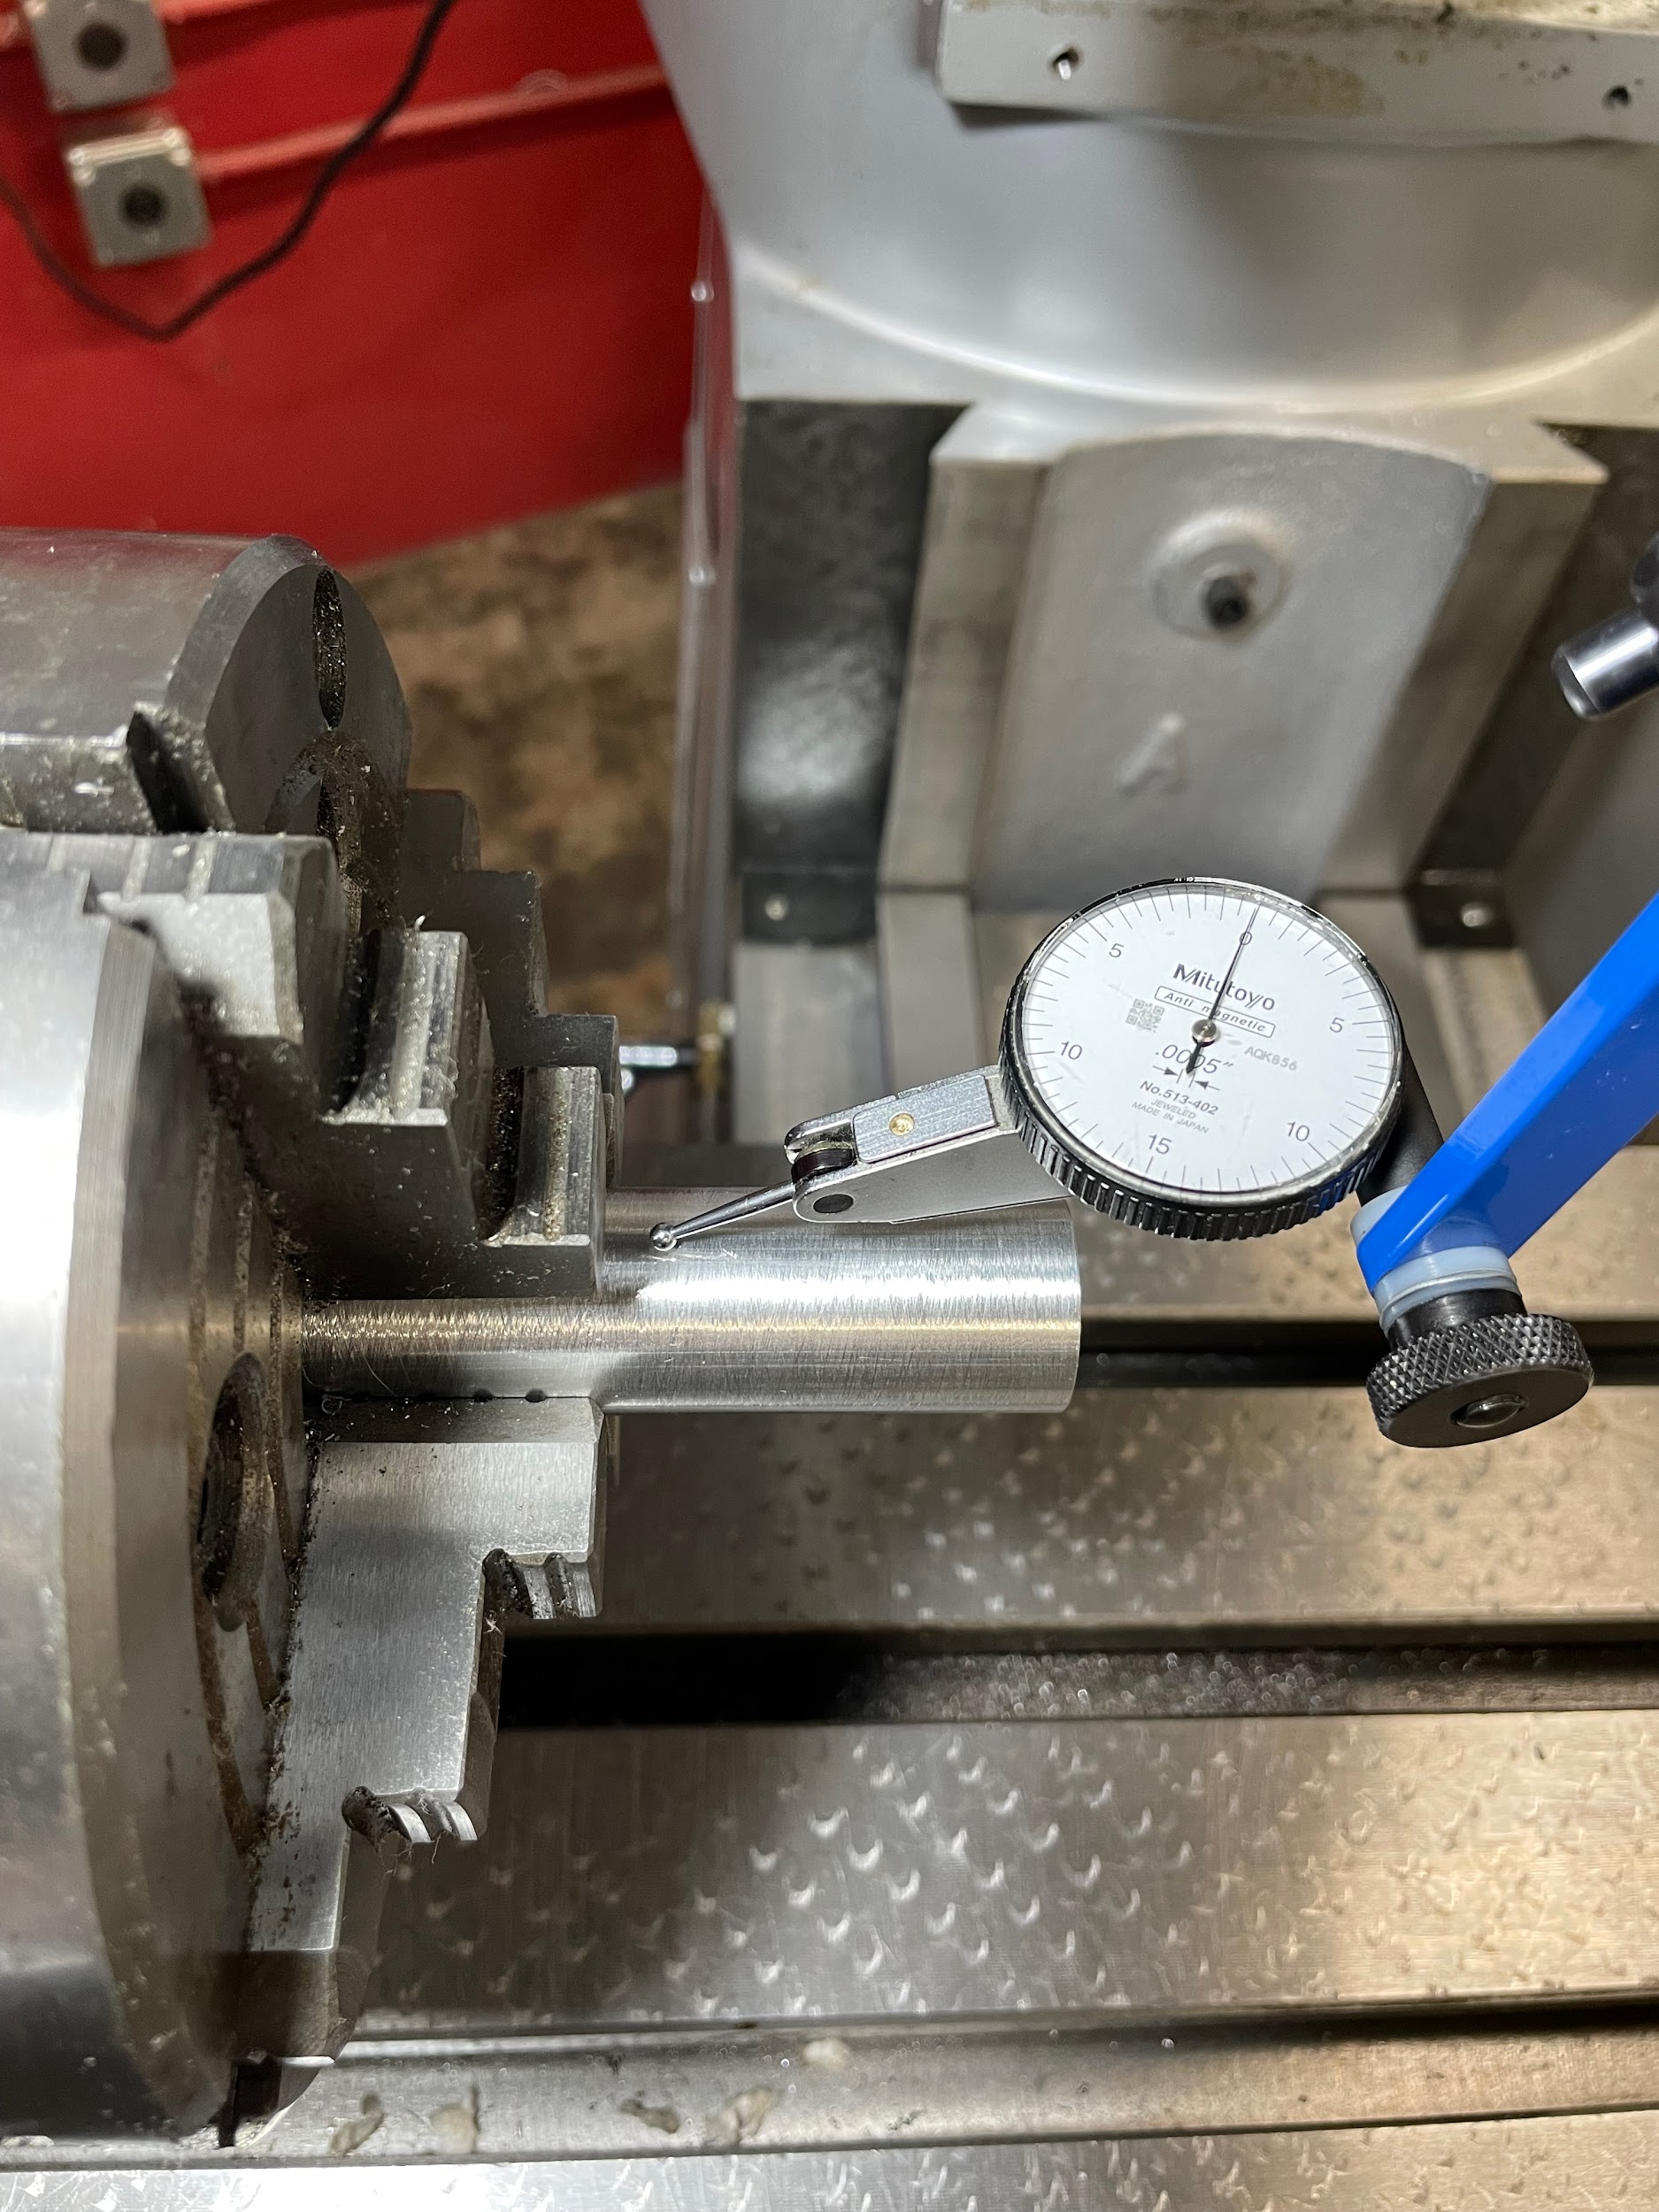
- Dial in the part so it is centered.
- Unlock the indexing head and rotate the spindle so the direct indexing pin sits securely in the zero position.
- Lock the indexing head.
- Lock the quill.
- Load a milling cutter. Select a milling cutter wide enough to cut the flat in one pass if possible.
- Lube the tool.
- Turn the spindle on and set the appropriate spindle speed.
- Bring the knee up to gently touch off the outside diameter of the material.
- Zero the knee.
- Move the table over and the knee up so that the side of the tool can be touched off. Only come up enough so that the area that is touched off does not create a divot in the finished part.
- Move the table to touch-off the tool to the face of the part.
- Zero the table.
- Maneuver the cutter to the side of the work so that a conventional cut can be taken by the saddle movement.
- Move the table to the amount required, minus .010”.
- Lock the table.
- Calculate and adjust the knee to the amount required, minus .010”. Be careful; every .001” adjustment of the knee will take .002” off over the flats once the part has been cut all the way around.
- Cut across the part with the saddle movement.
- Bring the part back to the starting point.
- Unlock the indexing head, remove the direct indexing pin, move the spindle 60 degrees, and relock the spindle.
- Repeat the previous steps until the part has been roughed.
- Turn off the spindle and let it come to a complete stop.
- Accurately measure the depth from the end of the part to the length of the step.
- Accurately measure across the flats of the hex.
- Start the spindle and move the cutter to the side of the part where climb milling cuts would start.
- Unlock the table.
- Adjust the table to take the remaining amount of material.
- Lock the table.
- Unlock the knee.
- Adjust the knee to take in the remaining amount of material. Be careful; every .001” adjustment of the knee will take .002” off over the flats once the part has been cut all the way around.
- Lock the knee.
- Make the finishing cuts across the part climb milling while direct indexing as before.
“Step 2: Dial in the part so it is centered.“
“Step 3: Unlock the indexing head and rotate the spindle so the direct indexing pin sits securely in the zero position.“

“Step 7: Lube the tool.“
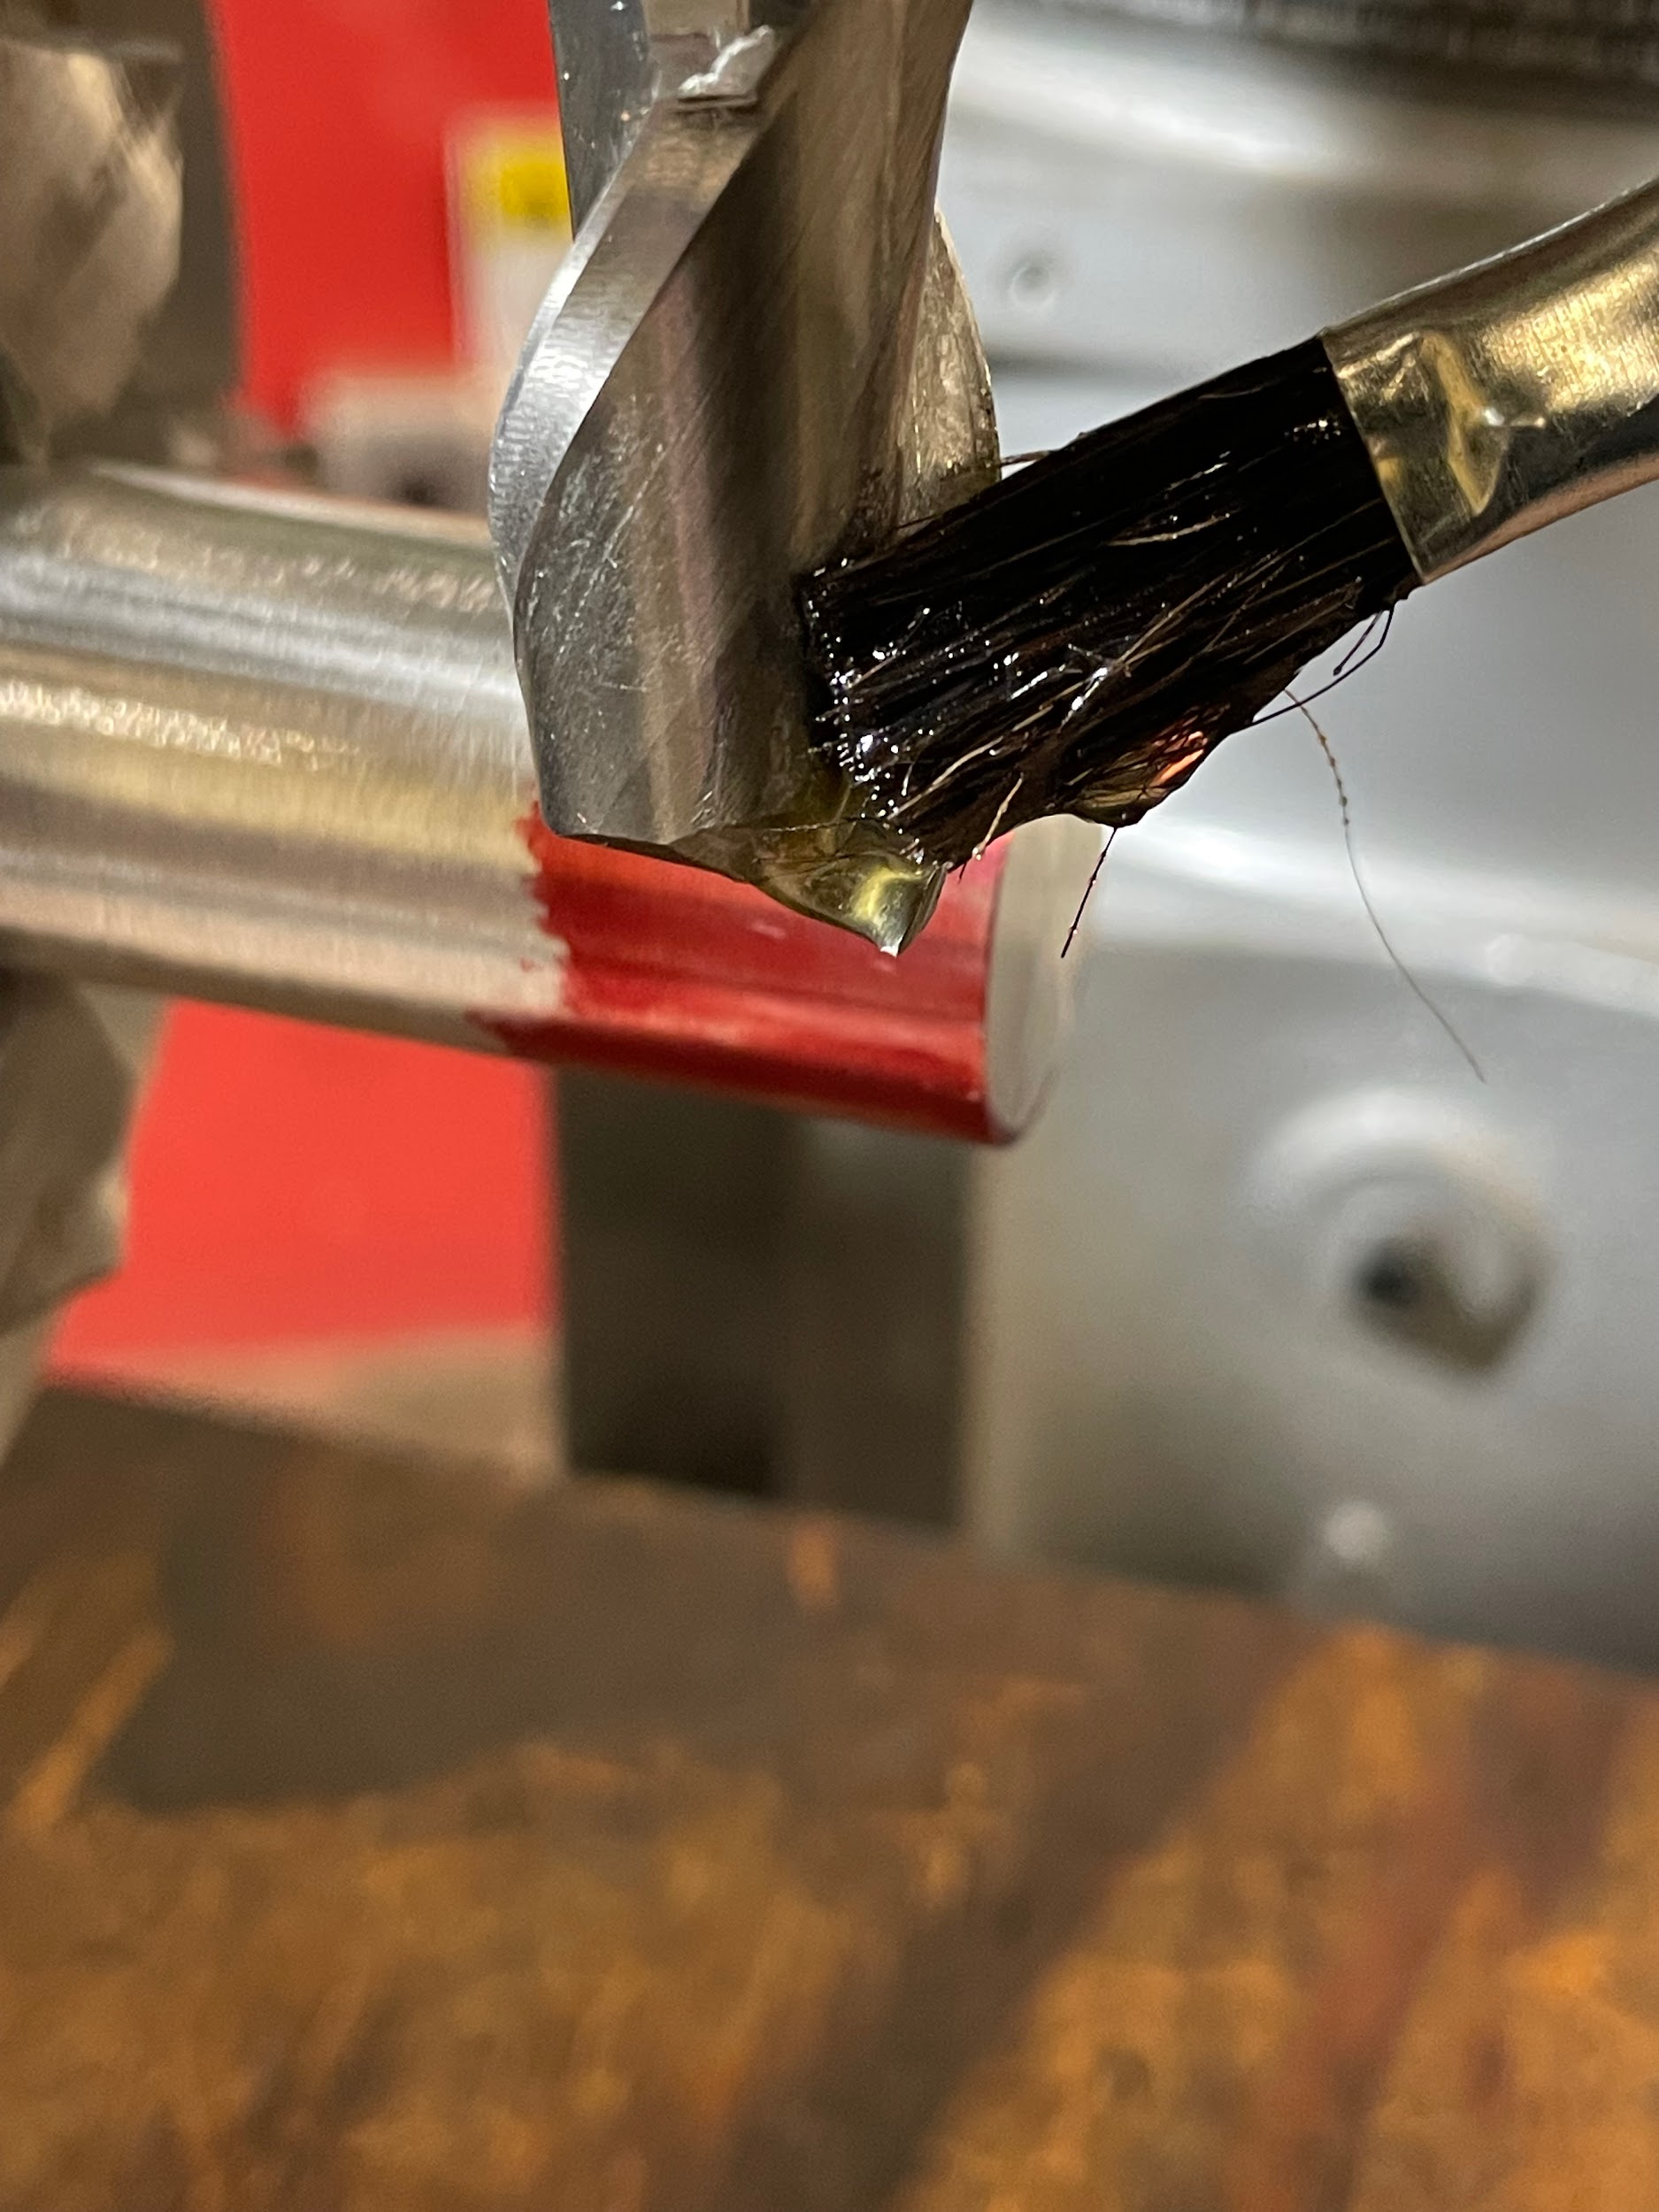
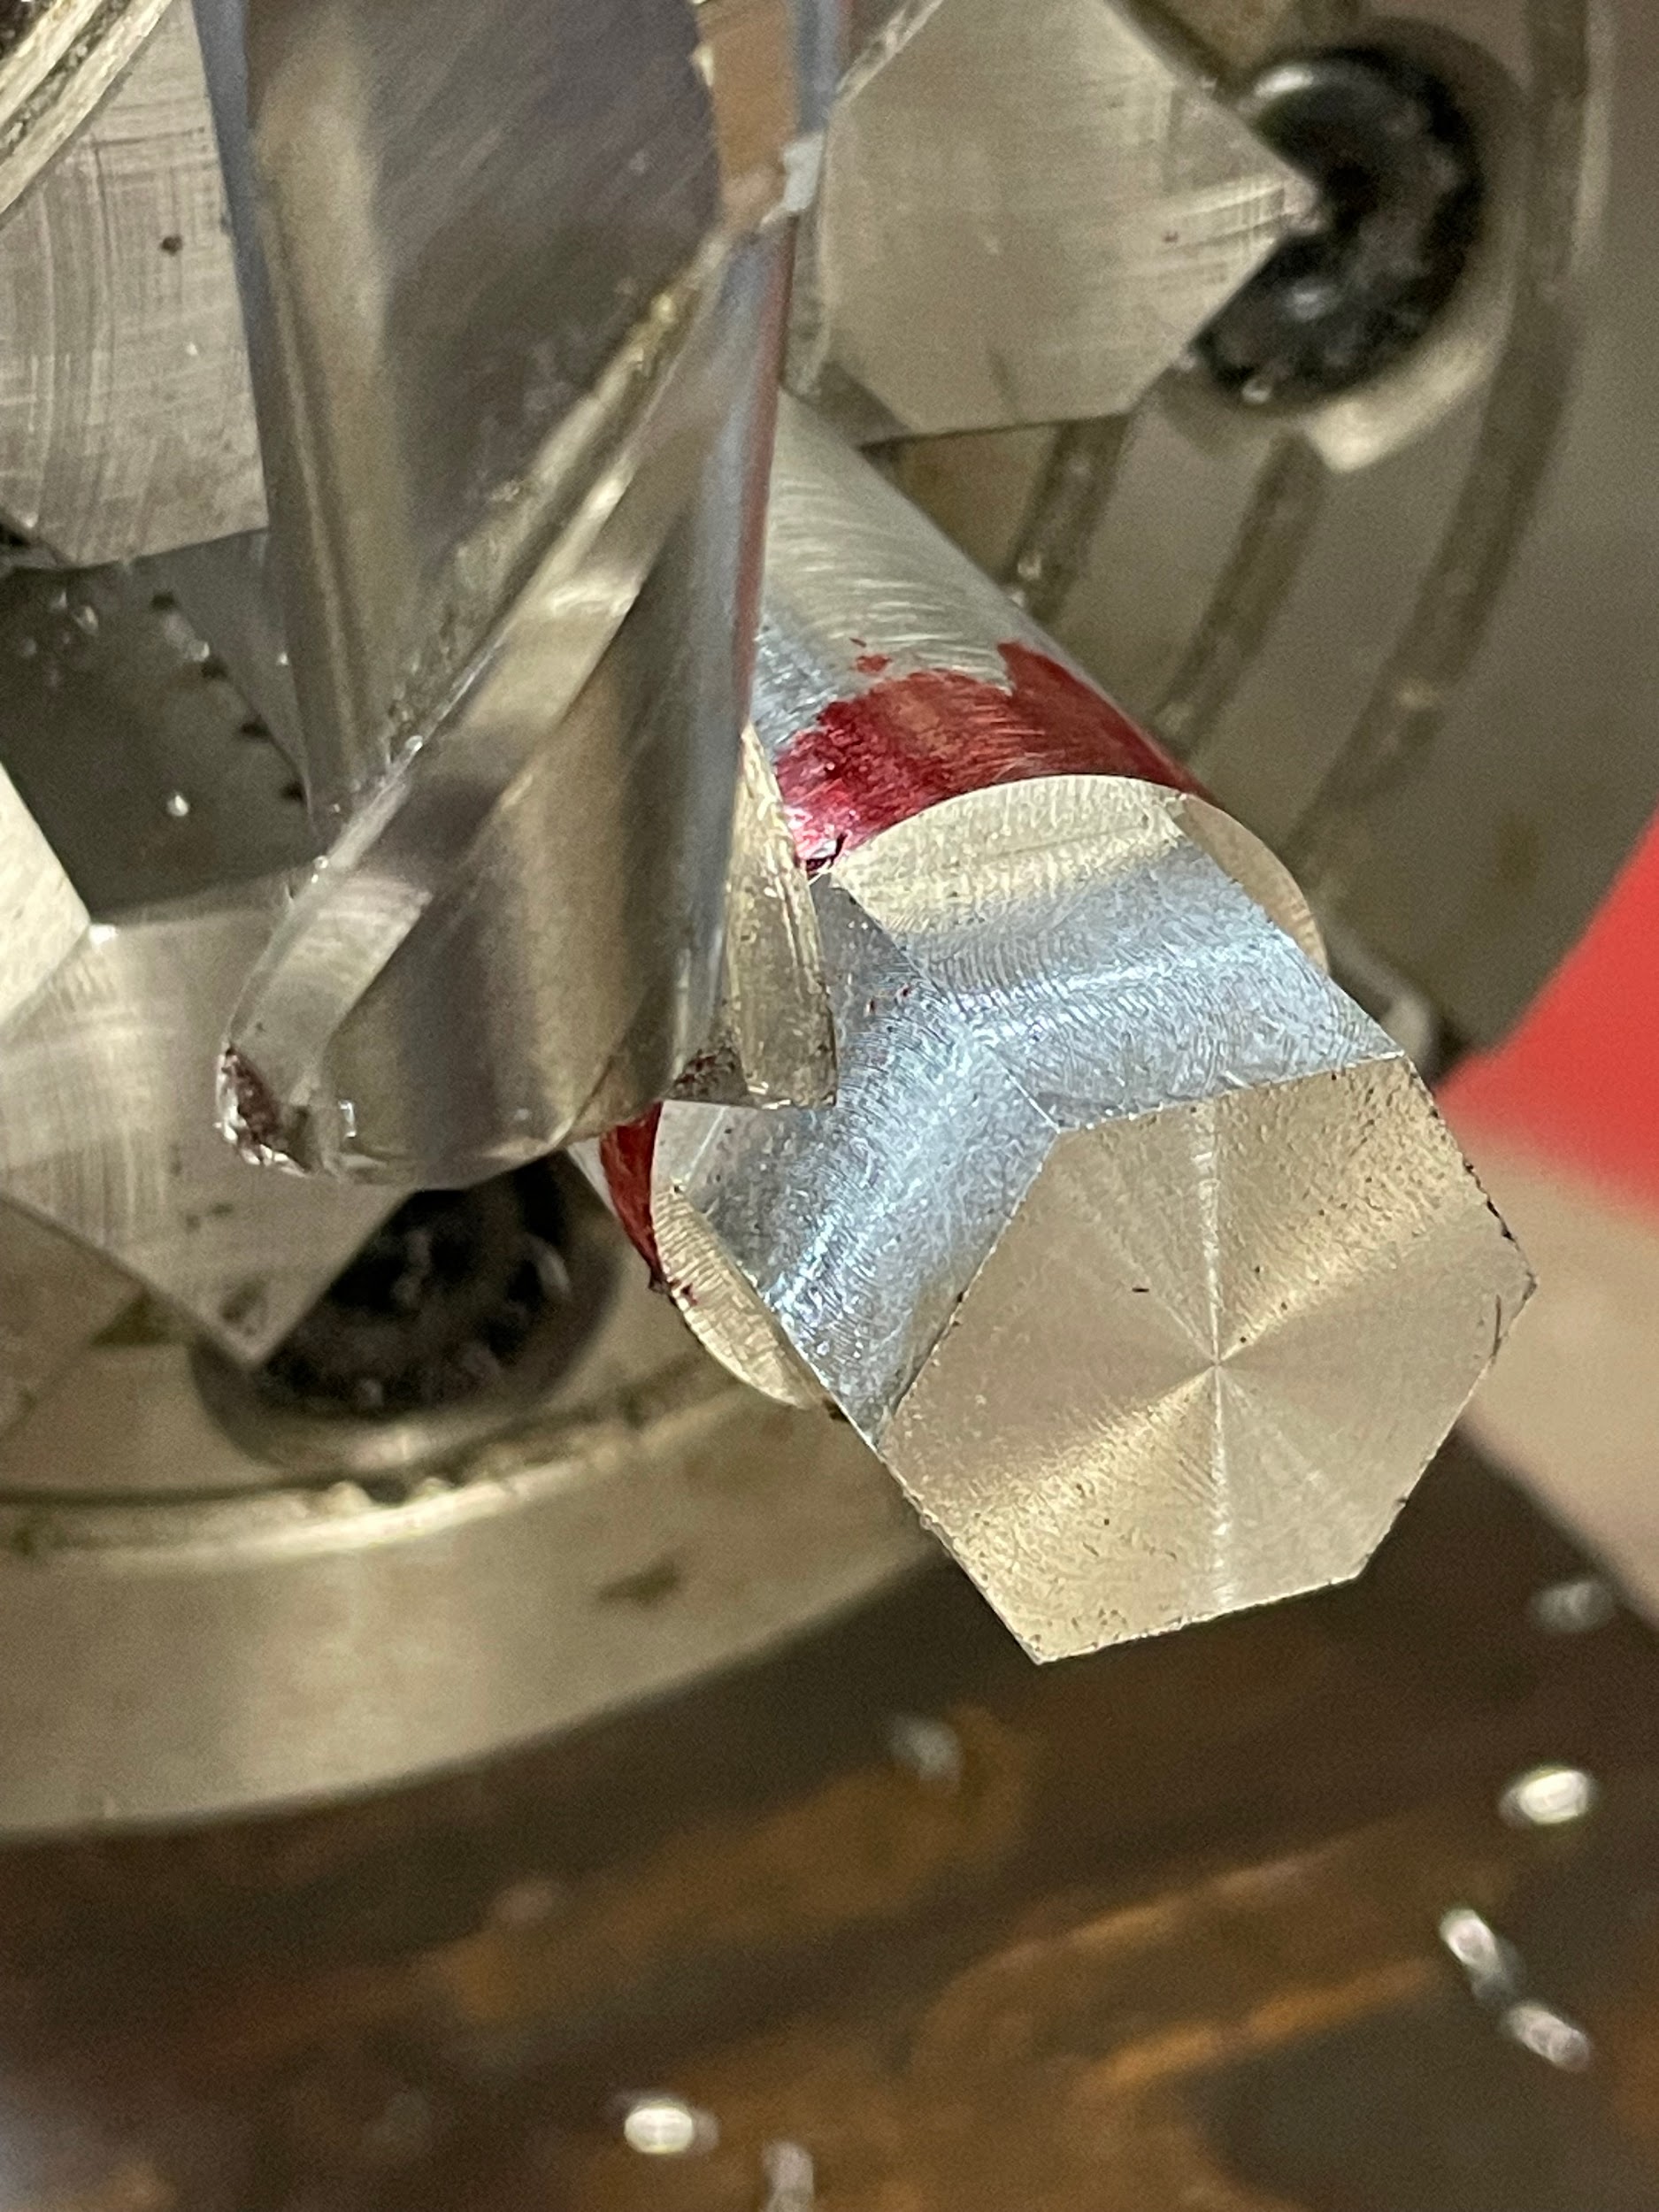
“Step 32: Make the finishing cuts across the part climb milling while direct indexing as before.“
Simple indexing
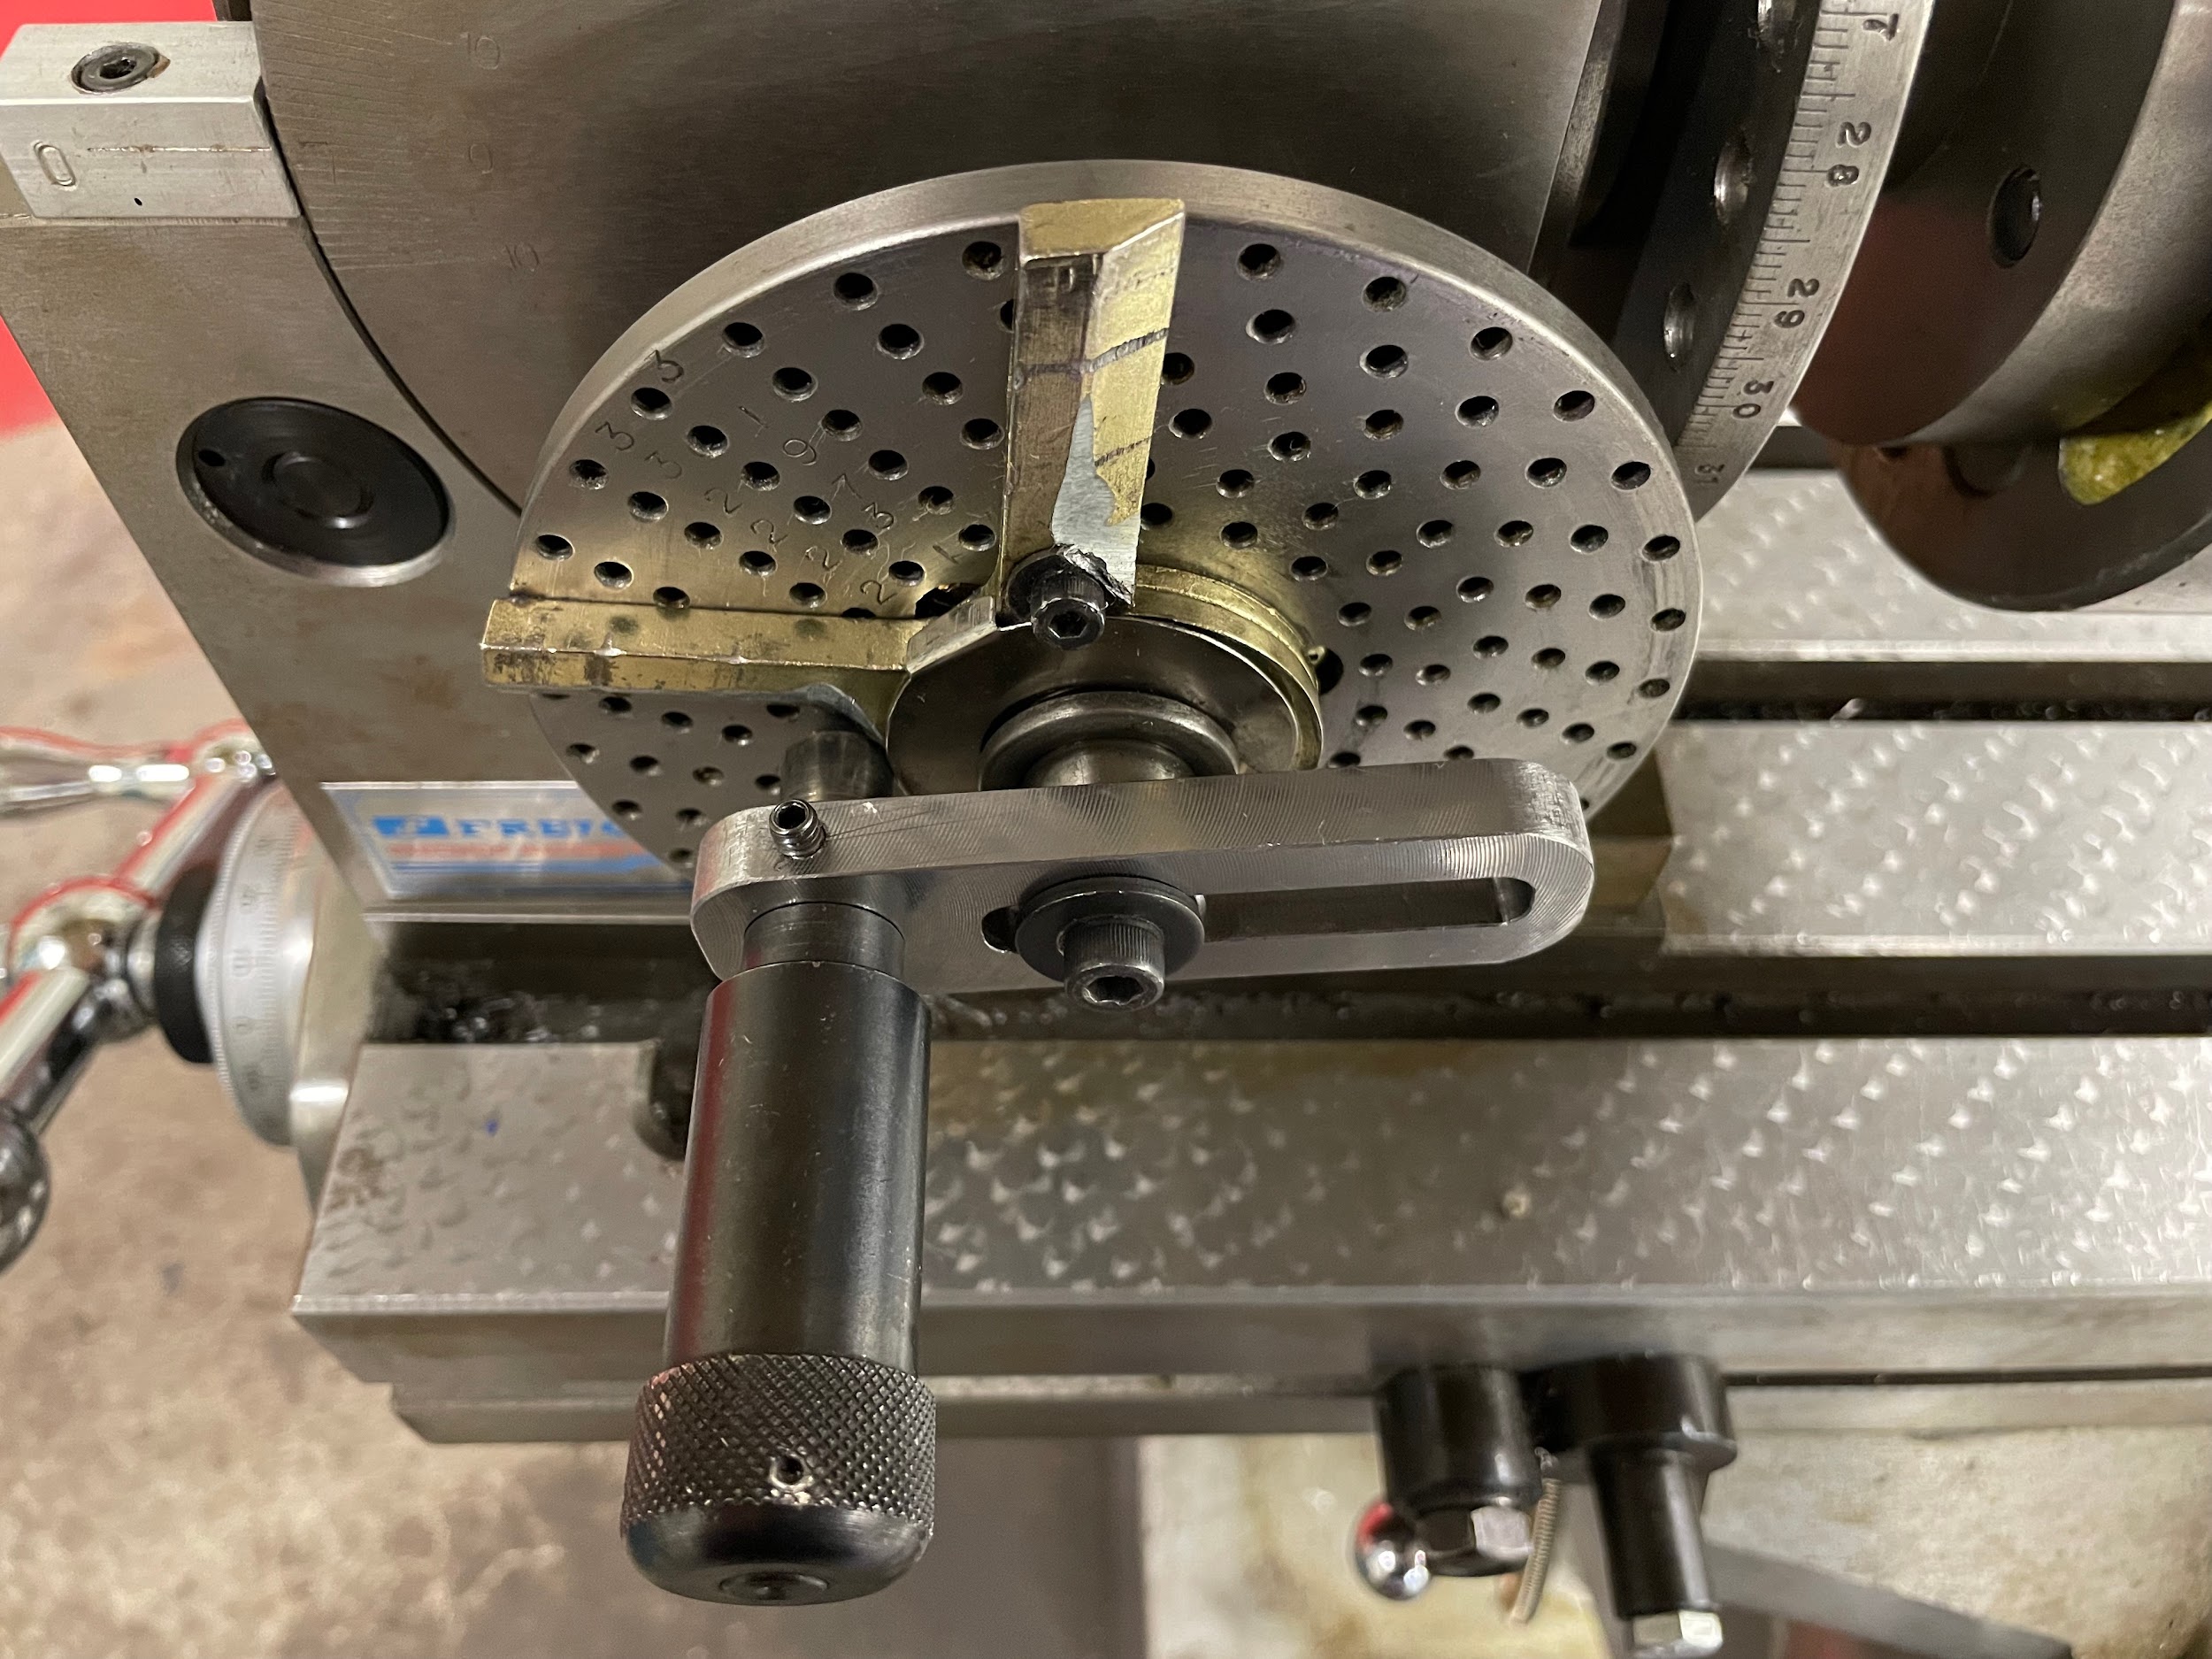
Simple indexing is used to create divisions around a circle that are not possible by direct indexing. Simple indexing utilizes the indexing plates, crank, and pin to accurately position the spindel.
Example
A part requires 13 equal divisions around the outside of a part. First, it should be checked for the ability of direct indexing.
360 / 13 = 27.692
27.692 / 15 = 1.846
1.846 is not a whole number, so direct indexing is not possible.
Once this is determined, the number of divisions can be input into the formula to calculate simple indexing. The formula is:
40 / N = Indexing
40 represents the ratio of turns of the indexing crank to the revolutions of the spindle. This may be different depending on the brand of indexing head. “N” is the number of divisions required. The key to finding the solution is by keeping the indexing answer in fraction form. Basically, pulling out the whole numbers from a potentially improper fraction.
40 / 13 = 3 and 1/13
Reduce the fraction if possible. In this case, 1/13 can not be reduced any further.
After that process, the fraction is ready to be applied to the indexing plate. Examine the three plates from the previous definition and look for the hole pattern that matches the denominator of the fraction.
13 isn’t on any of the plates.
An equivalent fraction must be found for 1/13 that will apply to the plates. The easiest way to accomplish this is to take the denominator of the fraction, multiply it by two, and check the plates for a match. If it doesn’t, multiply the denominator by three and check. Continue this process until a match is found.
13 x 2 = 26
26 isn’t a pattern on any of the plates.
13 x 3 = 39
39 matches a hole pattern on plate three.
Once the hole pattern has been selected, the fraction is converted to one that can be demonstrated on the plate. To do this, multiply the numerator by the same value the denominator was multiplied by when the correct hole pattern was matched. This will give the number of holes needed to advance the indexing crank once the full turns have been completed.
The number the denominator was multiplied by was 3 to find a match for the 39 hole pattern. To keep the fraction equal, the numerator and denominator need to be multiplied by the same number. It is basically an expansion of the fraction.
1 / 13 = ? / 39
1 / 13 = 3 / 39
With the fraction converted to a form that is demonstrable on an indexing plate, the final rotations of the indexing handwheel for each division can be expressed.
1 index = 3 full rotations of the crank and 3 holes on a 39 hole pattern.
Step by step process simple indexing a 13 sided part:
- Load a part into the four jaw chuck of an indexing head.
- Dial in the part so it is centered.
- Adjust the indexing crank so the indexing pin will align with the correct hole pattern in the indexing plate. In this example, it is the 39 bolt hole pattern.
- Unlock the indexing head and rotate the spindle using the indexing crank and indexing pin. Place the pin into a hole in the indexing plate to establish a starting position for simple indexing. Take care to only move the crank in one direction to eliminate backlash error.
- Lock the indexing head.
- Set and lock the selector arms. In this example, there will be 3 holes from the first position.
- Lock the quill.
- Load a milling cutter. Select a milling cutter wide enough to cut the flat in one pass if possible.
- Lube the tool.
- Turn the spindle on and set the appropriate spindle speed.
- Bring the tool down and gently touch off the outside diameter of the material.
- Zero the knee.
- Move the table over and the knee up so that the side of the tool can be touched off. Only come up enough so that the area that is touched off does not create a divot in the finished part.
- Move the table to touch-off the tool to the face of the part.
- Zero the table.
- Maneuver the cutter to the side of the work so that a conventional cut can be taken by the saddle movement.
- Move the table to the amount required, minus .010”.
- Lock the table.
- Calculate and adjust the knee to the amount required, minus .010”. Be careful; every .001” adjustment of the knee will take .002” off over the flats once the part has been cut all the way around.
- Cut across the part with the saddle movement.
- Bring the part back to the starting point.
- Unlock the indexing head, adjust the selector arms, remove the indexing pin, move the indexing crank (3 turns and 3 holes in this example), and relock the spindle.
- Repeat the previous steps until the part has been roughed.
- Turn off the spindle and let it come to a complete stop.
- Accurately measure the depth from the end of the part to the length of the step.
- Accurately measure the depth of the flats.
- Start the spindle and move the cutter to the side of the part where climb milling cuts would start.
- Unlock the table.
- Adjust the table to take the remaining amount of material.
- Lock the table.
- Unlock the knee.
- Adjust the knee to take in the remaining amount of material. Be careful; every .001” adjustment of the knee will take .002” off over the flats once the part has been cut all the way around.
- Lock the knee.
- Make the finishing cuts across the part climb milling, and simple indexing as before.
- A round piece of work containing a bored hole leans up against a boring head.
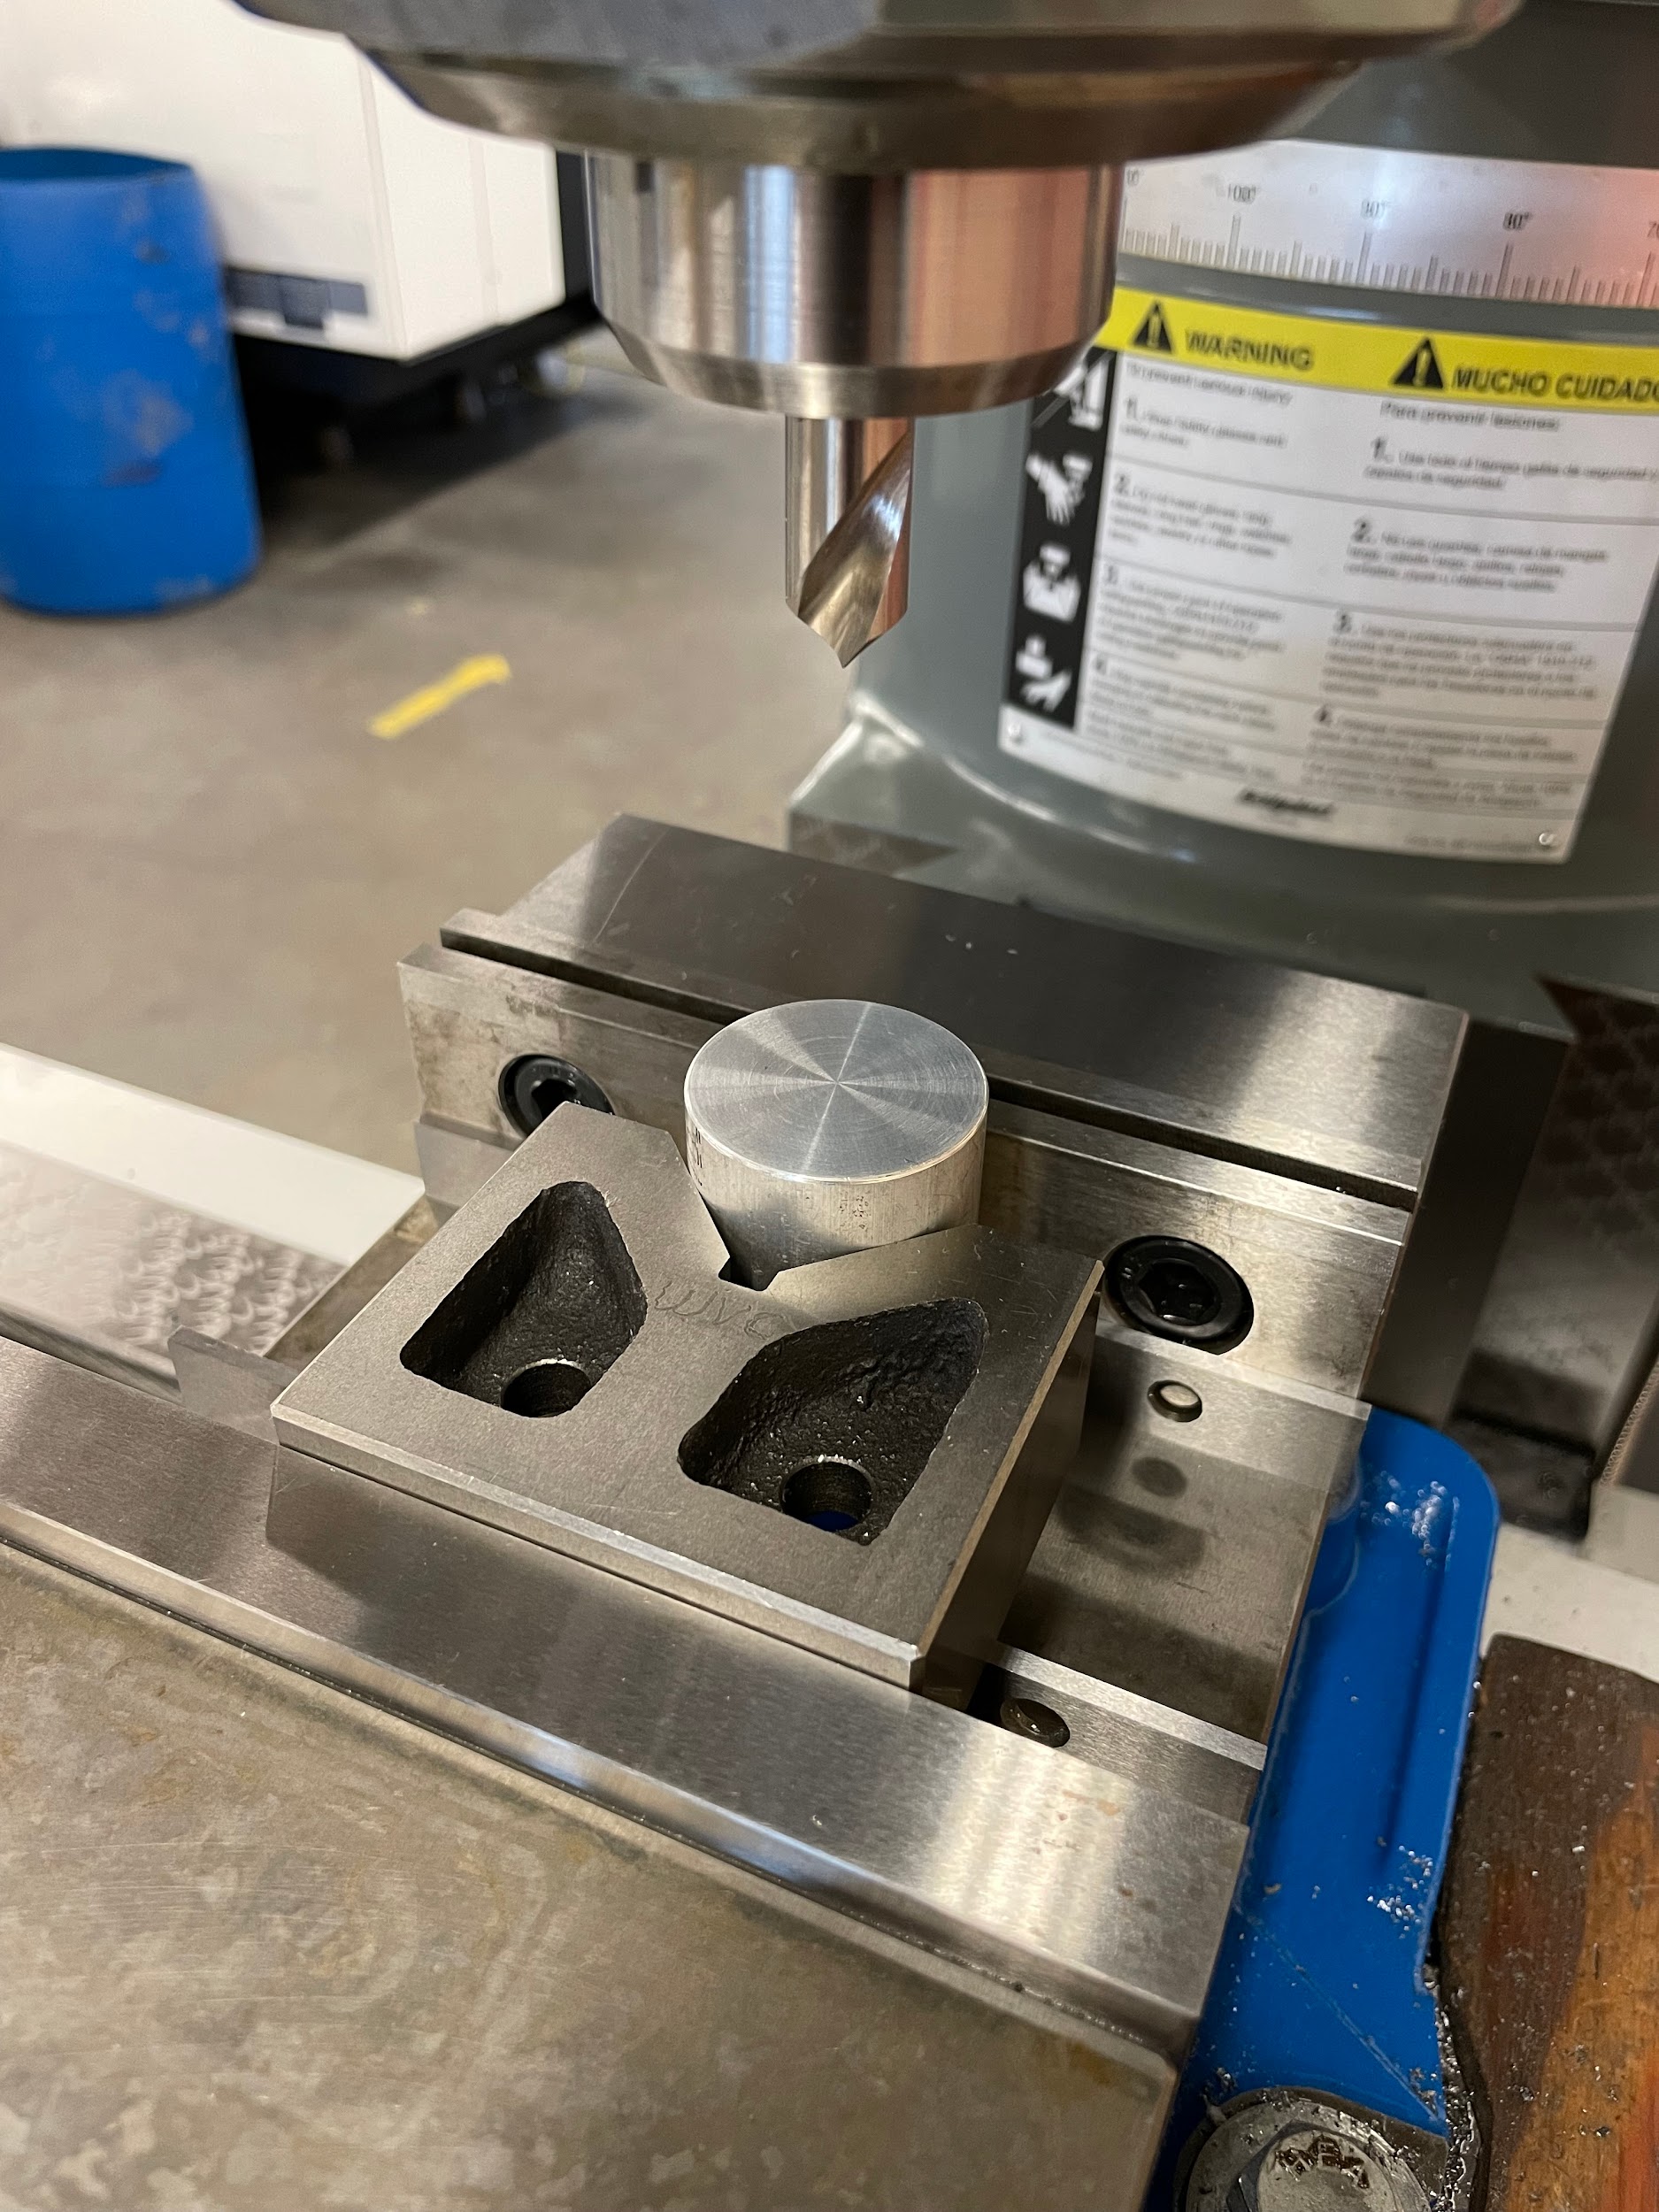
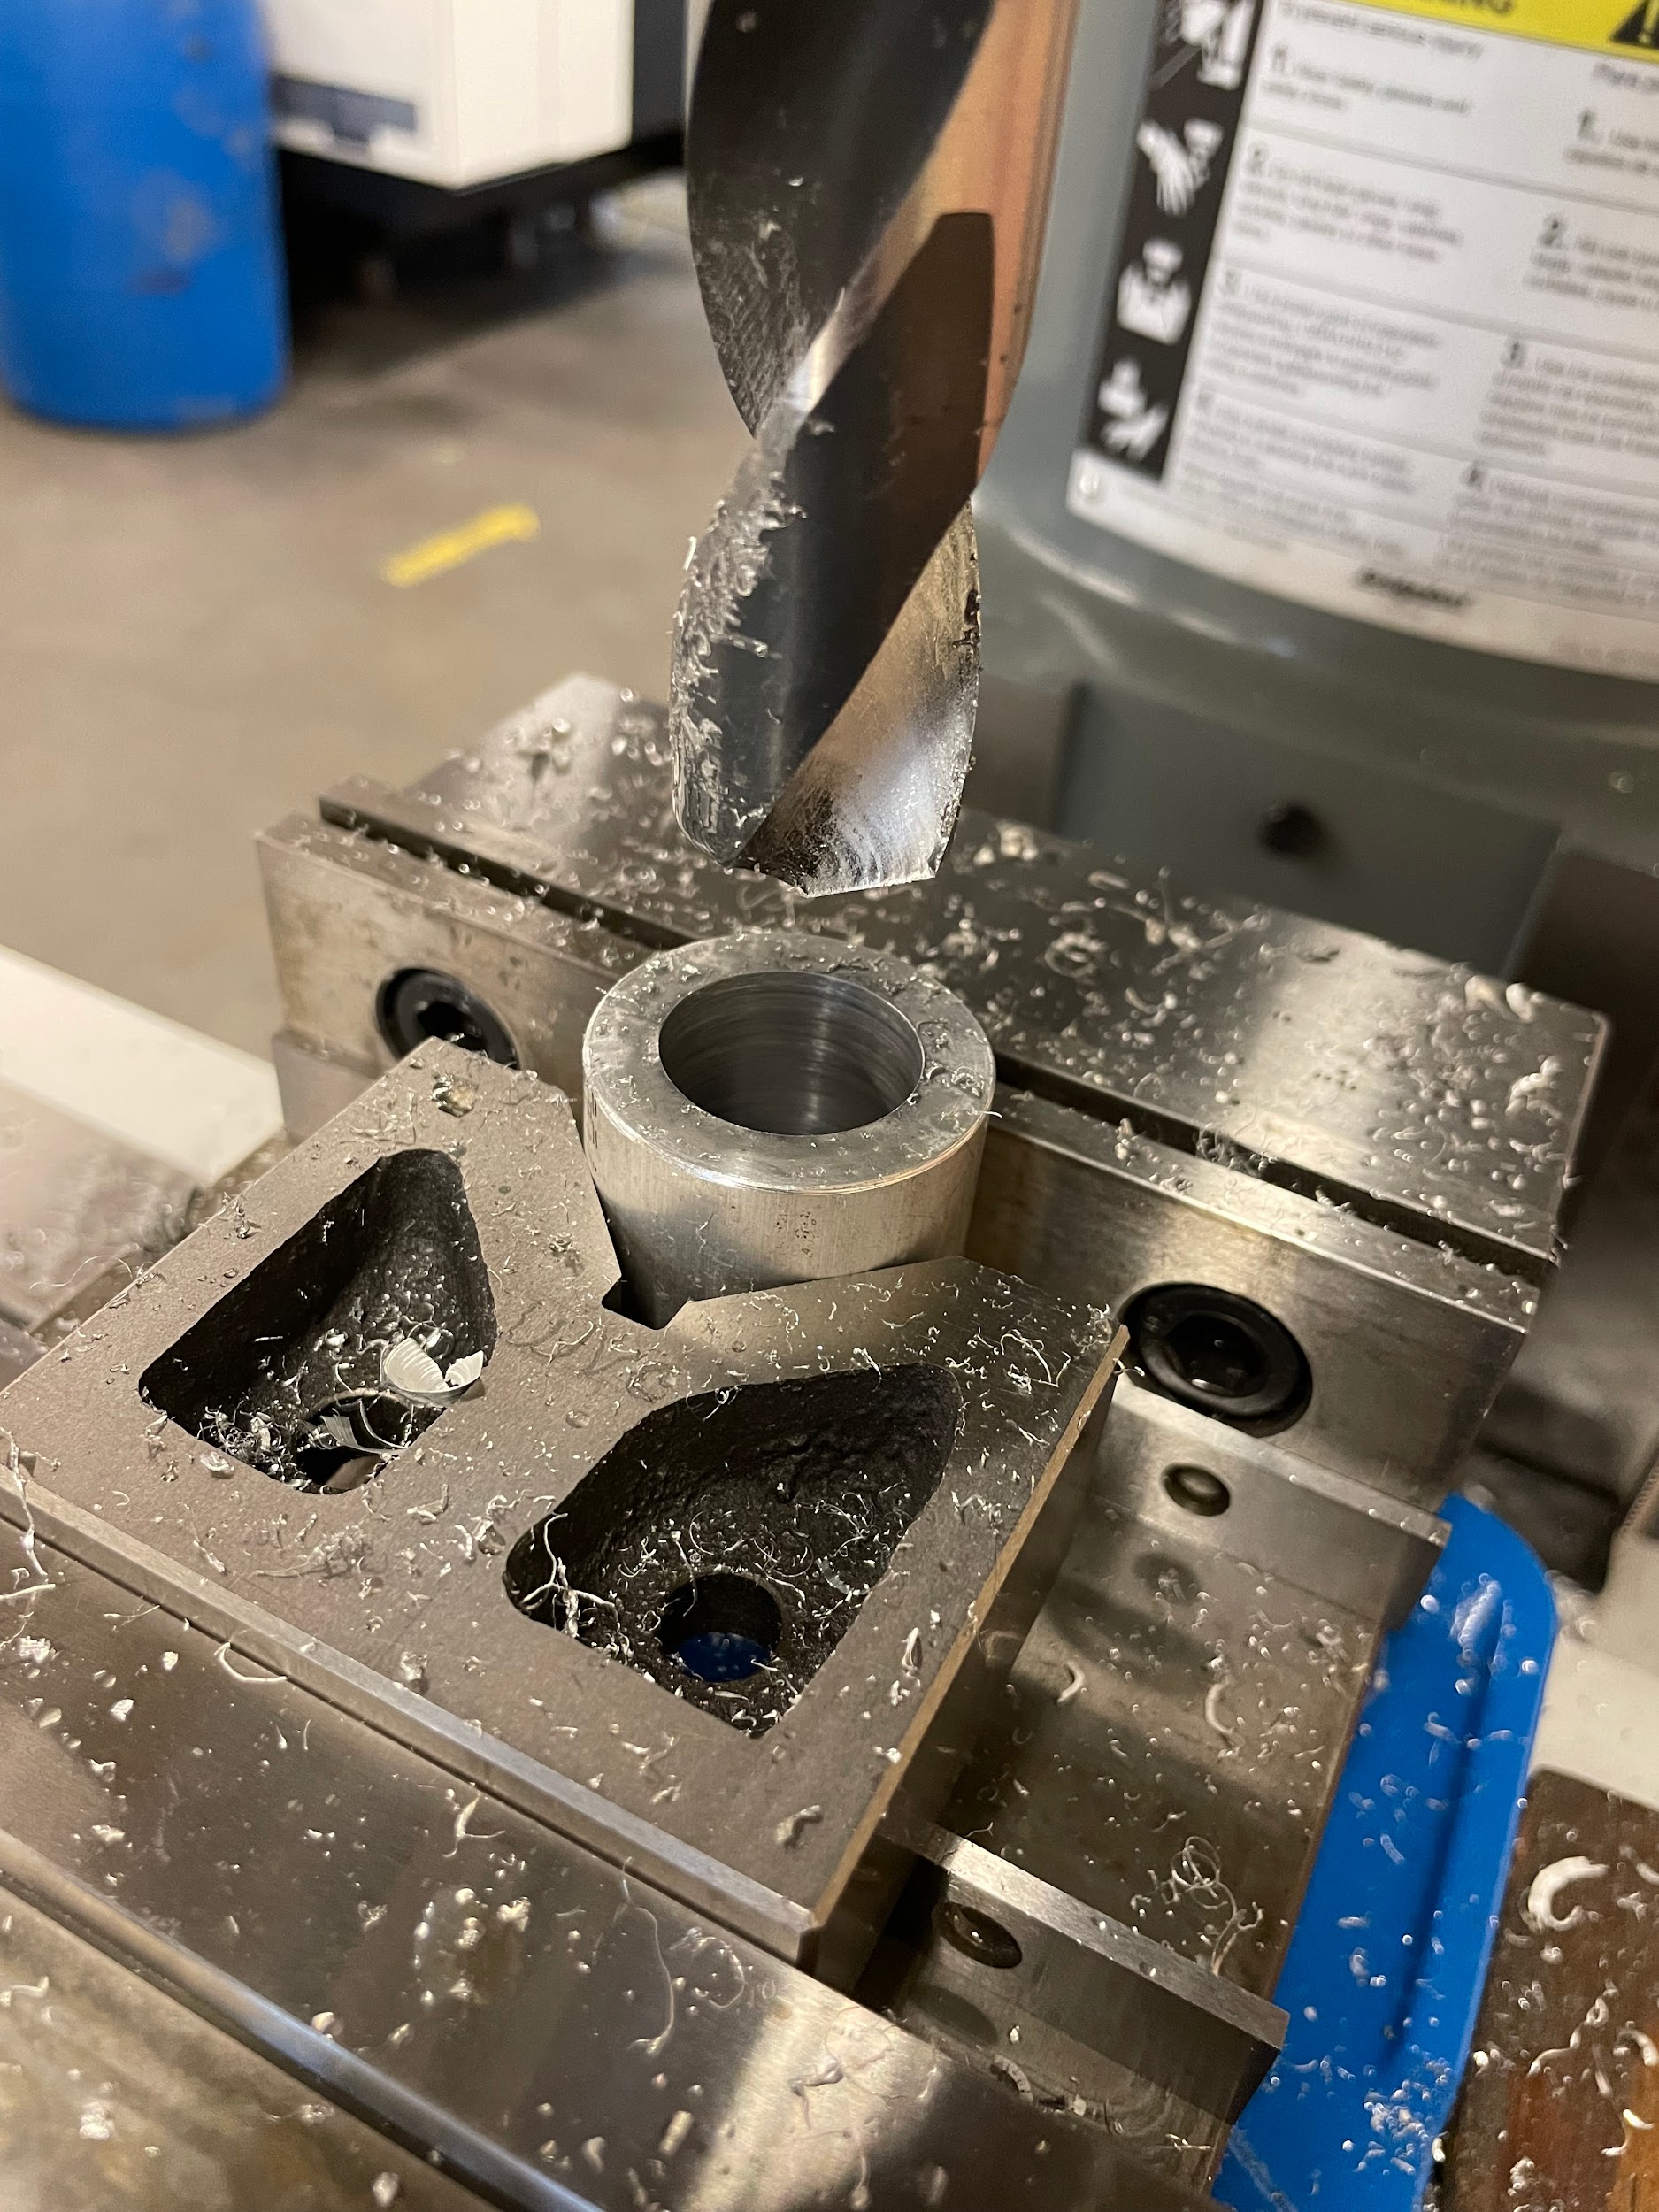
“Step 3: Drill the largest hole possible at the center of the bore layout. Removing material through drilling is much quicker than boring.“
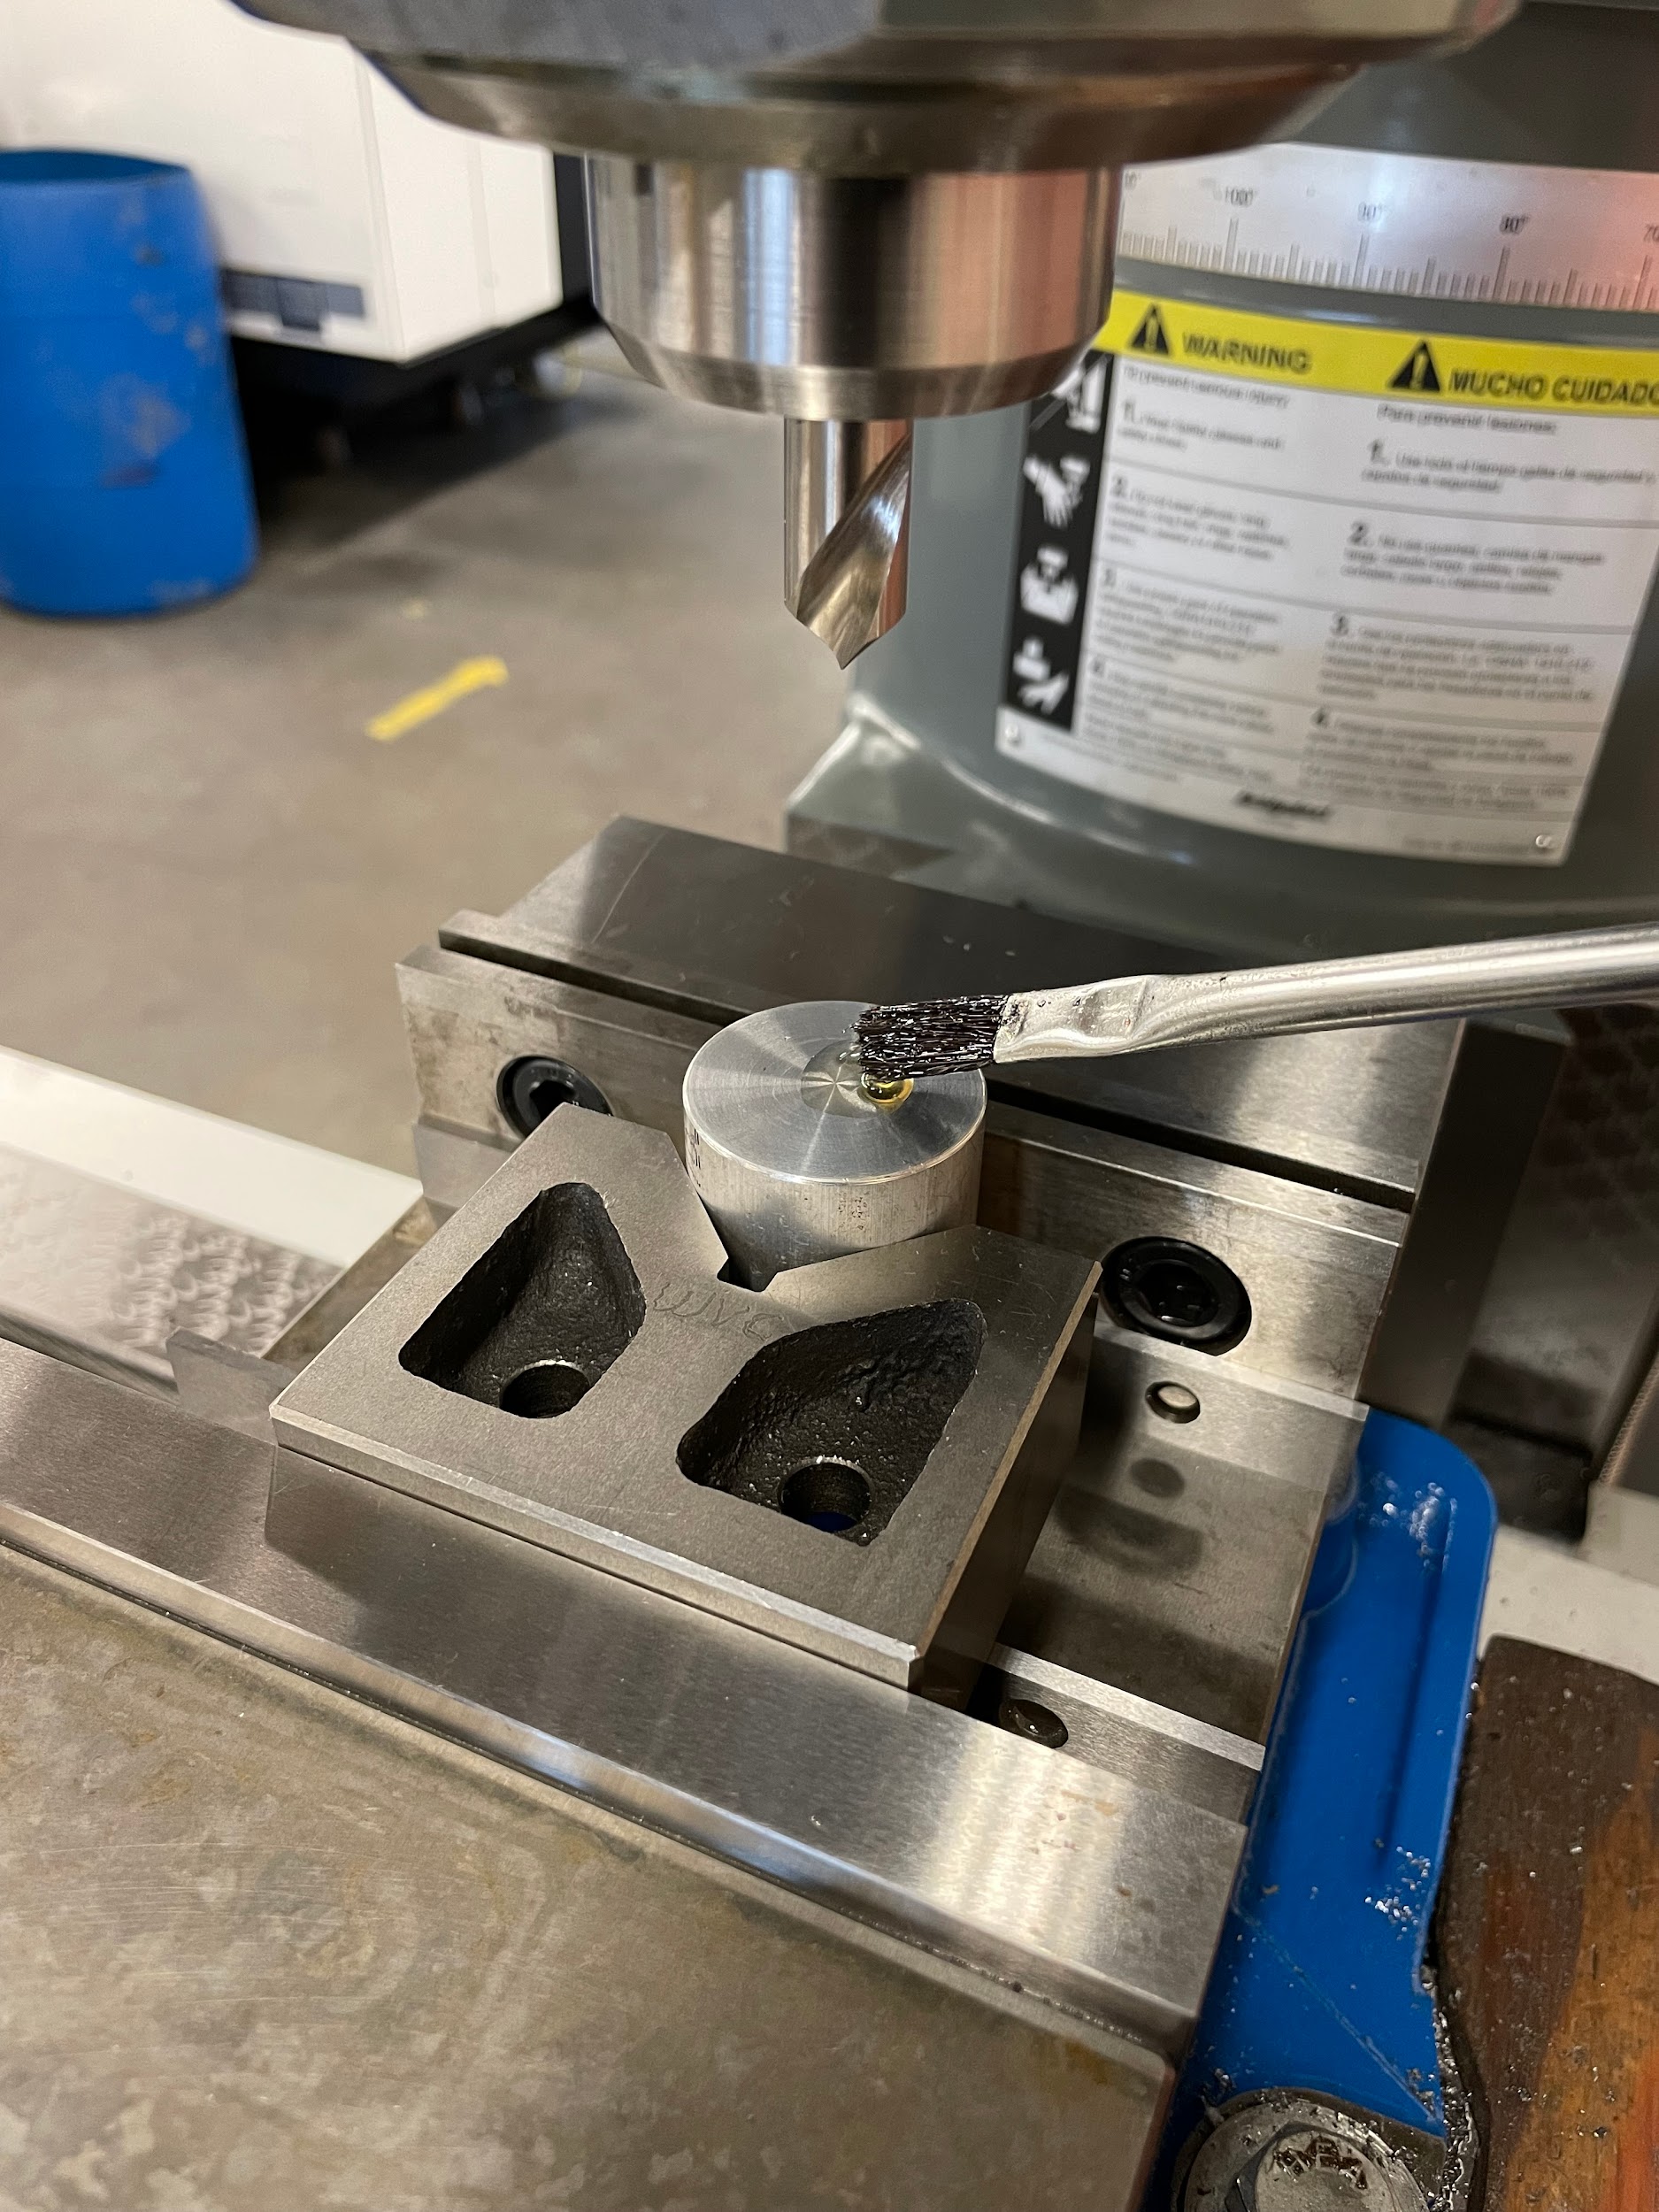
“Step 3: Drill the largest hole possible at the center of the bore layout. Removing material through drilling is much quicker than boring.“
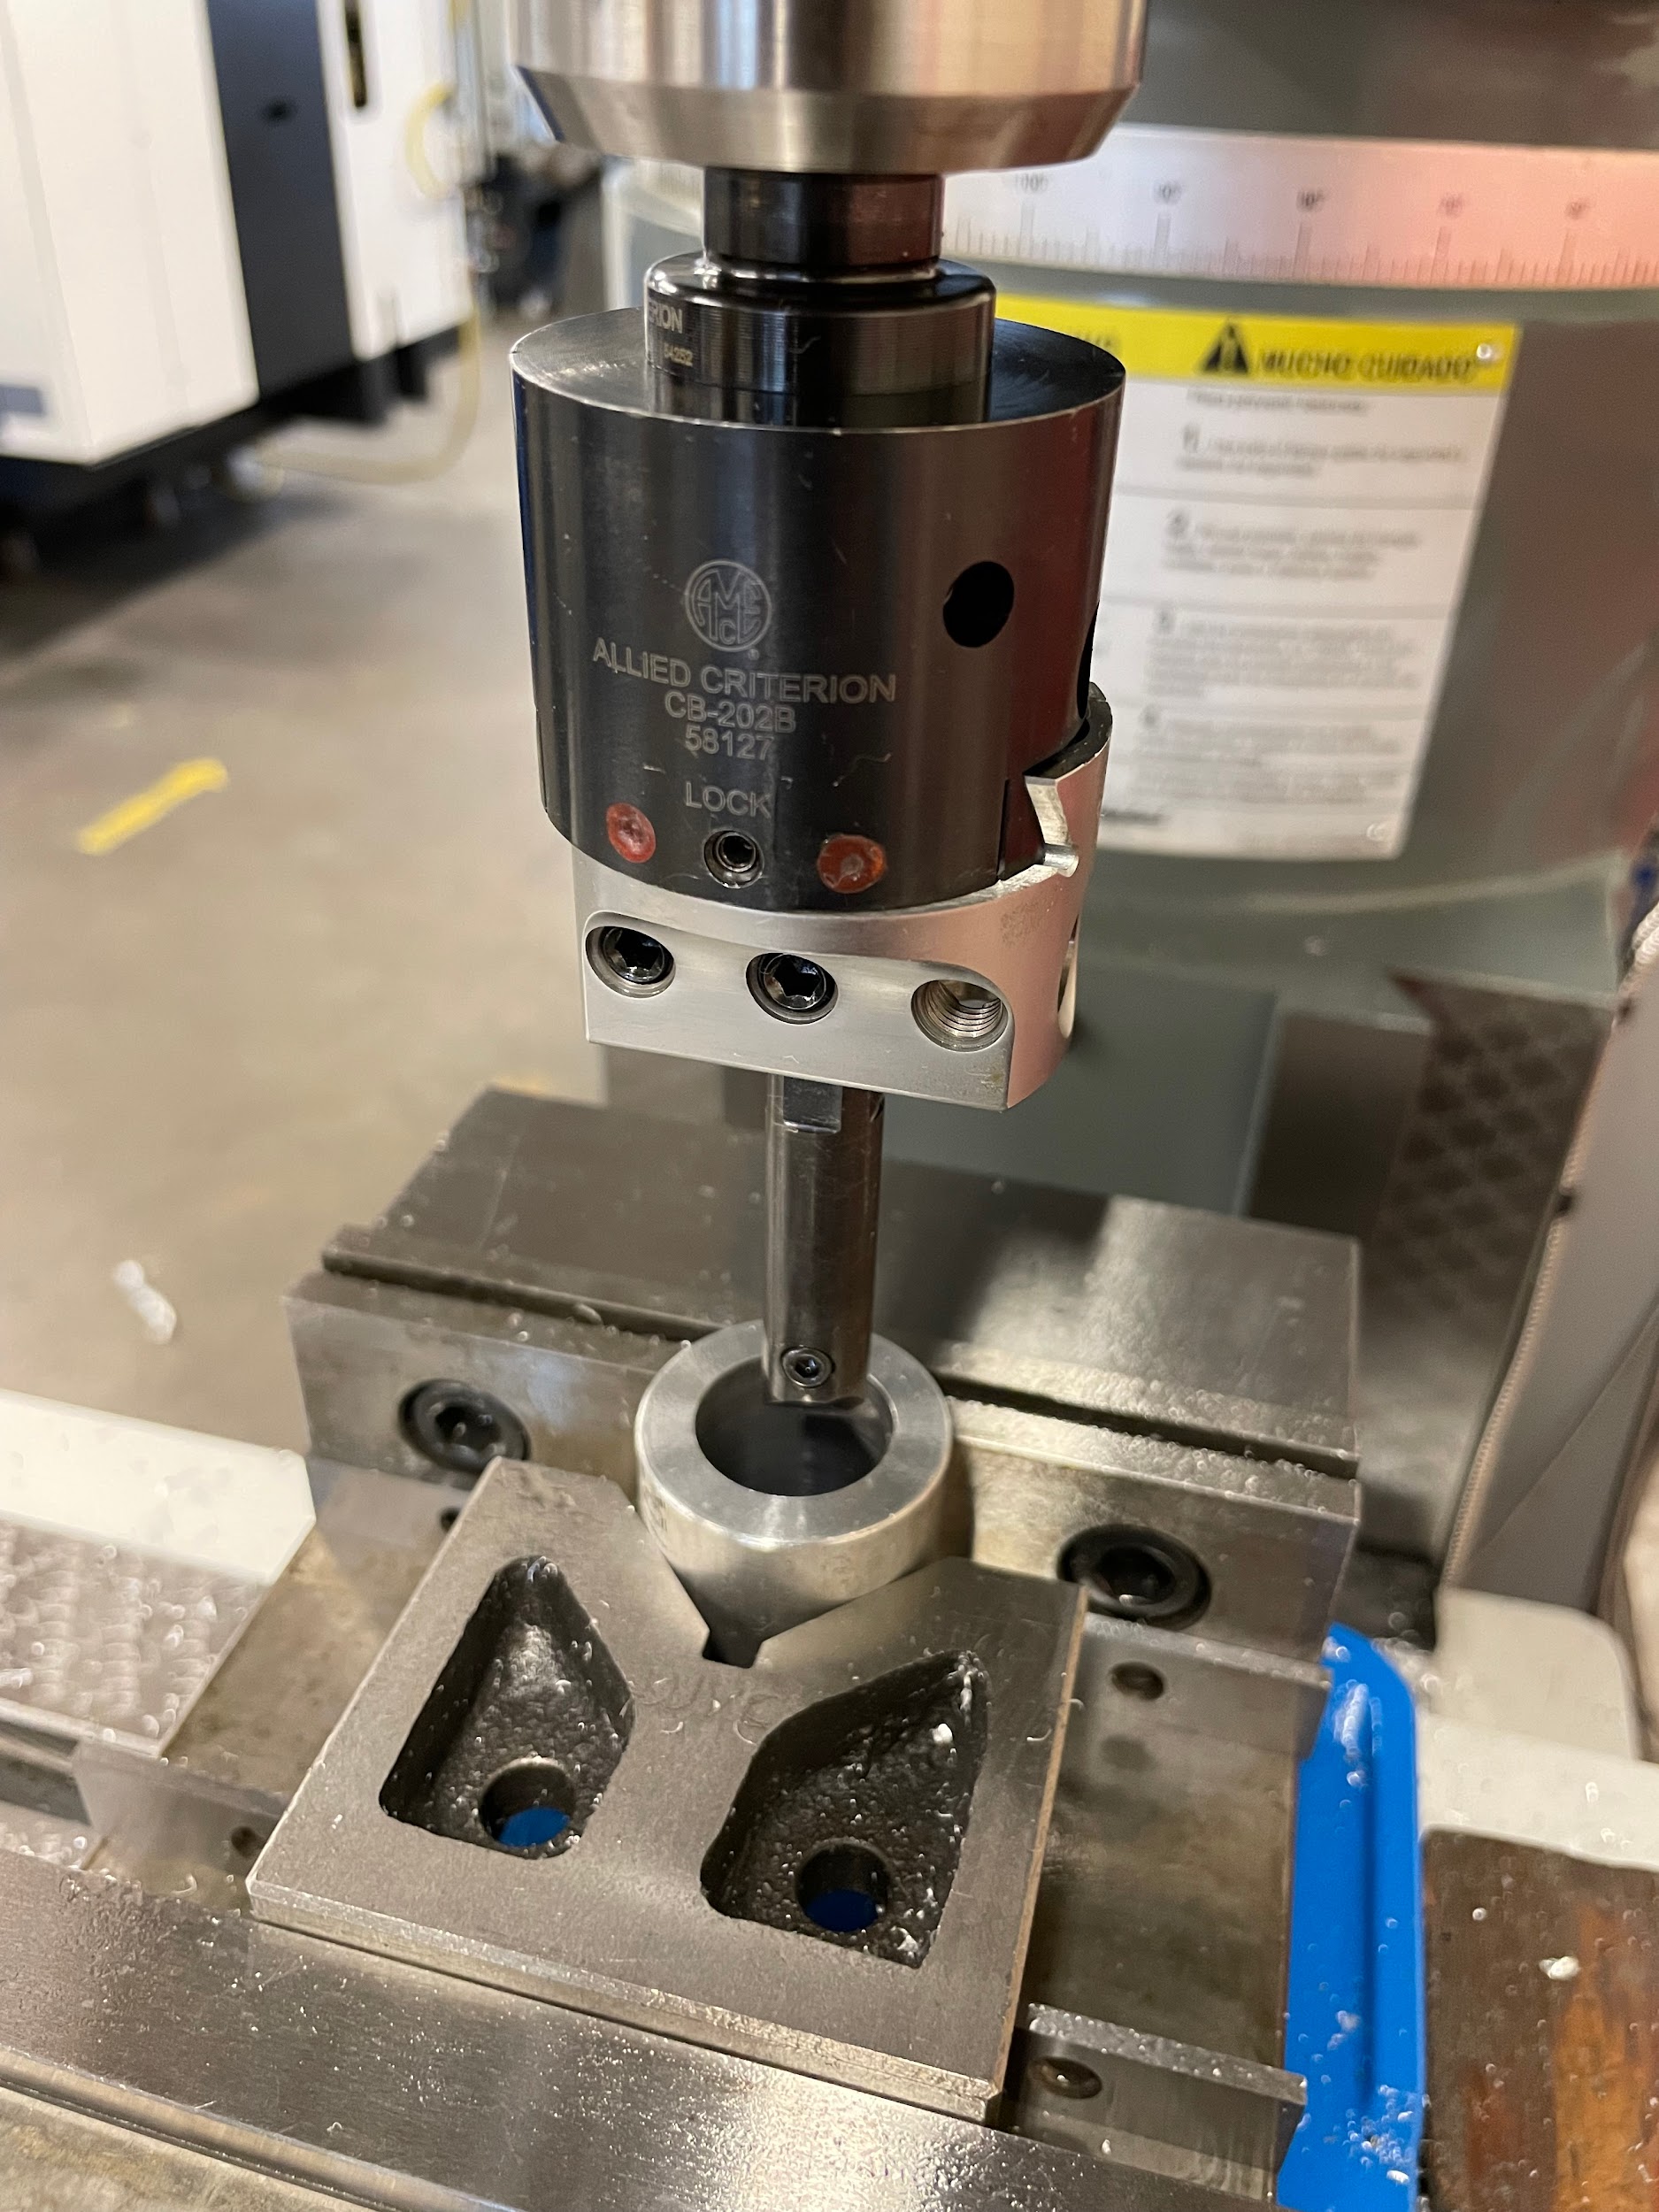
“Step 4: Install a boring head into the milling machine.“
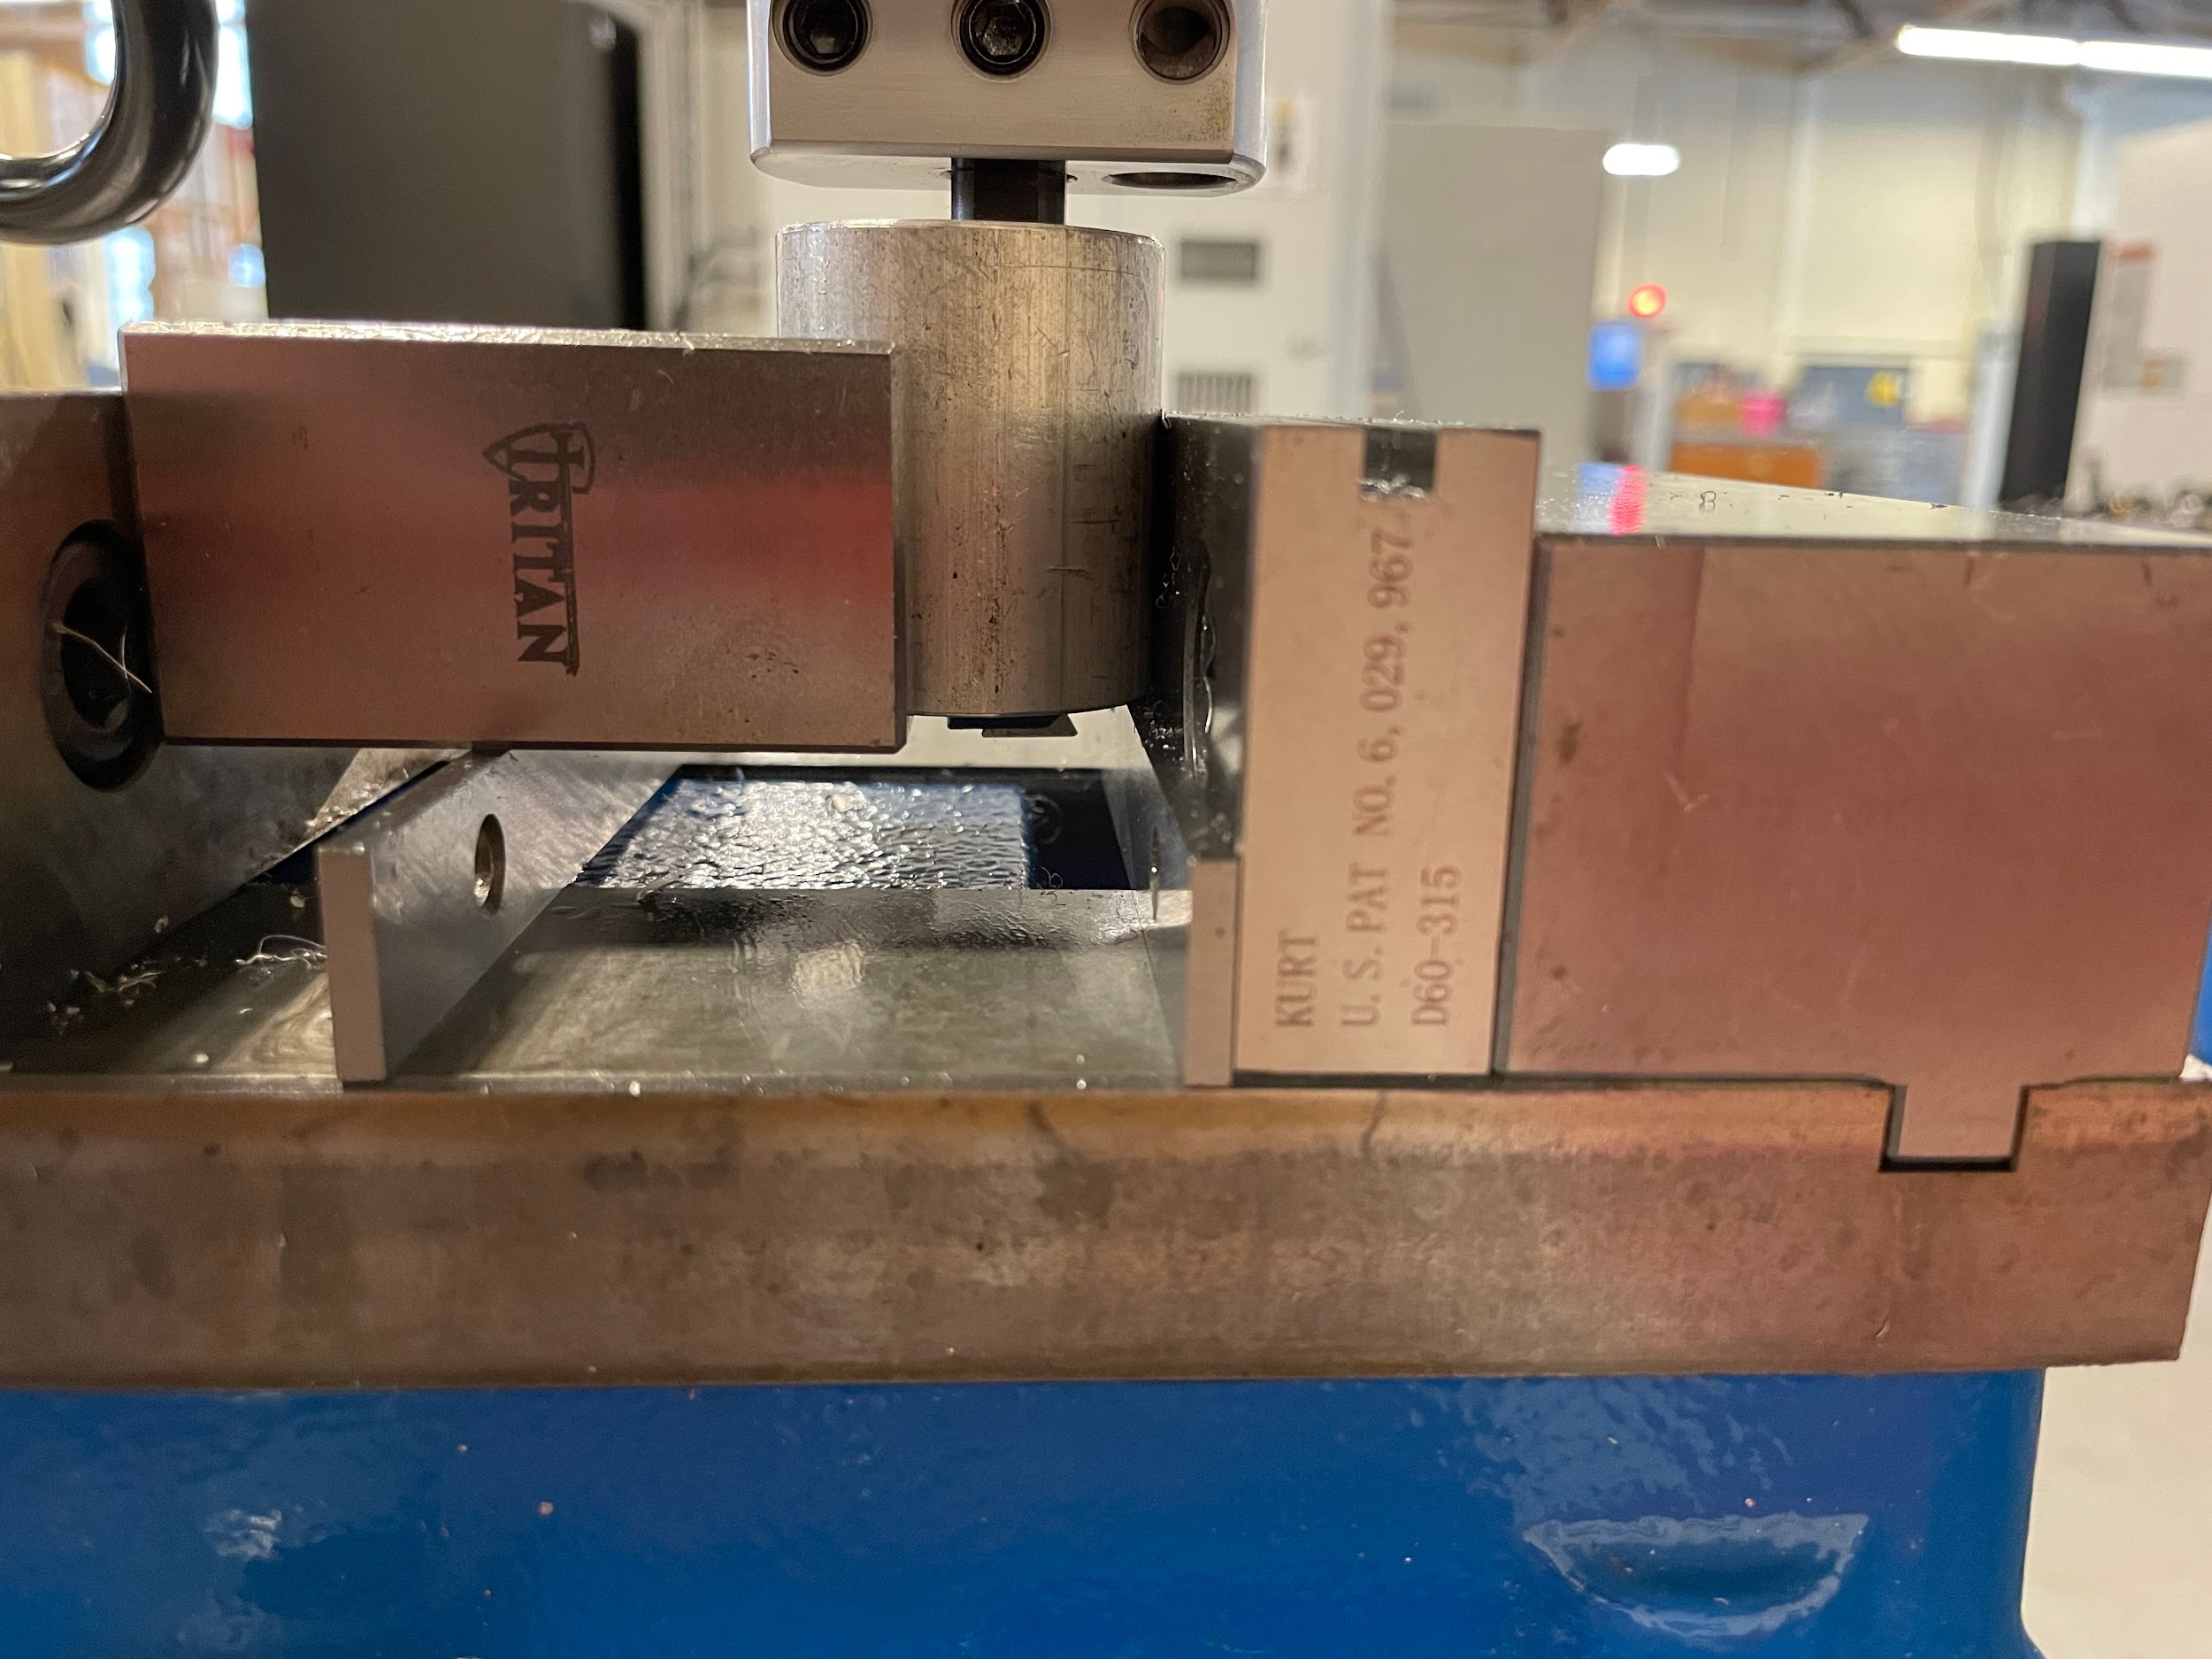
“Step 7: Pull the quill handle down to where the tool is sticking through the hole by about ⅛” and set the quill stop.“
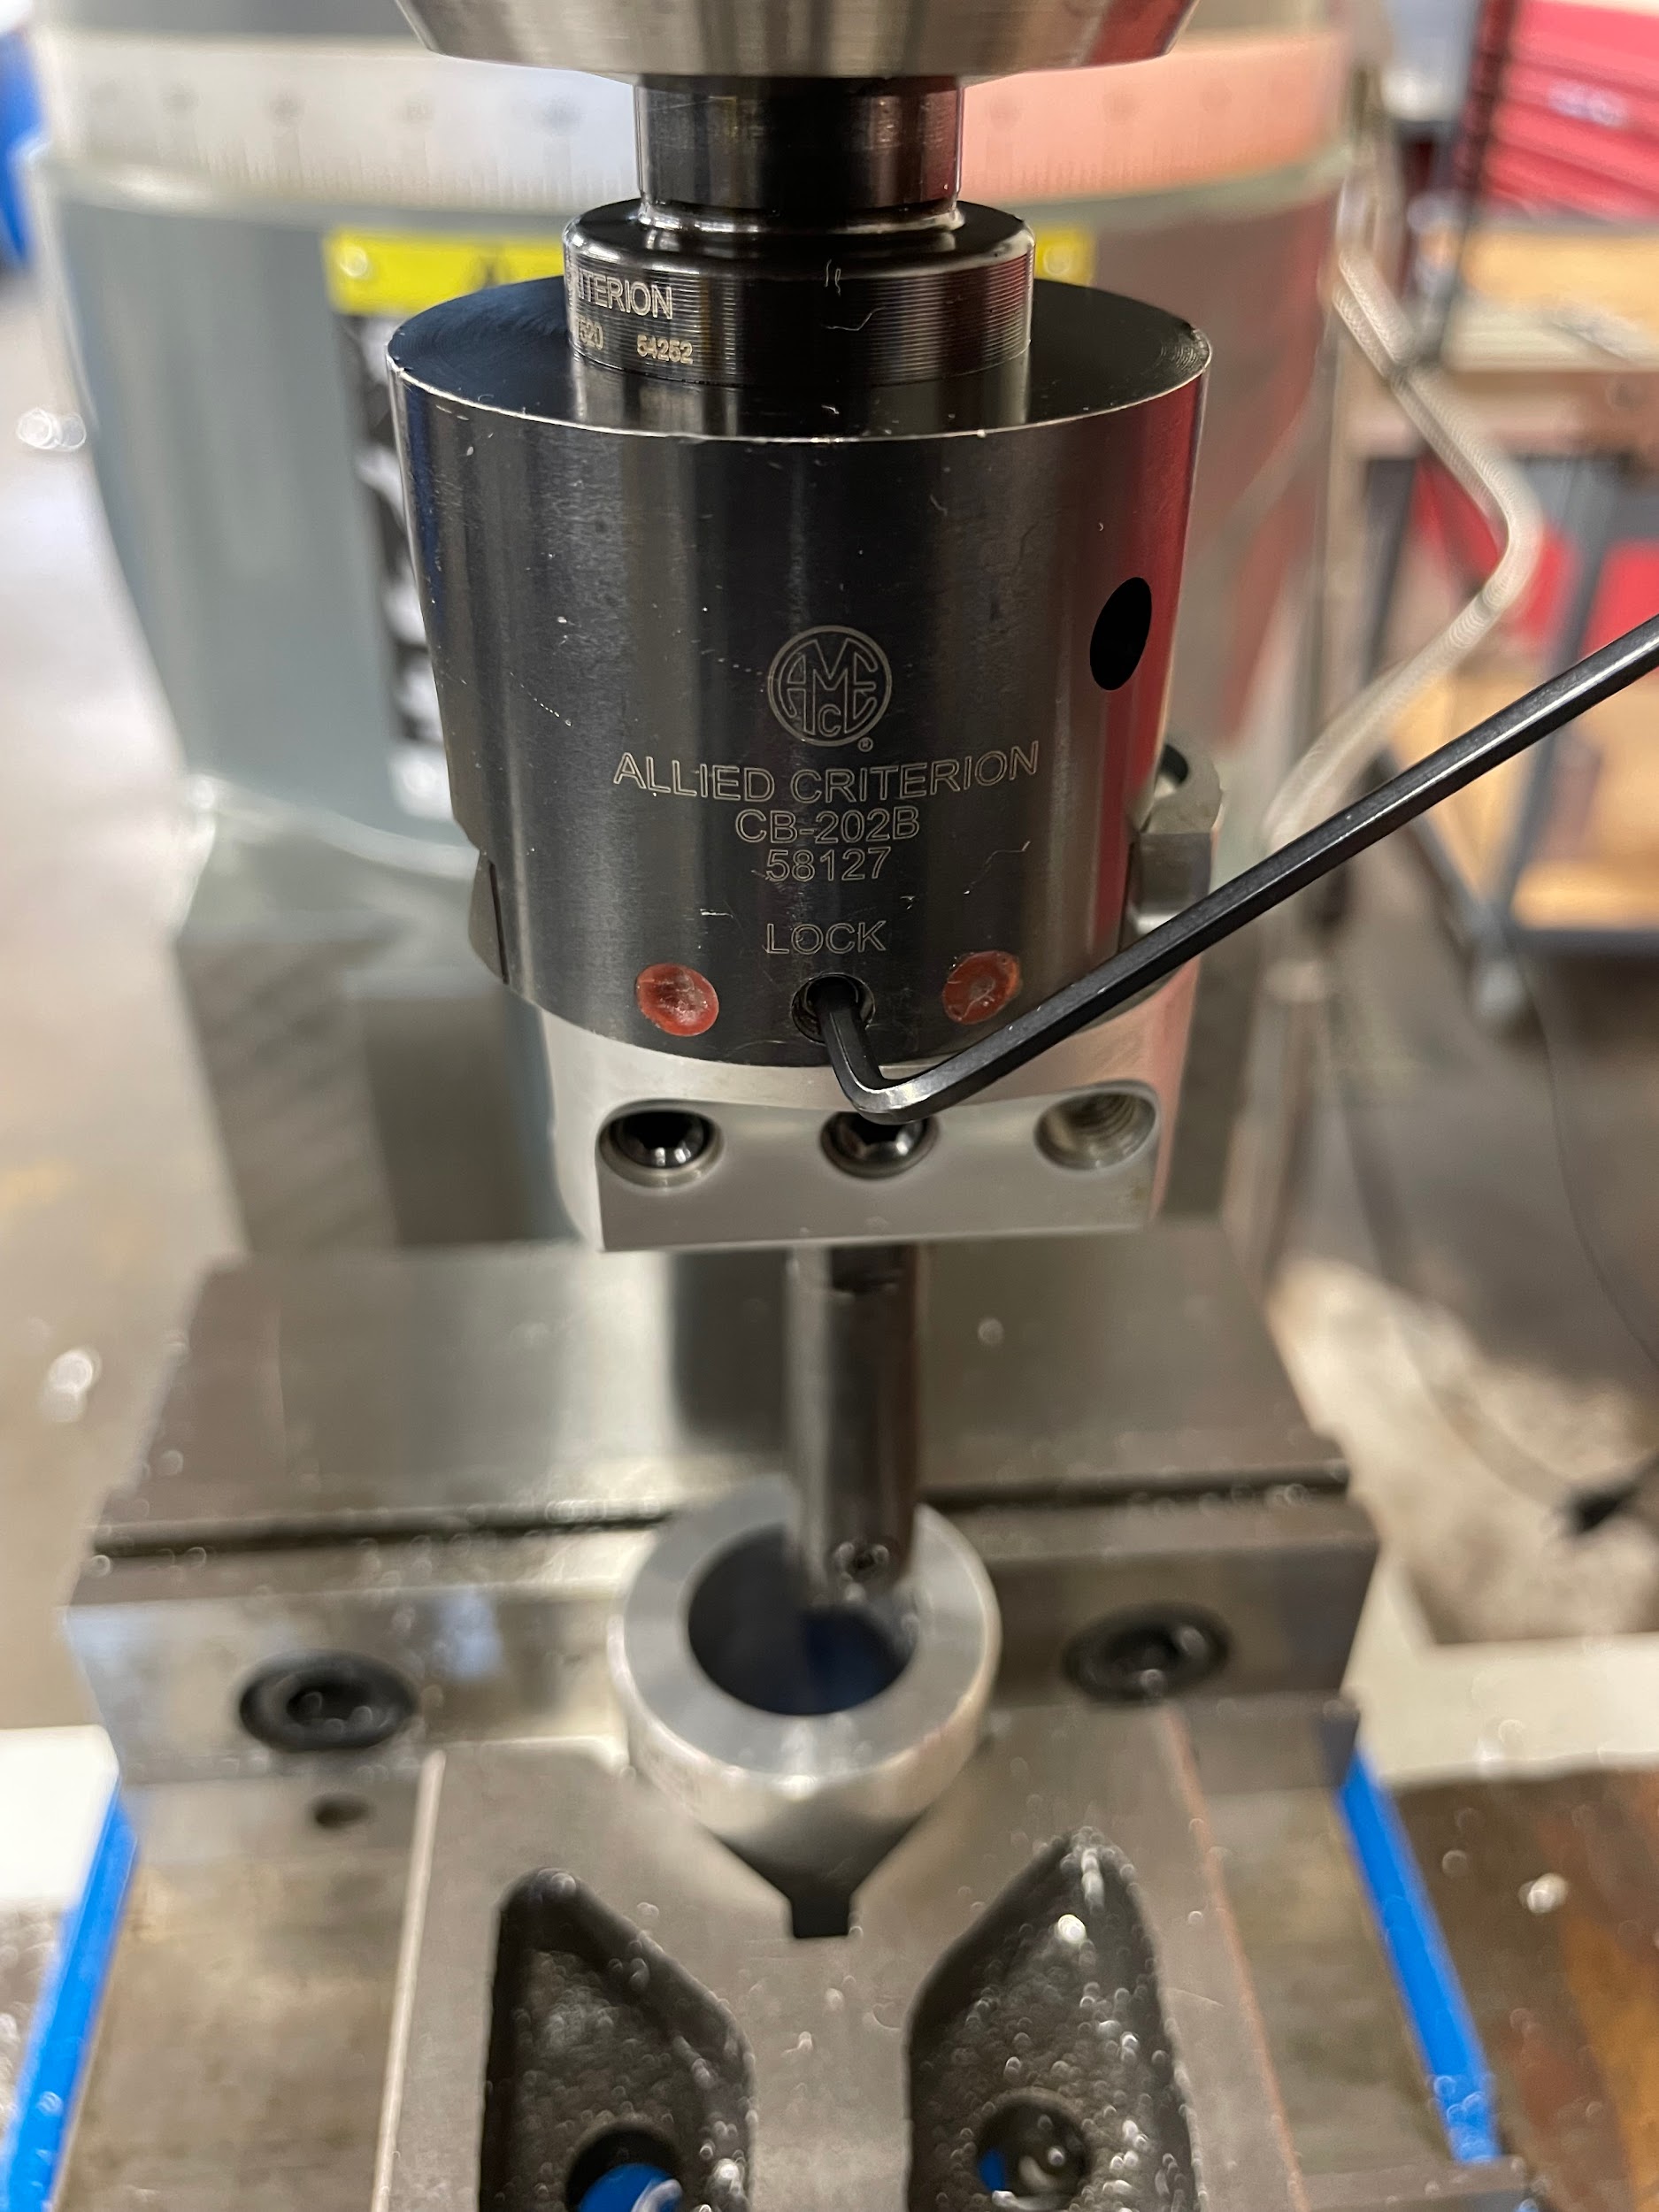
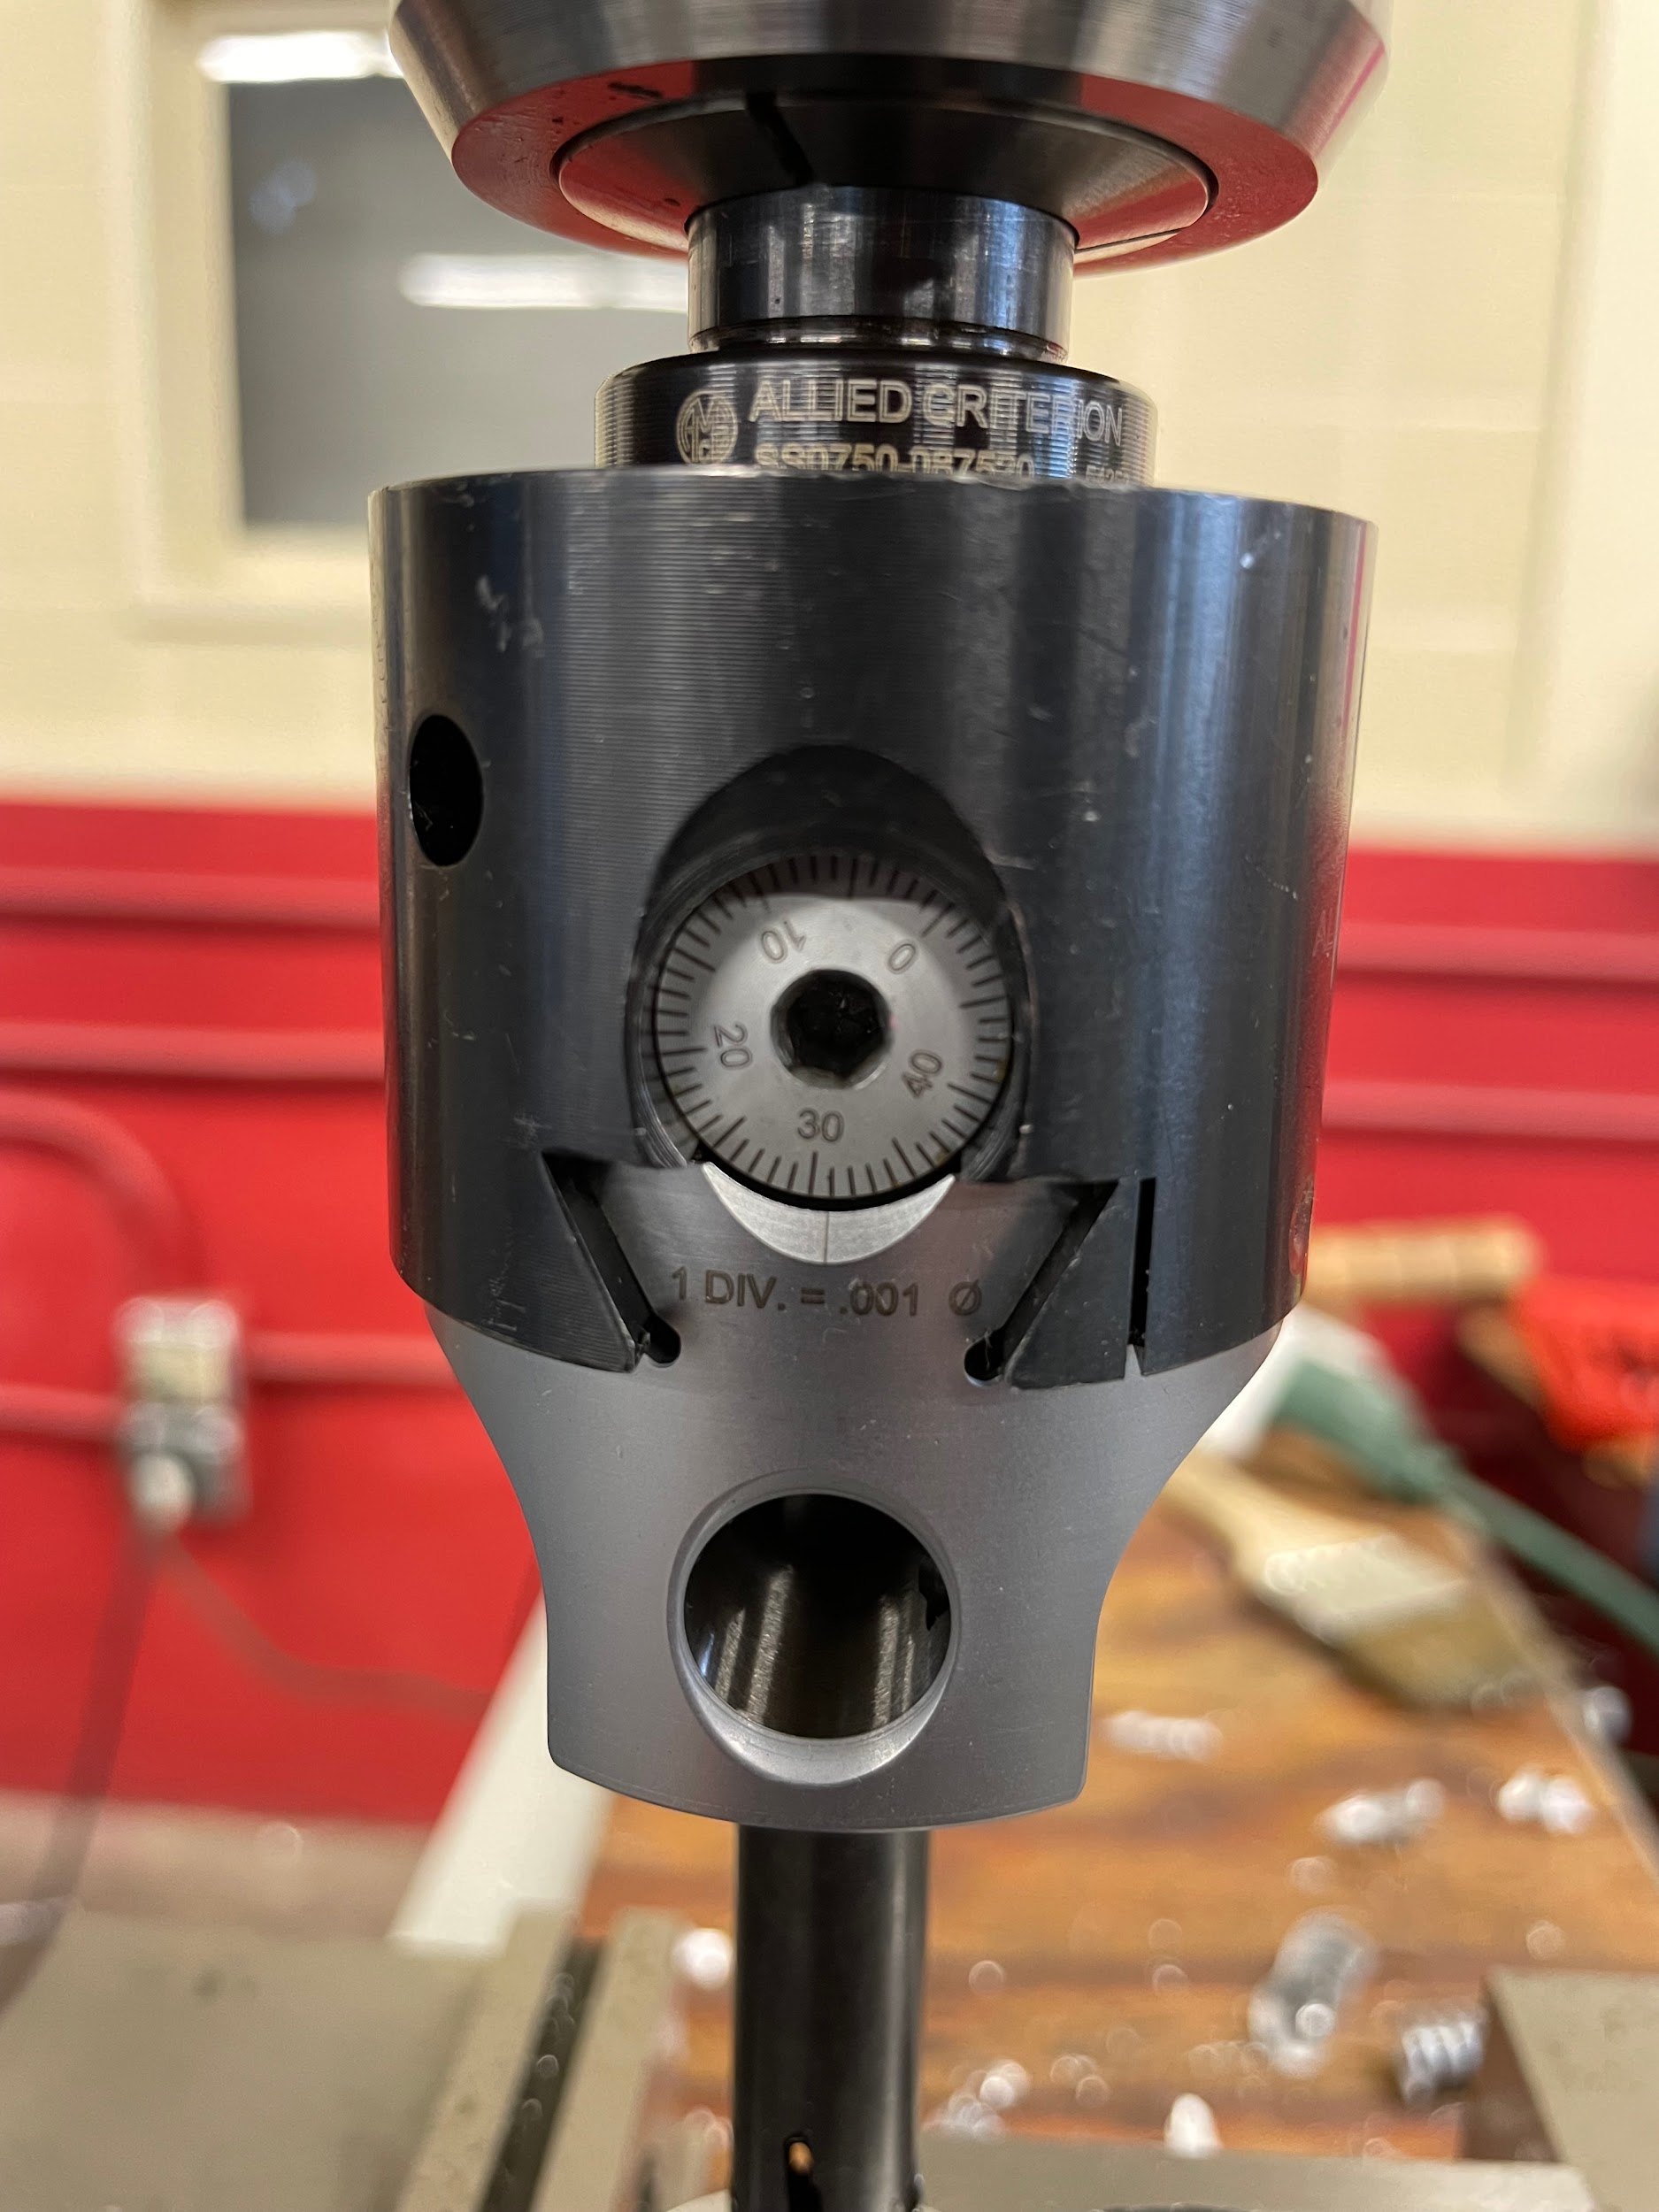
“Step 8: Adjust the boring head so that the cutting edge of the bar slightly touches the drilled hole by loosening the lock on the dovetail and turning the hex in the dial face.“
“Step 9: Adjust the boring head to take an initial cut. Depths of cut for a boring head will vary based on material, cutter, and conditions. Roughing cuts may be .020-.050, whereas finishing cuts may be .003-.010 or less.“
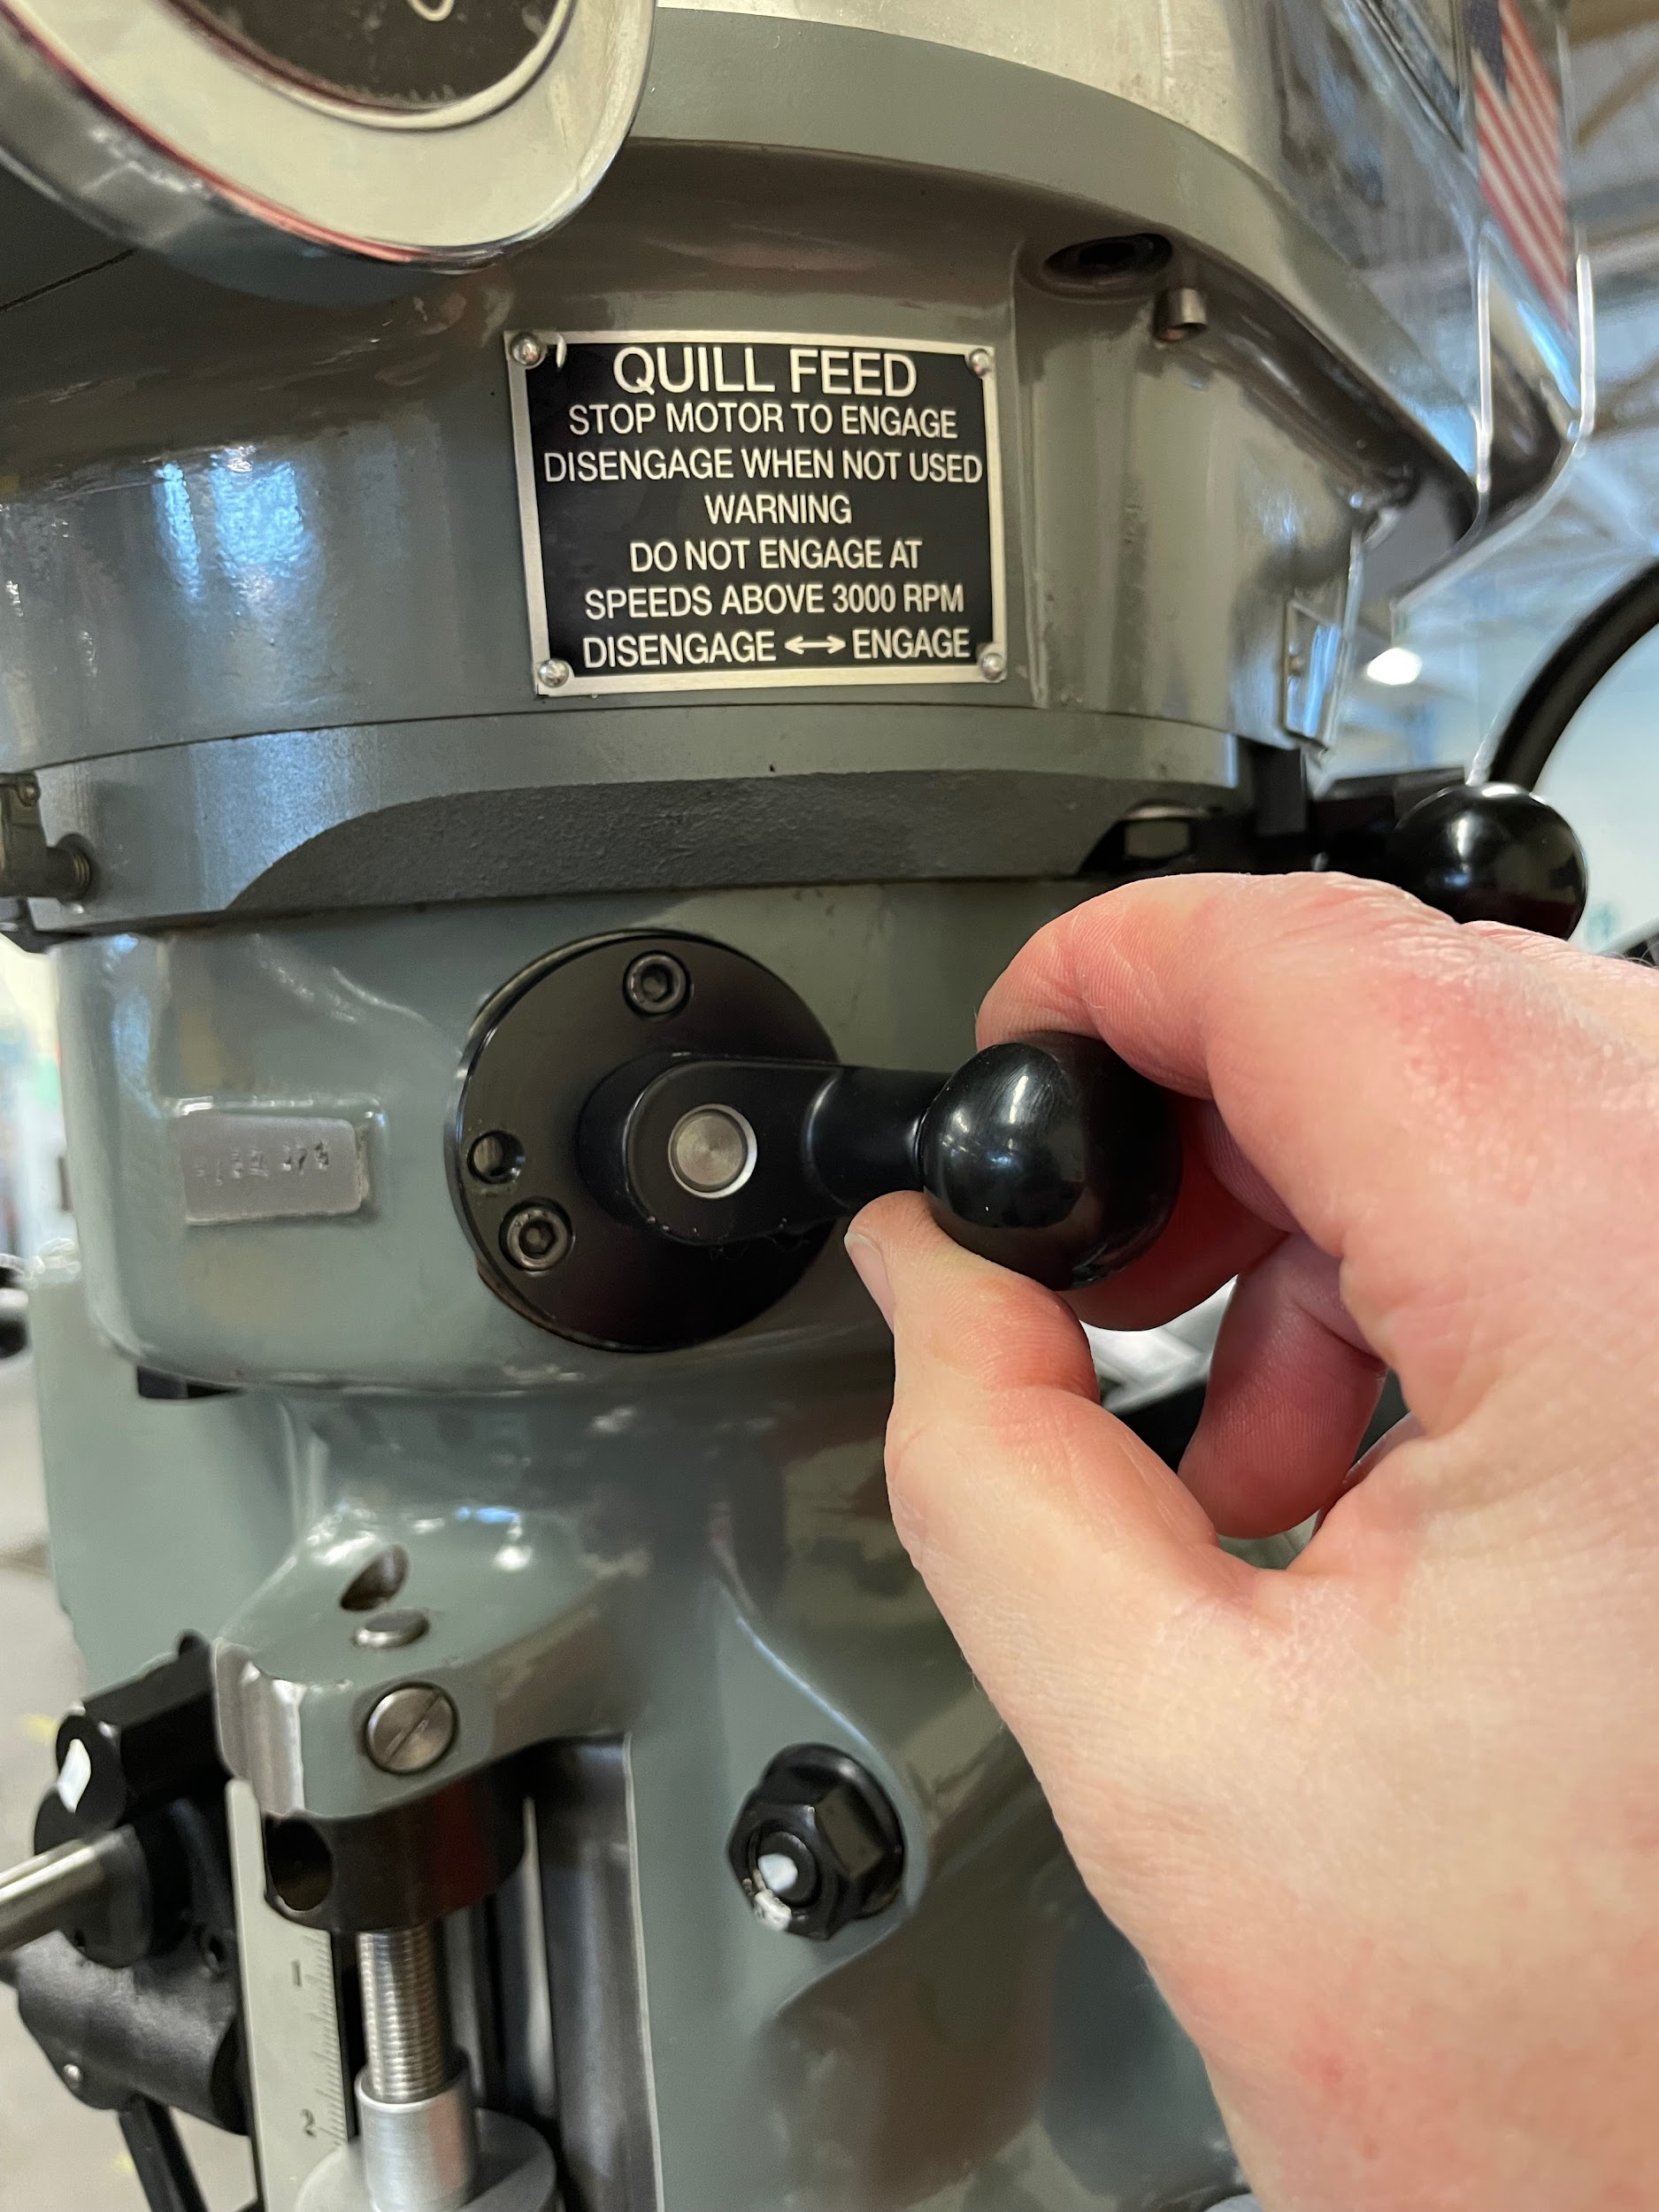
“Step 10: Move the quill feed engagement knob, located on the right side of the head, from disengage to engage. This can only be accomplished while the spindle is off.“
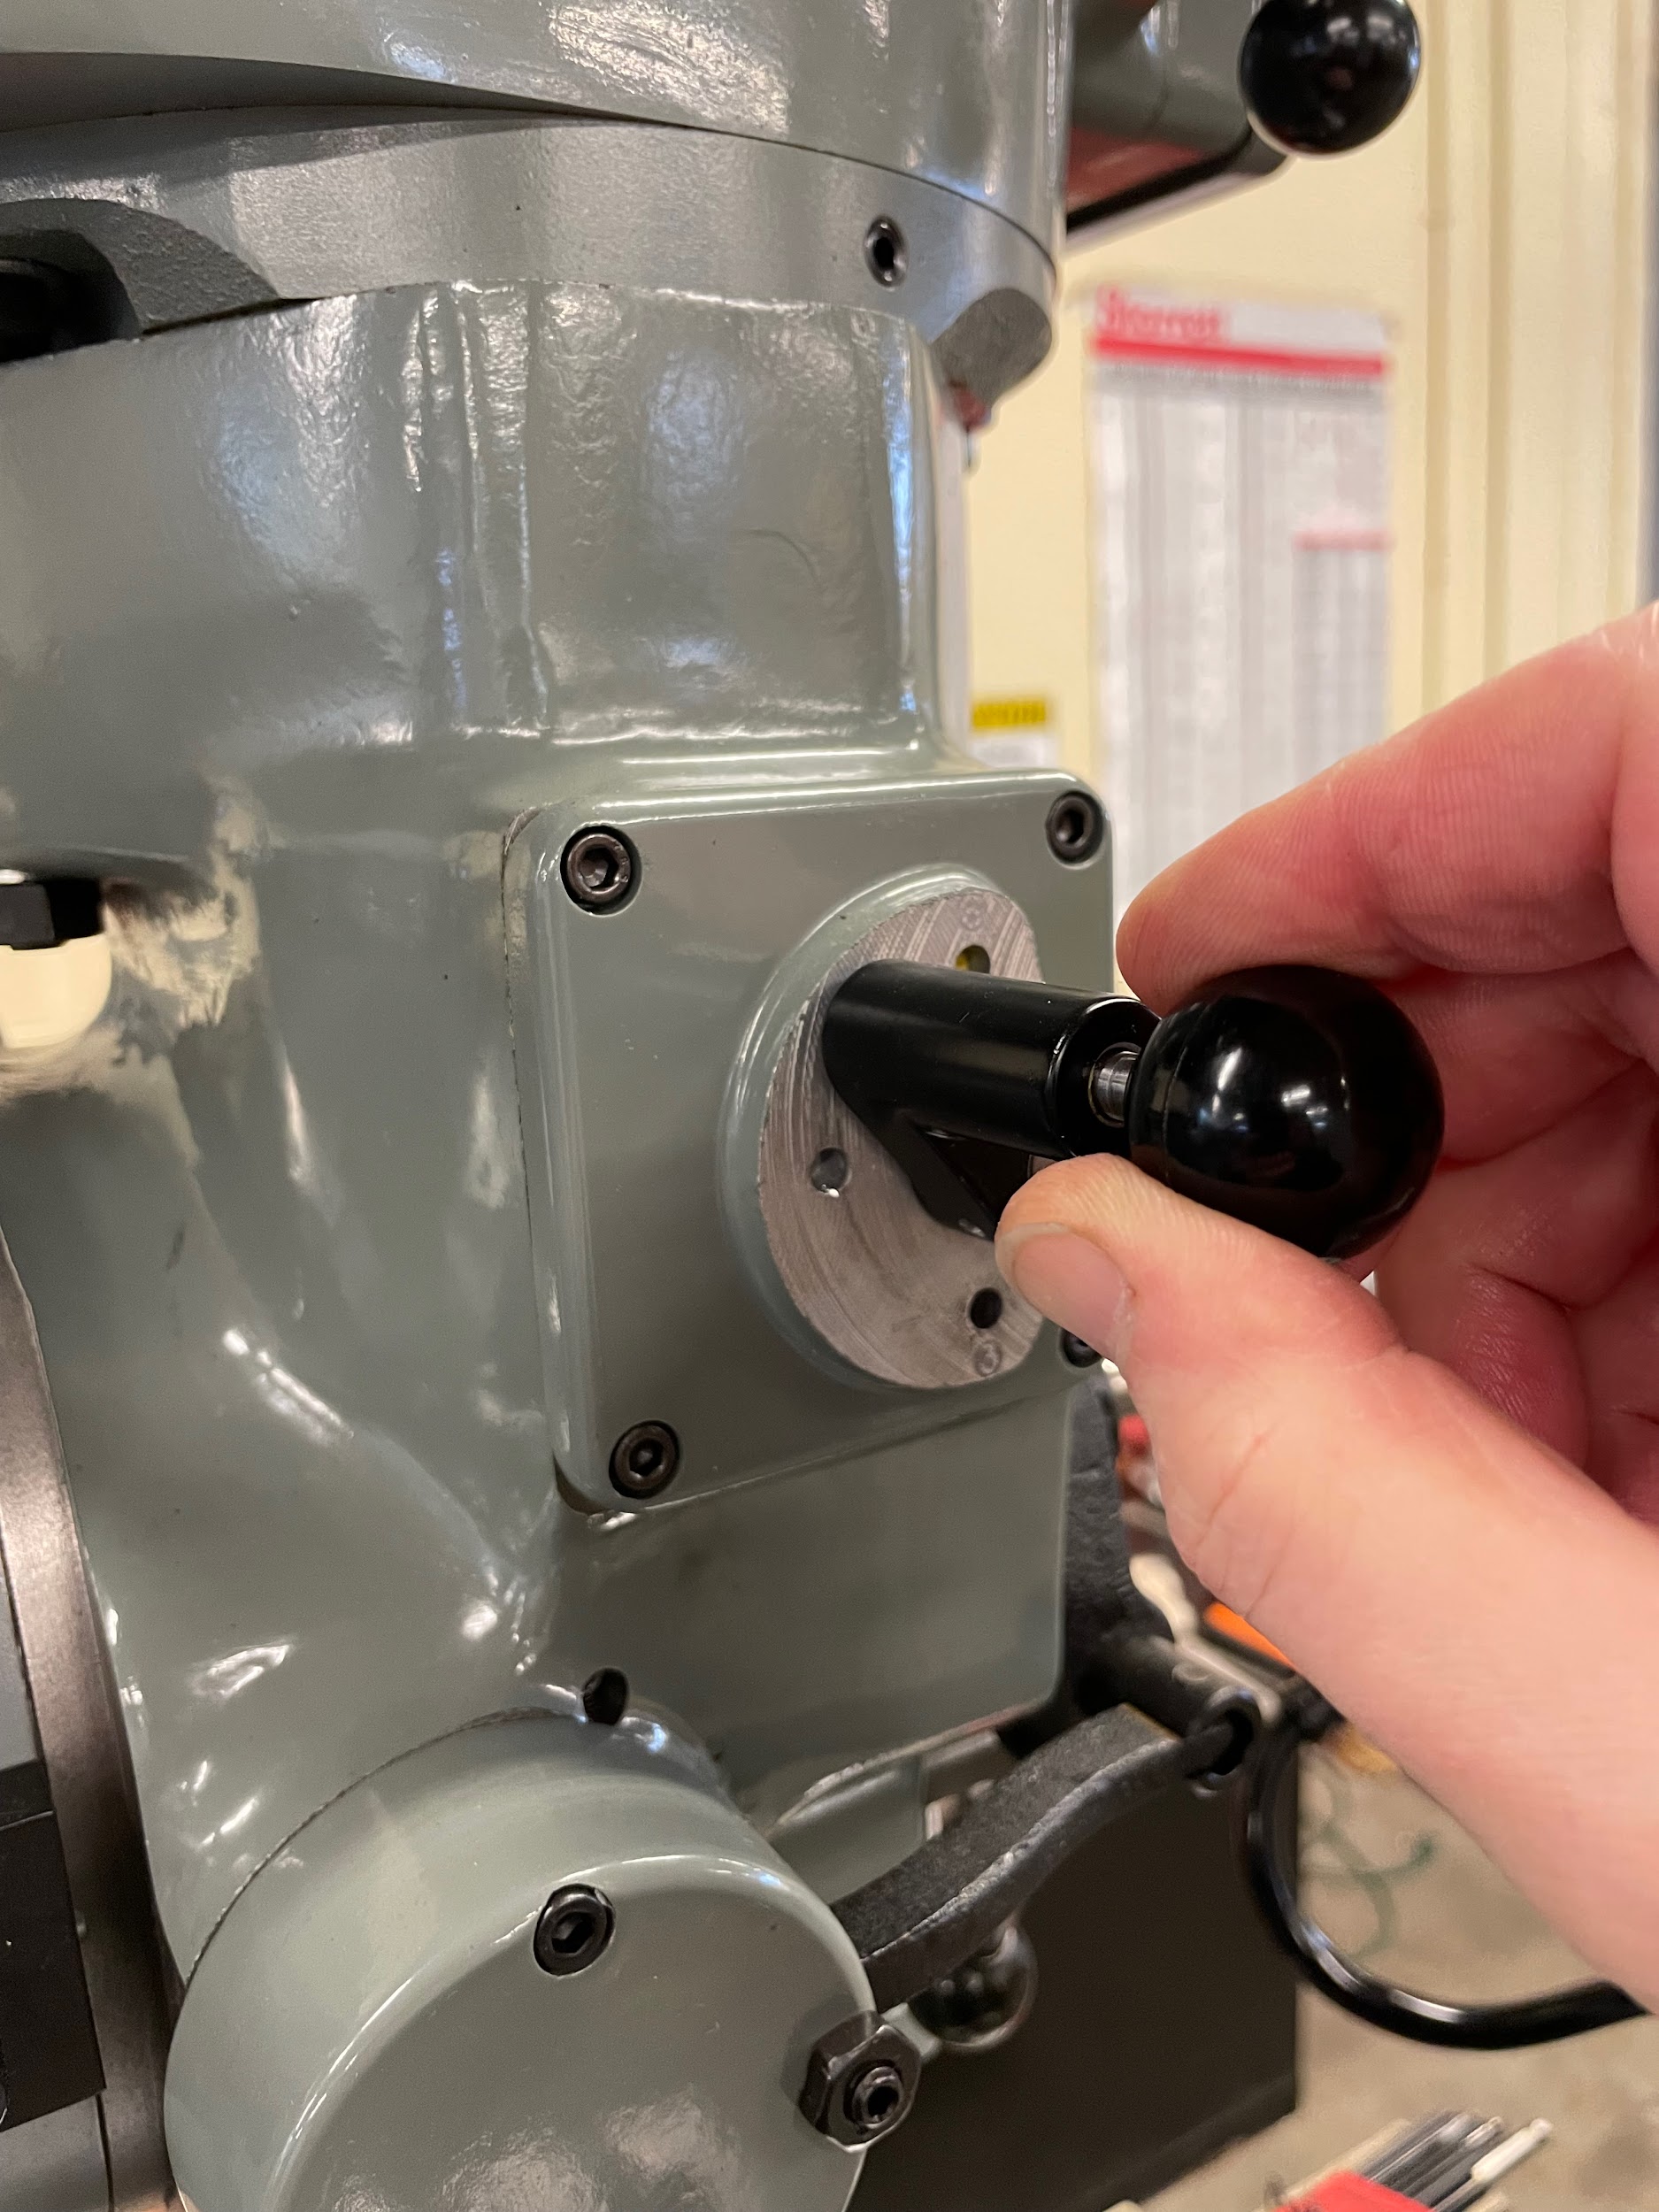
“Step 11: Select the quill feed increment, in IPR, on the left side of the mill. Some are labeled .006, .003, and .0015, but some are just labeled high, medium, and low. This can also only be accomplished while the spindle is off.“
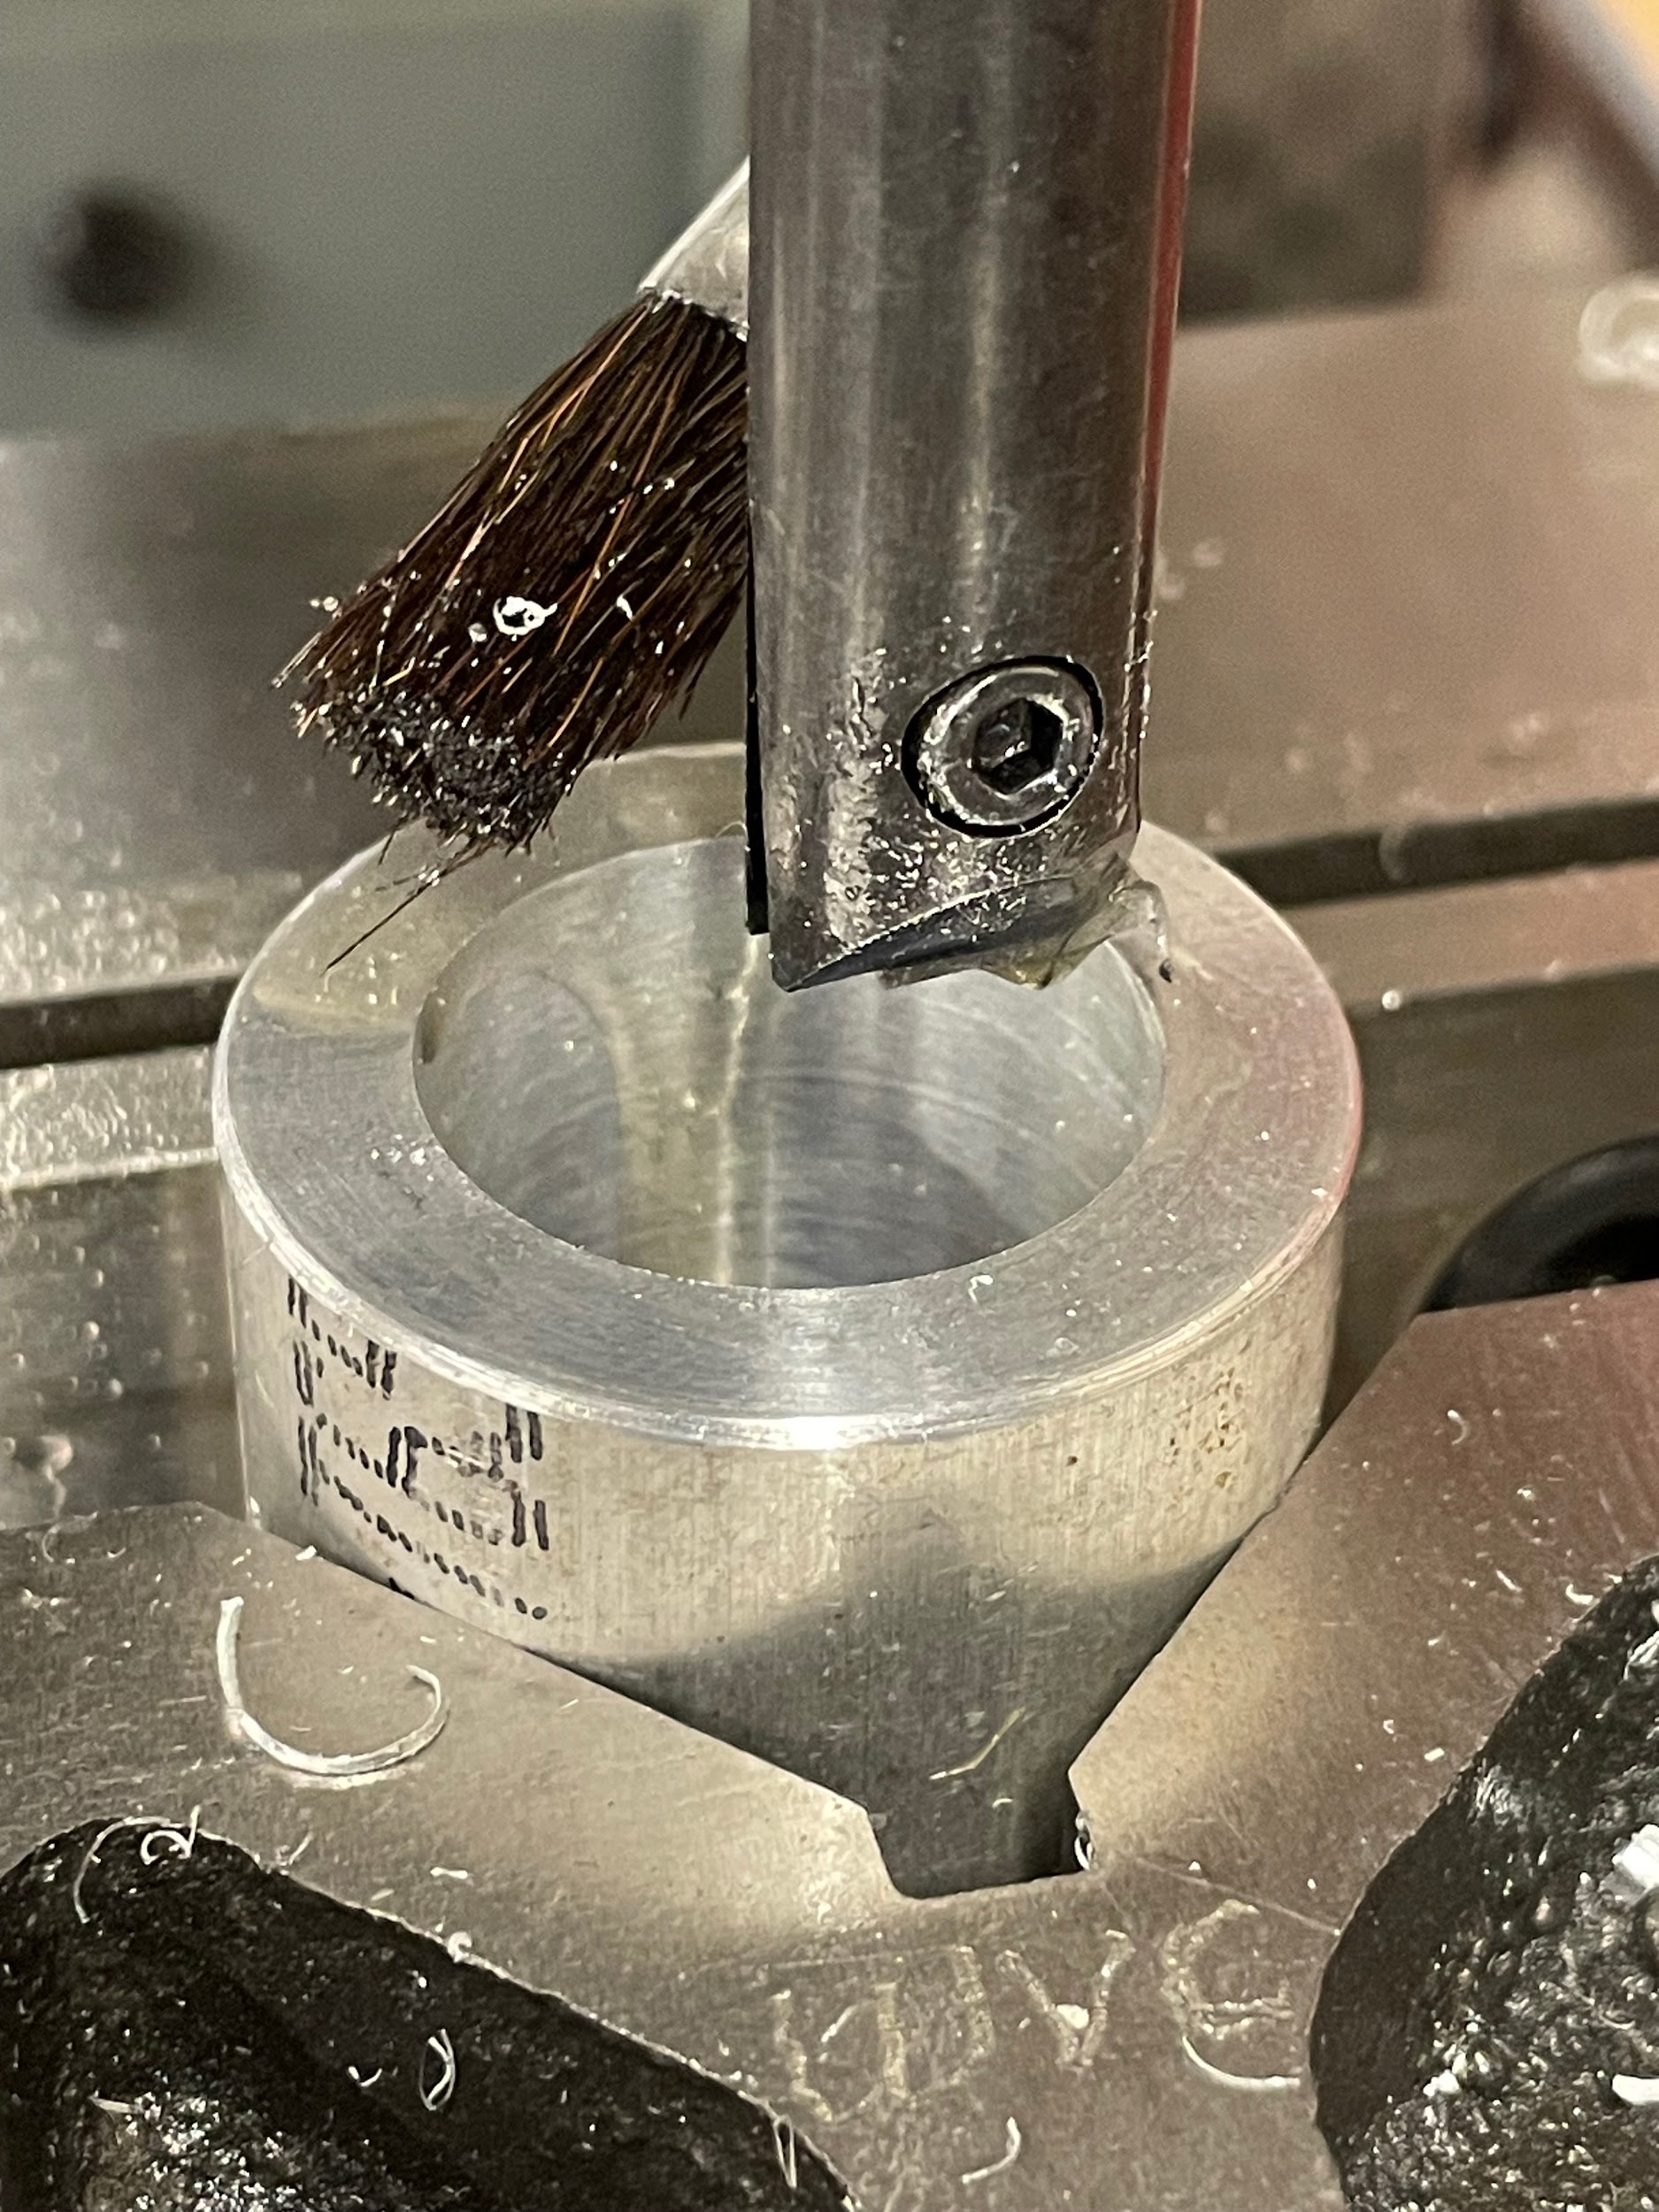
“Step 14: Lube the hole.“
“Step 15: Turn the spindle on and adjust the speed.“
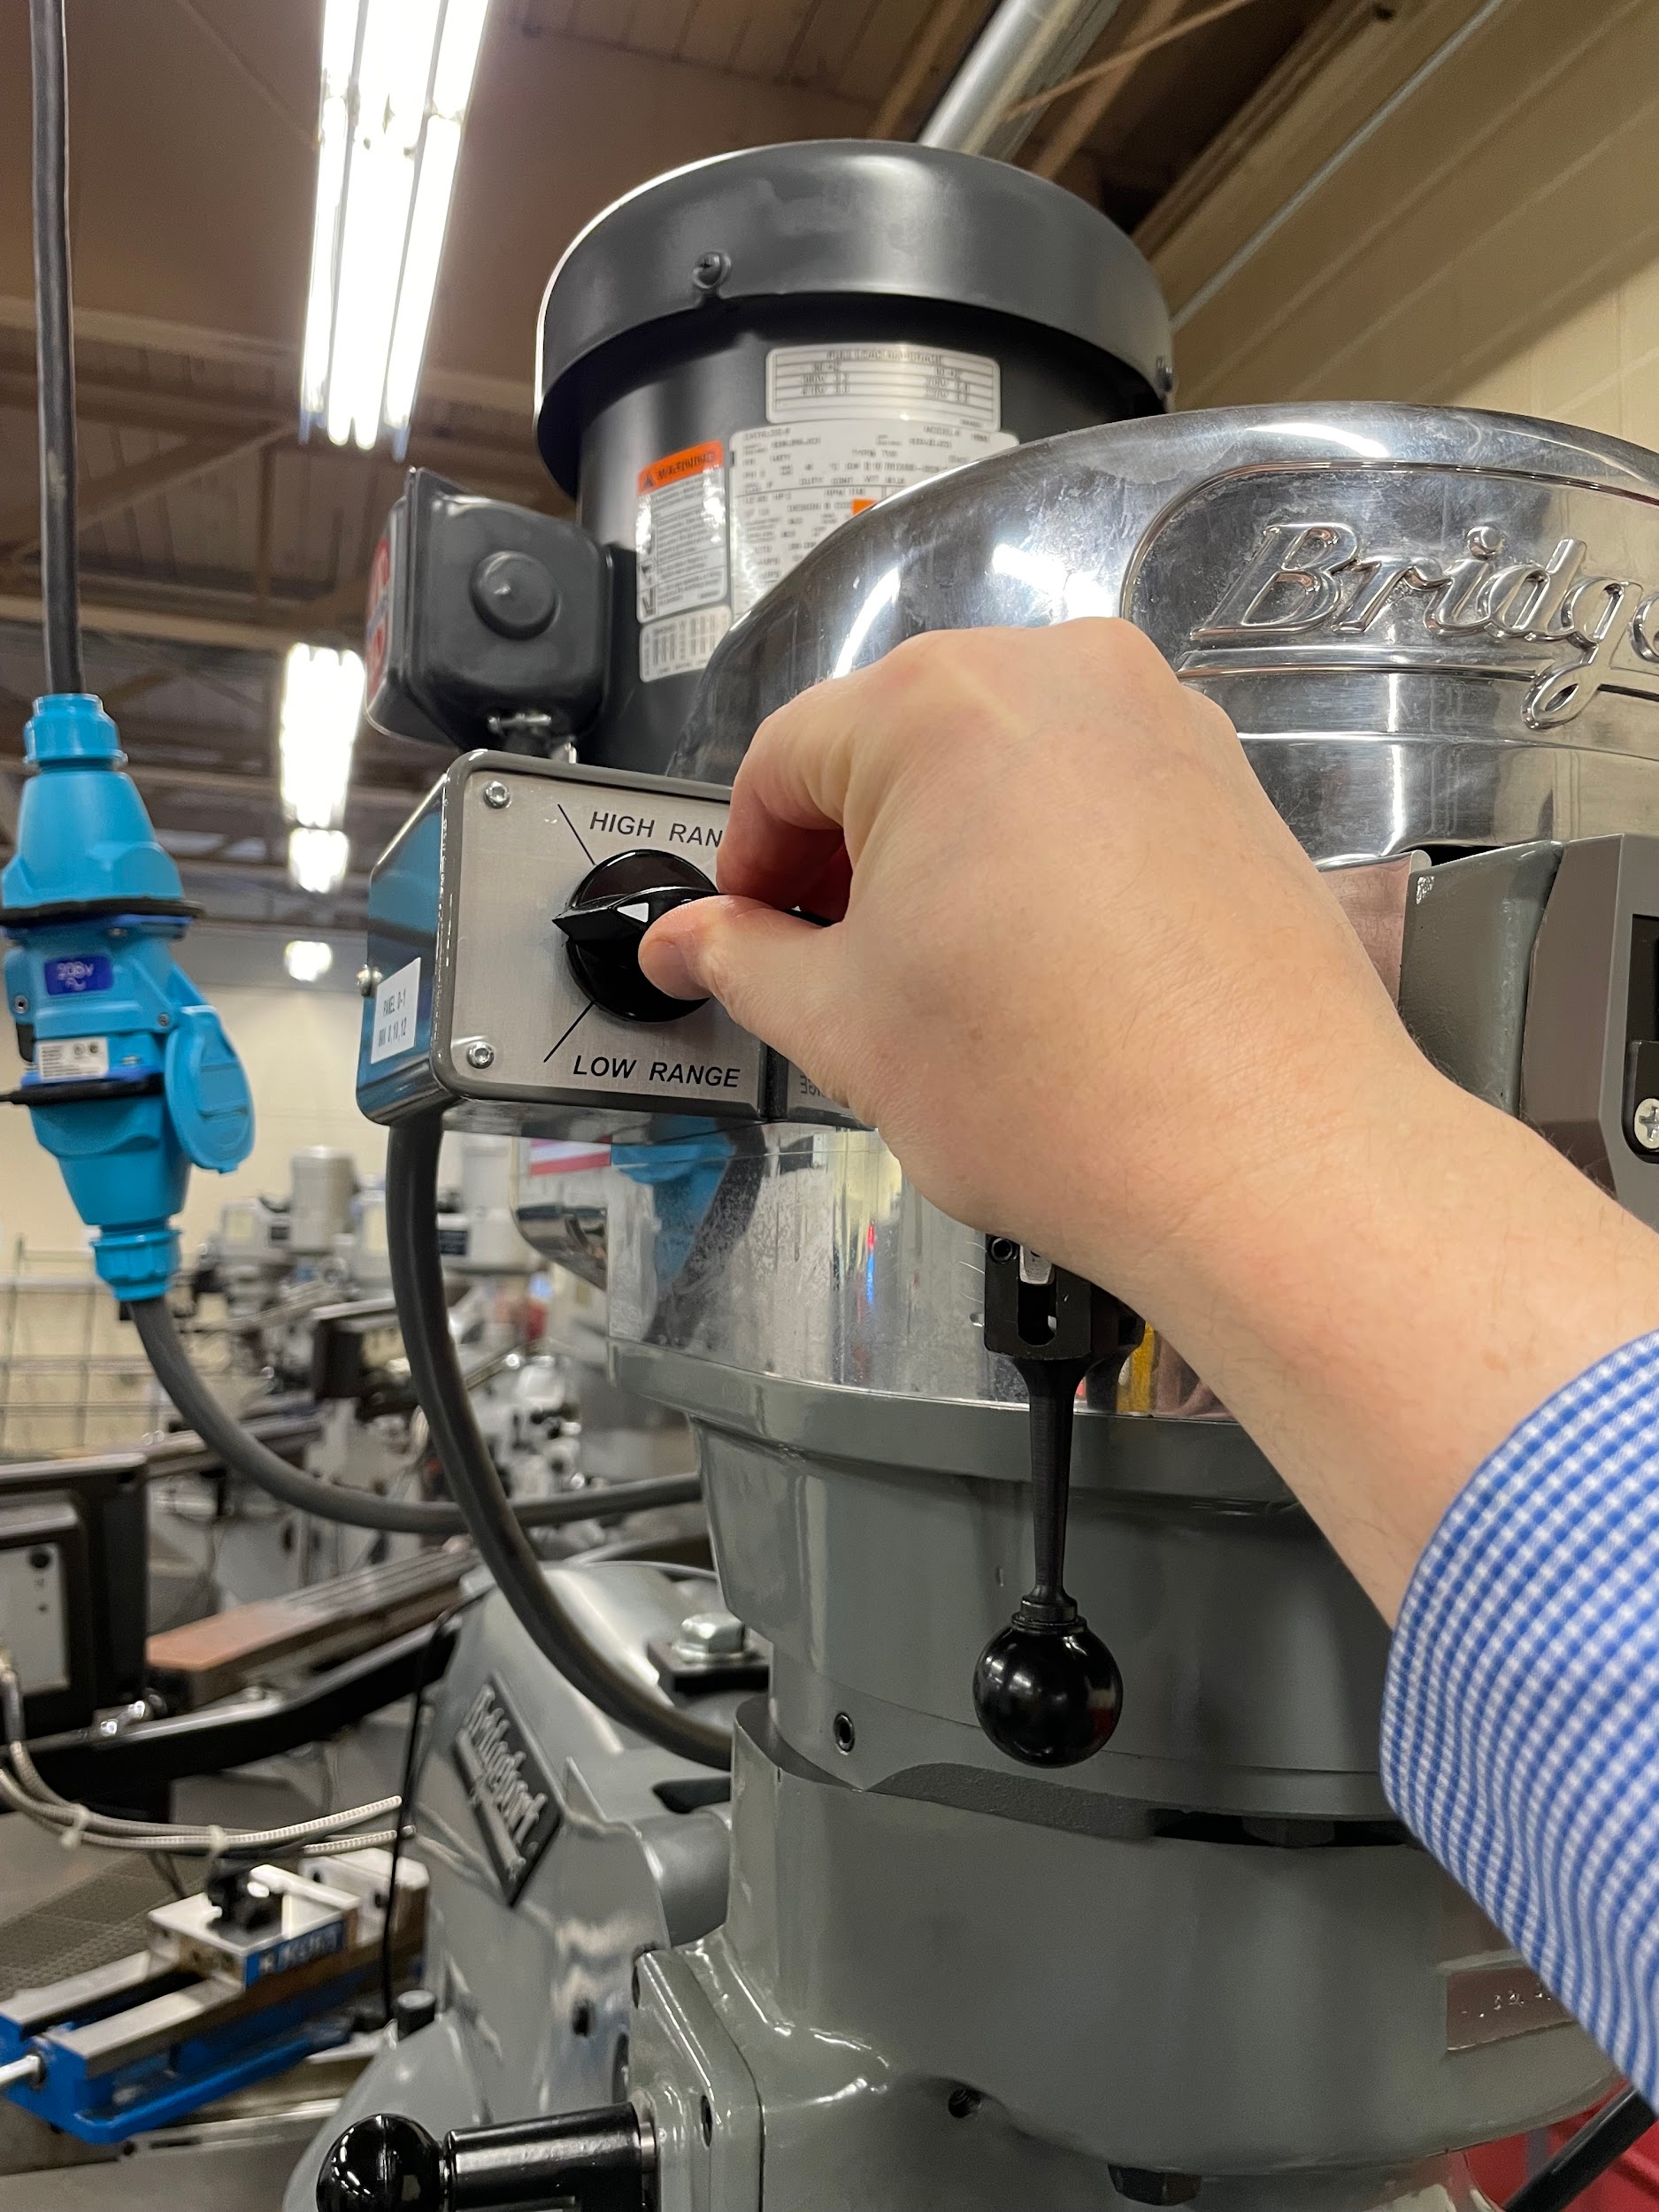
“Step 16: In the middle of the quill fine feed handwheel, pull out or push in the engagement pin. This will set the quill feed to move either up or down. “
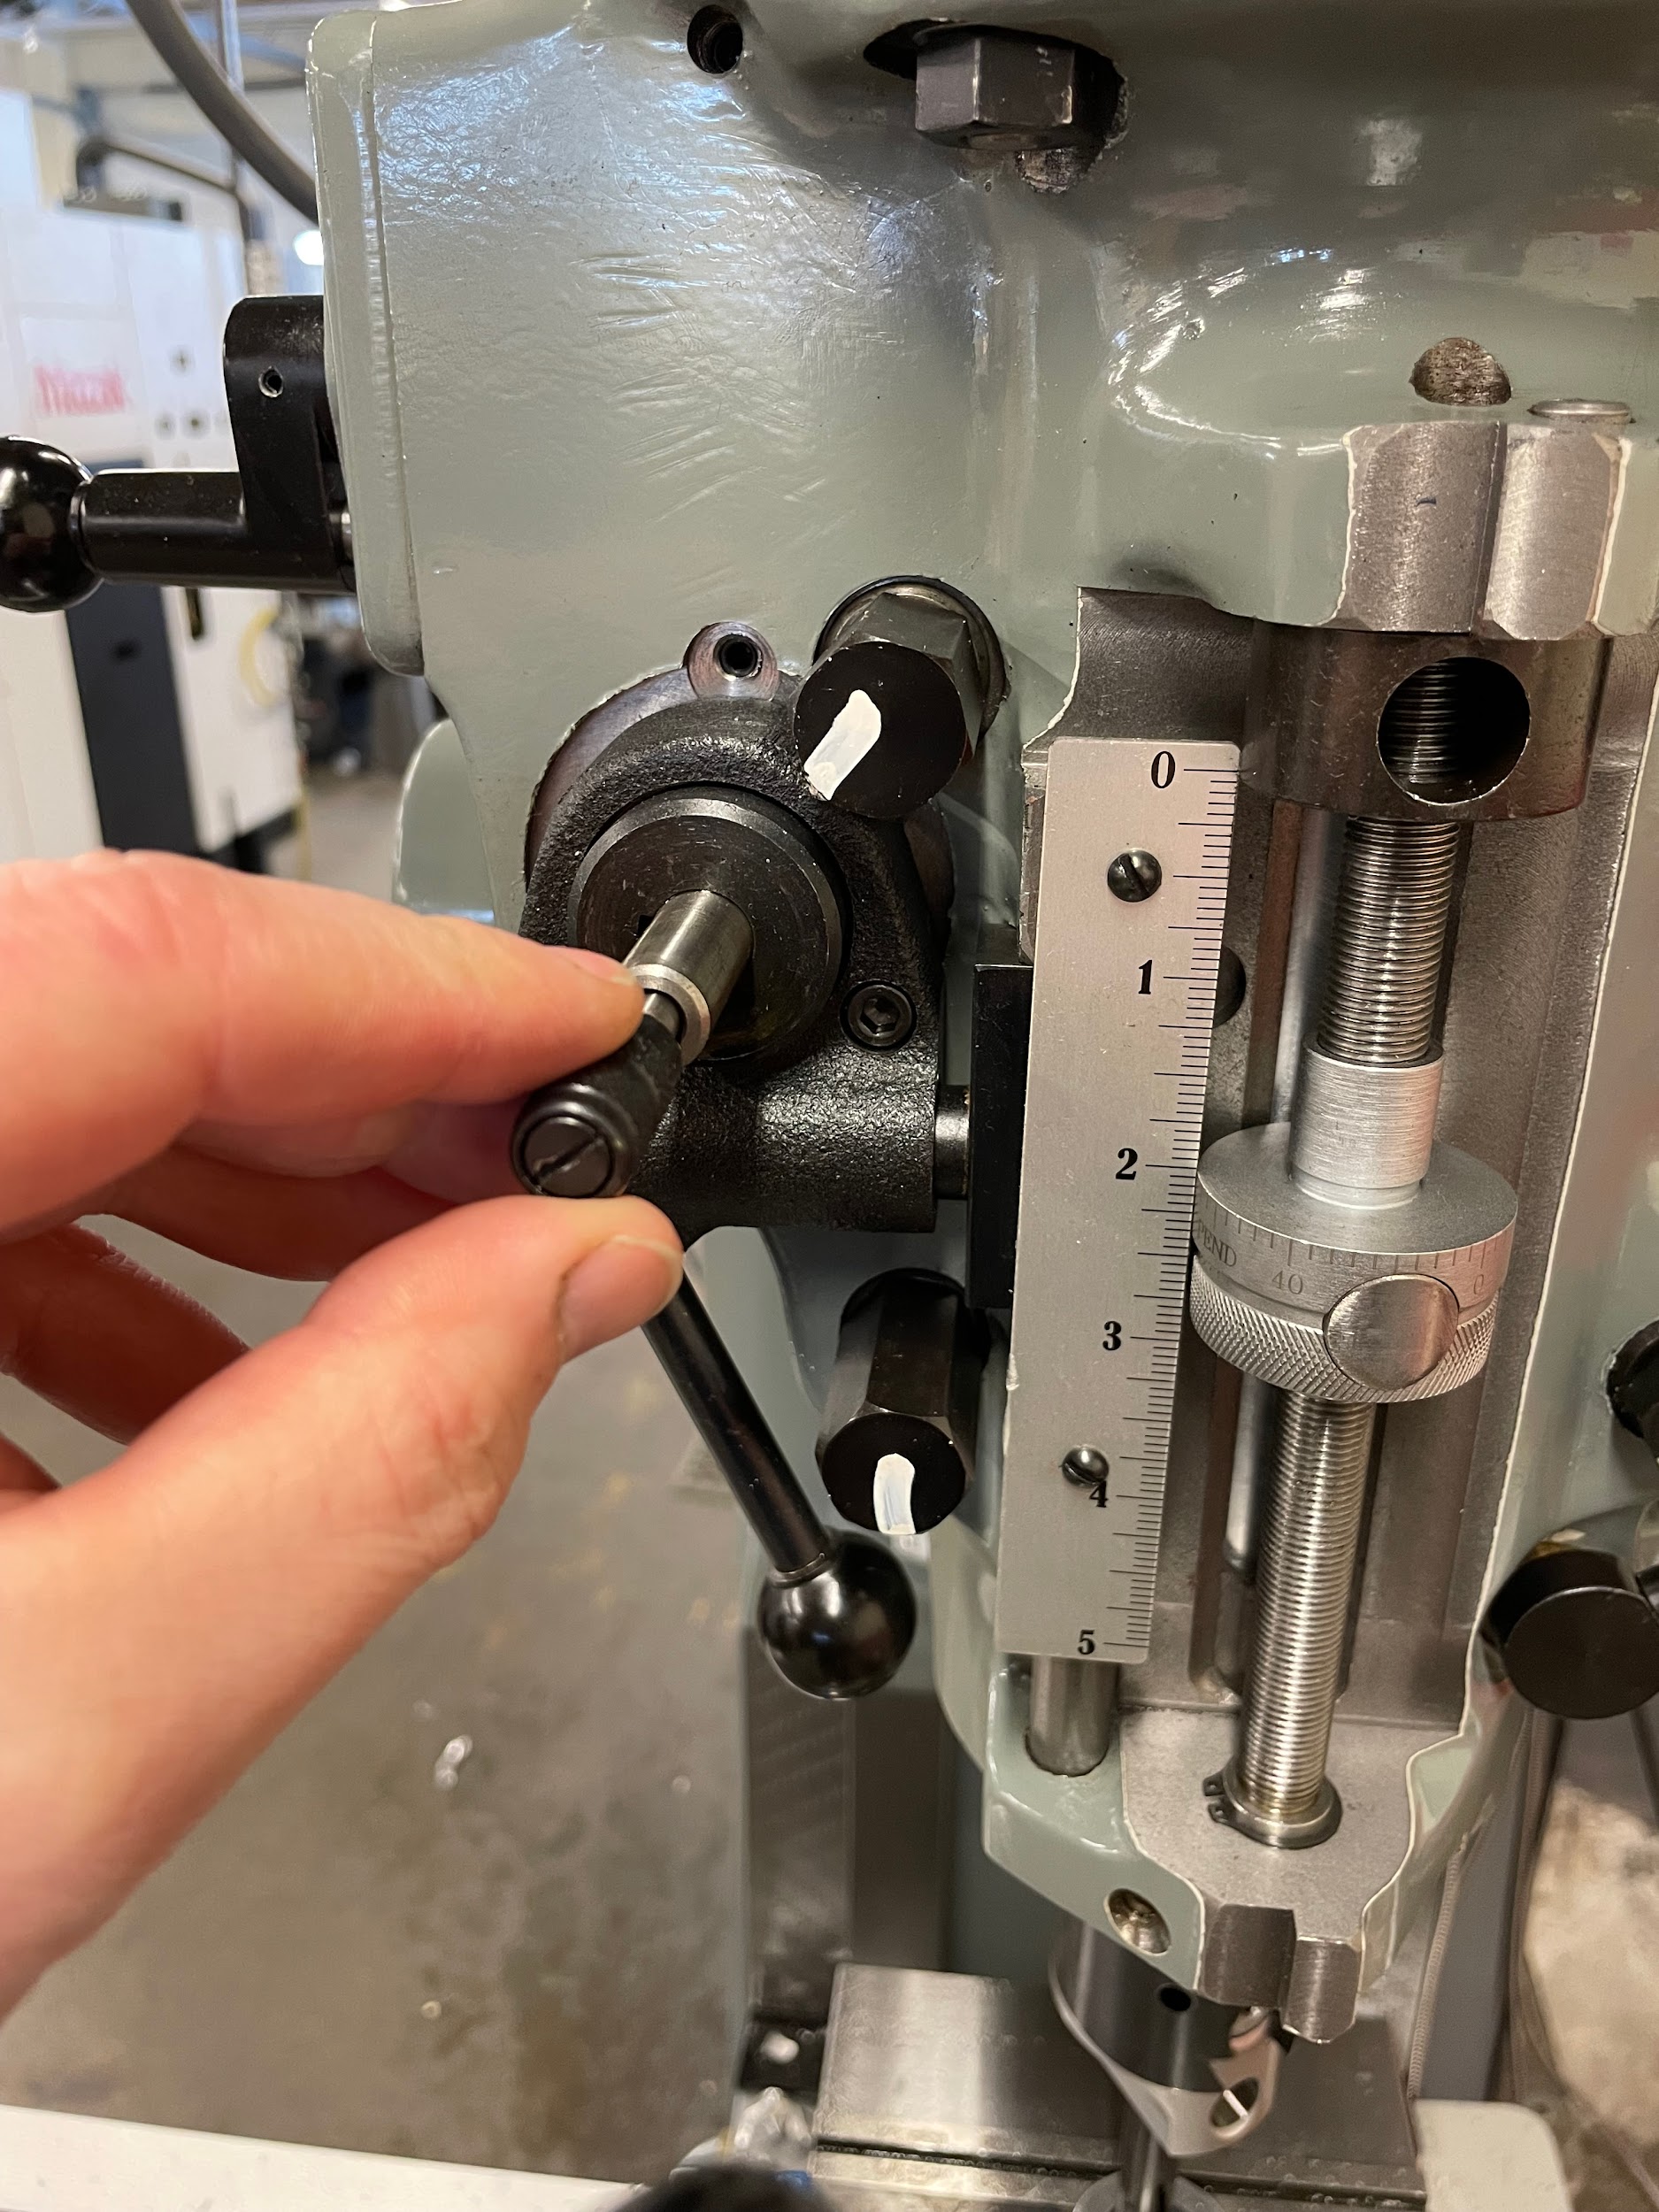
“Step 17: Now pull and briefly hold the quill feed lever on the left side of the head to start the automatic quill engagement.“
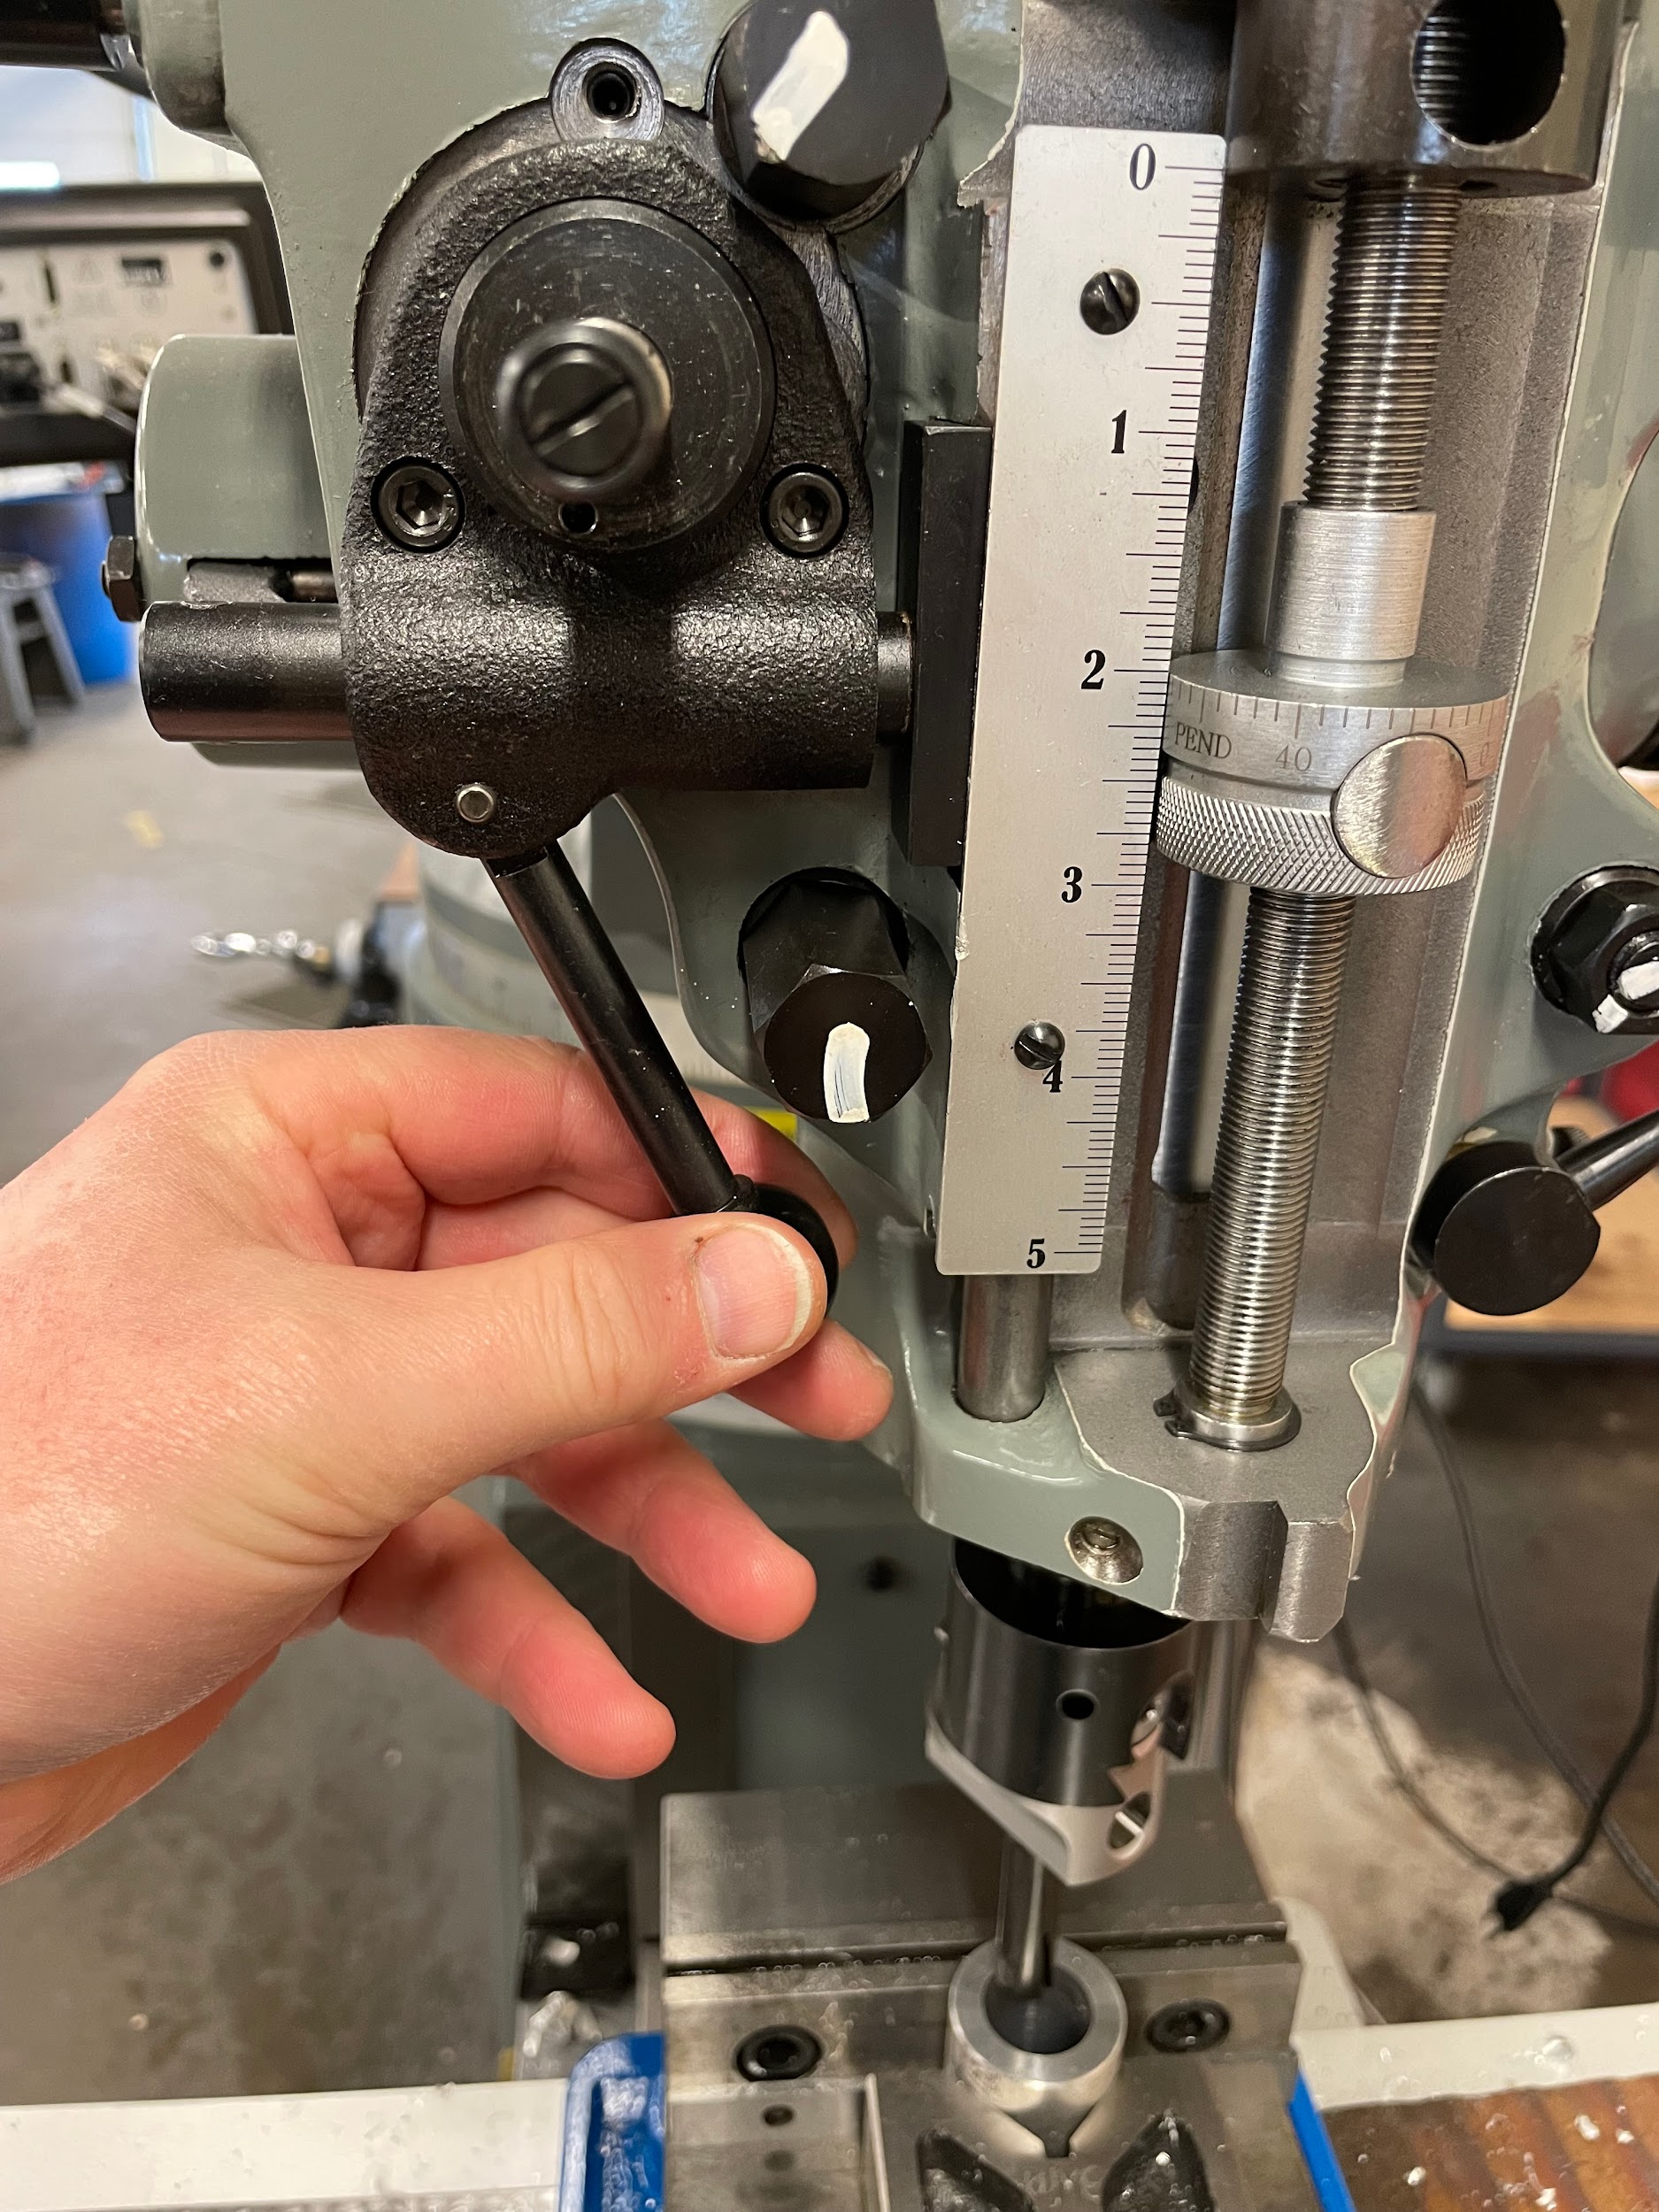
“Step 20: Manually pull the quill up through the hole. Pulling out in this fashion will keep the tool from cutting extra material on the upstroke and potentially oversizing the hole. Pulling out in this way will also indicate the amount of bar deflection during roughing passes when examining the scored line on the side of the bore. On a finish pass, the machine should be moved, or the head adjusted so scoring is absent.“
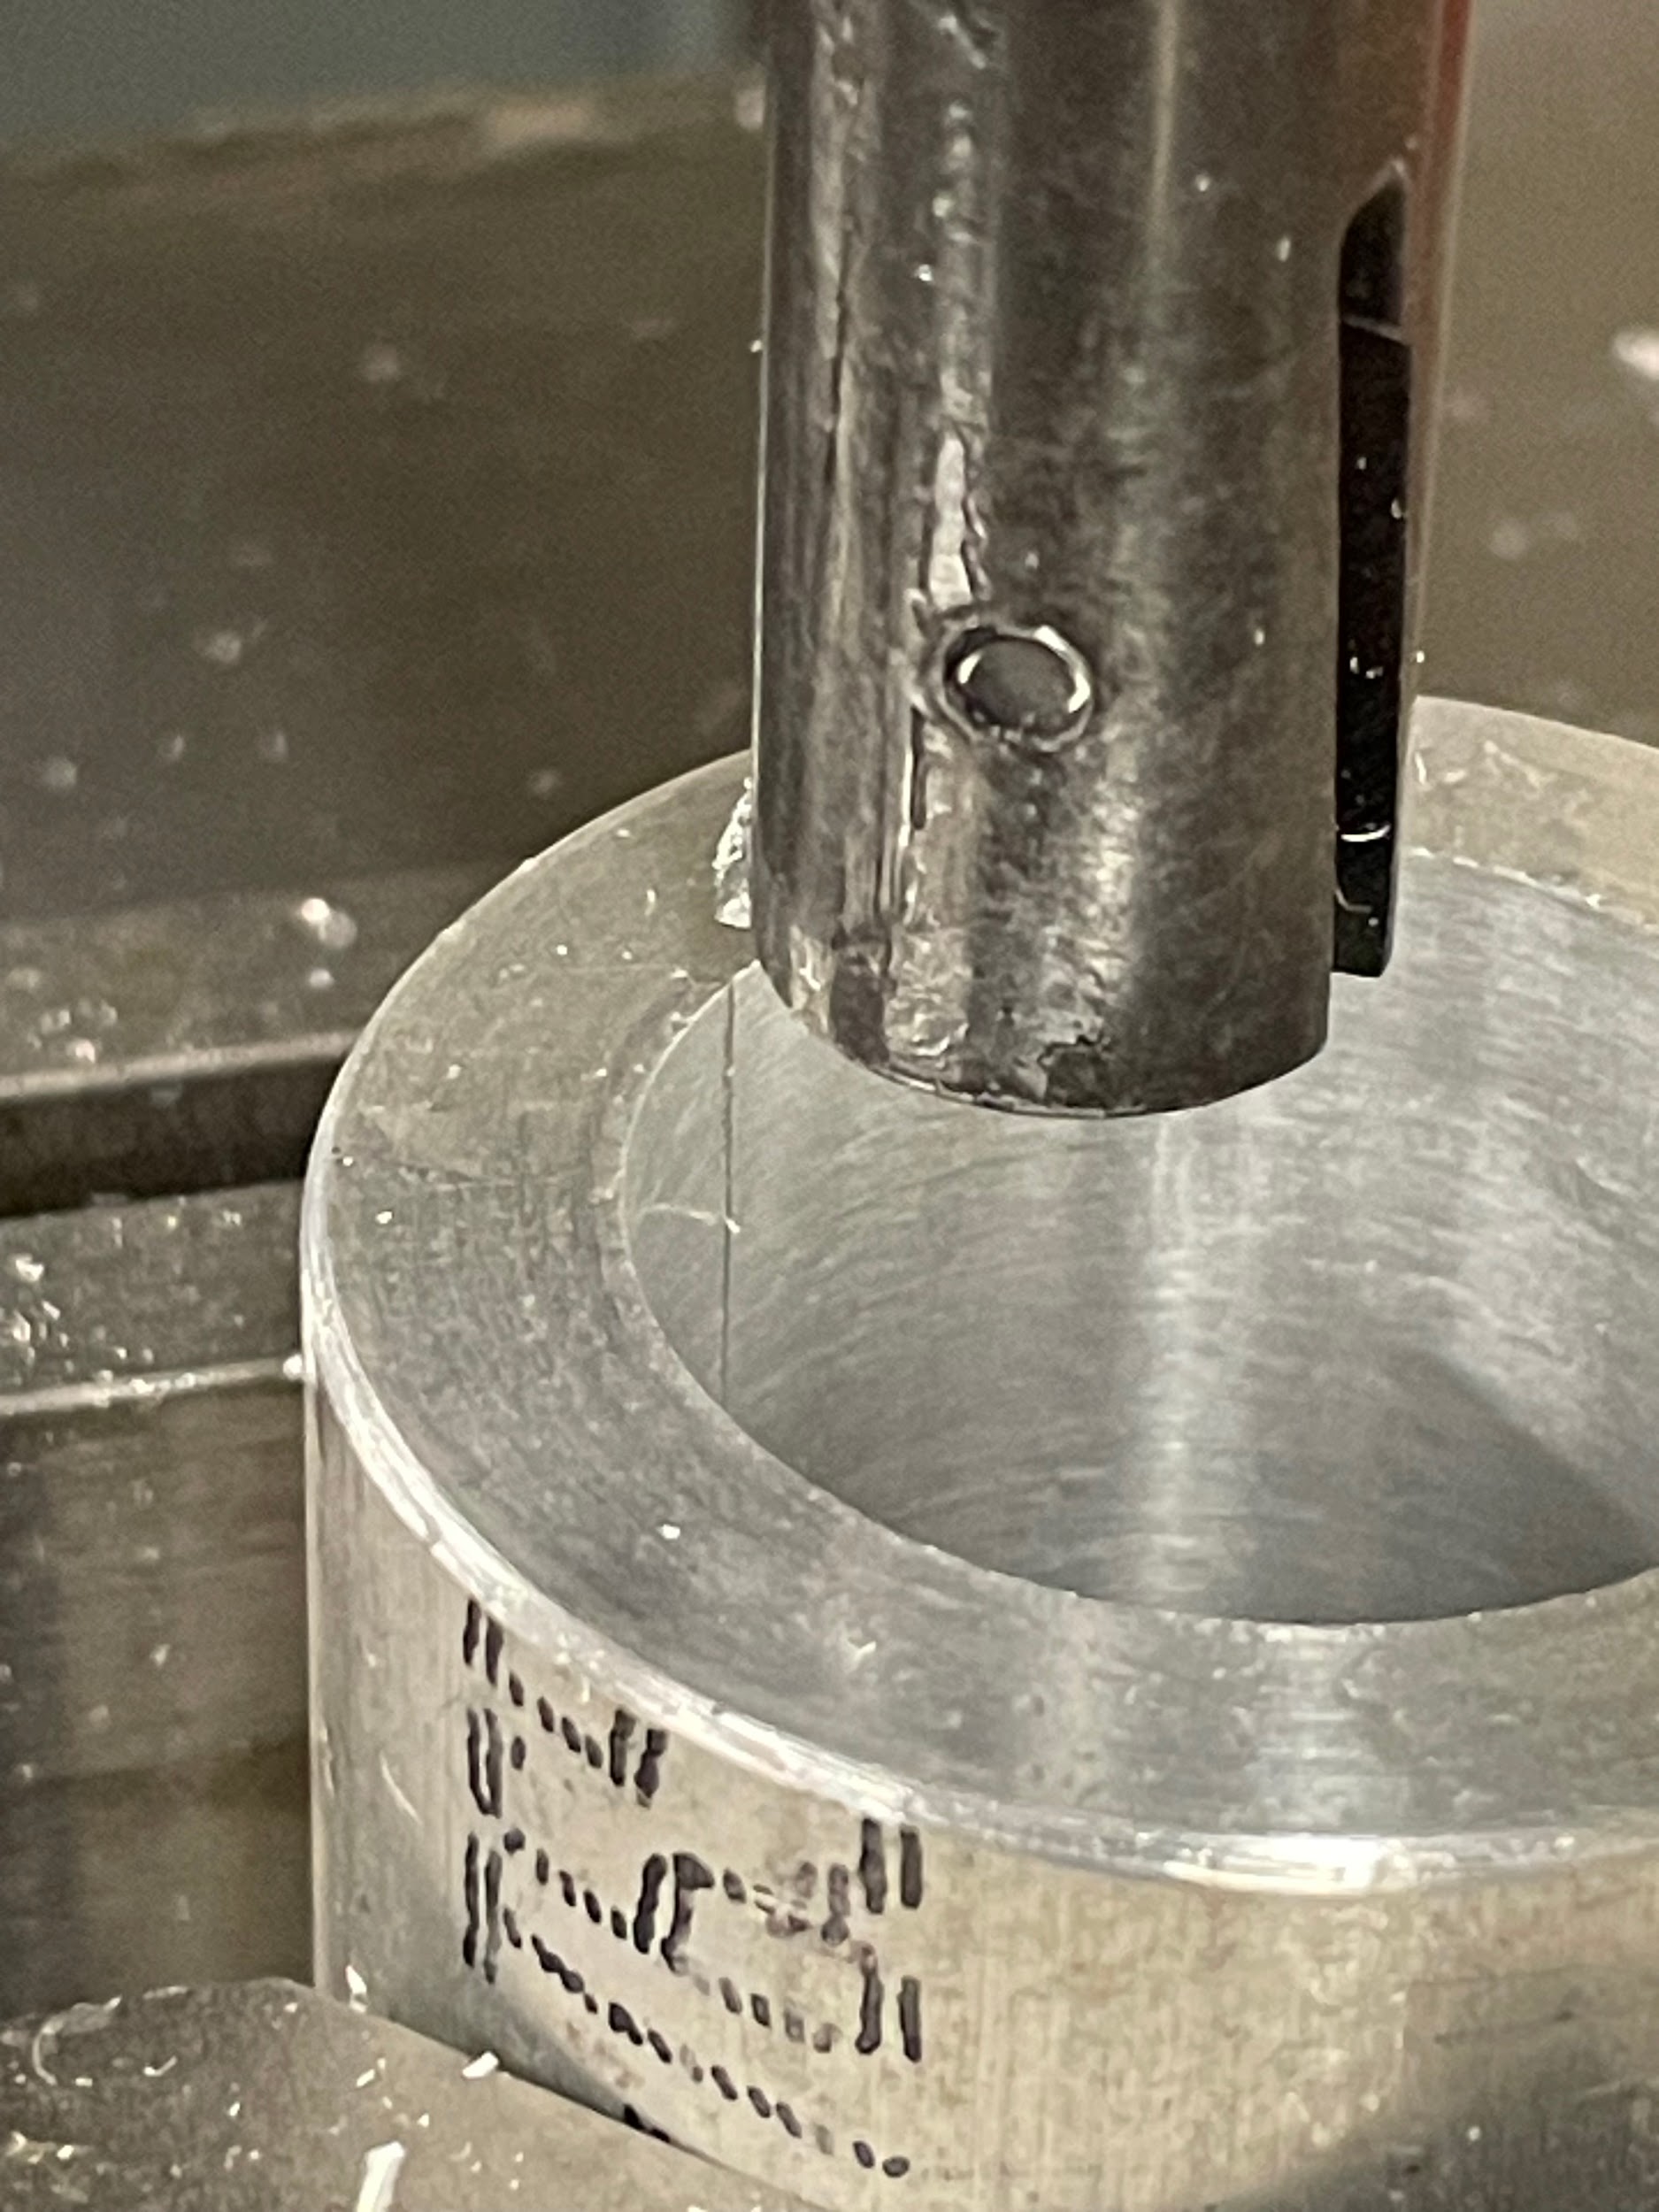
“Step 23: Clean and inspect the feature. “
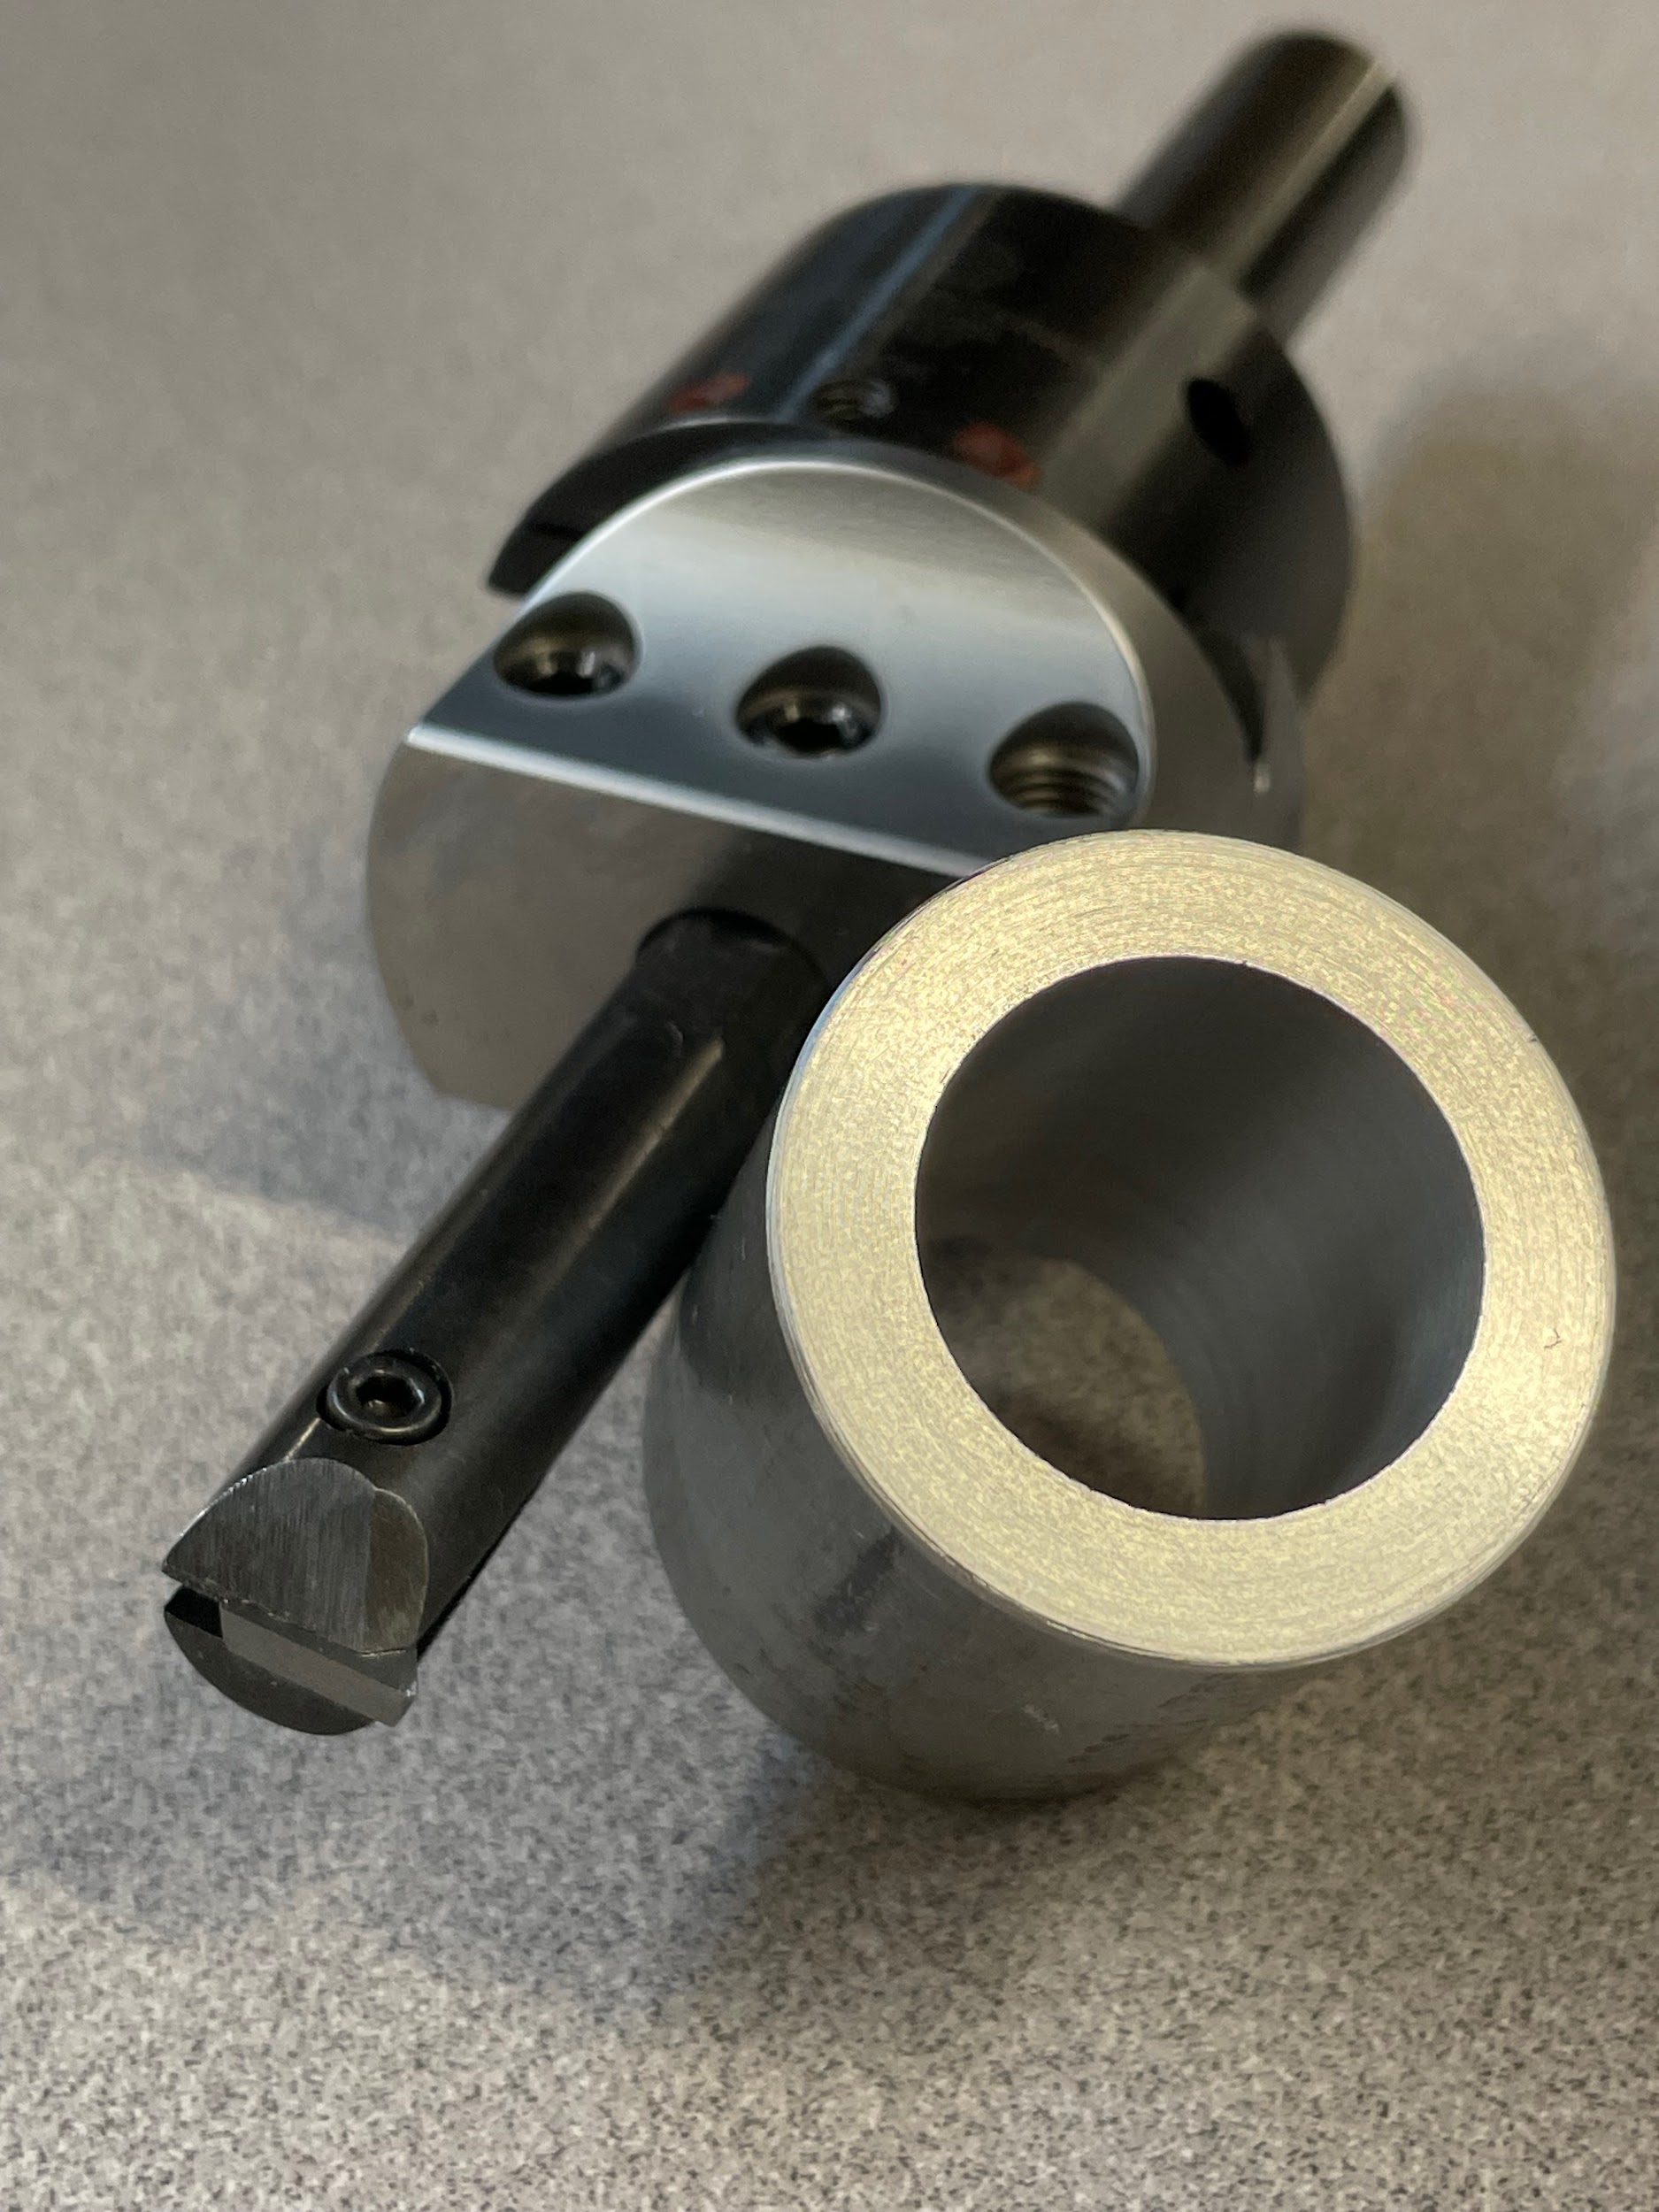
“Step 34: Make the finishing cuts across the part climb milling, and simple indexing as before.“

Angular indexing
Angular indexing is similar to simple indexing in that the operator can use the indexing plates, crank and pin to set the indexed position, but it is different in that the formula is based on the fact that one revolution of the indexing crank is equal to 9 degrees when a 40 : 1 ratio is used.
1 rotation of the crank = 1/40th of the spindle
1/40 of 360 degrees in a circle = The degrees in 1 rotation of the crank
(1 / 40) x 360 = 9-degrees
Example
If the previous example is looked at, where direct indexing couldnt be used to machine two holes that needed to be indexed 140 degrees apart, angular indexing can now be employed. Knowing that the base for the math is the 9-degree of rotation of the crank, the number of degrees needed should be divided by 9 to come up with the number of rotations of the crank. Remember to keep the number of rotations as a fraction.
Degrees of index / 9 = crank rotations
140 / 9 = 15 and 3 / 9
Or
15 and 1 / 3 once reduced
Now that this calculation has been made, the fraction is ready to be applied to the indexing plate. Examine the three plates from the previous definition and look for the hole pattern that matches the denominator of the fraction.
3 isn’t on any of the plates.
An equivalent fraction must be found for 1/3 that will apply to the plates. The easiest way to accomplish this is to take the denominator of the fraction, multiply it by two, and check the plates for a match. If it doesn’t, multiply the denominator by three and check. Continue this process until a match is found.
3 x 2 = 6
6 isn’t on any of the plates.
3 x 3 = 9
9 isn’t on any of the plates.
3 x 4 = 12
12 isn’t on any of the plates.
3 x 5 = 15
15 matches a hole pattern on plate one.
Once the hole pattern has been selected, the fraction is converted to one that can be demonstrated on the plate. To do this, multiply the numerator by the same value the denominator was multiplied by when the correct hole pattern was matched. This will give the number of holes needed to advance the indexing crank once the full turns have been completed.
The number the denominator was multiplied by was 5 to find a match for the 39 hole pattern. To keep the fraction equal, the numerator and denominator need to be multiplied by the same number. It is basically an expansion of the fraction.
1 / 3 = ? / 15
1 / 3 = 5 / 15
With the fraction converted to a form that is demonstrable on an indexing plate, the final rotations of the indexing handwheel for the indexing between the two holes can be expressed.
Indexing = 15 full rotations of the crank and 5 holes on a 15 hole pattern.
HOLE MAKING
Hole-making operations on a milling machine are much the same as hole operations on a drill press. Drilling, reaming, tapping, countersinking, and counterboring speeds and feeds are basically the same. The main difference in the process is the extra level of accuracy achievable on the milling machine as opposed to the drill press. On the milling machine, the operator may still layout hole positions, but the layout will just be for visual verification. There will not be any center punching because on the milling machine, the part is held rigidly and in line with the machine’s movements. With precision movements, the operator can use an edge finder or indicators in order to find the accurate positioning of holes and features. This level of accuracy is much more precise than the visual alignment that is done on the drill press.
Another difference on the milling machine is the accuracy of the depths of features that can be achieved. On the milling machine, the operator is able to set the quill stop at the top of the part,and then use the accuracy of the knee in order to get the depth accuracy needed. To be clear, the operator is only setting the depth with the knee and then cutting down to the quill stop using similar quill handle motions to break the chips, as on the drill press. It is not customary to make the cutting motion by moving the hand crank of the knee. Not only is it tiring, but it is also difficult to make the quick in-and-out motions that often need to be made to control the chips during hole-making operations.
COUNTERSINKING/COUNTERBORING
The following is an example of how hole-making depths could be performed on a manual milling machine.
Step by step process for counterboring:
- Load material onto the mill.
- Find accurate hole positions according to the print.
- Lock the saddle and table.
- Spot and drill the appropriate holes.
- Load the appropriate counterbore.
- Raise the quill to the top of its stroke.
- Bring the knee up so the top of the material is about ½” further from the tool than the depth required. For instance, if the depth required is ⅜”, bring the knee up so the top of the work is about ⅞” from the tip of the tool.
- Bring the tool down to touch the top of the work by gently pulling on the quill handle.
- Adjust the quill stop tight up against the current position of the quill.
- Lock the quill stop.
- Raise the quill up to the top of its stroke again.
- Raise the knee to the depth of cut required, minus .030”. This will give the operator an opportunity to cut the counterbore shallow, measure the depth, and adjust to get an accurate depth.
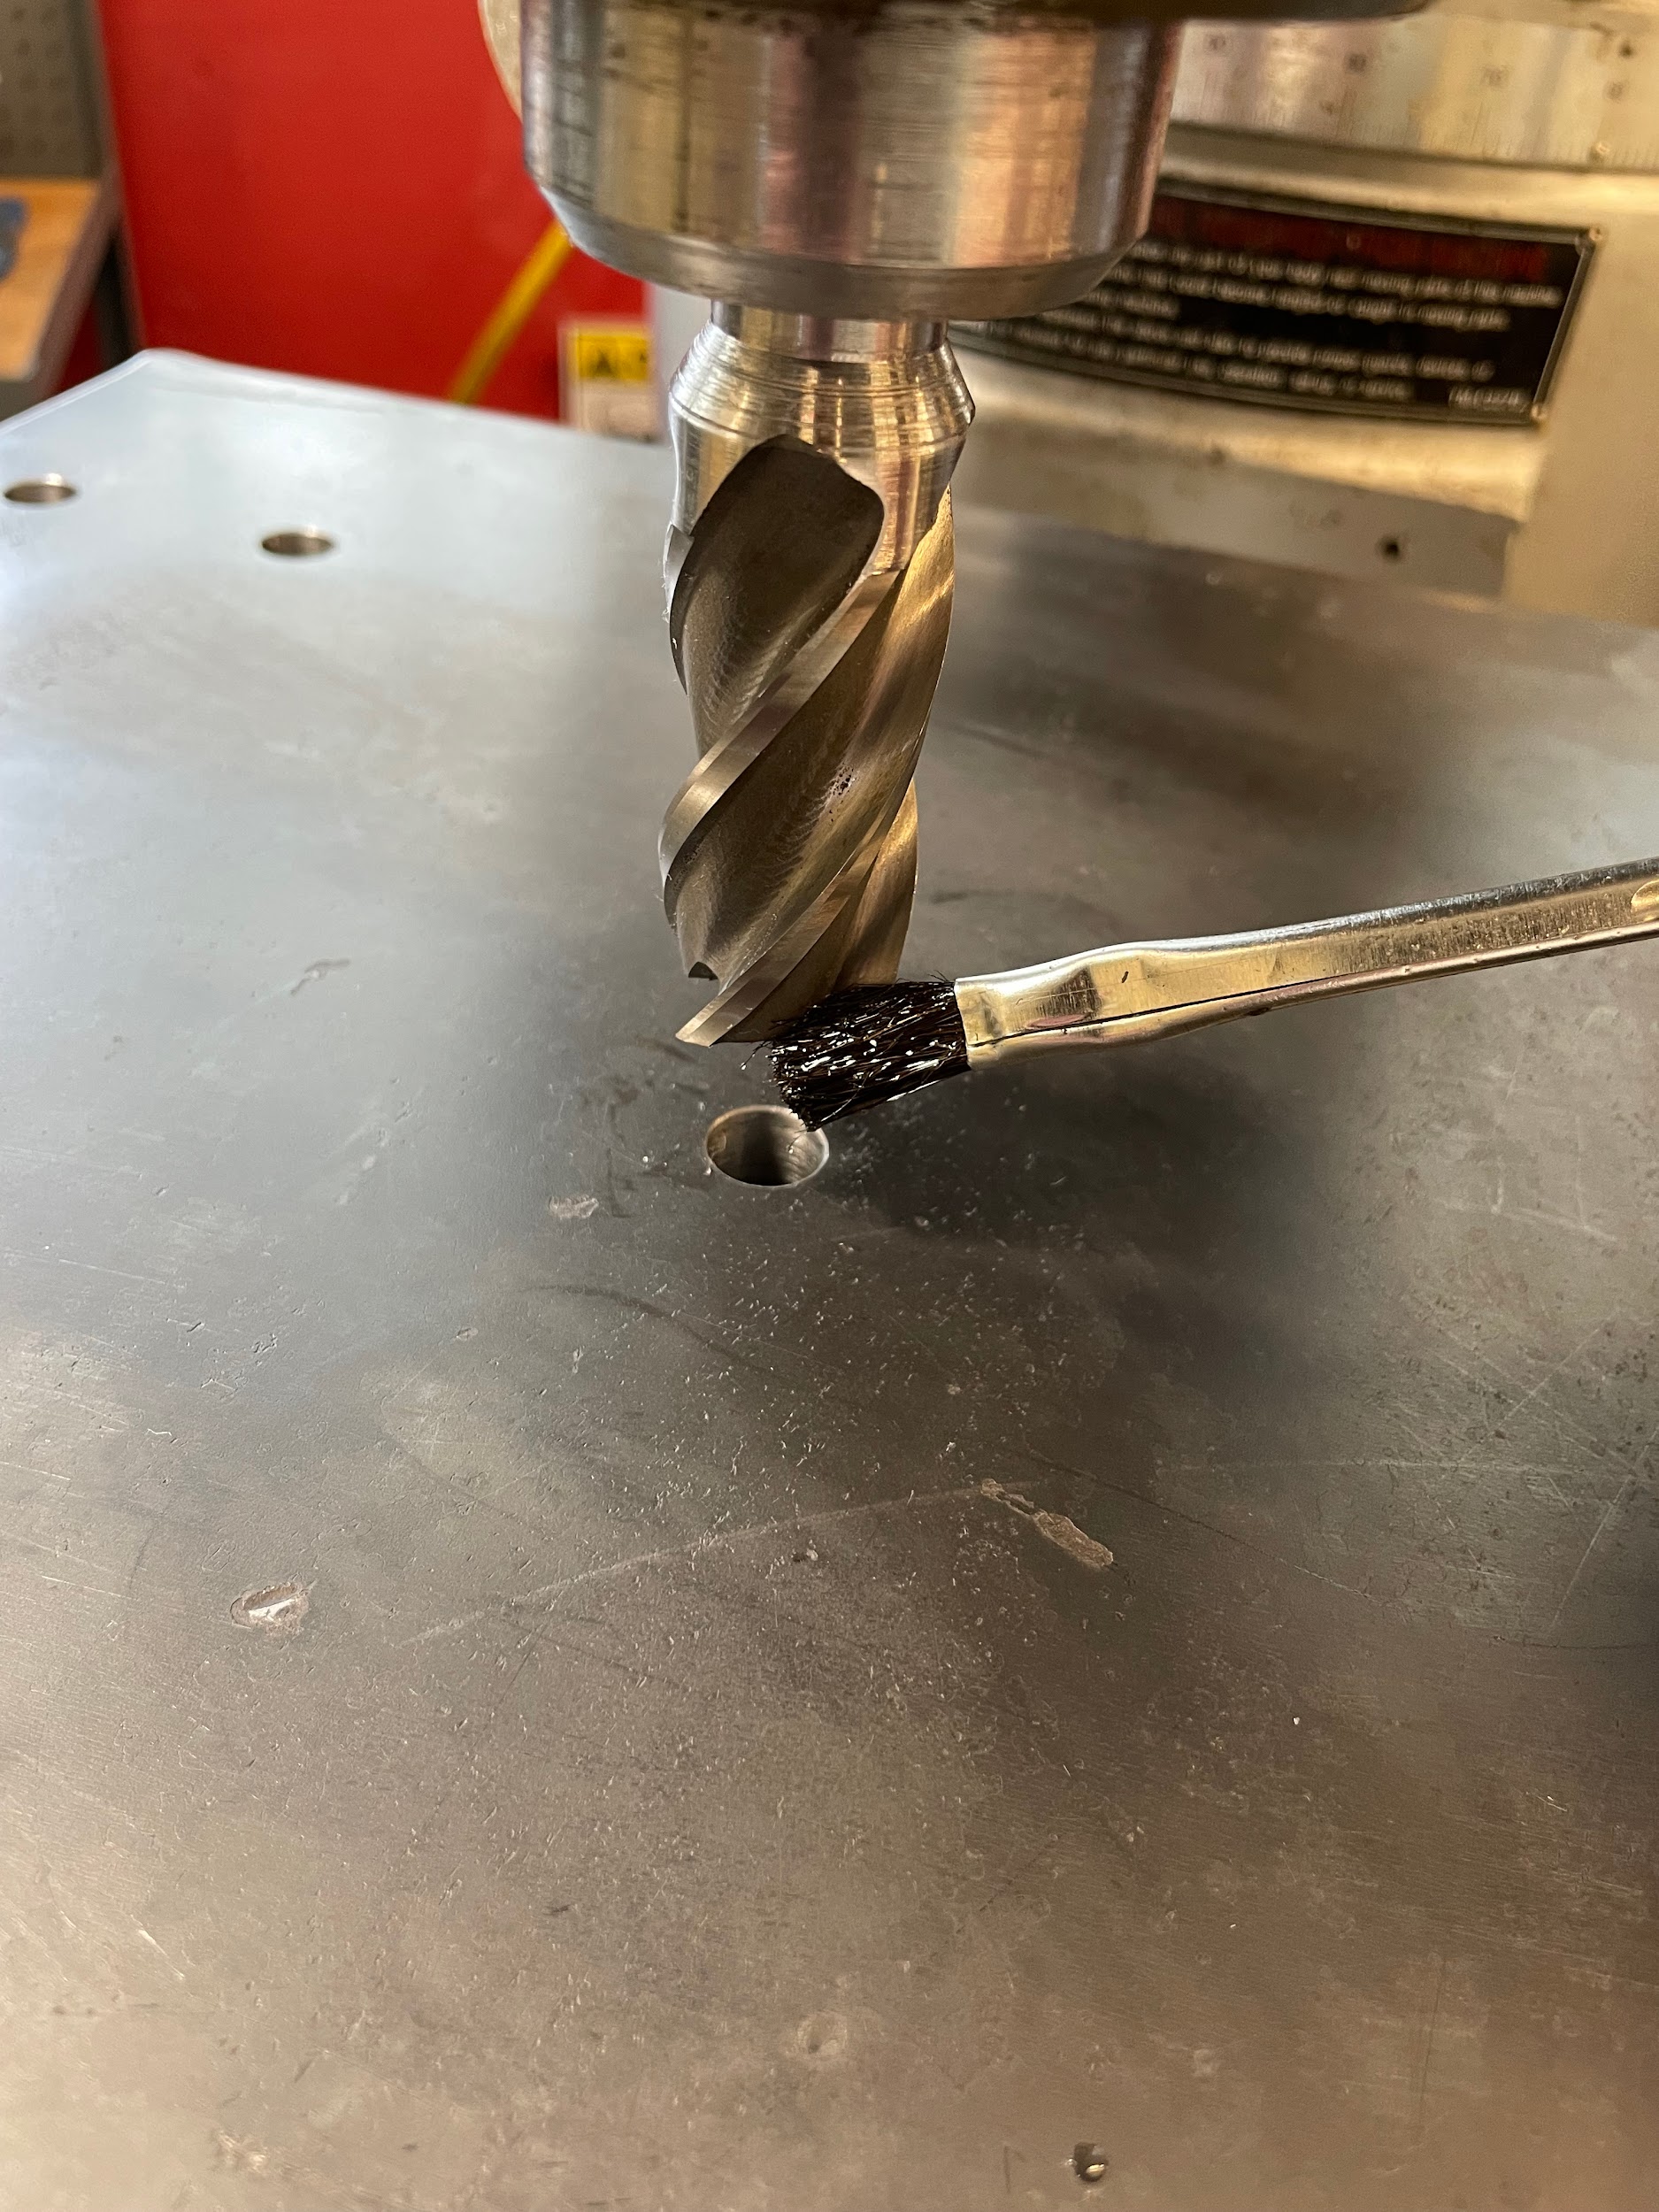
- Apply cutting oil.
- Turn the spindle on.
- Adjust the spindle speed.
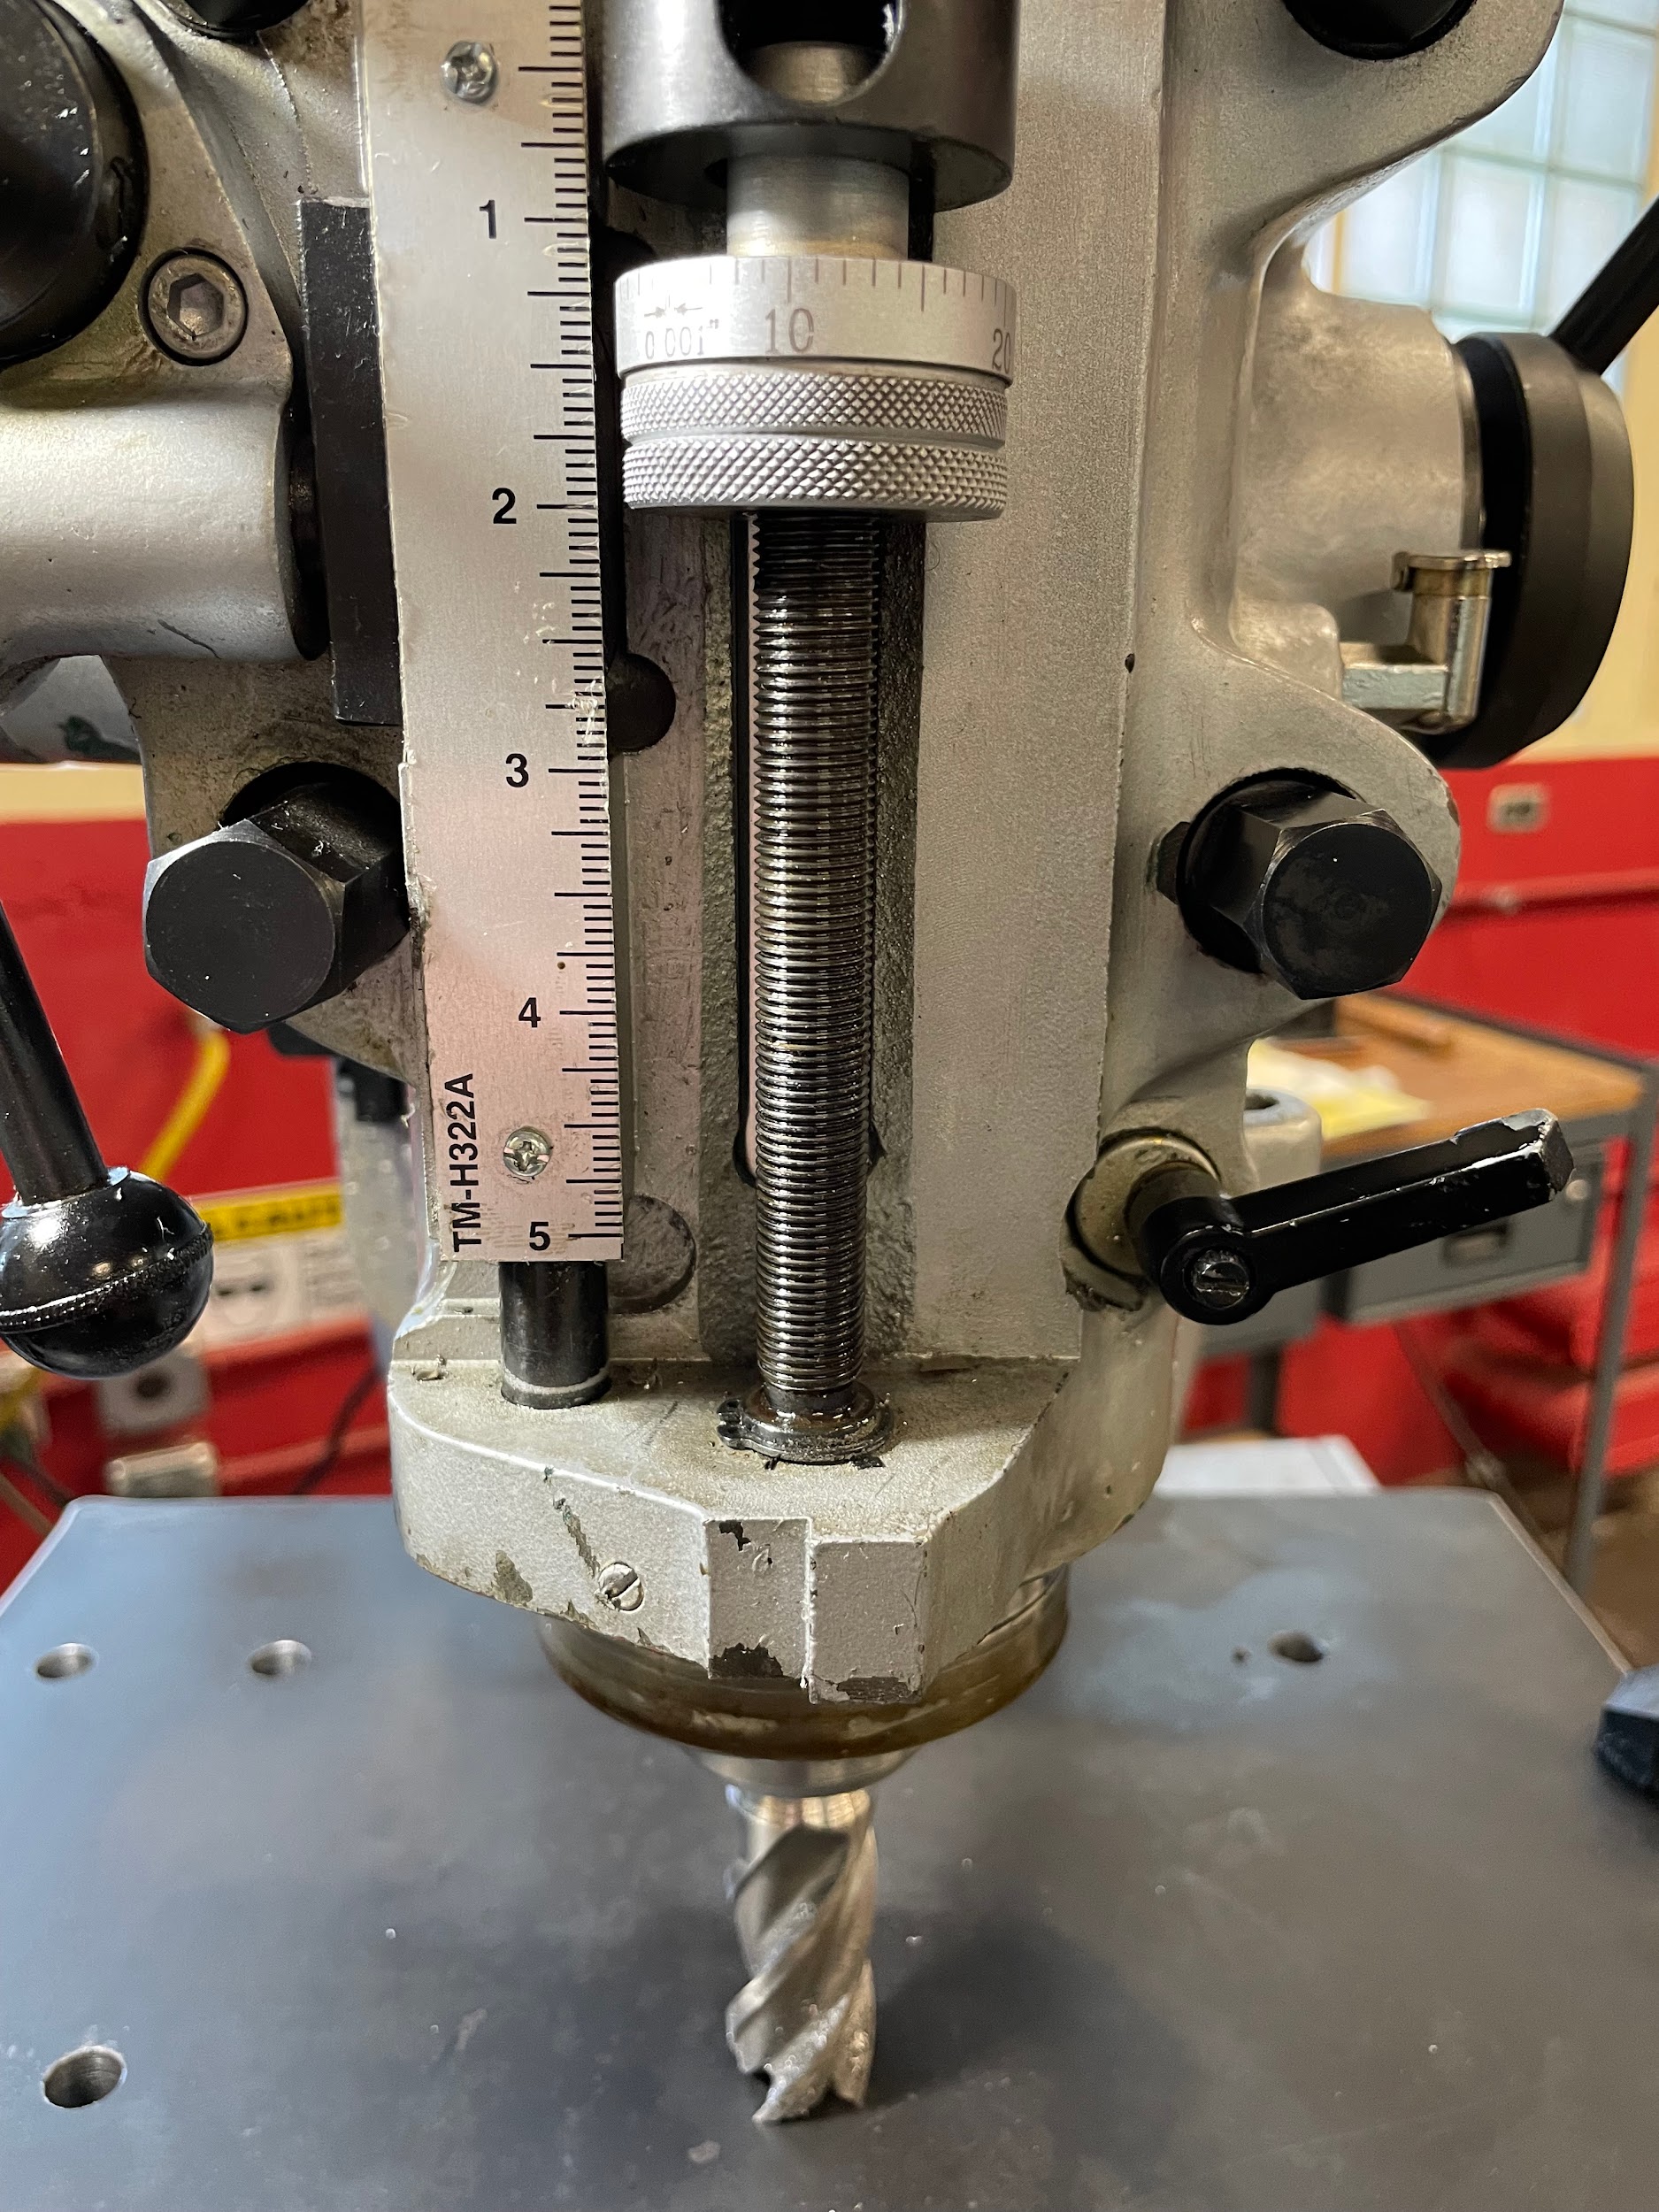
- Bring the cutter down and make appropriate cuts to depth using the quill handle.
- Turn off the spindle.
- Move the part out from under the tool using the saddle. Move it far enough to accurately measure the hole depth.
- Deburr the top edge of the counterbore.
- Measure the depth.
- The final depth can be adjusted by one of two methods.
- Adjust the quill stop down the remaining amount.
- Adjust the knee up the remaining amount.
- Put the machine back in the holmaking position and lock the saddle.
Start the spindle and cut the remaining amount out of the bottom of the counterbore.
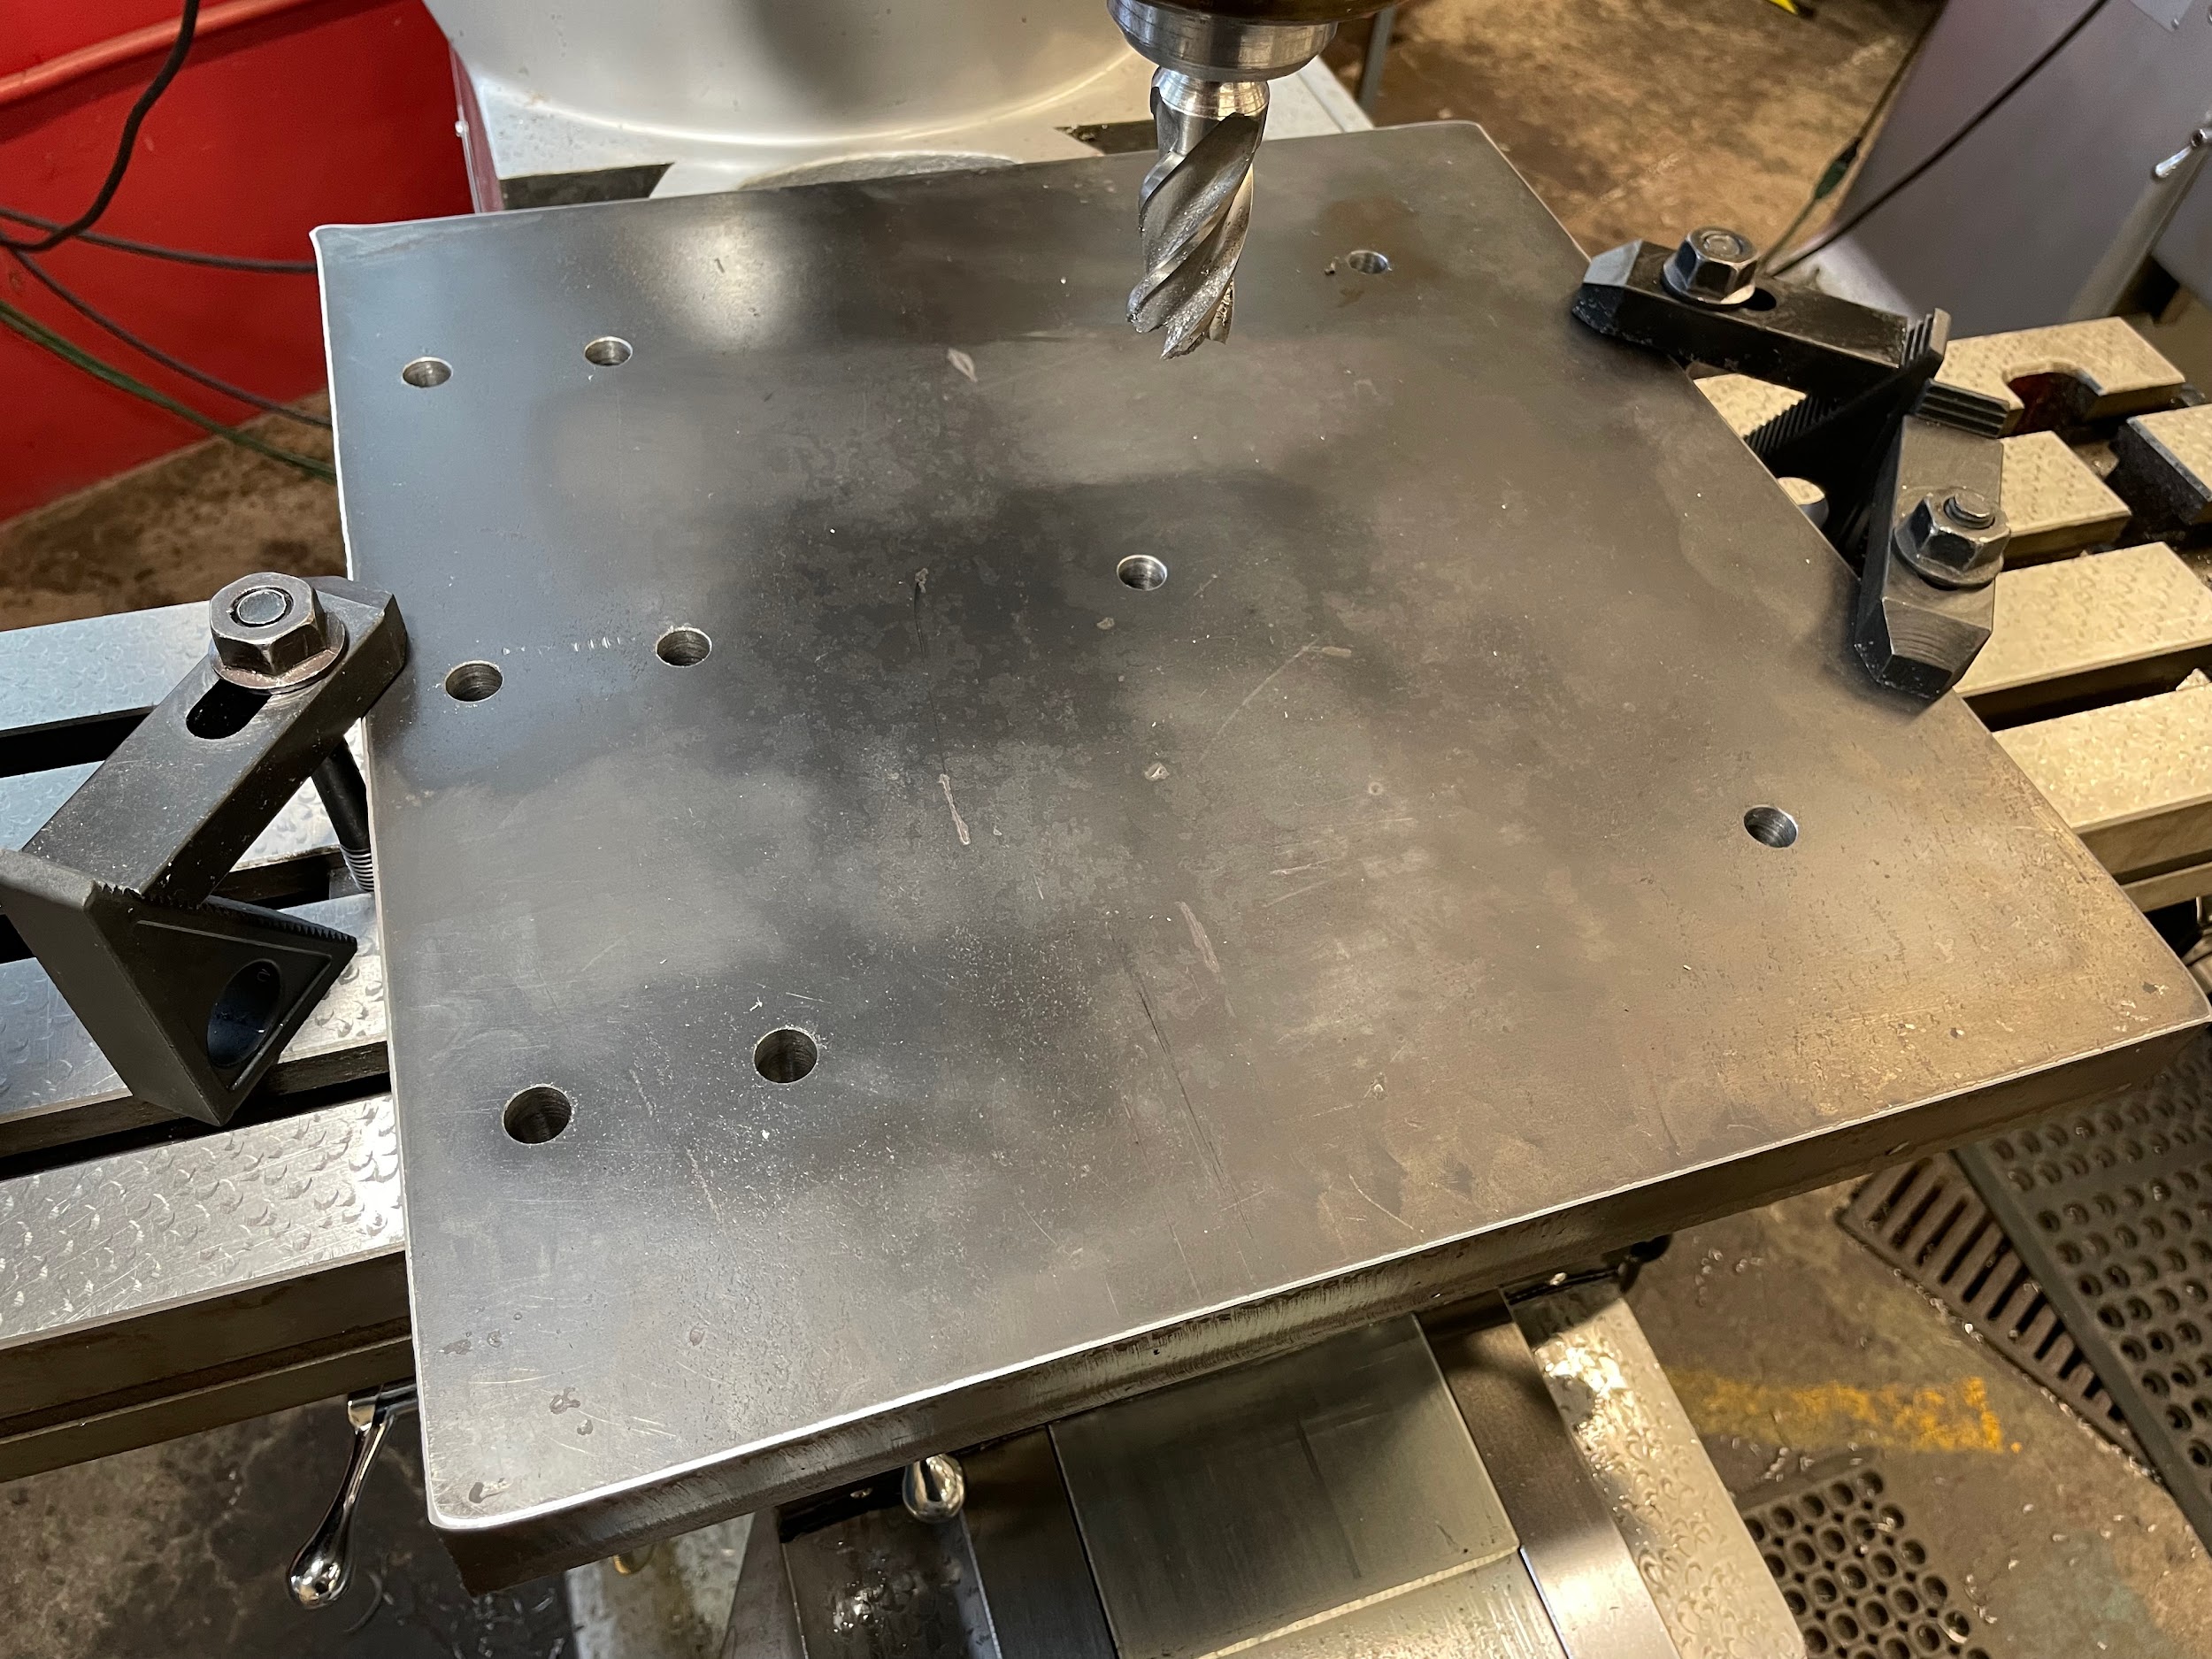
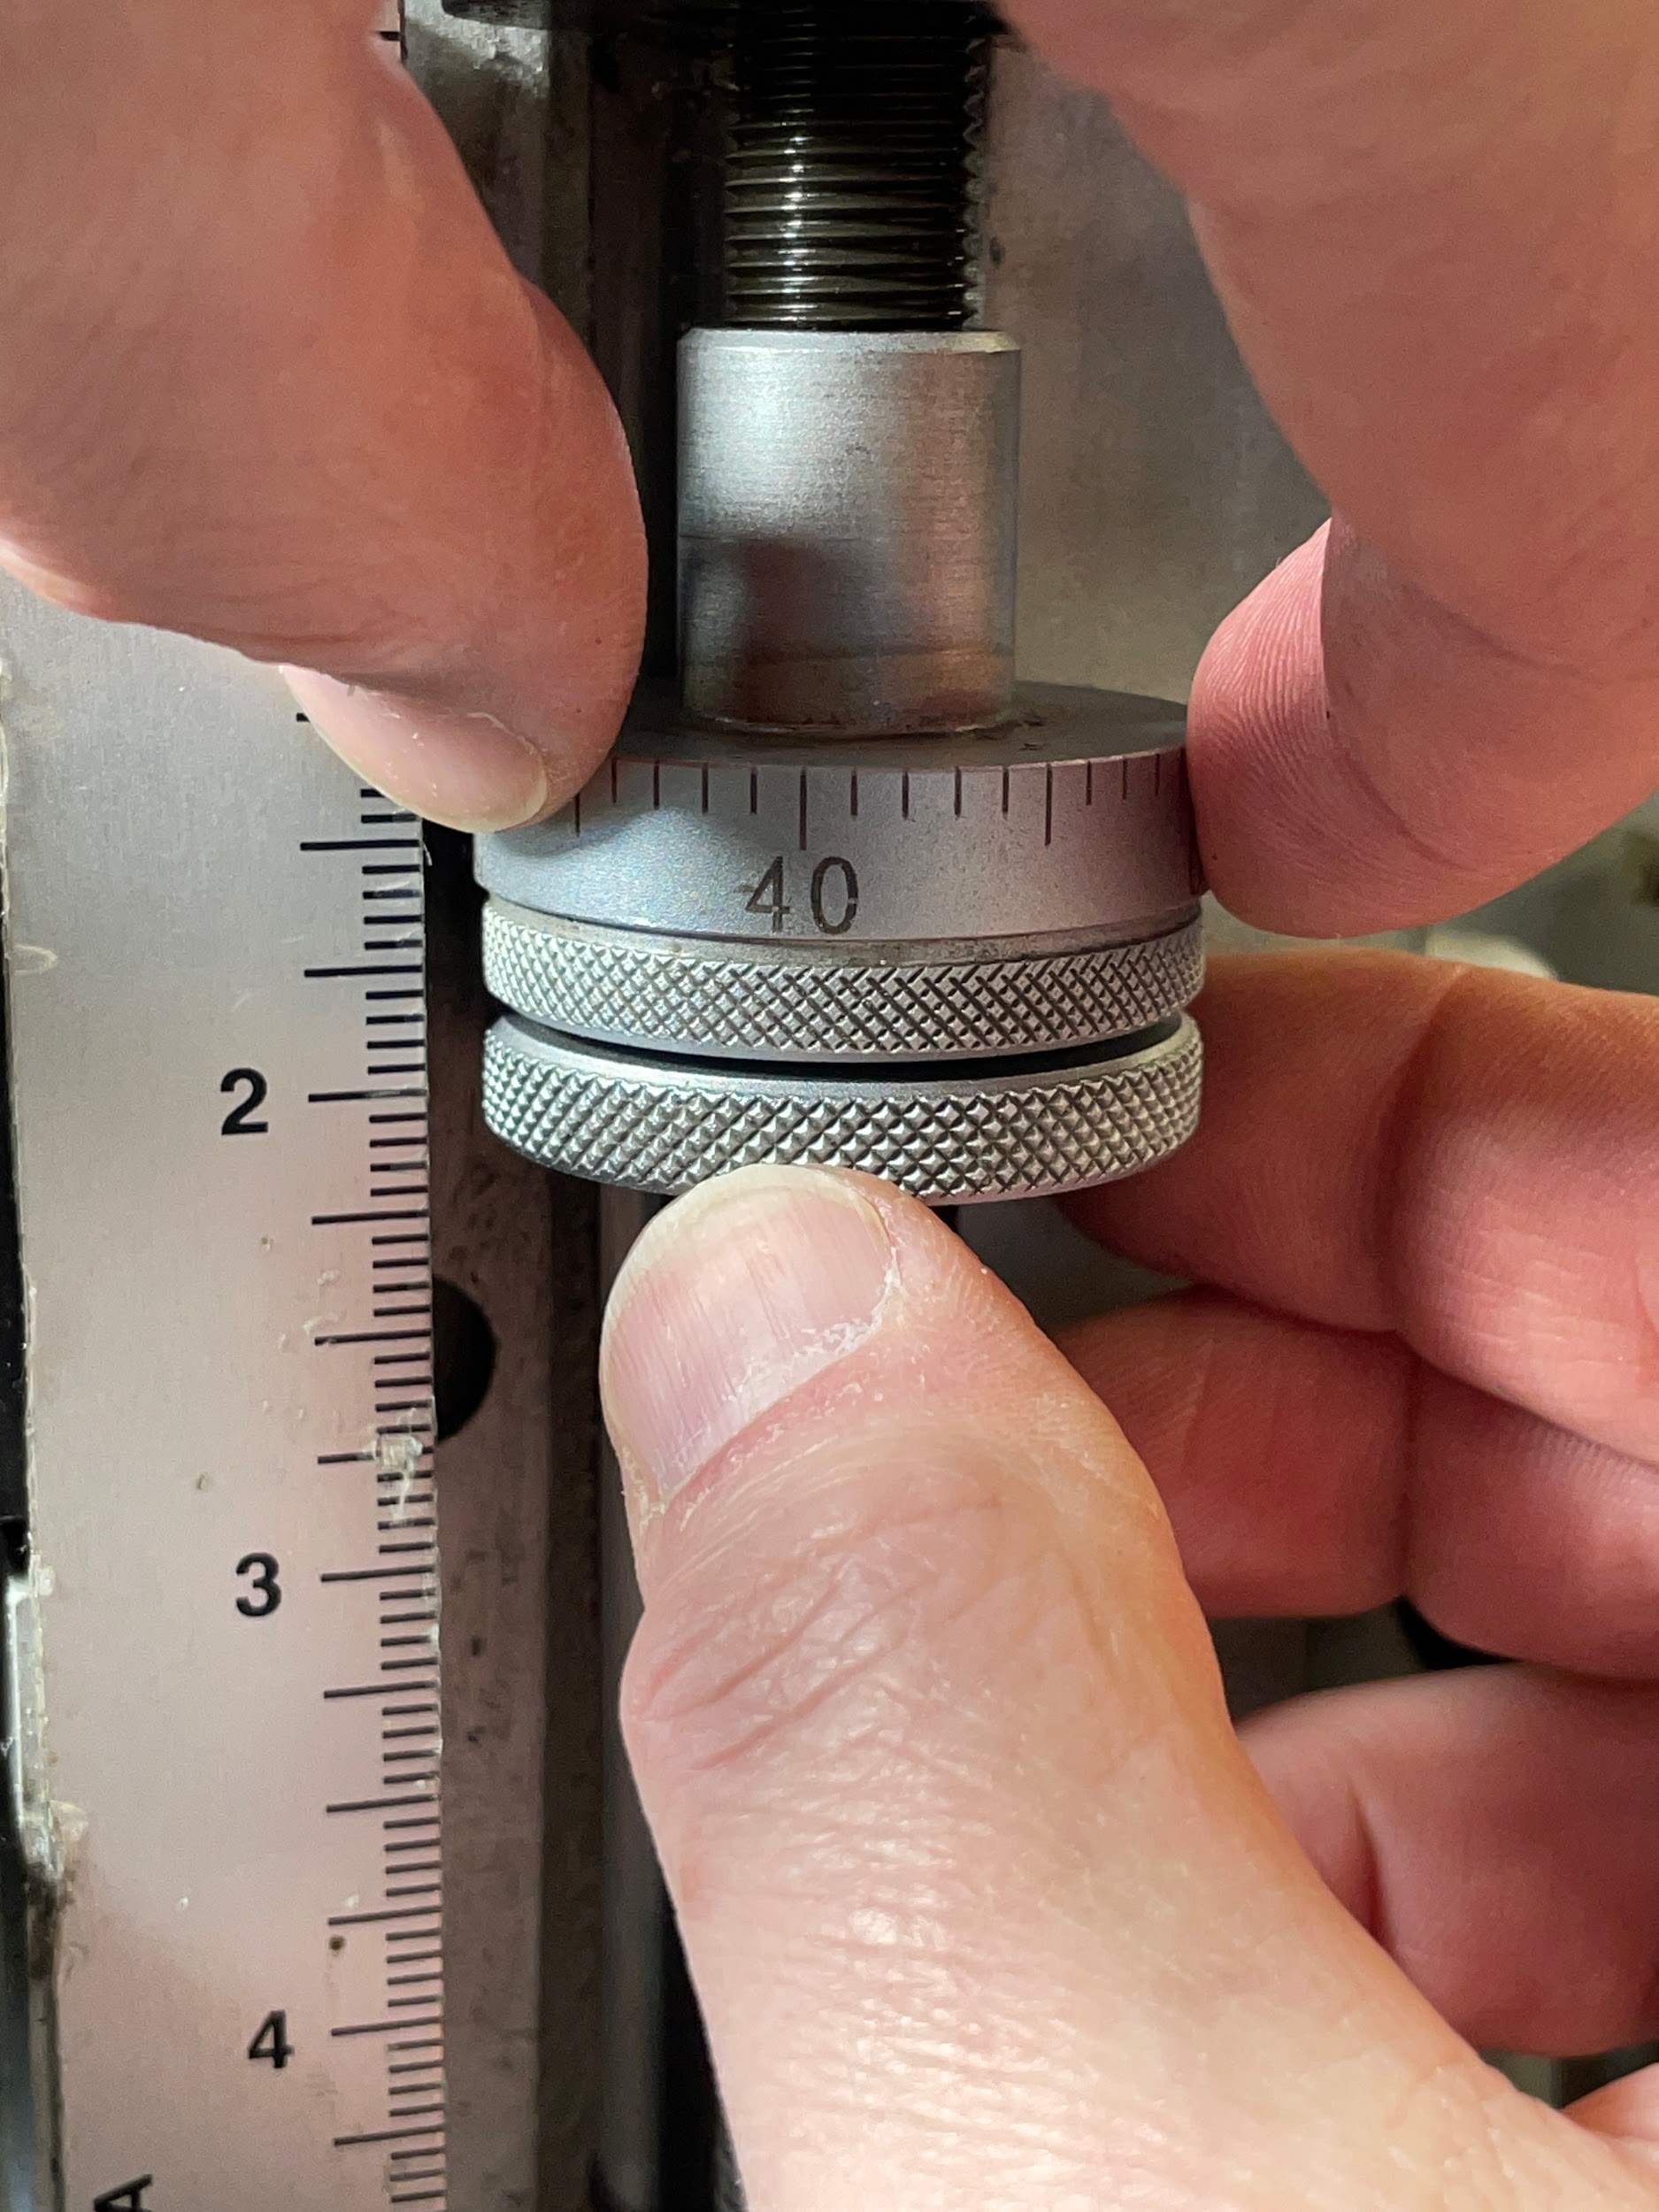
“Step 8: Bring the tool down to touch the top of the work by gently pulling on the quill handle.“
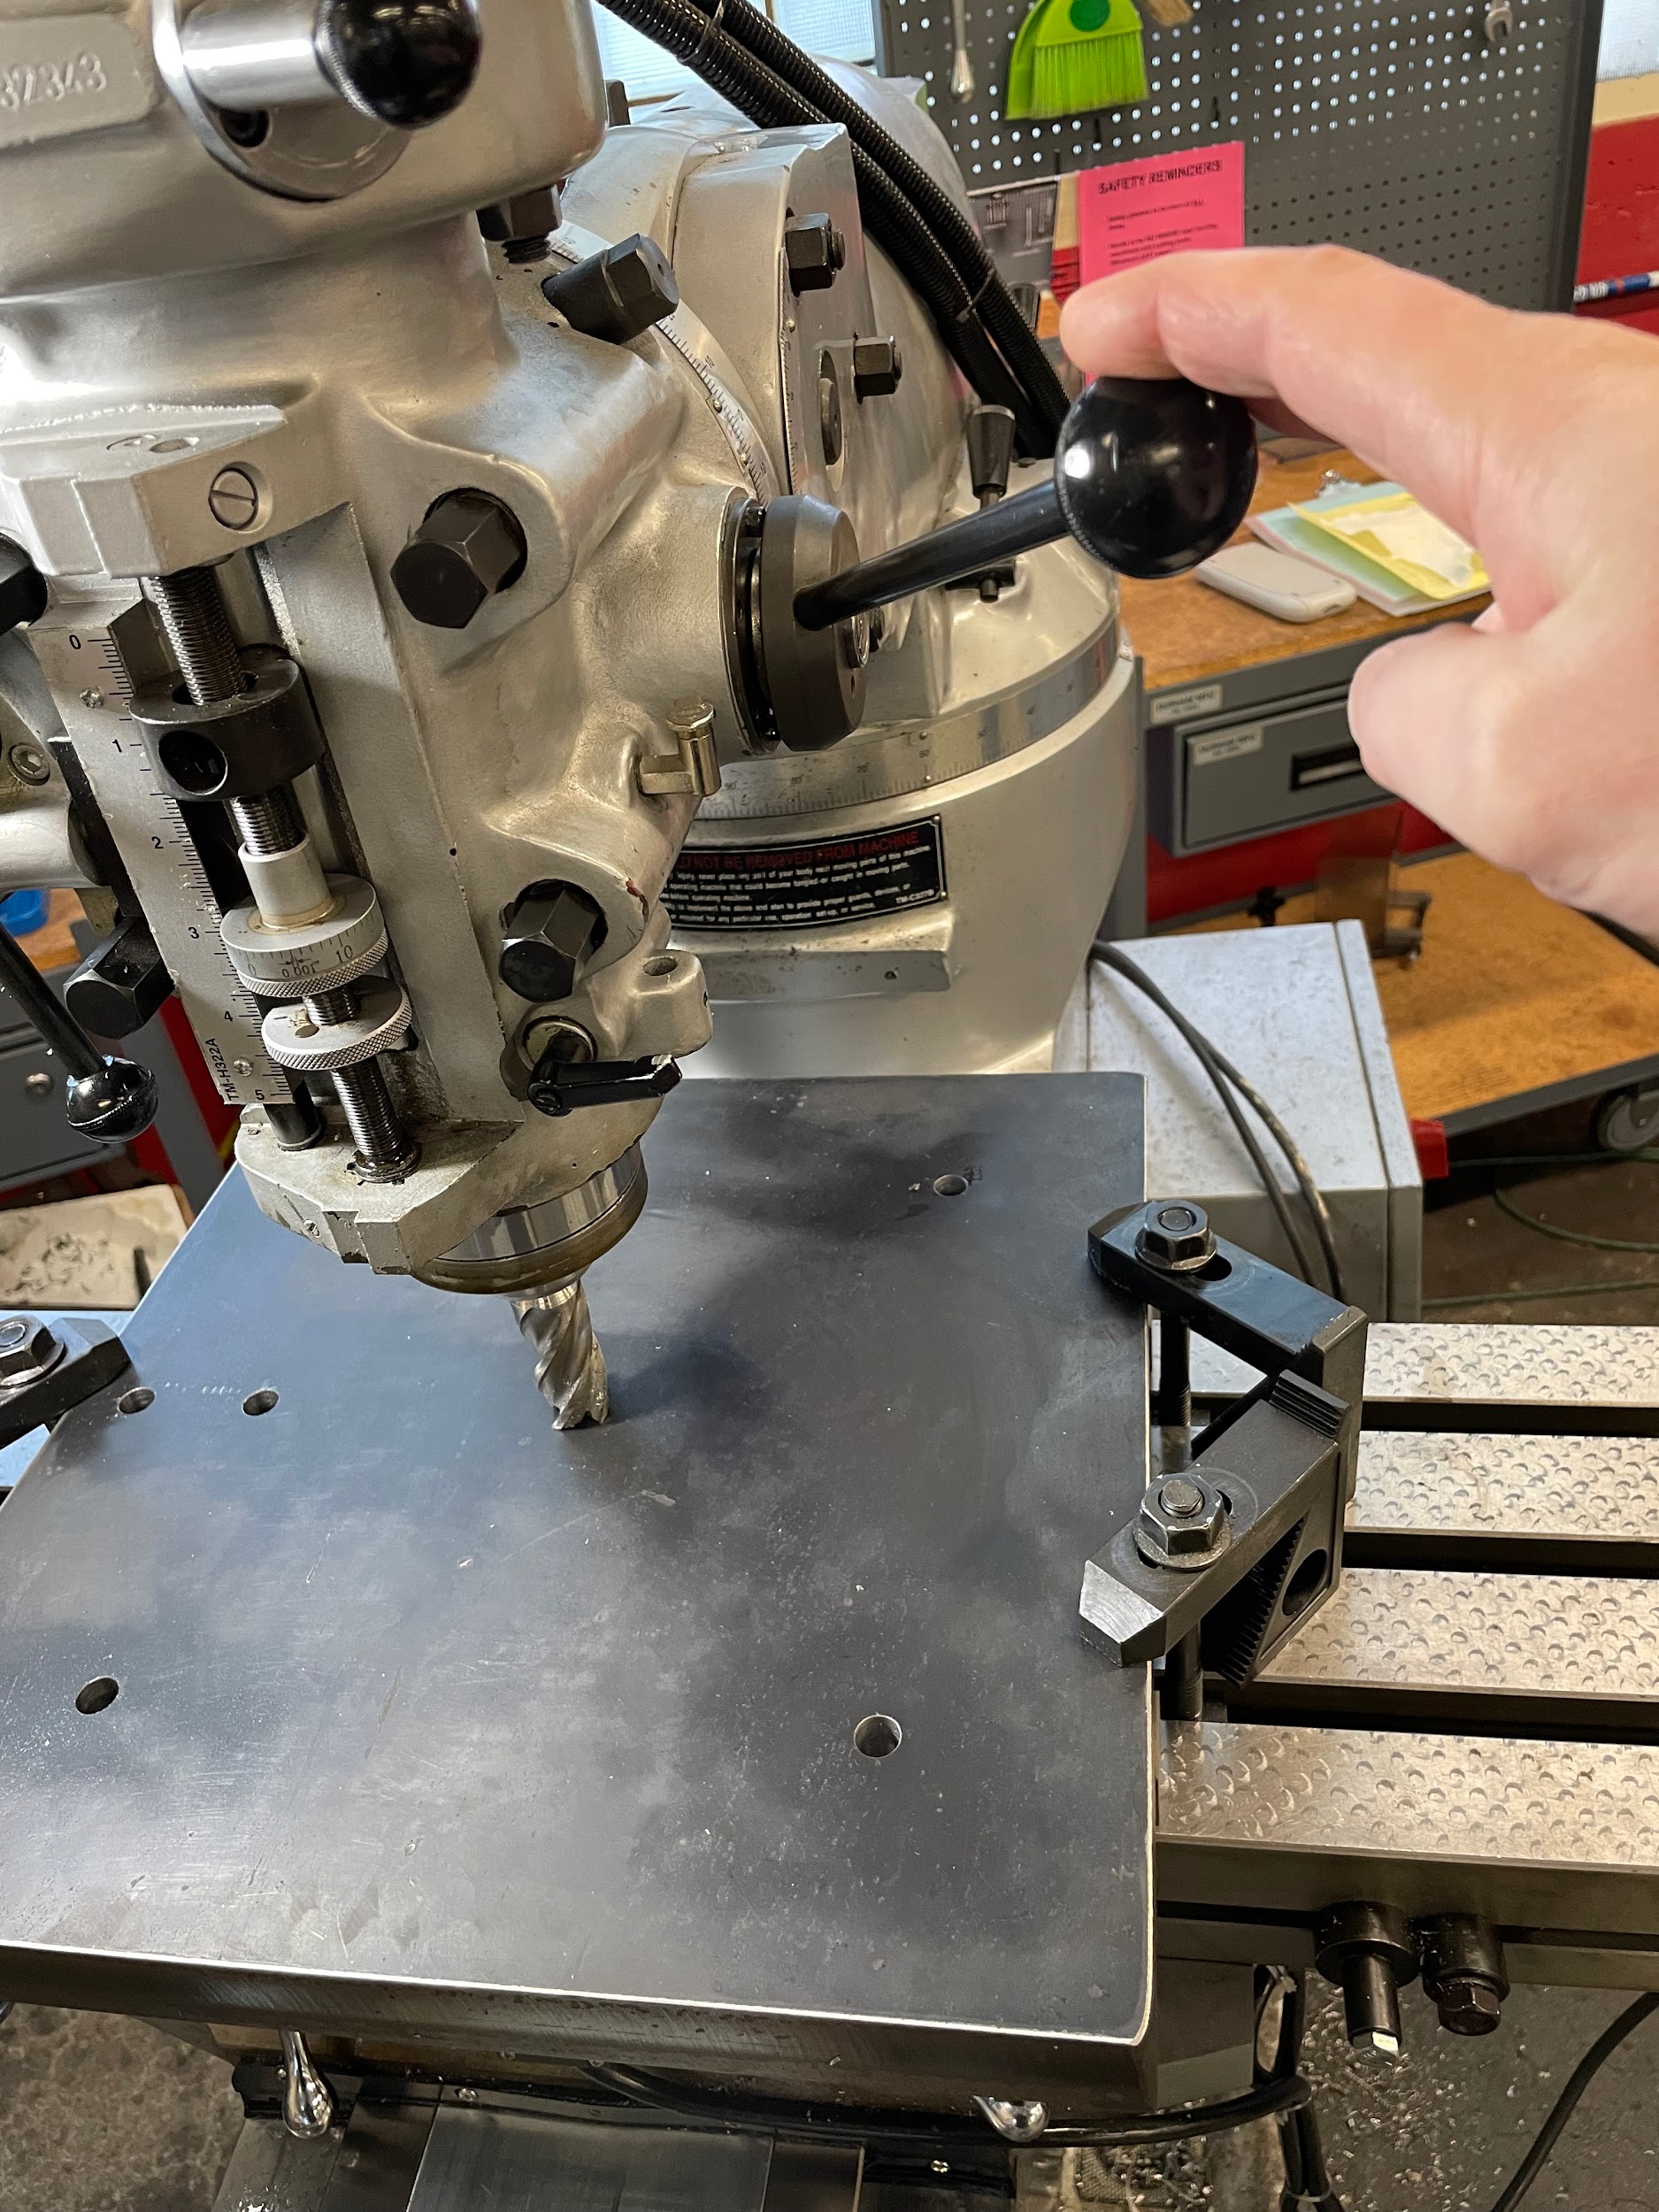
“Step 9: Adjust the quill stop tight up against the current position of the quill.“
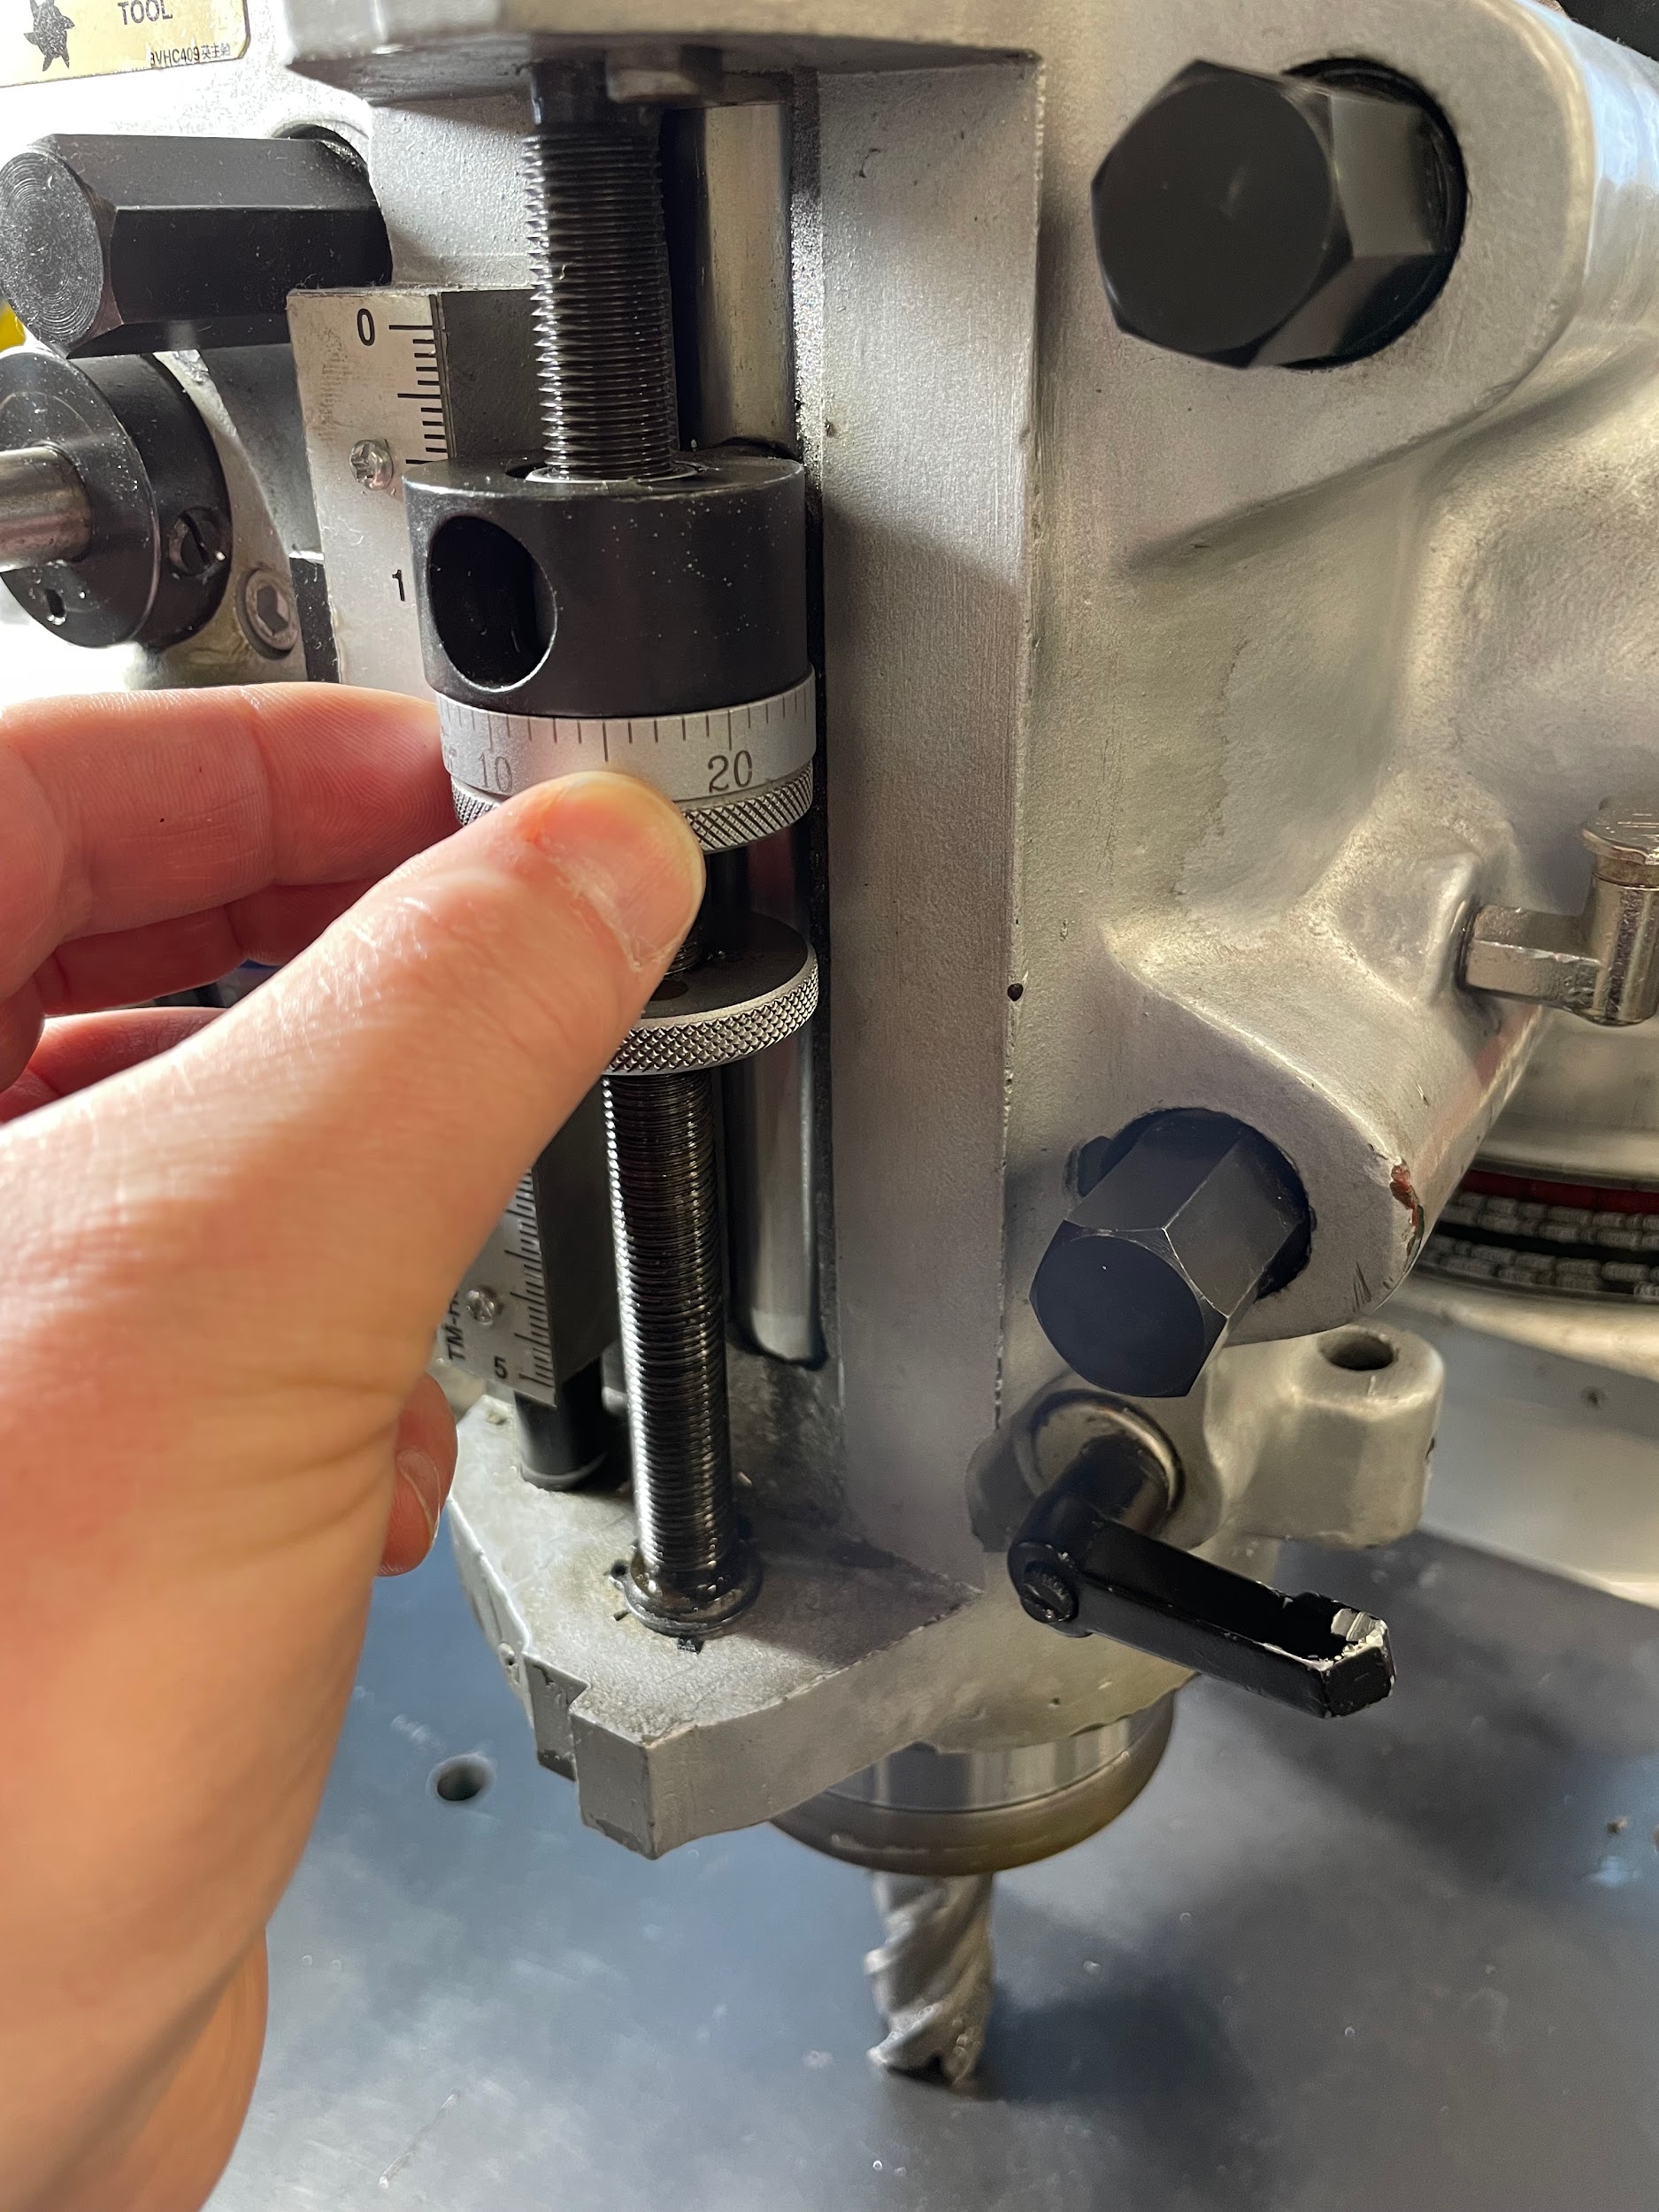
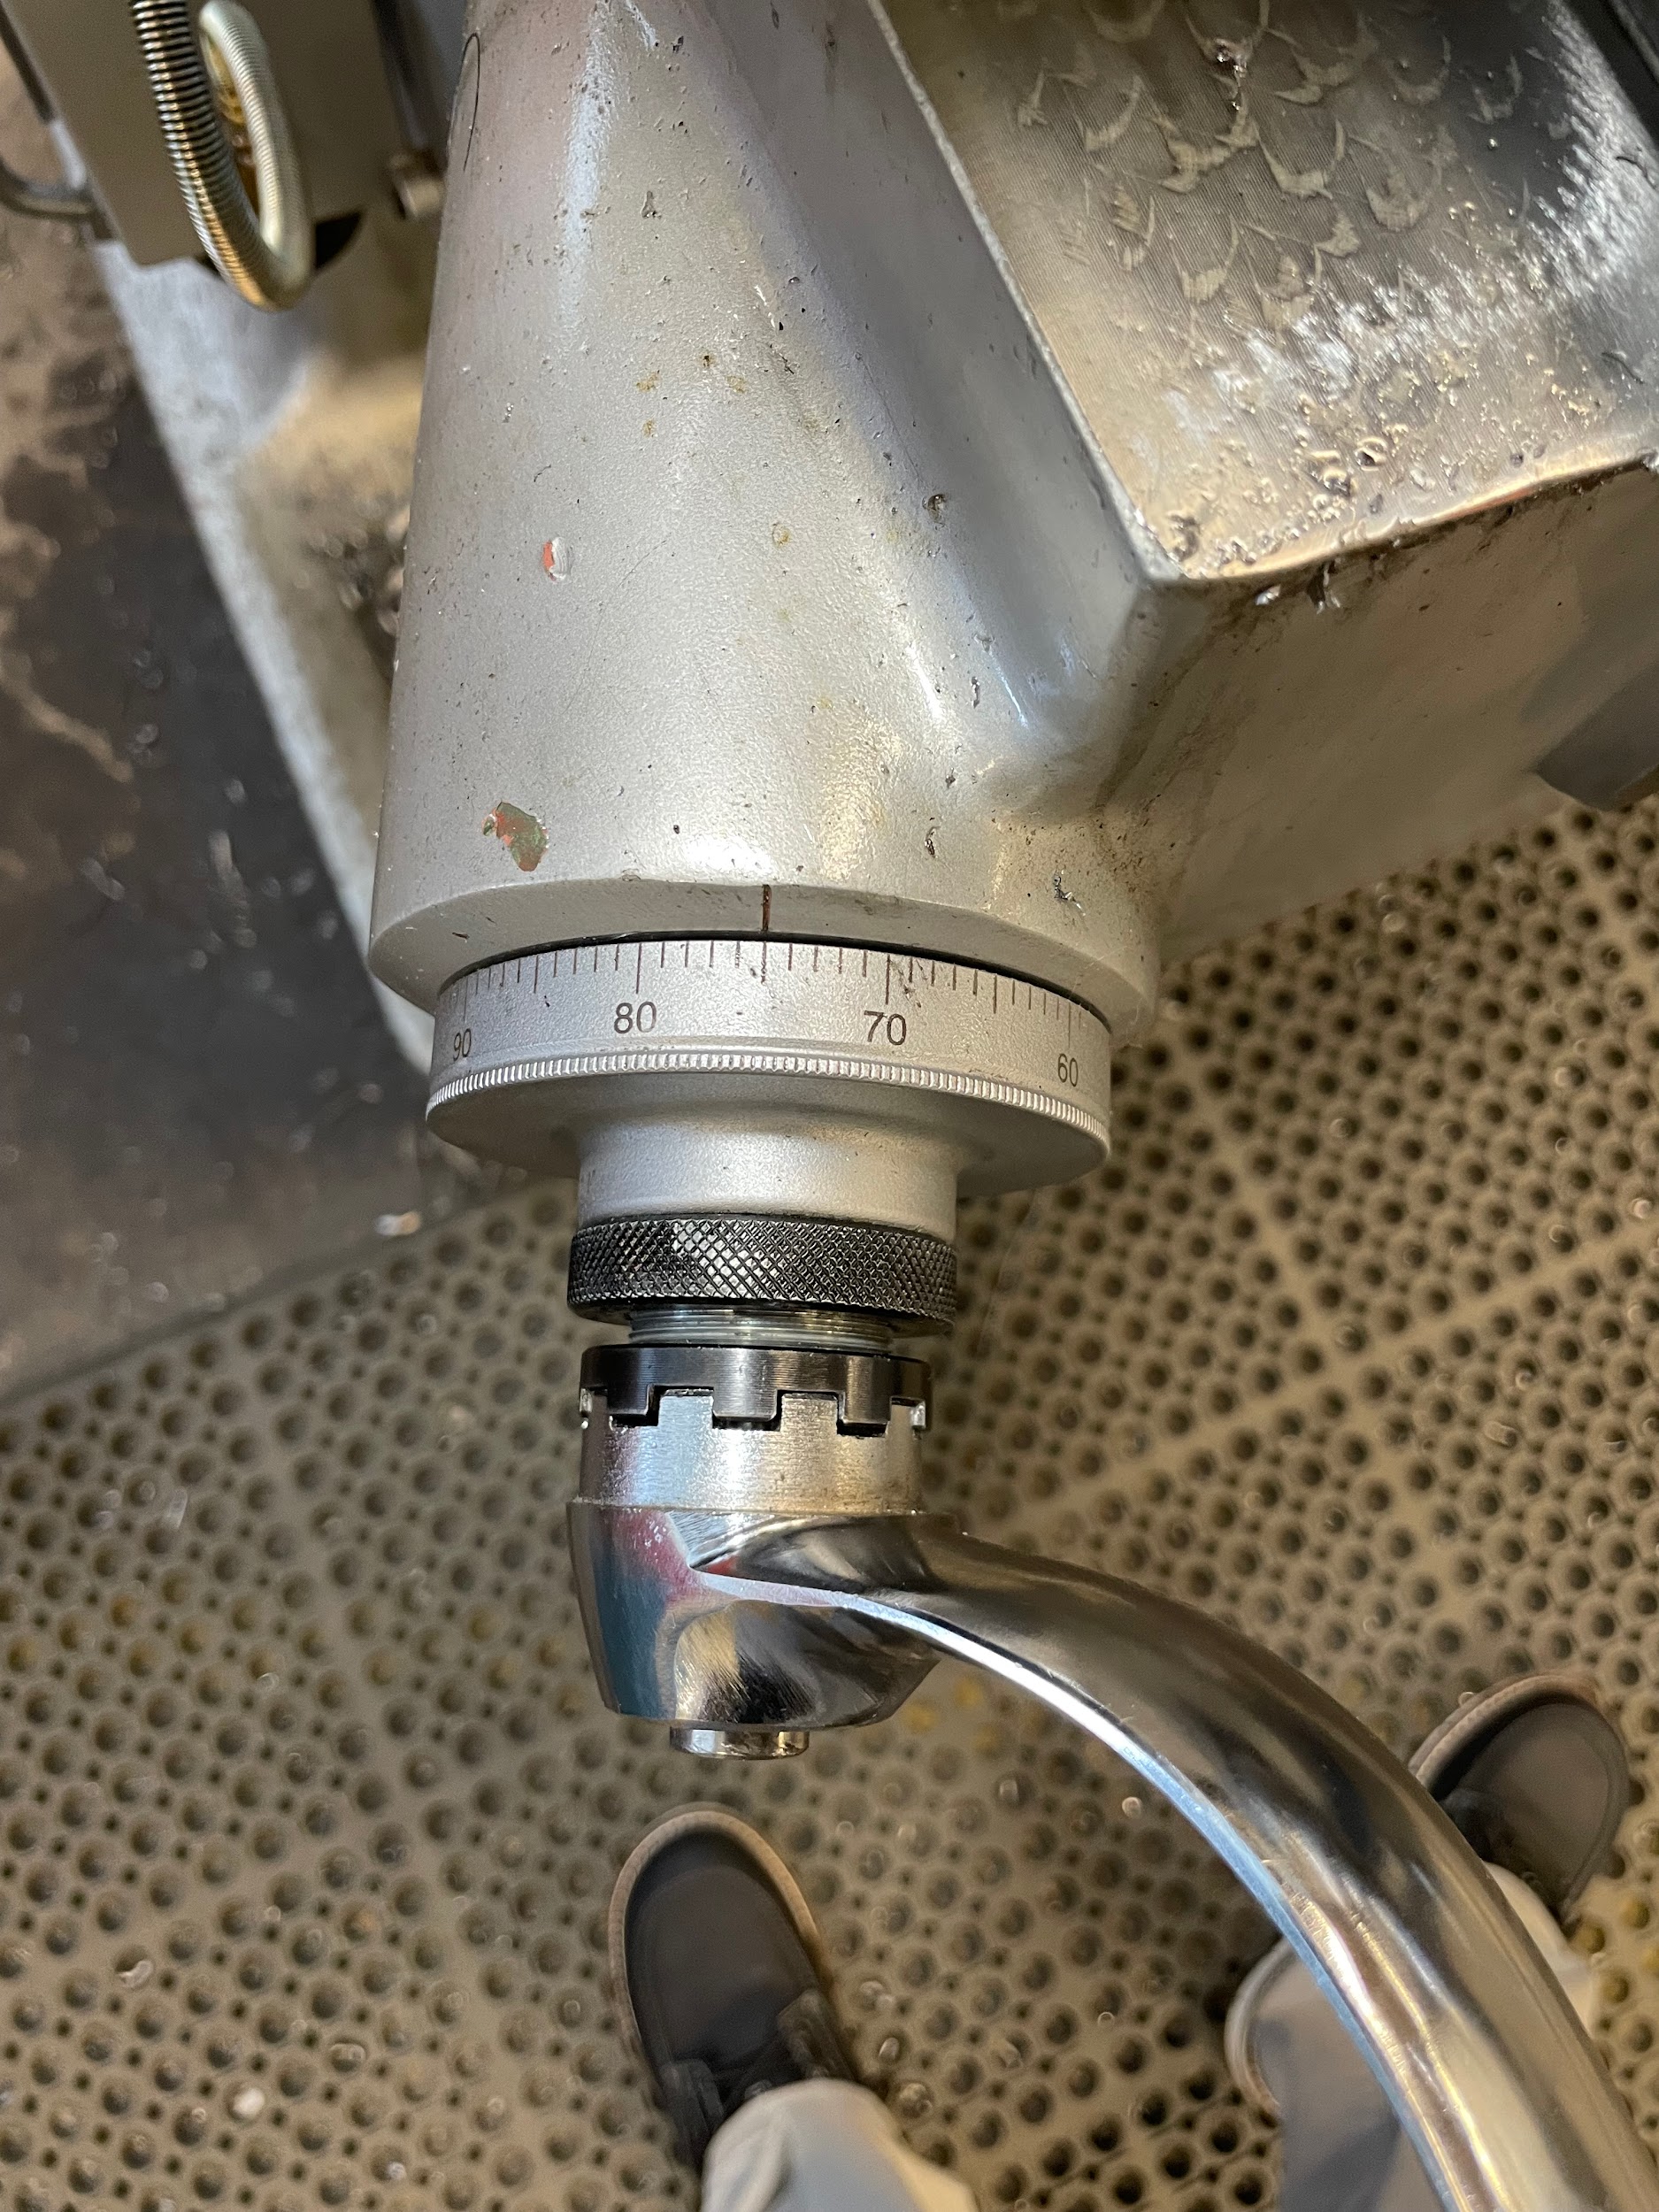
“Step 12: Raise the knee to the depth of cut required, minus .030”. This will give the operator an opportunity to cut the counterbore shallow, measure the depth, and adjust to get an accurate depth.“
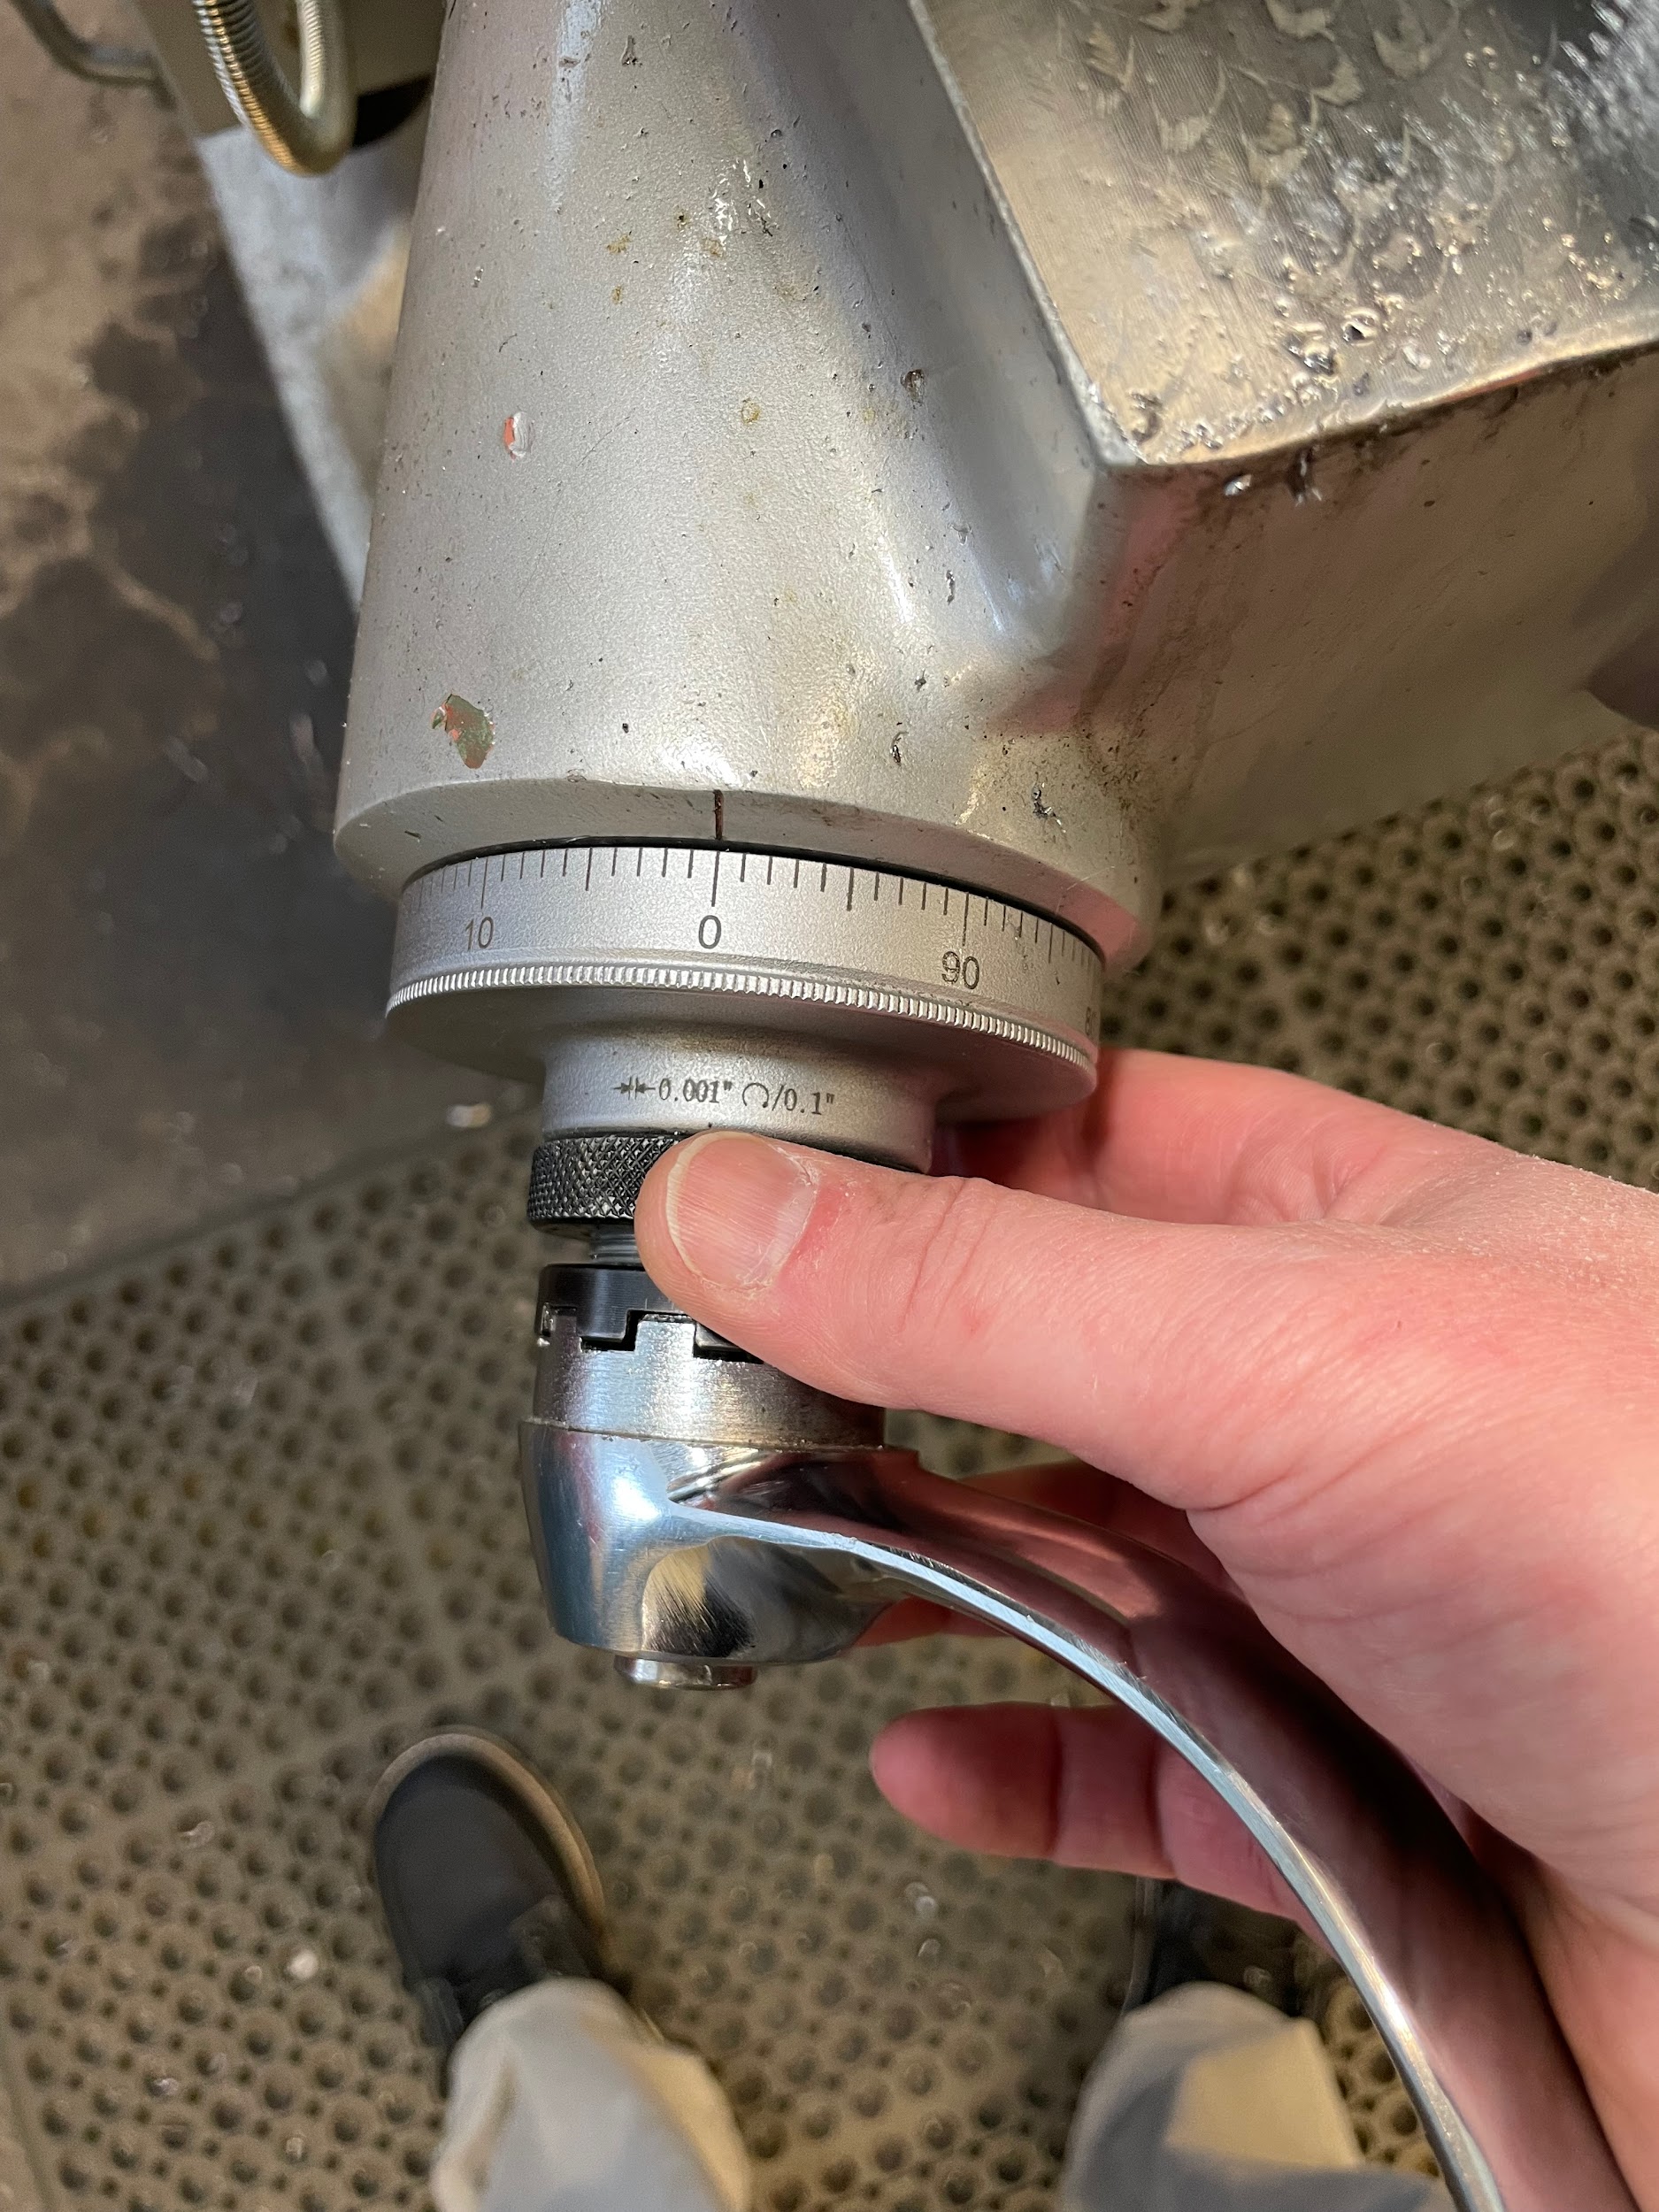
“Step 12: Raise the knee to the depth of cut required, minus .030”. This will give the operator an opportunity to cut the counterbore shallow, measure the depth, and adjust to get an accurate depth.“
“Step 13: Apply cutting oil.“
“Step 16: Bring the cutter down and make appropriate cuts to depth using the quill handle.“
“Step 21 – a: Adjust the quill stop down the remaining amount.“
POWER TAPPING
Power tapping on a milling machine is much the same as on the drill press, except the operator has the opportunity to securely hold the tap in a collet instead of a drill chuck or other adapter.
Step by step process for power tapping:
- Load material onto the mill.
- Find accurate hole positions according to the print.
- Lock the saddle and table.
- Spot and drill the appropriate holes.
- Load the appropriate tap into a collet.
- Raise the quill to the top of its stroke.
- Bring the knee up so the top of the material is about ½” from the tip of the tool.
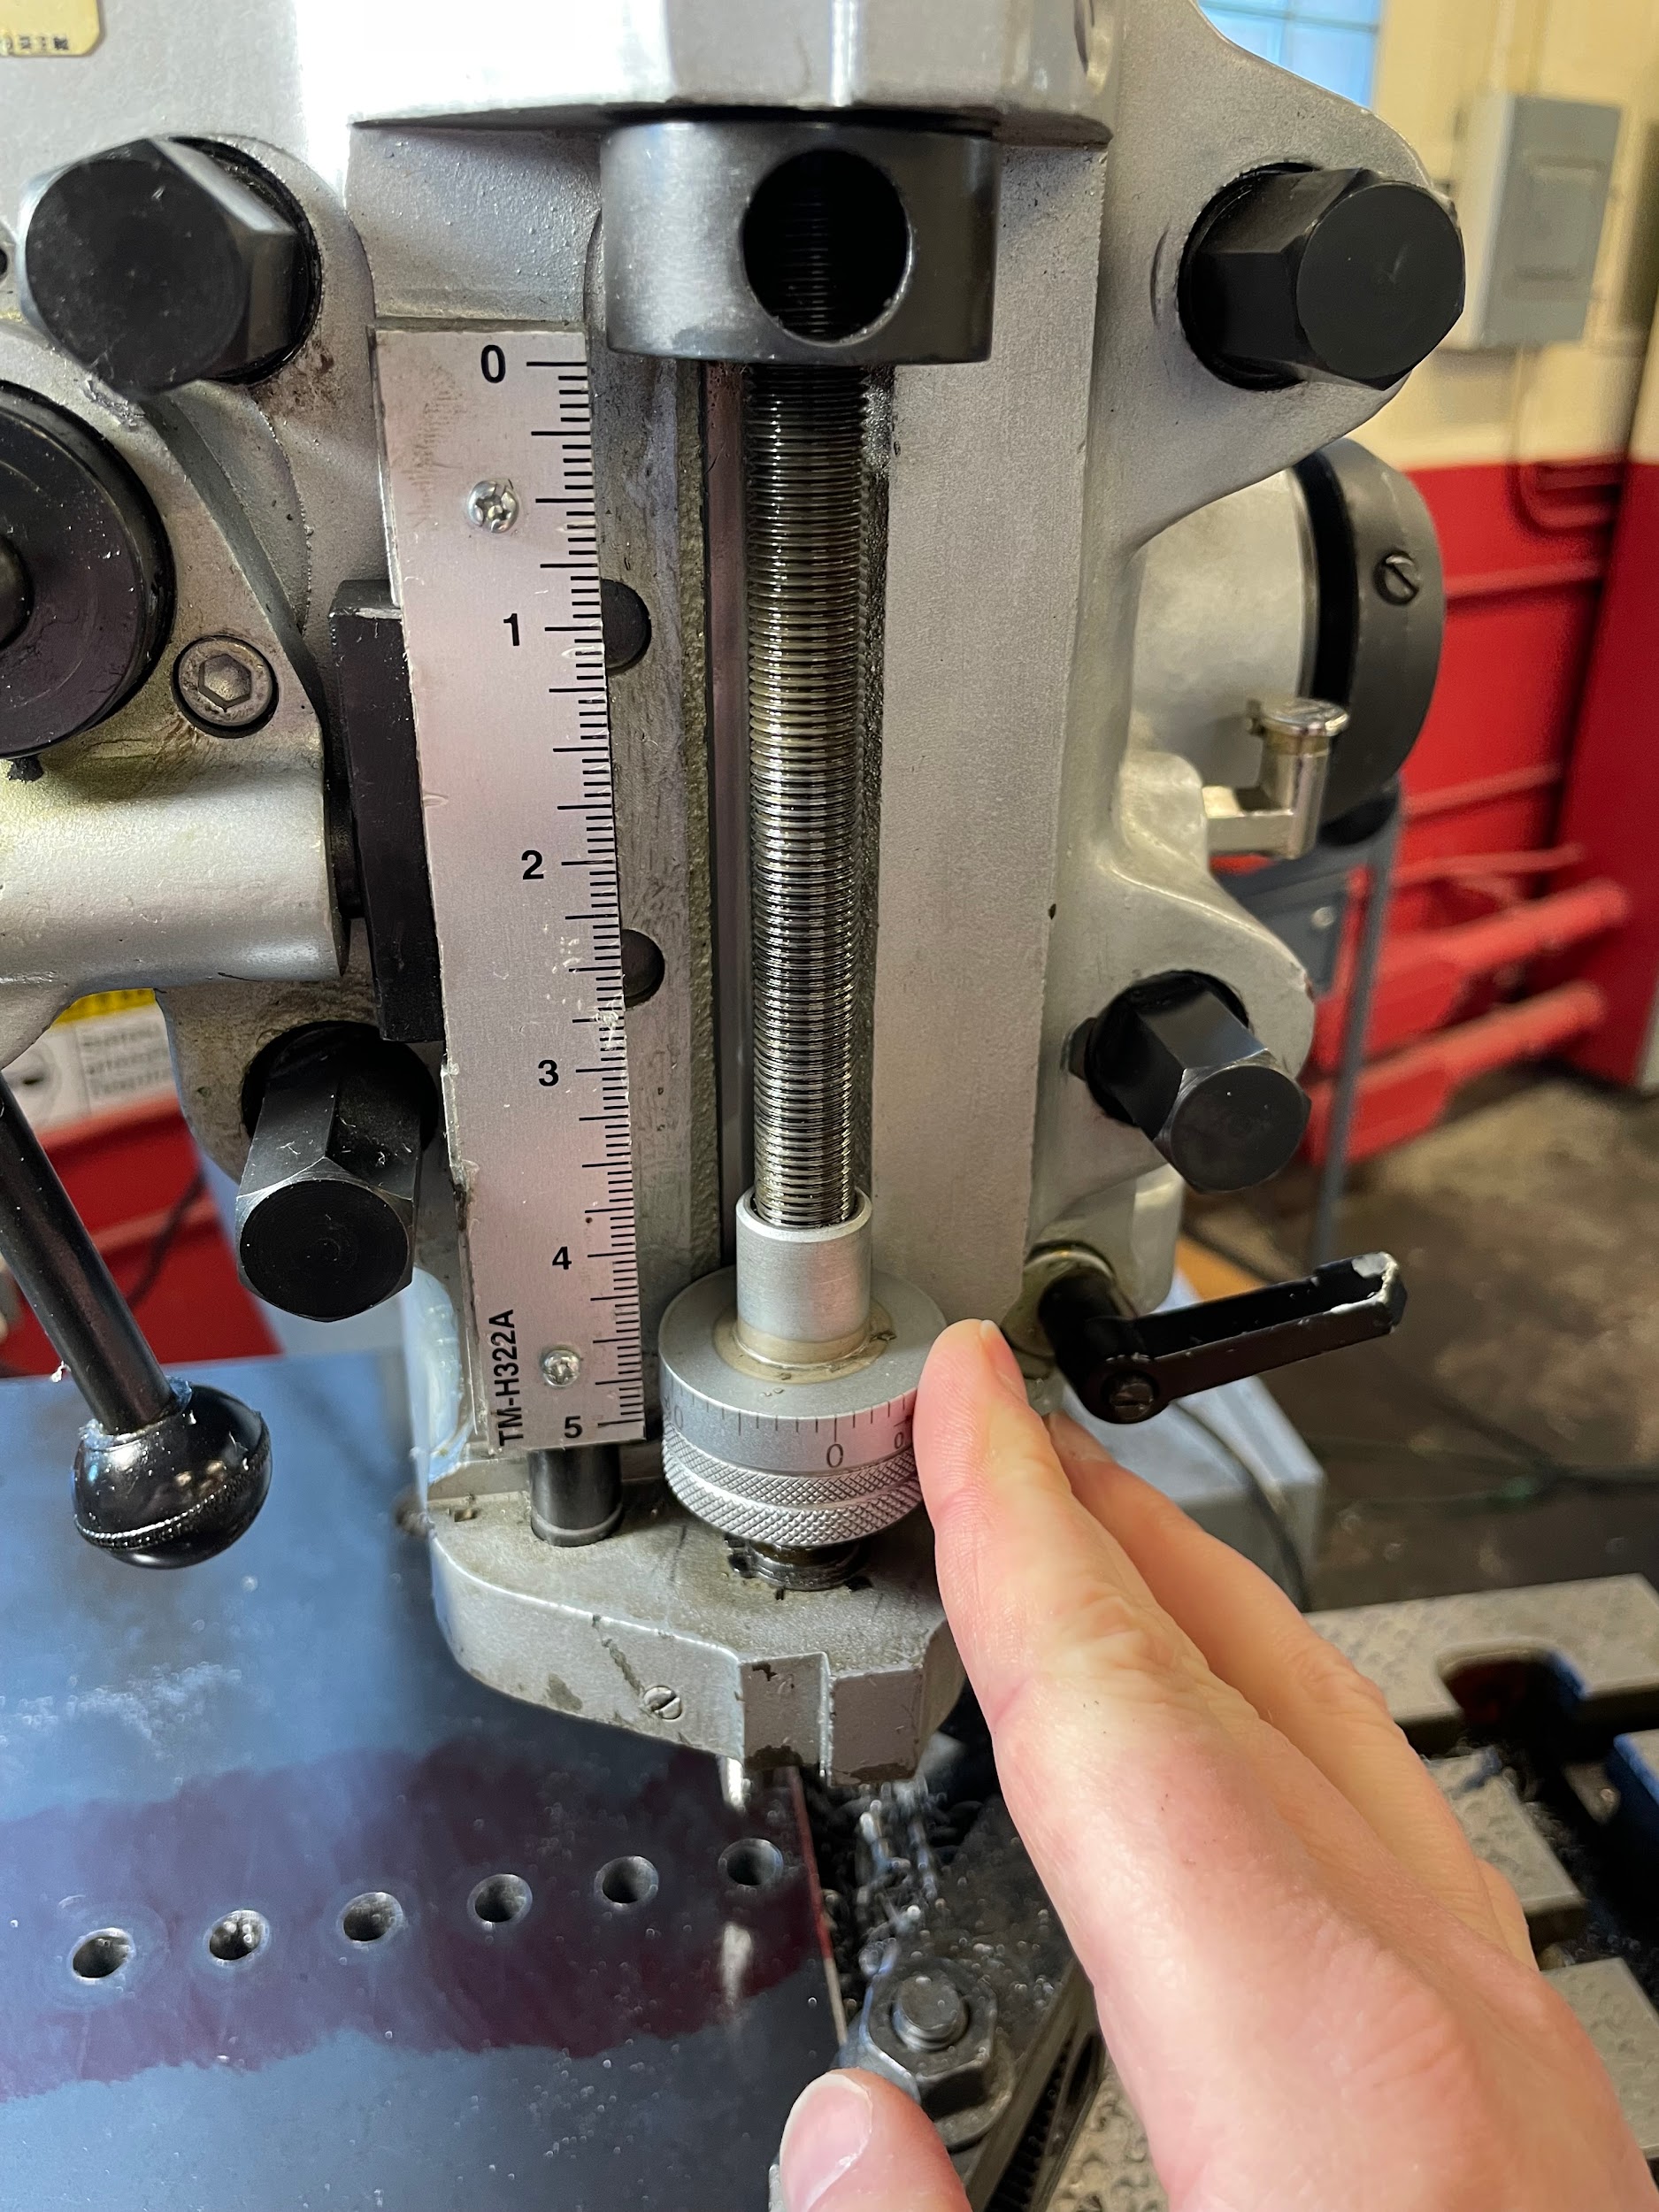
- Lower the quill stop to the bottom of its range. This is to make sure the tapping action isn’t accidentally stopped halfway through.
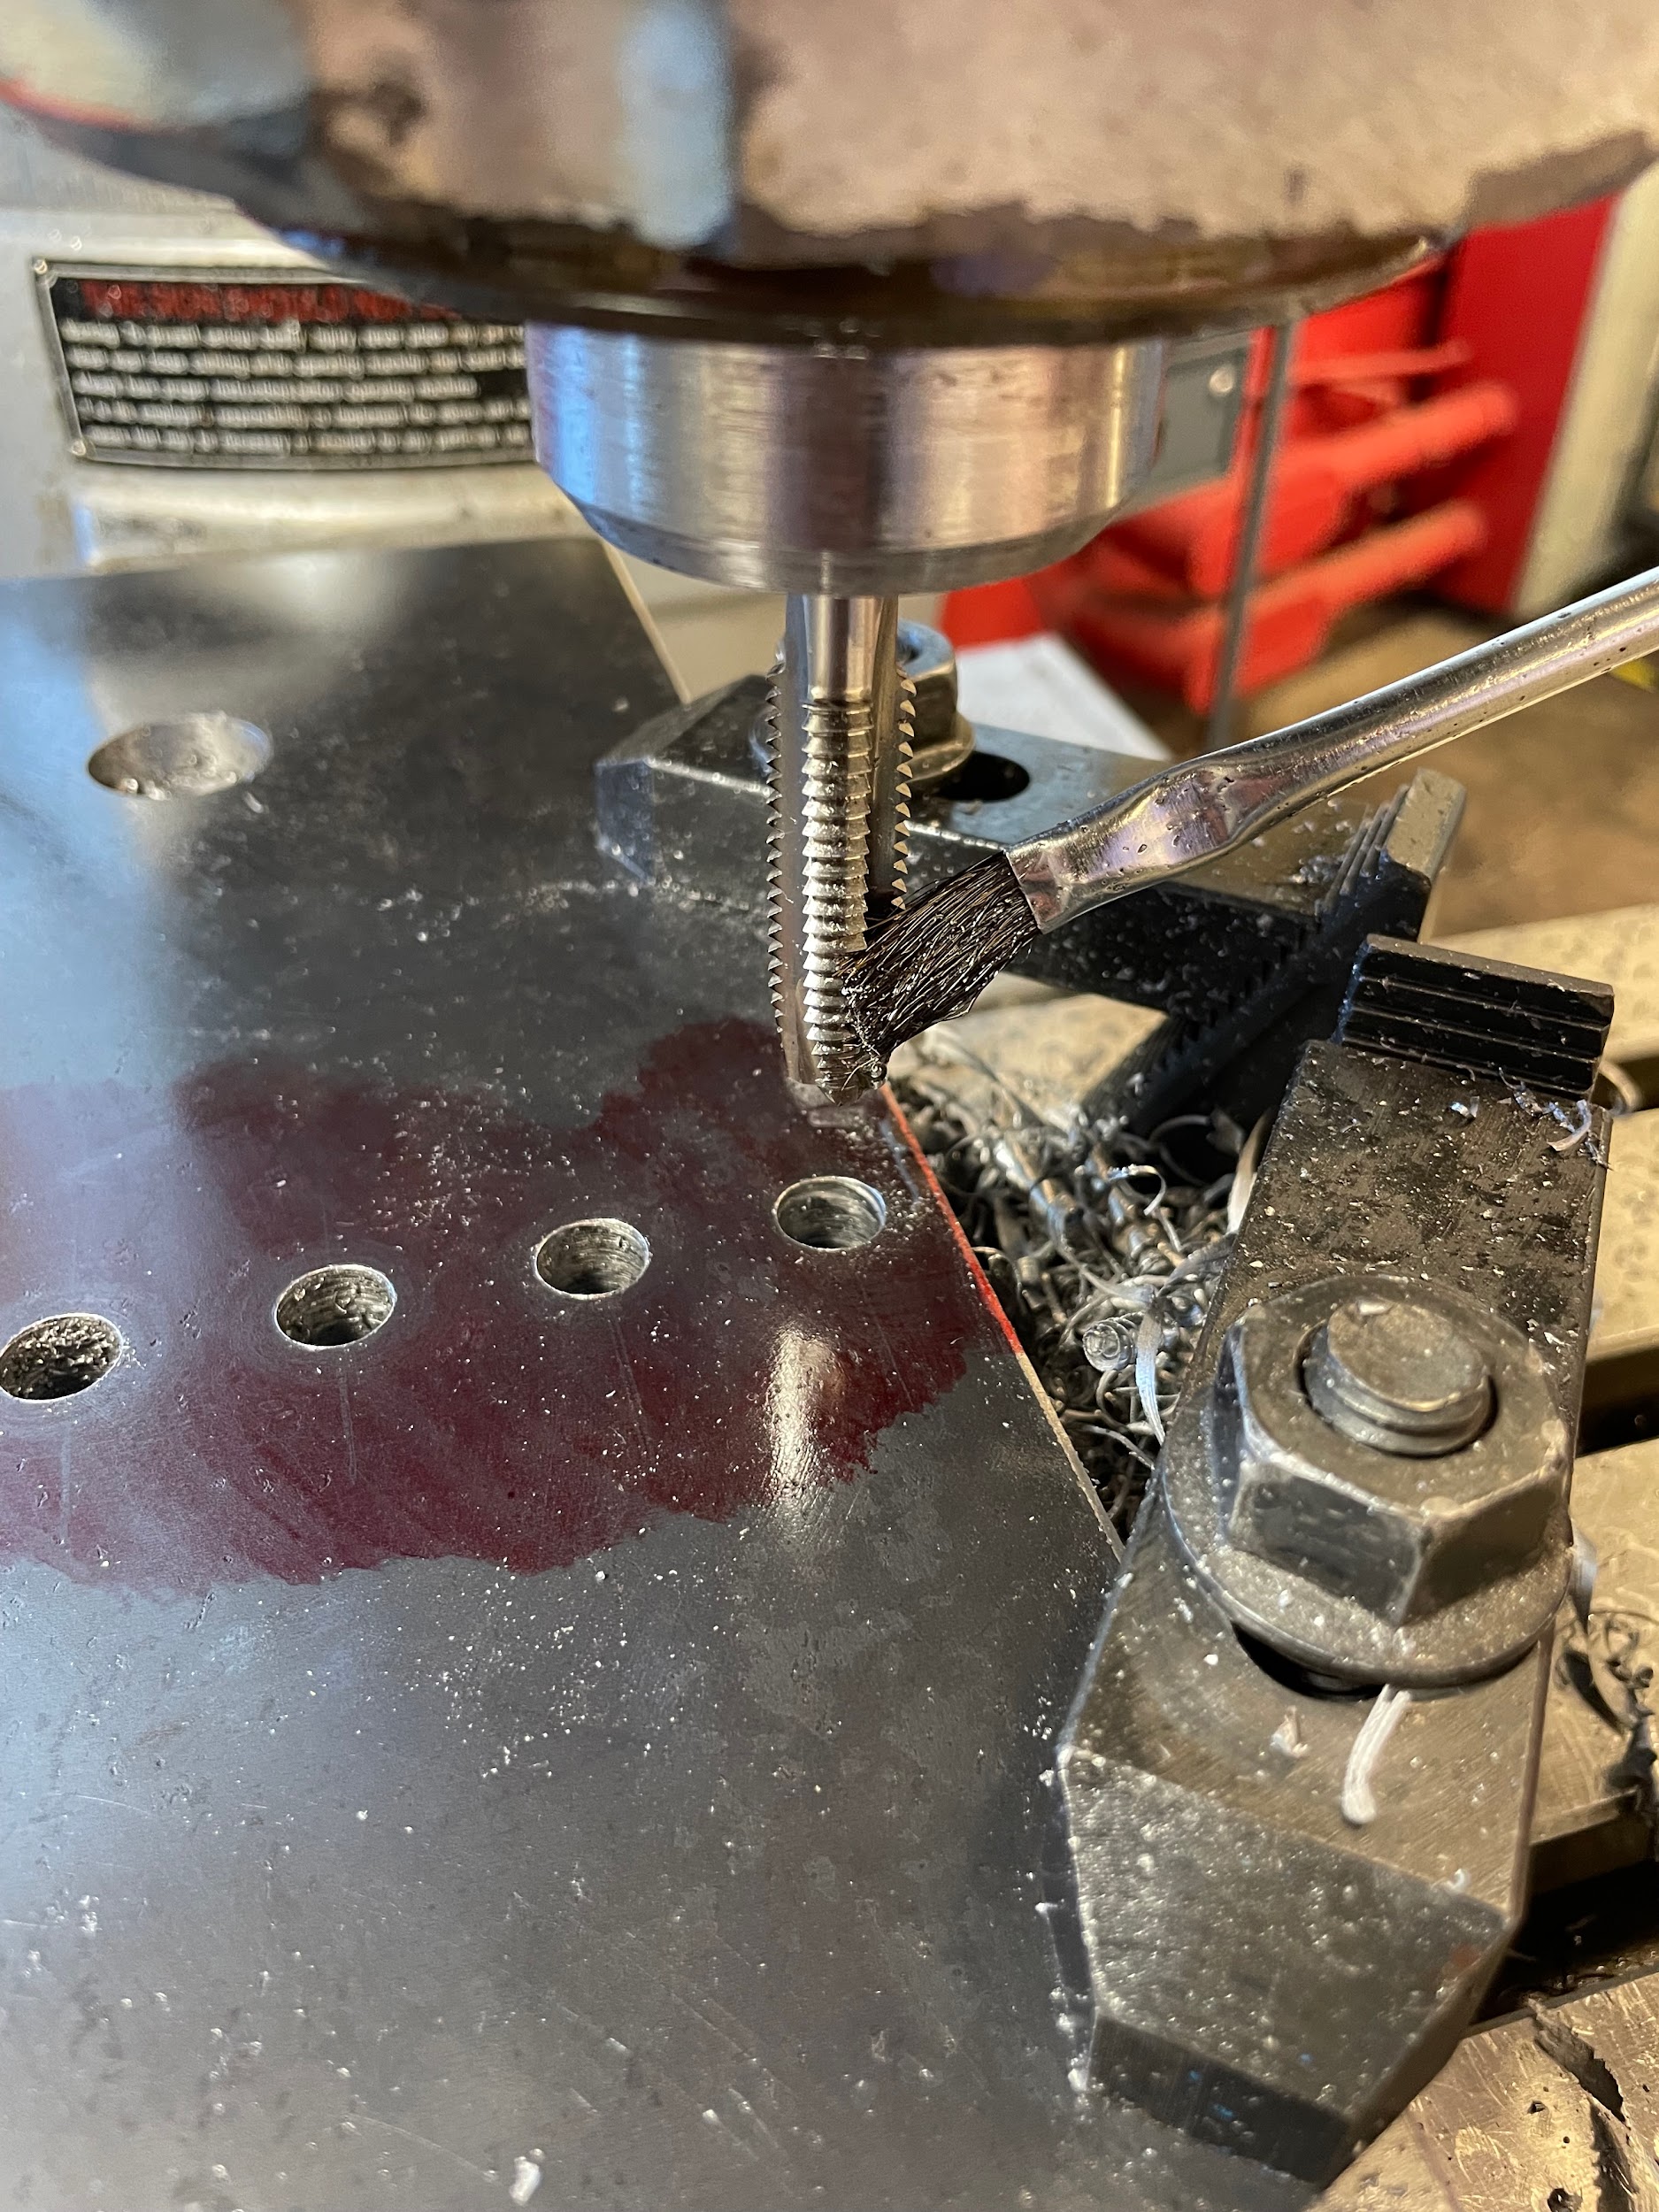
- Lube the tap and the hole.
- Turn the spindle on and adjust it to about 100 RPMs.
- Quickly and firmly pull the quill down, pushing the tap into the hole.
- Once the tap catches, it will pull itself into the hole.
- When the tap gets to the bottom of the hole, flip the spindle switch to the reverse direction so the tap works its way out of the hole.
“Step 7: Bring the knee up so the top of the material is about ½” from the tip of the tool.“
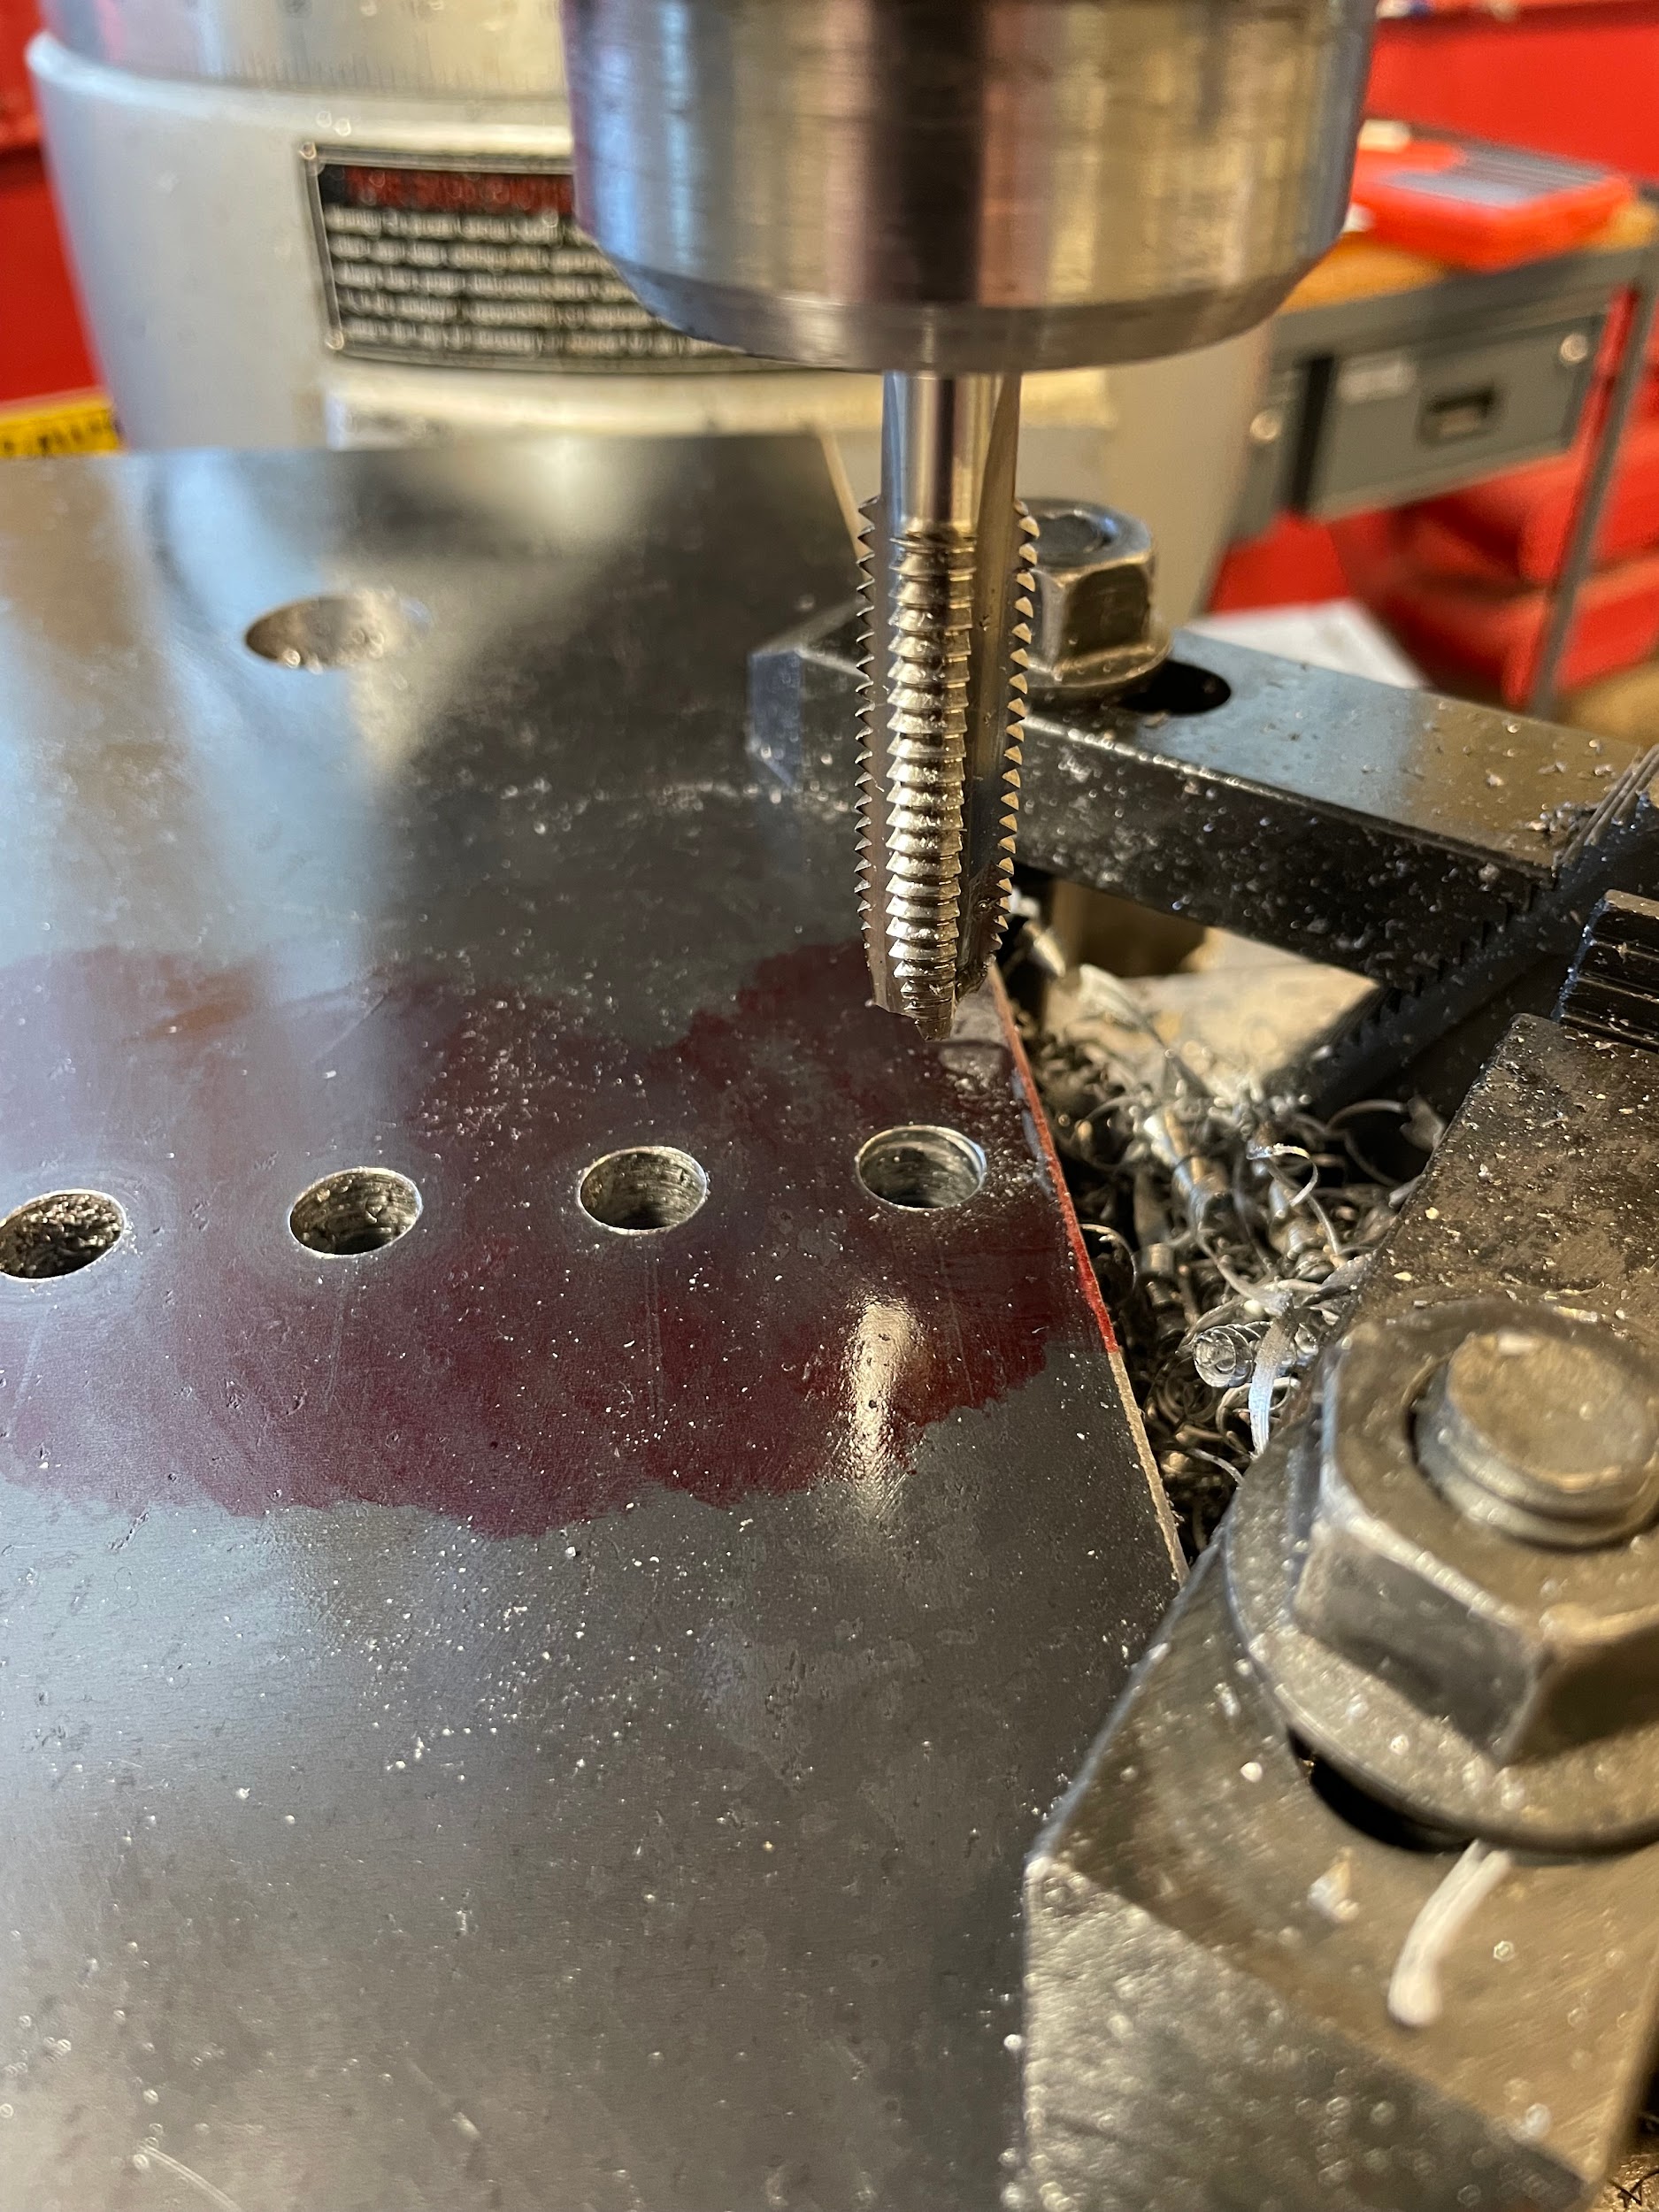
“Step 8: Lower the quill stop to the bottom of its range. This is to make sure the tapping action isn’t accidentally stopped halfway through.“
“Step 9: Lube the tap and the hole.“
SUMMARY
Manual milling machines are capable of many different operations. With each part the operator creates, they will be able to gain experience and become familiar with the milling machine and its components. Starting small and on parts with looser tolerances is a good way to build confidence. Operations like facing and side milling are a basic first step before more technical operations like angle milling and indexing are attempted. A machinist in industry will be able to efficiently perform all the operations indicated in this chapter. Knowing the milling operations, how they are performed, and how to troubleshoot the problems that arise are important steps toward upper-level positions in a machine shop, such as a CNC programmer.
REVIEW QUESTIONS
- List the necessary safety precautions required to run a milling machine.
- Explain the capacity of a milling machine and how it is indicated using examples.
- Discuss the purpose of the main parts of a milling machine.
- Describe the process of setting speeds and feeds on a milling machine.
- Describe, with examples, how to calculate spindle speed on a milling machine.
- Explain how feed on a milling machine is expressed.
- Describe the difference in feed for roughing and finishing cuts.
- Explain how to determine the depth of cut to be used on a job.
- Describe, in detail, the facing and block squaring processes.
- Describe the use of parallels and angle blocks.
- List and describe the use of various types of milling tools.
- Explain the process of hole making on a milling machine.
- Describe the process of boring on a milling machine.
- Explain the concept of a form-turning tool.
- Describe the difference between conventional and climb milling and when might be appropriate to use each.
- List the steps involved with loading a tool into the spindle of a milling machine
- Discuss the process of tramming in the head of a milling machine.
- Describe an edge finder and how to use one.
- Discuss indexing and the difference between direct, simple, and angular indexing.
- Describe a slitting saw and how one is used on a milling machine.
- List the different ways to cut angles on a milling machine and the advantages of each.
- Discuss the similarities between cutting a slot and cutting a pocket.
- Describe the process of aligning a milling vise.
References
Beaumont, T. (n.d.). Carbide vs HSS milling cutters. Cutwel.co.uk. Retrieved May 28, 2024, from https://www.cutwel.co.uk/blog/carbide-vs-hss-milling-cutters.html
Jacobs, P. (2022, May 24). Bridgeport Series I vs. Series II: The differences explained. CNC Masters. https://www.cncmasters.com/bridgeport-series-i-vs-series-ii-the-differences-explained/
National Floor Safety Institute. (n.d.). Slip & fall quick facts. Retrieved May 28, 2024, from https://nfsi.org/nfsi-research/quick-facts/

