Chapter 2: Python and IDEs
Overview
In this chapter we will begin our first steps with Python. Starting with interactive Python and moving toward our first Python script – the infamous “Hello World”. We will also introduce the idea of an Integrated Development Environment (IDE) to show how useful it can be for creating and debugging scripts.
Throughout this book we will be using Python version 3, which is sometimes referenced as python3. Older versions of Python versions 1 and 2 have historically both been referenced as simply python. When we are referring to the Python language, and running Python scripts, note we will use the command python3.
Learning Objectives
In this chapter we will cover the following:
Installing Python
Installing Visual Studio Code
Visual Studio Code and GitHub
Interactive Python
Hello World
Debugging
Simple Calculator
Creating a virtual environment in terminal
To create a virtual environment for our local repository, open a terminal window and type the following. Note that the second line should be the location of your local Git repository.
| sudo apt install python3-venv
cd PythonforCybersecurity |
This will create a virtual environment for our Python scripts named venv. Once the virtual environment is created, VSCode will automatically use and activate it when needed.
Key Terms
Add key terminologies in alphabetic order and matching definitions that students should learn as a result of learning the chapter. Feel free to keep the definition as concise or descriptive as you feel appropriate.
2.1 Installing Python
In most Linux environments, by default, Python will automatically be installed. Here we will walk through the installation process of Python and additional software required for Python to operate.
2.1.1 Install Python on Linux
If Python isn’t installed on the Linux system by default, you can easily install it. To begin the install, open a terminal and type the following commands:
|
sudo apt update |
NOTE: After typing the first command you may be prompted to reenter your password. This is a security feature of Linux, simply type your password and hit enter.
If your Linux distribution is not Ubuntu or another Debian based platform, like Raspberry Pi, these commands may not work. A simple internet search, such as “install python on XXX” will provide the specific commands needed to install it.
2.1.2 Install Python on other Operating Systems
Python works on most popular operating systems today. If it’s not already installed, it can quickly be installed by downloading it from python.org.
- Open a web browser and go to https://python.org
- Go to Downloads and select your operating system.
- Click to download and install the Latest Python 3 Release.
NOTE: Unless there is a specific reason to choose a different version, always choose the latest stable version.

Once the installer is downloaded, run it. Walk through the installer process accepting the defaults options.
2.1.3 Verify Python is installed
To verify Python is installed and running properly on a system, open a terminal and type python3 -V .

NOTE: The upper-case “V“
This will return the version of Python installed. Most any Python version 3.x will work for this book.
2.2 Installing Visual Studio Code
Visual Studio Code is an Integrated Development Environment (IDE) developed by Microsoft. An IDE is a tool used by software developers that simplifies the process of creating software and scripts by including multiple tools in a single program. Visual Studio Code includes a text editor, a linter to find typos and other issues, a debugger, and many other features. This single tool combines all that is needed to create Python scripts.
This IDE is supported on most major operating systems and is free to install and use. While Python scripts can be created using simple text editors like Notepad or Nano, using an IDE will make the process of writing, running, and debugging our scripts easier.
To create a virtual environment for our local repository, open a terminal window and type the following. Note that the second line should be the location of your local Git repository.
| sudo apt install python3-venv
cd PythonforCybersecurity |
This will create a virtual environment for our Python scripts named venv. Once the virtual environment is created, VSCode will automatically use and activate it when needed.
2.2.1 To install Visual Studio Code
- Log into the Linux environment
- Open the web browser and go to https://code.visualstudio.com
- Click the button to download the appropriate version for your computer.
- When the download completes, click on the downloaded file and select to install. If prompted, enter your password to confirm.
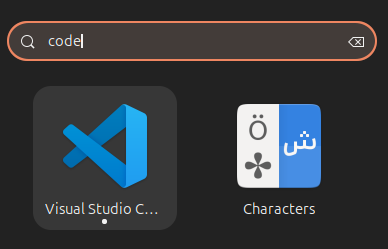
- When installation is finished, go to the start menu, and type in code to find the software.
2.2.2 Installing Visual Studio Code from the command line
If you prefer to install Visual Studio Code using the command line instead, you can use the following commands. These commands are summarized from the instructions provided by Microsoft at https://code.visualstudio.com/docs/setup/linux. If the commands change, look at Microsoft’s site for the updated directions.
|
wget -qO- https://packages.microsoft.com/keys/microsoft.asc | \ |
NOTE: These commands may need to be run twice to complete successfully.
2.3 Visual Studio Code and GitHub
Visual Studio Code simplifies access to GitHub, streamlining our efforts to create and manage our scripts in a user-friendly manner. Here, we will configure VSCode to connect to GitHub, and download/synchronize the contents from the repository to the local computer.
2.3.1 Configure Visual Studio Code for GitHub
- In your web browser, go to GitHub and select your repository
- Click the green Code button and copy the HTTPS URL to your clipboard
- Launch Visual Studio Code if it isn’t already running.
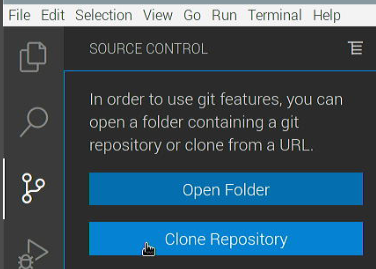
- On the Activity Bar (on the far left), click the Source Control icon (3 dots connected by lines).
- On the Source Control side bar that appears, click Clone Repository.
- In the text box at the top of the window, enter the GitHub URL that you copied for your repository. This URL should end in .git

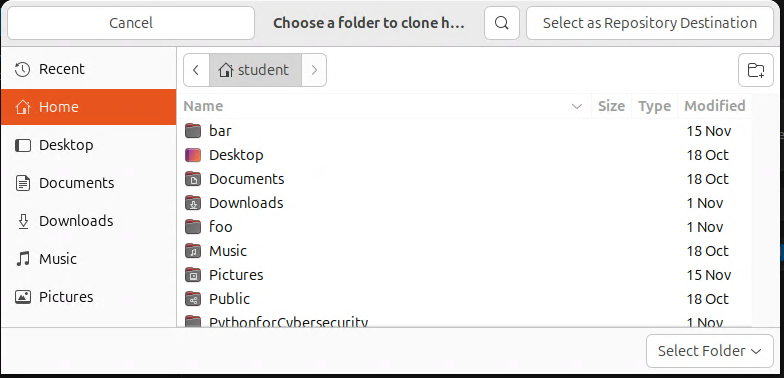
- When prompted for where to keep the local repository, choose a location, or simply click Select Repository Location.
NOTE: In some operating systems, the Select Repository Location button will be in the upper-right of the window, as shown in the screenshot. Other operating systems may place the button in a different location than shown in the image.
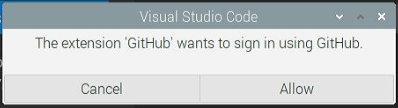
- When prompted to allow GitHub, click Allow.
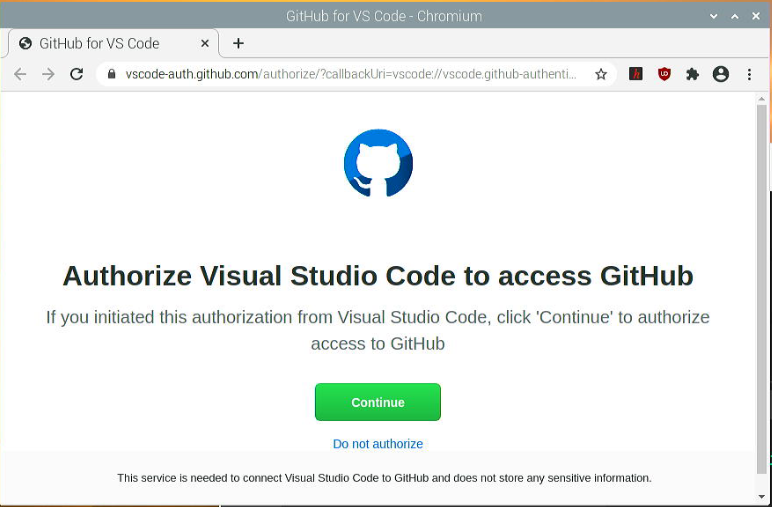
- Visual Studio Code will open a web browser and log into GitHub.com. Once logged in, it will prompt you to authorize Visual Studio Code to access GitHub. Click Continue.
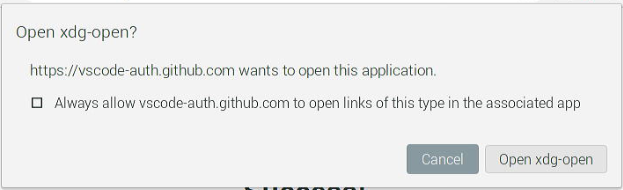
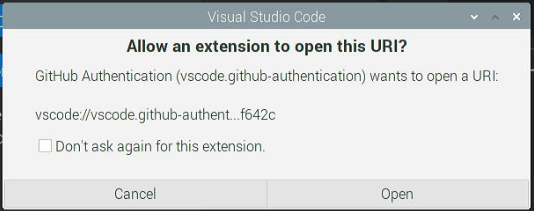
- On the following pop-ups, click Open.
- If prompted by Visual Studio Code, re-enter your GitHub.com password and press Enter.

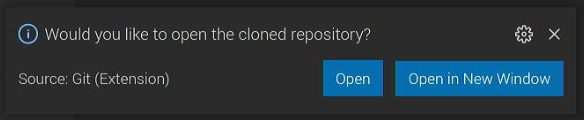
- At the bottom right of Visual Studio Code, a pop-up message will prompt to open the cloned repository. Click Open.
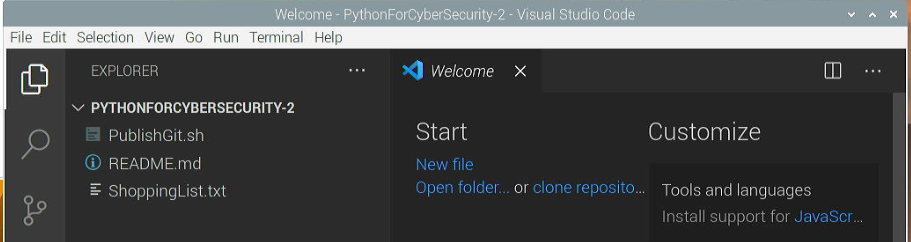
- You now have a local copy of the repository accessible in Visual Studio Code. If not already selected, on the Activity bar (icons on the far left), click Explorer view – icon looks like 2 pieces of paper. The Side bar will now show a list of folders and files.
2.3.2 Git User Identity
Because Git and Github are designed to be used in environments with multiple users simultaneously, each user must identify themselves. This allows Git to track not only what changes occur to files over time, but also who made the changes. For a user to be identified in Git and GitHub, we need to configure the user name and user email.
Open a terminal window and type the following, adding your own name and email. If you receive any errors when typing these, double check the commands typed. Specifically, confirm the spaces and the double dashes ( — ).
|
git config –global user.name “your name” |
2.3.3 Committing Changes
Once the GitHub repository is setup and cloned locally, Git will begin to track changes of the files. When the changes are made, they should then be committed to both the local Git and the remote GitHub repository. By committing changes to Git and GitHub, we are creating different versions of our files. These versions can be reviewed to identify the changes that have occurred over time. It is a good practice to commit changes frequently.
- In Visual Studio Code, click on ShoppingList.txt to open it, or create a new file.
- In the Editor pane on the right, you will see the contents of the file. Add one or two items to the shopping list.
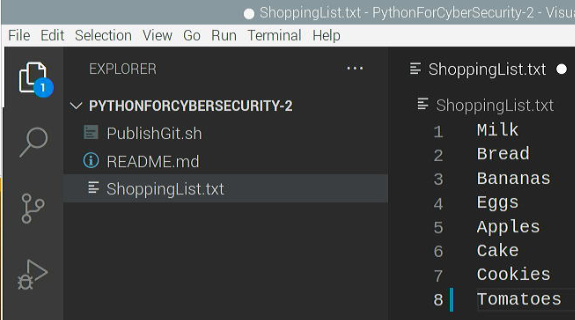
- Save the file by selecting File | Save, or by pressing CTRL+S.
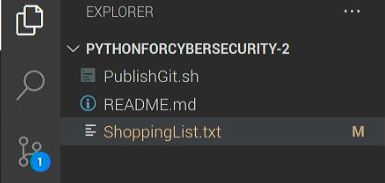
- On the Activity bar, click the Source Control icon (3 small circles connected with lines). Here we will see the ShoppingList.txt is listed as having changes made.
- In the Message field above the changes, enter a brief description of the changes made.
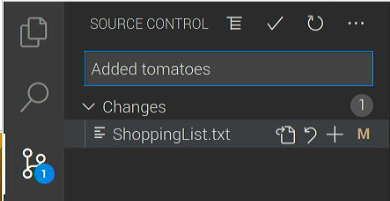
- Once the comment has been added, click the blue Commit button to commit the changes. Optionally, press the 3 dots at the top of the Source Control side bar and select Commit | Commit.
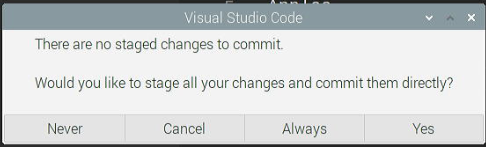
- If prompted by Visual Studio Code that there are no staged changes, click Always to always stage the changes without being prompted.
NOTE: As a general rule, commit comments should be descriptive and not include the word AND. If the word AND is needed, it suggests there should be 2 separate commits.
2.3.4 Synchronizing with GitHub
Once the changes have been stored in the local Git repository, we can then synchronize them to the remote repository on GitHub.
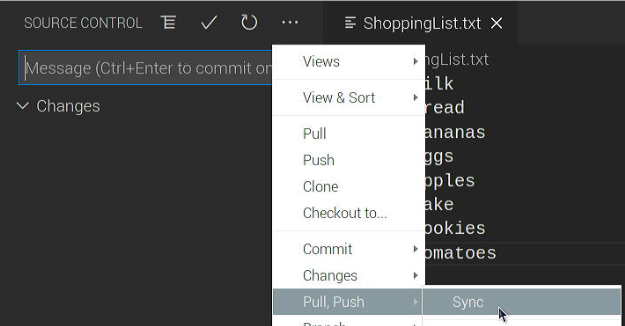
- Still on the Source Control side bar in Visual Studio Code, click the blue Synchronize button. Alternatively, select the 3 dots at the top of the pane. Select Pull, Push | Sync.
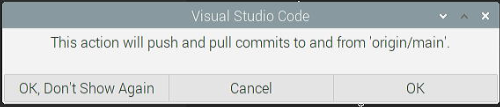
- If prompted by Visual Studio Code to confirm the action, click OK, Don’t Show Again.
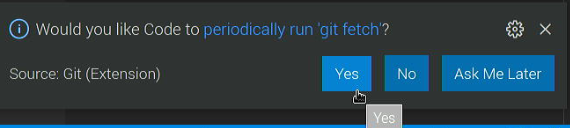
- If prompted to periodically run git fetch, click Yes.
At this point all the changes have been saved, version controlled, and synchronized online. The changes can be viewed in Visual Studio Code, and on GitHub.com.
2.3.5 Python Virtual Environments
When creating scripts or automations in computers, there are frequently issues stemming from package versioning and isolation. Different scripts or tools on a computer may have a dependency on a package or library, but require different versions of the package. To overcome this and other issues, Python uses what is known as a Virtual Environment to separate different sets of tools.
By using a virtual environment in Python dependency conflicts can be avoided. Additionally, these virtual environments remove many permission issues by installing packages to the virtual environment, instead of to the entire system. Some Python packages have begun to require the use of virtual environments for compatibility and as a best practice. Lastly, virtual environments enable reproducibility of the environment when moving from one system to another.
Creating a virtual environment in VSCode
To create a virtual environment for our local repository in VSCode, we use the Command Palette.
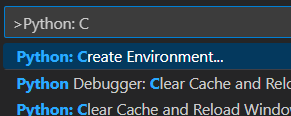
- In VSCode press the key combination CTRL+SHIFT+P, or go to View | Command Palette
- In the command palette, begin typing Python: Create Environment…
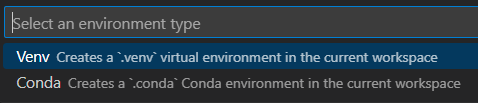
- Select Venv Creates a `.venv` virtual environment in the current workspace
- Select the default interpreter

Creating a virtual environment in terminal
To create a virtual environment for our local repository, open a terminal window and type the following. Note that the second line should be the location of your local Git repository.
|
sudo apt install python3-venv cd PythonforCybersecurity |
This will create a virtual environment for our Python scripts named venv. Once the virtual environment is created, VSCode will automatically use and activate it when needed.
Activating a virtual environment
To activate the virtual environment, open a terminal window and type the following
|
cd PythonforCybersecurity |
Once activated, you will notice that the terminal prompt has changed to indicate that you are inside the virtual environment.

Deactivating a virtual environment
To deactivate or leave a virtual environment, in the terminal window type the following
|
deactivate |
2.4 Interactive Python
Python works in both an interactive and scripted mode. The interactive mode is a quick and easy way to become familiar with some aspects of the Python language, as well as explore different features of Python and run ad-hoc commands.
To open Python in an interactive mode, on the Linux computer open a terminal window. From there, type python3, all lower case. The first few lines provide information about the version of Python running, as we can see in the screenshot below, this is running Python 3.12.3. Here however, we are primarily concerned with the major version of Python 3.
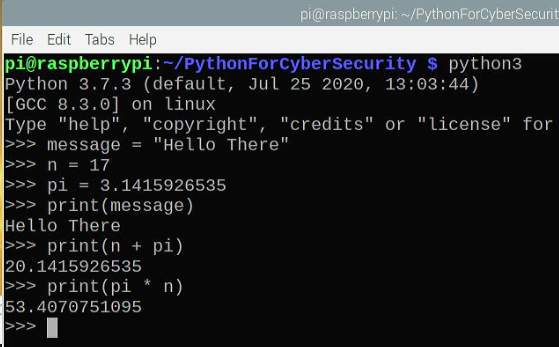
Once in interactive Python mode, we can begin typing various Python commands. The simplest commands to demonstrate are simple math. For this example, we can type 20 + 32 and hit Enter, Python then immediately returns the result.

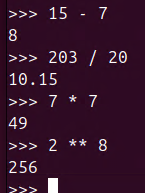
Along with addition, we can perform other math functions. For instance, we can type 15 – 7 (subtraction), 203 / 20 (division), 7 * 7 (multiplication), and 2 ** 8 (exponents). Once we hit enter after each of these, the results are immediately presented to the screen.
Another common command in Python, which we will be using frequently, is the print() function. As its name suggests, the command will print to the screen any value passed to it.
|
print(“Hello There”) |
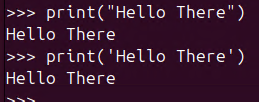
NOTE: For the print() function to work properly, there are several key components that must be correct.
- The keyword print is all lower case.
- There must be a matching opening and closing parenthesis ( and ). This becomes more important in the future as we may use multiple sets of parentheses on the same line.
- There must be a matching opening and closing set of double quotes ” “ or single quotes ‘ ‘. Generally, it isn’t important if you use single or double quotes, but they need to match on the same line.
2.5 Our first Python Script
In this section we will begin by creating our first Python script, the fabled “Hello World”.
2.5.1 Python conventions
As with all things computers, there are many ways to accomplish the same task. However, when learning something for the first time, it is best to complete tasks the same way as others. This can help make code that is reliable, very portable, and easy for others to read and understand.
We will cover a few of the common Python conventions here.
2.5.1.1 File Extension
By convention (meaning what most people follow), Python scripts always have a .py file extension. This helps the operating system and the user to quickly identify the file type, and how it should be used. While this is not strictly necessary, it simplifies management of the scripts.
2.5.1.2 Shebang
The shebang is normally the first line in a script and starts with a pound sign ( # ), followed by an exclamation mark ( ! ), and then the path of the interpreter for the script. The shebang is named as such by saying the words “hash” (another name for the pound sign) and “bang” (a colloquial name for exclamation mark) quickly: hash-bang –> shebang.
Different scripting languages such as bash, perl, python, php, and custom languages all have different interpreters, and therefore different shebangs. While not required to be included, a proper shebang will ensure scripts execute in a more reliable fashion. The preferred shebang for Python version 3 is:
|
#!/usr/bin/env python3 |
2.5.1.3 Comments
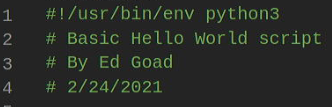
Comments in Python are identified by the use of the pound sign ( # ), and should be included throughout Python scripts. When the Python interpreter encounters a comment character, it will ignore any text following it. This is a great way to document what the script is and what it does.
Each script should begin by including several comments describing what the script is, what it is supposed to do, who wrote it, and when. This information, along with other comments throughout the file, will make the script easier to work with in the future when you may not remember the purpose of the script and various components.
2.5.1.4 Marking as executable
Lastly, once a script is created, we can mark it as executable so that we can run it from the command line. To mark the file as executable, on the terminal window in the same directory as the file, type chmod +x <pythonfile.py> (replacing the brackets with the file name). After this is completed, if you use the ls command, you will see the file is now a different color signifying it is executable.

2.5.2 Getting Ready
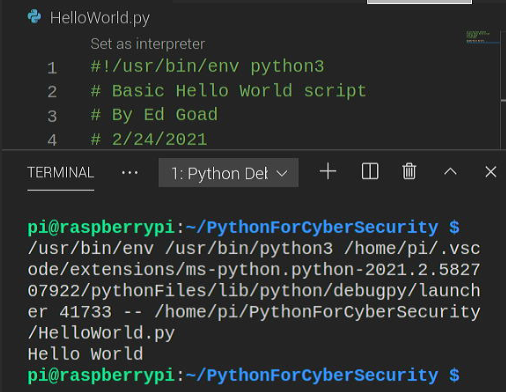
In Visual Studio Code, select the Explorer icon on the Activity bar (looks like 2 pieces of paper on the far left). In the Explorer sidebar, browse to start | CH02 | HelloWorld.py. This will open the file in the editor pane.
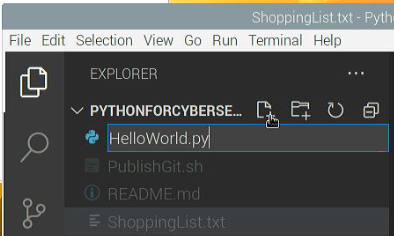
Alternatively, to create the file yourself, select the Explorer icon on the Activity bar (looks like 2 pieces of paper on the far left). In the Explorer side bar, next to where it says PythonForCyberSecurity click the New File icon – this looks like a piece of paper with a plus (+) on it. Name the new file HelloWorld.py.
2.5.3 How to do it
Our first Python script will be the famous Hello World script. This is a simple script that simply prints to the screen the words “Hello World” and is used in most programming/scripting classes as the first example created.
Once the file is open, in the editor pane, type in the following information. Start with the shebang, add in the appropriate comments, and the final print statement.
|
#!/usr/bin/env python3 |
Pay special attention to the line with the print statement. Watch to ensure the print command is lower-case, both opening and closing parenthesis () are included, and both quotes “” are included and the same type.
When finished, save the file by click File | Save, or press CTRL + S.
Committing changes to GitHub
Commit the changes to the local Git and GitHub by:
- On the Activity bar, click the Source Control icon (3 small circles connected with lines).
- In the Message field above the changes, enter a description of the changes made.
- Once the comment has been added, press the Commit button to commit the changes. Optionally, press the 3 dots at the top of the Source Control side bar and select Commit | Commit.
- Still on the Source Control side bar in Visual Studio Code, press the Synchronize button. Alternatively, click the 3 dots at the top of the pane, select Pull, Push | Sync.
2.5.4 How it works
2.5.4.1 Running inside Visual Studio Code
To execute our script inside of Visual Studio Code
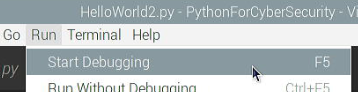
- With the file still open, go to Run | Start Debugging
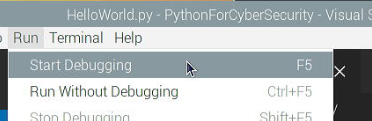
Note: as shown on the Start Debugging line, you can also press F5 on the keyboard to perform the same task.
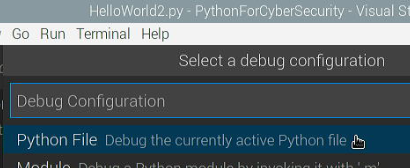
- In the pop-up window, select Python File.

- At the bottom of Visual Studio Code you will see a TERMINAL window open, and after a few seconds the script will complete, with “Hello World” printed.
2.5.4.2 Running from the command line
Running Python scripts from the command line is a relatively simple process of typing the name of the script. As you can see in the screenshot below, we are in the PythonForCyberSecurity directory (shown in blue), and typed ./HelloWorld.py. The output of the script is shown on the next line.

There are several important items to point out regarding the command typed above. The first being the need for the period and forward slash ( ./ ) before the script name. This is due to a security feature of Linux that requires scripts to be referenced by their location. The period and forward slash identify the current directory as the location of the HelloWorld.py script.
Instead of the relative path of ./ , we could also have used the absolute path of the script. Since the PythonForCyberSecurity folder is in the pi user’s home directory (identified by the ~ in the prompt), the file is in the /home/pi/PythonForCyberSecurity directory. In that case, we could also call the script by typing /home/pi/PythonForCyberSecurity/HelloWorld.py.
The next item to highlight was the previously mentioned using chmod +x to mark the script as executable. This step is needed to execute the script as shown, but the script can be called in different ways. For instance, if we didn’t mark the script as executable, we could still run it by typing python3 HelloWorld.py. This command starts the Python interpreter directly, and includes HelloWorld.py as a parameter or option.
2.6 Variables
The term variable refers to something that can change. Even if you are not familiar with the idea of a variable, if you took algebra or trigonometry in school, you have used variables in the past. You would have seen them written similarly to x = 3 + 5 , followed by the request Find the value of x.
Don’t Panic! This book won’t get close to the difficulty of algebra or trigonometry.
The easiest way to describe a variable in a computer is to imagine a box. We can take a box and give it a name such as “Frank”. We then can put almost anything we want, such as marbles, into “Frank”. Then, instead of asking for the specific contents (i.e., the marbles we put in it), we can ask for “Frank” instead.
If we want to change what is in the box, like coins, we remove the current contents and put something else in it. Now, instead of marbles being in “Frank”, we have coins in “Frank”. It is still the same box, and we still refer to it by the same name, but it has different contents.
This idea of changing the contents of a container like a box, envelope, or variable, is extremely useful when performing repetitive tasks. For instance, if we have a container called name, we can put a person’s name in it, and then do tasks for that person like make coffee, send birthday cards, or create user accounts. When we change the contents in the container, we can then repeat all of the tasks in the same manner, but with a different value.
2.6.1 Working with Variables
In general, there are 3 types of variables in Python: a string, an integer, and a float. There are more complex variable types seen later, but the more complicated types are generally based on these 3 simple types.
We start with a name for the variable, such as message, and then assign a value to it using a single equal sign ( = ). When a single equal sign is used in Python, it assigns the value on the right of the equal sign to the variable on the left. For instance, if we were writing a greeting to someone, we might assign the contents “Hello There” to a variable named message.
If we open Python in interactive mode, we can assign some variables as shown below.
|
message = “Hello There” |
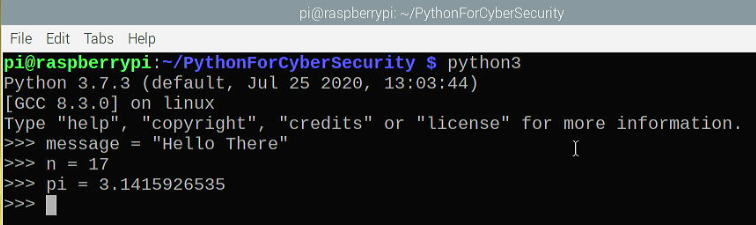
NOTE: Variable names can consist of letters (a-z, A-Z), numbers (0-9), and underscore (_). The first character cannot be a number.
Once the variables are created, we can begin to use them as if we were using their contents. So instead of typing print(“Hello There“), once we have assigned the message variable, we can type print(message).
2.6.2 Variable Names
When working with Python, there are several conventions, or suggestions, on how to name variables. These conventions help to encourage the “readability” focus when working with Python. More information regarding conventions can be found in the Python Style Guide .
Make names meaningful
Variable names should be descriptive of what information, or type of information, they hold. For instance, names such as student_id, first_name, and vehicle_type help identify the content of the variable and where and how it would be used. Names such as x, spam, and eggs are not descriptive and can become confusing, especially if reused multiple times in a script.
Names should be lowercase
Wherever possible, Python variables should be all lower case. Different programmers, organizations, and programming languages have preferred variable naming styles. Python suggests using what is known as snake_case, all lower case letters with underscores separating words.
Below is a comparison of some of the more popular styles of variable naming:
|
Type |
Example variable name |
|
camelCase |
exampleVariableName |
|
PascalCase |
ExampleVariableName |
|
skewer-case |
example-variable-name |
|
nocase |
examplevariablename |
|
SCREAMING_SNAKE_CASE |
EXAMPLE_VARIABLE_NAME |
|
snake_case |
example_variable_name |
Global variables
Global variables, or variables whose values are accessible throughout the script, are often identified by including two underscores ( _ ) before and after the variable name. For instance, if you had a variable named ip_address that you wanted to be globally accessible, you would name it __ip_address__.
With the exception of a few global variables that are built into Python, we won’t be using global variables in this book. In general, it is frowned upon to use global variables in Python. However, you may see them referenced in other scripts in the future.
2.6.3 Variable Types
Just as there are different types of pets in people’s homes, there are different types of variables in Python. It is important to recognize the different types of variables because some types work well together, while other types need special consideration to work together.
We can see more information about what our variable type is by using the type() built-in Python function. We can see an example of this below.
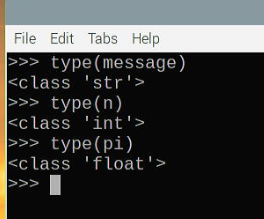
The three main types of variables used in Python:
- String (str) – can be a combination of text, numbers, and spaces, or most anything you can type on the keyboard.
- Integer (int) – is a simple number that doesn’t include a period. Numbers such as 0, 1, 2, -5, and 42 are integers.
- Float (float) – is a number that includes a period. Numbers such as 3.14 and 1.234 are floats.
2.7 Our Second Python Script
Getting Ready
In Visual Studio Code, select the Explorer icon on the Activity bar (looks like 2 pieces of paper on the far left). In the Explorer side bar, browse to start | CH02 | HelloWorld2.py. This will open the file in the editor pane.
Another Hello World
Now that we know a bit more about variables, let’s create a new Hello World script that uses a variable to return our name. Enter the following text:
|
#!/usr/bin/env python3 |
|
|
Don’t forget to commit the changes to Git and GitHub |

How it works
- The script starts on the first line after the opening comments. On the right of the equal sign we are using the input() built-in Python function to prompt the user and record their input.
- Once the user enters their name in the terminal and presses Enter, the script creates a variable called your_name and assigns the value to the variable.
- Then the script prints “Hello” followed by the name provided.
NOTE: We will discuss how the print statement works shortly.
To run the script:
- On the Visual Studio Code menu, select Run | Start Debugging.
- When prompted to Select a debug configuration choose Python File.
- In the TERMINAL window, the script will prompt you for your name and wait for a response. When you press Enter, the script will finish by printing the final Hello statement.

There’s More
Other ways to Print
In the prior example, we showed one way to use a print statement when combining text with a variable. As with all things in computers, there is always more than 1 way to complete the same task.
Below we have extended our script to HelloWorld3.py to highlight other common print statements. All of these forms print the same information.
|
#!/usr/bin/env python3 |
|
|
Don’t forget to commit the changes to Git and GitHub |

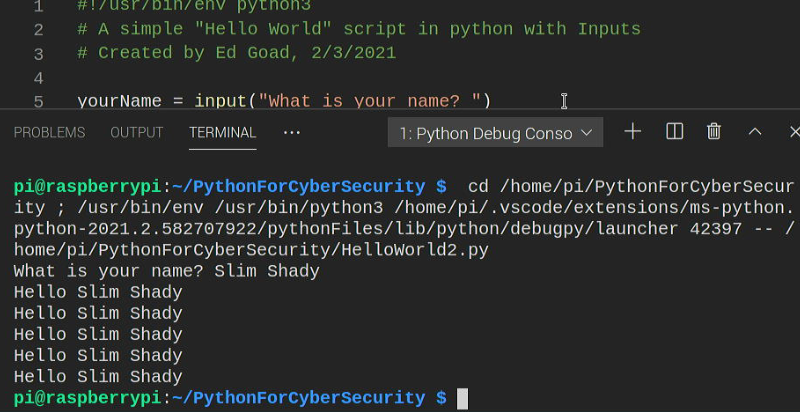
The script starts as before by asking the user for their name, and then storing the result into the your_name variable.
The next 2 lines use Python’s “string format” features. Formatting covers a large group of concepts, but here we are using it as placeholders to be filled in later. In the first line we create a placeholder using {0}, which is later filled with the contents of the variable named your_name.
The second print statement uses a placeholder as well, but this time directly references the your_name variable. This style of formatting is known as an f-string. Both of these lines work similarly, but some developers have a preference to one format or another.
The third print statement works by “appending” the two strings together. By appending, it joins the strings “Hello ” and the contents of the variable together. This method works well when only working with strings, but can cause problems if working with mixed variable types (string, integer, float, and other data types).
The fourth print statement is essentially 2 different print statements on the same line. It first prints the string “Hello”, and then prints the contents of the variable. This output may look slightly different on some systems due to the spacing Python places between the two print statements.
The final 2 lines create a new variable by joining the strings together and assigning it to the message variable. Once the message variable is assigned a value, it is then printed on the following line. This is essentially the same as the third print statement, but separated onto multiple lines.
As we can see below, each of the print statements works identically.
2.8 Debugging
Another great benefit of using an IDE similar to Visual Studio Code is the ability to debug the code as it runs. Debugging is useful if the script is not working properly, if there are unexpected outcomes, or simply for demonstration and educational purposes. Here we will introduce the idea of debugging in Visual Studio Code.
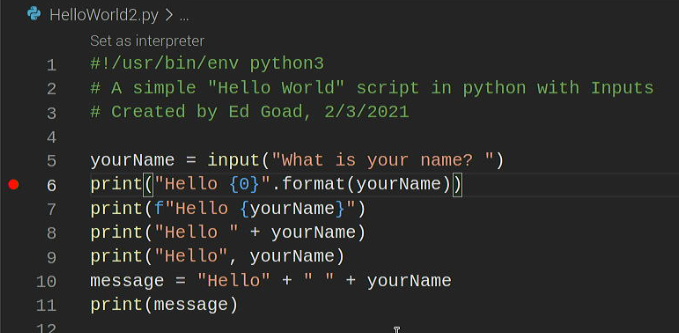
To demonstrate this, we can continue working with the HelloWorld3.py script. In the editor, to the left of the first print statement (line #6 in the example below) when you click with the mouse you will see a red dot appear. If you click again, the red dot will disappear or toggle on/off. This red dot is known as a “breakpoint”.
Once you have the breakpoint set, run the script by selecting Run | Start Debugging, and choosing Python File. The script will begin normally and prompt you for your name, and then pause.
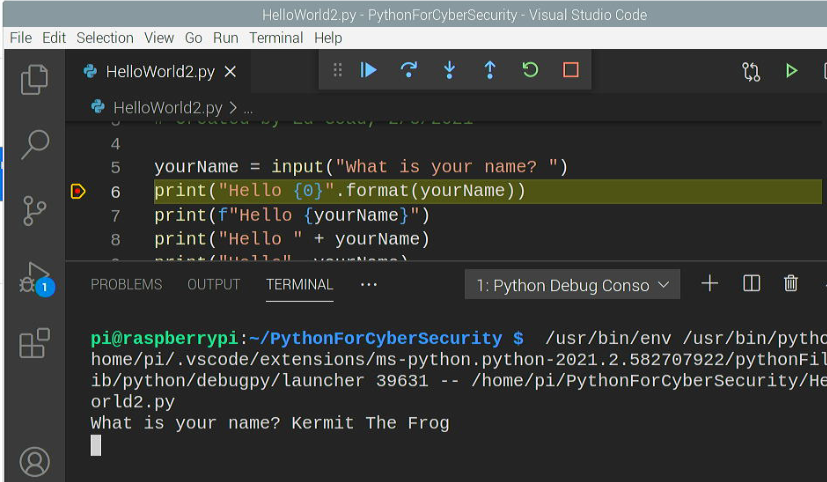
As you can see in the image above, line #6 is highlighted showing that the script is currently paused at this point. By reviewing the output in the terminal, we can see that this line hasnt yet run because there is no “Hello” statement. Additionally, there are several buttons at the top of Visual Studio Code, when you hover the mouse over the buttons they will show a description.
Continue (F5)
Step Over (F10)
Step Into (F11)
Step Out (Shift+F11)
Restart (Ctrl+Shift+F5)
Stop (Shift+F5)
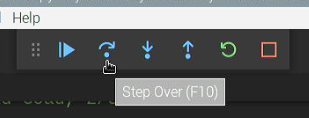
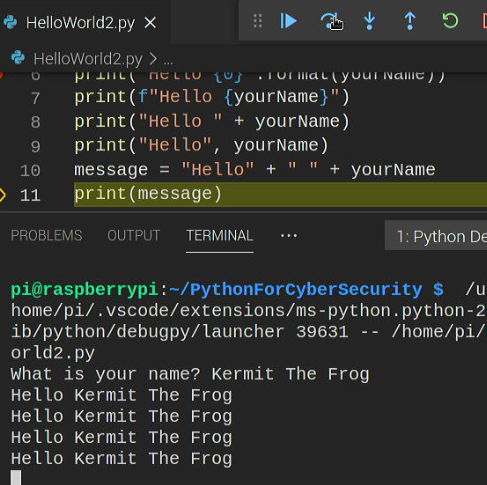
With your mouse, click the Step Over (F10) button one time. When you click the button, you will see that the highlighted print statement is executed, and the output is shown in the TERMINAL window. Once the command completes, the script pauses again and the next line is highlighted.
You can keep pressing the Step Over (F10) button to see each line executed one-by-one. When you get to the end of the script, the script will end, and the debugging tools will automatically be removed.
One interesting aspect of the debugger is that we can view the contents of our variables while the script is running. While debugging is occuring, you can hover your mouse over any of the variables to view their current contents. This is useful when the contents of the variables may change frequently, so that you can confirm if the script is working as expected.
2.9 Simple Calculator
In most scripting and programming languages, there is an idea known as a conditional, or an if/then statement. We use these terms in everyday human language, for instance we may say “if it is your birthday, then I will bake a cake.” In Python, this works essentially the same way.
Getting Ready
In Visual Studio Code, select the Explorer icon on the Activity bar (looks like 2 pieces of paper on the far left). In the Explorer sidebar, browse to start | CH02 | SimpleCalculator.py. This will open the file in the editor pane.
How to do it
SimpleCalculator.py
|
#!/usr/bin/env python3 |
|
|
Don’t forget to commit the changes to Git and GitHub |

How it works
The script starts by using the built-in Python function, input(), to collect the numbers used in our calculator. By default, the input() function returns string values which we can’t use for math. To convert the string values into numbers, we wrap the input() function with the float() function. This converts the string into a float and it is assigned to the appropriate variables.
While prompting for the numbers, the script also prompts the user for the activity to perform: add, subtract, multiply, or divide. This will be used to later choose what our script does.
The remaining lines are pairs of if and print() statements with different values in each pair.
In the first pair of if/print statements, the if statement is comparing the value in activity to the string “+“. If the comparison is True (i.e., activity is equal to “+”), then the indented lines below the if statement will be performed.
NOTE: A single equal sign is an assignment. A double equal sign is an evaluation.
The following line begins with an indentation to identify this line to be executed as part of the if statement. In this case we only have 1 line to execute, but multiple lines with the same indentation can be included. Here we are using a print statement to simply add the values together.
NOTE: Indentation must be consistent throughout the script. Inconsistent indentation and mixed indentation types (spaces vs tabs) will cause the script to fail.
The remaining 3 if/print statements work exactly the same. Evaluating the value of the activity variable and printing the results if there is a match.
|
|
Use the debugger to walk through the script for more details on how it works. |

There’s more
This simplified script makes use of 4 separate if statements to evaluate the various options. While this works, it is not the most efficient method, and in some cases can cause problems. More advanced Python scripts will use if/elif/else statements to combine these options.
Summary
Review Questions
References
