Note: use a mouse instead of a trackpad or touchscreen to limit frustration while using Afterglow.
Click “Next” above to see the step-by-step instructions.
Alternate Format: Video Instructions
- Follow along with this tutorial video
- NOTE: He clicks on the “Star” tool. We will use that first to select the sources, and then click on the “Lightbulb” tool to do the actual photometry.
Alternate Format: Written Instructions
We are going to measure how the brightness of the variable star (the RR Lyrae star) changes over time. This uses a process called photometry (measuring photons). He has a tutorial specifically about the photometry tool, if you like.
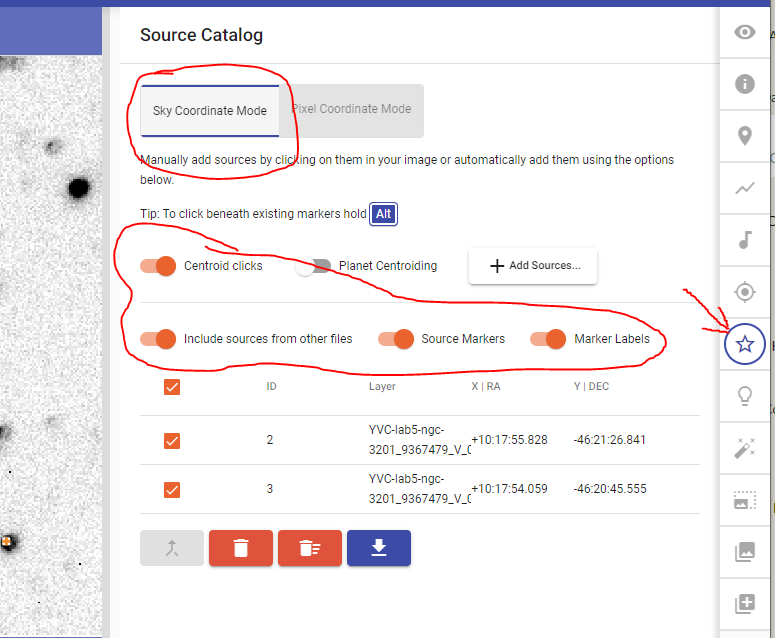
- Choose the photometry tool: the star in the middle of the right hand panel. Your markers will disappear. That’s ok.
- Turn on:
- Sky Coordinate Mode
- Centroid Clicks
- Include sources from other files
- Source Markers
- Marker Labels
- Click on your RRL star (write down what number Afterglow assigns in your assignment.)
- Click on your REF star (write down what number Afterglow assigns in your assignment.)
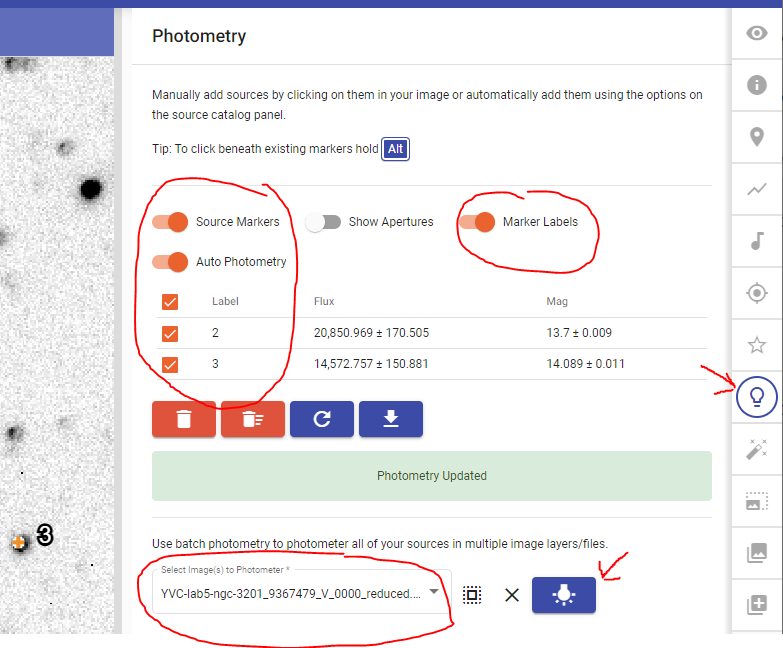
- Now click on the lightbulb tool. This is different than the video tutorial!
- Turn on:
- Auto Photometry
- Source Markers
- Marker Labels
- Select all the images of this cluster in the dropdown menu
- Select both sources using the checkboxes
- Click the lightbulb button right next to the list of images.
- Turn on:
- Download the CSV file created. This will download the .csv to your computer. Save it somewhere useful. You will not need to open it, but you will need it for the next part of the assignment.
Media Attributions
- Source catalog
- Batch photometry