12.4 OFC Operation and Techniques
Karl Fulton
Making Cuts
Before you do anything else to set up for OFC, check your environment for hazards and flammable materials. Once your working area is cleared of any hazards, set up what you will cut at least 10 feet away from your acetylene and oxygen cylinders.
Next, select the right tip size, fuel, and oxygen pressures for the material thickness you are working with based on the manufacturer’s directions for the torch that you are using. Light the torch with your friction igniter and establish a neutral flame (follow the steps from the Setting Up the System section of this chapter).
Depress the oxygen lever; you will see the cutting jet at this point, but the preheat cones should change minimally. If the flame is abnormal, you may need to shut off the torch and clean its tip.
Next, preheat your material. Use this time to get as comfortable as possible moving the torch over the area you wish to cut. The flame of the torch should hit the material in a perpendicular alignment, with the preheat cones hovering above the material. Make the space from the tip to the material about double the length of the preheat cones. Move the torch over the material slowly three or four times. Be careful not to overheat the material, as that can cause problems when cutting.
When it’s time to begin cutting, stop your torch at the edge of the material and let the edge heat to a bright orange. Just before it starts to turn yellow, depress the oxygen lever. Holding the torch 90 degrees to the metal, slowly move along the line that you wish to cut,. (If you are cutting thin material, you can angle the torch in the direction you are cutting to simulate a thicker piece of metal.)
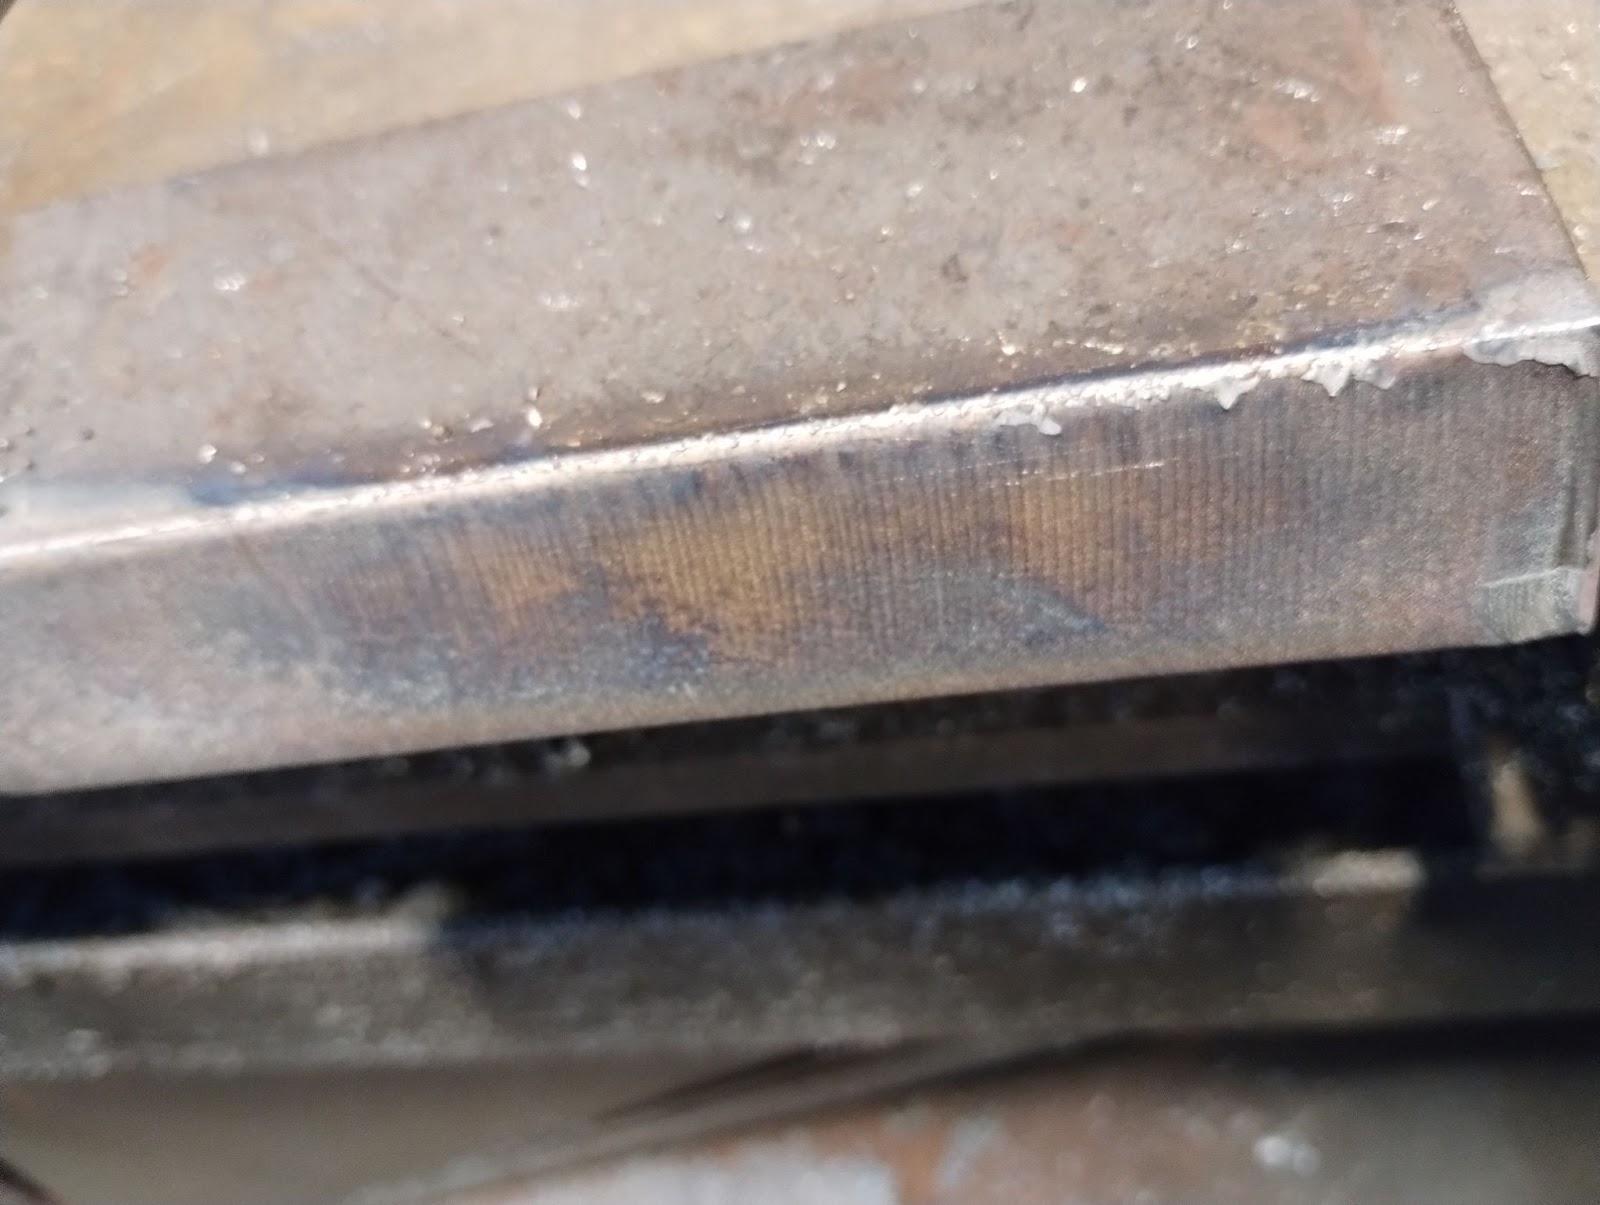
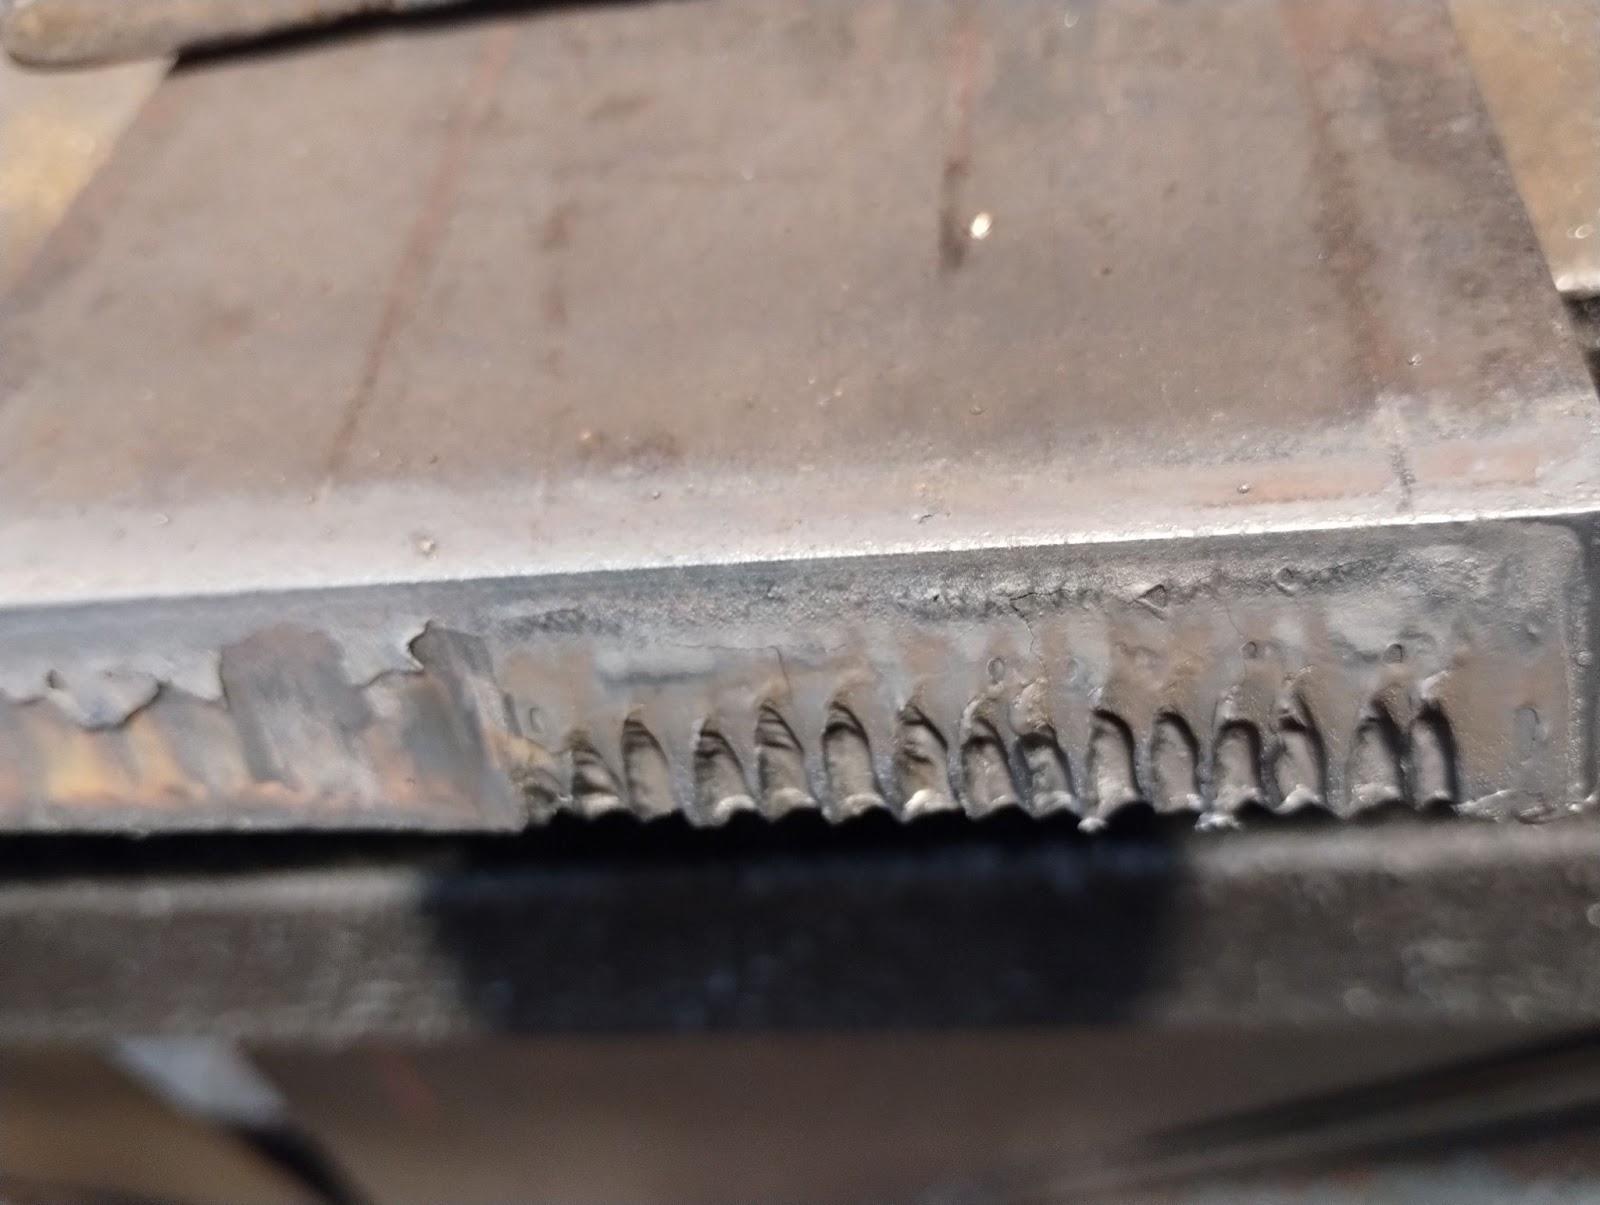
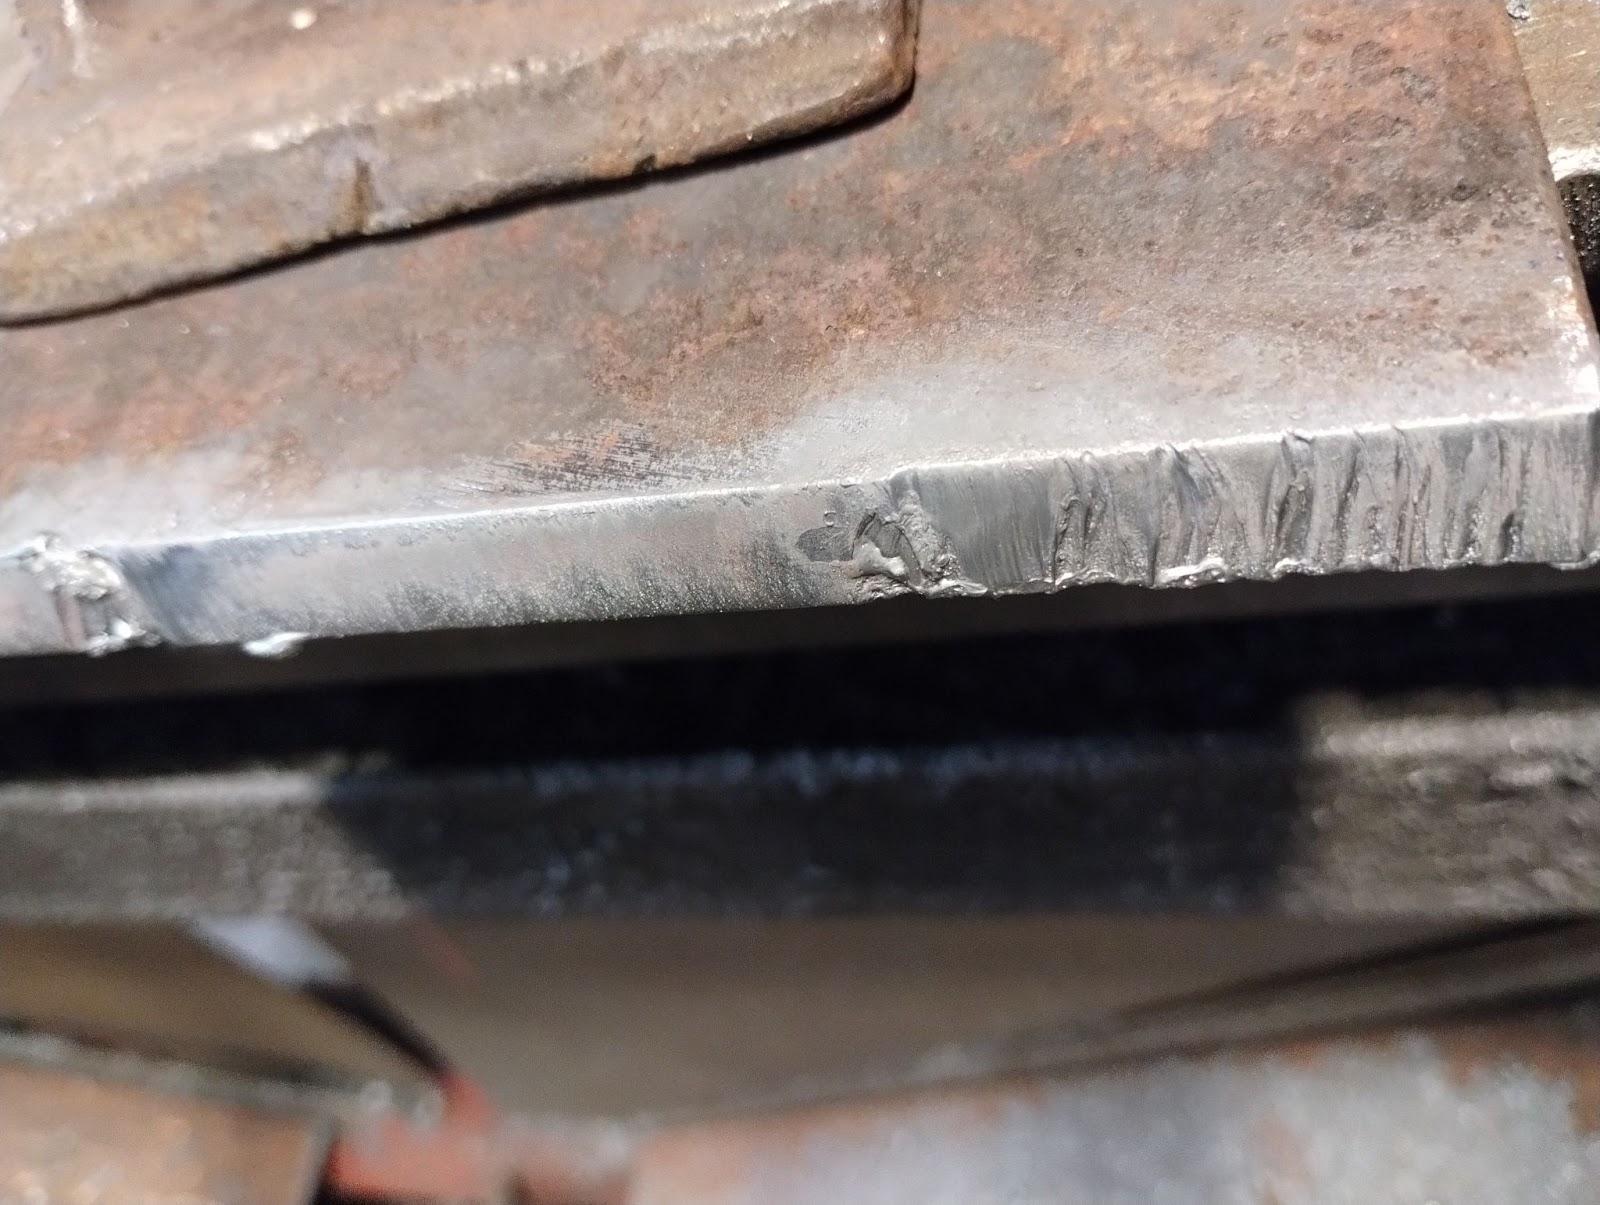
As you complete the cut your material should fall away, though this will not always happen for a variety of reasons. This is the time to inspect your material and the edge that is left behind—called the kerf. This should be fairly smooth and consistent with small ridges. Figures 12.12–12.14 show examples of a quality OFC cut and some mistakes that are commonly made.
Imperfect edges are not the only problems that can happen during OFC. Some other issues you could experience include:
- Not completely penetrating the metal. In this case, you will likely need to increase your oxygen pressure and slow down your cutting pace (travel speed).
- The material welds itself back together. A possible solution for this issue is to increase your travel speed and hold the torch slightly farther away from the material surface (a common mistake by those new to the process is to hold the torch too close to the material). This issue may also be caused by overheating the material before you try to cut it.
Cutting Techniques
You will need to practice making cuts as cleanly as you can. There are many techniques you can utilize, and you should get comfortable with as many as you can—some techniques work better in certain situations than others.
- Push the touch through your support hand very slowly.
- Pull the torch through your support hand. You have to be cautious with this technique, as at some point it will put your hand very close to the cutting tip.
- Rotate the torch in your hand to make a straight cut or to go around a piece of angle iron.
If you want to make a pierce or hole in the metal, try the following technique. Preheat the spot where you wish to make your hole, taking a little longer than you would heating the edge of the material for cutting. Once the metal is a bright orange, tilt the torch slightly away from you and depress the oxygen lever slowly (tilting the torch at first prevents dross—scum that forms on the surface of molten metal—from being shot up into the torch tip). Once you have pierced through the material, adjust the torch to 90 degrees in relation to the cutting plain and cut on the inside line of the shape you are trying to cut.
Specific Safety Considerations for OFC
The two most common hazards associated with OFC are fire hazards and burns. The cutting process creates an enormous amount of sparks that can cause fires. Make sure you are aware of your surroundings when performing this work.
The high heat presents burn risks. Always wear your PPE, which includes but is not limited to shaded goggles, welding gloves, and a welding jacket.
Maintaining the System
There is very little maintenance required for OFC. However, it’s always good to practice common sense maintenance. Make sure all parts are put away neatly when you are finished with them and inspect them before each use. Replace anything that shows signs of damage.
