CAE1002 Full Part Tutorial
Here let’s do another tutorial practice to get more familiar with creating multi-feature parts. Being able to visualize the individual features of a complex part is critical to gaining proficiency in parametric modeling software as well as successfully passing the CSWA exam. Here we will model CAE1002 based on the CAE1002 Part Drawing. CAE1002 is another part in the CAE1000 Compressed Motor Assembly that is modeled throughout this text.
Boss and Cut Extrudes
To begin, open a new part with IPS units and your preferred drafting standard. Sketch a one inch square on the Top Plane and extrude upwards to 5.660 inches.
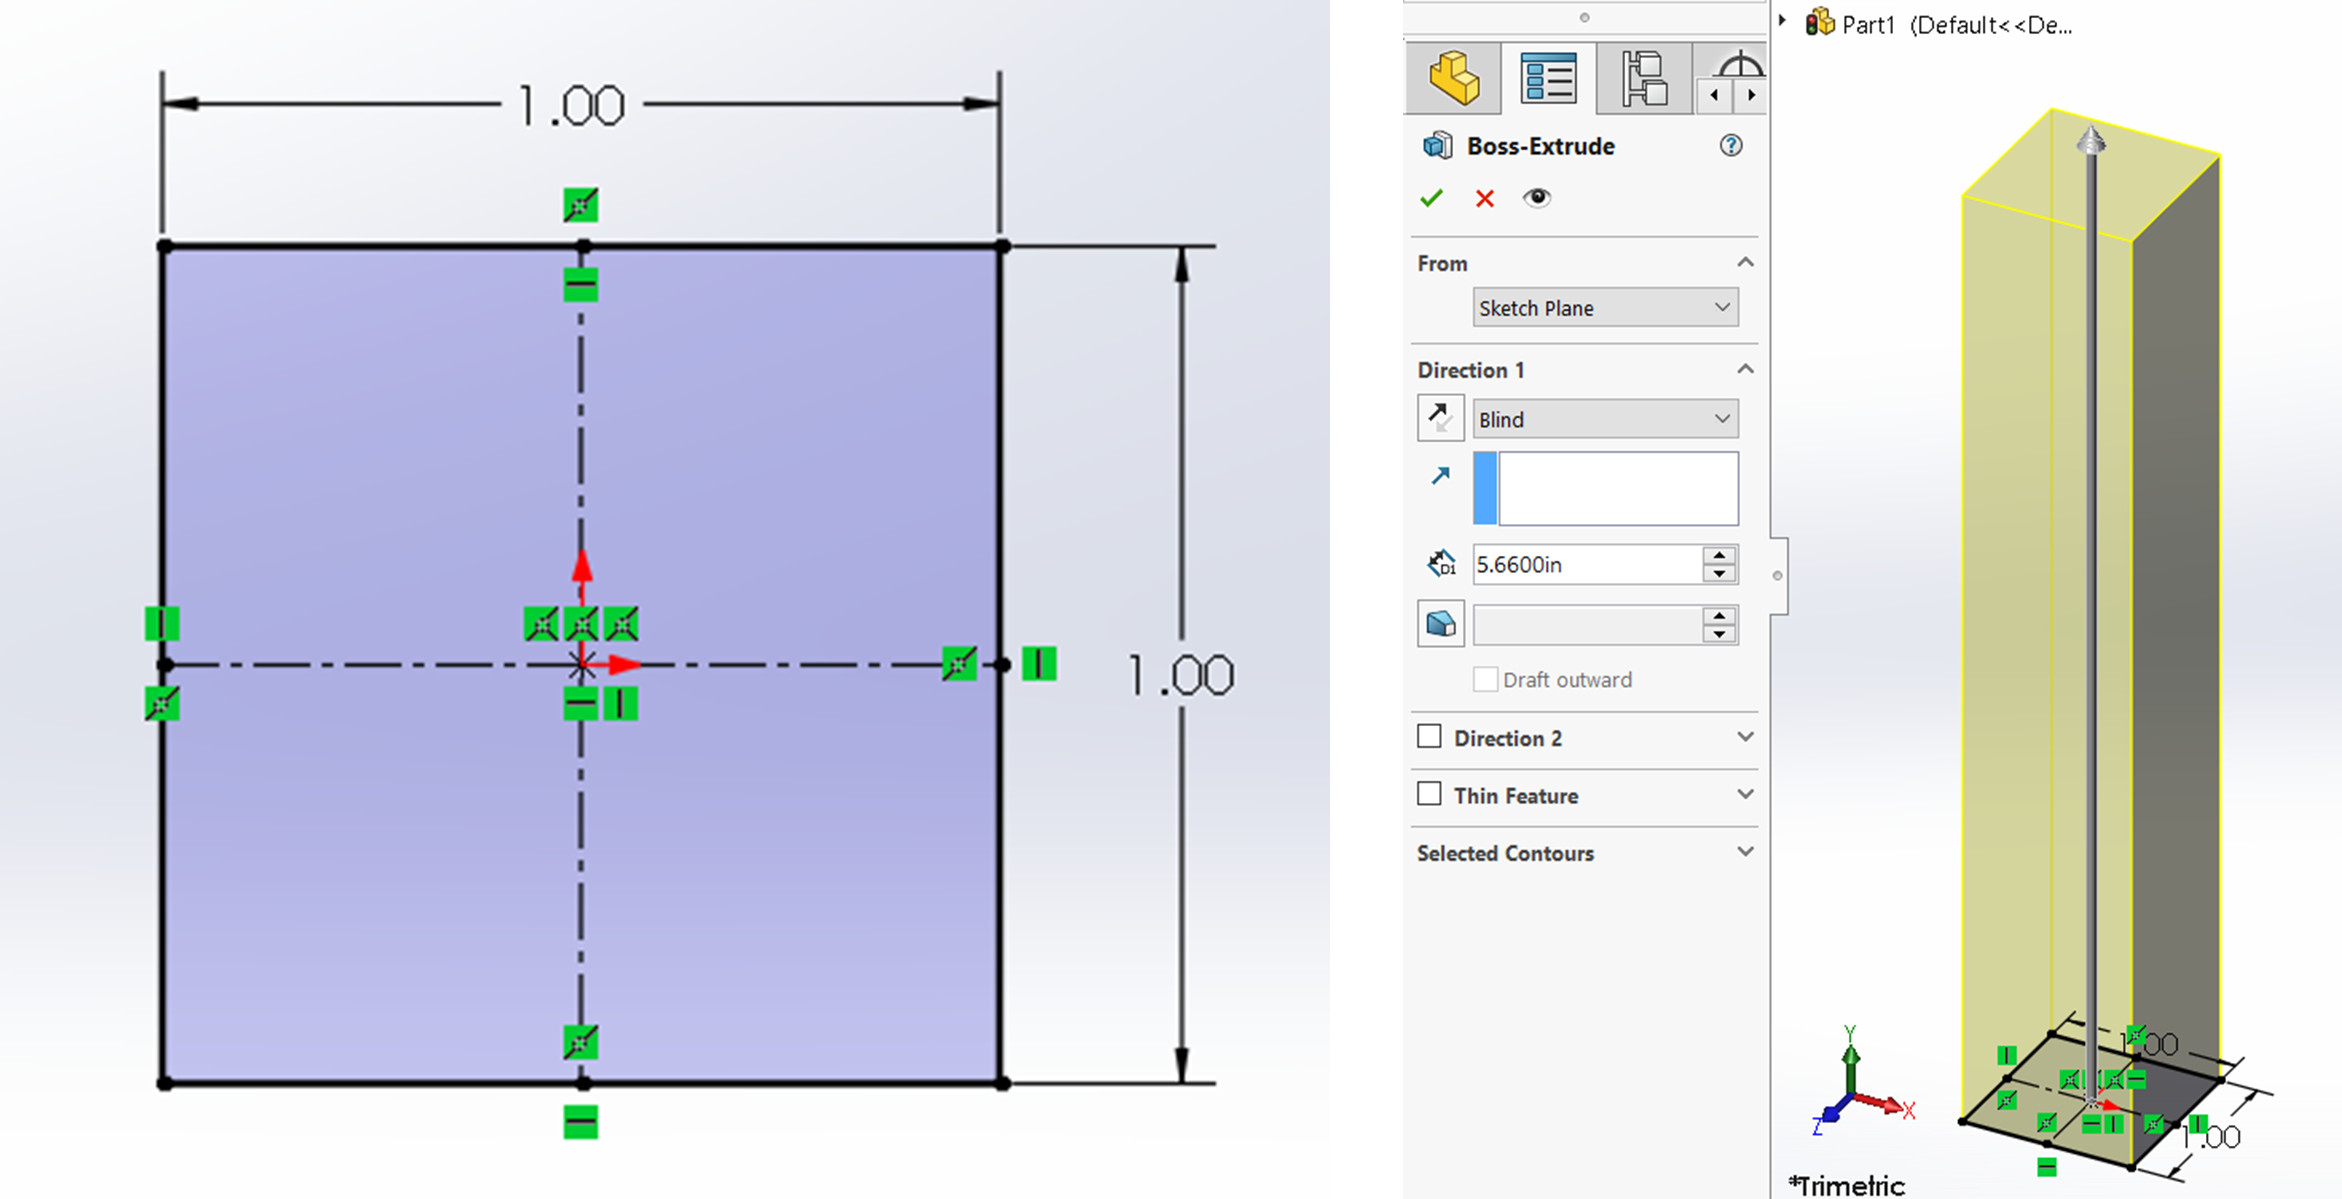
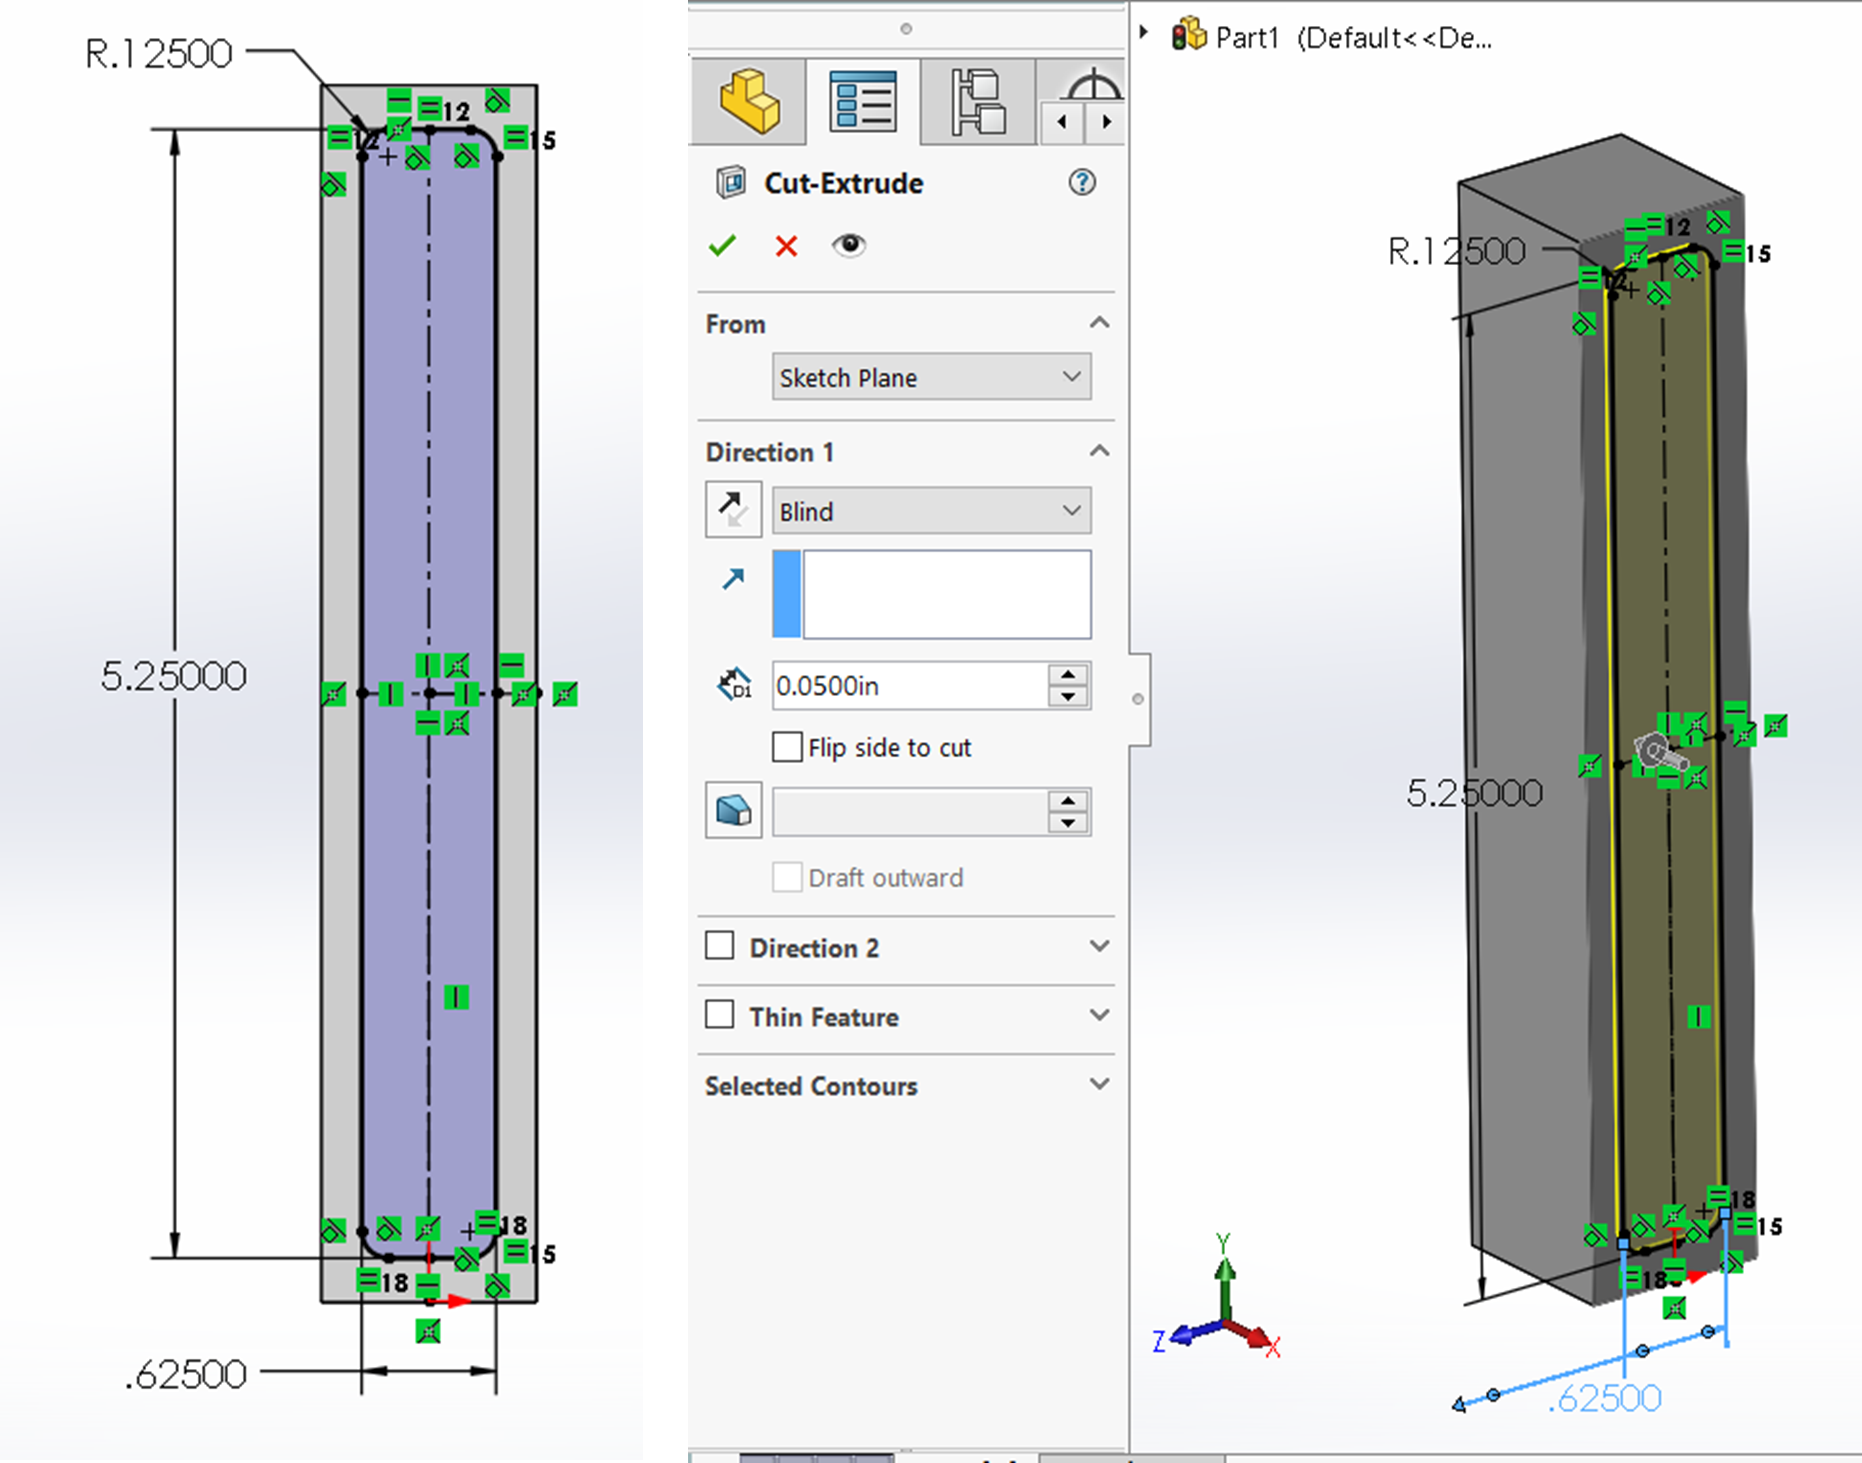
After extruding the base rectangular shape, sketch on the right face of the rectangle a 5.25 by .625 rectangle. Use center lines from the midpoints of the rectangular face to center the rectangle using vertical and horizontal relations. Add .125 inch sketch fillets to the corner of the rectangle sketch and cut extrude to a depth of .050 inches.
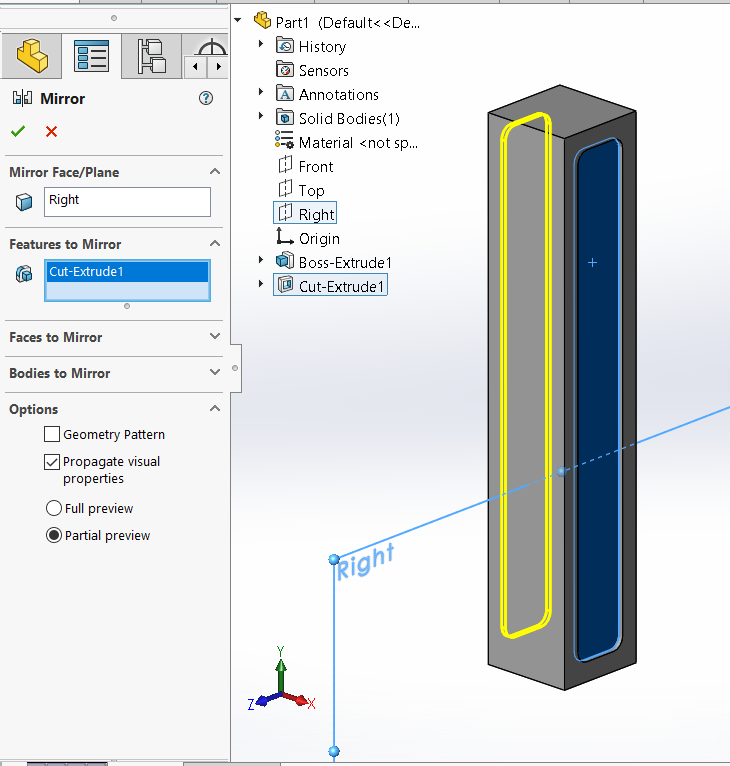
Once the cut extrude is done, mirror it to the left side of the part using the Right Plane as the mirror plane. If using the front plane isn’t working properly for you, you probably created the feature on the wrong face and should either edit the sketch plane of the original sketch or just use the Front Plane for your mirror plane.
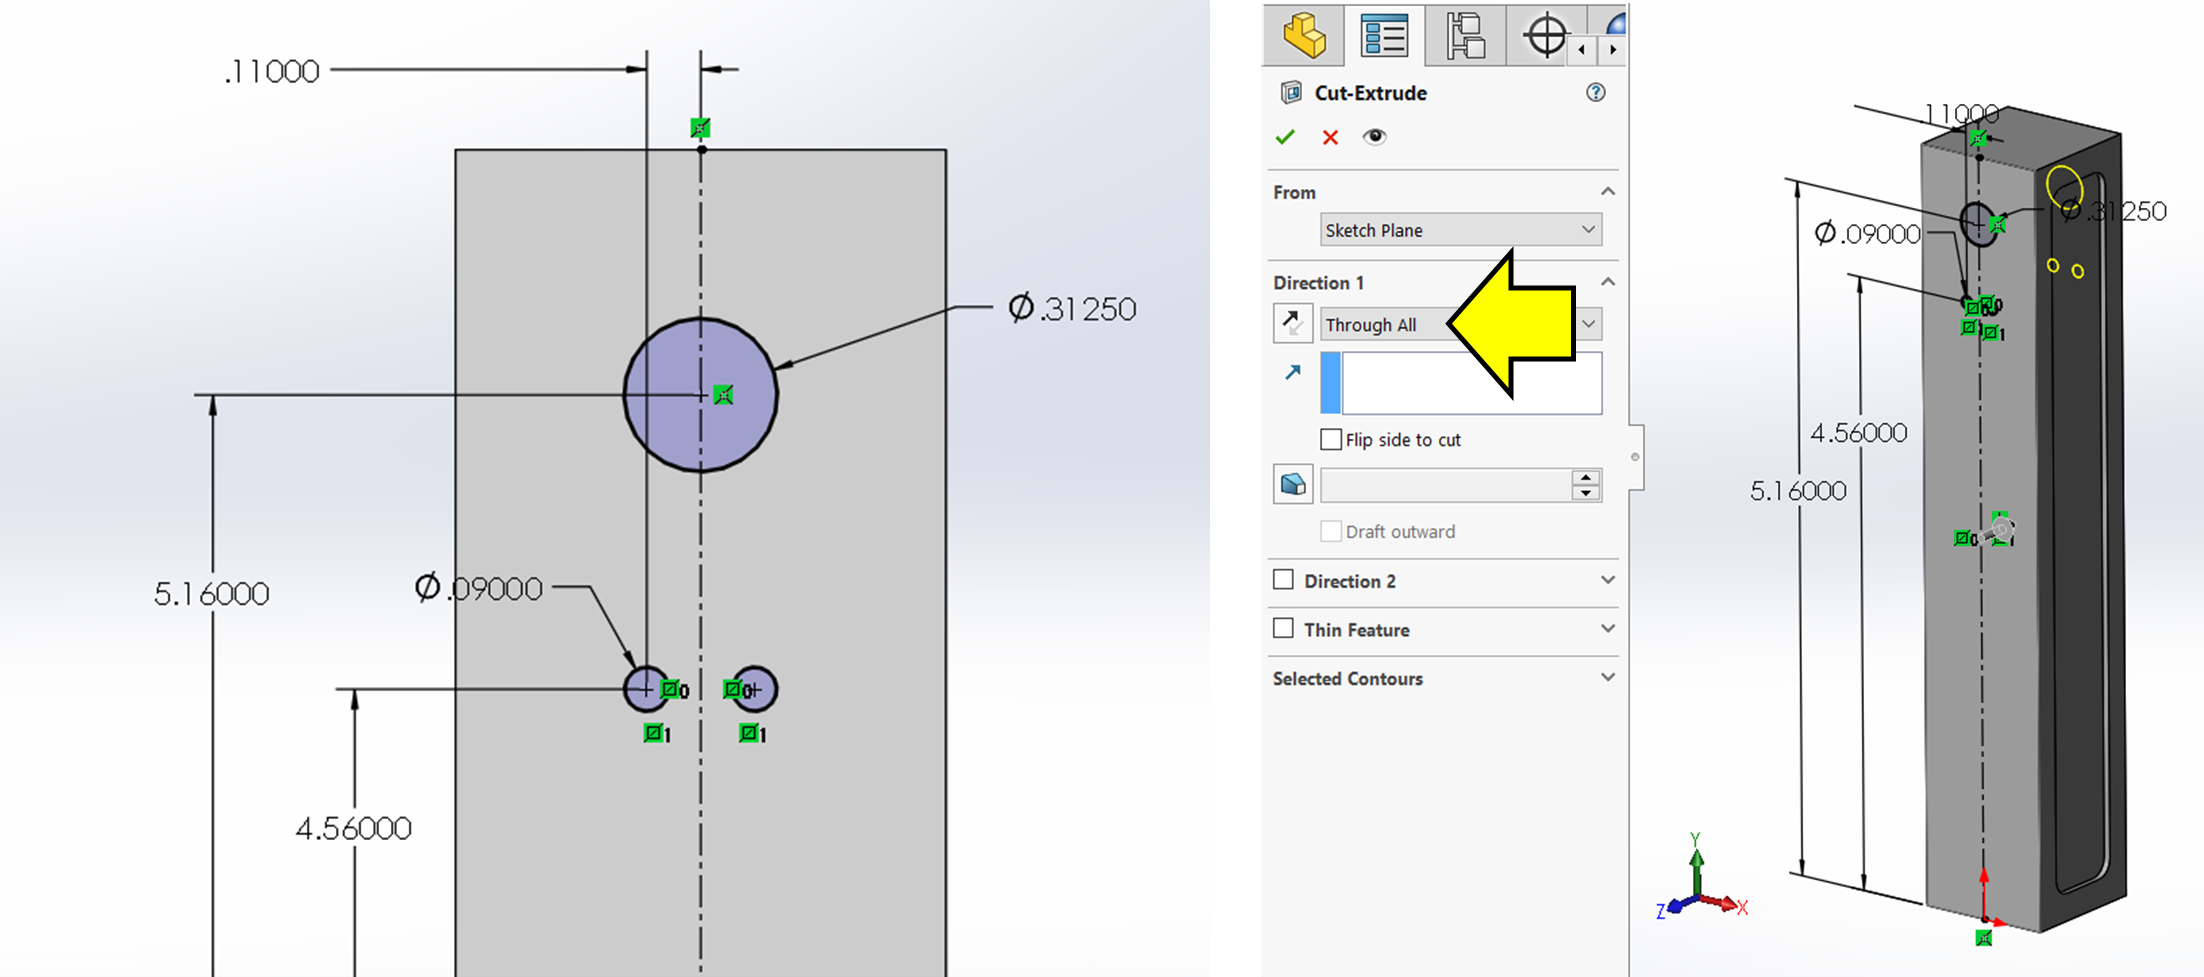
Now start a sketch on the front face of the part, sketch the .3125 inch circle and the two .090 inch circles. Use a center line through the front face vertically to help you place and constrain the holes. It is recommended that you use a symmetric or mirror with the .090″ holes.
Hole Wizard Holes
For this part, there are many hole wizard features and therefore will add many separate hole wizard features because all the standard holes here vary in type and size.
To begin, activate the hole wizard tool and choose a .5000 (1/2) fractional size simple hole that has a through all end condition and a .564 far side countersink. There is also a tolerance on the drawing for this hole that you can add at the bottom of the property manager if you would like.
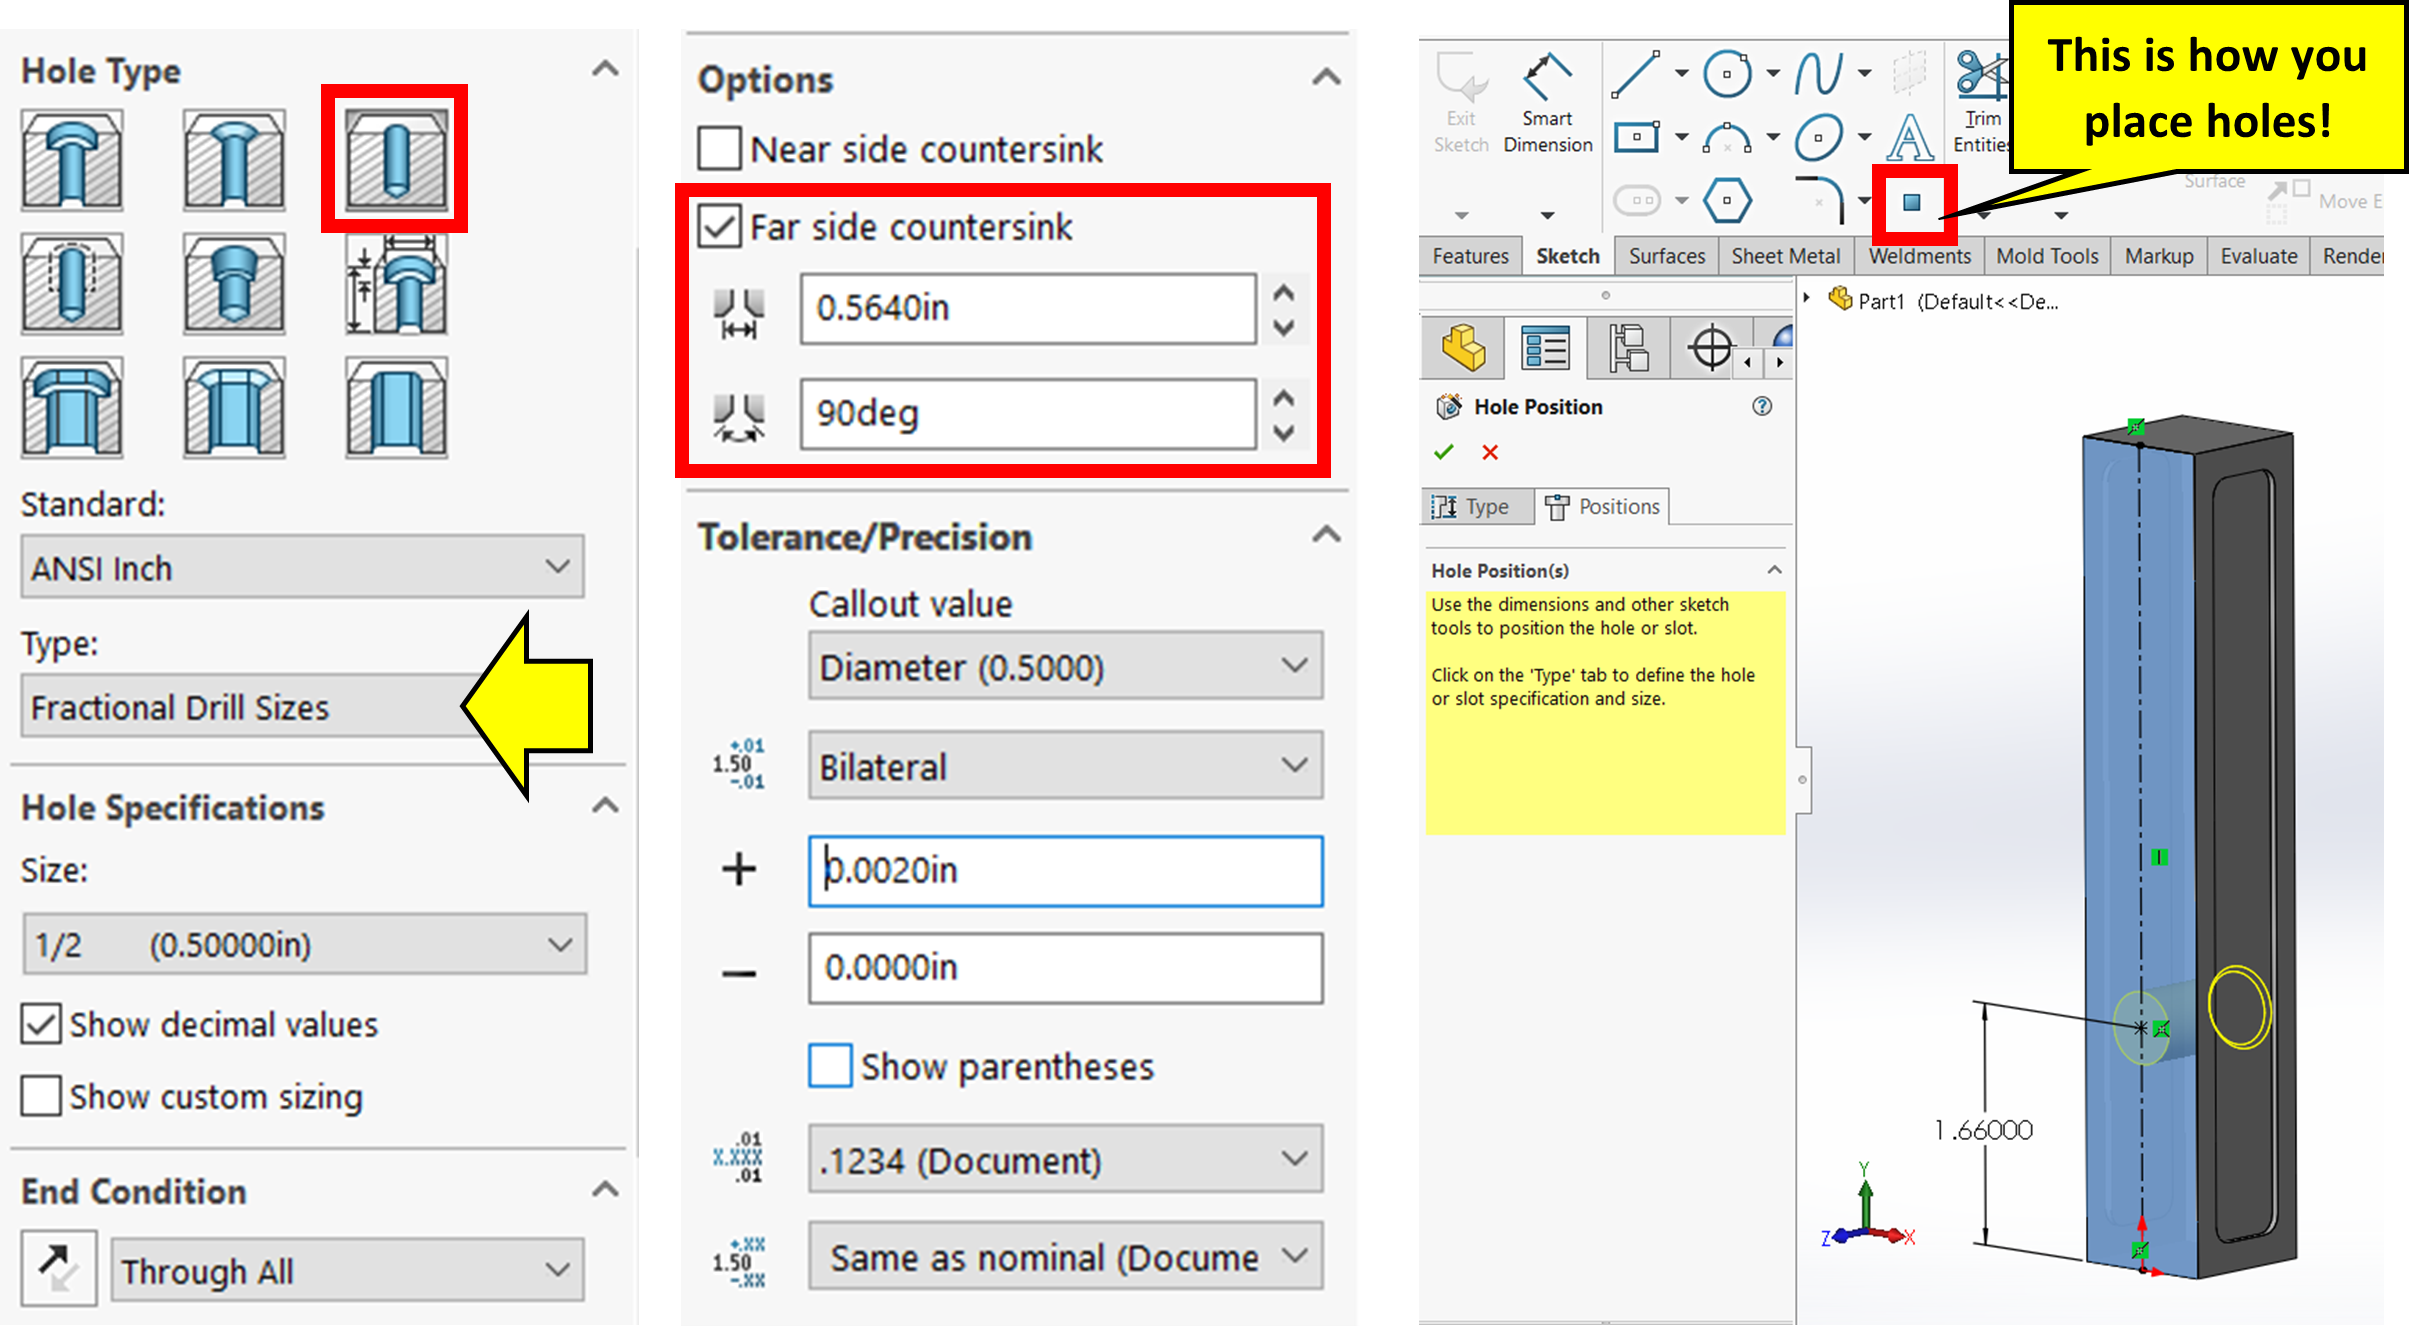
Switch to the Positions Tab, select the front face of the rectangular part, but before placing the hole, activate the centerline sketch tool, draw a centerline through the middle of the front face, then activate the point command to place the hole on the center line. Dimension the hole from the bottom edge of the part to the center of the hole at 1.660 inches. Confirm the hole wizard.
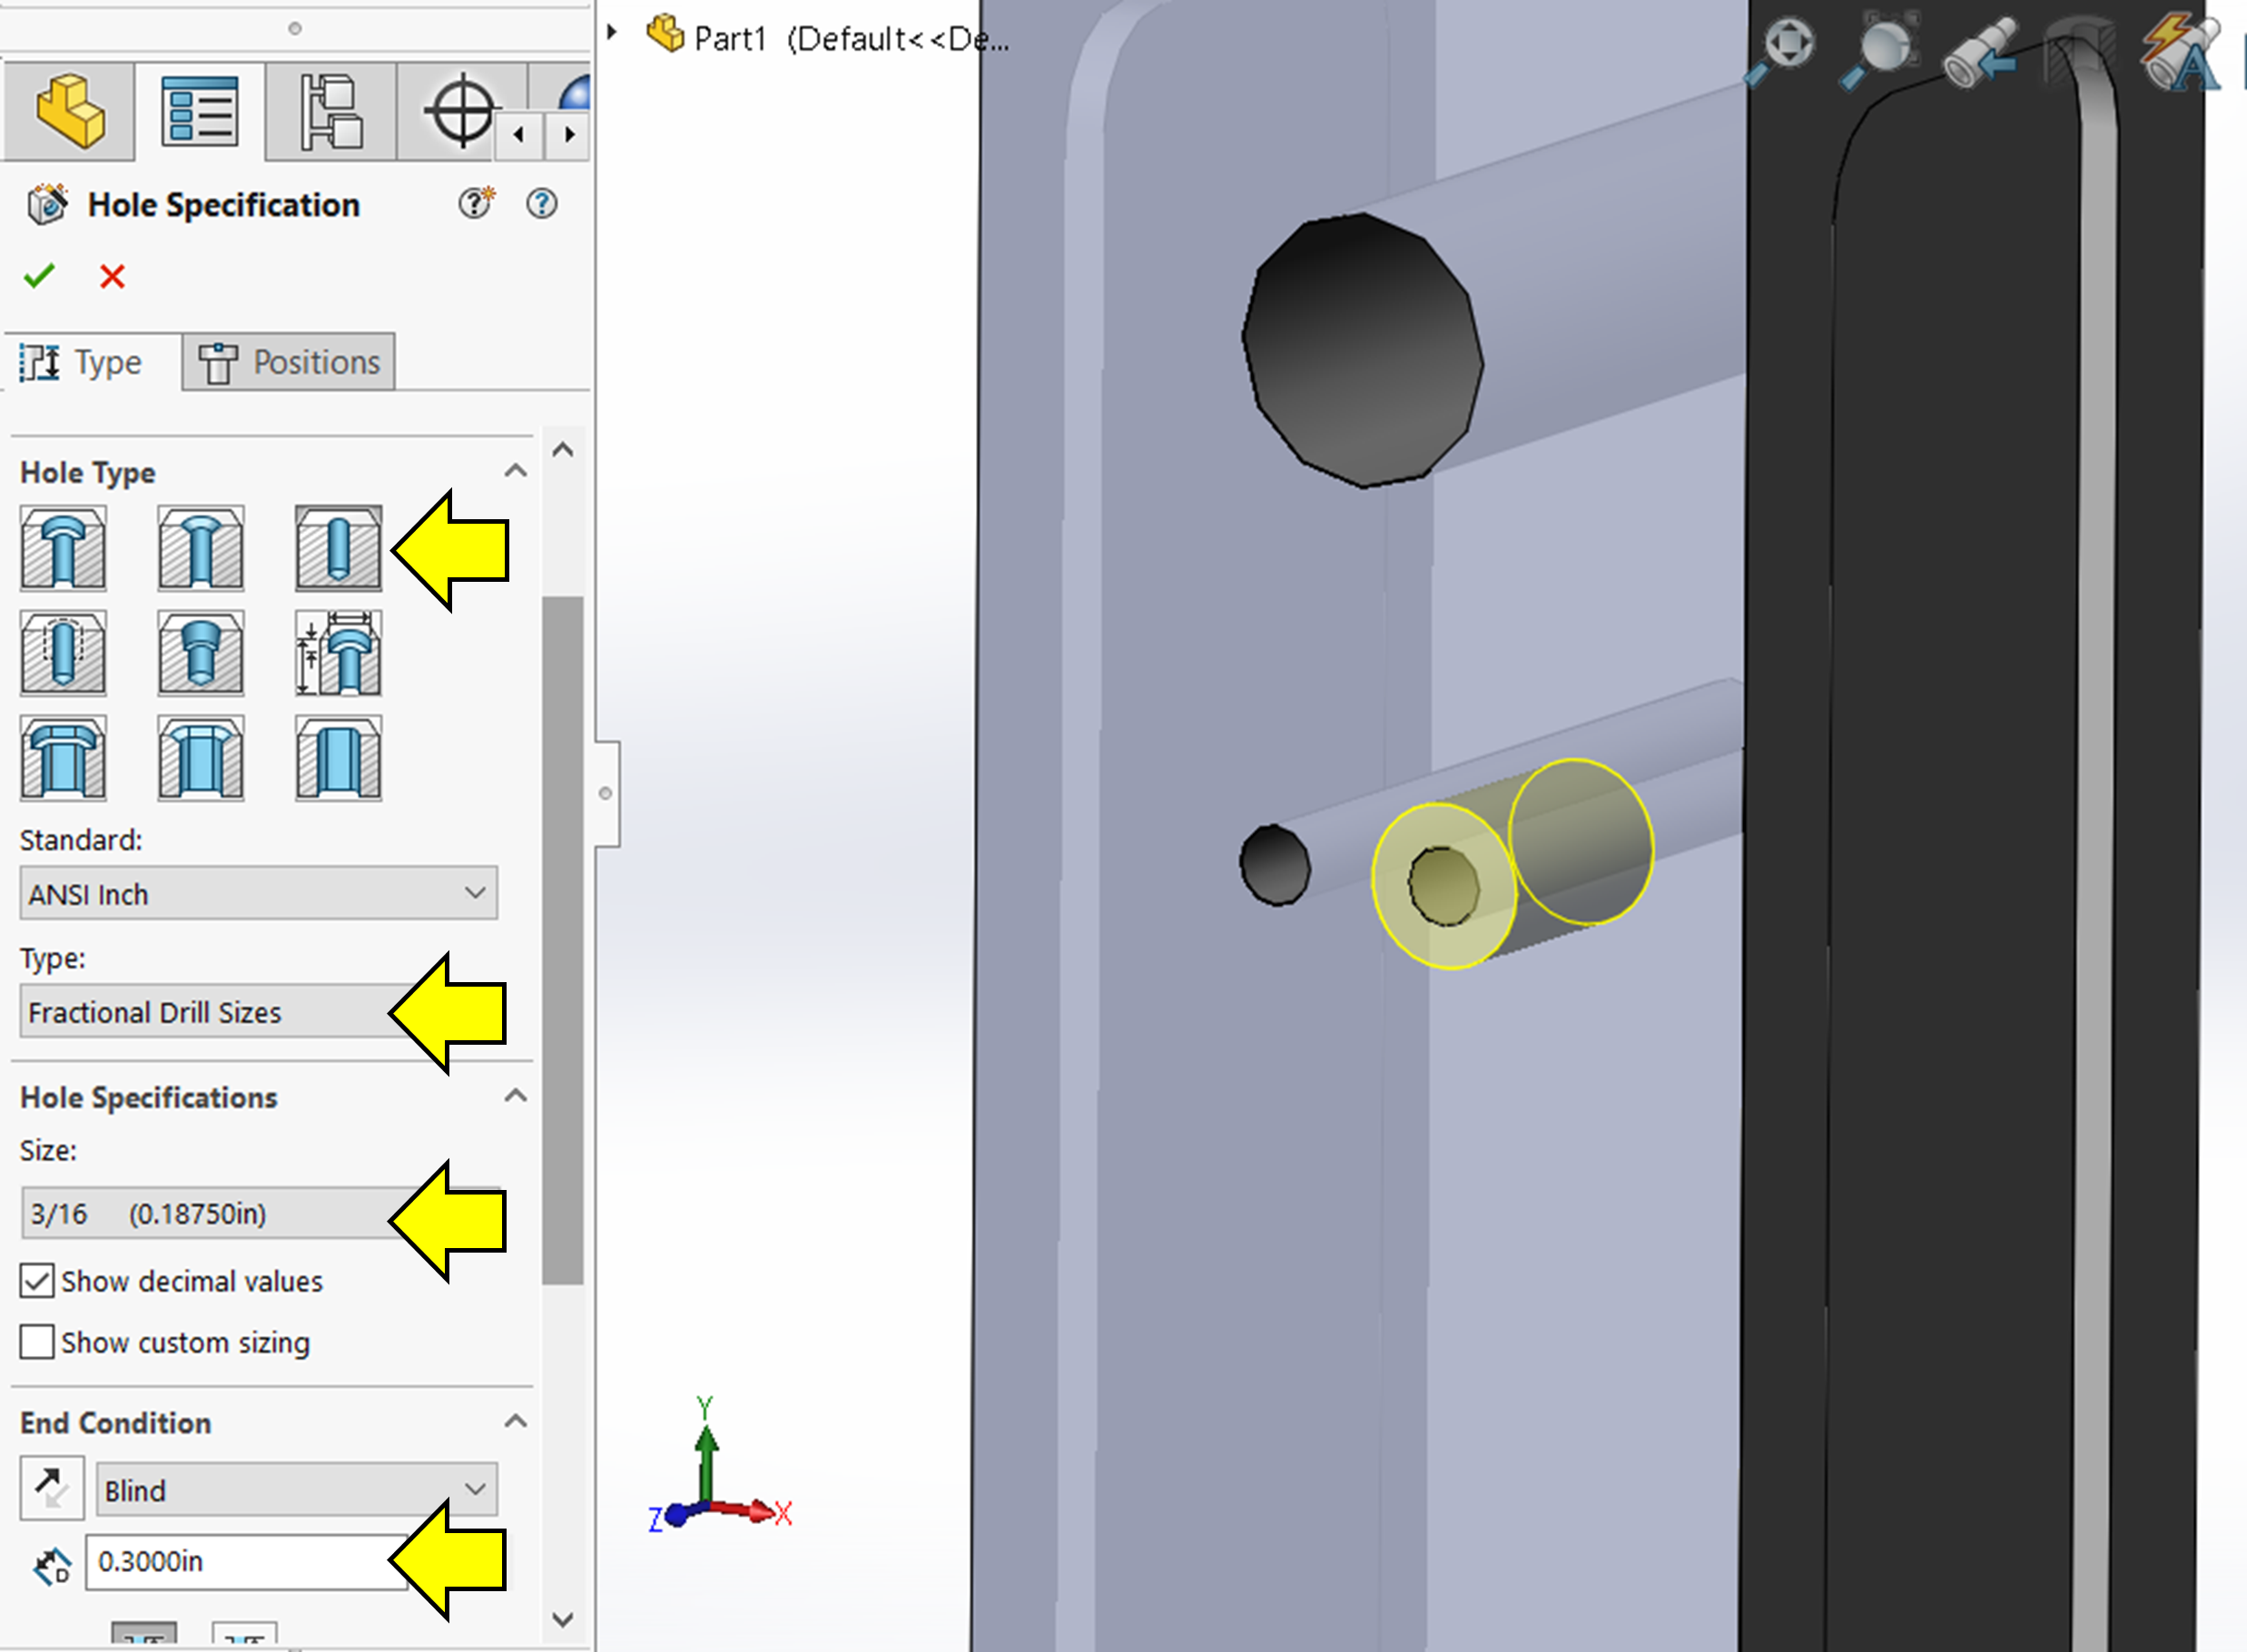
Start another hole wizard feature for the 0.1875 (3/16) fractional drill size simple hole that has a blind end condition of .300 inches deep. To place the hole directly on top of the .090 inch hole, switch to the positions tab, select the front face, hover near the perimeter of the .090 hole to snap to its center.
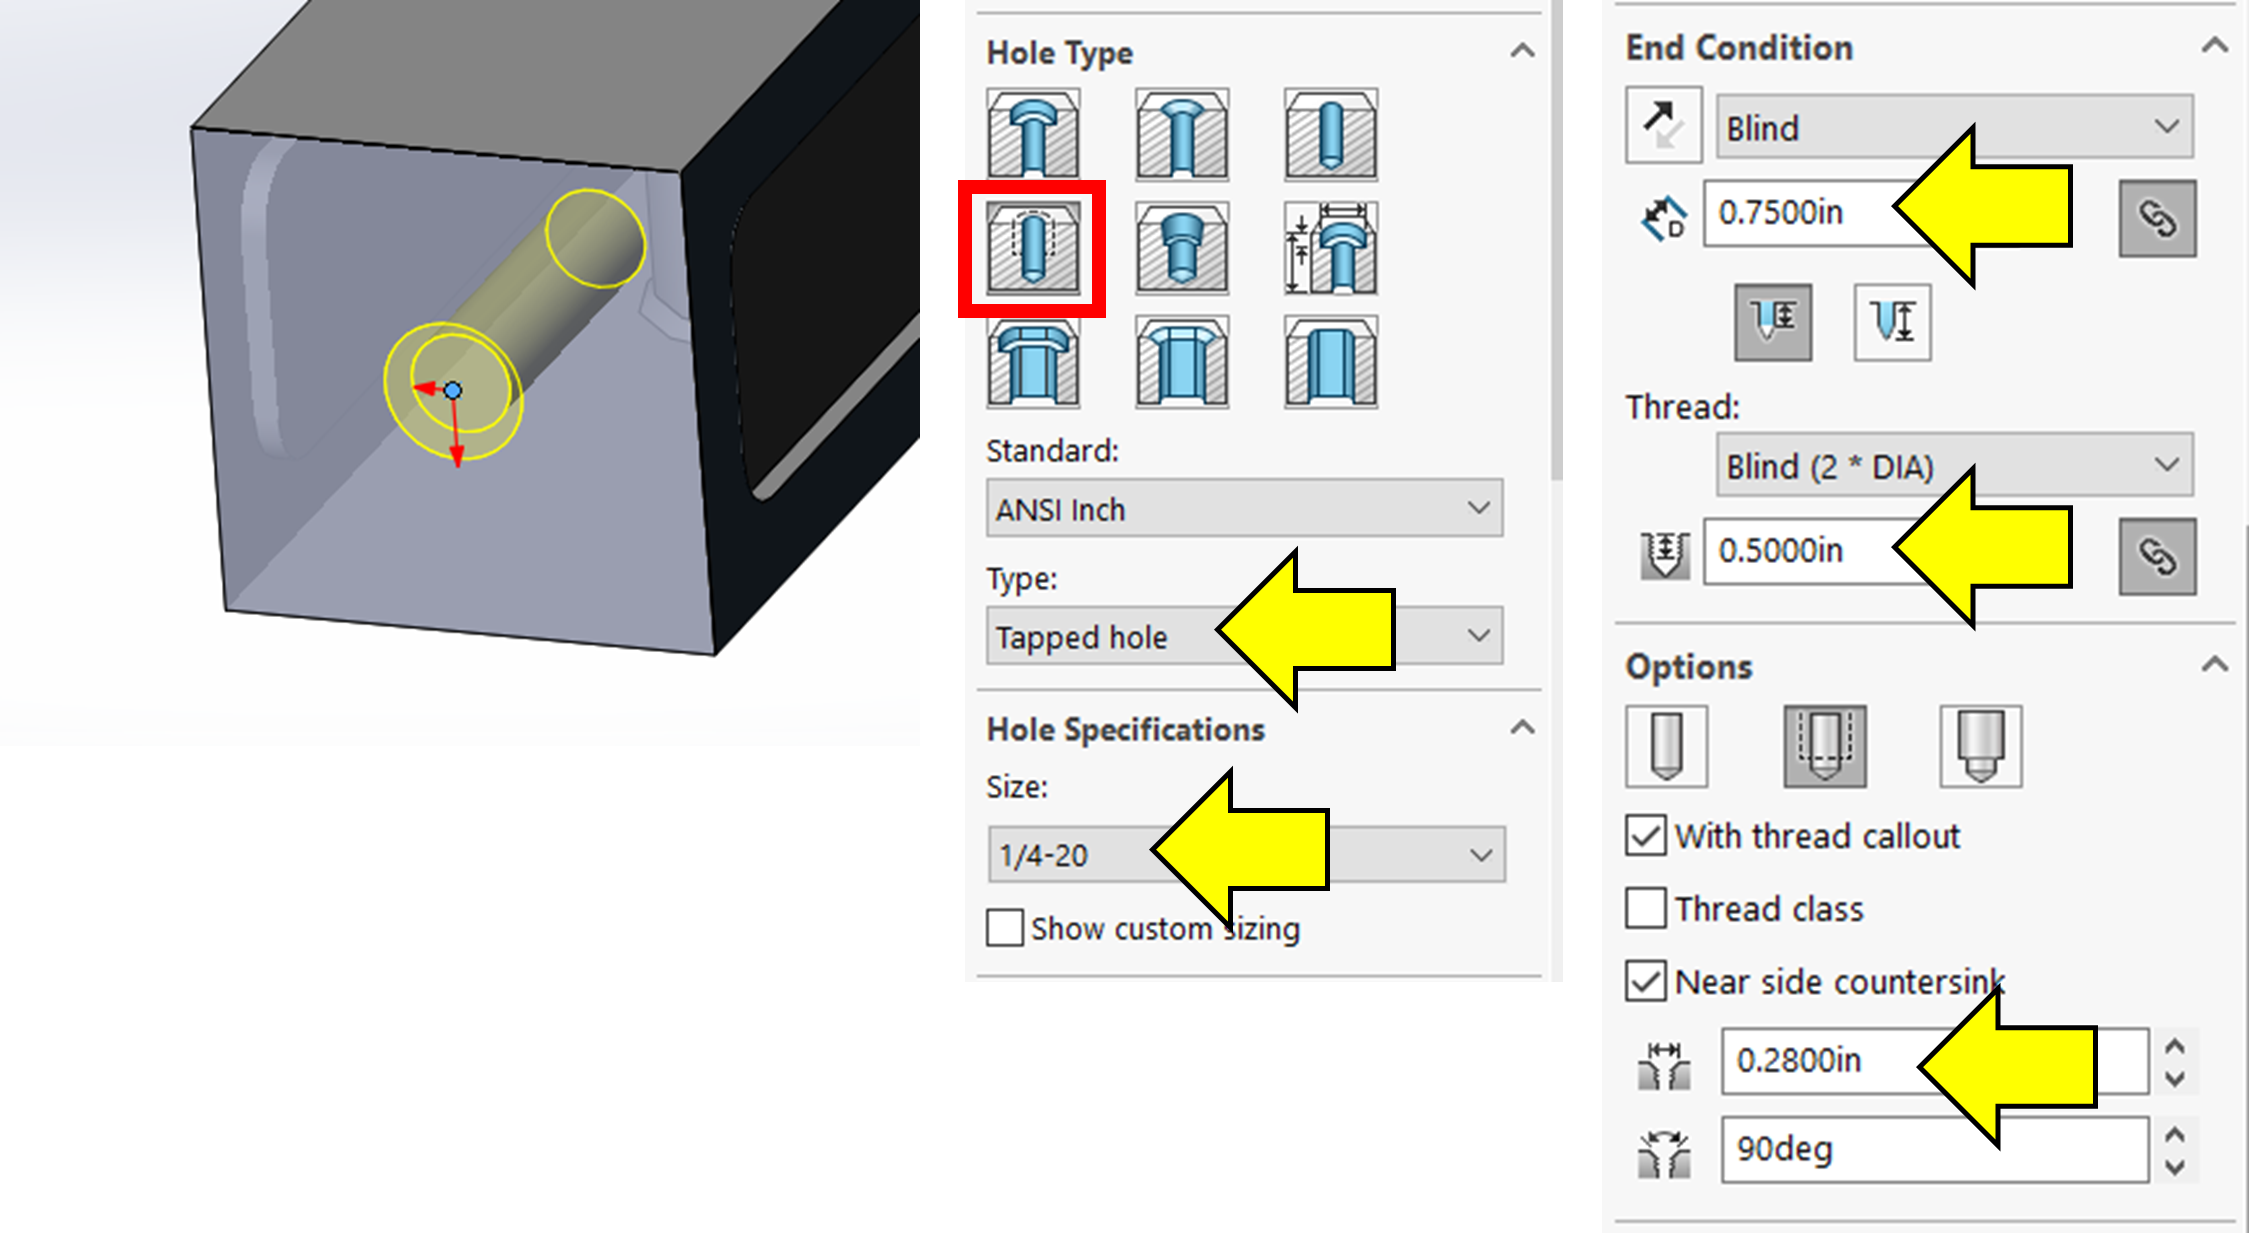
Start another hole wizard feature for the bottom 1/4-20 tapped hole that has a blind end condition of .500 for the threads and .7500 for the pilot hole. The tapped hole also has a near side countersink of .280 inches at 90 degrees. Place the hole using the positions tab on the bottom face directly in the middle of the face. The origin should appear when you select the face to help you place the hole in the middle.
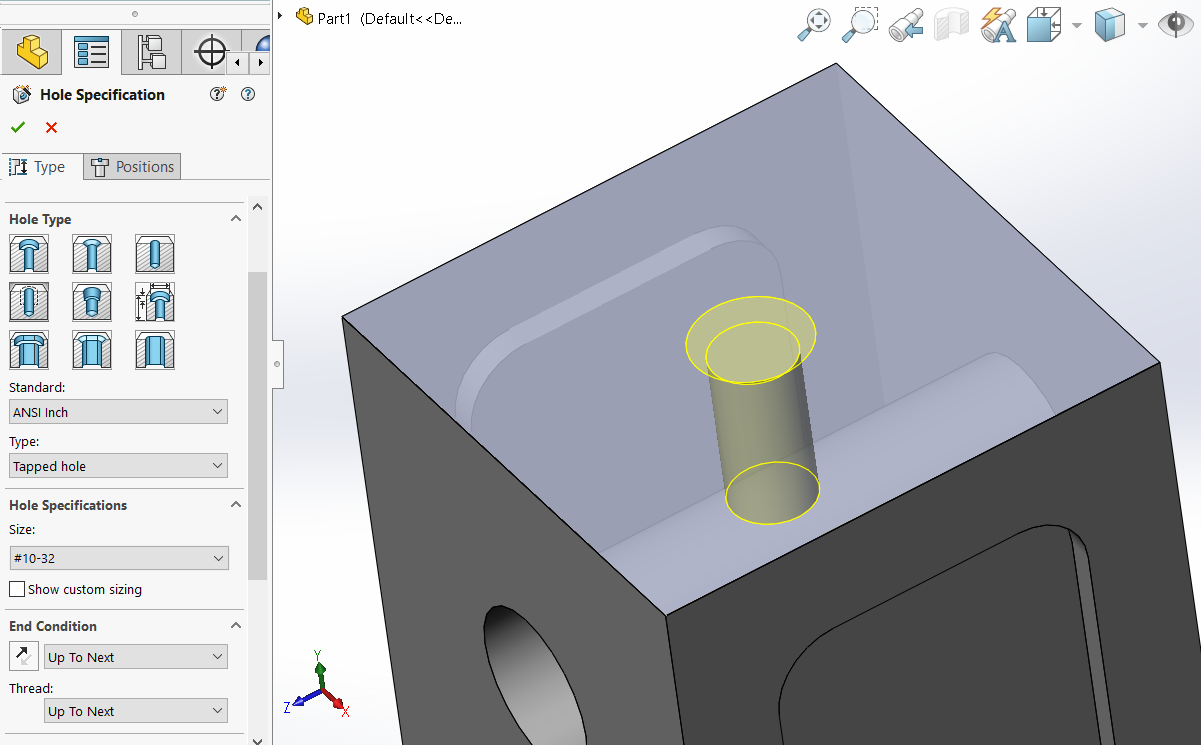
Finally, using the same method as with the previous 1/4-20 tapped hole, place a 10-32 tapped hole that goes up to the .3125 hole (use Up to Next) for both the pilot hole and threads. Also, make sure the tapped hole has a .220 inch nearside countersink at 90 degrees.
Now all that is left to do is specify the material as Plain Carbon Steel and save the part as CAE1002.
CAE1002 Part Tutorial
If you struggled to follow along with the written instruction for this tutorial, follow along with the video tutorial below to complete your model. Also, begin to start practicing trying to figure out how to do a feature before it is instructed because eventually, you will be determining the method of modeling features in a mechanical design.

