Revolved Features
Revolved features are used to primarily create cylindrical parts (though this doesn’t mean they can’t be used for other unique situations). Revolved features take the cross section of a cylindrical feature and then revolves it by a number of degrees (90, 180, 360, etc. See Figure 5.1).

The revolved part is generated from a sketch of the half section for the part (imagine a half section on a technical drawing). The sketch of revolved feature controls the cross-section of the feature and the revolved feature itself controls the axis of the revolution as well as how many degrees the profile is revolved.
To create a revolve feature, you first need to create the profile sketch. What the sketch needs to include depends on the scenario but one thing every revolve profile sketch needs is a centerline. The centerline is to tell the revolved feature where to revolve about (the axis of revolution). This should come as no surprise due to the fact that most all cylindrical parts have a central axis. It is good practice that the centerline for a revolved sketch be the very first thing you draw so that you can base the rest of that sketch off the centerline.
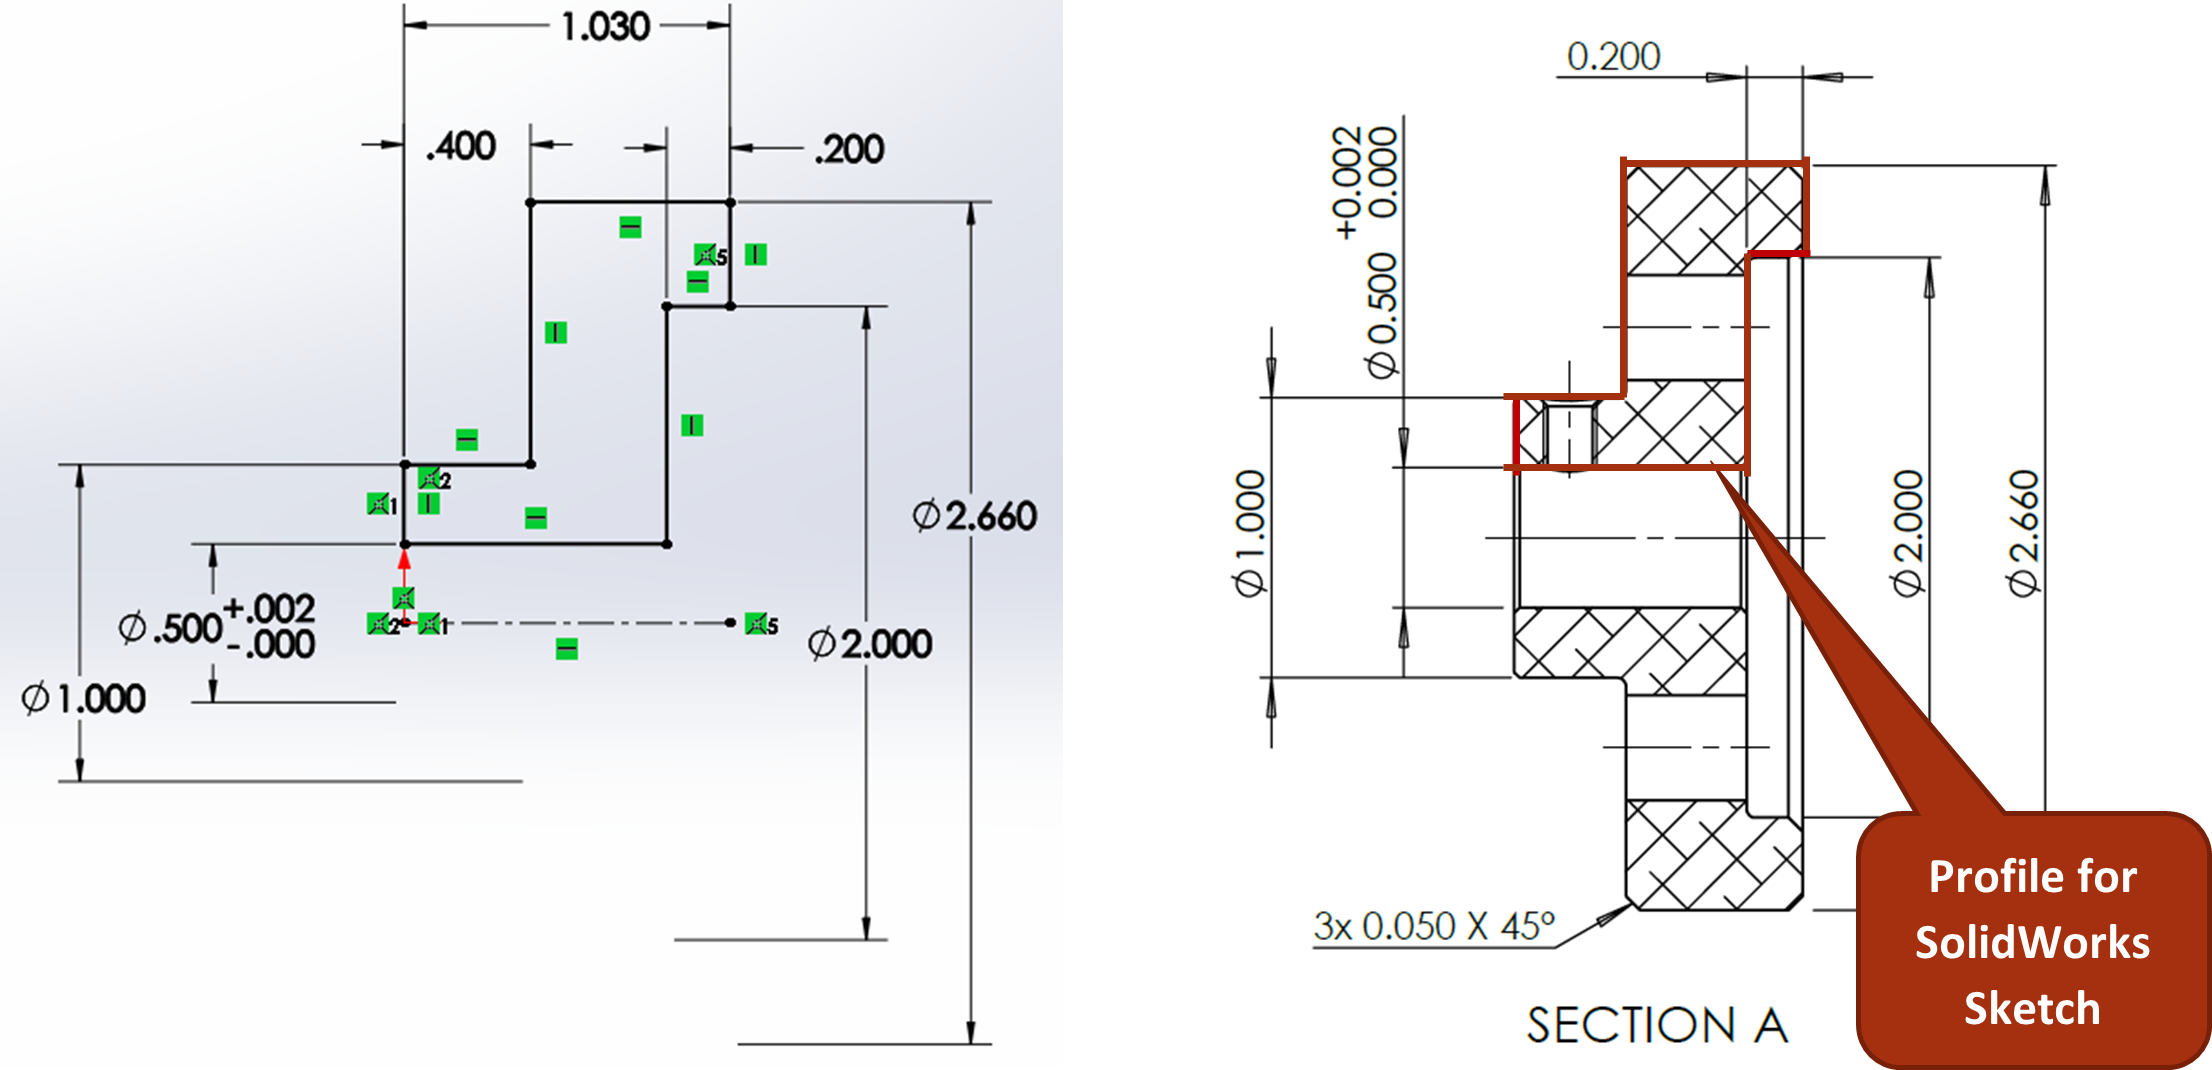
Because revolved features are used primarily for cylindrical parts that require lots of diameter dimensions to be specified, you can specify dimensions for diameters in the revolve profile sketch even though a circular feature doesn’t exist yet. See the left image of Figure 5.2 how the diameter dimensions reference horizontal lines and the centerline to dimensions implied diameters. The diameter symbol is automatically displayed and everything!

To specify diameter dimensions for revolved sketch profiles, select the horizontal line that will create the diameter when the revolve is done as well as the centerline being used for the axis of revolution. The dimension will show as a radius until you move your cursor below the centerline. After specifying your first diameter dimension, selecting other horizontal lines defaults to a diameter dimension. Eventually you finish specifying diameters and want to specify something else, so to end the automatic diameter dimension set, hit ESC from the keyboard or exit the command.

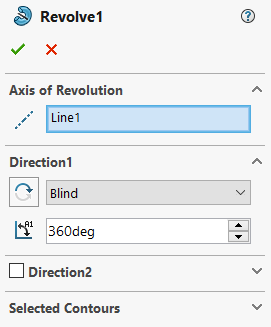
Once you have your sketch with the revolve profile and the centerline that will be used as the axis for the revolve, you can complete your revolve feature by activating Revolved Boss/Base from the Features tab of the CommandManager and using the property manager to specify your revolve settings (Figure 5.3).
Exercise 5.1 Exploring the Revolve Feature
Here let’s explore some of the components of a revolve sketch and the feature settings available for a revolved feature. Here we will first explore the Revolved Boss/Base tool and then also see how the Revolved Cut tool works along with the sketches involved.
- Start a new sketch on the right plane. Sketch a centerline and a profile above the centerline.
- Activate the Revolved Boss/Base Command, exploring the different options available.
- Then, Create a new sketch also on the Right Plane of a simple circle on one of the edges of your revolved boss.
- Finally, use revolved cut to cut the groove into the revolved boss using the existing axis.
A feature that is extruded by from the sketch profile around a selected axis of rotation.

