Modification Sketch Tools
The modification sketch tools are great tools for making sketching more streamlined and efficient. Everything that these tools do can be done in other ways but using these tools can be so much faster. Most these tools look familiar if you have ever been in a CAD software before such as AutoCAD. You won’t be surprised to find that the function of these tools in SolidWorks is very similar to that in other programs. One tool that probably doesn’t look familiar is Convert Entities. We will cover this tool in the simple extrudes part.

Trim Entities
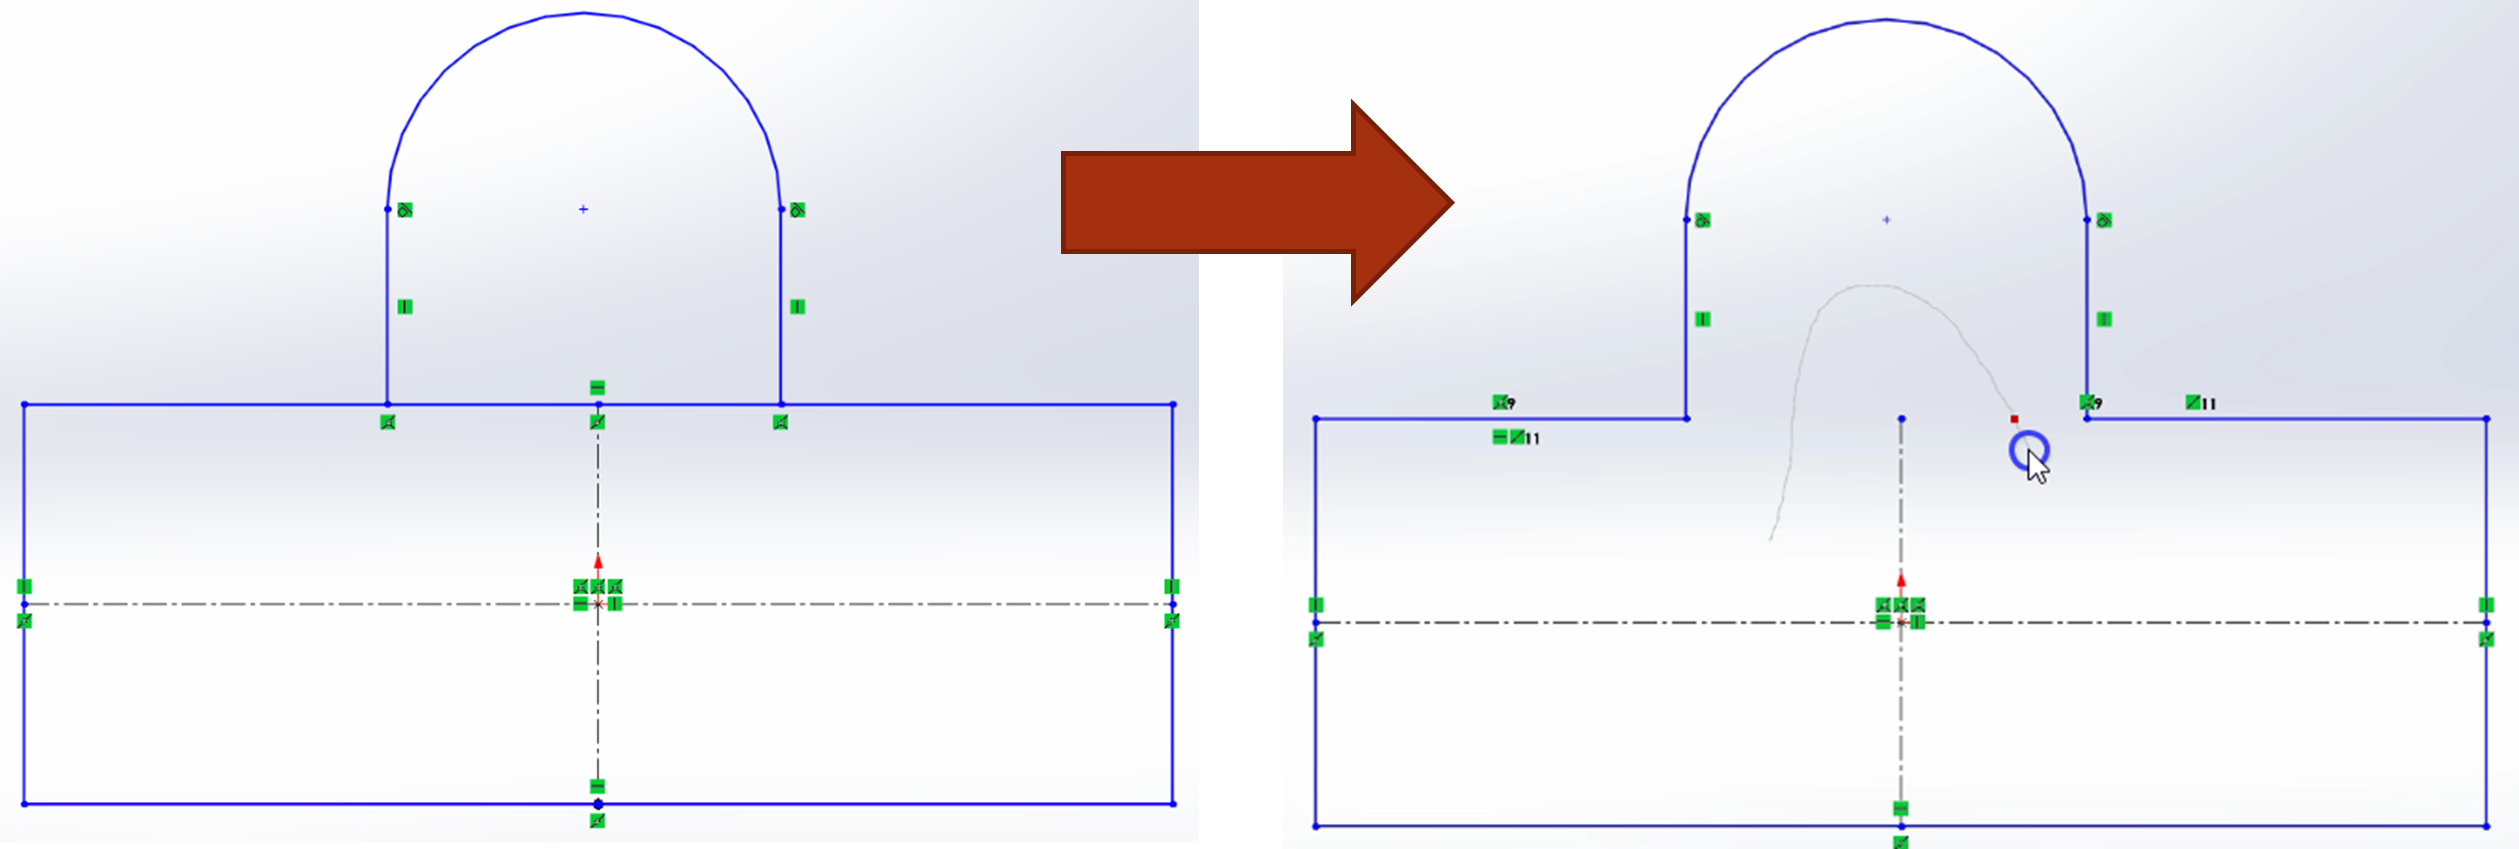
Trim entities is used to erase sketch elements that are between another element. A great example is the sketch shown below. You can use a rectangle and a line to create a T-shape such as is shown, but what you don’t usually want is the line that separates the rectangle from the rest of the sketch. Power Trim, the most common use of Trim Entities, can be used by left click dragging your mouse cursor through the lines you wish to remove (Figure 2.21). In using power trim, you should make sure not to drag your mouse cursor through entities you DON’T want to remove. Trim Entities also has an Extend Entities option in its drop down menu.
Exercise 2.7: Trim Entities Practice
Practice using the trim command in various geometric circumstances. There is a single tutorial below but feel encouraged to sketch more scenarios in which you can practice trim. Don’t worry about breaking SolidWorks; you can always discard the sketch and ask your instructor about it later.
- Sketch the geometry above on a default plane.
- Activate the trim tool and power trim through the shown line segments.
Offset Entities
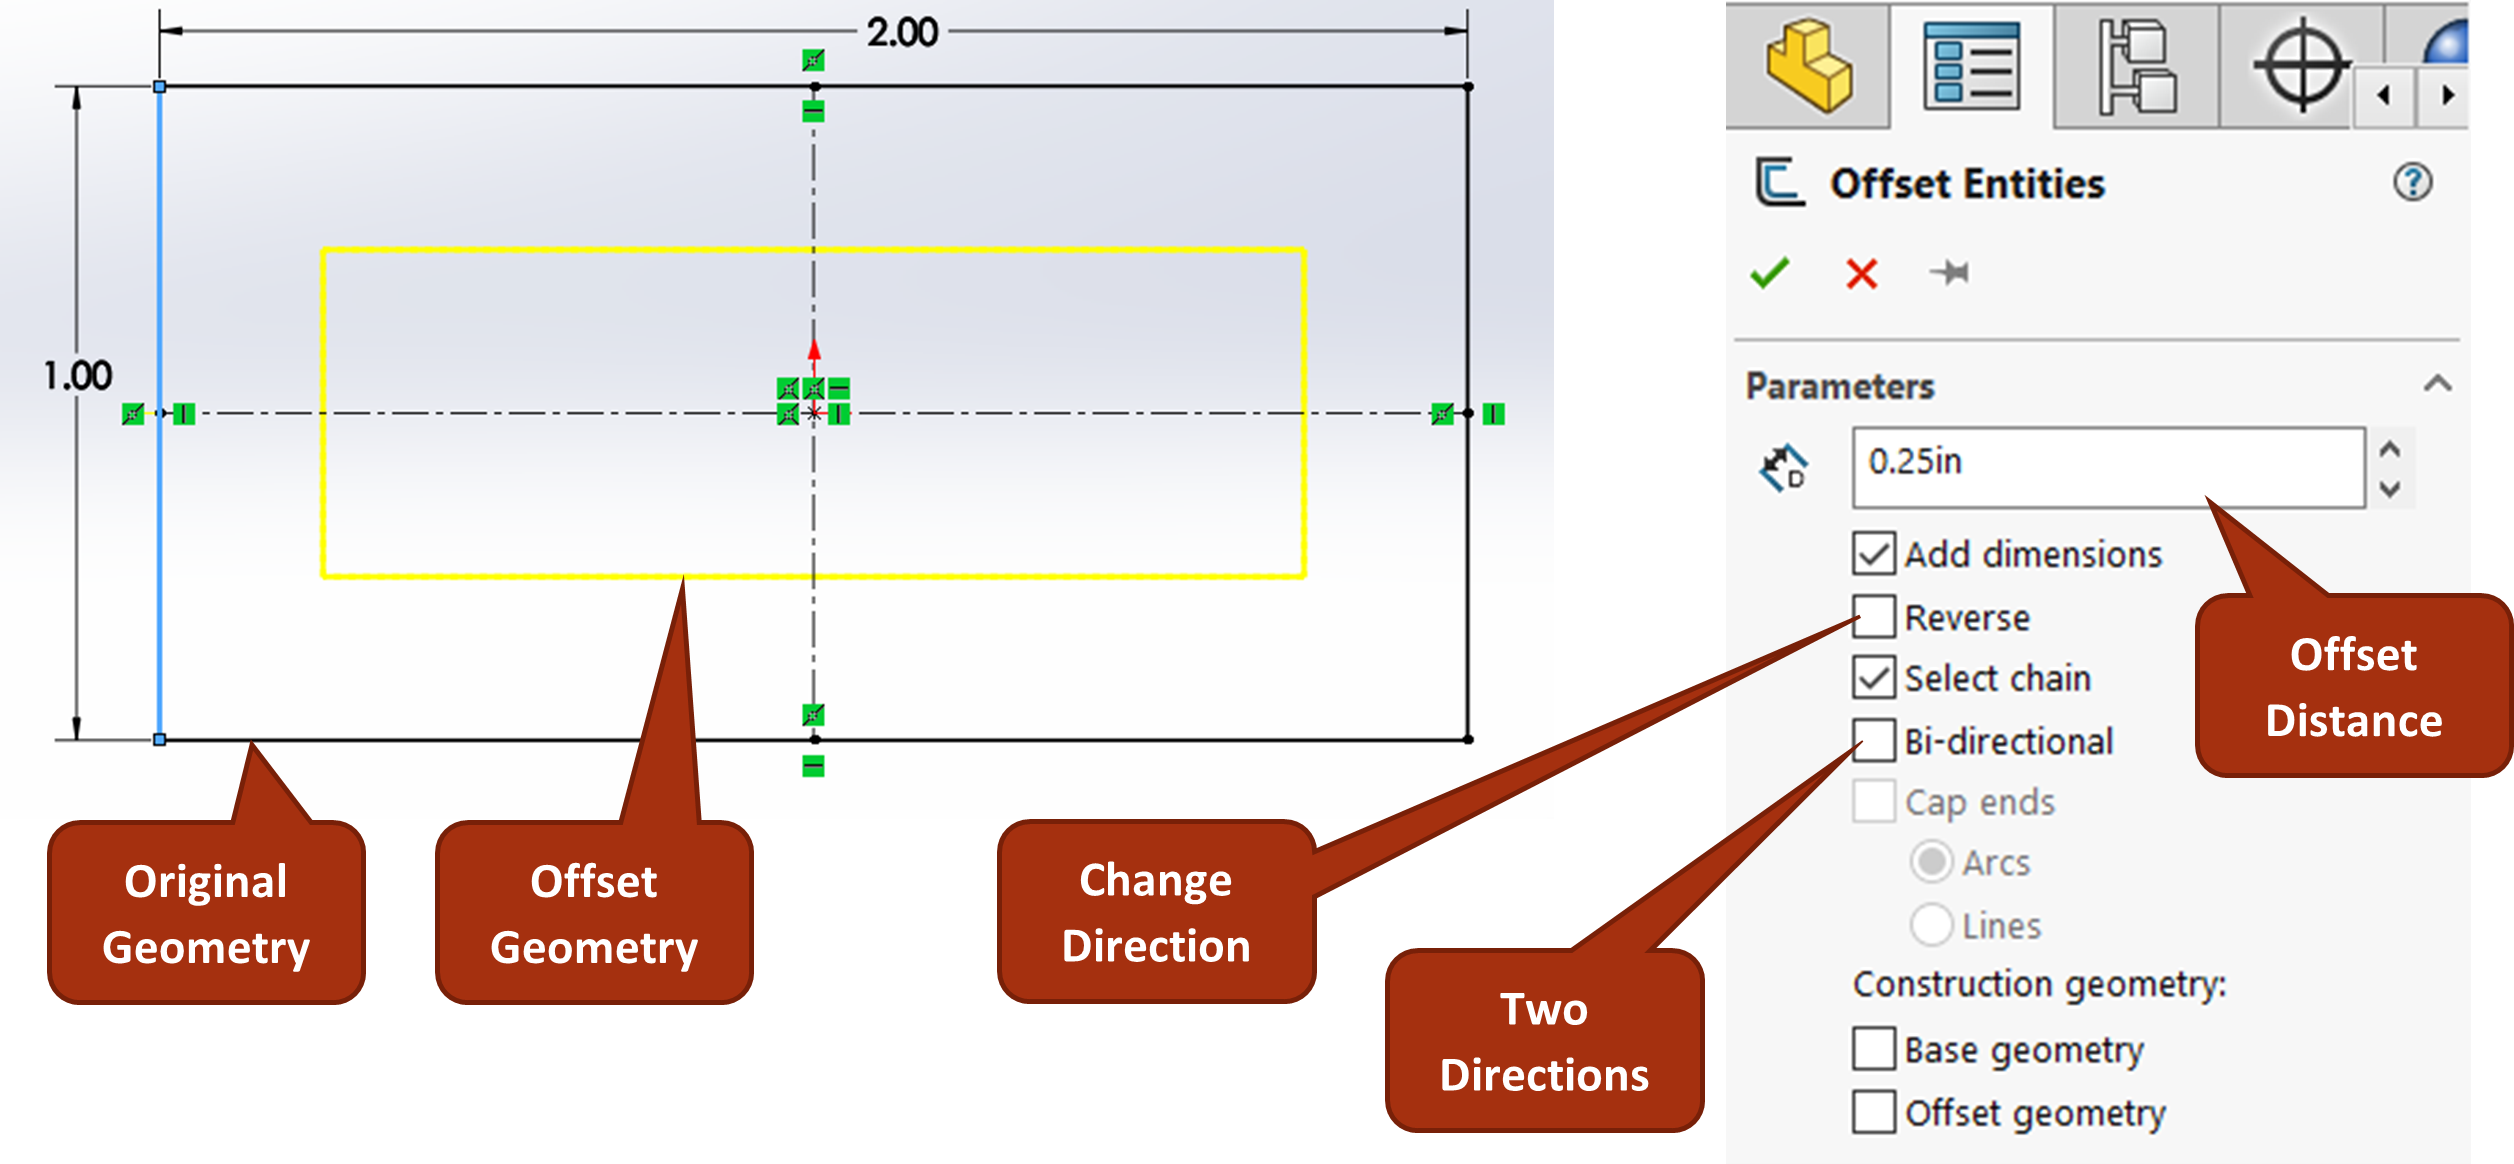
Offset entities work exactly as it sounds: you select sketch entities to copy in a chosen direction by a certain distance. This tool works similar to other CAD programs but has some enhanced capabilities such as the ability to offset in two directions at once, automatically trim connected entities based on design intent, add caps on the ends of offset entities to close them, and convert base or offset geometry into construction geometry (Figure 2.22).
Exercise 2.8: Offset Entities Practice
Now let’s practice using the offset entities command. Just as we did with trim entities, make lots of different types of geometry and practicing offsetting and using the different property manager options with the offset.
- Sketch out some various sketch geometries in SolidWorks.
- Use the Offset Entities command to test out different ways to offset geometry.
Mirror Entities
Mirror entities creates a copy of something as well as flips the orientation based on a mirror line; it’s as if those entities were looking in a mirror. Using mirror entities first requires that you draw the entities you want to mirror as well as having a line to represent your mirror line. The mirror line can be either a solid or construction line, but it is usually a construction line.

Creating a Construction Line
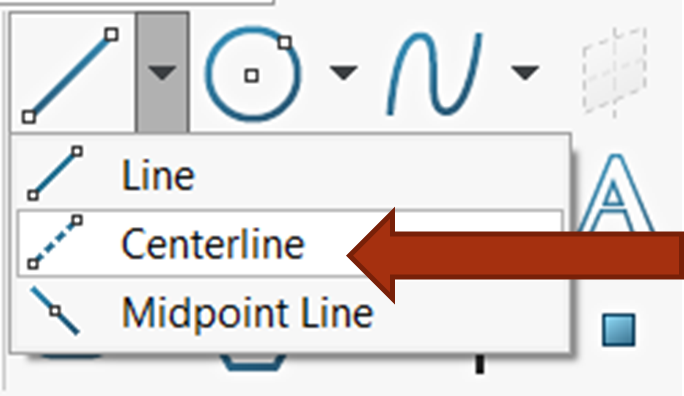
- Select “center line” from the line drop down when in a sketch (Figure 2.24).
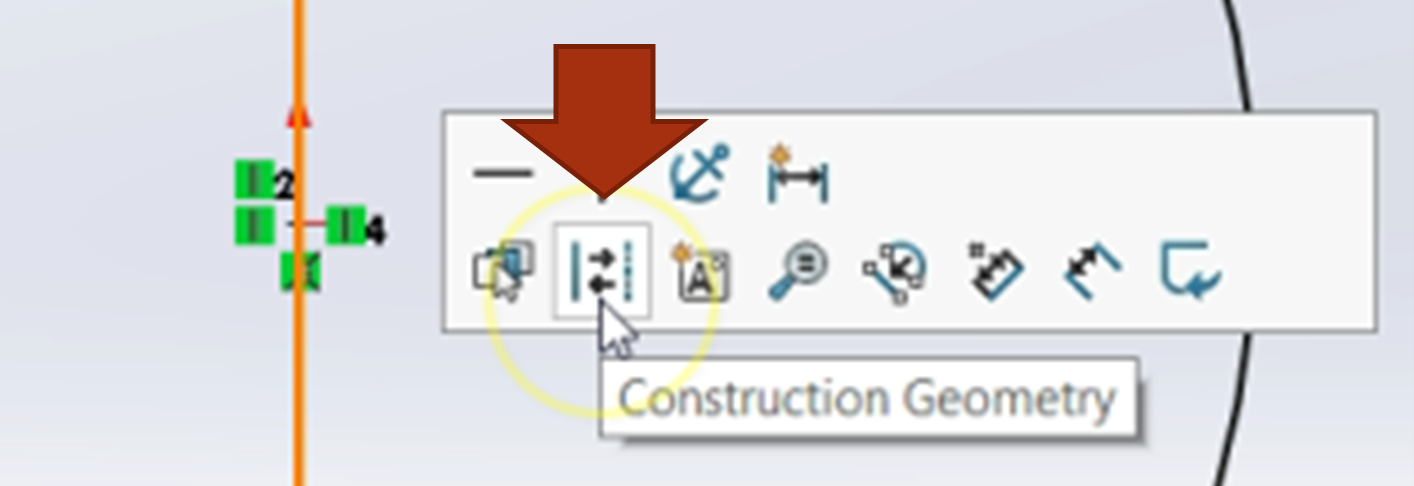
- Click on a solid line and select the “Construction Geometry” Icon from the context toolbar (Figure 2.25).
- Select a line and then check the box in the property manager that says, “For Construction” (Figure 2.26).

To use the mirror tool, select it from the CommandManager, select the entities you wish to mirror; then change to the mirror line selection box by clicking inside it from the property manager, then select your mirror line. Confirm the command in the property manager to confirm the mirror operation.
Exercise 2.9: Mirror Entities Practice
Practice drawing construction lines and using the mirror entities tool. The mirror entities tool doesn’t have many options because it is really just a shortcut for using symmetry relations to copy and constrain your geometry.
- First create a new sketch with some geometry to be mirrored.
- Create a construction line to represent the mirror line.
- Use the mirror entities tool to mirror your geometry.
Linear and Circular Sketch Pattern
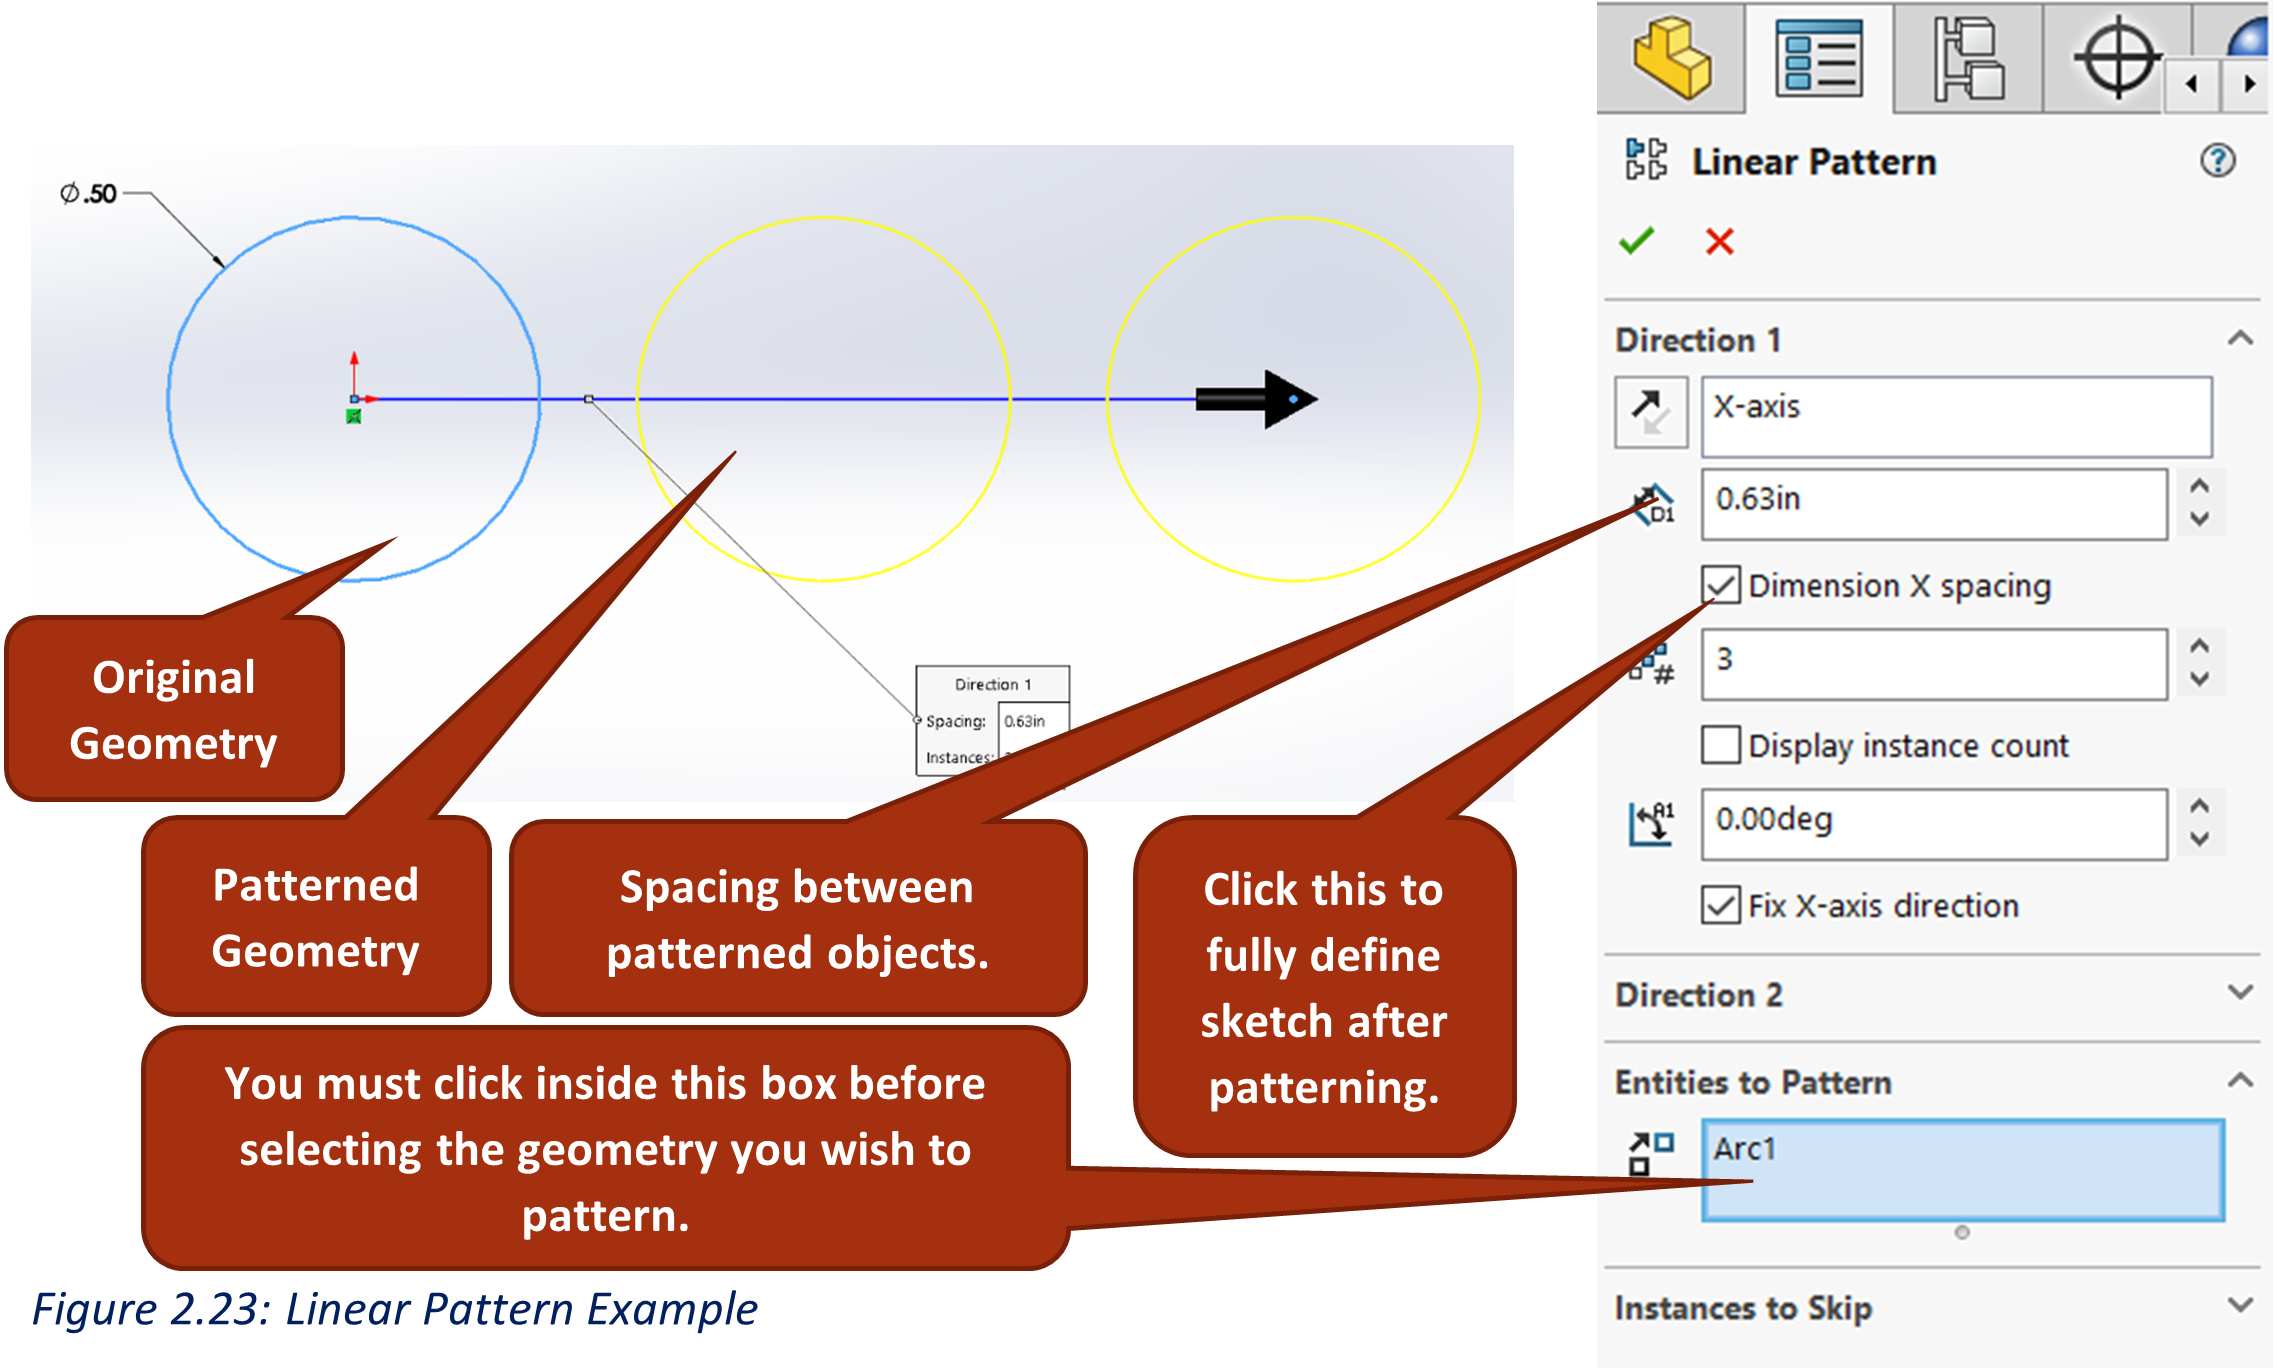
Linear sketch pattern is used less often due to the common preference amongst designers to use the linear/circular pattern feature which is outside the sketch environment (more on this in chapter 3). However, the sketch pattern comes in handy for special situations. To use the sketch pattern feature, you must create the geometry you wish to pattern first before activating the sketch pattern tool. Once you have the geometry, for instance a circle, you can use the sketch pattern property manager to specify the number of instances you’d like, the direction (horizontal/vertical direction), and the spacing (Figure 2.27). Circular sketch pattern is in the drop down for linear sketch pattern where you select a point as a center for the pattern and pattern radially.
Exercise 2.10: Linear and Circular Sketch Pattern
Linear and circular sketch pattern are a bit trickier to use so close attention should be paid here when practicing its use. Watch the video tutorial closely below and then experiment on your own with using the tool with all its property manager options.
"Trim" away excess geometry. See SolidWorks Help: Trim Entities.
More information from SolidWorks Help: Power Trim.
This does the opposite of Trim Entities, extending geometric entities to a boundary. See SolidWorks Help: Extend Entities.
Offset entities places geometry out of line by a prescribed distance. See SolidWorks Help: Offset Entities.
Also referred to as reference geometry is used to aid the definition of of geometry that will become part of the final part. Reference geometry isn't anything you will see in the final part, it is a part of the design parameter/constraint that will drive what you see in the final part. See SolidWorks Help Construction Geometry for more information.
More information at SolidWorks Help: Linear Sketch Pattern.
More information at SolidWorks Help: Circular Sketch Pattern.

